polish

Magnetic Nail Polishes – How They Work

With the rise of unique nail art trends, you may have come across magnetic nail polishes that create mesmerizing designs with just a few simple steps. You’ll learn how these polishes utilize magnetic particles and a magnet to produce stunning effects on your nails, elevating your manicure game. Understanding the science behind this innovative product can help you achieve those salon-quality looks at home, allowing you to express your style effortlessly. Let’s dive deeper into the workings of magnetic nail polishes and how you can use them for striking results.

Key Takeaways:

  • Magnetic Particles: Magnetic nail polishes contain tiny metallic particles that respond to magnetic fields, allowing them to create unique patterns when exposed to a magnet.
  • Application Technique: To achieve the desired effect, a layer of the magnetic polish is applied, followed by the swift positioning of a magnet over the nail, which manipulates the particles into a design.
  • Variety of Effects: Different magnet designs can produce diverse effects, including stripes, waves, and galaxies, offering a wide range of aesthetic options for nail art.

What are Magnetic Nail Polishes?

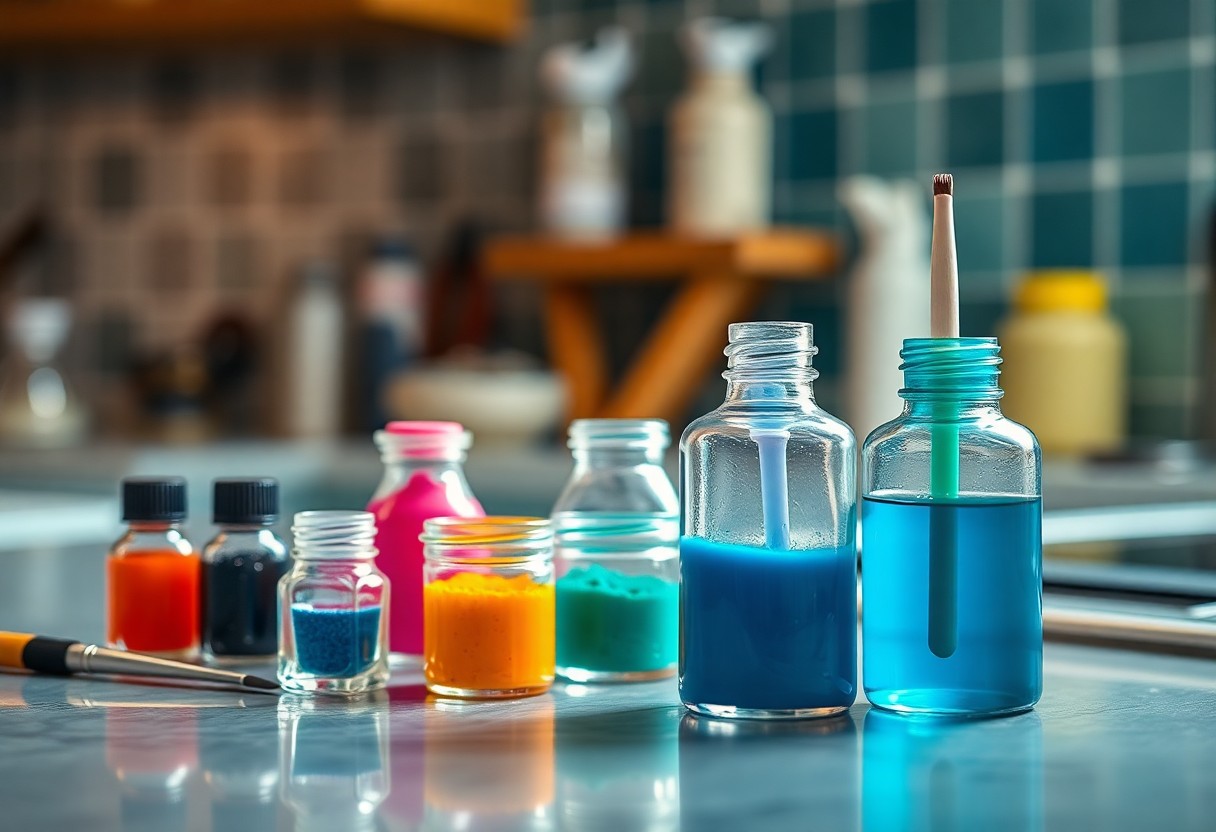
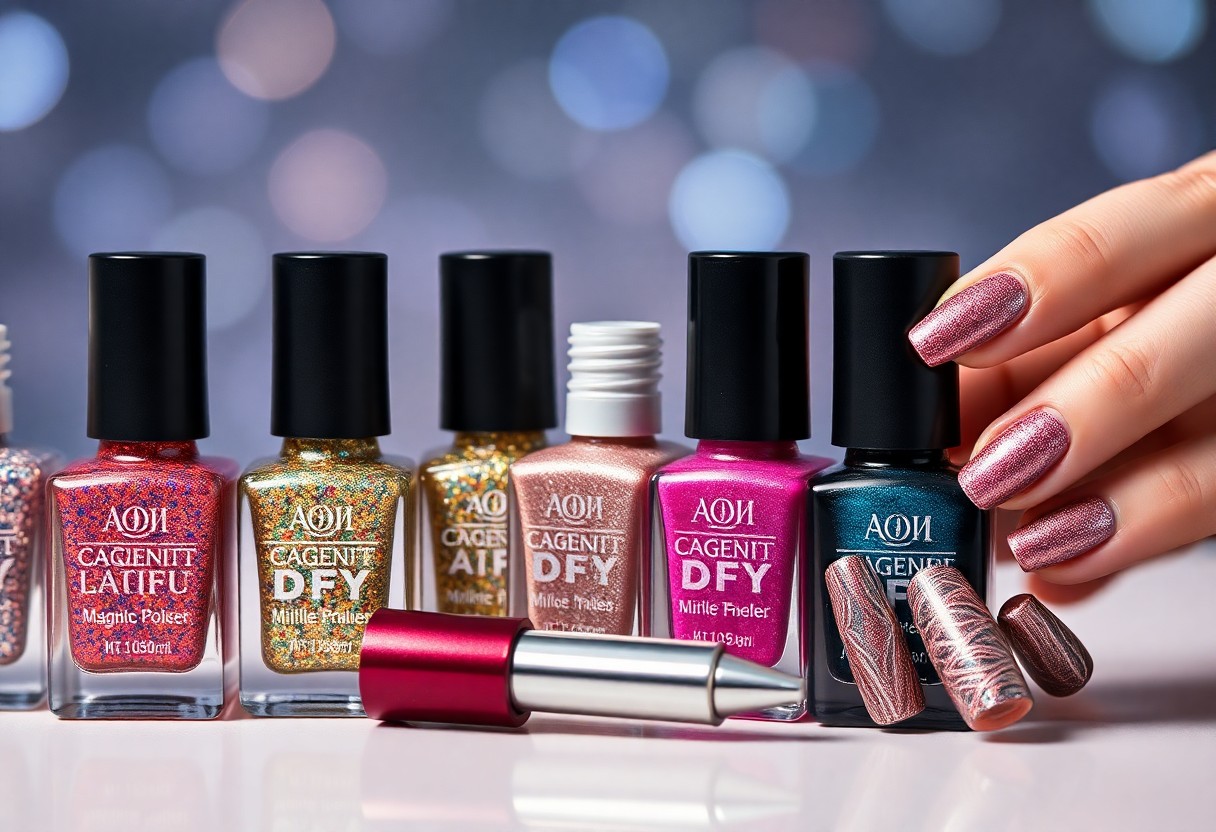
Before you investigate the world of nail art, it’s vital to understand what magnetic nail polishes are. These polishes contain finely milled metal particles that react to a magnetic field. When you bring a magnet close to the nail polish, it creates captivating patterns and designs. If you want to learn more about thermal and photochromatic options, check out this Thermal, Photochromatic, And Magnetic Nail Polish post.

Definition and Composition

Behind the allure of magnetic nail polishes lies a unique composition. These polishes typically combine standard nail polish ingredients with metallic elements like iron or magnetite. This blend allows the polish to be visually striking while responding to external magnetic forces. You will appreciate how the metal particles contribute to the final design.

Unique Features

Composition and creativity are at the heart of magnetic nail polish. One of the standout features is its ability to produce various designs with minimal effort. By simply using a magnet, you can create nail art that ranges from stripes to swirls. This interactive process allows for personalized nail designs, making your manicure truly individual.

Nail polishes with magnetic properties offer an exciting way to enhance your style. Whether you’re a novice or an experienced nail artist, these polishes encourage experimentation with patterns and colors. The convenience of applying a single coat and achieving dynamic results makes magnetic nail polishes a favorite choice for those seeking innovative nail aesthetics.

The Science Behind Magnetic Nail Polishes

The science behind magnetic nail polishes combines chemistry and physics to create unique, eye-catching designs. These polishes contain tiny iron filings that respond to a magnet’s magnetic field, resulting in mesmerizing patterns on your nails. When you apply the polish and hover a magnet above it, the iron filings within the formula align themselves, forming the distinctive designs that make these polishes so popular. Understanding this process will enhance your appreciation for this innovative beauty trend.

How Magnetism Works

To grasp the concept of magnetism in nail polishes, you should know that it involves the attraction and repulsion of magnetic fields. When a magnet is brought near the polish, its magnetic field interacts with the iron particles in the formula. This interaction causes the iron filings to shift and align in the direction of the magnetic force, creating beautiful designs on the surface of your nails.

Role of Iron Filings

One crucial component of magnetic nail polish is the addition of iron filings, which play a significant role in creating those stunning visual effects. These tiny particles are distributed throughout the polish and are key to its unique behavior when exposed to a magnet.

Iron filings facilitate the transformation of a simple nail polish into an artistic medium. When you apply the polish and place a magnet over it, these particles respond by moving and aligning according to the magnet’s polarities. This results in the formation of intricate swirls, stripes, and other patterns that weren’t there before the magnet was introduced. The quality and uniformity of the iron filings can greatly affect the final look of your nail art, emphasizing the importance of this component in magnetic nail polishes.

Application Techniques

Unlike traditional nail polishes, magnetic nail polishes require specific application techniques to achieve that stunning, shimmering effect. It’s crucial to understand these methods for optimal results, so you can impress with your unique nail art. Be patient, as the magnetic design will take a little extra effort but is worth it for the visual impact.

Step-by-Step Process

Between prep work and finishing touches, here’s a simplified guide to applying magnetic nail polish:

StepDescription
1Start with clean, dry nails and apply a base coat.
2Apply a generous layer of magnetic polish, ensuring full coverage.
3Immediately hover the magnet above the polish to create the design.
4Finish with a top coat for added shine and longevity.

Tools Needed

Around your workspace, you must gather crucial tools for a successful application of magnetic nail polish. These include a base coat, the magnetic polish itself, a magnet specifically designed for this purpose, a top coat, and the standard nail art tools such as nail files and cuticle pushers.

In addition, ensure you have a clean environment to work in, along with proper lighting. Using a high-quality magnet will enhance the effects of the polish, while a reliable base and top coat will protect your design for longer wear. Keeping every tool within easy reach will streamline your application process and help you achieve salon-quality results at home.

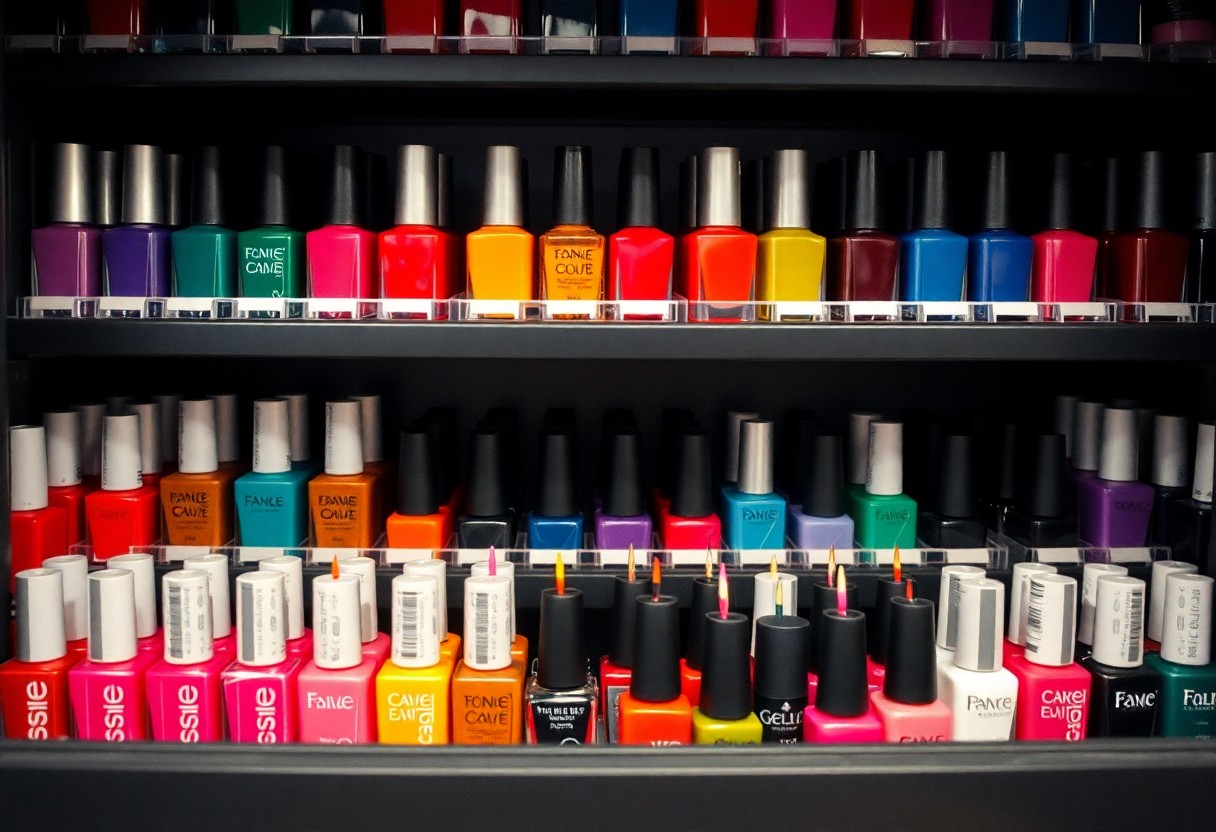
Popular Effects and Designs

Now that you understand how magnetic nail polishes work, it’s time to explore the popular effects and designs that you can create. With various magnetic particles that respond to the magnet’s pull, you can achieve stunning visual outcomes, ranging from bold stripes to soft waves. These unique patterns elevate your manicure, making it a conversation starter while allowing you to express your personal style effortlessly.

Common Patterns

Below are some of the most sought-after patterns you can achieve with magnetic nail polish. Popular choices include the classic cat-eye effect, where the magnet pulls particles toward the center, creating a mesmerizing shine. You can also experiment with diagonal stripes, starbursts, or even abstract swirls, offering a chic and dynamic look that enhances any outfit.

Customization Options

The customization options available with magnetic nail polishes are virtually limitless, allowing you to tailor your manicure to suit your style and preference. You can mix different colors, layer various types of magnetic polishes, or even incorporate glitter for added depth and texture. This versatility ensures that your nails are always on-trend and uniquely yours.

In fact, by playing with different magnets and their positions, you can create intricate designs that truly reflect your personality. You might experiment with stronger or weaker magnets to see how they affect the polish’s patterns or layer various shades for a gradient effect. The possibilities are endless, enabling you to craft a one-of-a-kind nail design for any occasion.

Pros and Cons of Magnetic Nail Polishes

All nail polishes have their upsides and downsides, and magnetic nail polishes are no different. Understanding the pros and cons can help you decide if they’re right for you. Check out the table below for a quick overview:

ProsCons
Creates unique designs with easeRequires specific magnetic tools
Fast applicationCan be challenging for beginners
Long-lasting effectsMay require special top coats
Wide range of colors and effectsPotential for streaking
Fun and trendyCan be more expensive

If you’re curious about how to apply these polishes effectively, check out A magnetic polish tutorial (detailed instructions in comments).

Benefits

Across the beauty community, magnetic nail polishes are sought after for their eye-catching designs and trendy appeal. They allow you to achieve intricate patterns without needing extensive nail art skills, making it fun and accessible for anyone looking to elevate their manicure. The application process is relatively quick, allowing you to enjoy professional-looking results in the comfort of your home.

Limitations

Nail enthusiasts should be aware that while magnetic polishes offer unique designs, they can also present challenges. Some formulas may require specific techniques to activate the magnetic effects properly, and this can be a learning curve for those who are inexperienced. Additionally, obtaining the desired result may take some trial and error, which could lead to frustration.

Benefits such as creating intricate designs can sometimes be overshadowed by the limitations that come with proper application and technique. You may find that achieving consistent results requires practice, especially when working with different brands or formulations. Keeping these factors in mind can help ensure that your experience with magnetic nail polishes is enjoyable and rewarding.

Maintenance and Removal

Not only do you want your magnetic nail polish to look stunning, but maintaining its integrity is crucial for longevity. Regular maintenance involves keeping your nails clean and avoiding excessive exposure to harsh chemicals, as this can alter the magnetic effect. You should also periodically check for chipping or wear, ensuring your nails remain vibrant and eye-catching.

Care Tips

Below are some care tips to help preserve your magnetic nail polish:

  • Apply a top coat to enhance durability.
  • Avoid using your nails as tools to prevent chips.
  • Keep your nails moisturized to prevent breakage.

Knowing these tips will help your magnetic nails stay fabulous longer.

Removal Techniques

Against common belief, removing magnetic nail polish is relatively simple. The best approach is to use an acetone-based remover, as it effectively breaks down the polish while minimizing residual effects on your natural nails.

Even though magnetic nail polish adheres well, it can be easily removed like regular nail polish. Soak a cotton ball in the acetone-based remover and press it against your nail for a few seconds to allow the remover to penetrate. Gently wipe the polish away, and repeat if necessary. This method ensures that you do not damage your nails while providing a clean slate for your next manicure.

Conclusion

As a reminder, understanding how magnetic nail polishes work can enhance your nail art experience. These unique polishes use tiny metal particles that react to a magnetic force, allowing you to create stunning designs with just a swipe of a magnet. By selecting the right polish and technique, you can achieve eye-catching patterns that change with the placement of the magnet. Embrace this innovative approach and elevate your manicure game with the fascinating world of magnetic nail polishes.

FAQ

Q: What are magnetic nail polishes made of?

A: Magnetic nail polishes contain metal particles, usually iron, which respond to magnetic fields. The base of the polish includes standard nail polish ingredients, making it safe and easy to apply. When the magnetic field is applied, the metal particles align and create unique designs on the nail surface.

Q: How do I use magnetic nail polish effectively?

A: To use magnetic nail polish, start with a base coat to protect your nails. Apply a generous layer of the magnetic polish and quickly hold a magnet above the nail for a few seconds. This will encourage the metal particles to shift and form patterns. Finish with a top coat to seal the design and enhance longevity.

Q: Will any magnet work with magnetic nail polish?

A: Not all magnets are suitable for use with magnetic nail polishes. It’s best to use the magnet that typically comes with the polish, as it is designed to create the appropriate effect. Some nail kits may also offer specific magnets with different shapes and patterns to produce various designs.

Q: How long does the design last after applying magnetic nail polish?

A: The longevity of a magnetic nail polish design can vary based on factors like application technique, top coat used, and daily activities. Generally, with proper application and a good top coat, you can expect the design to last anywhere from five to seven days before showing signs of wear.

Q: Can I use magnetic nail polish over regular nail polish?

A: While it’s technically possible to apply magnetic nail polish over a regular nail polish, it may not yield the best results. The magnetic effects might not be as pronounced if the underlying polish interferes with the magnetism. It’s recommended to apply magnetic nail polish directly onto a bare or base-coated nail for optimal designs.

How to Make Your Own Nail Polish at Home

There’s a world of color and creativity waiting for you when you learn how to make your own nail polish at home. By following simple steps, you can create unique shades tailored to your style while avoiding the harsh chemicals often found in commercial products. If you’re interested in a more natural approach, check out this guide on How to Make a Natural Nail Polish?. Get ready to mix, match, and express yourself through custom nail polish blends!

Key Takeaways:

  • Ingredients: Collect crucial ingredients such as clear nail polish, pigments or eyeshadow, and a mixing tool to create your desired color.
  • Mixing Process: Combine the chosen pigments with the clear polish in a small container, ensuring you mix thoroughly to achieve an even consistency.
  • Customizations: Experiment with glitter, scents, or textures to personalize your nail polish and create unique designs that suit your style.

Materials Needed

A variety of materials will help you create your own nail polish at home. You will need a base ingredient, colorants, a mixing bowl, a whisk or stirrer, a funnel, and empty nail polish bottles. Additionally, you may want gloves and a protective covering to keep your workspace clean. Having all these items ready will make your nail polish-making experience much smoother.

Base Ingredients

Between the important components, a clear nail polish base or clear polish is fundamental. This forms the foundation of your custom polish, giving it the right consistency and finish. You can also consider using a mixture of clear polish and glitter for added effect.

Colorant Options

An array of colorants provides you with endless possibilities to personalize your nail polish. You can utilize eye shadows, pigments, or even food coloring for vibrant shades. Just be sure to test the colorants for skin safety and how they blend with the base ingredients.

Plus, you can combine different colorants to achieve unique shades that reflect your personal style. Start with small amounts to see how they mix, adjusting as you go. Don’t hesitate to explore textures and finishes by adding glitter or shimmer; this adds depth to your creation. The world of colorants is exciting, so let your imagination run wild while crafting your custom nail polish!

Tools Required

The right tools are crucial to make your own nail polish at home effectively. You will need a mixing bowl, spatula, and pipettes for precise measurements. Additionally, don’t forget to grab empty nail polish bottles for your finished product. For more tips and insights on crafting your own polish, check out this guide on how to make your own polish? : r/RedditLaqueristas.

Mixing Equipment

By using quality mixing equipment, you ensure that your nail polish has the right consistency and color. A glass mixing bowl provides a smooth surface, while a small spatula is perfect for combining your ingredients thoroughly. Investing in pipettes will also help you measure your liquids accurately, making it easier to replicate your favorite shades.

Storage Containers

One important aspect of making your own nail polish is finding the right storage containers. The containers you choose will directly impact the longevity and usability of your polish.

Storage is crucial; you want to house your homemade nail polish in airtight containers to prevent drying out or separation. Clear glass bottles are ideal as they allow you to see the color clearly, and they maintain the integrity of the polish. Always label your containers with the shade or ingredients to easily identify them later. Investing in quality storage will preserve your creations and ensure they remain vibrant and ready for use when you need them.

Step-by-Step Guide

Many DIY enthusiasts find making nail polish at home rewarding and fun. Below is a simple step-by-step guide to help you create your personalized polish.

Step-by-Step Process

StepAction
1Gather your materials.
2Create the base.
3Add color.
4Mix thoroughly.
5Transfer to a bottle.
6Let it settle before use.

Creating the Base

StepbyStep, begin by combining a clear nail polish or a base of your choice with a mixing medium such as a few drops of clear nail lacquer. This provides the smooth consistency needed for your final product.

Adding Color

Any vibrant color can be achieved by carefully incorporating different pigments or mica powders. This addition allows you to customize the shade to fit your style.

Base choices vary, from clear nail polish to mixing mediums like white polish or a clear topcoat. Depending on your desired opacity or finish, you can experiment with these bases. If you prefer a sheer finish, use fewer color pigments, while more will provide a bolder look. This experimentation is what makes creating your nail polish a unique and enjoyable experience!

Customization Techniques

To personalize your nail polish, experiment with various colors and finishes. You can follow this guide on how to Make Your Own Custom Color Nail Polish, allowing you to create shades that perfectly match your style. Try blending different color pigments, or add base coats for a glossy finish, ensuring your polish is uniquely yours.

Glitter and Effects

An easy way to elevate your homemade nail polish is by adding glitter or special effects. Use fine glitter for a subtle shimmer, or opt for larger flakes for a bold statement. You can also incorporate items like sequins or small beads to create a textured look, making your nail polish stand out.

Scent Additives

To add a delightful twist to your custom nail polish, consider incorporating scent additives. Fragrances can transform your nails into a sensory experience, making each application more enjoyable.

Additives such as important oils or fragrance oils can be simply combined with your nail polish mixture. Choose scents that resonate with you, whether it be floral, fruity, or fresh. Ensure you use cosmetic-grade oils for safety, and start with just a few drops, as a little goes a long way. Enjoy your captivating fragrance while showcasing stunning nails!

Safety Considerations

Your safety should always be a priority when making DIY nail polish at home. Be sure to work in a well-ventilated area to minimize inhalation of fumes and avoid using ingredients that may cause allergic reactions. Wearing gloves is also advisable to protect your skin from potential irritation. Always read labels carefully and follow proper instructions to ensure a safe and enjoyable crafting experience.

Skin Sensitivity

Skin sensitivities can vary greatly from person to person. Before applying any homemade nail polish, it’s wise to perform a patch test on a small area of your skin to check for allergic reactions. If you experience redness, itching, or discomfort, discontinue use and consider alternative formulations that are gentler on the skin.

Ventilation and Cleanup

Between crafting sessions, maintaining a clean and well-ventilated workspace is necessary. Open windows or use fans to ensure fresh air circulates, reducing the likelihood of harmful vapors accumulating. Always have paper towels or a designated surface to catch spills, and dispose of waste materials properly to minimize clutter and potential hazards.

At the end of your nail polish-making session, carefully clean all utensils and surfaces with appropriate solvents to prevent cross-contamination of ingredients. Ensure any containers used are sealed tightly and stored in a safe, dry place away from direct sunlight. Taking these extra steps will help maintain both your health and the integrity of your homemade products.

Troubleshooting Common Issues

Keep in mind that creating your own nail polish can come with its share of challenges. From achieving the right texture to maintaining vibrant colors, identifying problems early can help you refine your process. If you encounter any issues, don’t get discouraged—adjustments can lead to a perfect batch of polish that showcases your unique style.

Consistency Problems

Among the most common issues is consistency, where your polish may end up too thick or thin. If your polish feels runny, try adding a little more pigment or base, which can help thicken it. Conversely, if it’s too thick, mix in a few drops of nail polish remover to achieve a smoother blend. Always test the polish on a nail after adjustments to ensure the desired consistency.

Color Fading

Among the challenges you might face, color fading is particularly frustrating, as it can diminish the look of your polish over time. Factors like exposure to sunlight and the quality of your ingredients can play a significant role in this issue.

In fact, using higher-quality pigments can help maintain color vibrancy, while storing your polish in a cool, dark place can prevent fading caused by light exposure. Additionally, applying a clear topcoat regularly can provide protection and keep your color looking fresh for longer. By being mindful of these factors, you can preserve the beauty of your nail polish for weeks to come.

To wrap up

Presently, making your own nail polish at home is an enjoyable and creative process that allows you to express your personal style while ensuring the ingredients are safe for you. By choosing your favorite colors, blending them with a base and a few simple additives, you can achieve unique shades tailored to your preferences. Whether you seek a shimmering finish or a matte look, the possibilities are endless. With just the right tools and ingredients, you can commence on a fun DIY journey that ultimately adds a personal touch to your beauty routine.

Q: What ingredients do I need to make my own nail polish at home?

A: To make your own nail polish, you will need a few key ingredients: a clear base polish (or clear nail polish), powdered pigments in your desired colors (like eyeshadow or mica powder), and a mixing tool (such as a small spatula or a toothpick). Optionally, you can add a few drops of crucial oils for scent or nail strengthening, and glitter for extra sparkle. Make sure to work in a well-ventilated area and ensure all tools are clean.

Q: Can I customize the color of my homemade nail polish?

A: Yes, you can customize the color of your nail polish! Start with a clear base polish and gradually mix in your chosen powdered pigments or crushed eyeshadow until you achieve the desired shade. Test the color on a small area or a nail wheel before applying it fully to ensure it matches your preference. The combination of different colors can also create unique shades, so feel free to experiment with various mixtures!

Q: How do I store my homemade nail polish to keep it fresh?

A: To keep your homemade nail polish fresh and usable, store it in a cool, dark place away from direct sunlight. Use a small glass or plastic container with a tight-sealing lid to prevent air from entering and to avoid thickening. Label the container with the creation date and color for easy identification. If your polish starts to thicken over time, you can dilute it with a few drops of clear polish or nail polish thinner to restore its consistency.

10 Nail Polish Colors Every Collection Needs

You may find yourself overwhelmed by the endless options when it comes to nail polish. Having a carefully curated selection can elevate your manicure game and prepare you for any occasion. In this post, we’ll highlight the must-have shades that everyone should have in their arsenal. From timeless classics to trendy hues, these colors will ensure your collection is both versatile and stylish. For a deeper dive, check out the Top 10 Must-Have Nail Polish Colors For Every Collection.

Key Takeaways:

  • Essential Neutrals: A selection of neutral shades provides versatility for everyday wear and complements any outfit.
  • Bold Statement Colors: Including a few vibrant hues allows for creative expression and standout looks on special occasions.
  • Seasonal Shades: Incorporating colors that align with seasonal trends enhances the collection’s overall appeal and encourages experimentation.

Classic Reds

A classic red nail polish is a must-have in your collection, symbolizing confidence and sophistication. This timeless shade works for any occasion, whether you’re dressing up for a gala or adding a pop of color to your everyday look. Red not only enhances your natural beauty but also complements a wide variety of skin tones, making it a versatile choice for you.

Timeless Appeal

With a classic red, you embrace a color that has stood the test of time. This shade conveys elegance and femininity, invoking feelings of strength and power. Its ability to make a statement while remaining sophisticated is what makes it indispensable in your nail polish arsenal.

Variations and Finishes

Above all, classic reds come in an array of variations and finishes, providing endless options for you to explore. From deep burgundies to vibrant cherry reds, each hue caters to different moods and styles, allowing you to express yourself fully. You can choose from glossy, matte, or even shimmer finishes for a personalized touch, adapting your red to any outfit or occasion.

Indeed, the versatility of classic reds allows you to play around with different shades and textures to suit your unique style. Whether you prefer a bold, glossy finish or something more understated, the variety available means you will always have the perfect red to match your look. Experimenting with different tones and applications can elevate your nail game and give you new ways to express your individuality.

Elegant Nudes

Some nail polish colors are timeless, and elegant nudes perfectly embody sophistication. These shades serve as a versatile base, complementing any outfit while bringing attention to your hands. Whether you prefer a sheer finish or a more opaque look, there’s a nude polish that will elevate your style with understated elegance. Including a range of nudes in your collection ensures that you are always prepared for any occasion, from casual outings to formal events.

Versatility Across Skin Tones

Before choosing a nude shade, it’s crucial to consider how different tones can flatter your unique complexion. Nudes can range from pale pinks to deep cafĂ© shades, allowing everyone to find their perfect match. This variety means that you can select a polish that enhances your natural beauty, making it a reliable option for everyday wear or special occasions.

Different Undertones to Consider

Before you select a nude polish, it’s important to pay attention to the undertones that suit your skin. Your undertone can be cool, warm, or neutral, influencing which nude shades will look best on you. For example, if you have a warm undertone, golden or peachy nudes can enhance your complexion, while cool undertones are complemented by pink or taupe shades. Identifying your undertone will help you choose a nail polish that harmonizes with your skin, ensuring a polished and flattering look.

This approach not only makes your nail polish shopping journey easier but also ensures you achieve a cohesive look. Trying out various shades within the nude family based on your undertone can reveal surprisingly flattering results. You may even discover new favorites that blend seamlessly with your overall makeup palette. Therefore, knowing your skin’s undertone can greatly enhance your nail polish experience and empower you to select shades that truly resonate with your style.

Bold Blues

Now, when you think of bold blues, imagine the versatility and excitement they bring to your nail polish collection. This striking hue can instantly elevate your look, whether you’re dressing up for a night out or keeping it casual during the day. A rich blue polish serves as a fantastic statement color, giving your nails the attention they deserve while still offering a touch of sophistication.

Shades That Stand Out

About bold blues, there are so many shades to choose from, ensuring you’ll find the perfect match for your style. Opt for a vibrant cobalt for a pop of energy, or a deep navy for a more serene and elegant vibe. Each shade offers a unique personality, allowing you to express yourself effortlessly through your manicure.

Suitable Occasions for Bold Choices

With bold blue nails, you can let your creativity shine during both casual and formal events. These unapologetic hues are ideal for nights out with friends, summer festivals, or even special occasions like weddings, where you want your look to represent confidence and flair.

Further, bold blue shades are excellent for office attire when you want to break the monotony of neutral colors. Pairing your vibrant nails with classic outfits can add just the right amount of boldness without being overwhelming. The versatility of this color allows you to wear it at brunch, a dinner party, or a night on the town, making it an imperative choice for any occasion.

Stunning Blacks

All nail polish collections need a stunning black to make a statement. This timeless shade exudes sophistication and versatility, serving as the perfect backdrop for any nail art or design. Whether you’re going for a sleek, polished look or a bold and edgy vibe, black polish will elevate your style. You can embrace its elegance with a glossy finish or take it to the next level with matte top coats. No matter how you choose to wear it, stunning blacks are an vital component of your nail polish repertoire.

The Drama of Black Polish

Below the surface, black polish is not just a color; it’s a canvas for adventure. Its dramatic flair allows you to express your individuality and mood effortlessly. From goth-inspired nail art to modern minimalist looks, black adds depth and intrigue to any manicure. You can utilize it as a base color for intricate designs or let it shine alone for maximum impact.

Creative Looks with Black

Looks you can create with black polish are endless, offering a realm of possibilities for innovative designs. It pairs beautifully with vibrant shades, metallics, and even textures like glitter or foil. You can opt for classic nail art techniques like stripes or polka dots, or experiment with negative space and geometric patterns. Black is incredibly adaptable, making it easy to transition from day to night with a simple touch-up or addition.

This versatility means you can mix and match black polish with other colors or styles for a unique twist. Layering it under holographic top coats or using it in combination with bright pastels can create stunning contrasts that catch the eye. Don’t hesitate to try out nail art tools like dotting pens or striping brushes to achieve intricate designs. With black polish in your collection, the creative possibilities are only limited by your imagination.

Gentle Pastels

Not all nail polish colors need to be bold and bright; gentle pastels offer a soft, sophisticated touch. These understated shades are perfect for those days when you want to showcase your elegance without overwhelming your look. From creamy lilacs to soft blushes, gentle pastels enhance your nails and provide a fresh, polished appearance that complements any outfit, making them an important part of your nail polish collection.

Soft Shades for Subtle Elegance

Gentle pastels are the epitome of understated beauty, allowing you to express your unique style while maintaining an air of sophistication. Shades like mint green and baby blue evoke a sense of calm and refinement, making them perfect for both casual outings and formal events. Incorporating these soft colors into your collection ensures you always have a chic option at hand.

Seasonal Favorites

For every season, there’s a perfect pastel hue that resonates with the changing atmosphere. Spring calls for light pinks and sunny yellows, while summer favors soft corals and powder blues. Embracing these seasonal favorites allows you to elevate your nail game and stay attuned to the mood of the moment.

Indeed, seasonal favorites in gentle pastels allow you to experiment with trending shades while embracing the beauty of each time of year. As the blossoms bloom in spring, look for delicate shades that embody renewal, such as soft lavenders or peachy tones. In summer, you might gravitate towards lighter hues that reflect the sun’s warmth. Adopting these seasonal colors not only refreshes your nail polish collection but also enhances your overall style and keeps you vibrant through every transition, ensuring your nails are a delightful accessory year-round.

Vibrant Greens

For a fresh and lively touch, incorporating vibrant greens into your nail polish collection is imperative. These shades exude energy and can elevate any outfit by adding a pop of color. From deep emeralds to bright limes, you have a variety of options to express your personality and style, making vibrant greens a must-have for any nail enthusiast.

Nature-Inspired Tones

About the beauty of nature can inspire your choice of nail colors. Earthy greens, reminiscent of lush forests and verdant landscapes, bring a sense of calm and grounding to your look. Shades such as sage, olive, and moss not only celebrate the natural world but also offer versatility for everyday wear.

Trendy and Unconventional

One of the most exciting aspects of green nail polish is its ability to push boundaries. Unique shades like neon greens or muted sage can create striking contrasts, allowing your nails to become a statement piece. These colors showcase your willingness to experiment and can set you apart from the crowd.

Greens can range from the unexpected to the classic, making them an excellent option for anyone seeking individuality in their style. Explore shades that challenge traditional color norms, such as a deep teal or a vibrant chartreuse, to add a contemporary twist to your look. Let these unconventional greens be your signature statement, sparking conversations and drawing attention with every gesture.

To wrap up

To wrap up, having the right selection of nail polish colors can elevate your entire manicure experience. By including classic shades like deep red, nude, and vibrant blue, along with fun options like glitter or pastel, you ensure your collection suits any occasion. It’s important to curate a palette that reflects your personal style and meets your needs. For more inspiration on what colors to add, consider checking out this discussion on what are your top 10 important nail polishes or colors?

FAQ

Q: Why are these 10 nail polish colors necessary for a complete nail collection?

A: Having a well-rounded nail polish collection means being prepared for any occasion. The 10 necessary colors include classic shades like red and nude, trendy hues such as deep blue and pastel pink, and unique options like metallics and glitter. These colors provide versatility and allow for endless combinations, ensuring you’re ready whether you prefer a sophisticated look for work or a playful style for a night out.

Q: How can I choose the right finishes for my nail polish collection?

A: The finish of a nail polish plays a significant role in its overall look. You should aim for a mixture of finishes—creams for a sleek and polished appearance, matte for a modern vibe, gloss for that classic shine, and glitter for a fun, festive feel. Incorporating various finishes into your collection allows you to express yourself in different ways and adapt to different trends.

Q: What factors should I consider when selecting nail polish colors for my collection?

A: When identifying nail polish colors, consider your personal style, skin tone, and lifestyle. Opt for colors that complement your wardrobe and can be worn in different situations. Additionally, think about seasonal trends; for instance, you might want vibrant colors for summer and deeper, richer tones for fall. Lastly, don’t hesitate to experiment with shades outside your usual palette to discover new favorites!

How to Store Nail Polish to Prevent Drying Out

Nail polish can easily become a frustrating mess if not stored properly. To ensure your favorite shades remain vibrant and usable, it’s vital to adopt smart storage habits. You should keep your nail polish in a cool, dry place, away from direct sunlight to maintain its consistency. For more guidance on preserving your nail polish, check out How to Store Nail Polish – ORLY.

Key Takeaways:

  • Temperature: Store nail polish in a cool, dry place away from direct sunlight to prevent it from thickening and drying out.
  • Sealing: Ensure that the cap is tightly closed after each use to avoid exposure to air, which can cause the formula to dry out.
  • If needed, use thinner: If nail polish starts to become thick, adding a few drops of nail polish thinner can help restore its original consistency without compromising the quality.

Understanding Nail Polish Composition

While nail polish may seem like a simple cosmetic product, it is actually made up of a complex combination of ingredients designed to create a long-lasting finish. The understanding of its composition is important in ensuring that you store your nail polish properly. Knowing the different components can help you appreciate their importance and the role they play in maintaining the quality and effectiveness of the polish over time.

Key Ingredients and Their Stability

Their stability lies in the balance of solvents, resins, and colorants within nail polish. Solvents, like ethyl acetate, aid in application but can evaporate quickly when exposed to air. Resins provide adhesion and durability, while colorants give your polish its vibrant shades. Each of these ingredients plays a vital role in maintaining the polish’s texture and usability, underscoring the importance of proper storage to prolong their lifespan.

What Causes Nail Polish to Dry Out

An important factor that leads to the drying out of nail polish is the exposure to air, which allows solvents to evaporate. Over time, this evaporation alters the formula, making it thick and unusable. Additionally, improper sealing of the polish cap and high temperatures can further accelerate this drying process, resulting in a product that no longer delivers the smooth finish you desire.

At the molecular level, nail polish contains volatile compounds that are meant to evaporate during the drying process after application. However, when the polish is not properly sealed or is left in hot environments, these compounds evaporate too quickly, leading to a thick and gummy texture. Factors such as frequent opening of the bottle and prolonged exposure to sunlight can exacerbate this issue, making it vital for you to be mindful of how you store your nail polish to maintain its quality and performance.

Optimal Storage Conditions

You can significantly extend the life of your nail polish by ensuring optimal storage conditions. This includes managing factors such as temperature and humidity, as well as finding the right location for your polishes. By taking the time to properly store your nail products, you’ll keep them fresh and ready for your next manicure.

Temperature and Humidity Considerations

To maintain the integrity of your nail polish, keep in mind the following:

Storage Factors

Ideal Temperature50°F – 75°F (10°C – 24°C)
Humidity LevelLow humidity, below 40% recommended

Ideal Locations for Storing Nail Polish

Optimal places to store your nail polish include a cool drawer or a temperature-controlled area, away from direct sunlight and heat sources. Such locations help maintain a consistent environment that minimizes the risk of drying out.

Consequently, consider storing your nail polish in a dedicated storage box or organizer that can be easily moved if necessary. Avoid areas like bathrooms where humidity fluctuates. Instead, opt for closets or cabinets that remain consistently cool. By choosing the right location, you help preserve the quality and longevity of your favorite shades.

Proper Nail Polish Bottle Care

Your nail polish bottles deserve special care to ensure they remain functional and effective for as long as possible. Regular maintenance can prevent drying out and help preserve the formula inside. By understanding the best practices for keeping your bottles in pristine condition, you can enjoy vibrant colors and flawless finishes without the worry of clumpy or unusable polish.

Seal and Cap Maintenance

Around each use, take a moment to inspect the caps of your nail polish bottles. Ensure that they are tightly sealed after each application to prevent air from seeping in, which can lead to thickening or drying out. If you notice any residue or polish buildup on the bottle’s neck, gently wipe it away with a cotton pad or cloth to guarantee a secure fit and maintain the integrity of your polish.

Avoiding Contamination

For best results, you should be vigilant about preventing contamination of your nail polish. Avoid exposing the brush to any outside surfaces or other products, as this can introduce bacteria or other substances that may alter the polish’s consistency. Always keep your brushes clean and store your bottles in a controlled environment to ensure longevity.

With each application, be mindful of how you handle your nail polish. By dipping the brush only into the polish and avoiding contact with other items, you can reduce the risk of contamination dramatically. Cleaning the brush before returning it to the bottle is an easy way to maintain the formula’s integrity. Prioritizing cleanliness not only prolongs your polish’s lifespan but also ensures healthier nails and a more enjoyable application experience.

Reviving Dried-Out Nail Polish

Many nail polish enthusiasts face the disappointment of dried-out polish, but there are effective methods to revive your favorite shades. First, check for separation; sometimes just shaking the bottle can help. If that doesn’t work, consider adding a few drops of nail polish thinner, which is designed to restore the original consistency without altering the color. Always test a small amount on a piece of paper or your cuticle before applying directly to your nails to ensure the texture is right.

How to Use Thinners Effectively

Along with reviving polish, using thinner correctly is key to achieving optimal results. Start by adding just one or two drops of thinner to your polish and mix gently. Avoid over-thinning, as this can lead to a watery consistency that makes application difficult. Shake the bottle well after adding thinner and check the consistency. If it’s still too thick, you can repeat the process, but make sure to test as you go.

When to Discard Old Polish

Below is a guideline for when to let go of your beloved nail polish. If you find that the polish has separated and cannot be revived, or if it has a strong, unpleasant odor, it’s time to toss it. Additionally, any polish that has dramatically changed in color or consistency may not yield the manicure you desire and should be replaced.

Polish typically has a shelf life of about 2 to 3 years, but signs of aging, like clumping or excessive thickening, indicate it’s time to discard it. Check the expiration date on the bottle if available. Investing in quality nail polish can enhance longevity, but regular assessments will ensure you maintain a fresh and workable collection. Always minimize the risk of contamination by keeping the brush clean and never adding solvents not designed for nail polish. This will preserve your polishes for as long as possible.

Preventative Measures

Despite the inevitable wear and tear that nail polish may experience, there are simple strategies you can adopt to extend its lifespan. Proper storage techniques, such as keeping your polishes upright in a cool, dark place, can help maintain their consistency. It’s also beneficial to check the seals on the bottles regularly to avoid air exposure. Applying these proactive steps will keep your collection in top condition.

Purchasing Strategies

Beside selecting high-quality brands, it’s wise to purchase nail polishes in smaller quantities. This way, you minimize the risk of them drying out before you get the chance to use them. You can also focus on seasonal shades, which can keep your collection feeling fresh and relevant. Opt for those colors that you will wear frequently.

Rotation and Usage Tips

Beside proper storage, regularly rotating your nail polish can help maintain its longevity. Aim to use all your polishes at least once every few months to prevent them from sitting for too long. Here are some tips for effective rotation:

  • Organize polishes by frequency of use.
  • Label bottles with purchase dates.
  • Set reminders to use less favored shades.

The more often you use your polishes, the less likely they are to dry out.

In addition to rotation, consider the following usage tips to prolong your nail polish life:

  • Shake, don’t stir – it avoids bubbles.
  • Keep the brush clean to prevent contamination.
  • Store in a temperature-stable environment.

The application of these practices can significantly lengthen the lifespan of your nail polish collection.

Frequently Asked Questions

Now that you know how to store your nail polish properly, you may have some questions. Common concerns include how long nail polish lasts and whether refrigeration is effective. Addressing these queries can help you maximize the lifespan of your favorite colors while maintaining their integrity. Let’s investigate into some common myths and troubleshooting tips to keep your nail polish in top shape.

Common Storage Myths

By debunking common storage myths, you can better preserve the quality of your nail polish. Many believe that keeping polish in the fridge extends its lifespan; however, this can sometimes cause separation of ingredients. It’s important to store your polish in a cool, dry place away from direct sunlight for optimal results.

Troubleshooting Common Issues

To address issues such as thickening or clumping, consider some simple fixes. If your nail polish has started to dry out, adding a few drops of nail polish thinner can restore its consistency without compromising color. Furthermore, if your polish won’t apply smoothly, check the brush for clumps and ensure you are using the right technique to achieve an even coat.

Consequently, taking the time to troubleshoot common issues can save your favorite shades from being discarded. If you notice your polish bottle is getting thicker, always reach for a thinner before throwing it away. Prioritizing proper storage and regular maintenance of your nail polish will ensure that you can enjoy your beautiful colors without the hassle of drying out.

Summing up

Drawing together the tips provided, storing your nail polish properly is imperative to prevent drying out. Ensure you keep your bottles upright in a cool, dark place, avoiding sunlight and extreme temperatures. Prioritize sealing caps tightly after each use and consider using a thinner if the polish starts to thicken. Regularly assess your collection, discarding any old or separated polish to maintain quality. By taking these simple steps, you’ll extend the life of your nail polishes and keep them in optimal condition for your next manicure.

Q: How can I prevent my nail polish from drying out too quickly?

A: To prevent nail polish from drying out, it’s necessary to store it in a cool, dark place away from direct sunlight and heat sources. Extreme temperatures can alter the formula and lead to quicker drying. Additionally, make sure to tighten the cap securely after each use to minimize exposure to air, which can also cause the polish to thicken and dry out.

Q: Is there a specific way to store nail polish bottles to keep them in good condition?

A: Yes, the way you store nail polish can significantly impact its longevity. Ideally, keep the bottles upright in a cabinet or a dedicated nail polish organizer rather than storing them on their sides. This positioning prevents the polish from leaking and ensures that the formula remains consistent. Using a cool drawer can be especially beneficial for maintaining optimal storage conditions.

Q: Can I revive nail polish that has started to dry out?

A: You can often revive slightly dried nail polish by adding a few drops of nail polish thinner or acetone to the bottle and shaking it gently. This can help restore the original consistency. However, if the polish has completely dried or separated, it may be best to replace it to ensure good application and staying power. Always use thinning products specifically designed for nail polish to maintain quality.

How to Remove Glitter Nail Polish Without Hassle

Nail polish can add a fun touch to your manicure, but removing that stubborn glitter can often feel like a daunting task. You might find that traditional methods leave behind remnants of sparkle that refuse to budge. Fear not—this guide will equip you with simple, effective techniques to easily remove glitter nail polish without damaging your nails. Get ready to say goodbye to the mess and hello to clean, polished nails!

Key Takeaways:

  • Acetone Method: Use pure acetone nail polish remover for a quick and effective removal of glitter polish.
  • Cotton Ball Approach: Soak a cotton ball with remover and press it against the nail for a minute to loosen the glitter.
  • Aluminum Foil Trick: Wrap the cotton ball-covered nails in aluminum foil to enhance the effectiveness and speed up the process.

Understanding Glitter Nail Polish

Your experience with glitter nail polish can be both fun and frustrating. With its shimmering effect, it adds a delightful touch to your manicure. However, understanding its components helps in managing the removal process better. Keep in mind that not all glitter polishes are created equal, making it imperative to identify what you’re dealing with.

The Different Types of Glitter Nail Polish

Your options for glitter nail polish range widely. Here’s a brief overview:

TypeDescription
Fine GlitterCreates a subtle shimmer effect.
Chunky GlitterFeatures larger pieces for a bolder look.
Holographic GlitterGives a rainbow-like effect under light.
Metallic GlitterShiny, reflective finish for dramatic flair.
Gel GlitterProvides a longer-lasting, glossy effect.

After identifying your type of glitter polish, you’ll be better prepared for its removal.

Why It’s Tough to Remove

Understanding the formulation of glitter nail polish sheds light on why it can be difficult to remove. Many glitter polishes contain larger particles and longer-lasting bases that adhere firmly to your nails. This means typical nail polish removers might not be enough.

Plus, the varying sizes of glitter particles complicate matters. While finer glitters may come off easily, chunky or larger glitters tend to cling stubbornly, often requiring more intense scrubbing or specialized removers. As a result, you may find yourself spending more time and effort than expected when trying to achieve a clean slate for your next manicure.

Essential Tools and Materials

Assuming you want to remove glitter nail polish easily, having the right tools and materials at hand makes all the difference. You’ll need high-quality nail polish remover, either acetone or non-acetone, cotton balls, and some aluminum foil. For a helpful tip on enhancing your removal process, check out this Remove Glitter Nail Polishes Quicker With This Little Trick.

Remover Options: Acetone vs. Non-Acetone

Around the nail care community, acetone is renowned for its powerful ability to dissolve nail polish quickly and effectively. While it can be harsh on your nails and cuticles, non-acetone removers are gentler but may take a bit longer to work. Choose the one that best suits your needs and sensitivity, so you can tackle that glitter without the fuss.

Cotton Balls and Foil Method

Balls of cotton soaked in nail polish remover can be your best friend when it comes to glitter removal. This method involves saturating cotton balls with your chosen remover and pressing them against your nails, then wrapping each fingertip in aluminum foil. This process helps the remover penetrate the glitter layers for more effective removal.

But this method goes beyond simple soaking; the foil traps heat, which aids in breaking down the stubborn glitter particles even more. Allow the cotton balls to sit for around 10 to 15 minutes before gently twisting the foil off. This should leave your nails glitter-free, making the entire process much simpler and less frustrating.

Step-by-Step Guide for Hassle-Free Removal

Despite the challenge of removing glitter nail polish, following this step-by-step guide will make the process much easier. Each step is designed to ensure you can remove glitter polish without unnecessary fuss. Use the table below to organize your materials and method for a seamless experience:

Materials & Methods

MaterialsMethods
Acetone or Nail Polish RemoverSoak a cotton ball or pad
Cotton Balls or PadsPress firmly on your nails
Aluminum Foil (optional)Wrap nails for better removal
Cuticle OilMoisturize nails and cuticles afterward

Preparing Your Workspace

On starting your glitter polish removal, make sure your workspace is well-organized. Lay down an old towel or paper to catch any spills, and keep your nail polish remover and cotton balls easily accessible. Having everything in place will make the process smoother and prevent mess.

Application Techniques

By utilizing the right application techniques, you can expedite the removal of glitter nail polish. Ensure to saturate your cotton ball or pad with nail polish remover and apply it generously to each nail. This maximizes the contact area and helps break down the glitter more effectively.

Plus, don’t rush this process; letting the remover soak into your nails for about 10-15 seconds will significantly ease glitter removal. Once the time is up, gently wipe the polish away with the cotton ball, and repeat if necessary until your nails are clean.

Tips for Stubborn Glitter

StepbyStep, some glitter polishes can be particularly difficult to remove. Follow these tips to tackle stubborn glitter effectively:

  • Soak your nails for a longer period.
  • Use a strong acetone remover for enhanced effectiveness.
  • Consider filing the surface of the polish lightly to break the seal.

After using these techniques, you’ll find it much easier to remove even the most stubborn glitter polish.

With additional effort, you can make glitter polish removal even more manageable. Here are some more tips for tackling stubborn glitter:

  • Try soaking multiple cotton balls and wrapping them with foil for better adherence.
  • After soaking, gently scrape the glitter off with an orange stick.
  • Be patient and repeat the process until all remnants are gone.

After mastering these methods, you will feel confident tackling any glitter nail polish challenge in the future.

Alternative Methods

After trying traditional nail polish removers, you may want to explore alternative methods that can effectively remove glitter nail polish without excessive scrubbing. These methods can not only save you time but also protect your nails from damage, making your polish removal experience much more pleasant. In this section, you’ll discover some creative approaches to effortlessly get rid of stubborn glitter.

Using Soaking Techniques

One effective way to remove glitter nail polish is by soaking your nails in a suitable solution. Start by saturating cotton balls with acetone or a non-acetone nail polish remover, then place them on your nails. Wrap your fingers in aluminum foil to trap heat and moisture, allowing the solution to break down the glitter more easily. After about 10-15 minutes, gently wipe away the polish, and you’ll notice significantly less residue.

Natural Remedies for Removal

By opting for natural remedies, you can remove glitter nail polish using ingredients you may already have at home. Common household items such as lemon juice and vinegar can serve as effective alternatives to commercial removers.

Alternative remedies like lemon juice and vinegar create a solvent that can help dissolve glitter polish. Simply mix equal parts of fresh lemon juice and vinegar, then soak your nails in the solution for about 10 minutes. This method not only helps lift the glitter but is also gentler on your nails and skin. For an added boost, you can use a soft toothbrush to gently scrub away any remaining polish. Embracing these natural options can lead to a less abrasive and more environmentally friendly approach to nail care.

Aftercare for Your Nails

Now that you’ve successfully removed your glitter nail polish, it’s time to focus on aftercare to restore your nails and skin. Glitter polish can often leave your nails feeling dry and damaged, so taking the necessary steps to nourish and protect them is vital for maintaining their health. Implementing a proper aftercare routine ensures your nails remain strong and vibrant for your next manicure.

Moisturizing Your Nails and Skin

Aftercare for your nails involves applying a quality moisturizer to both your nails and surrounding skin. This helps to combat any dryness or brittleness caused by the nail polish remover. Use a rich cuticle oil or hand cream that contains nourishing ingredients like Vitamin E or jojoba oil to keep your nails and skin hydrated.

Protecting Against Future Damage

Below are some effective strategies to shield your nails from future damage. Regular use of gloves while cleaning or handling harsh chemicals can significantly reduce wear and tear on your nails. Additionally, consider applying a base coat before using nail polish, as this creates a barrier that protects your natural nails. Strengthening treatments can also be beneficial; look for products specifically designed to fortify your nails.

Nails are more susceptible to damage without proper care and protection, so embracing these habits will help maintain their integrity. Be mindful of the products you expose your nails to and prioritize using gentle formulas. Regularly trimming your nails and keeping them filed will also prevent chipping and splitting, allowing you to enjoy healthier nails in the long run.

Common Mistakes to Avoid

Once again, many people overlook vital steps in the glitter nail polish removal process. You should avoid soaking your nails too quickly in acetone, using ineffective wipes, or trying to scrape off the polish. To enhance your understanding of the best techniques, visit How to Remove Glitter Nail Polish Without a Hassle.

Rushing the Removal Process

An effective removal method requires patience. Skimming through the steps will only make the process harder and might lead to more frustration. Give your nails adequate time to soak to ensure the glitter breaks down, which ultimately makes the entire experience smoother for you.

Using Incorrect Tools

Above all, using the right tools is vital for achieving a hassle-free glitter nail polish removal. If you rely on incorrect applicators or sturdy scrubs, you run the risk of damaging your nails or surrounding skin.

Also, avoid using regular nail polish removers that are not specifically formulated for removing glitter. They often do not have the strength needed to break down the glitter particles effectively. Invest in quality cotton balls and acetone-saturated pads to simplify your removal process and leave your nails looking healthy and pristine.

To wrap up

With these considerations, you can effectively remove glitter nail polish without hassle. Opt for products designed for stubborn formulas, and use strategic techniques like soaking cotton balls and wrapping your fingers. If you need more ideas, check out What are some tips for removing glittery nail polish? to enhance your approach. By following these steps, you’ll achieve clean nails in no time!

FAQ

Q: What products can I use to easily remove glitter nail polish?

A: To effectively remove glitter nail polish, you can use products such as acetone-based nail polish remover, which is particularly effective against thick glitter. If you prefer a gentler option, look for non-acetone removers, but be prepared for a longer removal process. Additionally, some specialty glitter polish removers are available in stores; these are specifically designed to break down glitter particles.

Q: What techniques can I use to enhance the glitter nail polish removal process?

A: One effective technique is to soak a cotton ball or pad in your chosen nail polish remover and place it on your nail, wrapping it with aluminum foil to keep it in place. Leave it on for about 10-15 minutes; this allows the remover to penetrate the polish, making it easier to wipe away. Another method is to gently buff the top layer of the glitter polish with a nail file before applying the remover, which can expedite the process.

Q: Are there any tips for avoiding damage to my nails during glitter polish removal?

A: Yes, to protect your nails during the removal process, ensure you moisturize your nails and cuticles afterward with a nourishing oil or cream. Additionally, try to avoid excessive scrubbing or using rough materials to remove the polish. It helps to use a gentle approach, allowing the remover to do the work rather than forcing the polish off. After removal, applying a strengthening base coat can further maintain nail health.

Skip to content