nails

Wedding Nail Ideas for Every Bride-to-Be

Ideas for your wedding nails can make a significant impact on your overall bridal look. From classic French tips to trendy ombre styles, the choices are endless and should reflect your personality and theme. You can express your individuality through intricate nail art designs or choose timeless elegance with subtle shades. In this blog post, you’ll discover various styles and inspirations tailored just for you, ensuring your nails are picture-perfect as you walk down the aisle.

Key Takeaways:

  • Personalization: Choose nail designs that reflect your unique style and personality, whether it’s classic elegance or bold creativity.
  • Seasonal Inspiration: Consider the season of your wedding to guide your nail color palette, from soft pastels in spring to rich jewel tones in winter.
  • Coordination: Ensure your nails complement your wedding attire and overall theme, creating a cohesive look that enhances your bridal ensemble.

Classic Bridal Nail Designs

Your wedding day is a moment of timeless elegance, and classic bridal nail designs can enhance your look beautifully. From the traditional French manicure to classic nude tones, these designs never go out of style. If you’re seeking inspiration, Show me your BRIDAL NAILS! : r/RedditLaqueristas is a wonderful resource to explore ideas to match your personality and gown.

French Manicure Variations

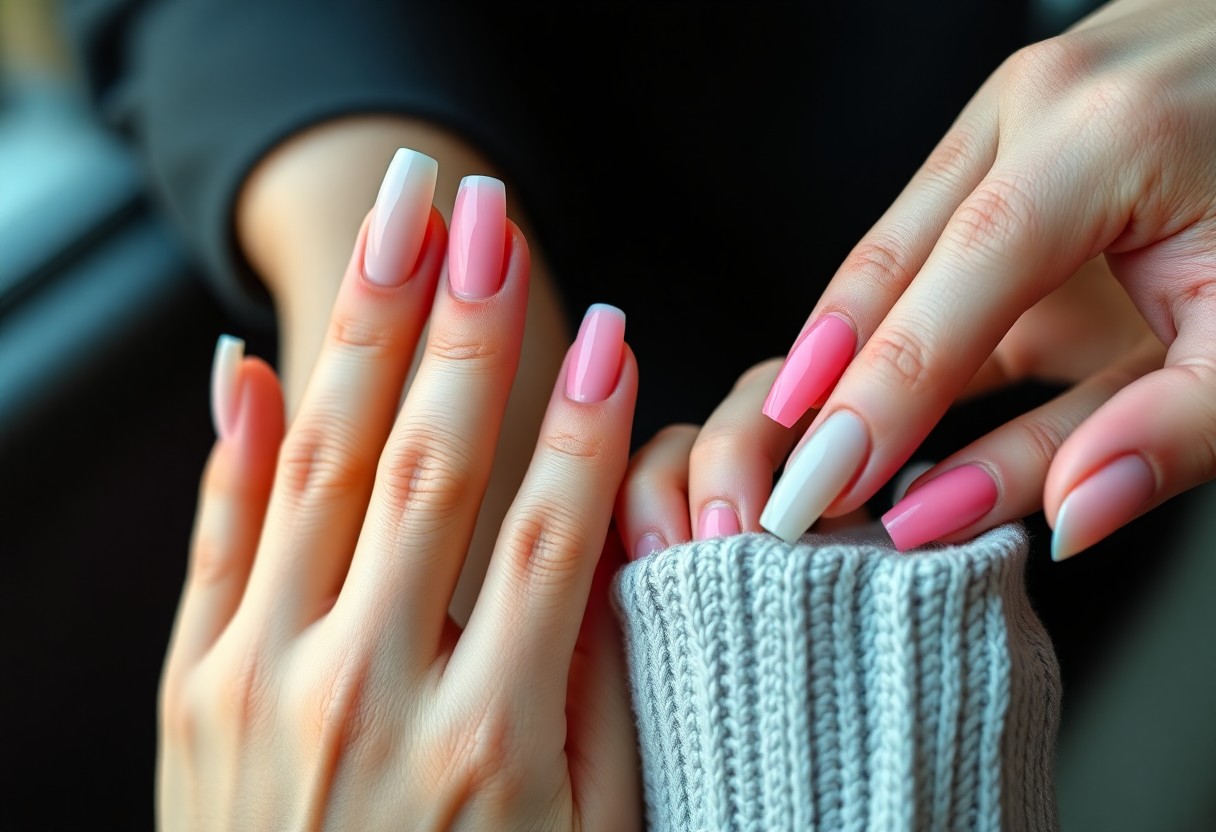
At your wedding, a French manicure remains a go-to choice for brides. It offers a sophisticated and polished appearance that complements any bridal look. You can opt for the classic white tips or experiment with colored tips that align with your wedding theme, adding a modern twist to this timeless design.

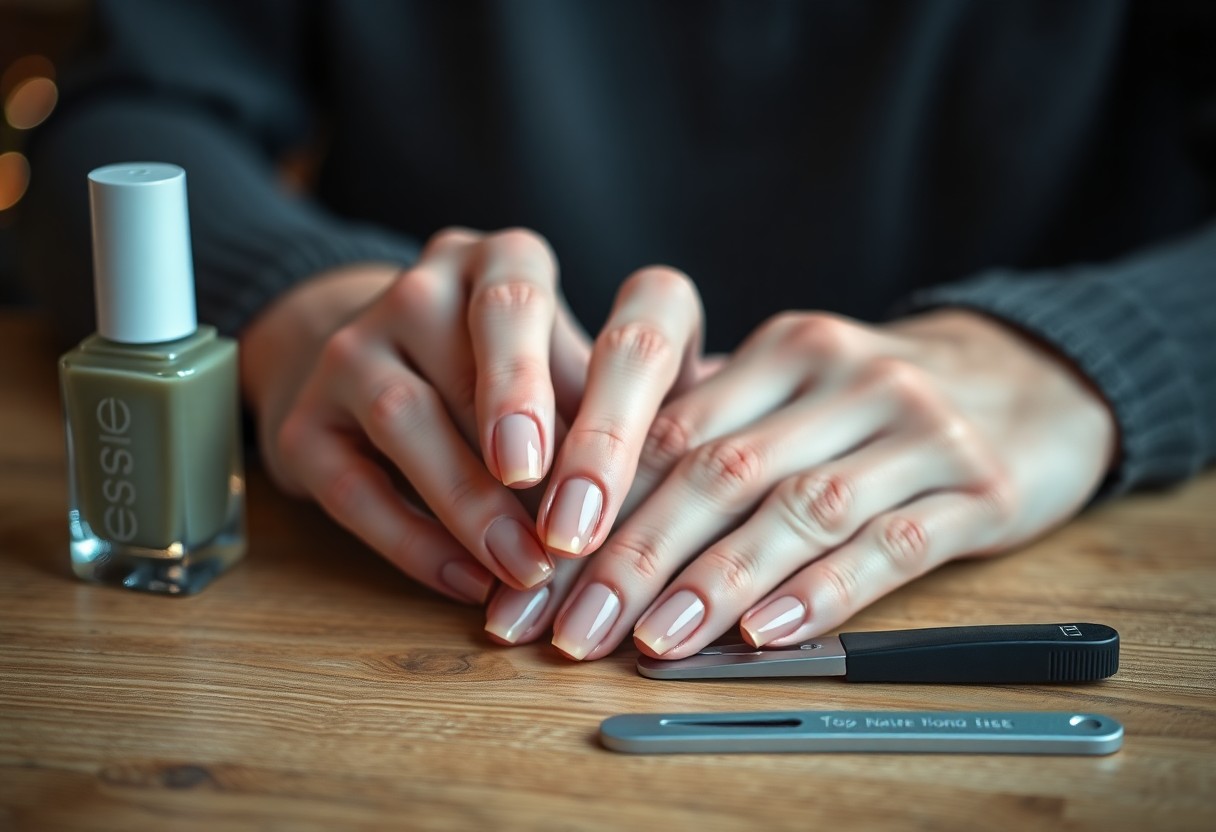
Simple Elegance with Neutral Shades

With neutral shades, you can achieve a sophisticated and understated look for your wedding day. Soft hues, such as beige, blush, or soft pink, enhance your natural beauty while offering a chic and refined feel. These subtle colors also pair well with a variety of wedding dress styles.

Elegance is the hallmark of neutral shades, making them perfect for your bridal nails. Their understated charm allows your ring to take center stage, while still providing a polished finish to complete your bridal look. Neutral nails offer versatility and can seamlessly transition from the ceremony to the reception, ensuring your hands remain picture-perfect throughout your special day.

Trendy Nail Art Ideas

While planning your wedding day, don’t overlook the significance of your nails. Trendy nail art can elevate your bridal look, allowing you to express your personal style. Whether you prefer intricate designs or subtle accents, exploring contemporary nail art ideas can add a unique flair to your overall ensemble, making your special day even more memorable.

Ombre Techniques for a Modern Twist

Ideas for ombre nails are endless, offering a soft and romantic gradient effect that’s perfect for brides. You can opt for classic white transitioning into a delicate pastel, or play with bolder colors that reflect your wedding palette. This technique adds depth and elegance to your look, making it a trendy choice for the modern bride.

Geometric Patterns and Accents

Around your wedding, unique geometric patterns can set your nails apart from the traditional designs. These contemporary styles utilize shapes like triangles, stripes, and lines to create a visually stunning effect. Whether painted in metallic hues or combined with soft pastels, geometric patterns can be playful yet sophisticated, perfectly complementing your bridal attire.

Nail art featuring geometric patterns allows you to infuse a touch of modernity into your wedding look. You can incorporate bold lines or even minimalist designs for a chic appearance. The beauty of geometric patterns lies in their versatility, adapting effortlessly to both classic and contemporary wedding themes. Feel free to mix and match colors and shapes to showcase your personality while maintaining an elegant aesthetic.

Floral and Nature-Inspired Nails

To embrace the beauty of nature on your special day, floral and nature-inspired nails are an enchanting choice. These designs can capture the essence of your wedding theme and reflect your personality, whether you prefer subtle accents or bold florals. From delicate blossoms to intricate leaf patterns, there are countless options to express your love for the outdoors. You can even incorporate your wedding flowers into your nail art for a truly personalized touch.

Hand-Painted Floral Designs

Designs featuring hand-painted florals can elevate your nail look to artistic heights. Skilled nail artists can create stunning blooms in various styles, from watercolor effects to intricate details, allowing you to customize colors that match your wedding palette. These designs offer a romantic and feminine touch, making them perfect for brides who want their nails to be a standout feature on their big day.

Using Real Dried Flowers

Flowers infused into your nails can provide a unique and organic aesthetic. Indeed, using real dried flowers allows you to incorporate nature directly into your manicure, creating an ethereal and one-of-a-kind look. Whether you choose tiny blossoms or elegant petals, these delicate elements evoke a sense of whimsy and intimacy. You can effortlessly pair them with nude or pastel bases to make the flowers pop. This trend not only adds texture but also serves as a beautiful reminder of the natural beauty surrounding you on your wedding day.

Glamorous Nail Enhancements

Once again, you have the opportunity to elevate your wedding day look with stunning nail enhancements that radiate glamour. Choosing the right enhancements can bring your entire bridal style together, allowing your nails to be not just a finishing touch, but a focal point. From breathtaking glitter to intricately designed gems, these enhancements can give your nails a captivating and luxurious flair that perfectly complements your wedding attire.

Glitter and Sparkle Techniques

Before submerging into the world of glitter and sparkle, consider the various techniques that can transform your nails into a shimmering masterpiece. From a soft glitter gradient to full-on glitterbombs, you can find a style that feels just right for you. Pairing these techniques with carefully chosen shades can add depth and dimension to your bridal look, making your nails a captivating accessory on your special day.

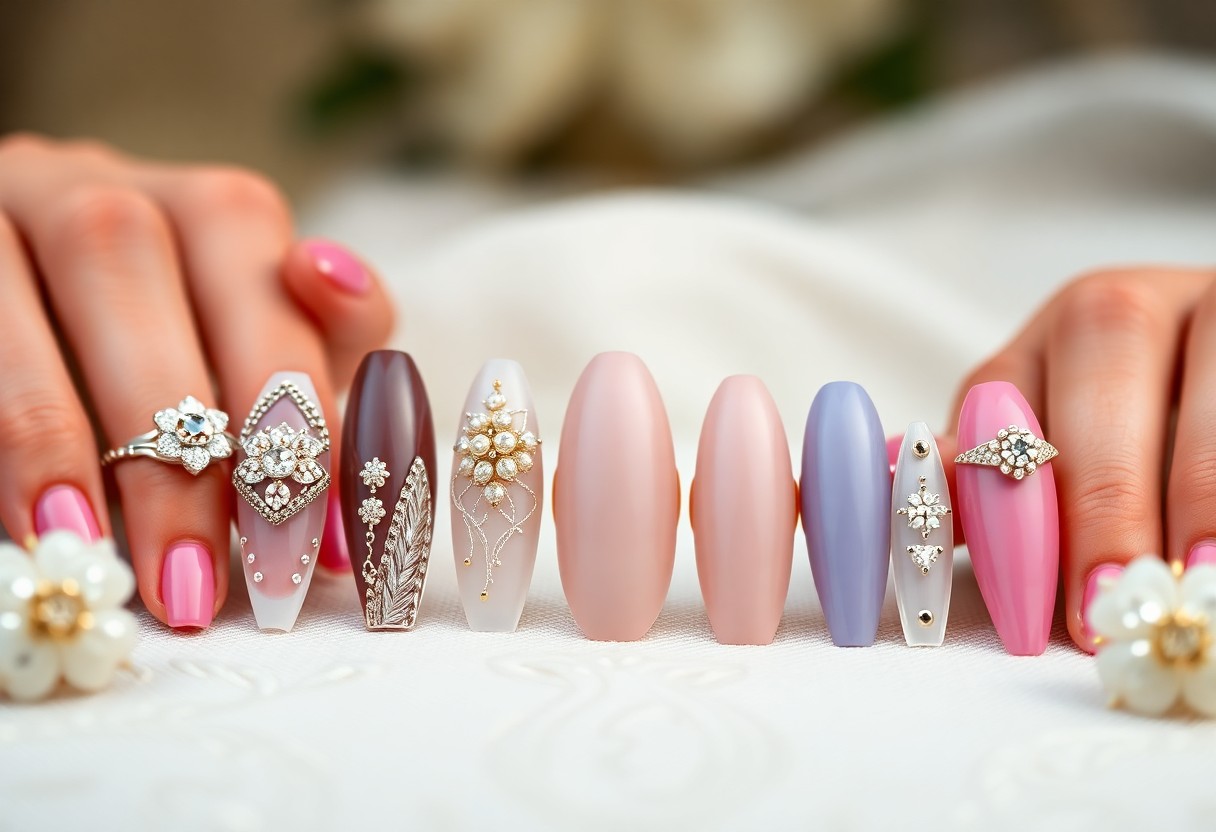
Rhinestones and Nail Art Gems

Around your wedding, you may want to incorporate rhinestones and nail art gems for an extra touch of sophistication. These embellishments can be arranged in various patterns, from minimalist lines to elaborate designs, allowing you to personalize your nails in a way that reflects your unique style. The sparkly additions can easily catch the light, drawing attention to your exquisite nails and enhancing your bridal ensemble.

Understanding how to effectively use rhinestones and nail art gems can elevate your bridal nails to a new level of elegance. Choose high-quality gems that reflect your overall color palette, and consider the placement – whether it’s a single gem on each nail or a statement piece on an accent nail. A balance of intricate design and simplicity is key, as you want your nails to shine without overshadowing your overall look. This thoughtful approach will ensure your nails are both eye-catching and harmonious with your wedding day theme.

Seasonal Wedding Nail Inspirations

Many brides-to-be look for nail designs that reflect the beauty of the season in which they’re tying the knot. Choosing seasonal colors and themes for your wedding nails can enhance your overall bridal look and provide a cohesive feel. From soft pastels to autumnal hues, your nails can be as unique and expressive as your love story.

Spring and Summer Shades

Any bride can embrace the freshness of spring and summer with vibrant and playful nail shades. Think bright pinks, lavender purples, or even soft mint greens that evoke the spirit of blooming flowers and sunny days. Floral accents or delicate glitter can add a touch of whimsy to your wedding nail design, perfectly matching the cheerful ambiance of the season.

Fall and Winter Designs

About the colder months, deeper hues and intricate designs can create a stunning contrast against your wedding gown. Rich burgundies, forest greens, and shimmering golds add elegance and warmth to your bridal look. Consider incorporating textures like matte finishes or velvety designs to reflect the cozy vibe of fall and winter celebrations.

In addition to classic colors, you can experiment with nail art such as geometric patterns or festive motifs like snowflakes or leaves. These details can elevate your nail game while mirroring the seasonal elements surrounding your wedding, creating a beautifully harmonious look that ties together your entire bridal aesthetic.

Tips for Choosing the Perfect Wedding Nails

Not every nail design will work for every bride. To find the right wedding nails for your big day, consider these tips:

  • Choose a style that reflects your personality
  • Coordinate nail colors with your wedding theme
  • Think about your comfort level with nail art
  • Consult with a professional nail artist for expert advice

After you’ve thought through these factors, your perfect wedding nails will be just a few steps away.

Matching with Your Dress and Theme

Besides your personal style, it’s vital to match your nails with your dress and wedding theme. Consider the color palette and design elements of your dress when selecting nail colors and styles. Soft pastels may harmonize beautifully with a romantic gown, while bold designs could complement a modern or edgy look. Take inspiration from your wedding decor and flowers as well, ensuring that your nails feel cohesive with the overall aesthetic of your big day.

Considering Nail Length and Shape

Tips for determining nail length and shape include understanding how they can enhance your overall look. The shape of your nails can influence the perception of your hands, making them appear longer or more elegant. Long, almond-shaped nails often exude glamour, while shorter, square nails can convey simplicity and ease.

Indeed, you should also consider your lifestyle and daily activities when choosing nail length. If you’re not used to long nails, opt for a shorter length that allows for comfort and practicality without sacrificing style. Assessing the specific shape that best complements your fingers will also help make your nails the perfect finishing touch for your wedding day ensemble.

To wrap up

Ultimately, choosing the perfect wedding nail design is an exciting opportunity to express your personal style on your special day. From classic elegance to trendy nail art, there’s a plethora of options tailored for your individual preferences. Consider the color palette of your wedding, the season, and your overall theme when making your selection. With these wedding nail ideas, you can ensure your hands look as stunning as you feel, making every detail count as you walk down the aisle.

FAQ

Q: What are some popular nail colors for brides on their wedding day?

A: Popular nail colors for brides often include classic shades like soft pinks, whites, and nudes. Other brides may opt for shades that match their wedding theme or bouquets, such as pastel shades or metallics. For a bolder statement, deep reds or dark berries can also be striking, especially if paired with elegant nail art.

Q: How can I incorporate nail art into my wedding nails?

A: Incorporating nail art can range from simple to intricate designs. For a subtle touch, brides can add delicate floral patterns or tiny gems on accent nails. Those looking for more flair might consider intricate lace designs or watercolor effects. Utilizing a professional nail artist can help you achieve a custom look that complements your overall bridal style while ensuring the designs are durable for the big day.

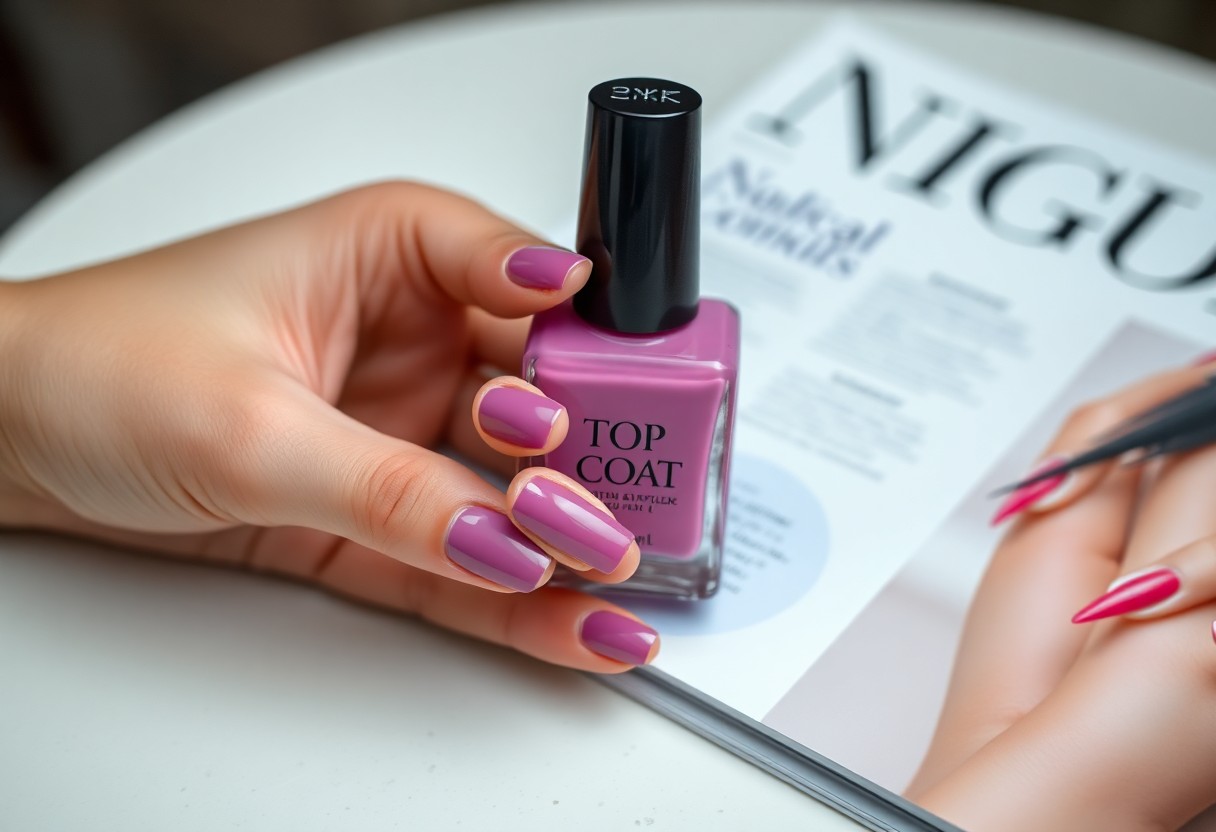
Q: Should I choose gel or regular polish for my wedding nails?

A: Gel polish is a popular choice for wedding nails since it lasts longer and is less likely to chip, providing a flawless look throughout the event. It also has a glossy finish that many brides appreciate. However, if you prefer a more natural finish or have sensitivities to gel products, regular polish can also be a good option, especially with proper topcoat application.

Q: How far in advance should I schedule my bridal nail appointment?

A: It’s advisable to schedule your bridal nail appointment about one to two weeks before your wedding day. This timing ensures that your nails look fresh and perfect without the risk of wear or chipping. However, if you wish to try out different designs in advance, consider doing a test run several weeks prior, ensuring you have enough time to finalize the look.

Q: Can I include my bridal party in my nail design plans?

A: Absolutely! Many brides choose to have matching or complementary nail designs for their bridal party. This can create a cohesive look for photos and is a lovely way to include your bridesmaids in the wedding preparations. You might select a similar color palette or design theme that reflects the overall vibe of your wedding, allowing everyone to feel special on your big day.

Gel vs. Acrylic Nails – Pros and Cons

Many people find themselves torn between gel and acrylic nails when choosing the perfect manicure. Each option has its own set of advantages and disadvantages, making it important for you to understand what best suits your lifestyle and preferences. In this post, we will explore the pros and cons of both gel and acrylic nails, helping you make an informed decision for your next nail enhancement. Dive in to discover what fits your beauty routine and lasts the best for your day-to-day activities.

Key Takeaways:

  • Longevity: Acrylic nails often last longer than gel nails, making them a preferred choice for durability.
  • Appearance: Gel nails typically offer a more natural look and shine compared to acrylics, appealing to those seeking a less artificial finish.
  • Removal Process: Gel nails can be easier to remove, but both methods require care to avoid damaging the natural nail.

Understanding Gel Nails

A gel nail is a popular manicure option that provides a glossy finish and long-lasting wear. They are cured under a UV or LED light, making them more durable than traditional nail polish. If you’re curious about the differences, check out What’s the Difference Between Gel Nails and Acrylics? for a detailed comparison.

Composition and Features

After understanding the basics, you’ll find that gel nails are made from a combination of polymers and resins that create a flexible and natural-looking finish. These components work together to give your nails strength and shine without the bulkiness often associated with acrylics.

Application Process

Across the beauty industry, the application process for gel nails is favored for its efficiency. Your nail technician will first prep your natural nails, apply a base coat, and then cure it under UV or LED light. Following this, colored gel polish is layered on and cured again until your desired look is achieved.

In addition, each layer of gel is crucial to achieving that smooth finish. Although the curing time is quick, the process may require several layers for optimal color and durability. Once all layers are applied and cured, a top coat seals the gel, ensuring it lasts for weeks without chipping.

Understanding Acrylic Nails

You may find acrylic nails to be a popular choice for enhancing your natural nails with added length and strength. These artificial nails are made by combining a liquid acrylic and a powder, which creates a durable layer over your existing nails. You can find them in various shapes and styles, making it easy to customize your look.

Composition and Features

One of the standout features of acrylic nails is their composition, which consists of a combination of liquid monomer and powder polymer. This mixture creates a hard, protective layer that not only adds length and versatility to your nails but also provides a strong foundation that resists chipping and breaking.

Application Process

Across the beauty industry, the application of acrylic nails involves a meticulous process that ensures a flawless finish. A nail technician will first prepare your natural nails by cleaning and shaping them, followed by applying a primer to enhance adhesion. After that, the acrylic mixture is applied to your nails, sculpting the desired shape and length.

Another important aspect of the application process is the drying technique. Once the acrylic has been applied, it hardens quickly, usually within minutes, thanks to the reaction between the monomer and polymer. The technician may then buff and shape the nails for a smooth finish, followed by applying polish or nail art as you desire. This careful application results in sturdy nails that can last for several weeks with proper care.

Pros of Gel Nails

Keep in mind that gel nails offer several benefits, making them a popular choice among nail enthusiasts. They provide a natural look, flexibility, and a high-gloss finish that can last for weeks without chipping. With their lightweight formula, gel nails feel more comfortable than other types, giving you a beautiful and polished appearance without sacrificing durability.

Durability

Nails enhanced with gel products are known for their remarkable durability. They can withstand daily activities without easily chipping or breaking, ensuring that your manicure remains intact for longer periods. This longevity makes gel nails an appealing option for those with busy lifestyles who still want their nails to look perfect.

Aesthetic Appeal

One of the standout features of gel nails is their aesthetic appeal. The glossy finish creates a vibrant and polished look that enhances the natural beauty of your nails. With a variety of colors and designs available, you can easily customize your gel nails to suit any occasion or personal style.

Consequently, the aesthetic qualities of gel nails deliver not just beauty, but also versatility. You can achieve intricate designs, vibrant colors, and a smooth finish that elevates your overall look. This makes gel nails a favorite among fashion-forward individuals who want to express their personality through their manicured nails. Whether you prefer classic shades or trendy patterns, gel nails contribute to a polished and elegant appearance.

Cons of Gel Nails

To fully understand the downsides of gel nails, you should consider the potential drawbacks. While they offer a beautiful finish and durability, the process can be time-consuming, and the exposure to UV light during curing might raise concerns about skin damage. Additionally, if not done correctly, gel nails can weaken your natural nails over time, leading to breakage. It’s crucial to weigh these factors before deciding on gel nails for your next manicure.

Removal Process

Nails can be challenging to remove when it comes to gel applications, requiring a soaking procedure that can be quite time-intensive. You may need to visit a salon for safe removal, as improper techniques can damage your natural nails. The process typically involves soaking in acetone, which can be drying and potentially irritating to your skin. Regular upkeep is necessary, so consider how this might affect your nail health.

Cost Implications

Above all, weighing the financial aspect of gel nails is vital for your budgeting. Initial application costs can be higher than other types of manicures, and the need for regular maintenance and professional removal adds up over time.

Cost can be a significant factor when choosing gel nails. While the initial investment in gel nails might seem justified due to their longevity and aesthetic appeal, the recurring appointments for fills and maintenance can gradually increase your overall spending. Moreover, if you opt for salon removal instead of DIY methods, you will incur additional expenses. Evaluate these costs to ensure they align with your beauty budget and priorities.

Pros of Acrylic Nails

Your journey into the world of nails might lead you to acrylics, which offer a variety of advantages. Acrylic nails are robust and durable, making them a popular choice for those who desire long-lasting wear. They can withstand daily wear and tear, providing you with a beautiful manicure that stays intact longer than other options. Additionally, the application process allows for intricate designs that can elevate your style.

Customization Options

Acrylic nails give you limitless customization options. You can choose from various shapes, lengths, and colors to craft a look that’s uniquely yours. Whether you prefer a classic French tip or a bold, artistic design, the versatility of acrylics enables you to express your personal style.

Longevity

Around three to six weeks, acrylic nails maintain their stunning appearance, depending on how well you care for them. This extended wear makes them ideal for those who want to enjoy a polished look without frequent trips to the salon.

Due to their durable nature, acrylic nails can last several weeks without significant chipping or wear. This longevity is particularly beneficial for those with busy lifestyles or individuals who frequently find themselves working with their hands. Regular maintenance, such as fills or touch-ups, can further extend their lifespan while ensuring your nails continue to look fresh and fabulous.

Cons of Acrylic Nails

All nail enhancements come with their downsides, and acrylic nails are no exception. While they are popular for their durability and variety, they can pose some significant drawbacks. Issues such as damage to natural nails, potential allergic reactions, and strong odors can make you rethink your choice. Understanding these cons can help you make an informed decision about whether acrylic nails are the right fit for you.

Damage to Natural Nails

One of the most significant concerns with acrylic nails is the potential damage they can inflict on your natural nails. The application process involves filing the nail surface to create a bond, which can thin and weaken your nails over time. Additionally, if acrylics are improperly removed or maintained, it can lead to brittleness, splits, and even permanent damage to your natural nail bed, necessitating time for recovery.

Odor and Allergies

An important aspect to consider is the odors and potential allergic reactions associated with acrylic nails. The chemicals used in applying acrylics, especially the acrylic liquid, often release strong fumes that can be unpleasant to breathe in. Those with sensitive skin or respiratory issues may find themselves experiencing irritation or reactions, highlighting the need for caution when opting for acrylic nails.

Odor from acrylic nails can be quite strong, stemming from substances like acetone and the monomer used in the process. This smell may linger in the salon even after your appointment. If you are sensitive to strong scents, you might find the experience uncomfortable. Moreover, allergies can manifest in various ways, from skin irritation to respiratory difficulties, making it imperative for you to consider your health history before choosing acrylic nails.

Final Words

Upon reflecting on the pros and cons of gel and acrylic nails, you have several factors to consider when choosing the best option for your needs. Gel nails offer a more natural look and flexibility, while acrylics provide strength and durability. Your lifestyle, budget, and personal preferences are key influences in this decision. It’s vital to weigh these aspects carefully, ensuring that your choice aligns with your desires for maintenance and appearance. Ultimately, understanding these differences empowers you to make an informed decision for your nail care journey.

FAQ

Q: What are the main differences between gel and acrylic nails?

A: The main differences between gel and acrylic nails lie in their composition and application process. Acrylic nails are created using a mixture of liquid monomer and powder polymer, which hardens when exposed to air. Gel nails, on the other hand, are made from a semi-solid gel that requires curing under a UV or LED lamp. This difference in curing affects the overall finish and durability of the nails—acrylic nails tend to be thicker and stronger, while gel nails offer a more natural, shiny appearance.

Q: What are the pros of choosing gel nails over acrylic nails?

A: Gel nails offer a number of advantages compared to acrylics. Firstly, they tend to look more natural, providing a glossier finish that mimics the appearance of natural nails. Additionally, gel nails are less prone to chipping and provide more flexibility, making them less likely to break. Moreover, the curing process creates a strong bond, which can result in a longer-lasting manicure without the strong chemicals often associated with acrylics.

Q: What are the drawbacks of using acrylic nails?

A: While acrylic nails provide a strong and durable option for nail enhancement, there are some drawbacks to consider. The application process can be more invasive, as it often involves filing down the natural nail to create a strong bond. This can lead to potential damage or thinning of the natural nail over time. Additionally, acrylics can have a strong odor during application due to the chemicals used, which might be off-putting to some individuals. Lastly, if not applied or removed properly, they can risk lifting and cause damage to the natural nail.

Q: Are gel nails easier to maintain than acrylic nails?

A: Generally, gel nails are considered easier to maintain than acrylic nails. They require less filing and can be less prone to lifting due to their flexibility, which allows them to withstand daily activities better. Regular upkeep typically involves minimal maintenance, as the growth gap from the cuticle area is less noticeable compared to that of acrylic nails. However, both types of nails require regular fills or maintenance every two to three weeks, depending on individual nail growth.

Q: Can I remove gel nails at home, or should I seek professional help?

A: While it is possible to remove gel nails at home, it is often recommended to seek professional help to avoid damaging the natural nails. The best practice for removal involves soaking the nails in acetone to loosen the gel before gently pushing it off. At home, this process can lead to mishaps if not done carefully. Professionals have experience and tools that can make the process quicker and safer, ensuring that your natural nails remain intact and healthy.

How to Safely Remove Acrylic Nails at Home

It’s crucial to know the right techniques for safely removing acrylic nails at home to avoid damaging your natural nails. With the right tools and careful steps, you can ensure that your nails stay healthy while eliminating those artificial extensions. This guide will walk you through the process, providing you with the knowledge and confidence to perform the task effectively without needing professional help. Get ready to reclaim your natural nails with these straightforward tips!

Key Takeaways:

  • Soaking Method: Use acetone or a nail polish remover containing acetone to soak your acrylic nails. This helps to break down the adhesive, making it easier to remove the nails without damage.
  • Gentle Scraping: After soaking, gently scrape off the acrylic using a wooden cuticle stick. Avoid using metal tools to prevent harming your natural nails.
  • Aftercare: Moisten your nails and cuticles with oil or lotion post-removal to nourish and restore hydration to your nails and skin.

Understanding Acrylic Nails

The acrylic nails trend continues to be popular due to their versatility and ability to enhance the beauty of your hands. These artificial nails are created by combining a liquid monomer and a powder polymer, forming a durable coating over your natural nails. This process allows for various shapes and lengths, catering to your personal style. However, while acrylic nails can be fabulous, there are times when removal becomes necessary for the health and well-being of your natural nails.

What Are Acrylic Nails?

The acrylic nails are synthetic enhancements that offer a polished appearance and can be customized to suit your aesthetic preferences. They are crafted by mixing a liquid and powder to form a hard protective layer over your natural nails. This method not only adds length but also strength, allowing your nails to withstand daily activities without breaking easily. With various colors and designs available, acrylic nails can be tailored to match your style.

Common Reasons for Removal

Below are some common reasons why you may consider removing your acrylic nails. Changes in personal style, natural nail growth, and damage to the acrylic or your underlying nail are just a few reasons. Feeling discomfort or noticing signs of lifting can also prompt you to seek removal. Maintaining the health of your natural nails is important, as excessive wear and tear can lead to further issues.

Reasons for removing acrylic nails can vary based on personal preference and nail health. You may decide to remove them if your nails have grown out significantly, as this can create an undesirable gap between your cuticle and the acrylic. Moreover, if you experience any discomfort or if the acrylic nails are at risk of breaking, it’s best to have them removed. Additionally, you might wish to switch from acrylics to a more natural nail approach or alter your nail look for a special occasion. Keeping an eye on the condition of your natural nails is necessary to ensure they remain healthy and strong.

Preparing for the Removal Process

You should take some time to prepare before attempting to remove your acrylic nails at home. This means gathering all the necessary tools and choosing a suitable environment where you can work efficiently, ensuring that you are comfortable and free from distractions. Proper preparation will not only make the process easier but will also help protect your natural nails and surrounding skin during removal.

Tools and Materials Needed

Needed for the removal process are acetone, cotton balls or pads, aluminum foil, a nail file, a wooden cuticle stick, and a bowl. Having a good pair of scissors on hand can also be useful for trimming the acrylic nails if they are particularly long. Ensure that all your tools are clean and ready to use to promote safety and hygiene.

Choosing the Right Environment

Above all, you’ll want to select a clean and well-ventilated space for removing your acrylic nails. Ideally, this should be a table where you can lay out all your tools and materials. Having good lighting will help you see what you’re doing, while a surface that is easy to clean will make cleanup after the process simpler. Avoiding damp or cluttered places will help you maintain focus and protect your belongings from any accidental spills.

At the same time, ensure that your chosen environment is free from distractions. Consider playing soothing music or keeping your phone out of reach to help you focus on the task at hand. A calm atmosphere can make the process more pleasant and allow you to execute each step with care, ultimately leading to a more successful removal of your acrylic nails.

Step-by-Step Removal Process

Once again, it’s important to follow a cautious approach when removing acrylic nails at home. Below is a structured guide to help you through the process effectively.

Step-by-Step Guide

Step 1Gather supplies: acetone, cotton balls, aluminum foil, a nail file, and a cuticle pusher.
Step 2File the top layer of the acrylic nails to break the seal.
Step 3Soak cotton balls in acetone and place them on your nails.
Step 4Wrap your fingertips with aluminum foil to hold the cotton balls in place.
Step 5Leave on for 15-30 minutes, then gently scrape off the softened acrylic.
Step 6Clean your nails and moisturize your hands.

Soaking Method

About 75% of the time, the soaking method is the preferred approach for removing acrylic nails. This method involves immersing your fingertips in acetone to dissolve the acrylic material gently. It’s a simple and effective way to tackle the adhesive without damaging your natural nails.

Nail File Method

An alternative to soaking, the nail file method can be used for quicker removal. This technique allows you to file away the acrylic layers gradually, although it requires more caution to avoid harming your natural nail beneath.

Step by step, to utilize the nail file method, start by filing the surface of the acrylic to reduce thickness. Be sure to use a coarse nail file to penetrate the layers without applying excessive pressure. Once you notice the acrylic getting weaker, carefully work your way down to the natural nail, taking breaks as needed to avoid damaging your nail bed. This method might take longer, but it lets you maintain better control throughout the removal process.

Aftercare for Your Natural Nails

To ensure the health of your natural nails post acrylic removal, it’s crucial to incorporate specific aftercare practices. Focus on nourishing and protecting your nails to promote healing and regain their strength. Maintaining a consistent regimen will help you achieve healthier, more resilient nails over time.

Moisturizing and Hydrating

Below are several ways to keep your nails and cuticles well-hydrated. Apply a high-quality cuticle oil or moisturizing cream regularly to help replenish moisture stripped away during the acrylic application and removal process. This will keep your nails flexible and prevent breakage.

Strengthening Treatments

An effective way to enhance your nail health is through strengthening treatments. Look for products specifically designed to fortify and promote growth, such as nail strengtheners and growth serums. These can provide your nails with the nutrients they need to recover quickly.

This approach often involves using formulas rich in proteins, vitamins, and crucial oils aimed at repairing any damage caused during acrylic wear. You might also consider biotin supplements to promote healthy nail growth from within. Regular use of strengthening treatments will help your nails regain their strength and resilience, ensuring they look their best in no time.

Common Mistakes to Avoid

All too often, people make avoidable mistakes while attempting to remove acrylic nails. It’s necessary to be mindful of your approach to ensure you don’t damage your natural nails or cause undue pain. Taking the right steps will lead to a more successful and safer removal process.

Rushing the Removal

Behind the urge to free yourself from acrylic nails, rushing the removal process can lead to painful consequences, including damaged nails and skin. Take your time and allow the necessary products to work effectively before moving onto the next step.

Using Harsh Chemicals

At times, damaging chemicals might seem like a quick solution for removing acrylic nails. However, using these substances can have adverse effects on your nails and skin, leading to irritation or long-term damage.

And it’s best to opt for acetone, which is widely recommended for gentle acrylic nail removal. While it effectively breaks down the acrylic material, ensure you use a pure form and avoid any products containing unnecessary additives or harsh chemicals. By sticking to safer options, you not only protect your natural nails but also maintain the health of your skin around them.

Frequently Asked Questions

Unlike what some might believe, safely removing acrylic nails at home can be straightforward with the right techniques. Many people have questions regarding the process, tools needed, and potential risks. If you’re unsure about how to start, you can find helpful guidance on how to safely remove acrylic nails at home. It’s important to approach this task carefully to maintain the health of your natural nails while ensuring a smooth removal process.

Conclusion

With this in mind, you can safely remove your acrylic nails at home by following the appropriate steps. Ensure you gather the necessary materials, soak your nails properly, and avoid aggressive methods that could damage your natural nails. By taking your time and being gentle, you can successfully remove the acrylics while maintaining the health of your nails. If you encounter any issues, don’t hesitate to consult a professional for assistance.

FAQ

Q: How can I safely remove acrylic nails at home?

A: To safely remove acrylic nails at home, start by gathering your supplies: nail file, cotton balls, acetone, foil, and a cuticle pusher. First, file the top layer of the acrylic to break the seal. Soak a cotton ball in acetone and place it on each nail, then wrap it in foil to keep the heat in. Leave it on for about 30 minutes. Once soft, gently push the acrylic off your nail using the cuticle pusher. If there’s any resistance, re-soak and wait a little longer.

Q: Is it safe to use regular nail polish remover instead of acetone?

A: Regular nail polish remover typically contains acetone but at a lower concentration. While it may work for some, it can take much longer to dissolve acrylic nails, and may not remove them completely. For the best results and faster removal, it’s advisable to use 100% acetone, which is specifically designed for dissolving acrylics.

Q: How do I prevent damage to my natural nails during the removal process?

A: To protect your natural nails, it’s important to avoid pulling or prying off the acrylic. Always follow the soaking method, as this minimizes trauma to your nails. Additionally, consider applying cuticle oil or a strengthening treatment to your nails and cuticles after the removal to help replenish moisture and encourage recovery.

Q: What should I do if the acrylic nails are not coming off easily?

A: If the acrylics are resistant to removal, do not force them off as this can cause damage to your natural nails. Instead, re-soak them by applying more acetone and wrapping the nails in foil again. If necessary, give them an extra 10 to 15 minutes to break down further. Patience is key to a safe removal process.

Q: What aftercare should I perform once the acrylic nails are removed?

A: After removing acrylic nails, it’s vital to care for your natural nails. Start by gently buffing the surface to smooth out any ridges. Consider applying a moisturizing hand cream and cuticle oil to nourish your nails and skin. Additionally, allowing some time for your natural nails to breathe before applying new enhancements is a good practice to ensure their health.

How to Prevent Your Nails from Chipping

Many people experience the frustration of chipped nails, which can detract from your overall appearance and confidence. You can take simple, effective steps to keep your nails looking their best through proper care and protective measures. This guide will help you understand the best practices for maintaining strong, healthy nails that resist chipping, ensuring you can show off your manicure with pride. With a few adjustments to your routine, you will greatly reduce the chances of your nails chipping and breaking.

Key Takeaways:

  • Moisturize your nails regularly to maintain flexibility and prevent brittleness.
  • Choose quality nail products, including polishes and topcoats, that are designed to resist chipping.
  • Avoid harsh chemicals and excessive exposure to water to protect your nails from damage.

Understanding Nail Structure

A comprehensive understanding of nail structure helps you maintain healthier nails and enjoy a longer-lasting manicure. Your nails are composed of layers of keratin, a type of protein that contributes to their strength. To explore insightful tips on how to stop nail polish from chipping? : r/Nailpolish, research into nail care techniques that can significantly enhance your nail health.

Anatomy of the Nail

Structure is key to understanding how to care for your nails effectively. Each nail consists of several parts: the nail plate, nail bed, cuticle, and matrix, which all work together to maintain nail integrity. The nail plate is the visible part while the nail bed provides support and nourishment. By keeping these elements in mind, you can better protect your nails from damage.

Common Causes of Chipping

Behind nail chipping are various factors that can weaken your manicure. Frequent exposure to water, harsh chemicals, or improper application of nail polish are only a few reasons your nails may chip. Understanding these irritants helps you proactively care for your nails.

Common habits and environmental triggers contribute significantly to nail chipping. Activities like washing dishes without gloves, using your nails as tools, or applying polish on dry, brittle nails can all exacerbate the problem. Additionally, skipping base and top coats can leave your polish unprotected, making it more susceptible to chipping. By identifying and altering these behaviors, you can enhance the durability of your manicures.

Nail Care Routine

Assuming you are looking to keep your nails healthy and chip-free, establishing a consistent nail care routine is crucial. This routine should involve not just polishing but also nourishing your nails to enhance their overall strength. Incorporate moisturizing, gentle filing, and regular trims into your regimen to prevent splits and breaks, giving you a better chance of maintaining flawless nails.

Daily Maintenance Tips

Above all, keeping up with daily maintenance is key to prolonging the life of your manicure. Consider the following tips:

  • Apply a protective base coat before polish.
  • Use a top coat every few days for added durability.
  • Moisturize your cuticles regularly.
  • Avoid using your nails as tools.

This will help keep your nails looking pristine.

Professional Treatments

Maintenance of your nails might also benefit from professional treatments, which can provide deeper care than at-home routines. Regular visits to a nail technician can ensure your nails receive necessary hydration, keratin treatments, and expert shaping. This proactive approach not only enhances the appearance of your nails but can also fortify them against damage.

Plus, seeking professional help means you can get personalized advice tailored to your nail type and lifestyle. Nail technicians can identify specific problems, such as splitting or brittleness, and offer solutions like paraffin baths or specialized products. Investing in these treatments can significantly extend the longevity of your manicure and promote healthier nail growth.

Choosing the Right Products

Your choice of products plays a significant role in preventing your nails from chipping. Look for high-quality nail polishes, strengthening treatments, and moisturizers specifically designed for nails. Ingredients matter, so opt for formulas that nourish and protect while providing a durable finish. With the right products, you can maintain vibrant nails that withstand daily wear and tear.

Nail Polishes and Top Coats

Among the factors influencing nail durability, the selection of nail polishes and top coats is vital. Opt for long-lasting, chip-resistant formulas, and don’t skip applying a top coat, as it serves as a protective shield, enhancing the polish’s longevity while giving your nails a glossy finish.

Moisturizers and Strengtheners

Nail health also depends on adequate moisture and strength. Regularly applying moisturizers and strengtheners can help maintain nail integrity and flexibility, reducing the chances of chipping.

Right moisturizers and strengtheners should contain nourishing ingredients like vitamins, oils, and proteins to support healthy nail growth. Look for options that specifically target brittleness and provide hydration. Incorporating these products into your routine can significantly improve your nails’ resilience, allowing you to enjoy beautifully manicured nails without the worry of chipping.

Lifestyle Changes for Stronger Nails

Unlike many think, the key to preventing nail chipping often lies in lifestyle adjustments. Proper care and maintenance can go a long way in preserving your nail health. Consider incorporating easy ways to stop your nail polish chipping by reassessing your daily routines and habits.

Nutrition and Supplements

Supplements like biotin, vitamin E, and zinc can greatly improve your nail strength. A formulated blend of these nutrients helps promote healthy nail growth, reducing the chances of breakage. Be sure to maintain a balanced diet full of fruits, vegetables, and lean proteins to give your nails the support they need.

Avoiding Harmful Habits

Across various daily activities, your habits can directly impact the strength of your nails. Engaging in practices that put undue stress on your nails, such as using them as tools or biting them, can lead to significant chipping. You should aim to keep your nails well-trimmed and avoid harsh products that can strip your nails of moisture.

Also, regular hand washing without the use of moisturizers can dry out your nails, making them prone to chipping. Make it a point to apply a good hand cream after washing your hands to keep both your skin and nails properly hydrated. Small changes in how you care for and treat your nails can yield significant improvements over time.

Protective Measures

Now that you know the importance of nail care, implementing protective measures can significantly reduce the chances of your nails chipping. Simple habits such as wearing gloves while performing household chores or avoiding excessive water exposure will safeguard your nails, ensuring they remain strong and beautiful.

Wearing Gloves

To protect your nails from harsh chemicals and the wear and tear of daily tasks, it’s imperative to wear gloves whenever you clean, wash dishes, or handle any abrasive materials.

Avoiding Excess Water Exposure

Excessive exposure to water can weaken your nails over time, making them more prone to chipping and breaking. Limit prolonged contact with water to maintain their integrity.

Water can cause your nails to swell and soften, compromising their strength. This can lead to splits or chips, particularly if you engage in activities like washing dishes or taking long baths frequently. To minimize this risk, consider wearing gloves during water-intensive tasks and aim to moisturize your hands and nails regularly, restoring hydration without overexposure to water.

Special Considerations

Once again, it’s imperative to consider individual differences in nail health. Factors such as age, diet, and lifestyle can significantly affect how prone your nails are to chipping. Assessing your unique situation can help you implement the most effective strategies to keep your nails strong and healthy.

Nails During Seasonal Changes

Beside temperature fluctuations and humidity levels affecting your nails, seasonal changes can alter their moisture content, making them vulnerable to chipping. By adjusting your nail care routine with the seasons—like increasing hydration in winter and protecting against sun damage in summer—you can help maintain their strength all year round.

Addressing Underlying Health Issues

After identifying surface-level factors affecting your nails, it’s important to evaluate any underlying health issues that may contribute to nail chipping. Conditions such as thyroid disorders or nutrient deficiencies can weaken your nails significantly, leading to increased chipping and breakage.

Health plays a major role in the condition of your nails. If you suspect that you may have an underlying health issue affecting your nail integrity, consulting with a healthcare professional can provide insights and solutions. Nutritional imbalances, such as inadequate biotin or protein intake, may require dietary adjustments or supplements to enhance nail strength. By addressing these health concerns, you can improve not only the appearance of your nails but also their overall resilience against chipping.

Final Words

With these considerations, you can effectively prevent your nails from chipping. Prioritize hydration by using cuticle oils and moisturizers, and adopt a proper nail care routine that includes regular trimming and filing. Wearing gloves during household chores will protect your nails from harsh chemicals and damage. Opt for high-quality nail products and consider a strengthening top coat for added durability. By being mindful of your habits and using the right techniques, you can enjoy strong, healthy nails that are less prone to chipping.

FAQ

Q: What are the best practices for applying nail polish to avoid chipping?

A: To prevent chipping, start with clean, dry nails and apply a base coat before your nail polish. Use thin layers of polish, allowing each coat to dry completely before applying the next. Finish with a top coat for added protection, and consider reapplying the top coat every few days to maintain a strong barrier.

Q: How can my daily habits impact the integrity of my nails?

A: Daily habits play a significant role in the health of your nails. Avoid using your nails as tools for opening items or scraping surfaces, as this can lead to chips and breakage. Wear gloves while doing dishes or using cleaning products to protect your nails from harsh chemicals and moisture loss, which can weaken them over time.

Q: Are there any specific nail care products that can help prevent chipping?

A: Yes, investing in high-quality nail care products can make a difference. Look for nail strengtheners, moisturizers, and cuticle oils that are specifically designed to nourish and protect your nails. These products can help maintain flexibility and strength, reducing the likelihood of chipping.

Q: Can my diet affect the condition of my nails?

A: Absolutely. A balanced diet rich in vitamins and minerals is imperative for healthy nails. Nutrients like biotin, protein, zinc, and omega-3 fatty acids contribute to nail strength. Incorporate foods like eggs, nuts, fish, and leafy greens into your diet to support nail health and minimize chipping.

Q: How often should I give my nails a break from polish?

A: Allowing your nails to go polish-free periodically is beneficial. Aim for at least a week or two every month without polish to let your nails breathe and recover. During this time, focus on moisturizing and treating your nails with strengthening products to maintain their health and prevent any potential damage.

Why You Should Never Skip the Top Coat

Nails can transform your look, but to achieve a polished, long-lasting manicure, you should never skip the top coat. This necessary step not only enhances your nail polish’s shine and vibrancy but also provides a protective barrier against chips, cracks, and fading. By incorporating a top coat into your nail care routine, you’re ensuring that your hard work lasts longer, keeping your manicure looking fresh and flawless. Investing a few extra minutes for this step can save you time and frustration, allowing you to enjoy beautiful nails for days to come.

Key Takeaways:

  • Protection: A top coat acts as a protective barrier, shielding your nail polish from chips, scratches, and dents.
  • Shine: Using a top coat enhances the shine and overall finish of your manicure, giving it a polished, high-gloss look.
  • Longevity: Applying a top coat can significantly extend the life of your nail polish, allowing you to enjoy your manicure for a longer time without touch-ups.

The Importance of Top Coat

For anyone who loves nail care, applying a top coat is an imperative step that should never be overlooked. It not only seals your manicure but also extends its longevity, ensuring a flawless finish that lasts longer. Without a top coat, you risk dulling the vibrant colors and diminishing the overall appearance of your nails. Make this step a non-negotiable part of your nail routine to achieve that salon-quality outcome at home.

Protection Against Chipping

Above all, a top coat provides a barrier that significantly reduces the risk of chipping. When you apply your polish, it’s vulnerable to nicks and dents from daily activities. The top coat acts like a shield, keeping your nails intact and looking fresh longer. By investing in this extra layer, you’re safeguarding your hard work and maintaining the pristine look of your manicure.

Enhanced Shine and Finish

The application of a top coat elevates your manicure with a brilliant shine that catches the light beautifully. This glossy finish not only makes your nails look healthier but also enhances the color payoff of your nail polish. At times, without a top coat, colors can appear flat or uneven, diminishing your effort. By opting for a high-quality top coat, you allow your nails to shine to their fullest potential, transforming a simple polish into a stunning statement while also providing extra protection from wear and tear.

The Benefits of Using a Top Coat

The benefits of using a top coat in your nail care routine are numerous. Not only does it enhance your nail’s shine, but it also serves as a protective shield, keeping your color vibrant and fresh for longer. A quality top coat creates a seal that helps mitigate chips, scratches, and other damage, ensuring your manicure looks its best. Incorporating a top coat is a simple yet effective step that elevates your nail game significantly.

Longevity of Nail Color

Against the commonly held belief that nail polish alone is sufficient, applying a top coat dramatically enhances the longevity of your nail color. Without it, your manicures are likely to succumb to chips and fading within days. A top coat acts like armor, extending the life of your polish so you can enjoy that flawless finish for much longer.

Prevention of Staining

Above all, a top coat plays a vital role in preventing staining of your natural nails. Dark or pigmented polishes can leave unsightly marks on your nail bed, making your nails look dull and unhealthy.

At times, you may notice that your favorite vibrant nail colors leave visible stains on your nails even after removal. This is where a good top coat comes into play. By applying it underneath your colored polish, you create a barrier that prevents the pigments from penetrating your nails. As a result, your natural nails remain clean and free from discoloration, allowing you to switch up your nail looks without the worry of long-term damage.

Different Types of Top Coats

Now that you understand the importance of a top coat, let’s explore the different types available to enhance your manicure:

Standard Top CoatProvides a glossy finish and durability.
Fast-Drying Top CoatDries your polish quickly to save time.
Matte Top CoatGives your nails a non-shiny, sophisticated look.
UV Top CoatCures under UV light for long-lasting effects.
Peel-Off Top CoatMakes removing your polish effortless.

After learning about these options, you might be tempted to join the conversation about skipping top coats. Check out this discussion on Reddit about skipping top coats for more insights.

Fast-Drying Options

On a busy schedule? Fast-drying top coats are your best friend. They minimize waiting time, allowing you to get back to your daily activities sooner without sacrificing your nail polish’s longevity. These formulations typically contain special ingredients that speed up the drying process, so you can enjoy beautiful nails without the usual hassle.

Matte vs. Glossy Finishes

One of the exciting decisions you’ll face is choosing between matte and glossy top coats. Both finishes can dramatically change the look of your nails and can be selected based on your personal style and occasion.

Coats serve as your finishing touch, whether you prefer a sleek, shiny surface or a more subdued, matte appearance. Glossy finishes will reflect light, giving your nails a vibrant look, while matte finishes offer a modern and edgy vibe. Consider trying both to see which one resonates with your personal aesthetic or suits different occasions.

Application Tips for the Perfect Top Coat

Unlike applying nail polish, applying a top coat requires precision for a flawless finish. Follow these tips to master the technique:

  • Ensure your base color is completely dry before application.
  • Use long, even strokes to apply the top coat.
  • Cap the edges of your nails to prevent chipping.
  • Apply a thin layer initially, allowing it to self-level.

Perceiving the difference a top coat makes is immediate, enhancing your manicure’s longevity and shine.

How to Apply Evenly

To achieve an even application, always start from the center of your nail and move outward. This technique ensures that the product spreads evenly without pooling at the edges, which can lead to an uneven finish. Make sure to use a clean brush and avoid overloading it with top coat to maintain controlled application.

Timing Between Coats

For optimal results, timing between layers is important. Allow your base color to fully dry before applying the top coat. If you’re layering multiple coats of top coat, waiting a minute or two between coats can prevent smudges and ensure that each layer adheres properly, promoting a beautiful, long-lasting shine.

Understanding the timing is key to a perfect finish. If you apply your top coat too soon, it can disrupt the underlying polish, leading to streaks and an uneven texture. By allowing adequate drying time, you ensure that each layer bonds effectively, giving you a smooth and flawless finish that enhances the durability of your manicure.

Common Myths About Top Coats

All too often, misconceptions about top coats can lead you to underestimate their importance. Some believe that a top coat is simply an unnecessary add-on, but in reality, it plays a vital role in enhancing the longevity, shine, and protection of your manicure. By debunking these myths, you can ensure your nails look their best while being safeguarded against chipping and wear.

Skipping Top Coat Saves Time

Saves you precious minutes, but the illusion of efficiency might cost you more in the long run. Skipping the top coat often leads to chips and dullness that require much more time to fix than applying that extra layer. Investing those extra moments can save you hassle later, allowing you to enjoy a polished look for longer.

Top Coat is Only for Nail Polish

After all, you might believe top coats are exclusively for your nail polish, but this isn’t the case. Top coats can be beneficial for various nail treatments, including gel and acrylics. By applying a top coat over these enhancements, you enhance their durability while improving the overall appearance of your nails.

In fact, using a top coat on gel and acrylic nails not only provides a protective layer but also adds a glossy finish that elevates the look of your nails. Moreover, it helps prevent discoloration and fading, ensuring that your investment in nail enhancements lasts longer. So whether using traditional polish or getting stylish tips with gel or acrylics, a top coat is imperative for maintenance and appeal.

Frequently Asked Questions

Keep your nails looking fabulous by understanding the importance of a top coat. If you’re wondering, Why Do I Need To Use A Top Coat?, it’s crucial for extending your manicure’s lifespan while adding shine and protection.

Can You Use Top Coat Alone?

An effective top coat can indeed be used on its own, giving your nails a glossy finish without color. This approach can enhance the natural color of your nails while still providing some protection against chips and scratches.

How Often Should You Reapply?

Any time you notice your nails losing their shine or if they begin to chip, it’s a good idea to apply your top coat again. Regular reapplication can significantly extend the life of your manicure.

With daily activities and exposure to elements, your manicure may start to wear down faster than you’d like. You should aim to reapply your top coat every few days to keep it looking fresh and glossy. Regular maintenance helps to seal in your color and keep your nails healthy and vibrant.

Conclusion

On the whole, you should never skip the top coat in your nail care routine, as it serves as a protective barrier, enhances the longevity of your manicure, and elevates the overall appearance of your nails. By always applying a top coat, you ensure that your polish remains vibrant and chip-free for longer, saving you both time and effort in touch-ups. Prioritizing this final layer not only extends the life of your nail art but also gives your nails that polished, professional finish you desire.

FAQ

Q: What is the purpose of a top coat in nail care?

A: A top coat serves several vital functions in nail care. Primarily, it adds a protective layer over your nail polish, helping to shield it from chips, scratches, and fading. This additional layer enhances the longevity of the polish, ensuring your manicure looks fresh for a longer period. Additionally, top coats can also add shine or a matte finish, depending on the type you choose, giving your nails a polished and professional appearance.

Q: How does skipping the top coat affect the longevity of my manicure?

A: Skipping the top coat significantly shortens the lifespan of your manicure. Without this protective layer, your nail polish is more susceptible to wear and tear from everyday activities. Chips and scratches are more likely to occur, and the color may fade faster due to exposure to elements like water, sunlight, and harsh chemicals. Ultimately, a manicure without a top coat can start to look dull and worn much sooner than one that includes this vital step.

Q: Can I use a top coat with any type of nail polish?

A: Yes, most top coats are designed to be compatible with a wide variety of nail polishes, including regular, gel, and even specialty formulas. However, it’s always a good idea to check the labels or manufacturers’ recommendations to ensure compatibility. Using the right top coat can help achieve the desired finish and longevity, whether you choose a glossy, matte, or quick-dry option.

Q: Are there different types of top coats, and how do I choose the right one?

A: There are several types of top coats available, each serving different purposes. Some are formulated for quick drying, while others may provide extra shine or a matte finish. There are also specialized top coats designed to enhance nail art or provide extra protection for gel manicures. When choosing a top coat, consider your desired finish, your nail type, and any specific needs you might have, such as a quick-drying option if you’re often in a hurry.

Q: Does using a top coat require special application techniques?

A: While applying a top coat is generally straightforward, there are a few techniques that can enhance its effectiveness. To get the best results, start with a clean, dry nail surface. Apply the top coat slowly and evenly, starting from the base of the nail and moving to the tip, sealing the edges to prevent chipping. Allow it to dry fully for maximum durability. For added shine, consider applying a second coat of topcoat after the first one has dried.

Skip to content