nails

Why Hydration Is Key for Healthy Nails

Most people underestimate the impact of hydration on nail health. Your nails, much like your skin, require adequate moisture to stay strong, flexible, and free from breakage. When you prioritize hydration, you not only enhance the appearance of your nails but also promote their overall strength and resilience. Understanding how hydration influences your nail health can help you adopt better habits that lead to more beautiful and robust nails.
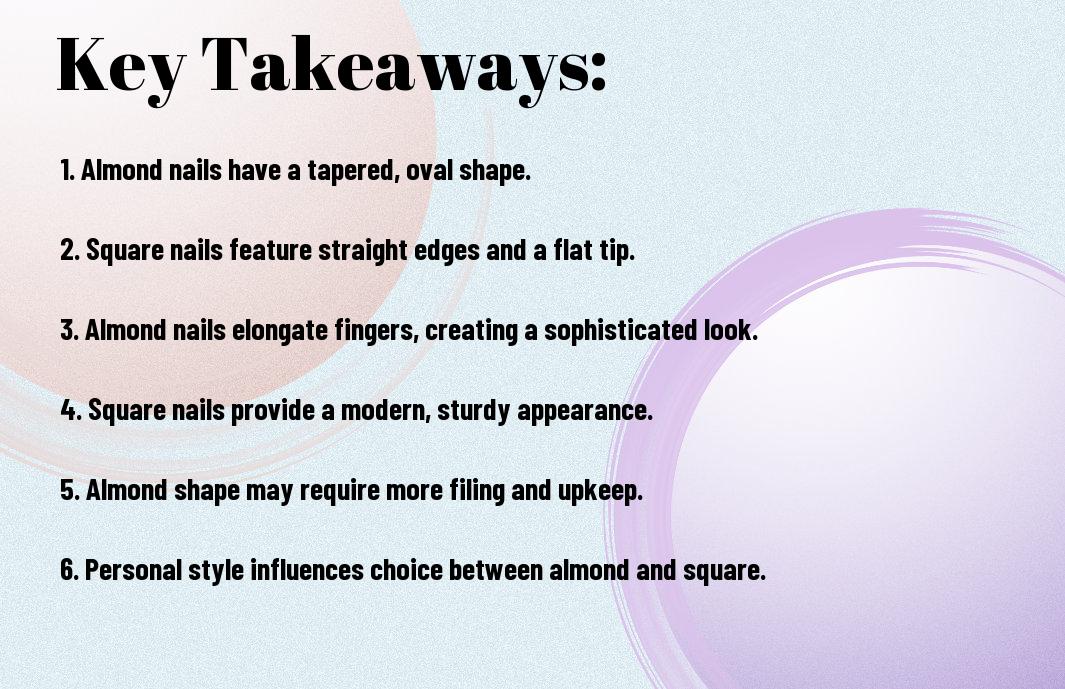
Key Takeaways:

  • Hydration promotes nail strength: Keeping your body well-hydrated helps maintain the integrity of your nails, preventing brittleness and breakage.
  • Moisture balance supports nail growth: Proper hydration enhances blood circulation, which nourishes the nail matrix and fosters healthy nail growth.
  • Preventative care against damage: Adequate fluid intake can minimize issues like hangnails and peeling, ensuring the overall health and appearance of your nails.

The Importance of Hydration for Nail Health

Your nails are a reflection of your overall health, and staying hydrated is necessary for maintaining their strength and appearance. When your body is adequately hydrated, it supports the necessary functions that keep your nails healthy and resilient. Proper hydration contributes to nail flexibility, prevents brittleness, and reduces the likelihood of breakage, promoting optimal growth and durability.

Understanding Nail Composition

An understanding of nail composition can provide valuable insight into how hydration impacts nail health. Your nails are primarily made of a protein called keratin, which requires moisture to maintain its structure and strength. When dehydrated, nails can become weak and prone to splitting, making it necessary to consider hydration in your nail care routine.

Role of Water in Nail Growth

Nail growth is significantly influenced by the availability of water in your body. Adequate hydration facilitates proper blood circulation, allowing necessary nutrients to reach your nails efficiently. As your body remains hydrated, it helps maintain a healthy moisture balance that supports keratin production, leading to stronger and healthier nails.

To fully appreciate the role of water in nail growth, consider how it affects the keratinocytes, the cells responsible for producing keratin. When you’re well-hydrated, these cells function more effectively, promoting faster nail growth and reducing the chances of defects. Conversely, dehydration can slow down the process and make your nails more vulnerable to damage. By ensuring you drink enough water daily, you can enhance the vitality and longevity of your nails.

Signs of Dehydrated Nails

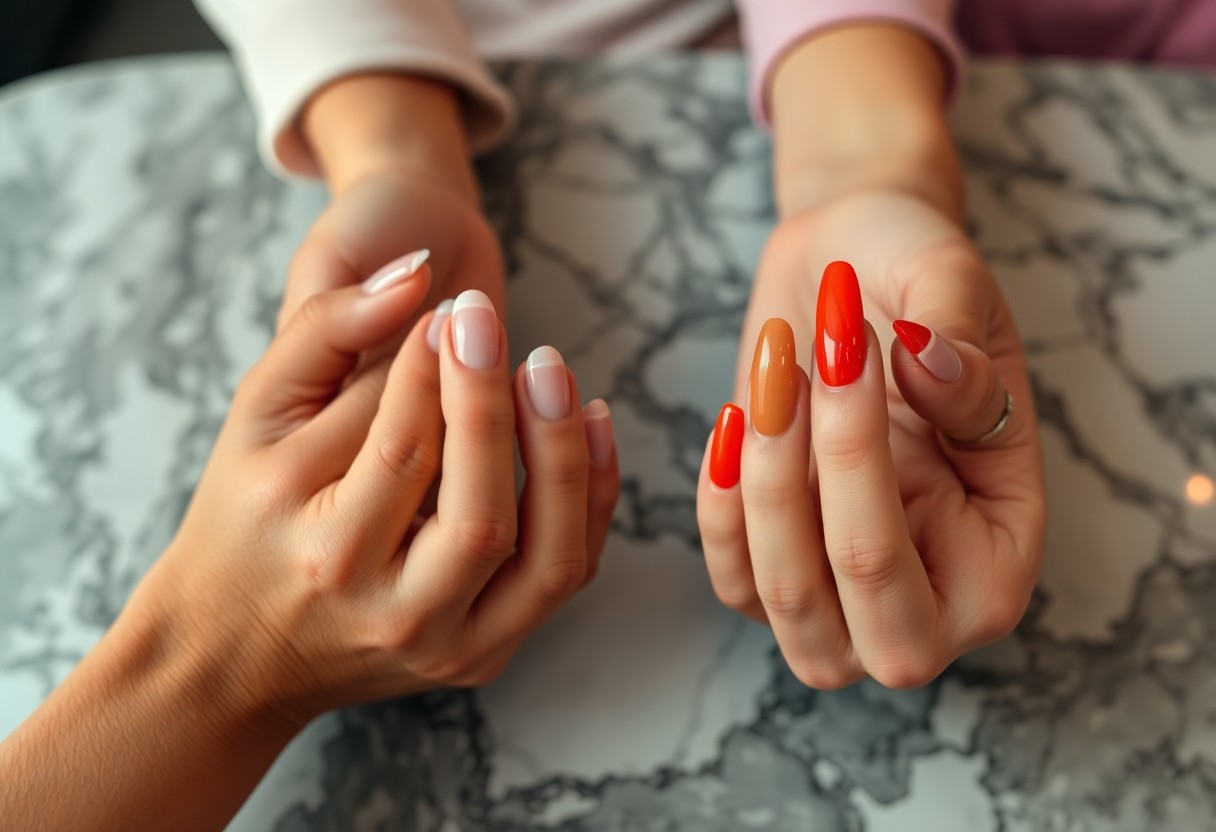
There’s no denying that healthy nails reflect overall well-being, but when dehydration occurs, your nails may start showing signs that something is wrong. If you notice changes in texture, coloration, or flexibility, these indicators can alert you to the need for enhanced hydration in your daily routine. Recognizing these signs early enables you to take actionable steps to restore the health and appearance of your nails.

Brittleness and Splitting

For many, brittle and splitting nails can be a frustrating concern. This condition often arises from insufficient moisture, making your nails prone to breakage. If you find that your nails snap or break with minimal pressure, it’s time to evaluate your hydration habits and consider incorporating moisture-rich products into your nail care routine.

Discoloration and Dullness

About the appearance of your nails, discoloration and dullness are common signs of dehydration. A lack of moisture can lead to a loss of vibrancy, making your nails look lifeless and unhealthy. This can also manifest in shades that differ from your natural nail color, altering their overall aesthetic.

Dehydrated nails may appear yellowish, grayish, or take on a matte finish, losing their usual luster. Such changes not only detract from your nails’ beauty but may also indicate an underlying issue with your body’s hydration levels. Addressing this concern through adequate water intake and moisturizing treatments can help restore your nails to their vibrant state.

Factors Affecting Nail Hydration

Now, understanding various factors can help you maintain optimal nail hydration. Key influences include:

  • Hydration levels in your body
  • Diet and nutritional intake
  • Environmental conditions
  • Personal hygiene practices

This knowledge empowers you to make informed choices for healthier nails.

Environmental Influences

An array of environmental factors can impact your nail hydration. Changes in humidity, temperature, and exposure to water can significantly affect how moisturized your nails remain. For instance, dry air can lead to brittle, weak nails, while too much moisture can encourage fungal growth. Being mindful of these elements helps you protect your nails effectively.

Lifestyle Choices

Against this backdrop, your lifestyle choices play a pivotal role in the hydration of your nails. Regular exposure to harsh chemicals, frequent hand washing, and neglecting nail care can lead to dry and damaged nails. Making conscious decisions regarding nail products and taking breaks from gel or acrylics can enhance your nail health.

Consequently, adopting healthier lifestyle habits is vital. Ensuring you hydrate adequately, using gloves when washing dishes or using cleaning products, and incorporating moisturizers into your nail care routine can vastly improve the condition of your nails. By prioritizing these practices, you’ll not only boost nail hydration but also foster overall nail strength and resilience, leading to a more polished appearance.

Tips for Maintaining Proper Nail Hydration

All individuals should prioritize their nail hydration for optimal health. Here are some crucial tips to ensure your nails stay well-hydrated:

  • Drink plenty of water daily.
  • Use a nourishing cuticle oil regularly.
  • Avoid excessive exposure to harsh chemicals.
  • Apply a hand moisturizer after washing your hands.
  • Consider wearing gloves when doing dishwashing or household chores.

Knowing these practices can significantly enhance the hydration levels of your nails and prevent damage.

Dietary Considerations

Above all, your diet plays a vital role in maintaining proper nail hydration. Incorporate foods rich in vitamins, minerals, and healthy fats, such as nuts, fish, fruits, and vegetables. Essential fatty acids, like omega-3s, found in flaxseeds and avocados, help nourish your nails from the inside out. Make sure you’re also getting adequate protein, as it is the building block of strong nails.

External Hydration Techniques

Hydration techniques for your nails extend beyond what you consume. Utilizing topical treatments can further enhance your nail health. Regularly applying nourishing lotions specifically designed for nails and cuticles will help seal moisture. Additionally, consider daily massages to improve blood flow and promote nutrient absorption.

And don’t underestimate the power of hydration masks. You can create your own using ingredients like olive oil or coconut oil to soak your fingertips, providing deep moisture. These techniques combined can significantly improve your nail hydration and overall appearance, ensuring they remain healthy and strong.

Myths About Nail Hydration

Not everything you hear about nail hydration is true. Many believe that simply applying nail polish will keep your nails moisturized, but this isn’t the case. In reality, without proper hydration, your nails can become brittle and prone to breakage. For Tips for Keeping Nails and Cuticles Hydrated, you need to focus on hydration practices beyond just cosmetic solutions.

Common Misconceptions

About hydration, you might think hydration is only important for skin, but your nails require moisture too. Many individuals neglect their nails, believing that the natural oils from hand creams are sufficient. However, without adequate hydration, your nails can lose strength and flexibility, leading to cracks and splits.

Evidence-Based Facts

Besides common myths, studies indicate that dehydrated nails are more susceptible to damage. Your nails are composed of layers of keratin, and when they lack moisture, they become porous and weak. Adequate hydration helps maintain the integrity of the nail structure, ensuring they remain healthy and resilient.

Plus, it’s vital to integrate hydration into your daily routine. Drinking enough water is vital, but you should also consider using nail oils and moisturizers specifically designed for nail health. These products penetrate deeply, providing your nails with the moisture they need while strengthening them from within. By prioritizing hydration, you’re investing in the long-term health of your nails.

The Connection Between Hydration and Overall Health

Despite the common perception that hydration only affects your thirst, it plays a significant role in your overall health. When you maintain proper hydration levels, your body functions more efficiently. This includes the absorption of vital nutrients, the elimination of toxins, and the support of cell regeneration. Ultimately, staying hydrated is vital for your skin, hair, and nails, helping them to remain resilient and healthy.

Systemic Effects on Nails

Across your entire body, hydration impacts various physiological processes, including those related to your nails. Insufficient fluid intake can lead to dehydration, which may result in brittle, dry, or discolored nails. As your body struggles to maintain its balance, the health of your nails can reflect these systemic issues, serving as an indicator of your hydration status overall.

Holistic Approaches to Care

On your journey to improve nail health, consider incorporating hydration as a key component of your holistic care routine. By adopting a well-rounded approach that integrates nutrition, proper hydration, and mindful self-care practices, you can enhance not only your nails but also your overall well-being.

Effects of hydration extend beyond just drinking water; it involves nourishing your body with a balanced diet rich in vitamins, minerals, and healthy fats. Incorporate foods high in water content, such as fruits and vegetables. You can also apply moisturizing treatments to your nails and cuticles, further promoting their integrity. Prioritizing consistent hydration and holistic practices enables you to cultivate healthier nails and overall vitality in your daily life.

To wrap up

Summing up, keeping your body well-hydrated is vital for maintaining healthy nails. When you drink enough water, you support your nail’s growth and elasticity, preventing brittleness and breakage. Furthermore, hydration aids in nutrient absorption, ensuring your nails receive the vitamins and minerals they need. By prioritizing your water intake, you’ll promote not only stronger nails but also improved overall wellness. So, make hydration a part of your daily routine and watch your nails thrive.

FAQ

Q: Why is hydration important for nail health?

A: Hydration plays a vital role in maintaining nail health because it helps keep the nails flexible and prevents brittleness. When nails are well-hydrated, they are less likely to chip or break, allowing for healthier growth overall.

Q: How does moisture directly affect the appearance of nails?

A: Moisture helps to enhance the appearance of nails by giving them a natural shine and smooth texture. Well-hydrated nails tend to look healthier, with fewer ridges or imperfections. In contrast, dry nails can appear dull and may develop unsightly cracks.

Q: What are some signs that my nails are dehydrated?

A: Signs of dehydrated nails include brittleness, split ends, peeling, or a dry and rough texture. If your nails break easily or if you notice white spots, it may indicate a lack of moisture. Additionally, hangnails are often more prevalent in individuals with dry nails.

Q: How can I improve the hydration of my nails?

A: Improving nail hydration can be achieved by drinking plenty of water and using moisturizing products specifically designed for nails and cuticles. Regularly applying oils or creams that contain ingredients like vitamin E, jojoba oil, or shea butter can also help maintain moisture levels.

Q: Is there a link between overall hydration and nail health?

A: Yes, there is a strong connection between overall hydration and nail health. Adequate water intake supports numerous bodily functions, including circulation and nutrient delivery to the nails. When the body is well-hydrated, it can promote optimal nail growth and maintenance, leading to stronger and healthier nails.

How to Create Ombre Nails at Home

It’s time to elevate your nail game with stunning ombre nails that you can create right at home. This trendy manicure technique allows you to blend colors seamlessly for a chic look that impresses. With a few imperative supplies and the right technique, you can master this art in no time. If you’re looking for a different approach, check out this guide on How-to Easy Ombre Nails (no sponge!). Let’s investigate the step-by-step process!

Key Takeaways:

  • Choose Your Colors: Select two or three nail polish shades that blend well together for a stunning ombre effect.
  • Use a Makeup Sponge: Apply the polishes onto a makeup sponge and dab them onto your nails to create a smooth gradient transition.
  • Finish with Top Coat: Seal your design with a top coat to enhance the shine and ensure lasting durability.

Understanding Ombre Nails

To create stunning ombre nails, it’s important to understand the gradient technique that blends two or more colors seamlessly. Ombre nails showcase a gradient effect, transitioning smoothly between shades, making them a stylish choice for any occasion. Utilizing your favorite color combinations, you can achieve a personalized look that matches your unique style and personality.

What Are Ombre Nails?

Any nail enthusiast knows that ombre nails are all about blending colors to create a beautiful gradient effect. This manicure style stands out by incorporating various shades, typically lighter to darker, allowing for creativity and expression in your nail design. It’s a popular trend that adds depth and dimension to your manicure.

Popular Ombre Techniques

Techniques for creating ombre nails can vary widely, allowing you to choose the method that best suits your skills and preferences. Whether using a sponge, a brush, or even tape, there are several ways to achieve that flawless gradient look. Each technique results in a unique finish, from soft and subtle to striking and bold.

Ombre nails can be achieved through various methods, including sponging, brush blending, and tape application. Sponging is the most popular technique, where you dab colors onto the nail with a makeup sponge for a soft blend. Brush blending involves using a nail brush to mix colors directly on your nails for more control. Tape application creates crisp lines, allowing for geometric designs with a gradient effect. Explore these methods to find the one that suits your style best!

Tools and Materials Needed

Even for a stylish ombre nail design, having the right tools and materials can make all the difference. You will need a few imperative supplies to create your masterpiece at home, including nail polish, sponges, a top coat, and some easy-to-use tools. Make sure to gather everything you need before starting your project to enjoy a seamless and fun experience.

Essential Nail Supplies

Between various brushes, sponges, and nail files, you’ll want to compile your imperative nail supplies. A good-quality base coat and top coat will provide a smooth finish and protect your nails. Additionally, you’ll need a soft sponge for blending and possibly some tape to keep the areas clean as you apply the polish.

Choosing the Right Nail Polishes

Needed for your ombre effect are two or more complementary nail polish colors that blend well together. Having the right shades will help you achieve a stunning gradient from one color to another. Consider colors that harmonize and create a smooth transition.

With so many options available, it is important to select polishes that not only look good together but also have a good consistency. Creamy or semi-opaque formulas work best for blending. Look for shades in the same color family, or choose contrasting colors to make a bold statement. When you’re happy with your selection, you’re one step closer to achieving that fabulous ombre look!

Preparing Your Nails

All great nail art begins with proper preparation. Start by removing any old polish and gently pushing back your cuticles. Next, buff your nails lightly to create a smooth surface, which will allow the polish to adhere better. Finish off by washing your hands thoroughly to eliminate any residue or oils that could interfere with your nail art. This step ensures a clean canvas for your ombre masterpiece.

Nail Care Essentials

Behind every stunning ombre design lies the importance of nail care. Ensure your nails are healthy and well-groomed by moisturizing them regularly and maintaining a good filing routine. Use a cuticle oil to nourish your cuticles and keep them looking fresh. Healthy nails are not only more attractive, but they also provide a better base for your nail art.

Base Coat Application

Against any notion that base coats are optional, applying one is vital for any polish application, especially for ombre nails. A base coat creates a protective layer between your natural nail and the colored polish, preventing staining and providing a smoother application. It also enhances the longevity of your design, ensuring that your beautiful ombre nails last longer without chipping.

Another benefit of using a base coat is its ability to improve the adhesion of the colors in your ombre design. By applying a thin layer of base coat to each nail, you create a primer that helps the polish adhere better, resulting in a more vibrant color payoff. Make sure to let the base coat dry completely before moving on to the next steps in your ombre nail process.

Step-by-Step Ombre Nail Technique

Your journey to beautiful ombre nails begins with gathering the right materials and following these steps:

Materials NeededSteps
Base coatApply a base coat to protect your nails.
Two or more polish colorsChoose your desired colors for the ombre effect.
Makeup spongeUse a sponge for the dry sponge method or a brush for blending.
Top coatSeal your design with a top coat for durability.

Dry Sponge Method

Around this method, you’ll focus on sponging the colors onto your nails for a more textured look. Start by applying one color onto the sponge, then dab it onto your nail, alternating with the second color until you achieve the desired gradient.

Brush Blending Method

Between applying layers, you’ll use a brush to blend the colors smoothly on your nails. This technique allows for a more controlled application and seamless transition between shades, ensuring a polished finish.

Also, for the brush blending method, start with your base color and let it dry completely. Once dry, apply a thin line of your second color close to the cuticle, then take a clean brush and gently blend the colors together using short strokes. This method provides a soft and professional ombre effect while giving you greater control over the gradient.

Finishing Touches

For a polished and professional look, finishing touches are crucial to enhance your ombre nails. Ensuring everything is smudge-free and tidy not only adds to the overall appearance but also makes your manicure last longer. Take your time to perfect these final steps for a stunning outcome.

Top Coat Application

Before applying the top coat, ensure your ombre design is completely dry. A high-quality top coat protects your nails and adds a glossy finish, making the colors stand out even more. Apply it gently to avoid disturbing your artwork, sealing in your hard work and giving your nails a professional shine.

Nail Art and Decals Options

After your top coat dries, consider adding some flair with nail art or decals to personalize your ombre nails further. These additions can provide a unique touch that showcases your style.

Also, you can explore various nail art options, such as using thin brushes for nail art designs or adding glitter for extra sparkle. Decals are another fun way to embellish your nails, letting you choose from floral patterns, geometric shapes, or whimsical themes. These embellishments enable you to create a one-of-a-kind look that reflects your personality and sets your nails apart.

Maintenance and Care

Not taking care of your ombre nails can lead to premature fading and chipping. To maintain their vibrant look, you’ll want to be gentle when performing everyday tasks and regularly moisturize your cuticles and hands. Additionally, avoiding prolonged exposure to water can help preserve your beautiful design, allowing you to enjoy your nails for longer.

Keeping Ombre Nails Fresh

To keep your ombre nails looking fresh, apply a top coat every few days. This protective layer not only adds shine but also helps prevent chips and fading. You may also want to avoid using your nails as tools, and always wear gloves when doing household chores to minimize damage.

Repairing Chipped Ombre Nails

Behind every chipped ombre nail lies a quick fix that won’t compromise your manicure. You can easily repair chips by applying a small amount of polish in the same color as the ombre, blending it carefully with the rest of your design. Finish off with a top coat to restore shine and keep your nails looking fresh.

Ombre nails can be effortlessly repaired by layering a thin coat of polish over the chipped area, ensuring that you feather the edges for a seamless look. If the chip is significant, you might consider adding some glitter or designs over the repair to cleverly disguise any imperfections. This technique not only repairs the chip but can also breathe new life into your ombre nails, allowing you to extend the life of your manicure and look great doing it.

Final Words

Conclusively, creating ombre nails at home is an enjoyable and creative process that allows you to express your unique style. By following the steps outlined, you can achieve a stunning gradient effect using simple tools and techniques. It’s important to practice and experiment with different color combinations to find what suits you best. With patience and a steady hand, your ombre nails will be a beautiful addition to your personal grooming routine.

FAQ

Q: What materials do I need to create ombre nails at home?

A: To create ombre nails at home, you will need the following materials: a base coat, two contrasting nail polishes (one for the base and one for the ombre effect), a makeup sponge, a top coat, and optionally a nail file and cuticle oil for preparation. Additionally, you may want some tape or a liquid latex barrier to protect your skin from excess polish.

Q: How do I prepare my nails before starting the ombre design?

A: Start by removing any old nail polish and washing your hands. Shape your nails with a file and push back your cuticles gently. Apply a base coat to protect your nails and help the polish adhere better. Allow the base coat to dry completely before moving on to the ombre technique.

Q: What is the best technique for blending the nail polishes to achieve an ombre effect?

A: One effective technique is to apply the base color to your entire nail and let it dry. Then, use a makeup sponge to apply the second polish. Dab the sponge in the darker polish and lightly press it onto the tips of your nails, gradually blending it downwards to create a gradient. You can repeat this step to intensify the color until you reach your desired ombre effect.

Q: How can I fix mistakes or messiness around my nails while creating ombre nails?

A: If you get polish on your skin, you can use a small brush dipped in nail polish remover to clean up the edges. Alternatively, you can apply tape or a liquid latex barrier around your nails before starting the ombre process to catch any excess polish. If you didn’t use a barrier, wait until the polish is dry, then carefully clean up around your nails.

Q: What tips can you share for ensuring my ombre nails last longer?

A: To enhance the longevity of your ombre nails, make sure to apply a top coat after the ombre effect has dried. This adds shine and seals the design. Additionally, avoid soaking your hands in water shortly after applying polish and consider using gloves while doing chores. Regular touch-ups with the top coat every few days can also help maintain the appearance of your ombre nails.

Almond vs. Square Nails – What’s the Difference

You might be wondering what the differences are between almond and square nails, two popular nail shapes that can dramatically impact your overall look. Each shape offers unique benefits and styles that cater to different preferences and occasions. In this post, you’ll learn about the characteristics, advantages, and potential drawbacks of almond and square nails, helping you make an informed choice for your next manicure. Whether you lean towards the elegance of almond or the boldness of square, understanding these options will enhance your nail game.

Key Takeaways:

  • Shape and Appearance: Almond nails feature a tapered and elongated shape resembling a real almond, while square nails have straight edges and a flat tip, offering a more bold and modern aesthetic.
  • Length and Maintenance: Almond nails tend to look best when longer and may require more maintenance, while square nails can be easier to manage at various lengths, making them a versatile choice.
  • Style Versatility: Almond nails can give a softer, more feminine appearance, suitable for elegant styles, while square nails often convey a more edgy and contemporary look, making them popular for bold fashion statements.

History of Nails

The history of nails dates back centuries, with various shapes and styles evolving to meet changing trends and preferences. Initially designed for functionality, nails have transformed into a major aspect of nail art and personal expression. As you explore the differences between almond and square nails, it’s fascinating to consider how each shape has developed over time, reflecting cultural shifts in beauty standards and nail care practices.

Origins of Almond Nails

History reveals that almond nails emerged as a popular shape in the 1970s and 1980s, inspired by the natural form of an almond. The shape quickly gained favor for its elegant and elongated appearance, appealing to those seeking a sophisticated look. If you appreciate a softer style, almond nails may resonate with your personal taste and aesthetics.

Origins of Square Nails

Between the 1980s and 1990s, square nails became a trend, widely embraced for their bold and modern appearance. This shape is characterized by its straight sides and flat tip, offering a more structured look. You may find square nails appealing if you prefer a statement style that exudes confidence and strength.

It’s interesting to note that square nails gained traction due to their association with power and professionalism. This shape quickly became a go-to choice for many people, particularly in corporate settings where a polished appearance is imperative. Square nails are not only versatile but also practical, allowing for creative designs while maintaining an edgy and chic look. If you enjoy experimenting with nail art, square nails can serve as a perfect canvas for your creativity.

Design and Structure

There’s a distinct difference in design and structure when comparing almond and square nails. Almond nails feature a tapered shape that mimics the look of an almond, providing an elegant and elongated appearance. In contrast, square nails are characterized by their straight edges and a flat, squared-off tip, offering a more geometric and modern look. Your choice of design can significantly impact your overall style and aesthetic, so consider what aligns best with your personal preferences.

Shape and Profile Differences

One notable difference between almond and square nails lies in their shape and profile. Almond nails are often considered more feminine and softer due to their rounded ends, while square nails emit a bolder and sharper vibe. When choosing between the two, think about how each shape complements your fingers and overall look.

Material Composition

An crucial aspect to consider is the material composition used for both almond and square nails. While both nail types can be created using a variety of materials, such as acrylic, gel, or natural nails, the choice you make will influence durability and overall appearance.

For instance, acrylic nails can be shaped into both almond and square designs, providing a sturdy and long-lasting option. Gel nails, on the other hand, tend to offer a more natural appearance while still allowing flexibility in shapes. The material you choose will affect not only the strength and longevity of your nails but also how closely they adhere to the desired shape and profile. You might find that certain materials work better with specific designs, enhancing your nail’s aesthetic appeal and functionality.

Applications and Usage

Unlike square nails, almond nails are often preferred for their elegant appearance and versatility. They can enhance a variety of styles, from natural to avant-garde, making them suitable for both casual outings and formal events. Almond nails can also provide a substantial surface area for artistic designs, allowing you to express your creativity while maintaining a sleek look.

Common Uses for Almond Nails

Around social gatherings and special occasions, almond nails are often chosen for their elongated shape that flatters the fingers. Many people opt for almond nail designs when looking to showcase intricate artwork, glitter, or bold colors, making them a popular choice among nail enthusiasts who prioritize style and expressiveness.

Common Uses for Square Nails

Applications of square nails primarily focus on their practicality and classic appeal. You likely find square nails in everyday settings, such as professional work environments or casual outings, where a clean and polished look is desired. This shape also tends to be more robust, making it suitable for those who engage in hands-on activities.

At work, you might appreciate square nails for their durability, as their straight edges can handle more wear and tear compared to almond nails. Many people prefer square nails for their straightforward and professional aesthetic, making them a popular choice for individuals in office settings or those who need long-lasting nail options. Additionally, square nails are often easier to maintain, making them a practical choice for busy lifestyles.

Performance and Strength

Keep in mind that performance and strength are key factors when deciding between almond and square nails. Almond nails tend to be more flexible, allowing for a greater range of motion, while square nails provide solid structural integrity. The choice between the two can affect both aesthetics and durability, depending on your personal needs and usage scenarios.

Load-Bearing Capacity

One of the main differences in load-bearing capacity is how each nail shape distributes weight. Square nails have a larger surface area, which helps them bear heavier loads without bending or breaking, making them ideal for construction. On the other hand, almond nails excel in lighter applications where flexibility is a priority, such as in decorative nail art.

Resistance to Rust and Corrosion

LoadBearing features are also influenced by the materials used in almond versus square nails, which affect their resistance to rust and corrosion. Almond nails are typically manufactured from materials that are less prone to corrosion, providing a longer-lasting solution in humid environments. Square nails may require additional protective coatings, especially in outdoor conditions, to maintain their integrity over time.

Considering the environment in which you’ll be using the nails, it’s important to choose wisely. If you anticipate exposure to moisture, opting for almond nails with rust-resistant properties can enhance durability. Alternatively, square nails may need additional treatment to resist corrosion effectively. Your choice should reflect the specific demands of your projects to ensure both performance and longevity.

Installation Techniques

For the best results in nail installations, understanding the techniques suitable for almond and square nails is key. Both shapes have unique requirements that can affect their longevity and appearance. For detailed guidance on the differences and to see expert opinions, check out Which Is Better Square Nails or Almond Nails.

Best Practices for Almond Nails

On installing almond nails, ensure that you file the tips into an elongated oval shape, allowing for a softer appearance. Utilize a high-quality base coat to promote adhesion and minimize lifting. For a seamless look, avoid filing too aggressively and focus on creating a natural curve.

Best Practices for Square Nails

One effective approach to square nails is to focus on achieving a sharp, defined edge. Start with a square shape at the tips and keep the sides straight. To enhance durability, use an appropriate primer and finish with a topcoat to protect your design and prevent chipping.

Best practice for square nails includes regular maintenance, such as filing to maintain the shape and applying cuticle oil to promote healthy growth. It’s vital to keep an eye on any lifting or breakage, as square nails can be more prone to snagging due to their edges. Regular touch-ups will ensure your square nails remain polished and professional.

Cost and Availability

Once again, the differences between almond and square nails extend beyond aesthetics and functionality; they also impact your wallet. Depending on your location and salon, the pricing for each nail shape can vary, but understanding these elements will help you make an informed decision for your next manicure.

Price Comparison

The following table provides a general overview of the price ranges for almond and square nails to help you assess your options:

Price Comparison

Nail ShapePrice Range
Almond Nails$35 – $70
Square Nails$30 – $65

Where to Buy

Comparison shopping for nail services can yield the best deals. You can find both almond and square nail options at local salons, spas, and even nail boutiques, each offering various price points and level of service.

Further, it is beneficial to check online platforms, as many salons now allow you to book appointments through their websites or popular apps. Additionally, local Beauty Supply stores often carry DIY kits for nail shapes, enabling you to create and maintain your desired look at home. Whether you prefer a salon experience or a DIY approach, the options are abundant!

To wrap up

Considering all points, understanding the differences between almond and square nails can significantly influence your nail design choices and overall style. Almond nails offer a more elongated and elegant look, while square nails provide a bold and contemporary appearance. Depending on your personal preferences, lifestyle, and nail care routine, the option you choose can enhance your hands and express your unique flair. Ultimately, both shapes have their advantages, so think about your desired aesthetic and comfort when making your selection.

FAQ

Q: What are the primary differences between almond and square nails?

A: The main differences between almond and square nails lie in their shapes. Almond nails are tapered at the tip, resembling an almond shape which gives a softer and more elongated appearance. Square nails, on the other hand, feature straight edges and a flat tip, resulting in a more bold and modern look. The choice between the two often depends on personal style and the desired appearance of the hands.

Q: Which nail shape is considered more versatile for nail art?

A: Almond nails are generally considered more versatile for nail art as their tapered shape allows for a larger canvas on the nail and a variety of artistic designs. The curvature of almond nails can make intricate designs appear more fluid and graceful. However, square nails also provide a solid base for nail art, particularly for geometric patterns or bold designs that benefit from the sharp edges.

Q: How do almond and square nails differ in terms of maintenance?

A: In terms of maintenance, both almond and square nails require regular upkeep, but their shapes suggest different approaches. Almond nails may require more careful filing to maintain their tapered shape and avoid breakage at the points. Square nails can be easier to maintain for some, as their straight edges make it simple to file them evenly. However, square nails may chip more easily at the corners if not kept at a moderate length.

Q: Are almond nails more suitable for certain nail types or lengths?

A: Almond nails are often recommended for those with longer nail beds or naturally long nails, as their shape can enhance the elegance of the finger. They can also elongate short fingers visually. Square nails tend to be more suited for various nail types, including short, medium, or long lengths, and can complement a wide range of hand shapes. Ultimately, the selection can depend on individual preferences and the look one wishes to achieve.

Q: What are some popular styles or finishes for almond and square nails?

A: Both almond and square nails can be styled in a variety of ways. Almond nails are popular for designs that emphasize flow and movement, making them great for ombre effects, marbling, or intricate designs. Popular finishes include matte, glossy, or metallic styles. Square nails can be showcased in more geometric or edgy designs, often using bold colors, stripes, or graphic patterns. The finish can also range from classic glossy to creative matte finishes, depending on the desired vibe.

How to Achieve the Perfect Coffin Nail Shape

Over the years, coffin nails have become a popular choice for those looking to express their style while maintaining elegance. If you want to master this chic look, it’s necessary to understand the techniques and tools you’ll need for shaping your nails to perfection. In this guide, you’ll discover step-by-step instructions that will help you achieve the ideal coffin shape, tailored to the unique structure of your nails. Get ready to impress with flawless, on-trend coffin nails that highlight your personality and flair!

Key Takeaways:

  • File Angles: Use a straight-edge file at a 45-degree angle to create the sharp edges characteristic of coffin nails.
  • Length and Shape: Ensure the nail length is long enough for the coffin shape, tapering it gradually towards the tip.
  • Buffing Techniques: Smooth the surface after shaping to achieve a flawless finish, enhancing the overall look of the nails.

Understanding Coffin Nails

To achieve stunning nails, it’s important to understand coffin nails, a stylish and modern shape that blends elegance with a bold look. This nail style features a straight edge and a tapered tip, resembling a coffin or a modern box. Characterized by its length and dramatic silhouette, coffin nails can be customized in various lengths and finishes, allowing you to showcase your personality and creativity.

Definition and Characteristics

Before stepping into how to achieve the perfect coffin nail shape, it’s important to explore its definition and characteristics. Coffin nails are typically long and feature square tips, creating a unique and sophisticated appearance. This shape is perfect for those who want a chic yet edgy look, allowing for creative nail art and designs that add individuality to your style.

Popularity and Trends

Around the world, coffin nails have gained immense popularity among fashion enthusiasts and influencers, making them a trendy choice for manicures. Their versatility allows them to be styled in many ways, from elegant to bold, catering to various preferences and occasions. Many people choose coffin nails to express their unique personality and elevate their overall look.

Characteristics of coffin nails have made them a favored trend in the beauty community. The shape not only flatters various hand sizes but also offers a chic canvas for nail art, designs, and intricate embellishments. Celebrities and social media influencers often showcase coffin-shaped nails, inspiring others to embrace this trendy look. As a result, you can find countless variations in colors and styles, making coffin nails suitable for both casual and formal settings.

Preparing Your Nails for Shaping

You will want to start by ensuring your nails are clean and free from any polish or product buildup. Gently push back your cuticles and trim any excess skin around the nail bed, as this will allow for a smooth application and perfect shaping. Take the time to check for any breaks or splits in your nails and address these accordingly. A clean canvas is important when transitioning to the striking coffin nail shape!

Nail Health and Maintenance

Health is paramount for achieving and maintaining beautiful coffin nails. Regularly moisturize your cuticles and nails to prevent dryness and brittleness. Incorporate a balanced diet rich in vitamins and minerals, such as biotin, which promotes nail strength. Establishing a routine for nail care can help you avoid problems and ensure they remain healthy and resilient as you shape them into the perfect coffin style.

Tools and Products Needed

By having the right tools and products at your disposal, you can streamline the process of achieving perfect coffin nails. Essential items include a quality nail file, cuticle remover, nail clippers, a buffer, and a top coat for a shiny finish. You may also consider using a base coat and nail strengthener for added protection.

A well-equipped nail kit can make all the difference when shaping coffin nails. Opt for a fine-grit nail file for precise shaping and smoothing, while a buffer helps achieve a polished finish. Don’t overlook the importance of cuticle oil to nourish your cuticles after shaping, as well as a high-quality top coat to seal in your stunning new coffin nail shape. Having these tools and products ready will elevate your nail care routine and deliver stunning results.

Step-by-Step Guide to Achieving the Coffin Shape

Now you can master the coffin nail shape with this easy-to-follow guide. This detailed table breaks down the process into simple steps, ensuring you achieve perfect results.

StepsInstructions
1. Start with LengthChoose your desired length for the nails; longer nails work best for coffin shape.
2. Shape the TipsBegin filing from the side towards the center, creating a tapered look.
3. Achieve the Coffin ShapeFile the tip straight across to form the ‘coffin’ end.
4. Smooth the EdgesUse a buffer to smooth all surfaces for a polished finish.

Filing Techniques

Guide yourself through effective filing techniques. Use a fine-grit file to minimize chipping while refining the shape. Ensure that you file in one direction rather than back and forth to maintain the integrity of your nails. This method promotes smooth edges and reduces breakage, leading to a flawless result.

Shaping with Precision

About fine-tuning your coffin shape, it’s crucial to focus on symmetry and balance. Start by slightly angling your file towards the center of the nail as you shape the edges. Check both hands frequently to ensure consistency, adjusting your technique as needed to maintain an even look.

Another vital aspect of shaping with precision is the use of a straight-edge file at the tip. This allows you to create a distinct and sharp end characteristic of coffin nails. Take your time and ensure that you are attentive to detail during this process, as it will greatly enhance the overall appearance of your nails.

Common Mistakes to Avoid

Unlike other nail shapes, achieving the perfect coffin nail requires precision and awareness of common pitfalls. Many people underestimate the importance of symmetry and end up with uneven edges. Additionally, using improper tools or techniques can lead to damage and an unsatisfactory finish. By being aware of these mistakes, you can ensure your coffin nails look stunning and professional.

Over-Filing

Common mistakes in filing often arise from over-filing your nails, which can weaken their structure and lead to breakage. Aim for a balanced approach, gently shaping the edges without taking too much length or thinning the nail plate.

Neglecting Nail Care

With coffin nails, it’s easy to focus solely on the shape and design while overlooking the health of your nails. Regular maintenance is crucial for longevity and appearance.

Plus, incorporating a dedicated nail care routine is vital for achieving perfect coffin nails. Use a good base coat to protect your natural nails and keep them moisturized with cuticle oil. Avoid excessive exposure to harsh chemicals and always wear gloves during household chores. By nourishing your nails and maintaining their health, you’ll ensure your coffin shape remains intact and vibrant for longer.

Finishing Touches

For achieving the perfect coffin nail shape, the final details can make all the difference. Once you have perfected the length and shape, it’s vital to refine your nails for a polished look. This includes buffing the surface to smooth any imperfections and applying a quality top coat that adds shine while protecting your design. A well-executed finishing touch not only enhances the appearance but also prolongs the life of your manicure.

Polishing and Top Coats

After shaping your coffin nails, focus on polishing. Begin with a base coat to prevent staining and enhance adhesion, followed by two layers of your chosen polish color. Finish off with a top coat to seal in your design and create a glossy finish. This layer helps to prevent chips and keeps your nails looking freshly manicured, ensuring they remain stunning for weeks.

Nail Art Ideas

For those looking to add a personal touch to their coffin nails, nail art offers endless possibilities. Whether you prefer simple designs or intricate patterns, your coffin shape provides a fantastic canvas. Experiment with nail stickers, delicate lines, or even ombre effects to showcase your style. You can also try incorporating gemstones or glitter for added flair, allowing your individuality to shine through.

The versatility of coffin nails means you can adopt various nail art ideas to suit any occasion. Consider seasonal themes for holidays, or choose colors and designs that reflect your mood. Don’t shy away from experimenting with mixed textures, such as matte and glossy finishes or combining different art techniques. Your nails are a canvas to express your creativity, so feel free to let your imagination run wild!

Maintenance and Longevity

Despite the stunning look of coffin nails, maintaining their shape and shine is necessary for longevity. Regular upkeep will prevent any chips or breakage, allowing you to enjoy your nails for longer. Be diligent about scheduling fills every two to three weeks, and keep a nail file and buffer handy at home for quick touch-ups. Additionally, using a high-quality topcoat will help preserve the finish and protect your nails from daily wear and tear.

Touch-Up Techniques

Among the best touch-up techniques are using a fine-grit buffer to smooth out any rough edges and reapplying topcoat weekly. You can also use a nail glue for any minor chips; this quick fix keeps your nails looking pristine while you wait for your next appointment. Don’t hesitate to file any uneven areas gently to maintain the coffin shape; it can significantly enhance the overall appearance of your nails.

Keeping Up with Growth

With regular nail growth, the gap between your cuticle and the acrylic or gel application will become noticeable. To keep your coffin nails looking fresh, it’s necessary to close this gap as soon as it becomes evident.

Maintenance of your coffin nails involves timely fills and addressing growth gaps promptly. As your natural nails grow, the acrylic extensions can look less appealing if left unattended. During your fill appointments, your nail technician will typically reshape and refinish your nails, ensuring they maintain that perfect coffin silhouette. In between visits, gentle filing and regular application of cuticle oil can help keep your nails healthy and encourage even growth, making it easier to maintain their beauty over time.

To wrap up

With these considerations, you can confidently achieve the perfect coffin nail shape that enhances your personal style. Focus on the desired length, ensure your prep work is thorough, and utilize the right filing techniques to create that flattering tapered look. By choosing the right tools and practicing your skills, you’ll be on your way to showcasing beautifully sculpted nails that complement any outfit. Whether you opt for DIY or a salon visit, your nails will make a statement with this trendy shape.

FAQ

Q: What are coffin nails and how do they differ from other nail shapes?

A: Coffin nails, also known as ballerina nails, feature a tapered shape that extends towards the top, where they are squared off. This style is distinct from others like oval or almond nails that have more rounded tips, and from square nails that have straight tips without the tapering.

Q: What tools do I need to shape my nails into a coffin shape?

A: To achieve the perfect coffin nails, you will need a few crucial tools: a nail file (preferably a fine-grit one), nail clippers, a buffer, and possibly dual forms or nail tips if you’re applying acrylics or gels. A good quality base and top coat will also enhance the finished look.

Q: How do I start shaping my nails into the coffin style?

A: Begin by trimming your nails to a desired length with nail clippers. Next, use the nail file to create the tapered shape by filing the sides of the nails at an angle, leaving the top straight. Consistently check both sides to ensure evenness. Finally, buff the edges to smooth and refine the shape.

Q: Can coffin nails be done on natural nails, or do I need enhancements?

A: Coffin nails can be shaped on both natural nails and enhancements such as acrylics or gels. If you’re working with natural nails, keep in mind that they do need to be strong enough to support the shape. Otherwise, adding extensions is a great way to achieve the look without risk of breakage.

Q: How can I maintain the coffin shape of my nails after achieving it?

A: To maintain the coffin shape, regularly file your nails as they grow out, ensuring to keep the sides tapered and the tips square. Using a top coat can provide extra strength and prevent chipping. It’s also important to keep your nails moisturized to prevent breakage, which can affect the shape.

Round Nails or Stiletto Finding Your Ideal Look

You face an important decision when it comes to nail shapes—whether to choose round nails or stiletto nails. Each option offers distinct aesthetics and can reflect different aspects of your personality and style. Round nails provide a classic, understated vibe, perfect for everyday wear, while stiletto nails exude boldness and modern flair, making a striking statement. In this blog post, we will explore the benefits and considerations of both nail shapes, helping you determine which one aligns best with your unique look and lifestyle.

Key Takeaways:

  • Round Nails offer a classic and versatile look that suits a variety of styles and occasions.
  • Stiletto Nails provide a bold and edgy aesthetic, perfect for making a statement and showcasing creativity.
  • Your ideal look may depend on personal style, lifestyle, and finger shape, so it’s important to choose a nail shape that complements you.

Understanding Nail Shapes

While choosing your nail shape, it’s important to consider how it complements your personal style and lifestyle. Different nail shapes can convey unique aesthetics and enhance your overall appearance. By understanding the characteristics of various nail shapes, you can make a more informed decision for your next manicure, ensuring that your nails reflect your personality and individual flair.

Round Nails: Characteristics and Benefits

About round nails, they are characterized by their soft, gentle curves, mimicking the natural shape of your fingertips. This classic form is not only versatile but also low-maintenance, making it a popular choice for those who prefer a polished look without the fuss. Round nails are great for everyday wear as they tend to resist breakage, offering durability alongside their elegant appearance.

Stiletto Nails: Advantages and Unique Features

Features of stiletto nails include their striking, elongated shape that sharpens to a point at the tip. This edgy design instantly adds drama to your look, drawing attention and showcasing your boldness. Stiletto nails provide a range of creative opportunities for nail art and customization, allowing for intricate designs that stand out. They can elevate your style and give you the confidence to express your individuality.

Indeed, stiletto nails are particularly favored for their ability to make a statement. The sharp, pointed tips create an impression of elegance and sophistication, while also offering versatility in design. Whether you prefer a classic solid color or elaborate nail art, stiletto nails serve as a fantastic canvas for your creative expression. They are ideal for those unafraid to embrace daring styles and who want their nails to reflect a bold personality.

Factors to Consider When Choosing Nail Shapes

Some important factors to consider when selecting your ideal nail shape include:

  • Your personal style and aesthetic
  • Your lifestyle and maintenance requirements
  • The shape of your natural nails
  • Special occasions or events
  • Current nail trends

This will help you make an informed decision that aligns with your preferences and needs.

Personal Style and Aesthetic

Around your personal style and aesthetic, nail shapes can play a significant role in expressing who you are. Whether you lean towards edgy, classic, or whimsical styles, the shape of your nails can complement your look. For instance, stiletto nails often convey a bold and dramatic flair, while round nails present a softer, more understated vibe. Consider the colors, designs, and occasions that best fit your individuality as you make your choice.

Lifestyle and Maintenance Requirements

Between your lifestyle and nail maintenance, it’s imperative to choose a nail shape that suits your daily activities. If you lead a busy life or perform tasks that require precision, shorter nail shapes like round or oval may work better. In contrast, if you prefer something eye-catching and don’t mind extra upkeep, stiletto or almond shapes might be the right choice for you.

And, while considering maintenance, think about how often you can commit to visits for fills or repairs. More dramatic shapes often require regular attention, whereas simpler shapes can be less demanding and more adaptable for an active lifestyle. Balancing aesthetics with your daily responsibilities will ensure that you enjoy your nails without added stress.

Popular Nail Art Ideas for Round Nails

Despite the variety of nail shapes available, round nails offer a classic and versatile canvas for expressing your style. Whether you opt for intricate designs or simple elegance, there’s something for everyone. If you’re unsure about the best nail shape for you, check out How to Choose the Best Nail Shape for You to help guide your decision.

Color Trends and Designs

Color plays a pivotal role in nail art, and round nails allow for an array of vibrant shades and unique combinations. You can experiment with seasonal palettes, pastels, or bold hues to match your mood or outfit, ensuring that your nails become a stunning focal point.

Creative Techniques and Finishes

On the other hand, creative techniques can elevate your round nails to a new level of artistry. From ombre effects to marble designs, incorporating different finishes and textures adds depth and intrigue to your nail look.

This versatility enables you to explore endless possibilities, such as matte finishes for a chic touch or glossy topcoats for a polished effect. You can also play with layering techniques, decals, or nail art decals to truly personalize your round nails. Being adventurous in your approach will set your style apart while making your nails a standout feature.

Stunning Stiletto Nail Designs

Unlike traditional nail shapes, stiletto nails exude an air of bold sophistication, making them a popular choice for those who wish to express their unique style. The tapered point creates a dramatic effect, allowing you to showcase your personality through various designs. From intricate artwork to simple, chic minimalism, stiletto nails provide ample canvas for creativity, ensuring that your nails truly stand out in any crowd.

Seasonal Inspiration

After the seasons change, so can your nail designs! Each time of year presents an opportunity to refresh your stiletto look with colors and patterns that reflect the essence of the season. Whether it’s warm tones for autumn, festive designs for the holidays, or bright florals for spring, don’t hesitate to draw inspiration from nature and seasonal trends to ensure your stiletto nails remain in vogue.

Glamorous Enhancements

Stiletto nails are perfect for adding glamorous enhancements that elevate your overall look. Consider incorporating embellishments like rhinestones, glitter, or metallic foils to create eye-catching designs that capture attention. Beyond basic polish, these decorations can transform your nails into a stunning display, making them the perfect finishing touch for any outfit.

Glamorous enhancements are not just limited to the nail art itself. You can also explore options like matte finishes, ombre effects, or even nail stamping for added flair. Mix and match different textures and colors to personalize your stiletto nails, ensuring that they reflect your individual taste. As you experiment with various styles and embellishments, you’ll find that glamorous enhancements can transform your nails into a statement accessory, making every glance at your hands a delightful experience.

Tips for Maintaining Your Chosen Nail Shape

Now that you’ve chosen your ideal nail shape, it’s imperative to keep them looking pristine. Follow these simple tips to maintain the health and appearance of your nails:

  • Regularly trim and file your nails as needed to maintain shape.
  • Use a nourishing cuticle oil to keep your cuticles hydrated.
  • Avoid using your nails as tools to prevent chips and breaks.
  • Wear gloves when doing household chores to protect your nails.
  • Keep your nails clean and polished for a polished look.

This will help ensure that your nails remain stunning and well-kept.

Care and Upkeep for Round Nails

Among the most popular shapes, round nails require specific care to maintain their gentle curves. Regular filing is imperative to keep their shape, as they can easily become jagged or uneven. Make sure to use a fine-grit file and buff your nails weekly to give them a smooth finish. Additionally, moisturizing your hands and cuticles daily will prevent dryness and breakage. Regular touch-ups with a clear polish can also help in maintaining their overall appearance and shine.

Preserving Stiletto Nail Integrity

With stiletto nails, keeping their sharp points intact takes a little extra diligence. Frequent filing is imperative, but it’s vital to use caution and the correct techniques to avoid unnecessary damage. Cut and file the sides to maintain that dramatic shape while paying attention to the points. Be mindful of your activities—avoid situations that might result in snagging or breaking your nails. Regular application of strengthening treatments can also help keep them healthy and prevent chips or breaks.

Considering the unique nature of stiletto nails, it’s beneficial to combine regular maintenance with a protective approach. Refrain from utilizing your fingertips for tasks that could compromise your nail shape. Embracing a gentle touch and keeping them hydrated with oils and conditioners will also support their structural integrity. Following these guidelines can ensure your stiletto nails remain an eye-catching statement while lasting longer between salon visits.

Transitioning Between Nail Shapes

Not all nail shapes are created equal, and changing from one to another can breathe new life into your manicures. Transitioning between shapes like round to stiletto requires some consideration of your nail health and personal style. Whether you’re feeling adventurous or simply looking for a change, be sure to evaluate your preferences and how they align with the demands of various nail shapes. It’s all about finding the balance that works best for you.

When and How to Switch Styles

Across the seasons, your style preferences may evolve, prompting you to switch your nail shape. Timing is crucial; perhaps you want shorter nails for summer or longer ones for festive occasions. Opt for a gradual transition by visiting a skilled nail technician who can help reshape without damaging your natural nails. This ensures that the transformation feels seamless and works harmoniously with your personal flair.

Adapting Nail Care Routines

Nail care routines must be adjusted as you switch shapes to keep your nails healthy and looking great. Each nail shape requires specific attention; for instance, stiletto nails may need more filing and trimming due to their pointed edges, while round nails might benefit from less maintenance. Tailoring your regimen will not only preserve the integrity of your nails but also enhance your overall aesthetic.

Switch your focus based on the shape you choose for your nails. For stiletto shapes, prioritize strengthening treatments to guard against breakage, while round nails often thrive with more basic upkeep and hydration. Weekly exfoliation and moisturizing can keep cuticles healthy across any shape, but be attentive to the individual needs of your style choice. Adjusting your products and techniques allows you to maintain beautiful nails, regardless of their shape.

Final Words

As a reminder, choosing between round nails or stiletto shapes ultimately depends on your personal style and lifestyle. Round nails offer practicality and elegance, making them perfect for everyday wear, while stiletto nails add a bold, artistic flair to your look. Consider how each shape complements your hands and fits into your routine. Experiment to find what resonates with you, ensuring that your choice enhances not just your appearance, but also your confidence. Ultimately, your nails should reflect your unique personality and bring you joy.

FAQ

Q: What are round nails and what is their appeal?

A: Round nails are shaped with a smooth, rounded tip that follows the natural shape of the fingertip. Their appeal lies in their versatility and classic aesthetic. This shape is ideal for those who prefer a low-maintenance look while still keeping their nails neatly trimmed and presentable. Round nails are also less prone to snagging compared to sharp shapes, making them a popular choice for everyday wear.

Q: What are stiletto nails and why are they considered trendy?

A: Stiletto nails are characterized by their long, pointed tips that create a dramatic and eye-catching appearance. They are considered trendy due to their bold statements and ability to showcase intricate nail art. Stiletto nails often allow for greater creativity in design, as their elongated shape provides more surface area for decorations like gems, designs, and colors. They are popular among fashion-forward individuals looking to make a striking impression.

Q: How do I choose between round nails and stiletto nails?

A: Choosing between round nails and stiletto nails largely depends on your personal style, lifestyle, and comfort. If you prefer a more classic, practical look with ease of maintenance, round nails might be the better choice. On the other hand, if you enjoy standing out and expressing yourself through bold nail art, stiletto nails could be ideal. Consider how each shape fits into your daily activities, as stiletto nails may require more caution due to their sharp points.

Q: Can I achieve different lengths with round and stiletto nails?

A: Yes, both round and stiletto nails can be achieved in various lengths. Round nails can be short to medium in length, making them suitable for those who want something subtle yet polished. Stiletto nails, typically longer, can range from medium to extra-long, allowing for even more dramatic looks. Your desired length should align with your comfort, style, and how much maintenance you are willing to perform.

Q: What maintenance do round and stiletto nails require?

A: The maintenance required for both shapes varies. Round nails typically require regular filing to maintain their shape and prevent any snagging. They may need a fill every few weeks, depending on growth. Stiletto nails, however, require more frequent maintenance due to their length and sharper tips. Regular fills, careful upkeep to avoid breakage, and possibly more frequent trips to a salon might be necessary, especially if you opt for intricate designs that need touch-ups. Additionally, using a good quality top coat can help protect the shape and finish of both nail styles.

Skip to content