nailcare

How to Properly Trim and Shape Your Nails

Over time, maintaining the health and appearance of your nails can enhance your overall grooming routine. Knowing how to properly trim and shape your nails not only prevents discomfort but also promotes healthy nail growth. In this guide, you will learn step-by-step techniques to achieve perfectly manicured nails, whether you prefer a square, oval, or almond shape. Let’s explore important tips and methods that will empower you to keep your nails looking their best.

Key Takeaways:

  • Choose the Right Tools: Invest in high-quality nail clippers, files, and buffers to ensure a clean and precise trim.
  • Follow the Natural Shape: Trim your nails to follow their natural contour, whether straight or rounded, to promote nail health and prevent breakage.
  • Maintain Regular Care: Establish a routine for nail care, including trimming and shaping every few weeks to keep nails healthy and aesthetically pleasing.

Importance of Nail Care

To maintain your overall health and appearance, nail care is important. Healthy nails not only enhance your personal grooming but also prevent issues like infections and breakage. By incorporating regular nail care into your routine, you can ensure that your nails are strong, aesthetically pleasing, and less prone to damage.

Benefits of Proper Trimming

Proper trimming of your nails offers numerous benefits, including preventing painful ingrown nails and minimizing the risk of snags or breaks. By keeping your nails at an appropriate length, you also reduce the chances of dirt and bacteria accumulating underneath, promoting better hygiene and overall nail health.

Preventing Nail Damage

Along with trimming, shaping your nails correctly can significantly reduce the likelihood of nail damage. When you cut or file your nails improperly, you risk splitting or tearing, which can lead to painful and unsightly conditions.

Further, taking the time to shape your nails can prevent the formation of jagged edges that easily catch on clothing or other objects. This not only preserves the integrity of your nails but also enhances their appearance. Additionally, investing in proper tools, like a good nail clipper and file, allows you to maintain your nails effectively and safely, reducing the risk of injury or infection. Regular maintenance can also alert you to any changes in your nails that may require medical attention.

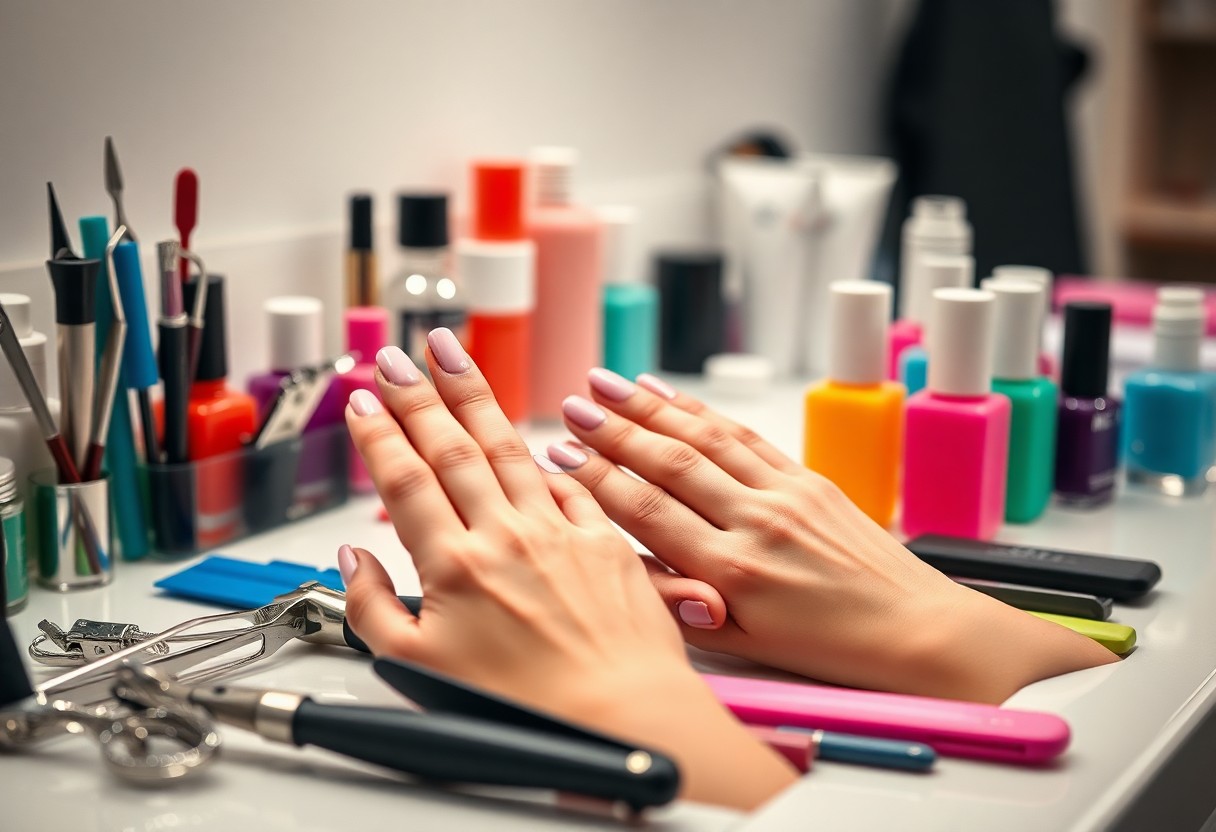
Tools for Nail Trimming

There’s no need to struggle when trimming your nails; the right tools can make all the difference. For a comprehensive guide on How to Cut Your Fingernails and Toenails, understanding what tools to use is vital. Equipped with proper instruments, you can achieve a neat and precise finish while minimizing the risk of injury.

Essential Tools

By investing in vital tools such as nail clippers, a nail file, and cuticle scissors, you can make the nail trimming process simpler and more effective. Nail clippers come in various shapes and sizes—choose a pair that feels comfortable in your hand for precise control. A fine-grit nail file will help smooth any rough edges, while cuticle scissors will aid in trimming excess cuticle skin.

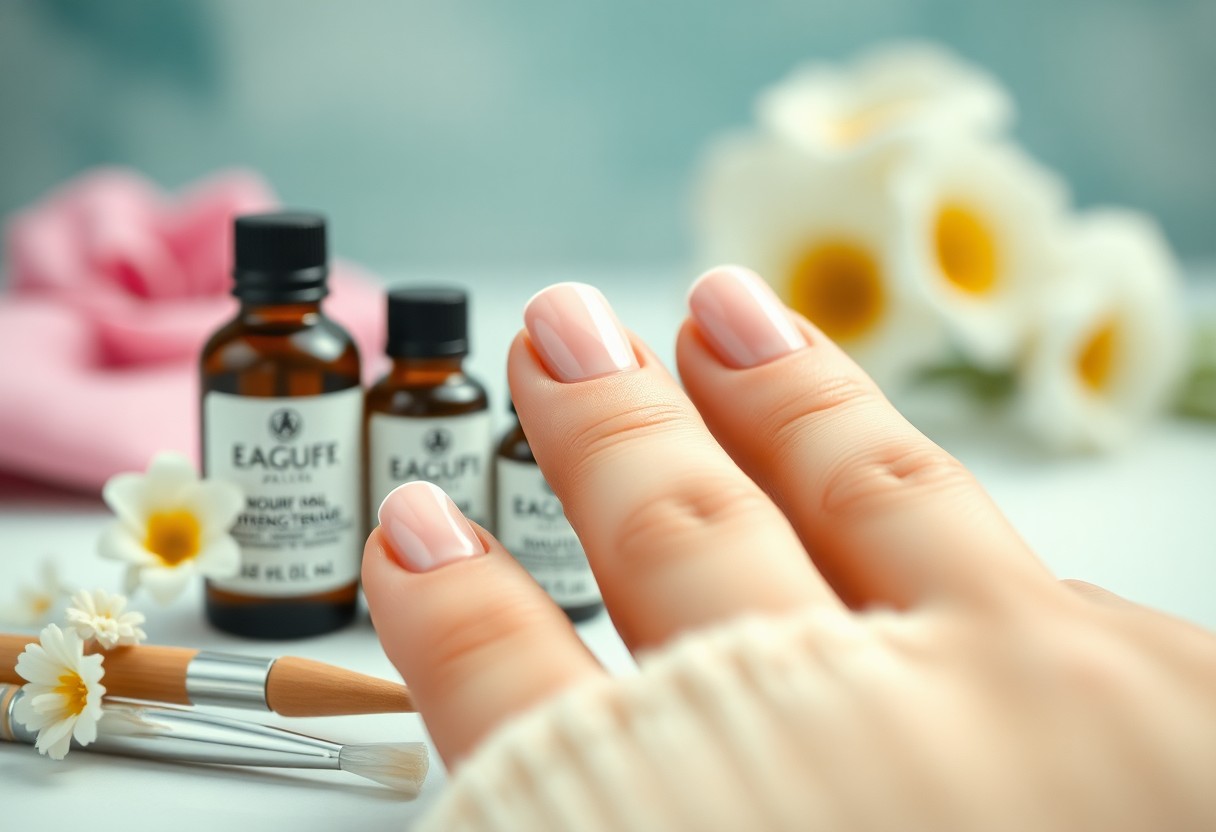
Optional Accessories

Along with vital tools, incorporating optional accessories can elevate your nail care routine. Items like a nail buffer, cuticle oil, and a nail polish remover can enhance your overall nail health and appearance.

Hence, exploring optional accessories could enrich your nail grooming experience. A nail buffer helps create a shiny finish and smooth texture, while cuticle oil nourishes and hydrates the cuticles for healthier nails. Additionally, effective nail polish removers ensure that your nails remain clean, making the perfect canvas for your next manicure. These accessories provide an extra layer of care that can lead to improved nail health over time.

Step-by-Step Nail Trimming Procedure

For a successful nail trimming session, follow this straightforward procedure to ensure your nails look their best.

StepDescription
1. Gather Your ToolsFind a nail clipper, file, and a bowl of warm, soapy water.
2. Soak Your NailsSoak your nails for 5-10 minutes to soften them.
3. Trim Your NailsUse the clippers to cut your nails straight across.
4. File Your NailsGently file the edges for a smooth finish.
5. MoisturizeApply cuticle oil or hand cream to keep your nails healthy.

Preparing Your Nails

Between trimming your nails, ensure they are clean and free from polish or debris to make the process easier. Soaking your hands in warm, soapy water for a few minutes will soften the nails, allowing for a smoother trim and reducing the risk of splitting or breaking.

Trimming Techniques

For effective trimming, use a sharp nail clipper and cut your nails straight across to help prevent ingrown nails. Make small, controlled clips rather than trying to cut the entire nail in one go.

Even using the right technique can make a significant difference in the appearance and health of your nails. Start by trimming just the edge of your nails, leaving a little length to avoid cutting too short. Follow up by rounding the corners slightly with the file, which minimizes the chances of snags or breaks while still ensuring a neat, polished look.

Shaping Your Nails

Unlike simply trimming, shaping your nails can greatly enhance their appearance and lend a polished look to your hands. The right shape will complement your natural nail growth and consider the size of your fingers, allowing you to showcase a well-groomed and sophisticated style. Understanding the various nail shapes available can help you choose the one that best suits your personal style and lifestyle.

Different Nail Shapes

Beside the classic square shape, your nails can take on a variety of forms, including oval, almond, stiletto, and squoval. Each shape brings a different aesthetic and can flatter your hands in unique ways. Knowing these options allows you to make an informed decision based on your individual taste and the impression you wish to create.

How to Achieve Each Shape

Achieve your desired nail shape by considering the fundamental techniques for each style. For example, square nails require a straight-edge cut, while oval nails should be filed softly towards the tip. To perfect the almond shape, file at an angle for a tapered look, and for stiletto nails, extend the tapering further. Maintaining consistency and symmetry on both hands is key to achieving a refined finish.

Indeed, taking the time to perfect each nail shape will create a stunning result that enhances your overall appearance. Start by trimming your nails evenly, then select a file that matches your chosen shape. Begin by filing the edges, gradually moving towards the tip, and checking for uniformity as you go. For more dramatic shapes like stiletto, focus on achieving that pointed tip with precision. Lastly, always keep your nails moisturized and healthy, which is just as important as their shape.

Nail Maintenance Tips

Now that your nails are trimmed and shaped, maintaining them is vital for a polished look. Follow these tips to keep your nails healthy:

  • Moisturize your cuticles regularly.
  • Avoid using your nails as tools.
  • Keep your nails clean and dry.
  • Wear gloves while doing chores.
  • Limit exposure to chemicals and harsh substances.

After incorporating these habits into your routine, you’ll notice your nails look better and are less prone to damage.

Aftercare Techniques

For optimal nail health, aftercare is imperative once you’ve finished shaping your nails. Gently massage cuticle oil or a moisturizing cream onto your nails and surrounding skin, promoting hydration and strength. Avoid exposing your nails to excessive water or harsh soaps immediately after trimming to preserve their integrity.

Regular Maintenance Routine

The key to maintaining beautiful nails lies in establishing a consistent maintenance routine. Schedule time each week to inspect your nails, keeping them clean and well-moisturized. Make it a habit to file any rough edges and push back your cuticles gently. This routine not only keeps your nails looking neat but also prevents potential breakage and splitting.

Nail maintenance should be part of your self-care regimen. Dedicate a few minutes each week to regularly check on your nail health, and consider scheduling regular manicures to pamper yourself. By staying proactive about their care, you’ll enjoy stronger, healthier nails that showcase your personal style with confidence.

Common Mistakes to Avoid

Many people make common mistakes when trimming and shaping their nails that can lead to uneven edges or even injury. It’s crucial to be mindful of how you approach this task to maintain healthy and attractive nails. Avoid rushing through the process and take the time to understand the techniques that will help you achieve the best results.

Over-Trimming

With over-trimming, you risk damaging the nail bed, which can lead to discomfort and uneven nail growth. You should aim to maintain a natural shape and length that complements your hands while avoiding excessive filing or cutting.

Using Dull Tools

Along with over-trimming, using dull tools is another mistake that can compromise your nail upkeep. Dull clippers or files can cause tearing or splitting, leading to painful hangnails and other issues.

To ensure optimal results, always invest in high-quality nail tools and keep them well-maintained. Sharp clippers and files will make clean, precise cuts and shapes, reducing the risk of injury and minimizing the chance of damage to your nails. Take a moment to sanitize your tools before use to avoid introducing bacteria that could lead to infections. Proper tools will make your nail care routine more effective and enjoyable.

Conclusion

Taking this into account, properly trimming and shaping your nails is imperative for both hygiene and aesthetics. By following the outlined steps, you can ensure that your nails are well-maintained and healthy. Regular nail care not only enhances your appearance but also helps prevent potential issues such as breakage and infection. Always use the right tools, take your time, and consider your nail shape to achieve the best results. With a little practice, you’ll have perfectly manicured nails that you can be proud of.

FAQ

Q: How often should I trim my nails?

A: The frequency of nail trimming can vary based on individual growth rates and personal preferences, but a good guideline is to trim your nails every 2 to 4 weeks. If you have faster-growing nails or prefer to maintain a certain style, you may need to trim them more often. Always trim your nails when they are dry for better control and shape.

Q: What tools do I need to properly trim and shape my nails?

A: For proper nail care, you will need a few basic tools: a set of nail clippers or scissors, a nail file or buffer, cuticle pushers, and optional clean tools such as a nail brush. It’s also helpful to have a moisturizing lotion for nail care after trimming. Ensure that all tools are clean and sanitized to prevent infection.

Q: What is the best technique for trimming and shaping my nails?

A: To trim your nails, start by cutting them straight across to prevent hangnails and ingrown nails. After cutting, file the edges to smooth out any roughness. For a rounded shape, file the corners gently in a curved motion. Avoid excessive filing as this can weaken the nails. Always aim for a shape that complements your fingers and fits your personal style.

Q: How do I care for my cuticles while trimming my nails?

A: Caring for your cuticles is vital for healthy nails. After trimming your nails, gently push back cuticles using a cuticle pusher, but do not cut them as this can lead to infection. Apply cuticle oil or moisturizer to keep them hydrated. This promotes healthy growth and maintains the appearance of your nails.

Q: What should I do if I accidentally cut my nail too short?

A: If you cut your nail too short, stop trimming and allow it to heal. Clean the affected area gently to prevent infection and apply an antiseptic if there’s any bleeding. To protect the nail, consider wearing a bandage while it grows back. Avoid further trimming until it’s at a comfortable length again, and ensure to keep it moisturized to aid recovery.

How to Heal Your Nails After Removing Acrylics

Healing your nails after acrylic removal requires care and attention to restore their natural strength and beauty. By understanding the steps needed to nurture your nails, you can help them regain their health effectively. Start by nourishing your nails with the right treatments, avoid further damage, and give them time to recover. For expert tips on nail repair, check out Nail repair: How to treat damaged nails, and initiate on your journey to beautiful, resilient nails.

Key Takeaways:

  • Moisturize: Keep your nails and cuticles hydrated with oils and creams to promote healing and prevent brittleness.
  • Gentle Care: Avoid harsh chemicals and tools; use a soft nail file and limit exposure to water while your nails recover.
  • Nutrition: Incorporate vitamins and minerals, such as biotin and zinc, into your diet to support nail health and growth.

Understanding Nail Damage

Before you can effectively heal your nails after removing acrylics, it’s important to understand the damage they may have incurred. Acrylics can provide stunning nails, but the removal process and prolonged wear can lead to various forms of damage, leaving your natural nails weakened and vulnerable. Recognizing the signs and symptoms of nail damage is the first step toward recovery.

Causes of Nail Damage from Acrylics

From improper application and removal techniques to prolonged wear, several factors contribute to nail damage. Acrylics can create pressure and stress on your natural nails, leading to brittleness and breakage. Additionally, using harsh chemicals during removal can strip away natural moisture, further compromising nail health.

Symptoms of Weak Nails

The signs of weak nails are often evident shortly after removing acrylics. You may notice your nails becoming thin, brittle, or prone to splitting and peeling. Furthermore, a lack of shine and flexibility can indicate underlying weakness, making your nails more susceptible to injury.

Damage to your nails may manifest in various ways, including ridges, discoloration, or brittleness. You might also experience a slower growth rate or increased sensitivity to pressure and moisture. Being aware of these symptoms helps you take proactive steps to nurture and strengthen your nails during the healing process.

Initial Steps After Acrylic Removal

The first step after removing your acrylics is to assess the condition of your natural nails. You may notice they are weak, brittle, or even peeling. To aid in recovery, allow your nails to breathe and refrain from applying any polish or enhancements for at least a week. During this period, keep your nails trimmed and practice gentle care to prevent further damage.

Proper Nail Care Routine

Acrylic removal can leave your nails in need of loving care. Establishing a proper nail care routine is necessary to restore their health. Start by keeping your nails clean and moisturized. Use a nourishing hand cream and consider applying cuticle oil regularly to promote hydration and resilience in your nails.

Immediate Treatments and Products

Any treatment you choose should focus on rehydrating and nurturing your nails. High-quality nail strengtheners and oils specifically formulated to boost nail health can provide immediate benefits. Look for products that contain ingredients like keratin, biotin, and vitamin E, which help improve the strength and appearance of your nails.

Consequently, integrating immediate treatments into your routine can significantly enhance the healing process. Applying a strengthening polish or a revitalizing nail serum can fortify your natural nails, reducing brittleness and promoting overall growth. Additionally, incorporating supplements rich in biotin or collagen may further support nail recovery from the inside out.

Nutritional Support for Healthy Nails

Keep your nails nourished by incorporating a variety of vitamins and minerals into your diet. The right nutrients can significantly enhance nail health and aid in their recovery after acrylic removal. Focus on foods that promote keratin production and strengthen your nail structure, ensuring you support your body during this restorative process.

Essential Vitamins and Minerals

With the right combination of vitamins and minerals, you can boost your nail health effectively. Biotin, vitamin E, zinc, and iron are particularly beneficial for strengthening and nourishing your nails. These nutrients play imperative roles in promoting new nail growth and repairing damage, so prioritizing them in your diet can yield excellent results.

Dietary Recommendations

One effective way to support your nails is by incorporating foods rich in the imperative nutrients mentioned earlier. Focus on nuts, seeds, leafy greens, eggs, and lean proteins. Additionally, adding avocados, berries, and whole grains can provide antioxidants and healthy fats that contribute to overall nail health.

Another excellent strategy is to ensure that your meals are balanced and varied. Aim to include a colorful assortment of fruits and vegetables, as they contain phytochemicals and vitamins that promote cellular repair and growth. Carrying a snack of almonds or a smoothie with spinach can help boost your nutrient intake throughout the day, ultimately supporting a quicker and healthier recovery for your nails.

Natural Remedies for Nail Strengthening

Once again, prioritizing natural remedies can significantly enhance the strength and appearance of your nails after acrylic removal. These remedies incorporate nourishing ingredients that help restore necessary moisture and promote growth. By integrating simple yet effective natural treatments into your nail care routine, you can facilitate healthy recovery and regain the durability your nails once had.

Oils and Moisturizers

Around your nails, using natural oils and moisturizers can make a profound difference. Oils like jojoba, almond, and coconut not only hydrate your nails but also penetrate the skin to improve health. Applying these oils daily helps to soften cuticles, prevent breakage, and enhance overall nail luster, allowing your nails to thrive post-acrylics.

DIY Nail Masks and Treatments

Natural ingredients can be combined to create effective DIY nail masks and treatments that help rejuvenate your nails. These masks typically include elements like honey, olive oil, and vitamin E, which nourish and strengthen the nail structure. By applying these treatments regularly, you can enhance your nails’ resilience and overall health from the comfort of your home.

At home, making DIY nail masks is straightforward and can be tailored to your preferences. For instance, you can mix equal parts of honey and olive oil, applying the mixture to your nails and allowing it to sit for about 30 minutes before rinsing. Alternatively, creating a paste with mashed bananas and olive oil can provide an extra boost due to the potassium and vitamins present. Incorporating these treatments into your routine once or twice a week will help accelerate the healing process, ultimately leading to stronger and healthier nails.

Professional Treatments and When to Seek Help

Unlike at-home remedies, professional treatments can offer a more targeted approach to healing your nails after acrylic removal. If your nails appear weakened or damaged, consider seeking assistance from a qualified nail technician or dermatologist. They can assess the condition of your nails and recommend effective solutions tailored to your specific needs.

Salon Services for Nail Recovery

Treatments offered in salons, such as deep conditioning manicures or healing nail therapies, can significantly enhance your nail recovery process. Skilled technicians apply specialized products that nourish and repair your nails, strengthening them over time. Additionally, these services often include gentle hand massages that improve circulation, promoting healthier nail growth.

Consulting a Dermatologist

When your nails do not improve despite consistent care, it may be time to consult a dermatologist. They can evaluate any underlying issues that might be contributing to the condition of your nails, such as fungal infections or nutritional deficiencies. With their expert guidance, you can receive a proper diagnosis and appropriate treatment recommendations to restore your nails to optimal health.

Another important aspect is that dermatologists can offer prescription-strength treatments that go beyond over-the-counter options. They may recommend topical solutions, nail plates treatments, or dietary modifications designed to nourish your nails from within. By seeking professional help, you are taking a significant step towards ensuring your nails recover effectively and regain their natural strength and appearance.

Prevention of Future Nail Damage

Despite the challenges that come with acrylic nails, taking preventative measures can ensure your natural nails stay healthy. Before considering acrylics again, reinforce your nail care routine by opting for high-quality products and avoiding harsh chemicals. Always communicate with your nail technician, ensuring they understand your nail health concerns. Establishing a solid foundation for your natural nails is key to enjoying beautifully adorned hands without compromising their integrity.

Best Practices Before Applying Acrylics

Practices such as assessing your nail’s health, performing a patch test for allergies, and ensuring your nail technician is experienced can make a significant difference in your acrylic experience. Prioritize a consultation to discuss your goals and potential risks.

Maintenance Tips for Healthy Nails

On top of pre-application practices, maintaining your nails is crucial. Follow these tips regularly to ensure their strength and appearance:

  • Keep your nails clean and dry.
  • Moisturize your cuticles and nails daily.
  • Avoid biting or picking at your nails.
  • Wear gloves during household chores.
  • Limit exposure to harsh chemicals.

Recognizing the importance of consistent care can protect your nails from future damage.

Due to the tendency for nails to become brittle after acrylic removal, focusing on maintenance is crucial for long-term health. You should also pay attention to your diet, including foods rich in vitamins and minerals that promote nail growth. Incorporating supplements like biotin may further support nail resilience. Follow these tips to keep your nails in optimal condition:

  • Stay hydrated.
  • Avoid using your nails as tools.
  • Regularly trim and file your nails.
  • Schedule regular breaks between acrylic applications.
  • Consider using a strengthening polish.

Recognizing the signs of weakness in your nails can prompt early intervention and promote lasting strength.

Summing up

With this in mind, nurturing your nails after removing acrylics is crucial for restoring their health and strength. Focus on moisturizing regularly, applying strengthening nail treatments, and maintaining a balanced diet rich in vitamins and minerals. Avoid exposing your nails to harsh chemicals and wear gloves during household tasks to protect them. Patience is key, as your nails will gradually improve with consistent care. By following these steps, you can enjoy healthier nails and reduce the risk of future damage.

Q: What steps should I take immediately after removing acrylic nails to promote healing?

A: After removing your acrylic nails, it’s important to avoid any stress on your natural nails. First, gently buff the surface of your nails to remove any remaining acrylic residue. Then, soak your nails in warm water for about 10 minutes to hydrate them. Following this, apply a good quality nail oil or cuticle oil to nourish the nail bed and surrounding skin. Regularly massage the oil into your nails to improve circulation and speed up the healing process.

Q: How can I strengthen my natural nails after acrylic removal?

A: To strengthen your nails after the removal of acrylics, consider using a nail strengthening treatment that contains ingredients like biotin, keratin, or calcium. Additionally, keeping your nails trimmed and filed can help reduce the risk of breakage. Incorporating a healthy diet rich in vitamins and minerals, especially vitamin E and biotin, can significantly help in the regeneration of strong, healthy nails. You may also want to limit exposure to water and harsh chemicals during this recovery period.

Q: How long does it typically take for nails to fully heal after acrylic removal?

A: The healing time for nails after acrylic removal can vary from person to person, typically ranging from several weeks to a few months. Generally, nails grow at a rate of about 1/8 inch per month, so it might take 4 to 6 weeks for your nails to regain their natural length and strength. However, factors such as your overall health, nutrition, and the extent of damage caused by the acrylics can influence recovery time. During this period, consistent care and protection of your nails will support healthier growth.

How to Transition from DIY to Salon Nail Care

With so many exciting options for nail care available today, you might be considering the jump from at-home DIY treatments to professional salon services. Embracing salon nail care can elevate your overall appearance and provide a relaxing experience that your kitchen table simply can’t replicate. This guide will walk you through imperative steps to ensure a smooth transition, covering the benefits of salon services, what to expect during your first visit, and how to choose the right salon for your nail needs. Dive in and discover how to enhance your nail care routine!

Key Takeaways:

  • Assess Your Skills: Evaluate your current nail care abilities and identify areas for improvement before transitioning to salon treatments.
  • Research Local Salons: Look into various nail salons in your area, checking for reviews, services offered, and technician expertise to find the right fit.
  • Communicate Your Preferences: Clearly express your nail care preferences and concerns with your chosen nail technician to ensure a satisfactory experience.

Understanding the Benefits of Professional Nail Care

Before making the leap to professional nail care, it’s important to understand the various advantages it offers. A salon professional not only provides high-quality products and services but also creates a relaxing environment tailored to your needs. With an expert’s touch, you’ll enjoy longer-lasting manicures and pedicures, as well as innovative nail art options that elevate your style. Ultimately, investing in professional care ensures your nails remain healthy and well-maintained.

Health and Safety Considerations

For your health and safety, visiting a professional nail salon is highly beneficial. Licensed technicians adhere to strict hygiene protocols and use sterilized tools, minimizing the risk of infections or nail damage. Proper education and training ensure they are equipped to identify signs of potential issues, helping you maintain overall nail health.

Skill and Technique Differences

Benefits of professional nail care arise from the skill and technique differences between DIY methods and salon services. A trained nail technician has acquired specialized knowledge and experience that surpass standard home care practices.

And these professionals employ advanced techniques, tools, and products that you may not have access to at home. Their expertise allows them to shape and polish your nails for a more precise and aesthetically pleasing finish. With their ability to assess your nail health and recommend tailored treatments, you can achieve results that simply aren’t attainable through DIY efforts. The time spent with a skilled technician not only enhances your nails’ appearance but also boosts your confidence in their durability and style.

Assessing Your Current Nail Care Routine

One of the first steps in transitioning from DIY to salon nail care is to assess your current nail care routine. Take some time to reflect on your practices—consider what nail products you use, how often you treat yourself to manicures and pedicures, and the effectiveness of your DIY techniques. You can even check out this Step-By-Step For the Best DIY Mani-Pedi for ideas on what areas can be improved.

Identifying Areas for Improvement

By assessing your nail care routine, you can identify areas for improvement. Look closely at any inconsistencies in your practice, such as nails that are consistently chipped or damaged. A few simple tweaks to your routine, like investing in better products or giving yourself more time for maintenance, can make a noticeable difference.

Recognizing Signs It’s Time for a Professional

To determine when it’s the right time to seek professional help, pay attention to any persistent nail issues. If you notice frequent breakage, constant hangnails, or unusual changes in your nail color or texture, these could indicate that it’s time for a professional assessment.

Nail health is a reflection of your overall wellbeing, and professional nail care can address issues that DIY solutions may not resolve. Conditions like fungal infections, ingrown nails, or persistent pain should always be evaluated by a trained nail technician or dermatologist. Investing in professional care can not only improve the appearance of your nails but also enhance their health.

Finding the Right Salon

After deciding to transition from DIY to salon nail care, finding the right salon is imperative for a rewarding experience. You might want to explore 3 at-home DIY alternatives to your next nail appointment to understand what services salons offer that you might miss.

Researching Local Salons

Along your journey, take the time to research local salons. Check reviews online, visit their websites, and follow their social media platforms for insights into their services and style. This can help you gauge which salon aligns with your personal preferences and standards.

Questions to Ask Salon Professionals

With your list of potential salons in hand, it’s important to ask the right questions while you communicate with the professionals. This will help you determine if the salon meets your expectations and needs.

Local salon staff should be knowledgeable and open to addressing your concerns. Inquire about their sanitation practices, the products they use, and their nail treatment techniques. Additionally, you might want to ask about their experience with different nail types and styles, as well as any special services they offer, ensuring you find a suitable match for your specific nail care goals.

Preparing for Your First Salon Visit

For many, stepping into a salon for the first time can feel overwhelming. To enhance your experience, it’s important to prepare in advance. This means arriving with a clear idea of what you want, considering your nail shape, color preferences, and any particular services you wish to try. Don’t hesitate to carry your favorite nail products or a list of specific services you’d like to receive; this will help facilitate a smooth transition into professional nail care.

Communicating Your Expectations

One of the best ways to ensure a fulfilling salon experience is to communicate your expectations clearly with your nail technician. Sharing your previous DIY experiences, preferences, and desired outcomes helps them tailor their services to meet your needs. Being open about what you love and what you don’t will lead to better results and enhance your overall satisfaction.

Bringing Inspiration and Ideas

Above all, bringing inspiration can significantly enhance your salon visit. Showcasing photos of nail art, styles, or colors that you adore allows your technician to better understand your vision, ensuring a more customized service. Whether you prefer classic elegance or vibrant trends, visual examples will provide a solid foundation for discussion.

Another effective way to express your style is by surfing through social media platforms like Instagram or Pinterest to gather nail art inspirations. Save images that resonate with you and be prepared to discuss the elements you want to incorporate into your manicure. This preparation not only aids your technician but also fuels your excitement, making your first salon experience enjoyable and personalized.

Transitioning Smoothly to Salon Services

Not every DIY enthusiast is eager to make the leap to salon nail care, but smooth transitions are achievable. Start by informing yourself about what to expect during your first salon visit. This will help ease any anxiety and give you the confidence to explore service options. If you’re looking for ways to maintain your nail care at home in between salon visits, check out DIY Nail Care: How to Create a Salon Experience at Home for valuable tips.

Establishing a Routine

To ensure you get the most out of your salon visits, develop a routine that works for your lifestyle. Regular appointments can help maintain the health and appearance of your nails. Schedule your visits consistently, whether it’s every three weeks or monthly, to ensure you stay on top of your nail care without overwhelming your schedule.

Building a Relationship with Your Nail Technician

Transitioning to salon services involves more than just choosing the right nail facility; it’s vital to build a rapport with your nail technician. By openly communicating your preferences and concerns, you create a more personalized experience. This relationship enables your technician to better understand your style, ensuring that each visit feels tailored to your individual needs. As you grow more comfortable, don’t hesitate to ask for advice on nail care, as they often have valuable insights that can help you maintain your nails between appointments.

Services provided by a nail technician can vary significantly, and they are there to guide you in finding the best options. Establishing a solid relationship means you’ll benefit from their expertise and suggestions for new techniques, colors, or treatments that fit your style. A good technician will listen to your ideas and work with you to achieve your desired look while keeping your nails healthy. This ongoing communication fosters trust and ensures you receive the best care, maximizing your salon experience.

Maintaining Nail Health Post-Salon Visits

Despite enjoying your fresh salon manicure, maintaining your nail health is important for longevity. Regular care ensures your nails remain strong and beautiful between visits. Implementing a consistent at-home routine can significantly enhance the results of your salon treatments while preventing potential issues that may arise from overuse of products or neglect.

At-Home Care Tips

Nail health starts at home, and maintaining your nails after a salon visit is key. Follow these tips for beautiful, lasting results:

  • Hydrate your cuticles with oil or cream regularly.
  • Avoid overexposure to water by wearing gloves during chores.
  • Moisturize your hands daily to prevent dryness.
  • Limit the use of harsh chemicals that can damage your nails.

Knowing how to care for your nails at home will help extend the life of your salon treatment.

Scheduling Regular Appointments

Scheduling regular appointments is important in maintaining healthy nails. Keeping a consistent routine allows the salon technicians to monitor your nail growth and health, ensuring timely maintenance. Regular visits also give you the opportunity to update your nail care approach as needed, based on your nail condition or personal aesthetics.

Visits to the salon should be tailored to your nail growth rate, lifestyle, and nail health. Generally, booking appointments every two to three weeks is ideal for most. This frequency helps in preventing breakage and maintaining strength while giving your nails a chance to recover if they experience stress from manicure procedures. Creating a schedule based on your unique needs will keep your nails looking their best.

Conclusion

Summing up, transitioning from DIY to salon nail care can elevate your nail health and overall appearance. Start by researching local salons and reading reviews to find a reputable establishment. Communicate your preferences and concerns with your nail technician to achieve the best results tailored to your needs. Regular salon visits can enhance the longevity of your manicures and pedicures, while professional products ensure quality care. Embrace this change by prioritizing your nail health and indulging in professional treatments that can save you time and improve your nail aesthetic.

Q: What are the signs that it’s time to transition from DIY nail care to professional salon services?

A: There are several indicators that might suggest it’s time to shift from DIY nail care to professional salon services. If you find that your nails are becoming difficult to maintain, with persistent issues such as breakage, discoloration, or peeling, it could be an indication that professional attention is needed. Additionally, if you are seeking more intricate nail art or designs that require a level of skill beyond your comfort zone, a salon can offer the expertise and tools necessary for high-quality results. Lastly, if you have limited time or access to the right tools for DIY nail care, opting for salon services might be a more efficient and effective solution.

Q: How can I choose the right nail salon for my first professional experience?

A: Selecting the right nail salon is vital for a positive experience. Start by researching local salons and reading online reviews to gauge their reputation. Look for a salon that prioritizes cleanliness and follows sanitation protocols. It can also be helpful to visit the salon beforehand to observe the technicians at work and interact with the staff to get a feel for the atmosphere. Asking for recommendations from friends or family who have experience with salons can provide valuable insights as well. Finally, consider salons that specialize in the services you are interested in, whether it’s gel nails, nail art, or restorative treatments, to ensure that you receive specialized care.

Q: What should I expect during my first visit to a nail salon, and how can I prepare?

A: During your first visit to a nail salon, you can expect a consultation where the technician will discuss your nail care preferences and assess your nails for any specific needs. To prepare, it’s beneficial to arrive with a clear idea of the service you would like, whether it’s a manicure, pedicure, or nail enhancements. Bring pictures for inspiration if you are looking for specific designs. If you have nail concerns, such as sensitivities or previous issues, communicating these to the technician will help them tailor the treatment to your needs. Lastly, maintaining an open mind and being relaxed can enhance the overall experience, as salon technicians are there to help you achieve the best results.

Top Travel Kits for Nail Care on the Go

Many travelers overlook the importance of nail care while on the road, yet maintaining healthy, well-groomed nails contributes significantly to your overall appearance. Whether you’re jet-setting for business or leisure, investing in a quality travel kit can make all the difference. This post will guide you through the top travel kits that ensure your nails remain fabulous and well-maintained during your adventures. With the right tools at your disposal, you’ll feel confident and polished no matter where you go.

Key Takeaways:

  • Compact Designs: Look for travel kits that offer space-saving arrangements for easy packing.
  • Essential Tools: Select kits that include key nail care tools like clippers, files, and cuticle pushers.
  • Quality Materials: Opt for kits made from durable materials to withstand travel conditions and last longer.
  • Multi-functionality: Some kits come with integrated tools for added convenience and versatility.
  • Easy Clean-Up: Choose products that allow for quick and hassle-free clean-up to maintain hygiene on the go.

Essential Nail Care Tools

A good travel kit for nail care includes a variety of imperative tools that ensure your nails remain well-groomed, no matter where you are. Investing in the right tools will not only keep your nails looking their best but also make your overall experience more enjoyable. From clippers to files, having these items on hand allows you to address any nail-related concerns quickly and efficiently, providing the care that your nails deserve while you’re on the go.

Nail Clippers

To maintain neat and tidy nails, a reliable pair of nail clippers should be a key component of your travel kit. Compact and easy to use, nail clippers allow you to trim any unwanted length and shape your nails effectively, ensuring a polished look while you’re away from home.

Nail Files

After trimming your nails, using a quality nail file is imperative to smoothing out any rough edges. Nail files come in various grits, allowing you to choose the right level of abrasiveness for your nails. Soft files work well for natural nails, while harsher files are ideal for acrylic or gel nails. Keeping a nail file in your travel kit will help you achieve the perfect finish, ensuring your nails look and feel their best at all times.

A good nail file can also help prevent nail breakage and splits, allowing you to maintain a healthy appearance as you travel. Consider bringing a small, lightweight nail file that fits easily in your travel kit, providing you with the convenience and reliability you need to keep your nails in top shape. With just a few swipes, you can transform your nails from ragged to refined, ensuring you feel confident and polished wherever you may be.

Complete Travel Kits for Nail Care

The perfect travel companion for nail care, a complete travel kit ensures that all importants are packed in one sleek package. Consider the Tweezerman & Tom Bachik Nail Care Travel Set, which offers everything you need to maintain your manicure while on the move.

Best All-in-One Kits

Travel kits that bundle all the necessary tools allow you to keep your nails in top shape effortlessly. These kits often include clippers, files, and cuticle tools to meet your nail care needs at home or away.

Affordable Options

To find a great nail care kit that fits your budget, look for options that still deliver quality tools without breaking the bank. There are plenty of brands that offer economical kits that provide important tools you need on the go.

Kits priced affordably can include all the importants without compromising on quality. Check out those that feature durable materials and well-designed tools, ensuring that your nail care routine remains effective even when you’re traveling. By investing in an affordable kit, you can enjoy salon-quality care wherever your journey takes you.

Specialty Kits for Nail Art

Your nail art journey doesn’t have to pause when you travel. Specialty kits designed specifically for nail art can help you unleash your creativity anywhere. One excellent option is the 8 Piece Travel Manicure Set – Barbasol, which includes all the vital tools to create stunning designs on the go. These kits often feature everything from dotting tools to nail brushes, ensuring you have what you need to express your style, no matter where you find yourself.

Art Supplies

After you pack your vital nail care items, you’ll want to include some specialized art supplies. Look for miniature nail polishes, nail art pens, and nail striping tape that can easily fit in your travel bag. These items are designed to help you create intricate designs, allowing for full artistic expression while ensuring portability. Opt for water-based or quick-dry formulas for added convenience, so you can change your style without the wait.

Decorate on the Go

Along with basic tools, having art supplies ready means you can transform plain nails into eye-catching designs whenever inspiration strikes. Whether you’re at a café, waiting for a flight, or relaxing at the beach, these kits allow you to personalize your look instantly. Look for travel-friendly options that are easy to use and can fit in your purse, making your nail art adventures spontaneous.

Further featuring mobile convenience, many nail art kits now come with multi-functional tools that combine several functions, saving space and lightening your load. This compact yet comprehensive approach enables you to explore endless design possibilities while on the move. From seasonal themes to playful styles, having everything you need to decorate on the go means you can always nail your look, wherever you may be.

Eco-Friendly Travel Options

All eco-conscious travelers can now enjoy convenient nail care solutions that prioritize sustainability. Exploring eco-friendly travel kits not only reduces your carbon footprint, but also promotes a healthier planet. With a range of options available, you can maintain your nail care routine without compromising your values while on the go.

Sustainable Products

At the heart of eco-friendly travel kits are sustainable products, which are made using environmentally responsible ingredients and materials. These products often feature natural, organic formulations free from harmful chemicals, making them safe for both you and the environment. By choosing these sustainable products, you contribute to a greener planet while keeping your nails looking stunning.

Zero-Waste Kits

ZeroWaste kits offer an innovative approach to nail care by ensuring that every component is reusable, recyclable, or compostable. These kits allow you to maintain your nail routine without creating excess waste. Opting for zero-waste solutions not only benefits the environment but also encourages you to rethink the way you consume personal care products.

This commitment to zero-waste practices means that you can enjoy your nail care regimens without contributing to the growing problem of plastic waste. Many zero-waste kits include items like bamboo nail files, refillable polish bottles, and biodegradable wipes, making them a practical choice for eco-conscious travelers. With these options, you can easily travel while doing your part to protect the planet, ensuring that your beauty routine aligns with your values.

Tips for Packing Nail Care Kits

For an efficient nail care kit while traveling, consider the following tips to keep your vitals organized and accessible:

  • Utilize a compact travel case.
  • Prioritize multi-functional tools.
  • Keep liquids in travel-sized containers.
  • Use pouches to separate items.
  • Regularly declutter your kit.

Recognizing the importance of keeping your nails in top shape while on the go will enhance your travel experience.

Maximizing Space

Along with choosing the right size travel case, consider rolling or folding your tools to maximize space. You can also place soft items like cotton balls or wipes in between tools to prevent them from shifting during travel. This will not only save space but also ensure your items remain secure.

TSA Regulations

Careful attention to TSA regulations will streamline your airport experience. Always check the size and volume limits for liquids, as most airlines permit only 3.4 ounces (100 milliliters) or less in your carry-on. Additionally, certain nail tools may need to be checked in rather than carried on, especially sharp implements.

Plus, staying informed about updated TSA guidelines will help you avoid potential delays at security checkpoints. Make sure your items are easily accessible in your bag, as you might need to take them out for screening. Following these regulations can ensure that your travel plans go smoothly without any unexpected hiccups.

User Reviews and Recommendations

Despite the wide array of travel nail care kits available, user reviews can provide invaluable insight into which options truly stand out. Many customers appreciate kits that prioritize compactness without sacrificing quality, offering tools that are both durable and effective. Look for those praised for their ease of use, as these can enhance your on-the-go nail care experience. Recommendations often highlight kits that include necessary items like cuticle oils and buffers, ensuring you have everything you need to keep your nails looking their best, even when you’re away from home.

Best-Selling Kits

Against popular belief, not every travel nail kit is created equal, and the best-sellers tend to sell for a reason. These kits showcase an ideal balance of value and functionality, often featuring reliable brands that nail enthusiasts trust. They frequently come highly rated for their effectiveness and convenience, making them favored choices among frequent travelers or anyone looking to maintain healthy nails on the go.

Expert Picks

Any nail care connoisseur understands the importance of expert recommendations, particularly when it comes to travel kits. Experts often suggest versatile kits that offer a complete nail care solution without taking up too much space in your travel bag. These selections usually feature high-quality tools that cater to both maintenance and beautification, ensuring you leave no nail behind in your grooming routine.

With a careful selection process, experts narrow down their top picks based on quality, portability, and overall value. They often choose kits that include all the necessarys, such as a nail clipper, file, buffer, and a nourishing oil. By choosing expert-recommended travel kits, you’ll benefit from tried-and-tested products that keep your nails in top condition, no matter where your journey takes you. Their insights can empower you to make informed choices that enhance your nail care regimen on the move.

Final Thoughts on Travel Nail Care Kits

Now that you’re armed with the knowledge of the best travel nail care kits, you can make informed decisions to keep your nails looking fabulous while on the go. With a well-chosen kit in your bag, maintaining your nail health and style becomes effortless, no matter where your adventures take you. Prioritize quality and versatility in your selection, ensuring that you’ve got everything from nail clippers to polish removers at your fingertips. Enjoy every trip with confidence, knowing your nails will always shine.

FAQ

Q: What should I look for in a travel nail care kit?

A: When choosing a travel nail care kit, consider a few key features. First, ensure it is compact and lightweight for easy packing and portability. Look for high-quality tools, such as clippers, scissors, and buffers, made from durable materials that are rust-resistant. Also, check for included items like cuticle pushers, nail files, and polish remover, as these can help you maintain your nail health while on the go. Lastly, consider a kit with a secure case to keep everything organized and protected during travel.

Q: Are travel nail care kits suitable for professional use?

A: Yes, many travel nail care kits can be tailored for professional use, though it’s imperative to choose a high-quality kit designed for frequent use. Professional kits often include specialized tools that provide better results and durability. Make sure to select a kit that includes all necessary tools and meets hygiene standards to ensure safety and effectiveness during professional nail care services.

Q: Can I customize my travel nail care kit?

A: Absolutely! Customizing your travel nail care kit is an excellent way to tailor it to your specific needs and preferences. You can select specific tools that you find most useful, such as your favorite nail clippers or a preferred nail file. Additionally, you can include your favorite shades of nail polish, treatments, or other personal care items. Many brands also offer the option to build a bespoke kit, allowing you to curate the perfect set for your travels.

Skip to content