Just because you’re on a budget doesn’t mean you can’t achieve fabulous celebrity nail art! You can create stunning designs inspired by your favorite stars without breaking the bank. In this guide, you’ll discover tips and tricks for achieving high-end looks using affordable products available at your local beauty supply store. You can even check out How to do beautiful nail art without spending money … for more ideas. Get ready to elevate your nail game and channel your inner celebrity!
Key Takeaways:
- DIY Techniques: Learning simple at-home techniques can help you replicate celebrity nail art without the need for professional help.
- Affordable Tools: Invest in budget-friendly nail tools such as dotting tools and nail brushes to create intricate designs.
- Color Matching: Find cost-effective nail polish brands that offer similar shades to those seen on your favorite stars.
- Online Tutorials: Utilize free online resources and tutorials that guide you step-by-step in achieving celebrity-inspired looks.
- Creativity: Don’t hesitate to put your own twist on celebrity designs, as personal flair can often enhance the overall effect.
Understanding Celebrity Nail Art
Your fascination with celebrity nail art likely stems from its ability to make a strong statement. From red carpet glamour to casual chic, these intricate designs often reflect current trends and showcase the personalities of the stars. By understanding the artistry behind these creations, you can better replicate their stunning looks while staying on a budget.
Popular Trends and Styles
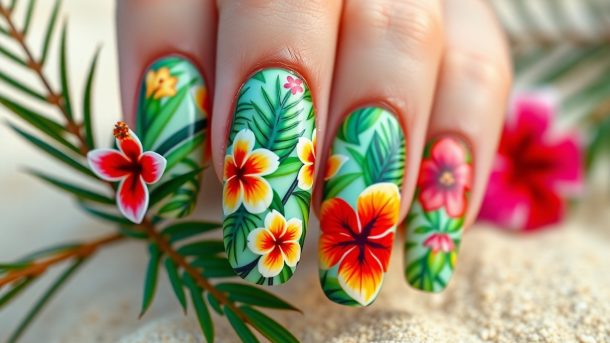
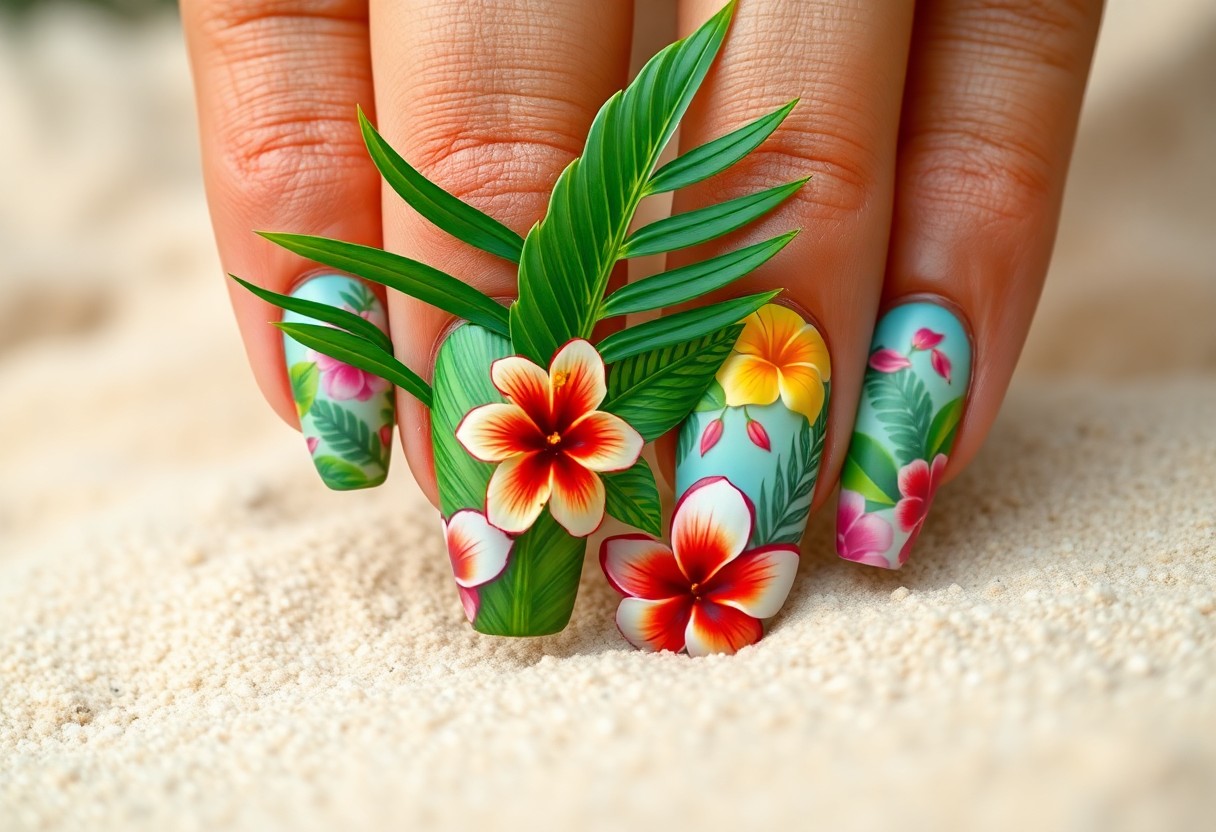
After exploring the world of celebrity nail art, you’ll notice that popular trends often feature bold colors, intricate patterns, and unique textures. Nail art has evolved to embrace everything from minimalist designs to elaborate 3D accents, allowing you to express your individual style while keeping up with the latest runway inspirations.
Tools and Products Used
The right tools and products are important for achieving that picture-perfect celebrity look at home. You’ll need quality nail polish, nail art brushes, dotting tools, and possibly nail decals to recreate intricate designs. Investing in good-quality base and topcoats will also ensure your creation lasts longer and looks professional.
Nail products come in various finishes and formulations, offering a plethora of options to suit your style. For example, gel polishes provide long-lasting wear, while lacquer polishes offer ease of application. Don’t forget to include nail art tools like striping tape and sponge applicators for gradient effects. By choosing budget-friendly alternatives, you can create salon-worthy designs without breaking the bank.

Budget-Friendly Alternatives
Assuming you want to achieve stunning nail art without breaking the bank, exploring budget-friendly alternatives can help you replicate your favorite celebrity styles. Many high-end products have drugstore counterparts that offer similar quality and effects for a fraction of the price. By doing a little research, you can find affordable options that allow you to express your personal style creatively while keeping your wallet intact.
Affordable Nail Products
BudgetFriendly nail products are widely available at local drugstores and online retailers. Look for brands offering vibrant colors and long-lasting formulas at a lower price point. You’ll find plenty of options for nail polish, top coats, and nail art supplies that still provide salon-quality results without the high costs. By selecting these economical alternatives, you can start building your nail art collection without overspending.
DIY Techniques for Nail Art
Below are some easy DIY techniques that can elevate your nail game without needing professional skills. Whether you’re interested in simple designs, ombre effects, or intricate patterns, you can create stunning looks using household items and basic tools. Techniques like using a toothpick for detailed designs or sponges for gradient effects can produce amazing results without requiring expensive equipment.
Nail art doesn’t have to be complicated or costly. With a little creativity and the right tools, you can replicate trendy designs right at home. Use items you already own, such as tape for clean lines or a bobby pin for dots. Experiment with different colors and techniques to find what suits your style best. With practice, you’ll master these DIY methods and impress everyone with your beautiful, polished nails.
Step-by-Step Replication Guide
Despite the intricacies involved in celebrity nail art, you can achieve stunning results at home by following a structured approach. Here’s a clear breakdown to help you with your nail art replication journey:
| Step | Description |
|---|---|
| 1 | Choose your design |
| 2 | Gather materials |
| 3 | Prepare your nails |
| 4 | Apply base coat |
| 5 | Execute your design |
| 6 | Seal with topcoat |
Choosing Your Design
On your journey to replicate celebrity nail art, selecting the right design is vital. Browse social media platforms or nail art blogs to find inspiration. Look for patterns that resonate with your personal style and are achievable within your skill level. Aim for designs that utilize colors you already have or can easily acquire to keep costs low.
Application Tips for a Flawless Finish
Guide your nail art process with a few strategic application tips to achieve a polished look. Make sure your nails are clean and dry before starting and consider these crucial tips:
- Use quality base and top coats for longevity
- Allow adequate drying time between layers
- Utilize nail tape or stencils for precision
Perceiving each step as an opportunity to enhance your technique ensures a smoother application.
Application Tips for a Flawless Finish
Tips can elevate your nail art from good to great. Prioritize preparation by pushing back cuticles and buffing the nail surface for a clean canvas. Here are more practices to consider:
- Apply thin layers of polish to prevent smudging
- Use a small brush for intricate designs
- Finish with a quick-dry top coat
Perceiving these techniques can significantly improve your overall nail art experience.
Special Techniques and Tricks
For achieving high-quality nail art on a budget, mastering special techniques and tricks can make all the difference. You can replicate intricate designs that celebrities flaunt, like ombre gradients or precise line work, by practicing different application methods and using low-cost tools. With some creativity and patience, you can elevate your nail art game significantly without breaking the bank.
Nail Art Tools You Can Make
For those who love DIY, creating your own nail art tools is an excellent way to save money while personalizing your nail designs. Simple items like old makeup brushes, toothpicks, and even sponges can help you achieve various effects, from dotting to swiping. Experimenting with these homemade tools adds a unique touch to your nail art process.
Using Household Items for Nail Art
One of the best ways to keep your nail art budget-friendly is by utilizing household items around you. Everyday items like cling wrap, straws, and tape can serve as stencils, sponges, or applicators, adding creative flair to your designs while saving you money on specialized tools.
And getting inventive with household items not only saves you cash but also allows you to explore new techniques. For example, using a straw can create perfect dots, while cling wrap can help achieve a marbled effect. Dive into your home supplies, and you’ll discover that the possibilities for stunning nail art are endless—all it takes is a little imagination and resourcefulness!
Maintaining Your Budget Nail Art
Once again, maintaining your budget nail art is key to keeping your nails looking fresh without overspending. Regular touch-ups are crucial, and you can master this by exploring 39 Easy Nail Designs Even Beginners Can Do at Home. With practice, you’ll save money while showcasing your unique style.
Tips for Longevity
At home, you can ensure your nail art lasts longer with a few simple steps:
- Apply a quality base coat before color.
- Seal your designs with a top coat every few days.
- Avoid exposing your nails to excessive water.
Perceiving these practices will significantly extend the life of your nail art.
Upkeep Without Breaking the Bank
With a little creativity and resourcefulness, you can maintain beautiful nails without overspending. Look for affordable alternatives, such as using drugstore nail polish or DIY nail art tools, which can help you achieve salon-quality results at home.
The art of budgeting while caring for your nails involves using what you already have and being smart about your purchases. Opting for multi-use products, like a good quality clear polish that doubles as a top coat, can save you money in the long run. Keep an eye out for sales and discounts on nail products, and consider hosting a nail art night with friends to share supplies and techniques. This way, you can keep your nails fabulous without draining your wallet.
Inspiration from Celebrities
All around us, celebrities set trends that inspire us to experiment with nail art. From red carpet events to casual outings, stars showcase creativity that resonates with their fans. Tapping into these styles allows you to channel your inner glam without having to break the bank. Get inspired by their unique aesthetics to transform your nails into a stunning canvas worthy of any VIP event!
Iconic Celebrity Nail Looks
Beside the usual fashion statements, many celebrities have made a lasting impact with their memorable nail designs. Whether it’s a bold color choice or intricate patterns, these iconic looks often become the talk of the town. By analyzing their styles, you can recreate similar looks tailored to your preferences, ensuring your nails become a standout feature of your overall look.
How to Customize Celebrity Styles
Across various social media platforms, you can find inspiration from celebrity nail art that you can adapt for your own style. Customizing these looks is all about experimenting with colors and designs that reflect your personality while incorporating elements of the original style.
The beauty of customizing celebrity styles lies in your ability to infuse personal touches into their iconic designs. Think about using your favorite colors or adding embellishments that resonate with your aesthetic. For instance, if a celebrity rocked a metallic gold design, you could swap it with a shimmering silver or add some glitter for a unique twist. By blending their inspiration with your creativity, you can achieve stunning nail art that feels authentically yours.

Conclusion
Ultimately, replicating celebrity nail art on a budget is entirely possible with a bit of creativity and some smart shopping. By sourcing affordable nail products, utilizing online tutorials, and experimenting with your techniques, you can achieve stunning looks without overspending. Embrace your inner artist and personalize designs to make them uniquely yours, and you’ll not only save money but also enjoy the satisfaction of showcasing your own nail masterpieces.
FAQ
Q: How can I replicate celebrity nail art without spending a fortune?
A: Replicating celebrity nail art on a budget can be both fun and satisfying. Start by researching the specific design you want to replicate through social media platforms like Instagram or Pinterest. Gather inspiration and identify the key elements of the design. Use affordable nail polish brands or designs from drugstores that closely match the celebrity’s choices. Consider using nail tools like striping brushes or sponges to achieve intricate designs without the need for professional tools. Practice at home and don’t hesitate to use nail stickers or decals for added flair, which can also save you time and money.
Q: Where can I find tutorials for celebrity nail art designs?
A: There are numerous resources available to help you find tutorials for celebrity nail art designs. YouTube is one of the best platforms, with countless beauty influencers demonstrating how to achieve specific looks step-by-step. Instagram and TikTok also feature short, engaging tutorials that showcase trendy nail art. Many blogs dedicated to beauty and nail care offer in-depth guides with images and tips. Just search for the celebrity’s name along with “nail art tutorial,” and you’ll find a wealth of information to guide your replicating efforts.
Q: What tools and products do I need for creating celebrity-inspired nail art at home?
A: To create celebrity-inspired nail art on a budget, you’ll need a few crucial tools and products. Start with a good base coat and top coat to ensure your nail art lasts longer. Invest in a few quality nail polishes in trendy colors or finishes that match those seen on celebrities. Additionally, gather basic nail art tools such as dotting tools, nail art brushes, and sponges. Nail tape can also be handy for creating clean lines. For added convenience, consider purchasing nail stickers, gems, or decals that can elevate your designs without requiring advanced skills. These basic supplies will help you create stunning nail art without breaking the bank.