nailart

Birthday-Themed Nail Art Designs You’ll Love

Designs that celebrate your special day can add a fun and personal flair to any birthday celebration. Whether you prefer intricate patterns, vibrant colors, or playful accents, there are endless possibilities to express your celebratory spirit through your nails. To spark your creativity, check out these exciting nail art inspirations, including 9 Birthday Nail Ideas To Celebrate Your Special Day. You’ll find perfect styles to make your birthday even more delightful!

Key Takeaways:

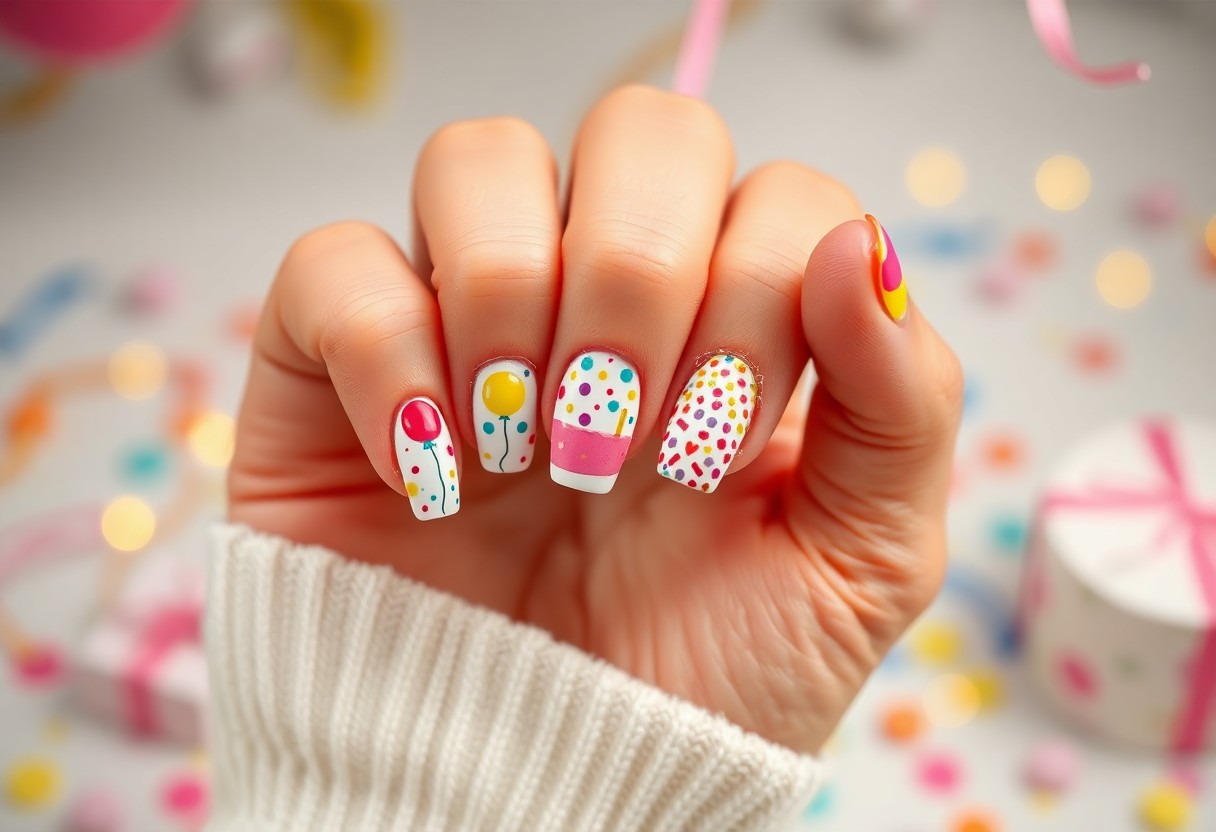
  • Creative Designs: Explore a variety of artistic nail designs that incorporate birthday themes such as cakes, balloons, and confetti.
  • Colorful Choices: Embrace vibrant colors that reflect the celebratory spirit of birthdays, featuring pastels or bold hues to match any party theme.
  • Personalization: Customize your nail art with unique elements like your birthstone or age to make the designs distinctly yours.

Trending Birthday Nail Art Designs

To celebrate your special day in style, staying updated with trending birthday nail art designs is crucial. These designs not only add a festive touch to your look but also reflect your personality and interests. Whether you opt for vibrant colors or intricate patterns, the latest trends will inspire you to showcase your birthday spirit and creativity on your fingertips.

Glitter and Glam

Among the most popular choices for birthday nail art are glitter and glam designs. Sparkling nail polishes, shimmering accents, and eye-catching embellishments can elevate any manicure, making it perfect for your celebration. Whether you prefer an all-over glitter finish or strategically placed sparkles, this style allows you to express your fun side while ensuring your nails are party-ready.

Cute Characters and Themes

About incorporating cute characters and themes, these designs offer a playful twist to traditional birthday nail art. By featuring your favorite cartoon characters, festive motifs, or whimsical patterns, you can infuse your personality into your nail art. This approach is particularly popular for those celebrating with a specific theme, making your manicure a delightful conversation starter at any birthday gathering.

This trend has gained immense popularity as it allows you to connect your nail art with your birthday theme or personal interests. From delightful cupcakes to adorable animals, these designs bring joy to your fingertips. Plus, incorporating characters that resonate with your age or hobbies can make your birthday celebration even more special. You can explore various nail art techniques, ensuring your chosen characters are beautifully represented in color and detail.

DIY Birthday Nail Art Techniques

You can create delightful birthday-themed nail art from the comfort of your home. With just a little creativity and practice, your nails can become a canvas for celebratory designs, featuring colorful cakes, balloons, and party hats. Whether you’re planning for a birthday party or just want to treat yourself, these DIY techniques will ensure your nails stand out and make a statement on your special day.

Essential Tools and Supplies

Any successful nail art project begins with the right tools. Gather your important supplies, including a base coat, various nail polish colors, a top coat, nail art brushes, dotting tools, and adhesive stickers for easy designs. A good quality remover and cotton pads are also helpful for correcting any mistakes.

Step-by-Step Guide for Beginners

Above all, getting started with nail art is simple and fun! Below is a detailed guide to help you create stunning birthday nail designs. Follow these easy steps and watch your nails transform into an incredible reflection of your birthday spirit.

Step-by-Step Process

1. Start by applying a base coat on your nails.
2. Choose your base color and apply two coats.
3. Use a fine brush or dotting tool to create fun birthday designs, like balloons and cakes.
4. Allow designs to dry, then seal with a top coat for durability.

Supplies for each design can vary based on your creativity, but this step-by-step guide accommodates your imagination. Experiment with different colors and patterns, and don’t hesitate to mix techniques. You can use stickers or stencils for additional flair or incorporate glitter for a festive touch. Personalizing your design will ensure your birthday nails are as unique as you are!

Professional Birthday Nail Art Ideas

Many people love to celebrate their special day with stunning nail art that complements their birthday theme. Professional nail artists offer a variety of techniques and styles that can elevate your birthday look, whether you’re hosting a party or attending one. Opting for professional nail art ensures that you receive high-quality designs that last, making your nails a true reflection of your celebration.

Salon-Approved Styles

Below are some salon-approved styles that can take your birthday nail art to the next level. From elegant and subtle designs to vibrant and playful patterns, your choices are endless. Consider getting intricate details like confetti, glitter, or even nail art stickers that embody the spirit of your special day while making a statement.

Customizable Options

Options for customizable nail art are plentiful, allowing you to truly reflect your personal style. Many salons provide a wide selection of colors, patterns, and finishes that you can mix and match according to your preference. You can choose designs that represent your favorite things, from your birthstone to memorable symbols that relate to your birthday.

Considering the variety of customizable options available, you can collaborate with your nail artist to create a unique design that represents your personality and celebrates your birthday theme. This can include incorporating your favorite shades, adding special elements like star shapes or balloons, and even integrating nail charms that resonate with your birthday vibes. The result will be a gorgeous nail design that feels personal and meaningful just for you.

Seasonal Inspirations for Birthday Nail Art

All year round, your birthday can be a wonderful excuse to express yourself through nail art inspired by the season. Each season offers unique colors, patterns, and themes that can elevate your birthday celebrations, ensuring your nails are as festive as your spirit. Whether you prefer soft pastels or vibrant hues, let the beauty of the season guide your nail art choices for a celebration that reflects your personal style.

Summer Celebrations

About summer birthdays, the bright, sunny vibe can shine through your nail art. You can opt for tropical designs with palm trees and flamingos, or incorporate bright colors like yellows, corals, and ocean blues. Consider fun nail decals or even simple stripes reminiscent of beach umbrellas, making your nails perfect for outdoor gatherings and summer parties.

Winter Wonderland

Beside summer, winter brings a contrasting yet equally enchanting palette to your birthday nail art. Think cool shades of blue, white, and metallics that mimic the glistening snow and winter nights. Cozy motifs like snowflakes, icicles, and holiday cheer can all be incorporated into your designs, blending the warmth of celebrating with the beauty of winter.

Birthday nail art inspired by winter can be truly magical. You can experiment with intricate snowflake designs or a shimmering frost effect on your nails. Adding a touch of glitter can create a festive vibe, perfect for holiday parties or winter gatherings. Don’t shy away from combining textures, like matte polishes with glossy accents, to achieve a sophisticated look that showcases the beauty of the season while celebrating your special day.

Color Palettes for Birthday Nail Art

After selecting your favorite design, consider the perfect color palette to complement your birthday nail art. Vibrant hues can add excitement, while softer tones can convey elegance. Mixing and matching colors will not only highlight your creativity but also express your unique personality for this special occasion. Choose your colors wisely to ensure your nails stand out and match the festive spirit of your birthday celebration.

Pastels and Brights

For a playful and cheerful look, combine pastel shades with bright colors. Think soft pinks, light blues, and mint greens contrasted with bold yellows, lively oranges, or vivid purples. This palette not only embodies the fun of birthday festivities but also allows for versatility. You can create ombre effects, intricate patterns, or even simple, dotty designs to make your nails pop without overwhelming your overall look.

Classic and Sophisticated Combinations

Sophisticated color choices can elevate your birthday nail art, offering an elegant twist to your celebration. Pair classic shades like deep red, royal blue, or rich burgundy with neutral tones such as beige, nude, or white for a timeless look. These combinations not only exude refinement but also provide a chic backdrop for intricate designs or embellishments, like gold or silver accents, ensuring your nails are perfectly polished for your special day.

The beauty of classic and sophisticated combinations lies in their versatility and elegance. By selecting rich colors along with understated neutrals, you can create stunning nail art that seamlessly transitions from day to night. Adding metallic details or subtle glitter can also enhance your design, making your nails an eye-catching feature of your birthday look. You’ll feel both glamorous and confident, perfectly suited for celebrating your special occasion.

Tips for Maintaining Birthday Nail Art

Keep your birthday nail art looking fresh and fabulous with these necessary tips:

  • Avoid exposure to water for long periods, especially during the first 48 hours.
  • Apply a clear topcoat weekly to maintain shine and prevent chips.
  • Moisturize your cuticles regularly to keep them healthy.
  • Use gloves while doing household chores to protect your nails.

Thou shall elevate your celebration with these care tips, and for more inspiration, check out 27 Birthday Manicure Ideas That Call For a Celebration.

Prolonging the Design

By taking some preventive steps, you can ensure your stunning birthday nails last as long as possible. Regular touch-ups or having a nail technician reinforce your design can prolong the beauty. Additionally, be cautious about activities that might chip or fade the art, such as excessive typing or rough handling of objects.

Nail Care Essentials

Before you investigate nail art, it’s vital to focus on nail care to ensure a smooth canvas for your designs. This includes keeping your nails well-trimmed and properly shaped. Maintaining healthy nails will give your birthday manicure a flawless look and help it last longer.

In fact, incorporating nail care into your routine can enhance the overall appearance of your birthday-themed nails. Regularly using nourishing oils and hydrating creams not only strengthens your nails but also improves how the nail art adheres to your surface. This way, your nails will remain vibrant and eye-catching throughout the festivities.

To wrap up

Ultimately, you can elevate your birthday celebrations with stunning nail art designs that reflect your personality and joy. From vibrant cupcakes to elegant balloons, there are endless creative possibilities to make your nails a true celebration. For inspiration, consider exploring this DIY Freehand Nail Art – Birthday Cake idea that can bring a festive touch to your look. With these designs, your nails will undoubtedly become a highlight of your special day!

FAQ

Q: What are some popular birthday-themed nail art designs I can try?

A: There are numerous birthday-themed nail art designs that you can explore. Some of the favorites include cupcake motifs, balloon patterns, and confetti designs. You might also consider colorful gradients that resemble a celebratory cake or adding sparkles and glitter to mimic party decorations. For a playful touch, nail stickers featuring birthday candles or gifts can enhance the festive look. Personalizing your nails with the birthday person’s favorite colors or symbols can make your designs even more special.

Q: How can I create a birthday-themed nail look at home?

A: To create a birthday-themed nail look at home, start by prepping your nails with a clean and tidy manicure. Choose a base color that matches the birthday theme, like bright pink or vibrant blue, and apply two coats for a solid foundation. Next, you can use nail art brushes or dotting tools to create designs like balloons, presents, or even a birthday cake. Nail stickers and stamping plates can simplify the process, providing fun and detailed images easily. Lastly, seal your designs with a clear topcoat for added shine and longevity.

Q: Are there any specific nail polish brands recommended for birthday nail art?

A: As far as nail polish for birthday-themed nail art, brands that offer a wide range of colors and finishes are ideal. Essie, OPI, and Sally Hansen are popular choices as they provide vibrant shades and quality formulas. For glitter and specialty polishes, brands like China Glaze and Zoya also have fantastic options. Additionally, look for fast-drying and long-lasting topcoats to ensure your festive nail designs remain intact throughout the celebration. Ultimately, the best choice is a brand that matches your preferred style and application ease.

How to Price Your Services as a Nail Artist

Pricing your services as a nail artist can be a daunting task, but with the right approach, you can effectively value your skills and creativity. You need to consider factors like your experience, the quality of products you use, and local market rates to set competitive and fair prices. In this blog post, you’ll discover imperative strategies that will help you determine how to price your services effectively, ensuring that you attract clients while also rewarding your expertise.

Key Takeaways:

  • Evaluate Costs: Calculate all expenses, including materials, tools, and overhead, to determine a minimum price point.
  • Market Research: Analyze competitors’ pricing in your area to understand the going rates for similar services.
  • Skill Level: Consider your experience and expertise; more skilled artists can justify higher prices.
  • Service Offerings: Differentiate your services by specialty, such as nail art or organic products, to attract various client segments.
  • Client Perception: Set prices that reflect the value and quality of your services to foster a positive client perception and loyalty.

Understanding the Nail Art Industry

The nail art industry is a vibrant and ever-evolving sector that combines creativity with skilled craftsmanship. As you navigate pricing your services, it’s important to stay informed about industry standards and practices. A helpful resource can be found in this article on How to charge and make a profit from your nail art services.

Market Trends

The nail art industry is influenced by seasonal trends, popular designs, and emerging technologies. Staying updated with these trends will help you tailor your services to meet customer demands and enhance your appeal.

Competitor Pricing

Some nail artists may struggle to set their prices appropriately due to unclear competitor options. It’s beneficial to conduct market research to determine what similar services in your area charge. By analyzing competitor pricing, you can find a comfortable range that reflects your skills while remaining accessible to potential clients.

This approach not only helps you position yourself effectively within the market but also enables you to adjust your pricing strategy as needed. Pay attention to various factors such as location, design complexity, and clientele preferences; these will assist you in crafting a competitive yet profitable pricing scheme.

Key Factors Influencing Pricing

If you’re looking to effectively price your services as a nail artist, several key factors come into play:

  • Location and market demand
  • Service type and duration
  • Your skill level and experience
  • Materials and overhead costs

Knowing how these factors affect your pricing can help you create a strategy that aligns with your business goals. For more insights, check out How to Calculate Your Nail Service Costs.

Skill Level and Experience

There’s a direct relationship between your skill level and pricing. As you gain more experience and expertise, you can justify higher rates. Clients often perceive seasoned artists as more reliable and talented, allowing you to reflect this value in your pricing.

Service Complexity

With every service you provide, complexity can greatly affect how you price your offerings. More intricate nail designs, special techniques, and longer application times require not only skill but also additional resources. You need to consider these elements when determining your price.

To ensure your pricing reflects the complexity of the services you offer, take into account how long each design takes, the artistry required, and any specialized products or tools you might use. It’s vital to balance attracting clients with appropriately compensating yourself for your expertise and the intricacy of your work.

How to Calculate Your Costs

After considering your skills and the market, you need to calculate your costs to set a fair price for your services. This involves breaking down your expenses into manageable categories, allowing you to understand how much you need to charge to stay profitable. Knowing your costs will help you avoid undervaluing your work and ensure your business thrives.

Material Costs

For a nail artist, material costs encompass all supplies needed for your services, including nail polish, gels, tools, and additives. Tracking these expenses accurately can help you determine the cost per service and prevent unexpected losses.

Overhead and Labor

Some of your costs will also include overhead expenses, such as rent, utilities, and equipment maintenance, alongside your labor costs if you’re employing others. These factors contribute to the overall pricing strategy that ensures sustainability in your business.

Material and labor costs can rapidly accumulate, making it crucial to evaluate these regularly. Your overhead includes not only physical space but also utilities and any subscriptions that might help your business, like software for managing appointments. Factor in your time as well, including preparation and clean-up, to present a comprehensive pricing model that reflects true value.

Setting Your Pricing Strategy

Unlike many other professions, pricing your services as a nail artist requires careful consideration of various factors. You should take into account your overhead costs, skill level, and local market trends. Utilize tools like this Nail Tech Prices: How Much to Charge for Services at Your … guide to analyze your cost structure and position yourself effectively within your market.

Competitive Pricing

Pricing your services competitively means researching what other nail artists in your area charge for similar services. By analyzing competitors, you can better understand the market rate and adjust your prices to stay attractive to potential clients. This strategy allows you to balance affordability with the quality of services you provide.

Value-Based Pricing

For value-based pricing, you focus on the perceived value of your services rather than just the cost. This means understanding what your clients find important and how your unique offerings meet their needs. By effectively communicating the quality and benefits of your services, you can justify higher prices.

Pricing based on value requires clarity about what sets you apart. If your work involves high-quality materials or exceptional techniques, ensure your clients are aware of these distinctions. Your pricing strategy should reflect the overall experience and satisfaction clients gain from your services, making them more likely to invest in what you offer.

Tips for Communicating Your Pricing

Now that you have established your pricing structure, it’s crucial to communicate it effectively. Clear communication helps to set expectations and build trust with your clients. Here are some tips to consider:

  • Always provide a detailed breakdown of your pricing.
  • Be consistent in how you present your pricing across platforms.
  • Address any questions or concerns about pricing proactively.
  • Use simple language that anyone can understand.

Any ambiguity can lead to misunderstandings, so clarity is vital.

Transparency with Clients

Your approach to transparency can significantly impact your client relationships. Sharing detailed information about your pricing structure and any potential additional costs helps clients feel informed and valued. Whether you’re discussing the price of basic services or add-ons, being upfront about all charges fosters trust and encourages repeat business.

Making the Value Clear

One effective strategy for justifying your prices is by making the value of your services clear to clients. Highlight the unique aspects of your skills and artistry that set you apart from competing nail artists.

With detailed descriptions of the time, expertise, and quality materials involved in your services, clients gain a better understanding of what they are paying for. Showcasing your portfolio, sharing client testimonials, and explaining the benefits of using high-quality products can further reinforce the value of your work. This approach not only helps justify your pricing but can also enhance client satisfaction and loyalty.

Adjusting Your Prices Over Time

Your journey as a nail artist requires flexibility in pricing. As you gain experience and refine your skills, it’s crucial to adjust your rates accordingly. This ensures that your prices reflect your expertise, the quality of your work, and the demand for your services, allowing you to thrive in an evolving market.

When to Raise Your Rates

There’s no set time for raising your rates, but consider doing so when you’ve enhanced your skills, increased your client base, or invested in new tools and techniques. Additionally, if your local market trends upward, adjusting your pricing may be warranted to remain competitive.

How to Implement Changes

Even small changes to your pricing structure can have a big impact on your business. It’s important to communicate any price adjustments clearly to your clients to maintain transparency and trust. Providing advance notice before implementing new rates allows clients to adjust their expectations.

Your communication should express the reasons behind the adjustments, such as the improved quality of service or increased demand for appointments. Offering loyalty discounts or package deals can also ease the transition for your clients. Always ensure that the changes align with your brand and the value you’re providing, fostering a positive response to your new pricing strategy.

Final Words

So, as you navigate the process of pricing your services as a nail artist, consider factors such as your skill level, market trends, and the specific demands of your clientele. By calculating your costs accurately and researching what others in your area charge, you can establish a pricing structure that reflects the quality and uniqueness of your work. Don’t hesitate to revisit and adjust your prices as you gain experience and expand your offerings. This strategic approach will help you build a successful and sustainable business in the competitive nail art industry.

Q: How do I determine the base price for my nail services?

A: To determine the base price for your nail services, start by calculating your costs. Consider costs such as supplies (polish, tools, etc.), overhead (rent, utilities), and labor (your time). Research what other local nail artists charge to get a market benchmark. Factor in your level of skill and experience. For new artists, consider starting at a lower price to attract clientele, then gradually adjust as your reputation and demand grow. Keep a balance between affordability and value to ensure long-term profitability.

Q: Should I charge more for special designs or nail art?

A: Yes, it’s advisable to charge more for special designs or intricate nail art. These services typically require more time, skill, and materials compared to standard manicures. Establishing a pricing structure for different levels of nail art can help clients understand the value of your work. Consider creating tiered pricing based on design complexity, which can appeal to a range of budgets while ensuring you are compensated appropriately for your expertise and effort.

Q: How often should I reevaluate my pricing strategy?

A: It’s important to periodically reevaluate your pricing strategy to ensure it aligns with market changes, your growing experience, and evolving business expenses. A good practice is to assess your prices every 6 to 12 months or after significant changes in your service offerings or costs. Additionally, monitor customer feedback and sales trends to decide if adjustments are necessary. Keeping an eye on competitors’ pricing can also provide insights and help you stay competitive in the market.

7-Day Nail Art Challenge – A Design for Each Day

There’s an exciting opportunity awaiting you in the world of nail art! Join the 7-Day Nail Art Challenge, where each day offers a unique design to unleash your creativity and enhance your skills. This blog post will guide you through seven distinct themes that cater to various styles, ensuring that your nails will be a canvas for self-expression. Whether you’re a novice or an experienced nail artist, this challenge is perfect for elevating your nail game and inspiring your personal aesthetic. Get ready to dazzle with your daily nail creations!

Key Takeaways:

  • Day-by-day themes: Each day features a unique design prompt that encourages creativity and exploration of different styles.
  • Accessibility: The challenge is designed for all skill levels, making it easy for beginners and experienced nail artists to participate.
  • Community engagement: Participants can share their creations on social media, fostering a sense of community and inspiration among nail art enthusiasts.
  • Variety of techniques: The challenge promotes the use of various nail art techniques like painting, stamping, and embellishing.
  • Inspiration source: This challenge serves as a great way to spark creativity and push the boundaries of traditional nail art.

Day 1: Classic French Tips

The classic French tips are a timeless design that never goes out of style. They are perfect for any occasion, adding a touch of elegance to your look. To achieve this chic and clean aesthetic, follow these simple steps:

  • Start with a neutral base coat.
  • Choose a white polish for the tips.
  • Use tape or guides to ensure crisp lines.
  • Finish with a glossy top coat for shine.

Any nail art enthusiast can appreciate the versatility of French tips, making it an ideal starting point for your 7-day challenge!

Day 2: Floral Patterns

While you might think floral patterns are only for spring, they can actually add a vibrant touch to your nails year-round. To create stunning floral nail art, start with a solid base coat in a color of your choice. Once dry, use a fine detail brush or a dotting tool to paint your flowers, selecting complementary colors to make them pop. Layering different flower sizes and shapes creates depth and interest. Don’t forget to seal your design with a top coat for durability. Embrace your creative side, and let your nails blossom with beautiful floral art!

Day 3: Geometric Designs

Now, immerse yourself in the world of geometric designs for Day 3 of your nail art challenge. This style offers a perfect blend of modernity and sophistication, allowing you to express your creativity while keeping a polished look. Start by choosing a color palette that speaks to you; bold contrasts can make shapes pop, while pastels can offer a softer feel. Use tape or stencils to achieve precise lines and angles, ensuring that each shape is uniform and eye-catching. Experiment with triangles, squares, and lines to elevate your nail game and showcase your artistic flair.

Day 4: Ombre Effects

If you’re looking to create a stunning and trendy nail design today, try your hand at the ombre effect. This technique involves blending two or more colors seamlessly from one to another, resulting in a beautiful gradient that can elevate your manicure. To achieve this look, select your preferred shades, apply a base coat, and use a makeup sponge to dab the colors onto your nails for a soft transition. Seal your design with a top coat to enhance shine and longevity. Your nails will not only look fashionable but also give off an effortlessly chic vibe!

Day 5: Artistic Abstracts

Any artist knows that abstract designs can express a myriad of emotions and styles, making them a perfect choice for your nail art today. You can create a stunning abstract look by combining bold colors, geometric shapes, and unique brush strokes. Use a dotting tool or a fine brush to layer on different hues, allowing each color to interact organically with the others. This technique not only showcases your creativity but also gives your nails an effortlessly chic appearance. Experiment with different patterns and color combinations that reflect your personal style and mood!

Day 6: Seasonal Themes

One of the most exciting aspects of nail art is the ability to reflect the changing seasons on your fingertips. For Day 6 of your challenge, consider incorporating elements that symbolize the current season; such as vibrant flowers for spring, sandy beaches for summer, warm hues and leaves for autumn, or icy blues and whites for winter. This not only enhances your creativity but also connects your art to the world around you. If you’re seeking inspiration for these designs, check out this 100 Days of Nail Art – Nail Art Challenge, where you’ll find a wealth of ideas.

Day 7: Glitter and Glam

Unlike the previous days, today is all about adding some sparkle to your nails. You can unleash your creativity by combining different types of glitter, whether it’s fine, chunky, or holographic, to create a dazzling effect. Start with a solid base color, and then apply your glitter as an accent on one or two nails for a chic finish. If you’re looking for more inspiration, check out this 7 days nail challenge playlist that showcases stunning designs to help you on your glittery journey!

Final Words

As a reminder, the 7-Day Nail Art Challenge is a fantastic way for you to explore your creativity and improve your nail art skills. Each day’s design offers an opportunity to experiment with different techniques and styles, helping you to expand your repertoire. By participating in this challenge, you’ll not only have fun but also gain confidence in your nail artistry. So gather your supplies, unleash your imagination, and enjoy the journey of creating stunning nail designs each day!

Q: What is the 7-Day Nail Art Challenge?

A: The 7-Day Nail Art Challenge is a fun and creative activity designed for nail art enthusiasts of all skill levels. Each day focuses on a different theme or nail design, allowing participants to explore various techniques and styles. The challenge encourages individuals to express their creativity, experiment with new materials, and improve their nail art skills over the course of a week. Participants can share their designs on social media and connect with others taking part in the challenge.

Q: What materials do I need to participate in the challenge?

A: To successfully complete the 7-Day Nail Art Challenge, you will need a basic set of nail art supplies, which may include nail polish in various colors, nail art brushes, dotting tools, striping tape, and a top coat for finishing. Additionally, you might want to have nail stickers, gems, or rhinestones for added decoration. Although the specific requirements may vary depending on the daily themes, having a good assortment of tools will enhance your creative possibilities and help you achieve different effects.

Q: Can beginners join the 7-Day Nail Art Challenge?

A: Absolutely! The 7-Day Nail Art Challenge is designed to be inclusive, making it accessible for both beginners and experienced nail artists. Each day’s design can be adapted to suit your skill level; beginners can start with simpler designs and gradually progress to more intricate techniques as they gain confidence. The challenge is a wonderful opportunity for learning and sharing tips with others, so don’t hesitate to join in and enjoy the creative process!

Testing Viral Nail Art Hacks from Social Media

You might have stumbled across some impressive nail art hacks on social media and wondered if they really work. In this post, we’ll investigate the most popular viral nail art techniques, evaluating their effectiveness and guiding you through the steps. From quick designs to intricate patterns, you’ll discover whether these trends can elevate your nail game. Get inspired by Creative Nail Art Techniques Using Tape Hacks and explore how they compare with traditional methods.

Key Takeaways:

  • Effectiveness: Not all viral nail art hacks yield the desired results; some may be more trouble than they’re worth.
  • Quality of Materials: The products used can greatly affect the outcome of the hacks, making high-quality supplies necessary.
  • Technique Mastery: Many hacks require practice to master and may not be beginner-friendly.
  • Innovation vs. Tradition: While some hacks offer creative solutions, classic methods often remain dependable for achieving neat and long-lasting designs.
  • Social Media Influence: The popularity of a hack doesn’t guarantee efficiency; critical evaluation is important before trying new trends.

Overview of Viral Nail Art Hacks

A wide array of viral nail art hacks have emerged on social media, capturing the attention of nail enthusiasts everywhere. These hacks promise to simplify the nail art process, often utilizing household items or unconventional techniques. As you investigate into this world, you’ll discover how these hacks range from quick DIY methods to elaborate designs that mimic professional results, giving you plenty of inspiration for your next manicure.

Popular Trends in Nail Art

Trends in nail art often evolve rapidly, influenced by seasonal colors, cultural phenomena, and creative experimentation. You might find yourself drawn to the latest designs, whether it’s minimalistic lines, abstract shapes, or vibrant color-blocking. By exploring trending nail art styles, you can keep your nail game fresh and exciting, ensuring that your manicures always reflect current fashion and aesthetics.

Social Media Influences

With the rise of platforms like Instagram and TikTok, social media plays a significant role in shaping nail art trends and techniques. These platforms have made it easier for you to discover innovative hacks and tutorials, often shared by talented influencers and nail technicians eager to showcase their work. You can quickly find step-by-step guides and inspiration that help you stay on top of the latest styles.

To fully appreciate the impact of social media on nail art, consider how tutorial videos and striking images can motivate you to try new techniques or revive old favorites. Influencers often share their tricks, transforming ordinary nails into intricate works of art. By following these creators, you can learn valuable skills and gain insights into the trends that are currently captivating the nail art community, making it easier for you to experiment and express your personal style.

Methodology for Testing Hacks

Assuming you want to explore the world of nail art hacks, we followed a structured approach to meticulously evaluate each technique. This involved systematic testing, documentation of results, and a final analysis of effectiveness, helping you decipher which hacks truly deserve a place in your nail art routine.

Selection Criteria for Hacks

Around 30 popular nail art hacks were chosen based on their visibility and engagement on various social media platforms. We focused on those that garnered significant interest, likes, and shares, ensuring you get the most talked-about techniques that have piqued people’s curiosity.

Tools and Materials Used

An array of commonly used nail art tools and materials were assembled for this testing phase. These included nail polishes, brushes, sponges, striping tape, and common household items that promised to enhance your nail art experience.

Due to the diversity of hacks, we prioritized a blend of both professional and easily accessible tools. This selection ensures that you can replicate the experiments with materials found in most homes, making these hacks not only practical but also approachable for your nail art adventures.

Results of Testing Nail Art Hacks

Despite the popularity of viral nail art hacks, the results can vary significantly. You may find that some techniques yield beautiful results while others lead to a frustrating mess. This experimentation not only showcases the potential of creative ideas but also highlights the importance of trial and error in achieving those perfect nails.

Successful Hacks

To your delight, several nail art hacks proved to be effective and easy to replicate. Techniques such as using a sponge for ombre effects or employing adhesive tape for clean designs yielded satisfying and professional-looking results. You can add these hacks to your nail art repertoire confidently.

Unsuccessful Hacks

An unfortunate outcome of this testing revealed that some popular hacks simply did not work as intended. Items like peel-off nail polish or certain unconventional tools fell flat when put to the test.

Indeed, you might find plenty of promise in the ideas showcased on social media, yet the reality can be a bit disappointing. Tools that seemed to cause more trouble than they’re worth, such as using household items that weren’t well-suited for nail art, led to smudged results or uneven applications. It’s important to evaluate the practicality of each hack before diving in, ensuring you can achieve the nail art you envision without unnecessary complications.

Analysis of Effectiveness

Unlike many beauty trends that fizzle out quickly, the viral nail art hacks you encounter on social media often promise impressive results. However, it’s vital to evaluate their effectiveness based on personal experience and the quality of materials used. Testing these hacks can lead to surprising discoveries about what truly works for your nail art needs, offering insights into which methods deserve your attention and which may not live up to their expectations.

Visual Appeal

Among the countless nail art hacks circulating online, visual appeal is often the first factor that draws you in. Many of these techniques boast stunning aesthetics that can transform a simple manicure into a masterpiece. When assessing visual appeal, consider if the finished look aligns with your personal style and if it’s something you would be proud to showcase.

Longevity and Durability

Durability is a key aspect to consider when testing nail art hacks. The best nail art not only looks fantastic but also stands the test of time. You want to ensure that your creations can withstand daily wear and tear without chipping or fading quickly.

At the heart of longevity lies the choice of products and application technique. High-quality nail polishes and topcoats can significantly enhance the lifespan of your designs. When applying these hacks, pay attention to drying times and layering techniques to maximize durability. Experimenting with various combinations will help you discover which methods yield longer-lasting results for your nail art projects.

Expert Opinions on Viral Nail Hacks

Your fascination with viral nail art hacks can lead to exciting outcomes, but it’s important to consider expert opinions. Nail technicians often weigh in on the feasibility and safety of these trending techniques. By consulting professionals, you can gain a clearer understanding of which hacks are worth trying and which might compromise the health of your nails.

Insights from Nail Technicians

Viral nail art hacks can be enticing, but nail technicians often caution against blindly following every trend. Many hacks oversimplify the process, leading to disappointing results. Technicians emphasize the significance of proper technique and the use of quality products, ensuring that your nails remain healthy while achieving that Instagram-worthy look.

Industry Standards vs. DIY Trends

At the heart of the nail art world, there’s often a stark contrast between industry standards and DIY trends. While social media offers creative inspiration, the techniques showcased might not align with professional practices. Many hacks disregard important safety measures or fail to utilize high-quality materials that are critical for long-lasting results.

Hacks popularized on social media can sometimes lead you to shortcuts that compromise the integrity of your nails. Professional techniques are built on years of training and knowledge about products and tools. Adhering to these standards not only guarantees a polished result but also protects your nails from damage. Balancing the fun of experimenting with viral trends while being mindful of expert guidance will help you achieve beautiful nails without sacrificing their health.

Tips for Successful Nail Art

Many nail art enthusiasts find that a few simple tips can elevate their designs significantly. Consider these best practices to ensure a successful outcome:

  • Prep your nails properly by cleaning and buffing them.
  • Use high-quality nail polish for better pigmentation.
  • Experiment with various tools to achieve different effects.
  • Practice patience and allow adequate drying time between layers.

Assume that following these tips will lead to stunning nail art that you’re proud to show off.

Best Practices for Application

About achieving eye-catching nail art hinges on your application techniques. Always start with a base coat to protect your nails and create a smooth canvas. Layer your colors carefully, ensuring that each color is fully dry before applying the next. Utilize tools like dotting pens or striping brushes for precision. Lastly, finish with a topcoat to seal your design and add longevity.

Common Mistakes to Avoid

Best practices can only go so far if you don’t steer clear of common pitfalls. Rushing through your nail art may lead to smudges and uneven lines. Skipping the base coat could compromise your nail health and the vibrancy of your design. Be cautious when using nail tape; misaligned tape can disturb your artistic vision. Lastly, neglecting to clean up excess polish can leave your nails looking unrefined.

Hence, it’s necessary to take your time. A rushed job often results in bubbling or uneven polish application. Skipping the base coat not only affects the design but also contributes to potential staining of your nails. When using nail tape, ensure you cut it to the correct size and adhere it firmly for clean lines. While it may seem minor, cleaning the cuticles and surrounding areas can elevate your overall nail art presentation significantly.

To wrap up

From above, you’ve explored the fascinating world of viral nail art hacks trending on social media. By testing these techniques, you can discover what works for your personal style and nail care routine. Whether you find success in an easy tutorial or learn to avoid a tricky method, this journey of experimentation can enhance your skills and creativity in nail art. Embrace the process, share your results, and elevate your manicure game with the best hacks tailored to suit your tastes.

FAQ

Q: What are some common viral nail art hacks found on social media?

A: Viral nail art hacks on social media often include creative methods for applying nail polish, using household items for nail art designs, or DIY techniques for nail enhancements. Examples include using a sponge to create gradient effects, employing tape to achieve clean lines, or using plastic wrap to create fun patterns. Many of these hacks aim to simplify the nail art process or produce professional-looking results at home.

Q: How can I test the effectiveness of a viral nail art hack?

A: To test the effectiveness of a viral nail art hack, start by gathering all necessary materials as indicated in the original post or video. Follow the instructions closely, and take notes on any challenges you encounter and the final result. It’s helpful to document your process with photos or videos to compare with the original hack, and to assess whether it meets your expectations in terms of ease of execution and overall appearance.

Q: Are there any safety concerns I should be aware of when trying these hacks?

A: Yes, while many viral nail art hacks are safe, it’s important to be cautious. Always check that the materials used are suitable for nail application and skin contact. Some social media hacks may suggest using unconventional items that can irritate the skin or may not be safe for use on nails. If you’re ever unsure, it’s best to research each product and method or consult a professional before attempting the hack.

Creating Nail Art Using Only Household Items

You can unleash your creativity and transform your nails using items you already have at home. This informative guide will show you how to create stunning nail art without needing expensive tools or supplies. With just a few simple household items, you can achieve impressive designs that reflect your personal style. If you’re unsure where to begin, check out Where to start with DIY nail art? : r/RedditLaqueristas for tips and inspiration.

Key Takeaways:

  • Innovative Tools: Household items like forks, sponges, and straws can be repurposed as unique nail art tools.
  • Affordable Materials: Utilize common products like cooking oil or glue to create nail art designs without buying special supplies.
  • Endless Creativity: Experiment with colors and techniques using items you already have, allowing for personalized styles.
  • Simple Techniques: Basic methods like dotting, sponging, or striping can achieve beautiful effects easily.
  • Cleansing Options: Household items like vinegar can assist in nail preparation and cleanup processes effectively.

Essential Household Items for Nail Art

To begin on your nail art journey, gather a few important household items that can elevate your creative process. These items are often found around your home and can help you achieve stunning designs without the need for specialized tools. From brushes to sponges, you can explore various techniques and styles using everyday items, making nail art accessible and enjoyable for everyone.

Common Tools and Their Uses

For your nail art project, consider using common tools like toothpicks, cotton swabs, and scissors. Toothpicks can create fine lines and intricate details, while cotton swabs are excellent for cleaning up mistakes or creating stippled effects. Scissors can be used to cut tape for precise designs or even to craft custom nail stickers from household materials.

Suggested Household Products

Their effectiveness in nail art lies in the creativity of the materials you already own. Nail polish remover, kitchen sponges, and adhesive tape are fantastic for creating unique textures and patterns. Nail polish remover can help with cleanup and can be mixed with polishes to create fading effects. Sponges can create gradient looks, while tape helps with geometric designs.

This versatility of household products opens up endless possibilities for your nail art. You can use nail polish remover not just for cleanup but also as a tool for blending colors. A kitchen sponge allows you to dab on various shades, achieving beautiful gradients with ease. Additionally, using tape can create clean lines for those intricate designs that require precision. By tapping into these everyday items, you can unleash your creativity and transform your nails into a canvas without breaking the bank!

Basic Techniques for Nail Art

Clearly, mastering the basic techniques of nail art will elevate your DIY manicure skills. You can create beautiful designs using common household items and a bit of creativity. Whether you’re a beginner or just looking to refresh your skills, familiarizing yourself with different methods will help you express your personal style while enjoying the nail art process.

Painting Techniques

At the heart of nail art lies the painting techniques you will employ to create stunning designs. You can use regular nail polish, markers, or even kitchen utensils like a toothbrush to achieve splatter effects. Practice your brush strokes and experiment with layering colors to develop unique patterns that stand out.

Stamping and Stenciling Methods

For a more intricate look, stamping and stenciling methods can bring your nail designs to life. Utilizing everyday items like sponge, tape, or even plastic lids, you can create impressive patterns in no time.

Another effective approach involves creating your own stencils or stamps using simple materials like stickers or cutouts. Once you’ve made your stencil, just apply nail polish over it and peel it off to reveal your design. This technique allows for precision and creativity, giving you the freedom to experiment with different shapes, colors, and patterns. Enjoy the process and let your imagination run wild!

Creative Nail Art Ideas

All you need is a little imagination and some household items to create stunning nail art. From simple designs to intricate patterns, the possibilities are endless. Explore your creativity by utilizing items like paper clips, toothbrushes, and even sponges to achieve unique effects. You can express your individual style and make your nails stand out with these fun nail art ideas!

Simple Designs for Beginners

To get started with nail art, focus on easy and straightforward designs that build your confidence. Simple dotting, stripes, and color blocking can be done with basic supplies, helping you ease into the world of nail art. Feel free to experiment with different colors and techniques!

Advanced Techniques for Experienced Users

After mastering the basics, you can probe advanced nail art techniques that require more creativity and skill. Techniques such as marbling, gradient effects, and stamping can elevate your art game significantly. These methods give you the opportunity to create intricate designs that truly showcase your unique flair.

Advanced Techniques Overview

TechniqueDescription
MarblingCreating a swirling effect by mixing two or more nail polish colors.
Gradient EffectBlending two colors from light to dark for a smooth transition.
StampingUsing a stamper to transfer designs onto your nails for intricate patterns.

Consequently, incorporating advanced techniques can drastically enhance your nail art game and allow you to express your creativity in more sophisticated ways. By investing time to practice these methods, you will build your skills and confidence. Here’s how you can start:

  1. Gather tools such as a nail art brush, sponge, or stamping plate.
  2. Choose a color palette that inspires you.
  3. Experiment with different techniques on a practice nail or wheel.
Further Techniques To Try

TechniqueDescription
WatercolorUsing diluted nail polish to create soft, blended color effects.
Negative SpaceLeaving parts of your natural nail exposed for a minimalist design.

Maintenance and Care for Nail Art

Many people overlook the importance of proper maintenance for their intricate nail art. Keeping your nails protected can enhance their appearance and longevity. Regularly apply a clear top coat to seal in your designs and shield them from chips. For more inspiration, check out these 8 nail art designs you can DIY at home with limited tools and colors.

How to Make Your Nail Art Last

Your nail art can stay vibrant and intact for a longer time by taking a few simple steps. Ensure your nails are clean and prepped before applying any polish. After creating your design, seal it with a quality top coat and reapply it every few days to maintain shine and durability.

Proper Removal Techniques

Beside caring for your nail art, knowing how to remove it safely is also important. Using the right removal technique can prevent damage to your nails and cuticles, ensuring they remain healthy.

In fact, to effectively remove your nail art, soak a cotton ball in acetone or nail polish remover and press it onto your nail for a few seconds before gently wiping it away. Avoid harsh scraping, which can weaken your nails. If your art is particularly intricate, consider soaking your nails in the remover instead, allowing the designs to dissolve gradually without harm.

Troubleshooting Common Issues

Keep your nail art looking flawless by addressing common issues promptly. If you encounter bubbling or smudging, ensure your polish layers are thin and allow ample drying time between each coat. If you’re not satisfied with the outcome, don’t fear; you can fix most issues with a little creativity and patience.

Fixing Mistakes

Troubleshooting mistakes in your nail art can be easy with a bit of finesse. If you accidentally smudge your design, use a clean brush dipped in acetone to gently erase the mistake. Alternatively, add a creative design overlay or strategically place some rhinestones to distract from any errors.

Addressing Durability Problems

After applying your nail art, you may notice that it doesn’t last as long as you’d like. To enhance the durability of your designs, always start with a solid base coat and finish with a top coat to seal your artwork and protect it from chips and wear.

Problems with durability often arise from not prepping your nails properly. Ensure your nails are clean and dry before application, as oils and residues can weaken the bond. Additionally, avoid using products that contain harsh chemicals or excessive water exposure as they may cause your designs to lift or chip prematurely. Keeping your nails trimmed and maintaining a consistent routine will also contribute to longer-lasting nail art.

Tips for Inspiration and Design

Once again, tapping into your creativity can transform everyday objects into stunning nail art. Consider these tips for fresh inspiration:

  • Browse social media for popular designs
  • Take note of colors in your wardrobe
  • Mix and match items from your kitchen
  • Explore nature for unique patterns

This process can help you discover fantastic ideas. For more suggestions, check out What are some of the nail art ideas/design to try at home?

Finding Ideas in Everyday Life

Against the backdrop of your daily routine, inspiration can come from unexpected places. Look around your home—your favorite book covers, patterned curtains, or even the design on a mug can give you a spark for your next nail art creation. Don’t hesitate to experiment with textures and motifs you encounter daily.

Following Trends with Household Resources

An exciting way to engage with nail art is to stay on trend using items you already have. By observing the latest styles on social media or beauty blogs, you can adapt those designs with household materials. Customizing trending patterns allows you to create personalized looks without the need for expensive tools.

Ideas for following trends can include items like plastic wrap for gradients or using tape for geometric shapes. Look closely at current nail art trends and translate them using household products, such as sponges, cotton swabs, or even food items. This approach not only saves money but allows you to express your creativity uniquely and personally.

Conclusion

Upon reflecting on your journey to create nail art using only household items, it’s clear that your creativity knows no bounds. By utilizing everyday materials, you unlock endless possibilities to express yourself through vibrant designs and unique styles. You can confidently explore various techniques that enhance not just your nails, but also your resourcefulness. With each creation, you not only beautify your nails but also discover the joy of inventiveness right at your fingertips.

FAQ

Q: What household items can I use to create nail art?

A: There are a variety of household items that can be repurposed for nail art. Common items include toothpicks and bobby pins, which can be used to create intricate designs. Tape can be cut into various shapes to create clean lines or patterns. A makeup sponge can be used for sponging techniques, blending colors smoothly. Additionally, you can use cotton swabs for dotting and small brushes for finer details. Nail polish bottles themselves, with their brush applicators, can also be utilized for creating nail art designs.

Q: How can I achieve a marble effect using household items?

A: To create a marble effect using household items, start by selecting two or three nail polish colors. Apply a base coat to your nails as a foundation. Once dry, drop small amounts of each polish onto a disposable plate or piece of aluminum foil. Take a toothpick or a bobby pin and swirl the colors gently to create a marbled pattern. Then, quickly press your nails onto the swirling paint or use a makeup sponge to dab the design onto your nails, ensuring even coverage. Finish with a top coat to seal your design and enhance its longevity.

Q: Can I use food items for nail art designs?

A: Yes, food items can be an unexpected source of creativity for nail art. For example, you can use the ends of fruits like strawberries or apples to create unique stamp designs by dipping them into nail polish and pressing them onto your nails. Alternatively, spices like cinnamon can create textured effects when mixed with clear nail polish and applied over a base color. Just ensure that whatever food item you use is clean and safe for contact with your nails. It’s a fun way to explore nail art using items you already have at home!

Skip to content