manicure

How to Do a Professional Manicure at Home

Over time, mastering the art of a professional manicure at home can save you both money and time while ensuring your nails look fabulous. You can achieve salon-quality results without stepping outside your door by following vital steps and utilizing the right tools. In this guide, you’ll discover how to prep, shape, and polish your nails, transforming your grooming routine into a relaxing and rewarding experience. Let’s look into the techniques that will elevate your at-home manicure to a new level of excellence.

Key Takeaways:

  • Preparation: Start with clean, dry hands and remove any previous nail polish. Soak your nails in warm soapy water for a few minutes to soften them before trimming and shaping.
  • Tools: Use high-quality tools such as a nail clipper, file, cuticle pusher, and buffer. Invest in a good base coat and top coat to enhance the polish’s longevity and shine.
  • Application: Apply nail polish in thin, even layers, allowing each coat to dry before applying the next. This helps prevent chipping and ensures a smooth, professional finish.

Essential Tools for a Professional Manicure

While creating a salon-worthy manicure at home, having the right tools is important. Start with basic items like a nail clipper, nail file, and buffer, along with cuticle pushers and scissors to maintain healthy nails and cuticles. A good-quality base coat, top coat, and nail polish in your favorite shades will complete your manicure. Additionally, consider adding tools like a nail brush and polish remover for efficient cleaning and preparation for your manicure, ensuring that you achieve a flawless finish.

Nail Care Kits

On your journey to achieving beautiful nails, investing in a nail care kit is a smart choice. These kits typically include tools for cutting, shaping, and maintaining your nails, as well as products specifically designed for nail health. With everything organized in one package, you can easily take care of your nails without hunting for individual tools, making your manicure process smoother and more enjoyable.

Nail Polishes and Treatments

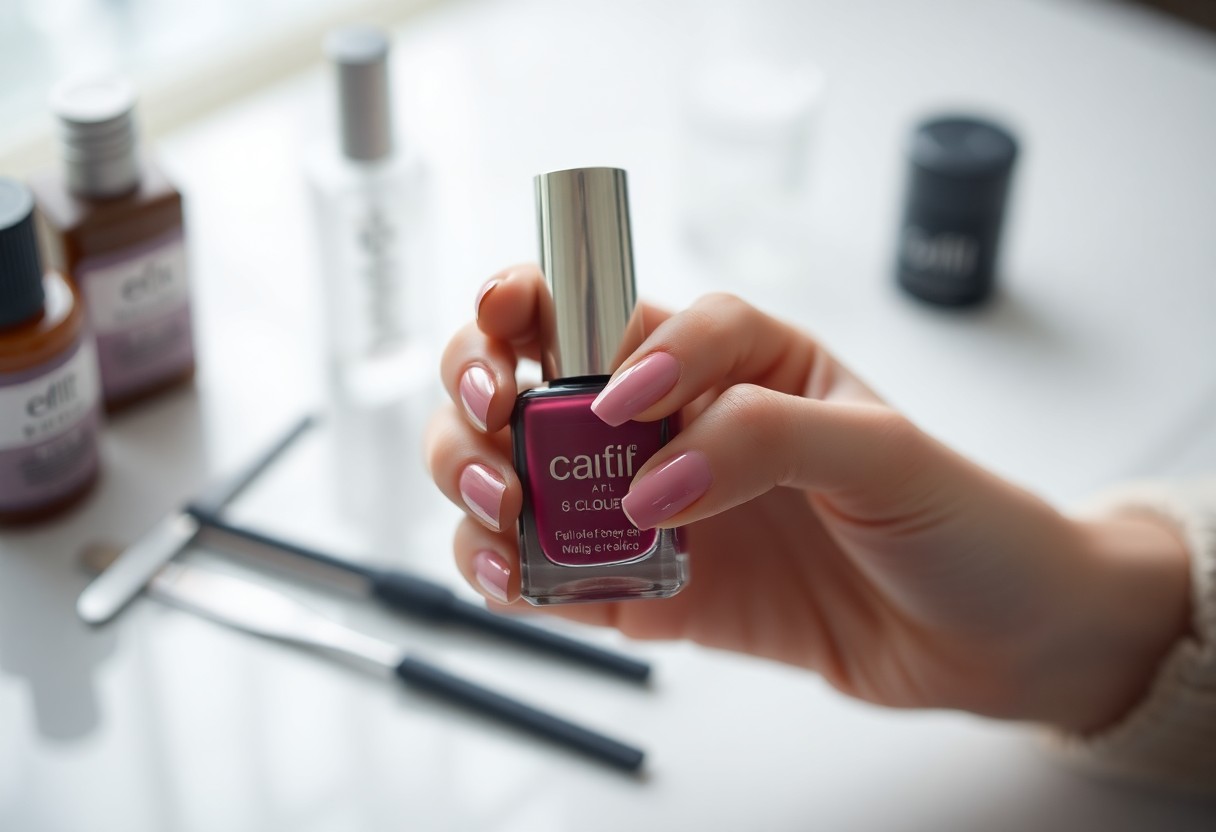
On top of maintaining the health of your nails, choosing the right nail polishes and treatments can elevate your home manicure. Opt for high-quality polishes that offer good coverage and longevity, and don’t forget to use a nourishing base coat to protect your natural nails. If your nails are prone to breakage, consider strengthening treatments that can help improve their resilience, ensuring your manicure lasts longer and looks polished.

Manicure products play a significant role in how your nails look and feel. Selecting the right nail treatments can enhance shine, reduce brittleness, and keep your nails healthy. Look for formulas that cater to your specific needs, whether you’re seeking hydration, strengthening, or quick-drying options. With the proper nail care products, you’ll set the stage for a stunning manicure that not only looks great but also promotes long-term nail health.

Preparing Your Nails

Assuming you’re ready to elevate your nail care routine, the first step in achieving a professional manicure at home is properly preparing your nails. This involves a few vital cleaning and grooming tasks that will set the foundation for a flawless finish. Taking the time to prep your nails not only enhances the appearance but also promotes nail health and longevity of your manicure.

Cleaning and Sanitizing

About maintaining hygiene, it’s vital to clean and sanitize your nails and tools before starting your manicure. Wash your hands thoroughly with soap and water, ensuring you clean under your nails and around your cuticles. Additionally, use disinfectant wipes or spray to sanitize any tools you’ll be using, such as clippers, files, and buffers, to maintain a clean workspace and prevent any potential infections.

Removing Old Nail Polish

Among the first tasks in your nail preparation is removing any old nail polish. This step not only helps in achieving a polished look but also ensures that no residue interferes with your new coat. Use a good quality nail polish remover that works swiftly and effectively to minimize damage to your nails.

Another effective way to remove old nail polish is to soak a cotton ball with your remover, then hold it against your nail for a few seconds before swiping it off. This helps to dissolve the polish, making it easier to wipe away. If you’re dealing with stubborn glitter or dark colors, you may need to repeat the process a couple of times. After the polish is removed, be sure to wash your hands to eliminate any leftover remover residue before moving on to the next steps of your manicure.

Shaping and Filing Your Nails

After you have cleaned and softened your nails, it’s time to shape and file them. Start by choosing a shape that complements your fingers and lifestyle. You can opt for square, oval, or almond-shaped nails, depending on your preference. Make sure to choose a high-quality nail file to avoid any damage. With precise movements, gently file your nails to achieve a clean and polished look.

Choosing the Right Shape

Along with considering your personal style, you should take into account the shape of your fingertips and your daily activities. Square shapes offer a modern look, while oval shapes provide a softer appearance. Almond shapes can give your nails an elegant, elongated effect. Think about what you feel most comfortable wearing as you choose your nail shape.

Filing Techniques for Best Results

To achieve the best results when filing your nails, use a gentle motion with your file. Always file in one direction rather than back and forth, as this can prevent splitting and breakage. Start at the outer edge of your nail and work inward, applying light pressure. It’s helpful to hold the file at a slight angle for smoother results.

Even small adjustments in your filing technique can significantly enhance the appearance of your manicure. Ensure that you hold your file steady and don’t rush the process. Using a buffer can help smooth out the edges and add a nice shine to your nails, giving you that salon-quality finish at home. By adopting these techniques, you’ll have nails that not only look great but are also healthier and less prone to damage.

Cuticle Care

Not only does proper cuticle care enhance the overall appearance of your manicure, but it also promotes healthy nail growth. Start by assessing the condition of your cuticles; neglecting them can lead to dryness or hangnails that compromise the beauty of your nails. By addressing your cuticles during your at-home manicure, you can achieve a polished, professional look that rivals any salon service.
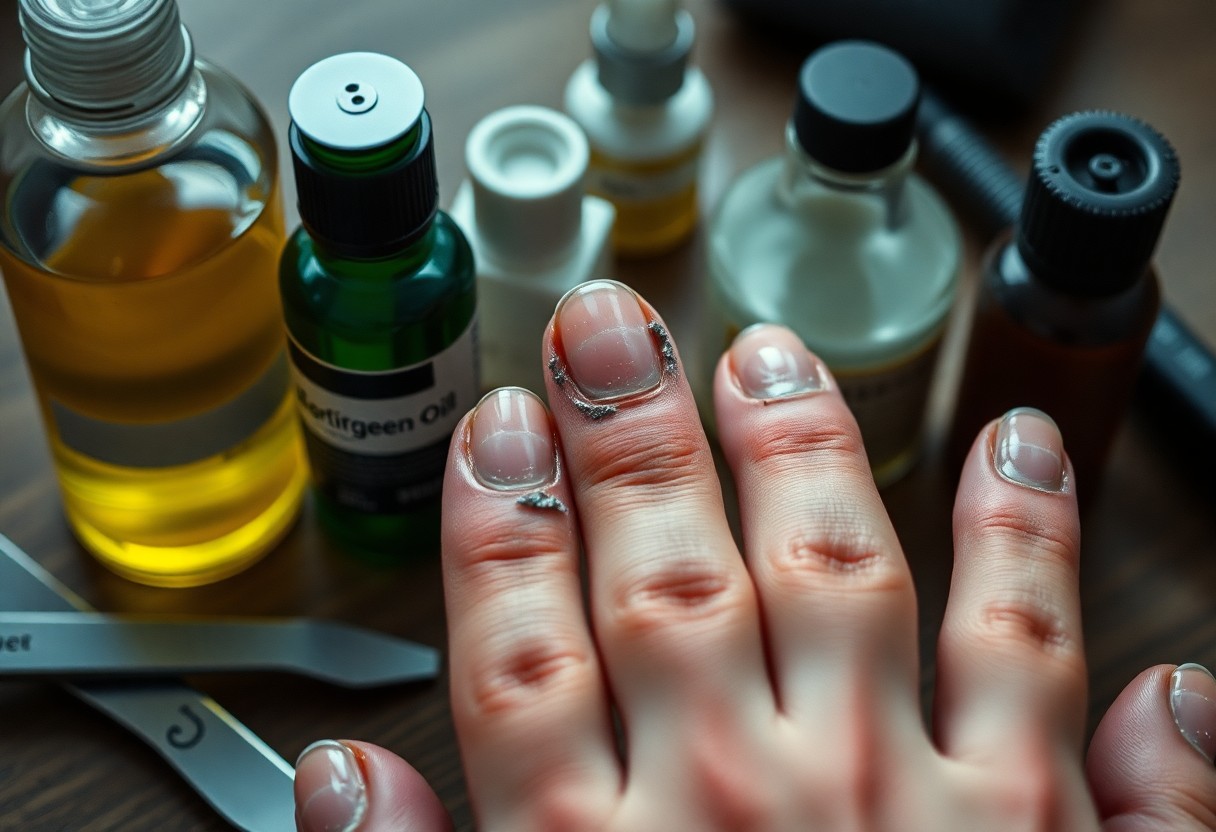
Softening Cuticles

Beside providing a fresh look, softening your cuticles is necessary for a successful manicure. Start by soaking your fingers in warm, soapy water for approximately five to ten minutes. This helps to loosen any dead skin and makes the cuticles easier to manage. You can enhance this step by using a cuticle oil or cream for added moisture and nourishment.

Trimming and Pushing Back Cuticles

Above all, trimming and pushing back your cuticles is an important step in achieving beautifully manicured nails. After softening, gently push back your cuticles using a cuticle pusher, taking care not to apply too much pressure, as this can damage the nail bed.

Trimming excess cuticle can help maintain a neat appearance, but be sure to only remove what is necessary. Use a sterile cuticle nipper to snip away any dead skin. By pushing back the cuticles, you reveal more of your nail bed, contributing to the illusion of longer, more elegant nails. Always ensure that your tools are clean to avoid infections and maintain the health of your nails.

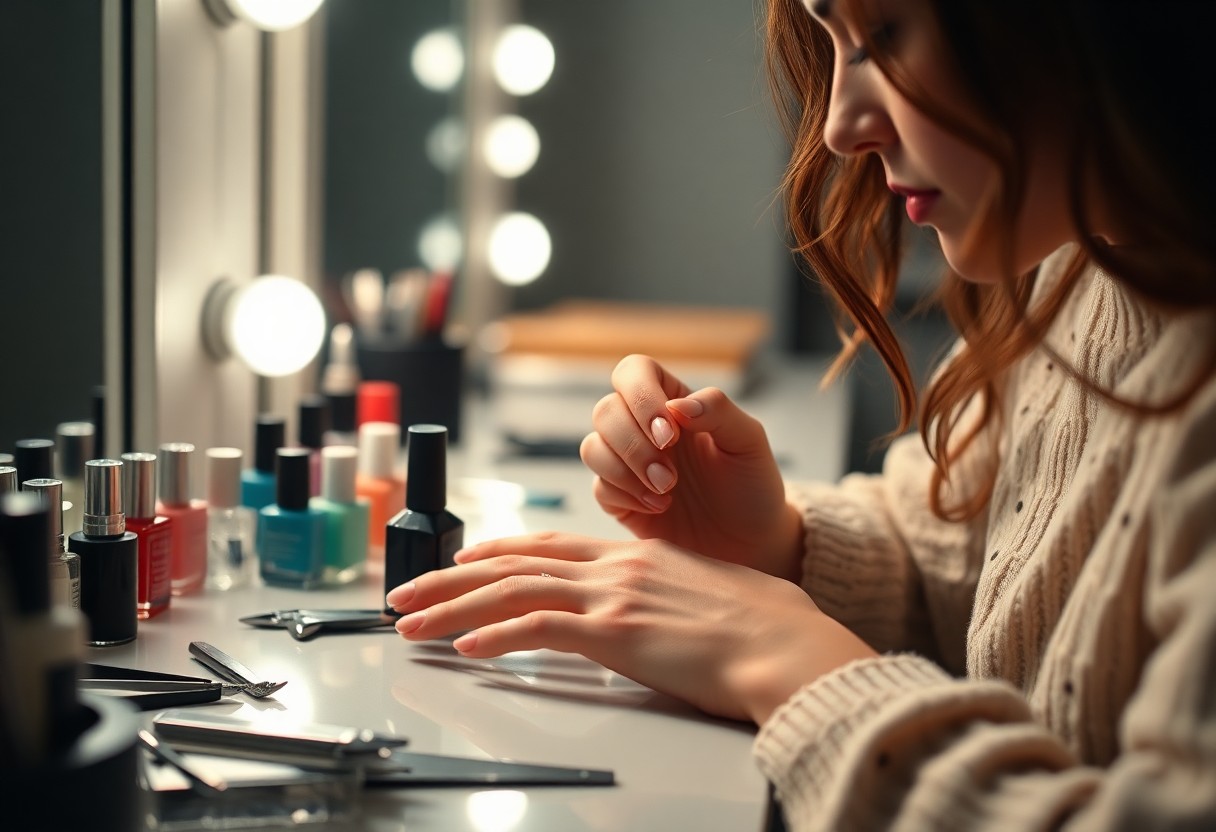
Applying Polish Like a Pro

Unlike the hasty application often seen in salons, a professional-looking manicure at home requires patience and precision. Begin by selecting high-quality nail polish to ensure a long-lasting finish. Apply in thin layers, allowing each layer to dry completely before the next, and don’t forget to cap your nail tips for a flawless look. Your attention to detail will give your nails that salon-fresh appearance.

Base Coat Application

To start your manicure off right, apply a base coat to protect your nails from staining and enhance the longevity of your polish. Use a brush to evenly coat each nail, starting from the base and sweeping up to the tips. This foundational step not only prevents colors from bleeding but also creates a smooth surface for the polish to adhere to.

Techniques for Smooth Polish Application

Smooth application is key to a professional-looking manicure. Using the right technique can make all the difference in achieving an even finish.

Even pressure is important when applying polish; this helps avoid streaks and bubbles. Start with a small amount of polish on your brush and begin at the center of the nail. Use a three-stroke method: one stroke down the middle and one on each side to evenly distribute the polish. If necessary, add more polish for coverage, but always avoid overloading the brush to maintain control and precision.

Finishing Touches

For the best results in your at-home manicure, pay attention to the finishing touches. A great way to ensure a professional look is to follow 10 Steps for a DIY Manicure that highlight all important components of a flawless finish.

Top Coat for a Flawless Finish

Against common perception, a top coat isn’t just for aesthetics; it also adds durability to your manicure. Apply a high-quality top coat to seal in your color and give your nails a professional shine.

Nail Care Maintenance Tips

To maintain your gorgeous manicure, follow these simple nail care tips:

  • Moisturize your hands regularly to keep the skin and nails hydrated.
  • Avoid using your nails as tools to prevent breakage.
  • Limit exposure to harsh chemicals and detergents.

Knowing how to care for your manicure will extend its lifespan and keep your nails looking fresh. Hence, consistent maintenance is key to nail health:

  • Keep cuticles soft with oil or cream to avoid hangnails.
  • Regularly file your nails to prevent splits and tears.
  • Consider using nail strengtheners if your nails are prone to breaking.

Knowing these tips allows you to maintain that polished DIY look effectively and enjoy beautiful nails for longer periods.

Summing up

Hence, by following these vital steps for a professional manicure at home, you can effectively achieve beautiful, well-groomed nails. Begin by preparing your nails and cuticles, file and buff them to your desired shape, apply polish carefully, and finish with a top coat for longevity. Be mindful of hygiene and keep your tools clean. With practice, your at-home manicure skills will improve, enabling you to maintain healthy, stunning nails without the need for salon visits.

FAQ

Q: What supplies do I need for a professional manicure at home?

A: To achieve a salon-quality manicure at home, you’ll need several key supplies. Gather nail clippers, a nail file, a buffer, cuticle remover, a cuticle pusher, hand lotion, base coat, nail polish, and top coat. Optionally, you may want a nail strengthener, nail art tools, and a bowl of warm water for soaking your hands.

Q: How should I prepare my nails before painting them?

A: Start by removing any old nail polish using a gentle remover. Next, wash your hands to remove dirt and oils. You can soak your nails in warm, soapy water for a few minutes to soften the cuticles, making them easier to manage. After soaking, gently push back your cuticles with a cuticle pusher, trim any excess skin carefully, and buff the nail surface lightly to ensure a smooth base for polish application.

Q: What technique should I use to apply nail polish evenly?

A: To apply nail polish evenly, first apply a thin coat of base coat to protect your nails. When painting the color, start by dipping your brush into the polish and wiping off the excess. Apply the polish in three strokes: one down the center and one on each side. This minimizes streaks and helps distribute the polish evenly. Allow each coat to dry before applying additional layers, and finish with a top coat for shine and protection.

Q: How can I prevent my manicure from chipping?

A: To prolong the life of your manicure and minimize chipping, apply a quality base coat before the nail polish and finish with a durable top coat. Additionally, avoid using your nails as tools, and try to keep your hands away from water for prolonged periods, as moisture can weaken the polish. Regularly reapply the top coat every few days to maintain shine and protection.

Q: What aftercare should I follow post-manicure?

A: After completing your manicure, hydrate your hands and nails with a nourishing lotion or cuticle oil to keep them moisturized. Avoid exposing your hands to harsh chemicals or excessive water right after your manicure to ensure that the polish sets properly. Additionally, try to wear gloves during household chores to protect your manicure and maintain its longevity.

How to Extend the Life of Your Gel Manicure

Manicure longevity is a priority for many, especially with the vibrant look and durability of gel polish. To ensure your gel manicure stays flawless for as long as possible, there are several key practices you can adopt. From proper aftercare to mindful habits, you can significantly enhance the durability and appearance of your nails. This guide will provide you with crucial tips and techniques to help you enjoy your gel manicure to the fullest, maintaining its shine and chip-free finish for weeks on end.

Key Takeaways:

  • Moisturize your hands and cuticles regularly to prevent dryness and peeling, which can lead to the gel manicure chipping.
  • Avoid hot water exposure for prolonged periods, as it can weaken the adhesion of the gel polish.
  • Use gloves while cleaning or doing household chores to protect your manicure from harsh chemicals and abrasives.

Understanding Gel Manicures

The gel manicure is a popular nail treatment that combines traditional nail polish with a gel formula. This innovative process often involves curing the gel under a UV or LED light, resulting in a glossy finish that lasts longer than standard polish. Gel manicures are known for their durability and resistance to chipping, which makes them a favorite among those seeking a long-lasting manicure.

What are Gel Manicures?

Below are the crucial elements of gel manicures. They are typically applied in multiple layers, including a base coat, color, and top coat. Each layer is cured under a special light to form a hard, protective coating that helps retain shine and prevent wear. This method not only allows for intricate designs but also promotes healthy nail growth by providing a strong barrier against external damage.

Benefits of Gel Manicures

Behind the allure of gel manicures lie several advantages that make them an ideal choice for many. The long-lasting nature of gel polish means that you can enjoy fresh, vibrant nails for up to two weeks or more without frequent touch-ups. Additionally, gel manicures are less prone to chipping, providing you with a stress-free experience, especially for those with busy lifestyles.

But the benefits don’t stop there. You’ll also appreciate the quick drying time offered by gel manicures, as the curing process means you won’t have to worry about smudging your nails right after application. Furthermore, many gel formulas offer a glossy finish that can elevate your overall look. For individuals who frequently engage in activities that wear down traditional polish, gel manicures present a strategic solution to maintain beautiful nails while minimizing maintenance efforts.

Preparing Your Nails

Some crucial steps can help you prepare your nails for a gel manicure, ensuring a longer-lasting finish. Start by cleaning your nails thoroughly, removing old polish, and gently pushing back your cuticles. As you get ready, check out How to Make Gel Nails Last Longer: 18 Tips that Work for additional techniques that can enhance your manicure longevity.

Pre-Manicure Care

Before starting your gel manicure, it is vital to ensure your nails are in the best condition. This includes trimming and shaping your nails to your desired length and style. Take the time to exfoliate and moisturize your hands, which not only helps with the application process but also contributes to the overall appearance of your nails.

Choosing the Right Products

Besides proper nail care, selecting high-quality products can significantly affect the durability of your gel manicure. Invest in a reputable gel polish and base coat, as cheap products may not provide the same adhesion and longevity. Make sure to choose products that are specifically designed for gel applications to ensure the best results.

Preparing for your manicure involves more than just the application; it’s about using the right tools and products to support your nail health. Opt for a gel polish that is known for its staying power, and pair it with a reliable top coat. Additionally, consider using a nourishing cuticle oil to maintain the health of your nails and surrounding skin as this can help keep your manicure looking fresh and vibrant for longer.

Application Techniques

For a long-lasting gel manicure, mastering application techniques is key. Start by prepping your nails correctly, ensuring they are clean, dry, and free of oils. Use a base coat to create a smooth surface for better adhesion. Apply thin layers of gel polish, allowing each layer to cure properly under the UV or LED lamp for optimal results. This attention to detail will enhance the overall durability of your manicure.

Proper Gel Application

Between each coat, be mindful of how you apply the polish. Use even strokes, starting from the center of the nail and working your way to the edges. This technique prevents pooling at the cuticles, which can lead to lifting. Keeping a steady hand and applying thin layers will help your manicure adhere better and last longer.

Curing Process Best Practices

Below the surface of your gel manicure lies the importance of the curing process. Properly curing each layer not only hardens the gel but also ensures it bonds well to your natural nail. Make sure to follow the guidelines provided with your gel products regarding the duration and type of lamp needed for curing.

But don’t rush the curing process. It’s imperative to ensure that the gel polish is fully cured to achieve optimal strength and longevity. If your gel polish feels tacky after curing, it may not be fully set, which can lead to premature chipping or lifting. Always make sure to check the manufacturer’s instructions for the right curing time, and ensure that your lamp is functioning properly. Taking the time for this step pays off in the longevity of your manicure.

Maintaining Your Manicure at Home

Many people seek ways to prolong the life of their gel manicure, and caring for your nails at home can make all the difference. By implementing a few simple habits, you can keep your nails looking fresh and shiny for weeks. This includes protecting your hands from excessive moisture, using gentle cleansers, and applying cuticle oil regularly to nourish your nails.

Daily Care Routine

Your daily care routine is necessary for maintaining the integrity of your gel manicure. Be sure to wash your hands with mild soap and keep them moisturized without soaking them too much in water. Incorporate a hydrating lotion that is free of harsh chemicals and a quick-drying topcoat to maintain the shine and protect the color.

Dealing with Chips and Peeling

Your gel manicure may be prone to chips and peeling over time, especially if your hands are frequently exposed to harsh conditions. Be attentive to any signs of damage and take immediate action to minimize the effects on your manicure.

But if you do encounter chips or peeling, there are ways to mitigate the damage. You can use a brush-on gel topcoat to smooth over the affected area, sealing it and preventing further chipping. For significant issues, consider visiting your nail technician for a repair or a fill-in. Taking prompt action not only enhances the appearance of your manicure but also extends its lifespan.

Protecting Your Manicure

Unlike regular nail polish, gel manicures require additional care to maintain their shine and prevent chipping. To protect your manicure, be mindful of your hands’ daily exposure to elements that can cause wear and tear. Simple precautions can significantly stretch the longevity of your gel polish, ensuring your nails look their best for weeks on end.

Avoiding Damage in Daily Activities

Protecting your manicure starts with being attentive to your daily activities. Avoid using your nails as tools; this includes opening cans or scraping off labels. Instead, use appropriate instruments designed for the task. Be gentle while typing or handling items, as excessive force can lead to chipping.

Tips for Special Occasions

About special events, you want your gel manicure to shine just as brightly as the occasion. To keep your nails looking pristine, consider these tips:

  • Apply a top coat before attending an event to enhance longevity.
  • Carry a small nail file for quick fixes on the go.
  • Avoid harsh chemicals like bleach, as they can dull your manicure.
  • Be cautious with foods that stain and always keep a napkin handy.

Assume that taking these precautions will help retain your manicure’s beauty during special occasions.

At events where you want to make a lasting impression, always plan ahead for your manicure care. Here are additional strategies to consider:

  • Choose less abrasive seating arrangements to avoid scratching your nails.
  • Bring your own set of utensils or glassware to prevent unintentional damage.
  • Take breaks to ensure your hands stay relaxed and avoid accidental contact with rough surfaces.

Assume that these proactive measures will keep your nails looking fabulous throughout your event.

Regular Care and Removal

Once again, regular care and proper removal are imperative to prolong the life of your gel manicure. Maintaining the health of your nails helps you enjoy your polished look longer, while also preventing damage to the natural nail. Moisturizing your cuticles, avoiding harsh chemicals, and wearing gloves while doing household chores can significantly aid in keeping your gel manicure looking fresh and vibrant.

How to Safely Remove Gel Manicure

Among the key steps for safely removing your gel manicure, it’s important to avoid picking or peeling the polish off, as this can damage your natural nails. Instead, soak a cotton ball in acetone, place it on the nail, and wrap it with aluminum foil. After 10-15 minutes, gently slide off the gel with an orange stick.

Aftercare for Healthy Nails

Below, prioritize aftercare for your nails post-manicure. Once you’ve removed the gel polish, nourish your nails and cuticles with a good quality cuticle oil or moisturizer to promote healing and hydration.

And, maintain this routine consistently to keep your nails strong and healthy. Consider regular breaks between gel manicures to allow your nails to breathe and recover. Additionally, incorporating biotin or other vitamins into your diet can further enhance the resilience of your nails, ensuring they remain in top condition for your next gel manicure.

Summing up

On the whole, extending the life of your gel manicure involves a combination of proper application, maintenance, and care. Ensure your nails are clean and well-prepped before applying your gel polish, and always seal the edges to prevent chipping. After your manicure, protect your nails by avoiding excessive moisture and harsh chemicals. Additionally, regularly moisturize your hands and cuticles to keep them healthy. By following these steps, you can enjoy your beautiful gel manicure for a longer period, saving you time and money while looking fabulous.

FAQ

Q: How can I protect my gel manicure from chipping?

A: To protect your gel manicure from chipping, avoid using your nails as tools. Be gentle when tapping or pressing on surfaces, and use gloves when doing household chores or working with harsh chemicals. Additionally, applying a top coat every few days can add an extra layer of protection.

Q: What should I avoid doing after getting a gel manicure?

A: After getting a gel manicure, it’s best to avoid soaking your nails in water for extended periods, as excess moisture can weaken the gel. Steer clear of activities that may cause your nails to experience trauma, such as opening cans or digging into hard materials with your fingertips.

Q: How should I care for my nails between gel manicures?

A: Caring for your nails between gel manicures involves keeping them moisturized and healthy. Use a cuticle oil daily to hydrate the cuticles and surrounding skin. Additionally, consider a nail strengthener to reinforce the nail bed, and maintain a balanced diet to support overall nail health.

Q: Can I use regular nail polish over my gel manicure?

A: It’s not recommended to apply regular nail polish over a gel manicure as it can weaken the gel and lead to chipping. If you desire to change your color, it’s best to remove the gel properly and start fresh with a new gel application.

Q: How often should I consider getting a gel manicure touch-up?

A: It’s advisable to schedule a touch-up for your gel manicure every 2 to 4 weeks, depending on how quickly your nails grow. Regular maintenance helps prevent lifting and keeps your nails looking fresh. Monitoring for any signs of wear can also guide you on when to go in for a refill.

The History of Manicures – From Ancient Times to Today

History reveals that manicures are not just a modern trend; they trace back thousands of years to ancient civilizations where hand care was a sign of status and beauty. You may be surprised to learn that even in ancient Egypt, royalty adorned their nails with vibrant colors and intricate designs. As you explore the evolution of manicures, you’ll discover how cultural practices, innovations in nail care, and changing beauty standards have shaped your manicure experience today, making it a blend of art, tradition, and personal expression.

Key Takeaways:

  • Ancient Origins: The practice of manicures dates back to ancient civilizations, with evidence of nail care rituals in Egypt and China, where the wealthy would adorn their nails with intricate colors and designs.
  • Evolution of Techniques: Over centuries, manicure techniques and tools have evolved, transitioning from basic grooming practices to sophisticated procedures involving nail art and treatments.
  • Modern Popularity: Today, manicures are a mainstream beauty practice, reflecting personal style and self-care, with a wide array of services available in salons worldwide.

The Origins of Manicures

To understand the origins of manicures, you must look back to ancient times when nail care signified wealth and status. Civilizations such as the Egyptians and Chinese crafted intricate nail designs and used various substances to enhance their appearance. For an in-depth look at the History of manicure and nail industry, you’ll find that these early practices laid the foundation for modern techniques and grooming standards.

Ancient Civilizations and Nail Care

By examining ancient civilizations, you can see that manicures were not merely about aesthetics; they carried profound significance. Egyptians used henna and adorned their nails to symbolize their social standing, while ancient Chinese practiced nail care as part of a broader beauty regimen that highlighted luxury and refinement.

The Role of Manicures in Cultural Practices

For various cultures, manicures served as a reflection of personal identity and societal norms. From ornate decorations in imperial courts to simplistic styles in everyday life, manicures became intertwined with cultural values and beauty ideals.

A deeper look into the role of manicures in cultural practices reveals that they symbolize more than just beauty. They often mark significant life events, traditions, or personal milestones. In many societies, well-groomed nails embody discipline and attention to detail, forging connections between self-care and social acceptance. You may find it interesting to explore how different cultures have embraced manicures as a form of personal expression and communal identity.

Manicures in the Middle Ages

Some historians note that during the Middle Ages, manicures were largely influenced by social status and fashion. Both men and women participated in nail grooming, often using rudimentary tools to keep their nails clean and trimmed. If you want to investigate deeper into this fascinating topic, check out The history of manicure. The beginning to the present day for a comprehensive overview.

Beauty Ideals and Nail Grooming

Around the 11th century, beauty ideas began to take shape, with the nobility setting the trends for nail grooming. Importance was placed on neat, well-maintained nails as a sign of refinement and sophistication. The upper classes often used herbal concoctions to enhance the appearance of their nails, while the lower classes managed with more practical methods to maintain cleanliness.

Health Beliefs and the Importance of Nails

Ideals of health during the Middle Ages also tied closely to nail care, as clean nails were seen as a reflection of one’s overall well-being. It was believed that well-groomed nails could help prevent sickness and promote good health. This connection between nails and health likely motivated many individuals to keep their nails neat and trimmed.

Even beyond aesthetics, nails were seen as important indicators of health. In a time when survival was directly linked to one’s physical condition, maintaining clean nails and good hygiene became a basic necessity. You may find it interesting that scrapes or infections on the nails were often viewed as omens of illness or misfortune, underscoring the significant role nails played in everyday life.

The Evolution of Modern Manicures

Your understanding of manicures would be incomplete without recognizing their evolution over the years. With the shift from basic grooming to sophisticated beauty rituals, modern manicures now encompass artistic designs and cutting-edge techniques. Curated specifically for self-expression and aesthetic appeal, manicures have transformed into an vital aspect of personal care and style in today’s world. From classic French tips to intricate nail art, the modern manicure is a versatile canvas for creativity.

The Rise of Nail Salons in the 20th Century

On the heels of the 20th century, nail salons emerged as trendy hotspots for those seeking pampering and professional care. The expansion of nail salons marked a new era where manicures became accessible and popular among not just the elite but a broader audience. This growth allowed you to indulge in personalized services, elevating nail care to an experience that blends relaxation with beauty.

Innovations in Nail Products and Techniques

Behind the scenes, the beauty industry has seen remarkable advancements in nail products and techniques. Today’s manicures benefit from high-quality, long-lasting formulas and innovative application methods that provide a superior finish. The introduction of gel and dip powders, along with tools like LED lamps, has revolutionized the way you achieve stunning nails that stand the test of time.

Another significant development in nail products and techniques is the rise of eco-friendly and non-toxic formulas, appealing to your health-conscious mindset. Brands are now offering vegan, cruelty-free options that deliver both safety and style. Moreover, techniques such as nail stamping and 3D nail art have allowed for intricate designs that were once unimaginable. You can now experiment with a plethora of styles, ensuring your nails are not just groomed, but also a unique representation of your personal flair.

Popularity of Manicures in the 21st Century

After centuries of evolution, manicures have now become a staple of personal grooming and self-expression in the 21st century. With the rise of nail salons and increased accessibility of nail care products, you can easily embrace this beauty ritual. Today’s manicures go beyond a simple polish; they encompass intricate nail art, gel options, and even 3D embellishments, catering to a vast range of styles and preferences.

Trends Influencing Modern Nail Art

The current landscape of nail art is influenced by various trends that reflect personal style and societal shifts. From abstract designs to minimalist aesthetics, you can find inspiration all around you, helping to shape your unique look. Techniques such as ombre and negative space have gained traction, enabling you to experiment and express yourself creatively through your nails.

The Influence of Social Media on Nail Culture

To understand modern nail culture, it is crucial to recognize the impact of social media platforms. With influencers and nail artists sharing their creations online, you have instant access to a wealth of ideas, techniques, and trends. These platforms have turned nail art into a communal experience, where you can not only showcase your work but also engage with a global audience.

This surge in online visibility has prompted innovative styles and DIY tutorials, making it easy for you to recreate eye-catching designs at home. Social media has also encouraged nail challenges and trends to go viral, allowing you to stay updated with what’s popular. As a result, your nails can now serve as a canvas to express your individuality, while connecting you with a vibrant, like-minded community across the globe.

Health and Safety in Nail Care

For anyone seeking nail care, understanding health and safety practices is necessary to ensure a safe and enjoyable experience. Nail salons must adhere to strict hygiene protocols to protect both clients and technicians. Focusing on sanitation, proper tool disinfection, and safe product usage can mitigate risks, allowing you to relax and enjoy your manicure while maintaining your health.

Hygiene Practices in Nail Salons

Among the key elements of a safe nail salon are stringent hygiene practices. Ensure that the technicians are using sterilized tools, fresh nail files, and clean workstations. You should look for certificates indicating the salon follows local health regulations and inquire about their sanitization methods to promote a health-conscious environment.

Common Risks and Preventative Measures

After understanding the importance of hygiene, it’s vital to be aware of potential risks associated with nail care, such as infections or allergic reactions. To minimize these risks, opt for reputable salons that prioritize cleanliness and educate their staff on safe practices.

And as you navigate your nail care journey, be observant of the products being used. Allergies can result from harsh chemicals in nail polish or removers, so consider asking for hypoallergenic alternatives. Additionally, be cautious about any cuts or abrasions; ensuring your technician uses new tools and follows safety protocols can greatly reduce your risk of infection. Your awareness and proactive approach towards health in nail care will contribute to a positive experience.

The Future of Manicures

Keep an eye on emerging trends that are shaping the future of manicures. As societal awareness of self-care and personal grooming continues to evolve, the demand for innovative and sustainable practices in nail care is increasing. Your nails are not just a canvas for creativity; they represent the intersection of self-expression and health, paving the way for new advancements in the field.

Sustainable Practices and Eco-Friendly Products

Future nail care will focus on sustainability, prioritizing eco-friendly products and practices. As consumers, you now seek out brands that minimize environmental impact, using non-toxic ingredients and biodegradable materials. This shift not only benefits your health but also contributes to a healthier planet, making your manicure a conscious choice for beauty and responsibility.

Technological Advances in Nail Care

One of the most exciting developments in the world of manicures is the inclusion of cutting-edge technology. Innovative tools are transforming traditional manicures into more efficient and precise experiences.

This includes the use of UV or LED light technology for faster curing, as well as smart devices that can analyze nail health, allowing you to customize treatments based on your unique nail needs. Virtual reality and augmented reality applications are even paving the way for virtual try-ons, giving you the chance to experiment with different colors and designs before making a decision. As these advancements continue to grow, they will enhance not only your nail care experience but also empower you to make informed choices about your manicure.

Conclusion

Taking this into account, you can appreciate how the art of manicures has evolved significantly from ancient civilizations to contemporary practices. The journey reflects cultural shifts, technological advancements, and a growing emphasis on personal grooming. By understanding this history, you can better appreciate the significance of manicures in your own life and the broader cultural context they inhabit today. Embracing these traditions allows you to connect with a rich legacy while expressing your own unique style.

FAQ

Q: What is the historical significance of manicures in ancient civilizations?

A: Manicures have been practiced for thousands of years, with evidence tracing back to ancient Egypt around 3000 BC. Egyptians used natural ingredients like henna to color their nails, which signified social status and beauty. Similarly, in ancient China, royalty would often embellish their nails with intricate designs, using materials like gold and silver to showcase their wealth and power. These early practices emphasized the importance of nail care as a reflection of one’s social standing and personal grooming.

Q: How did the manicure evolve during the Middle Ages?

A: During the Middle Ages, particularly in Europe, the focus on manicures shifted significantly. Instead of emphasizing beauty, nail care was often associated with hygiene and health. People believed that clean nails were indicative of good morality. It wasn’t until the Renaissance that manicures saw a resurgence in beauty trends, with ladies returning to elaborate nail embellishments as a display of femininity and status, aided by the use of natural dyes and adornments.

Q: When did modern manicures begin to take shape?

A: The modern manicure began to take shape in the late 19th century, particularly with the development of commercial nail polish. In 1916, the first nail polish was made available in a version similar to the automobile paint of the time, which greatly influenced nail aesthetics. The push towards professional nail care started to emerge in the 1930s with the establishment of nail salons, where skilled beauticians offered specialized manicure services, marking a shift in nail care from a personal routine to a social and salon-oriented experience.

Q: What are some key innovations in manicure products and techniques over the years?

A: The manicure industry has seen several innovations, particularly in the last few decades. The introduction of acrylic nails in the 1970s allowed for extended nail lengths and designs, while gel nail polish, which cures under UV light, became popular in the 2000s for its durability and glossy finish. Recent developments also focus on healthier alternatives, such as non-toxic polishes and eco-friendly products, catering to a growing demand for safer beauty options. Additionally, techniques like nail art and intricate designs have transformed manicures into a form of artistic expression.

Q: How have cultural differences influenced manicures around the world?

A: Cultural differences have played a significant role in the evolution of manicures worldwide. In Japan, for instance, there is a tradition of intricate nail art that often reflects seasonal themes and cultural symbols, showcasing the artistry involved in nail care. In contrast, Western societies have tended to focus on more simplistic, polished looks, while recent years have introduced a blend of these influences. Globally, nail salons have adapted their services to reflect local aesthetics and preferences, highlighting the diverse ways in which manicures are appreciated and practiced.

How to Repair Damaged Nails After a Manicure

Manicure sessions can leave your nails looking fabulous, but they sometimes come with unwanted damage. If you’ve experienced chips, splits, or brittleness after your last visit to the salon, it’s imperative to take action to restore your nails’ health. In this guide, you’ll learn effective strategies and techniques to repair and strengthen your nails, ensuring they return to their flawless state. From at-home remedies to professional treatments, you’ll discover how to nurture your nails back to vitality.

Key Takeaways:

  • Hydration: Keep nails moisturized with a nourishing cuticle oil or hand cream to promote healing and prevent further damage.
  • Gentle Care: Avoid harsh chemicals and be gentle while handling your nails to prevent additional breakage or irritation.
  • Strengthening Treatments: Use strengthening nail treatments or buffers to help restore the integrity and appearance of your damaged nails.

Common Causes of Nail Damage

Before you can effectively repair your damaged nails, it’s imperative to understand the common causes behind the damage. From over-treatment during manicures to exposure to harsh chemicals, these factors can compromise the integrity of your nails. For more insights on recovery methods, check out How to Strengthen Damaged Nails After Acrylic & Gel, which provides tips tailored to your situation.

Over-Treatment During Manicure

Around the world of manicures, over-treatment can occur when nails are subjected to excessive filing, buffing, or aggressive removal of products. This can lead to thinning and weakening of your nails, exposing them to potential damage.

Use of Harsh Chemicals

Nail products containing strong chemicals can wreak havoc on your nails. Excessive use of nail polish removers with acetone or regular exposure to harsh cleanings agents can strip your nails of their natural oils, leaving them brittle and prone to breakage.

Causes of nail damage often stem from these harsh chemicals making them fragile. Many manicure products include ingredients that can lead to dehydration, resulting in splitting and peeling. Being mindful of the products you use and incorporating gentle alternatives can make all the difference in maintaining healthy nails.

Initial Steps to Take After Damage

It is important to act quickly after you notice any damage to your nails following a manicure. First, assess the situation to determine the extent of the damage and what steps need to be taken. Avoid further manipulating the nails, as this could worsen the condition. Instead, focus on providing care that can help restore their health and appearance.

Assessing the Severity of Damage

Against a backdrop of concerns over nail health, take a moment to evaluate the damage you see. Is it a minor chip, a tear, or more extensive breakage? Understanding the severity will guide your next steps. For minor chips, you may simply need to apply a fresh coat of polish. However, deeper cracks may require more intensive care, such as filing and conditioning.

Cleaning and Protecting the Nail

About your nail care routine, cleaning and protecting your nails is crucial after any damage. Begin by gently washing your hands and nails with mild soap to remove any debris. After cleansing, ensure your nails are completely dry to prevent further issues. Applying a nourishing cuticle oil will help promote healing and add a protective layer, safeguarding against additional damage.

Nail health can be significantly improved with a consistent cleaning and protection regimen. Use an antibacterial solution to cleanse the areas around your nails, which helps prevent potential infections. Follow with a good quality moisturizer or cuticle oil, focusing on nourishing both the nail bed and surrounding skin. This will not only provide protection but also encourage growth and resilience as your nails heal.

Repair Techniques

Now that you understand common causes of nail damage, it’s time to explore effective repair techniques. These methods can help restore your nails to their former glory and protect them from further harm. Whether you prefer a more traditional approach or a DIY fix, there are several ways to get your nails back in shape.

Nail Glue and Fiber Method

Across many nail care circles, the nail glue and fiber method is a go-to solution for minor breaks. Simply apply a small amount of clear nail glue to the damaged area, then place a piece of fiber, like a nail repair patch or even a cotton ball, over it. Once dry, seal it with another layer of glue for extra strength.

Using a Tea Bag or Silk Wrap

Beside the nail glue method, using a tea bag or silk wrap can be an effective way to mend broken nails. This technique involves cutting a small piece of tea bag or silk fabric and gluing it over the damaged area to reinforce it. You can then apply a top coat for a smooth finish.

A tea bag or silk wrap acts as a barrier, reinforcing your nail structure while promoting recovery. Start by cutting a suitably sized piece that covers the break. Apply a base coat of clear nail polish or glue on the affected area, place the fabric over it, and gently press to secure it. Finish with another layer of polish to smooth the surface and protect the repair. This method not only restores aesthetics but also provides support until your nail regrows.

Nutritional Support for Nail Health

Many factors contribute to healthy nails, and proper nutrition plays a vital role. Incorporating a variety of vitamins and minerals into your diet can significantly improve your nail strength and appearance. For tips on how to care for your nails, check out How To Apply, Remove, and Repair Damaged Nails.

Importance of Vitamins and Minerals

At the foundation of strong nails are imperative vitamins and minerals that support keratin production and overall nail health. Key nutrients, such as Biotin, Vitamin E, and zinc, help prevent brittleness and promote growth, making them important additions to your routine.

Recommended Dietary Practices

The best way to ensure your nails receive the nourishment they need is through a balanced diet rich in vital nutrients. Focus on incorporating foods like nuts, seeds, leafy greens, eggs, and whole grains for optimal nail health.

Minerals such as calcium, magnesium, and iron also significantly contribute to the integrity of your nails. Including foods rich in these minerals, like dairy products, legumes, and lean meats, can further enhance the strength and resilience of your nails. Prioritizing a nutrient-dense diet will not only benefit your nails but also improve your overall health and well-being.

Preventative Measures for Future Care

Not taking the right precautions can lead to further damage to your nails after a manicure. To avoid future issues, prioritize the health of your nails by incorporating protective measures such as using gloves while doing household chores, choosing a qualified nail technician, and allowing your nails to breathe between manicures. Additionally, consider the environment you expose your nails to and try to minimize contact with harsh chemicals that can weaken them.

Choosing the Right Products

Among the plethora of nail products available, it’s crucial to select those that promote nail health. Opt for nail polishes that are free from harmful chemicals like toluene, dibutyl phthalate, and formaldehyde. Investing in high-quality base and top coats can protect your nails from chips and moisture loss, while nourishing oils and fortified treatments can strengthen your nail beds.

Establishing a Regular Nail Care Routine

Choosing to implement a consistent nail care routine will greatly benefit your nails in the long run. This routine should include moisturizing your nails and cuticles daily, along with regular filing and trimming to maintain their shape. Regular application of strengthening treatments can help prevent breakage and promote growth, while setting aside time for pampering with hand creams or conditioning oils will keep your nails looking their best.

Another key element of your routine is to schedule regular appointments for professional manicures. This allows for expert maintenance that can help identify any potential issues before they become problematic, while also providing an opportunity for a thorough cleaning and trimming. Furthermore, make an effort to include a healthy diet rich in vitamins and minerals, as this contributes significantly to the overall health and strength of your nails.

Professional Help: When to Consult an Expert

After a damaging manicure, it’s necessary to know when to seek professional help. If your nails are consistently splitting, peeling, or displaying extreme discoloration, consider reaching out to a nail technician or dermatologist. There are times when home remedies aren’t enough. For instance, you can get insights and support from others who have been in similar situations through this Help! Just had gel removed and my nails are paper thin … post.

Signs That Professional Repair is Needed

At times, you may notice persistent pain, severe brittleness, or signs of infection. If your nails are excessively fragile or demonstrate unusual changes that home care methods can’t rectify, it’s a signal that you should consult a professional. Observing any of these signs early can help prevent further damage.

What to Expect at a Nail Salon

Across your visit to a nail salon for professional help, you can expect a thorough assessment of your nail health. Nail technicians will likely ask about your nail care routine and recent treatments. They may also provide customized treatments to promote recovery, using products designed to strengthen and nourish your nails.

Expert technicians are trained to identify issues with your nails and provide specialized care tailored to your needs. They may use nourishing oils, strengthening treatments, or recommend specific nail products that aid in repair. Additionally, they will ensure that your nails are not only treated but also further protected from future damage, offering insights on a proactive nail care routine that you can follow at home.

Final Words

The process of repairing damaged nails after a manicure involves several steps to restore your nails’ health and appearance. Start by moisturising your hands and nails regularly, applying a strengthening base coat before polish, and avoiding harsh chemicals whenever possible. You should also give your nails a break from polish to allow them time to recover. Incorporating a healthy diet rich in vitamins and minerals can further support nail repair. By following these guidelines, you can promote stronger, healthier nails as part of your personal care routine.

FAQ

Q: What are common causes of nail damage after a manicure?

A: Nail damage can occur due to several reasons, including improper filing techniques that weaken the nails, overuse of harsh chemicals found in nail polish removers, or prolonged exposure to water which can cause nails to become brittle. Additionally, using low-quality nail products or not allowing sufficient drying time can also lead to chipping and peeling.

Q: How can I treat and repair my damaged nails at home?

A: To repair damaged nails, start by gently cleaning your nails and removing any remaining polish. Avoid harsh removers. Treat the nails with a nourishing oil, like vitamin E or jojoba oil, to help hydrate and strengthen them. Consider using a nail strengthening treatment or a clear strengthening polish that provides a protective layer. Lastly, maintain a balanced diet rich in vitamins and minerals, particularly biotin and protein, which support nail health.

Q: When should I seek professional help for nail repairs?

A: If your nails show signs of serious damage, such as splitting, lifting from the nail bed, or signs of infection (redness, swelling, or pus), it’s advisable to consult a nail care professional. They can assess the extent of the damage and provide appropriate treatment options. Additionally, if home remedies aren’t effective after a few weeks, seeking professional help can ensure your nails receive the care they need to recover properly.

Step-by-Step Guide to Reverse French Manicures

This guide will empower you to master the art of reverse French manicures, a chic twist on the classic style that showcases your creativity and flair. You’ll learn how to perfectly paint your nails in a way that highlights the tips while leaving the base of your nails a fresh, vibrant hue. From choosing the right colors to precise techniques that ensure a polished finish, this step-by-step approach will equip you with the skills you need for a stunning manicure that’s sure to impress.

Key Takeaways:

  • Preparation: Start with clean, dry nails and remove any old polish to ensure a smooth base for your manicure.
  • Base Coat: Apply a base coat to protect your natural nails and enhance the longevity of your polish.
  • Color Application: Choose your desired nail color and apply it to the tips of your nails, creating a crescent shape for the reverse French effect.
  • Top Coat: Finish with a high-quality top coat to seal your design and add shine, extending the wear of your manicure.
  • Creative Variations: Experiment with different colors and designs, such as ombre effects or glitter, to personalize your reverse French manicure.

Types of Reverse French Manicures

Your nail art journey can be enhanced by exploring different types of reverse French manicures. Here are some styles to consider:

  • Classic Reverse French
  • Ombre Reverse French
  • Metallic Reverse French
  • Gradient Reverse French
  • Multicolor Reverse French

Assume that each style allows you to express your creativity in unique ways.

StyleDescription
Classic Reverse FrenchA classic approach featuring a bold color tip at the base of the nail.
Ombre Reverse FrenchFading colors from dark to light, starting at the bottom.
Metallic Reverse FrenchUtilizing shiny metallic shades for the tips.
Gradient Reverse FrenchA smooth transition in color from the cuticle to the tip.
Multicolor Reverse FrenchCombining several colors for a vibrant look.

Classic Reverse French

Reverse French manicures traditionally feature a bold colored tip at the base of the nail, contrasting with a lighter or nude base. This style offers an elegant twist on the classic French manicure, making it a suitable choice for a variety of occasions.

Modern Variations

Manicures have evolved, introducing exciting modern variations of the reverse French style. These innovative designs integrate eye-catching colors and patterns, allowing for greater personalization.

Reverse techniques like ombre and gradient provide a fun twist, while metallic or multicolor options can make a bold statement. Each variation gives you the chance to showcase your style and creativity, transforming traditional nail art into something uniquely yours.

Essential Tips for a Successful Application

Some key tips will help you achieve a polished reverse French manicure. Follow these guidelines for the best results:

  • Ensure your nails are clean and dry before starting.
  • Use a base coat to protect your natural nails.
  • Be patient and allow each layer of polish to dry before applying the next.
  • Use tape or nail guides for precise lines.
  • Finish with a top coat for a shiny and long-lasting finish.

This approach will enhance the longevity and appearance of your manicure.

Nail Preparation

Even the best polishes won’t look great on poorly prepared nails, so it’s vital to invest time in nail preparation. Start by removing any old polish and gently buffing your nails to create a smooth surface. Cut, file, and shape your nails to your desired length, ensuring they are even. Finally, apply a nourishing cuticle oil to keep your nails and cuticles healthy, as this will promote better adhesion and overall look of your reverse French manicure.

Tool Recommendations

If you’re aiming for a flawless reverse French manicure, investing in the right tools is vital. A good-quality base coat, nail polish, top coat, and nail guides or tape will make the application process much easier. Additionally, using a small detail brush can help you achieve clean lines and defined edges.

This investment in quality tools will enhance your nail art experience and ensure beautiful results for your reverse French manicure. By having the right tools on hand, you will be able to express your creativity while maintaining a professional finish.

Step-by-Step Guide to Achieving the Perfect Look

Despite the intricacies involved in mastering a reverse French manicure, you can easily achieve a stunning result with the right approach. Follow these steps outlined in the table below to elevate your manicure game.

StepDescription
Prep Your NailsBegin by cleaning and shaping your nails for an even canvas.
Base CoatApply a thin layer of base coat to protect your nails.
Choose Your ColorsSelect contrasting colors for a striking effect.
Paint the TipsApply your chosen color to the tips of your nails.
Add a Top CoatFinish with a top coat for shine and protection.

Basic Steps Overview

Achieving a flawless reverse French manicure is all about the preparation and application techniques you employ. Following the basic steps, from nail prepping to painting and adding a top coat, ensures that your nails will look polished and chic.

Detailed Application Process

Even with your base and colors chosen, the key to a perfect reverse French manicure lies in the application process. Precision and steadiness are vital when painting the tips, as this will define the entire look of your manicure.

Plus, using a fine-tipped brush or a nail art pen can greatly enhance your precision while painting the tips. For an even more polished look, ensure your colors are applied in thin layers and allow each coat to dry before applying the next. This technique not only helps with evenness but also reduces bubbling and peeling, giving your manicure a professional finish that lasts longer.

Factors to Consider Before Getting Started

After deciding to try a reverse French manicure, there are a few factors you should take into account:

  • Your nail length and shape
  • The polish colors you wish to use
  • Your skill level with nail art
  • The time you can dedicate to the process

Any preparation you do will help ensure a successful and enjoyable nail art experience. For more tips, check out Mastering The Reverse French Nail Technique.

Nail Health

One vital aspect to keep in mind is the health of your nails. You should ensure that your nails are in good condition, free from any damage or signs of weakness. If your nails are brittle or peeling, you may want to consider applying a strengthening treatment before beginning your manicure.

Personal Style Preference

Any style preference you have will significantly influence your reverse French manicure. Whether you prefer bold colors or subtle shades, your personal taste can guide the design process.

Health is a key aspect of your overall nail care routine. Choosing colors and styles that reflect your personality can make wearing your nail art enjoyable and empowering. Experiment with different color combinations and designs that resonate with you, and don’t shy away from expressing your individuality through your nails.

Pros and Cons of Reverse French Manicures

Unlike traditional French manicures, reverse French manicures offer a unique twist on nail art. They can be a fun way to express your style, but it’s imperative to weigh the benefits and drawbacks before diving in. Below is a comparison of the pros and cons to help you decide if this trendy look suits your preferences.

Pros and Cons

ProsCons
Creative and modern styleCan be challenging for beginners
Great for nail art enthusiastsRequires precision for clean lines
Versatile with color combinationsLonger application time
Trendy and eye-catchingMay not suit formal occasions
Suitable for various nail shapesMaintenance required for perfect look

Advantages

You can enjoy a reverse French manicure’s versatility, allowing you to play with colors and designs in a way that traditional manicures may not. This style sets you apart and offers a modern twist, making your nails a unique form of expression while catching the attention of others.

Disadvantages

Advantages come with a few drawbacks as well. You may find that achieving the perfect reverse French look can be more demanding than a standard manicure. It often requires a steady hand and attention to detail, making it less suitable for those who are new to nail art.

This style can also be time-consuming to apply, and if done improperly, it may appear messy. Furthermore, if you have an active lifestyle or frequent hand washing, maintaining the clean lines can be an ongoing effort. You might find it necessary to touch up your nails more regularly to keep the design looking fresh and polished.

Frequently Asked Questions

Not every technique works for everyone, and you may have specific questions about reverse French manicures. If you’re curious about nail shapes, color combinations, or how to make your design last longer, you’ve come to the right place. This section addresses common inquiries to help you achieve the perfect reverse French look.

Common Concerns

While trying a new nail art style can be exciting, many people have concerns about achieving the desired look or how to maintain it. You might wonder how to avoid smudging or if you can use this technique on natural nails. These are valid points, and understanding them can help ease your mind.

Expert Answers

Expert advice can be invaluable when navigating the world of nail art. Many nail professionals recommend starting with a steady hand and using high-quality tools to ensure precise application. Additionally, using a good topcoat can significantly enhance the longevity of your manicure.

Plus, if you’re looking for color inspiration or design variations, consider experimenting with different shades that contrast or complement each other. Don’t hesitate to watch tutorials for visual guidance as well. Building your skills takes time, so be patient with yourself and enjoy the creative process.

To wrap up

Presently, you should feel confident in your ability to create a stunning reverse French manicure at home. By following this step-by-step guide, you can achieve a chic and modern look that complements your style. If you want more detailed instructions and tips, check out this Reverse french manicure step by step | Blog. Enjoy showing off your beautiful and fashionable nails!

FAQ

Q: What supplies do I need to perform a reverse French manicure at home?

A: To create a reverse French manicure, you will need the following supplies: a base coat, two colors of nail polish (one for the base and one for the tips), a top coat, nail tape or French manicure guides, a nail file, a clean-up brush or cotton swabs, and nail polish remover for any touch-ups. It’s also helpful to have a clear drying or fast-drying top coat to enhance the finish.

Q: How do I apply the base color for the reverse French manicure?

A: Start by applying a base coat to protect your natural nails. Once dry, apply your chosen base color (usually a neutral or nude color) to the entire nail. Apply two thin coats for an even coverage, letting the first coat dry completely before applying the second. This base color will serve as the canvas for your reversed tips.

Q: What techniques can I use for creating the tips in a reverse French manicure?

A: For the tips, you can use nail tape or French manicure guides to create clean lines. Position the tape or guides at the tips of your nails, ensuring they are even across all fingers. Apply the second color of nail polish over the tip area, making sure to cover any exposed base color. After the polish dries, carefully remove the tape or guides to reveal a sharp, defined line. You can also use a small brush for more precision. Finally, apply a top coat to seal the design and add shine.

Skip to content