Acrylic

Gel vs. Acrylic Nails – Pros and Cons

Many people find themselves torn between gel and acrylic nails when choosing the perfect manicure. Each option has its own set of advantages and disadvantages, making it important for you to understand what best suits your lifestyle and preferences. In this post, we will explore the pros and cons of both gel and acrylic nails, helping you make an informed decision for your next nail enhancement. Dive in to discover what fits your beauty routine and lasts the best for your day-to-day activities.

Key Takeaways:

  • Longevity: Acrylic nails often last longer than gel nails, making them a preferred choice for durability.
  • Appearance: Gel nails typically offer a more natural look and shine compared to acrylics, appealing to those seeking a less artificial finish.
  • Removal Process: Gel nails can be easier to remove, but both methods require care to avoid damaging the natural nail.

Understanding Gel Nails

A gel nail is a popular manicure option that provides a glossy finish and long-lasting wear. They are cured under a UV or LED light, making them more durable than traditional nail polish. If you’re curious about the differences, check out What’s the Difference Between Gel Nails and Acrylics? for a detailed comparison.

Composition and Features

After understanding the basics, you’ll find that gel nails are made from a combination of polymers and resins that create a flexible and natural-looking finish. These components work together to give your nails strength and shine without the bulkiness often associated with acrylics.

Application Process

Across the beauty industry, the application process for gel nails is favored for its efficiency. Your nail technician will first prep your natural nails, apply a base coat, and then cure it under UV or LED light. Following this, colored gel polish is layered on and cured again until your desired look is achieved.

In addition, each layer of gel is crucial to achieving that smooth finish. Although the curing time is quick, the process may require several layers for optimal color and durability. Once all layers are applied and cured, a top coat seals the gel, ensuring it lasts for weeks without chipping.

Understanding Acrylic Nails

You may find acrylic nails to be a popular choice for enhancing your natural nails with added length and strength. These artificial nails are made by combining a liquid acrylic and a powder, which creates a durable layer over your existing nails. You can find them in various shapes and styles, making it easy to customize your look.

Composition and Features

One of the standout features of acrylic nails is their composition, which consists of a combination of liquid monomer and powder polymer. This mixture creates a hard, protective layer that not only adds length and versatility to your nails but also provides a strong foundation that resists chipping and breaking.

Application Process

Across the beauty industry, the application of acrylic nails involves a meticulous process that ensures a flawless finish. A nail technician will first prepare your natural nails by cleaning and shaping them, followed by applying a primer to enhance adhesion. After that, the acrylic mixture is applied to your nails, sculpting the desired shape and length.

Another important aspect of the application process is the drying technique. Once the acrylic has been applied, it hardens quickly, usually within minutes, thanks to the reaction between the monomer and polymer. The technician may then buff and shape the nails for a smooth finish, followed by applying polish or nail art as you desire. This careful application results in sturdy nails that can last for several weeks with proper care.

Pros of Gel Nails

Keep in mind that gel nails offer several benefits, making them a popular choice among nail enthusiasts. They provide a natural look, flexibility, and a high-gloss finish that can last for weeks without chipping. With their lightweight formula, gel nails feel more comfortable than other types, giving you a beautiful and polished appearance without sacrificing durability.

Durability

Nails enhanced with gel products are known for their remarkable durability. They can withstand daily activities without easily chipping or breaking, ensuring that your manicure remains intact for longer periods. This longevity makes gel nails an appealing option for those with busy lifestyles who still want their nails to look perfect.

Aesthetic Appeal

One of the standout features of gel nails is their aesthetic appeal. The glossy finish creates a vibrant and polished look that enhances the natural beauty of your nails. With a variety of colors and designs available, you can easily customize your gel nails to suit any occasion or personal style.

Consequently, the aesthetic qualities of gel nails deliver not just beauty, but also versatility. You can achieve intricate designs, vibrant colors, and a smooth finish that elevates your overall look. This makes gel nails a favorite among fashion-forward individuals who want to express their personality through their manicured nails. Whether you prefer classic shades or trendy patterns, gel nails contribute to a polished and elegant appearance.

Cons of Gel Nails

To fully understand the downsides of gel nails, you should consider the potential drawbacks. While they offer a beautiful finish and durability, the process can be time-consuming, and the exposure to UV light during curing might raise concerns about skin damage. Additionally, if not done correctly, gel nails can weaken your natural nails over time, leading to breakage. It’s crucial to weigh these factors before deciding on gel nails for your next manicure.

Removal Process

Nails can be challenging to remove when it comes to gel applications, requiring a soaking procedure that can be quite time-intensive. You may need to visit a salon for safe removal, as improper techniques can damage your natural nails. The process typically involves soaking in acetone, which can be drying and potentially irritating to your skin. Regular upkeep is necessary, so consider how this might affect your nail health.

Cost Implications

Above all, weighing the financial aspect of gel nails is vital for your budgeting. Initial application costs can be higher than other types of manicures, and the need for regular maintenance and professional removal adds up over time.

Cost can be a significant factor when choosing gel nails. While the initial investment in gel nails might seem justified due to their longevity and aesthetic appeal, the recurring appointments for fills and maintenance can gradually increase your overall spending. Moreover, if you opt for salon removal instead of DIY methods, you will incur additional expenses. Evaluate these costs to ensure they align with your beauty budget and priorities.

Pros of Acrylic Nails

Your journey into the world of nails might lead you to acrylics, which offer a variety of advantages. Acrylic nails are robust and durable, making them a popular choice for those who desire long-lasting wear. They can withstand daily wear and tear, providing you with a beautiful manicure that stays intact longer than other options. Additionally, the application process allows for intricate designs that can elevate your style.

Customization Options

Acrylic nails give you limitless customization options. You can choose from various shapes, lengths, and colors to craft a look that’s uniquely yours. Whether you prefer a classic French tip or a bold, artistic design, the versatility of acrylics enables you to express your personal style.

Longevity

Around three to six weeks, acrylic nails maintain their stunning appearance, depending on how well you care for them. This extended wear makes them ideal for those who want to enjoy a polished look without frequent trips to the salon.

Due to their durable nature, acrylic nails can last several weeks without significant chipping or wear. This longevity is particularly beneficial for those with busy lifestyles or individuals who frequently find themselves working with their hands. Regular maintenance, such as fills or touch-ups, can further extend their lifespan while ensuring your nails continue to look fresh and fabulous.

Cons of Acrylic Nails

All nail enhancements come with their downsides, and acrylic nails are no exception. While they are popular for their durability and variety, they can pose some significant drawbacks. Issues such as damage to natural nails, potential allergic reactions, and strong odors can make you rethink your choice. Understanding these cons can help you make an informed decision about whether acrylic nails are the right fit for you.

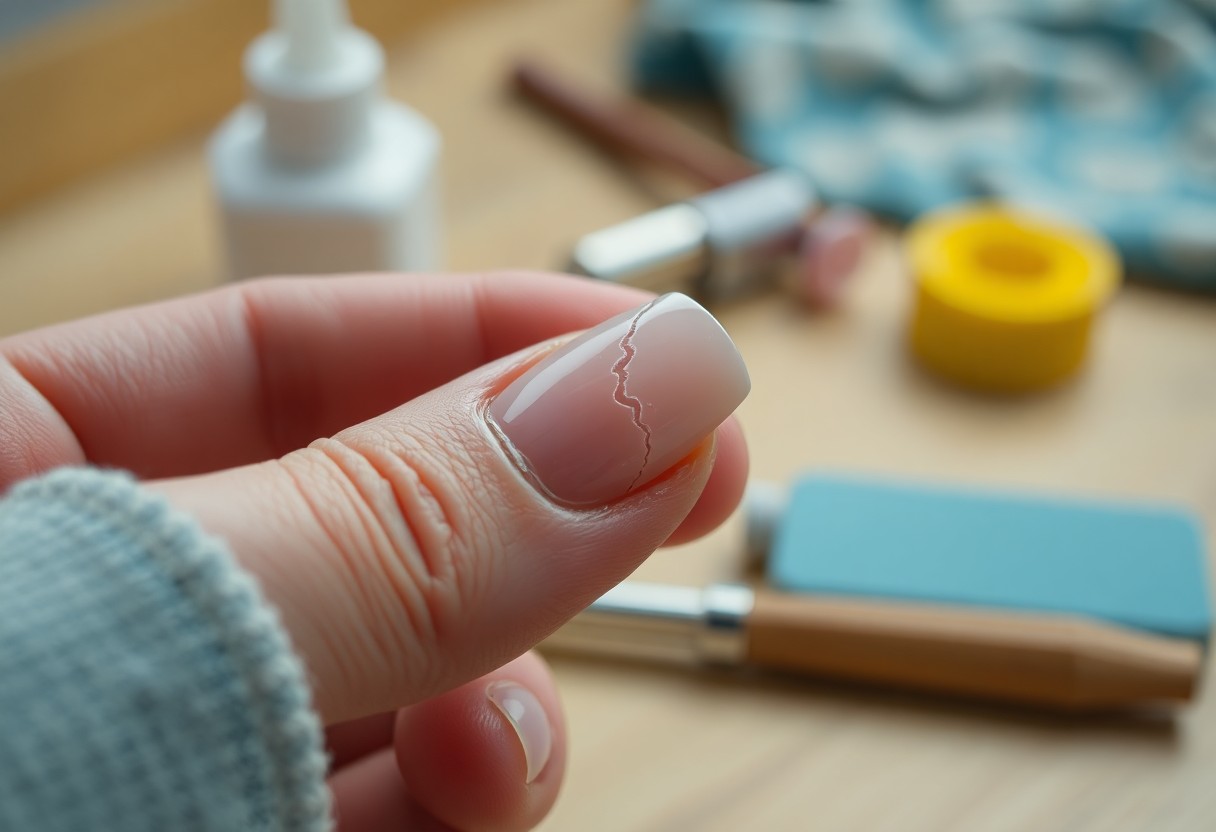
Damage to Natural Nails

One of the most significant concerns with acrylic nails is the potential damage they can inflict on your natural nails. The application process involves filing the nail surface to create a bond, which can thin and weaken your nails over time. Additionally, if acrylics are improperly removed or maintained, it can lead to brittleness, splits, and even permanent damage to your natural nail bed, necessitating time for recovery.

Odor and Allergies

An important aspect to consider is the odors and potential allergic reactions associated with acrylic nails. The chemicals used in applying acrylics, especially the acrylic liquid, often release strong fumes that can be unpleasant to breathe in. Those with sensitive skin or respiratory issues may find themselves experiencing irritation or reactions, highlighting the need for caution when opting for acrylic nails.

Odor from acrylic nails can be quite strong, stemming from substances like acetone and the monomer used in the process. This smell may linger in the salon even after your appointment. If you are sensitive to strong scents, you might find the experience uncomfortable. Moreover, allergies can manifest in various ways, from skin irritation to respiratory difficulties, making it imperative for you to consider your health history before choosing acrylic nails.

Final Words

Upon reflecting on the pros and cons of gel and acrylic nails, you have several factors to consider when choosing the best option for your needs. Gel nails offer a more natural look and flexibility, while acrylics provide strength and durability. Your lifestyle, budget, and personal preferences are key influences in this decision. It’s vital to weigh these aspects carefully, ensuring that your choice aligns with your desires for maintenance and appearance. Ultimately, understanding these differences empowers you to make an informed decision for your nail care journey.

FAQ

Q: What are the main differences between gel and acrylic nails?

A: The main differences between gel and acrylic nails lie in their composition and application process. Acrylic nails are created using a mixture of liquid monomer and powder polymer, which hardens when exposed to air. Gel nails, on the other hand, are made from a semi-solid gel that requires curing under a UV or LED lamp. This difference in curing affects the overall finish and durability of the nails—acrylic nails tend to be thicker and stronger, while gel nails offer a more natural, shiny appearance.

Q: What are the pros of choosing gel nails over acrylic nails?

A: Gel nails offer a number of advantages compared to acrylics. Firstly, they tend to look more natural, providing a glossier finish that mimics the appearance of natural nails. Additionally, gel nails are less prone to chipping and provide more flexibility, making them less likely to break. Moreover, the curing process creates a strong bond, which can result in a longer-lasting manicure without the strong chemicals often associated with acrylics.

Q: What are the drawbacks of using acrylic nails?

A: While acrylic nails provide a strong and durable option for nail enhancement, there are some drawbacks to consider. The application process can be more invasive, as it often involves filing down the natural nail to create a strong bond. This can lead to potential damage or thinning of the natural nail over time. Additionally, acrylics can have a strong odor during application due to the chemicals used, which might be off-putting to some individuals. Lastly, if not applied or removed properly, they can risk lifting and cause damage to the natural nail.

Q: Are gel nails easier to maintain than acrylic nails?

A: Generally, gel nails are considered easier to maintain than acrylic nails. They require less filing and can be less prone to lifting due to their flexibility, which allows them to withstand daily activities better. Regular upkeep typically involves minimal maintenance, as the growth gap from the cuticle area is less noticeable compared to that of acrylic nails. However, both types of nails require regular fills or maintenance every two to three weeks, depending on individual nail growth.

Q: Can I remove gel nails at home, or should I seek professional help?

A: While it is possible to remove gel nails at home, it is often recommended to seek professional help to avoid damaging the natural nails. The best practice for removal involves soaking the nails in acetone to loosen the gel before gently pushing it off. At home, this process can lead to mishaps if not done carefully. Professionals have experience and tools that can make the process quicker and safer, ensuring that your natural nails remain intact and healthy.

The Ultimate Guide to Acrylic Nail Care

Acrylic nails can elevate your look and boost your confidence, but proper care is crucial to keep them looking fresh and beautiful. In this guide, you will learn everything you need to know about maintaining your acrylic nails, from the best products and techniques for cleaning, to tips for preventing damage and ensuring longevity. Whether you are a newbie or a seasoned acrylic wearer, this guide will help you achieve gorgeous nails while prioritizing their health and durability.

Key Takeaways:

  • Maintenance: Regular upkeep is imperative for extending the life of your acrylic nails and keeping them looking fresh.
  • Hygiene: Proper cleaning and care are important to prevent infections and maintain nail health.
  • Removal: Safe and gentle removal methods are necessary to avoid damage to your natural nails.

Understanding Acrylic Nails

To fully embrace the beauty of acrylic nails, it’s vital to grasp what they are and how they function. Acrylic nails offer a durable and stunning alternative to natural nails, allowing for creative designs and extended length. For more information on acrylic nails, check out What You Need to Know Before Getting Acrylic Nails.

What Are Acrylic Nails?

Below is an overview of acrylic nails, which are enhancements made from a blend of liquid monomer and powder polymer. These are applied over your natural nails, creating a hard protective layer that can be shaped and styled according to your preference.

Benefits of Acrylic Nails

Acrylic nails provide various advantages, making them a popular choice for nail enthusiasts. They are incredibly durable, often lasting for weeks without chipping or breaking, which means less maintenance for you. You can also enjoy a wide array of styles, colors, and designs, transforming your nails into a canvas for your creativity.

With acrylic nails, you can achieve a polished and sophisticated look that complements your style. They are ideal for those who desire longer nails but struggle with breakage. Additionally, acrylics can help you overcome nail-biting habits, fostering healthier nail growth in the long run. The flexibility in customization allows you to express yourself, ensuring your nails always look stunning.

Getting Acrylic Nails Applied

Any time you decide to enhance your look with acrylic nails, it’s important to ensure that the application is done correctly for both aesthetic appeal and nail health. From choosing the right technician to understanding the application steps, this guide will help you navigate the process seamlessly, so you can enjoy beautiful, long-lasting nails.

Choosing a Professional Nail Technician

Nails are an expression of your personal style, and selecting a skilled technician can make all the difference. Look for a licensed professional with experience in acrylic applications. Read reviews, check out their social media, and don’t hesitate to ask about their sanitation practices to ensure a safe and quality experience.

The Application Process

Nails undergo several steps during the acrylic application process to ensure a perfect finish. Initially, your technician will prepare your natural nails by cleaning and buffing them. They will then apply a primer before sculpting the acrylic, forming it over your nails to achieve the desired shape. Finally, after the acrylic has set, they’ll file and shape them to finish your desired look.

Considering the intricacies involved, your technician will also assess your nail type and health during the application process. They may apply tips to extend your nails if necessary, ensuring a sturdy base. The acrylic mixture is then expertly applied in layers, allowing for sculpting and shaping. This meticulous process can take anywhere from 45 minutes to a couple of hours, depending on the complexity of your desired finish and the technician’s skill level.

Daily Care for Acrylic Nails

Unlike natural nails, acrylic nails require consistent care to maintain their beauty and durability. Incorporating daily routines, such as moisturizing your cuticles and avoiding harsh chemicals, can significantly extend the life of your acrylics. By prioritizing daily care, you can keep your nails looking fresh and prevent potential damage, ensuring they remain a stunning accessory to your overall look.

Cleaning and Maintenance

Acrylic nails thrive on proper cleaning and maintenance. Gently wash your hands daily with a mild soap, ensuring that you remove any dirt or residue without damaging the acrylic. You can use a soft brush to clean beneath the nails and avoid soaking your hands in water, which can loosen the acrylic over time. Following this routine will help prolong the life and appearance of your nails.

Avoiding Common Pitfalls

Across the acrylic nail care community, there are common mistakes that can lead to premature damage or degradation. From neglecting proper cleaning to using the wrong products, these pitfalls can shorten the lifespan of your nails.

Daily practices and mindful choices are your best defense against these issues. Avoiding excessive exposure to water, limiting contact with harsh chemicals, and steering clear of using your nails as tools are practical steps you can take. Keeping your nails hydrated with cuticle oil and maintaining regular visits to your nail technician for fills and maintenance will also support the integrity of your acrylics, ensuring they look their best for longer.

Repairing and Maintaining Acrylic Nails

Despite the durability of acrylic nails, they may chip or lift over time. To keep your nails looking pristine, it’s imperative to address any issues promptly. Regular maintenance and repairs not only enhance the aesthetic appeal of your nails but also prolong their lifespan. By staying proactive about your acrylic nails, you can ensure that they remain healthy and beautiful.

Identifying Issues Early

Below are some common signs that indicate your acrylic nails may need attention. Look for noticeable lifting at the edges, chips in the acrylic, or any changes in color or texture. Early detection allows you to address the problem before it worsens, ultimately saving you time and money on repairs.

Tools and Products for Repairs

Behind every successful acrylic nail repair is a set of imperative tools and products. Investing in a good quality acrylic nail kit, including a brush, nail file, and glue, will equip you to handle minor damages with ease. Having these tools on hand will streamline the repair process whenever issues arise.

Also, consider keeping a repair kit stocked with items like a buffer, cuticle oil, and a nail strengthener. A buffer will help smooth out any rough edges, while cuticle oil maintains nail health. Nail strengtheners can help prevent further damage, giving your acrylics extra support. By having these tools readily available, you empower yourself to perform quick fixes and prolong the life of your stunning acrylic nails.

Removing Acrylic Nails Safely

Once again, the removal process of acrylic nails is just as important as their application. To ensure that your natural nails remain healthy and undamaged, it’s necessary to follow a safe removal method. Avoid the temptation to rip them off, as this can lead to breakage and long-term damage. Instead, choose a method that will gently dissolve the acrylic, protecting your natural nails in the process.

Professional vs. At-Home Removal

Beside the option of removing acrylic nails at home, you can also choose to visit a professional nail technician. While at-home removal can save you time and money, a professional can ensure that the process is done with minimal risk of damage. Assess your comfort level and the condition of your nails to make the best choice for your situation.

Steps for Safe Removal

Steps to remove acrylic nails correctly involve careful techniques to safeguard your natural nails. Start by trimming your acrylics as short as possible and using an acetone-soaked cotton ball to soften the adhesive. Wrap your fingers with foil to keep the cotton in place and allow it to sit for a while. Finally, gently scrape off the softened acrylic using a wooden stick and buff any leftover residue.

Safe removal begins with preparation; make sure to gather the necessary tools such as acetone, cotton balls, and aluminum foil. After trimming your acrylic nails, soak the cotton balls in acetone and place them over each nail, securing them with foil. This allows the acetone to penetrate and dissolve the acrylic effectively. After 20-30 minutes, gently scrape away the acrylic using a wooden stick to avoid hurting your natural nails. Always follow up with nourishing cuticle oil to restore moisture and promote healthy nail growth.

Common Myths About Acrylic Nails

Keep in mind that myths surrounding acrylic nails can lead to misconceptions about their safety and maintenance. Many people believe that acrylics will damage your natural nails irreparably, but with proper care, that’s far from the truth. By debunking these myths, you can embrace the beauty of acrylic nails without fear.

Debunking Misconceptions

Misconceptions about acrylic nails often stem from misunderstandings about the application process and nail health. You might have heard that they cause thinning or breaking of your natural nails, but this can occur mainly due to improper application or removal techniques. When done correctly by a skilled technician, acrylics can coexist harmoniously with your natural nails.

Understanding the Truth

Understanding the truth about acrylic nails involves recognizing the benefits and responsibilities associated with their use. Many people believe that acrylics are inherently harmful, which isn’t true when you prioritize quality products and professional care. By following the right aftercare routine and allowing your nails time to breathe between applications, you can maintain healthy natural nails alongside your acrylic enhancements.

At the end of the day, knowledge is power when it comes to acrylic nail care. Regular maintenance, such as timely fills and gentle handling, will keep your nails looking fabulous while reducing any potential risks associated with acrylics. By understanding both the advantages and limitations of acrylic nails, you empower yourself to make informed decisions that suit your lifestyle and nail health needs.

To wrap up

As a reminder, maintaining your acrylic nails is imperative for both their longevity and the health of your natural nails. By following the care tips outlined in this guide, such as regular hydration, gentle cleaning, and avoiding harsh chemicals, you can keep your acrylics looking fabulous while preventing damage. Always prioritize regular maintenance appointments and listen to your nails’ needs. With the right care, you can enjoy beautifully manicured nails that enhance your overall style and confidence.

The Ultimate Guide to Acrylic Nail Care – FAQ

Q: What are acrylic nails and how are they applied?

A: Acrylic nails are artificial nail enhancements made from a mixture of a liquid monomer and a powdered polymer. The application process typically involves cleaning the natural nails, applying a primer, and then sculpting the acrylic mixture over the nail bed, which can be shaped into various styles. A UV or LED lamp is used to cure the product, resulting in a strong and durable nail extension.

Q: How do I maintain my acrylic nails to keep them looking good?

A: To maintain your acrylic nails, it’s crucial to keep them clean and moisturized. Regularly apply cuticle oil to the base of your nails and hand lotion to prevent dryness. Avoid exposing your nails to harsh chemicals and always wear gloves while doing household chores. Schedule regular fill-ins, typically every 2-3 weeks, to manage regrowth and maintain the overall appearance of the nails.

Q: Can I do everyday activities with acrylic nails?

A: Yes, you can perform most everyday activities with acrylic nails, but it’s important to be cautious. While acrylic nails are quite durable, they can still chip or break if subjected to excessive force. Avoid using your nails as tools for opening packages or scratching surfaces, and be careful with heavy lifting to prevent stress on the nails.

Q: What should I do if my acrylic nails lift or break?

A: If you notice any lifting or breaking of your acrylic nails, it’s best to visit your nail technician for repairs as soon as possible. Do not attempt to fix it yourself, as this can lead to further damage to your natural nails. If immediate professional help isn’t available, you can apply a nail glue or adhesive to temporarily secure the broken piece until you can get it fixed properly.

Q: Are there any special products I should use for acrylic nail care?

A: Yes, using specific products can help maintain the health of your acrylic nails. Look for non-acetone nail polish removers to avoid damaging the acrylic. Additionally, use gentle soaps and moisturizers, and consider applying a top coat designed for acrylics to enhance durability and shine. Using a strengthener can also help protect both your acrylics and natural nails.

Common Myths About Gel and Acrylic Nails

Most people have encountered various myths about gel and acrylic nails that can lead to confusion when choosing the right option for your nails. Whether you’re a novice or a seasoned nail enthusiast, understanding the truth behind these popular enhancements is crucial for making informed decisions and maintaining healthy nails. In this post, we’ll debunk some of the most prevalent misconceptions, providing you with the facts you need to enhance your nail experience while keeping your nails looking fabulous.

Key Takeaways:

  • Damage: Many believe that gel and acrylic nails cause significant damage to natural nails, but with proper application and care, they can be safe and non-damaging.
  • Longevity: There’s a myth that gel nails last longer than acrylics; however, the longevity of each depends on factors like nail care and personal lifestyle rather than the product itself.
  • Maintenance: Some think that maintenance for gel and acrylic nails is excessively high; in reality, regular fills and careful upkeep can keep them looking great without too much effort.

Myth 1: Gel Nails Are More Damaging Than Acrylics

A common belief is that gel nails are more damaging to your natural nails than acrylics. However, this isn’t necessarily true. The actual damage depends more on the application and removal process than the product itself. When applied and removed correctly, gel nails can be less harmful than acrylics since they typically require less filing of your natural nail. It’s important to choose a skilled technician who follows proper techniques to minimize any potential damage, whether you opt for gel or acrylic nails.

Myth 2: Acrylic Nails Last Longer Than Gel Nails

For many, the belief that acrylic nails last longer than gel nails is prevalent, but that’s not necessarily the case. Gel nails can be just as durable, with proper application and care, often lasting up to three weeks or more. Factors such as your lifestyle, nail care routine, and the skills of your nail technician play significant roles in longevity. If you’re looking to bust more myths around gel nails, check out the Common Gel Nail Myths Debunked | Miss Dolla Blog USA for more insights.

Myth 3: You Can’t Soak Off Acrylic Nails

One of the common misconceptions about acrylic nails is that you can’t soak them off. In reality, you can safely remove acrylic nails by soaking them in acetone. By doing so, the acrylic begins to break down, allowing you to gently peel or scrape it off without damaging your natural nails. It’s necessary to give yourself enough soaking time and to follow the right procedure for removal to maintain the health of your nails. Using the right techniques ensures your nails stay strong after the acrylics are gone.

Myth 4: Gel Nails Don’t Chip or Break

It’s a common misconception that gel nails are impervious to chipping or breaking. While gel nails are more flexible and durable than traditional polish, they are not indestructible. Your daily activities, like typing or household chores, can expose your nails to stress, leading to chips or breaks if proper care isn’t taken. To prolong the life of your gel nails, consider using gloves during heavy-duty tasks and avoid using your nails as tools. Understanding this reality will help you maintain the integrity of your beautiful nails without disappointment.

Myth 5: Both Nail Types Require the Same Maintenance

While many believe that gel and acrylic nails require similar maintenance, the truth reveals significant differences. Recognizing these differences can help you better care for your nails and prolong their beauty.

Nail TypeMaintenance Requirements
Gel NailsNeed regular touch-ups every 2-3 weeks.
Acrylic NailsRequire fills every 3-4 weeks, based on growth.
Gel NailsLess prone to lifting, easier upkeep.
Acrylic NailsMore maintenance due to potential lifting.
Gel vs AcrylicGel needs less frequent, but more specialized upkeep.

Assume that understanding the maintenance differences will enhance your nail care experience and ensure your nails always look their best.

Myth 6: You Can’t Customize Nail Designs with Gel

There’s a misconception that gel nails limit your creative potential, but that’s far from the truth. In fact, gel polish can be easily customized with a variety of colors, textures, and nail art techniques. Whether you prefer intricate designs, gradients, or even 3D embellishments, gel nails provide a versatile canvas for your personal style. You can experiment with different finishes, like matte or glossy, and incorporate glitter or foils to make your nails truly unique. So, embrace your creativity and let your gel nails become an extension of your personality!

Conclusion

Now that you are equipped with the facts about common myths surrounding gel and acrylic nails, you can make informed decisions about your nail care. Understanding the differences in application, durability, and safety will help you choose the best option for your lifestyle and nail health. Embrace your nail journey with knowledge, ensuring that your choices enhance both your appearance and well-being.

FAQ

Q: Are gel and acrylic nails the same?

A: No, gel and acrylic nails are not the same. Gel nails are made using a gel formula that requires UV or LED light to cure and harden, giving them a glossy finish. Acrylic nails, on the other hand, are made from a combination of a liquid monomer and a powder polymer, which hardens when exposed to air. Each has different applications and results, catering to various preferences.

Q: Do gel and acrylic nails damage natural nails?

A: Both gel and acrylic nails can potentially cause damage to natural nails if not applied or removed correctly. However, when applied properly by a trained professional and removed safely, the risk of damage can be minimized. It’s vital to practice good nail care and allow natural nails to rest between applications.

Q: Can you get acrylic nails if you have weak or damaged nails?

A: Yes, you can get acrylic nails even if you have weak or damaged nails. In fact, acrylics can provide a protective layer, helping to shield the natural nails while they recover. However, it’s important to consult with a nail technician who can assess your nail health and provide tailored advice based on your specific situation.

Q: Do gel and acrylic nails require maintenance?

A: Yes, both gel and acrylic nails require maintenance. Typically, they need to be refilled or “infilled” every two to three weeks as the natural nails grow. Additionally, regular touch-ups can help maintain their appearance and prevent lifting or chipping. Proper care can also extend the longevity of the enhancements.

Q: Can I paint over my gel or acrylic nails?

A: Yes, you can paint over gel or acrylic nails. Many people choose to apply regular nail polish or gel polish for added color and design. However, it’s important to use a remover that is suitable for the type of enhancement to avoid damaging the nails during future maintenance or removal. Using a topcoat can also protect both the polish and the underlying enhancements.

How to Safely Remove Acrylic Nails at Home

It’s crucial to know the right techniques for safely removing acrylic nails at home to avoid damaging your natural nails. With the right tools and careful steps, you can ensure that your nails stay healthy while eliminating those artificial extensions. This guide will walk you through the process, providing you with the knowledge and confidence to perform the task effectively without needing professional help. Get ready to reclaim your natural nails with these straightforward tips!

Key Takeaways:

  • Soaking Method: Use acetone or a nail polish remover containing acetone to soak your acrylic nails. This helps to break down the adhesive, making it easier to remove the nails without damage.
  • Gentle Scraping: After soaking, gently scrape off the acrylic using a wooden cuticle stick. Avoid using metal tools to prevent harming your natural nails.
  • Aftercare: Moisten your nails and cuticles with oil or lotion post-removal to nourish and restore hydration to your nails and skin.

Understanding Acrylic Nails

The acrylic nails trend continues to be popular due to their versatility and ability to enhance the beauty of your hands. These artificial nails are created by combining a liquid monomer and a powder polymer, forming a durable coating over your natural nails. This process allows for various shapes and lengths, catering to your personal style. However, while acrylic nails can be fabulous, there are times when removal becomes necessary for the health and well-being of your natural nails.

What Are Acrylic Nails?

The acrylic nails are synthetic enhancements that offer a polished appearance and can be customized to suit your aesthetic preferences. They are crafted by mixing a liquid and powder to form a hard protective layer over your natural nails. This method not only adds length but also strength, allowing your nails to withstand daily activities without breaking easily. With various colors and designs available, acrylic nails can be tailored to match your style.

Common Reasons for Removal

Below are some common reasons why you may consider removing your acrylic nails. Changes in personal style, natural nail growth, and damage to the acrylic or your underlying nail are just a few reasons. Feeling discomfort or noticing signs of lifting can also prompt you to seek removal. Maintaining the health of your natural nails is important, as excessive wear and tear can lead to further issues.

Reasons for removing acrylic nails can vary based on personal preference and nail health. You may decide to remove them if your nails have grown out significantly, as this can create an undesirable gap between your cuticle and the acrylic. Moreover, if you experience any discomfort or if the acrylic nails are at risk of breaking, it’s best to have them removed. Additionally, you might wish to switch from acrylics to a more natural nail approach or alter your nail look for a special occasion. Keeping an eye on the condition of your natural nails is necessary to ensure they remain healthy and strong.

Preparing for the Removal Process

You should take some time to prepare before attempting to remove your acrylic nails at home. This means gathering all the necessary tools and choosing a suitable environment where you can work efficiently, ensuring that you are comfortable and free from distractions. Proper preparation will not only make the process easier but will also help protect your natural nails and surrounding skin during removal.

Tools and Materials Needed

Needed for the removal process are acetone, cotton balls or pads, aluminum foil, a nail file, a wooden cuticle stick, and a bowl. Having a good pair of scissors on hand can also be useful for trimming the acrylic nails if they are particularly long. Ensure that all your tools are clean and ready to use to promote safety and hygiene.

Choosing the Right Environment

Above all, you’ll want to select a clean and well-ventilated space for removing your acrylic nails. Ideally, this should be a table where you can lay out all your tools and materials. Having good lighting will help you see what you’re doing, while a surface that is easy to clean will make cleanup after the process simpler. Avoiding damp or cluttered places will help you maintain focus and protect your belongings from any accidental spills.

At the same time, ensure that your chosen environment is free from distractions. Consider playing soothing music or keeping your phone out of reach to help you focus on the task at hand. A calm atmosphere can make the process more pleasant and allow you to execute each step with care, ultimately leading to a more successful removal of your acrylic nails.

Step-by-Step Removal Process

Once again, it’s important to follow a cautious approach when removing acrylic nails at home. Below is a structured guide to help you through the process effectively.

Step-by-Step Guide

Step 1Gather supplies: acetone, cotton balls, aluminum foil, a nail file, and a cuticle pusher.
Step 2File the top layer of the acrylic nails to break the seal.
Step 3Soak cotton balls in acetone and place them on your nails.
Step 4Wrap your fingertips with aluminum foil to hold the cotton balls in place.
Step 5Leave on for 15-30 minutes, then gently scrape off the softened acrylic.
Step 6Clean your nails and moisturize your hands.

Soaking Method

About 75% of the time, the soaking method is the preferred approach for removing acrylic nails. This method involves immersing your fingertips in acetone to dissolve the acrylic material gently. It’s a simple and effective way to tackle the adhesive without damaging your natural nails.

Nail File Method

An alternative to soaking, the nail file method can be used for quicker removal. This technique allows you to file away the acrylic layers gradually, although it requires more caution to avoid harming your natural nail beneath.

Step by step, to utilize the nail file method, start by filing the surface of the acrylic to reduce thickness. Be sure to use a coarse nail file to penetrate the layers without applying excessive pressure. Once you notice the acrylic getting weaker, carefully work your way down to the natural nail, taking breaks as needed to avoid damaging your nail bed. This method might take longer, but it lets you maintain better control throughout the removal process.

Aftercare for Your Natural Nails

To ensure the health of your natural nails post acrylic removal, it’s crucial to incorporate specific aftercare practices. Focus on nourishing and protecting your nails to promote healing and regain their strength. Maintaining a consistent regimen will help you achieve healthier, more resilient nails over time.

Moisturizing and Hydrating

Below are several ways to keep your nails and cuticles well-hydrated. Apply a high-quality cuticle oil or moisturizing cream regularly to help replenish moisture stripped away during the acrylic application and removal process. This will keep your nails flexible and prevent breakage.

Strengthening Treatments

An effective way to enhance your nail health is through strengthening treatments. Look for products specifically designed to fortify and promote growth, such as nail strengtheners and growth serums. These can provide your nails with the nutrients they need to recover quickly.

This approach often involves using formulas rich in proteins, vitamins, and crucial oils aimed at repairing any damage caused during acrylic wear. You might also consider biotin supplements to promote healthy nail growth from within. Regular use of strengthening treatments will help your nails regain their strength and resilience, ensuring they look their best in no time.

Common Mistakes to Avoid

All too often, people make avoidable mistakes while attempting to remove acrylic nails. It’s necessary to be mindful of your approach to ensure you don’t damage your natural nails or cause undue pain. Taking the right steps will lead to a more successful and safer removal process.

Rushing the Removal

Behind the urge to free yourself from acrylic nails, rushing the removal process can lead to painful consequences, including damaged nails and skin. Take your time and allow the necessary products to work effectively before moving onto the next step.

Using Harsh Chemicals

At times, damaging chemicals might seem like a quick solution for removing acrylic nails. However, using these substances can have adverse effects on your nails and skin, leading to irritation or long-term damage.

And it’s best to opt for acetone, which is widely recommended for gentle acrylic nail removal. While it effectively breaks down the acrylic material, ensure you use a pure form and avoid any products containing unnecessary additives or harsh chemicals. By sticking to safer options, you not only protect your natural nails but also maintain the health of your skin around them.

Frequently Asked Questions

Unlike what some might believe, safely removing acrylic nails at home can be straightforward with the right techniques. Many people have questions regarding the process, tools needed, and potential risks. If you’re unsure about how to start, you can find helpful guidance on how to safely remove acrylic nails at home. It’s important to approach this task carefully to maintain the health of your natural nails while ensuring a smooth removal process.

Conclusion

With this in mind, you can safely remove your acrylic nails at home by following the appropriate steps. Ensure you gather the necessary materials, soak your nails properly, and avoid aggressive methods that could damage your natural nails. By taking your time and being gentle, you can successfully remove the acrylics while maintaining the health of your nails. If you encounter any issues, don’t hesitate to consult a professional for assistance.

FAQ

Q: How can I safely remove acrylic nails at home?

A: To safely remove acrylic nails at home, start by gathering your supplies: nail file, cotton balls, acetone, foil, and a cuticle pusher. First, file the top layer of the acrylic to break the seal. Soak a cotton ball in acetone and place it on each nail, then wrap it in foil to keep the heat in. Leave it on for about 30 minutes. Once soft, gently push the acrylic off your nail using the cuticle pusher. If there’s any resistance, re-soak and wait a little longer.

Q: Is it safe to use regular nail polish remover instead of acetone?

A: Regular nail polish remover typically contains acetone but at a lower concentration. While it may work for some, it can take much longer to dissolve acrylic nails, and may not remove them completely. For the best results and faster removal, it’s advisable to use 100% acetone, which is specifically designed for dissolving acrylics.

Q: How do I prevent damage to my natural nails during the removal process?

A: To protect your natural nails, it’s important to avoid pulling or prying off the acrylic. Always follow the soaking method, as this minimizes trauma to your nails. Additionally, consider applying cuticle oil or a strengthening treatment to your nails and cuticles after the removal to help replenish moisture and encourage recovery.

Q: What should I do if the acrylic nails are not coming off easily?

A: If the acrylics are resistant to removal, do not force them off as this can cause damage to your natural nails. Instead, re-soak them by applying more acetone and wrapping the nails in foil again. If necessary, give them an extra 10 to 15 minutes to break down further. Patience is key to a safe removal process.

Q: What aftercare should I perform once the acrylic nails are removed?

A: After removing acrylic nails, it’s vital to care for your natural nails. Start by gently buffing the surface to smooth out any ridges. Consider applying a moisturizing hand cream and cuticle oil to nourish your nails and skin. Additionally, allowing some time for your natural nails to breathe before applying new enhancements is a good practice to ensure their health.

How to Repair a Cracked Acrylic Nail

Just like any other beauty treatment, acrylic nails can encounter some mishaps, including cracks. If you find yourself with a cracked acrylic nail, you don’t need to panic—there are simple steps you can follow to restore it. This guide will walk you through the process, ensuring your nails look flawless again. For a quick technique, you can check out this detailed resource on how to Repair a Cracked Acrylic Nail in Two Minutes – Technique.

Key Takeaways:

  • Assess the Damage: Before starting the repair, evaluate the extent of the crack to determine if a simple fix or a complete replacement of the nail is needed.
  • Use Proper Tools: Gather crucial tools such as nail glue, a file, and a buffing block for an effective repair process.
  • Seal the Crack: Apply nail glue carefully into the crack, smooth it out, and allow it to dry completely to ensure a strong bond.

Understanding Acrylic Nails

To appreciate the maintenance involved with acrylic nails, it’s important to understand their composition and functionality. Acrylic nails are artificial nails created using a mixture of liquid monomer and powder polymer, which hardens when applied over your natural nails. They provide strength and versatility for various nail enhancements, enabling you to achieve different shapes and lengths while protecting your natural nails from damage.

What Are Acrylic Nails?

Between the myriad of nail options available, acrylic nails stand out for their durability and adaptability. They are popular for those who desire long-lasting, elegant nails with a polished look. Achieved through an application process that includes sculpting and shaping, acrylics can be customized to fit your preferred style, making them a go-to choice for many nail enthusiasts.

Common Issues with Acrylic Nails

Beside the appealing aesthetic, acrylic nails can encounter several issues that you should be aware of to maintain their integrity. Common concerns include lifting, cracking, and chipping, which can arise from various factors such as improper application, inadequate aftercare, or even lifestyle habits that put stress on your nails.

Consequently, being informed about these common issues can help you take proactive measures to preserve the quality of your acrylic nails. For instance, ensuring that your acrylic nails are properly applied and regularly maintained can prevent lifting, while being cautious during daily activities can minimize the risk of chipping. By understanding these challenges, you can better care for your acrylics and enjoy their benefits longer.

Diagnosing the Crack

Assuming you notice a crack in your acrylic nail, the first step is to accurately diagnose its nature. Understanding the type and extent of the crack will guide your repair efforts and help you determine whether professional assistance is required. Inspect your nail closely and note any other signs of damage, such as lifting or discoloration, which may indicate a more serious problem.

Types of Cracks

Assuming you’re familiar with common types of cracks, here are some categories to consider:

  • Surface Cracks: Minor, generally aesthetic.
  • Deep Cracks: Extend through multiple layers and require more extensive repair.
  • Split Nails: More severe, may involve loss of nail integrity.
  • Chips: Small areas where the acrylic has broken away.
  • Fissures: Hairline fractures that can worsen over time.

Thou should assess your nail carefully to identify any of these issues.

Type of CrackDescription
Surface CracksMinor with no structural damage.
Deep CracksPotential to separate the nail from the natural nail.
Split NailsInvolves a significant loss of integrity.
ChipsSmall portions missing from the edge of the nail.

Assessing Damage Severity

Crack identification is a key part of assessing damage severity. It’s important to evaluate how deep the crack goes and whether it affects the overall structure and appearance of your nail. Is the crack merely cosmetic, or does it lead to the natural nail being exposed? Carefully consider if the surrounding area shows redness, swelling, or infection signs, as these may require immediate attention.

Assessing the severity of the damage involves looking at various factors, including the type and location of the crack, how deep it penetrates, and any accompanying symptoms. A good rule of thumb is to visualize whether the crack compromises the nail’s functionality or aesthetics. If you notice significant impairment in any form, it is wise to consult a professional before attempting a DIY repair. Treat your nails with the care they deserve, ensuring they remain healthy and beautiful.

Tools and Materials Needed

Unlike other nail repair methods, fixing a cracked acrylic nail requires specific tools and materials to achieve a seamless finish. Gather items such as a nail file, buffer, nail glue, a repair wrap, and cuticle oil to ensure a smooth and effective repair process. Having the right supplies will help you restore your nail to its former beauty and maintain its integrity.

Essential Repair Tools

Between the various tools you’ll use, a nail file and buffer are imperative for smoothing the surface of the damaged area. A pair of scissors can also be handy for trimming any ragged edges. Additionally, nail glue will be required to bond the pieces together securely.

Recommended Products

Beside these tools, you may want to consider specific products that enhance your repair efforts, such as professional-grade nail glue or specialized acrylic repair kits.

Products like high-quality nail glue often provide stronger adhesion, preventing future cracks or breaks. Acrylic repair kits typically include everything needed for a comprehensive fix, including wraps or fiberglass patches that can reinforce the nail. Investing in these products not only makes your repair easier but also helps maintain the longevity of your acrylic nails.

Step-by-Step Repair Process

Now that you’ve identified the issue, follow these steps to effectively repair your acrylic nail. For more insights on similar experiences, check out My acrylic nail has cracked through the middle and …

Information Breakdown

StepDescription
1. Preparing the NailEnsure the area around the crack is clean and dry.
2. The Repair TechniqueUse an acrylic repair kit or bonding agent.
3. Finishing TouchesShape and polish the repaired nail.

Preparing the Nail

To prepare your nail for repair, first clean the cracked area with a gentle nail cleanser to remove oils or debris. You’ll want to gently buff around the crack with a fine buffer, which will help the adhesive bond better to your acrylic nail.

The Repair Technique

The next step involves applying a suitable acrylic repair product. Carefully follow the manufacturer’s instructions to ensure a proper application.

A well-applied acrylic repair product will fill in the crack seamlessly. Make sure to apply it evenly, using a small brush or a toothpick to push the material into the crack and smooth it out. Allow the product to cure completely before moving on to the next step.

Finishing Touches

Between applications, check the repair to ensure it has set correctly. Once dry, file the nail gently to reshape it, and buff the surface until smooth.

Further refinements can involve applying a top coat for shine and durability. This also helps blend the repaired area with the existing acrylic, making the repair less noticeable.

Preventing Future Damage

Despite the occasional mishap, you can take effective measures to keep your acrylic nails intact and prevent future damage. Adopting a few simple habits will enhance the longevity of your nails and reduce the chances of cracking or lifting. Regular maintenance and careful interactions with your environment play key roles in preserving the quality of your acrylics.

Proper Care Tips

Below are some proper care tips to consider for your acrylic nails:

  • Keep your nails moisturized with cuticle oil.
  • Avoid using your nails as tools for opening or prying.
  • Limit exposure to harsh chemicals and detergents.
  • Wear gloves during cleaning tasks or when using chemicals.
  • Schedule regular maintenance appointments with your nail technician.

Knowing how to care for your nails can significantly extend their life and appearance.

Best Practices for Acrylic Nails

Between your appointments, you can adopt best practices to maintain the health and integrity of your acrylic nails. These practices help prevent damage while ensuring your nails always look their best.

Best practices for acrylic nails include avoiding excessive moisture and ensuring your hands are always clean and dry. Be mindful of any activities that can put stress on your nails, such as typing or using your phone, and try to minimize force during these actions. Regularly trim and file your natural nails before your appointment to keep them healthy. Additionally, be sure to apply sunscreen to your hands to protect against UV rays, which can weaken the acrylic over time. These effective approaches will help you enjoy stunning nails while minimizing the risk of damage.

When to Seek Professional Help

Your DIY repair skills may be impressive, but there are situations where seeking professional help is the best option. If the crack is deep, near the nail bed, or accompanied by pain, you should consult a nail technician or dermatologist. Attempting to fix it yourself could lead to further damage or infection. Additionally, if multiple nails are cracked, it might indicate an underlying issue that requires expert assessment. Don’t hesitate to get professional advice to ensure your nails remain healthy and beautiful.

Summing up

Summing up, repairing a cracked acrylic nail can be a straightforward process if you follow the proper steps. You should clean the area, apply a nail glue or acrylic resin for reinforcement, and shape it to match your natural nail. Don’t forget to file the edges for a smooth finish. For more detailed guidance, check out How to Handle a Snapped Acrylic Nail: Repair Tips. By taking these measures, you can maintain the integrity of your nails while ensuring they look flawless.

Q: What materials do I need to repair a cracked acrylic nail?

A: To repair a cracked acrylic nail, you will need the following materials:
– Nail file or buffer to smooth the surface
– Clear nail glue or acrylic nail repair kit
– An acrylic brush (if using acrylic powder and liquid)
– Acrylic powder and liquid (if doing a more extensive repair)
– Nail tips or a piece of a plastic nail (for larger cracks)
– A small pair of scissors (optional for trimming)
– Cuticle oil (optional for hydration)
– Rubbing alcohol and lint-free wipes for sanitation

Q: How can I repair a minor crack in my acrylic nail at home?

A: For a minor crack, start by carefully filing the area around the crack to smooth it out. Clean the nail with rubbing alcohol using a lint-free wipe. Next, apply a small amount of clear nail glue over the crack and let it dry completely. Once the glue is dry, you can shape and buff the nail to make it look natural. Finish by applying a topcoat for added protection and shine.

Q: Can I repair a severe crack or break in my acrylic nail myself?

A: Yes, a severe crack or break can be repaired at home, but it may require more materials and effort. Start by assessing the damage. If the nail is entirely broken off, you will need to use a nail tip. First, file the remaining acrylic down to create a smooth surface. Then, apply the nail tip to the broken area with nail glue. Once secure, you may need to apply a thin layer of acrylic over the tip using an acrylic powder and liquid for a seamless finish. Afterward, shape, buff, and polish your nail to blend it with the rest. For larger damages, consider visiting a nail technician for a more polished result.

Skip to content