At-Home Nail Care

How to Make Your Own Nail Polish at Home

There’s a world of color and creativity waiting for you when you learn how to make your own nail polish at home. By following simple steps, you can create unique shades tailored to your style while avoiding the harsh chemicals often found in commercial products. If you’re interested in a more natural approach, check out this guide on How to Make a Natural Nail Polish?. Get ready to mix, match, and express yourself through custom nail polish blends!

Key Takeaways:

  • Ingredients: Collect crucial ingredients such as clear nail polish, pigments or eyeshadow, and a mixing tool to create your desired color.
  • Mixing Process: Combine the chosen pigments with the clear polish in a small container, ensuring you mix thoroughly to achieve an even consistency.
  • Customizations: Experiment with glitter, scents, or textures to personalize your nail polish and create unique designs that suit your style.
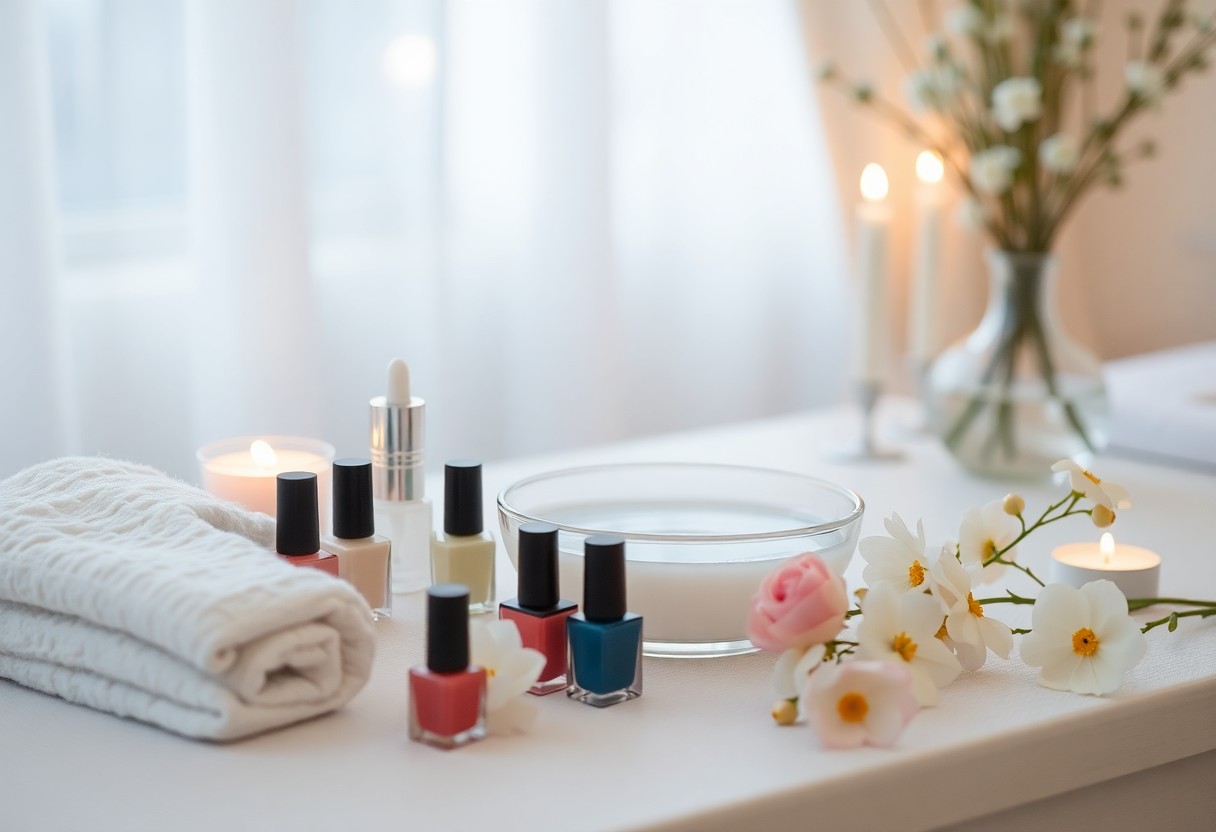
Materials Needed

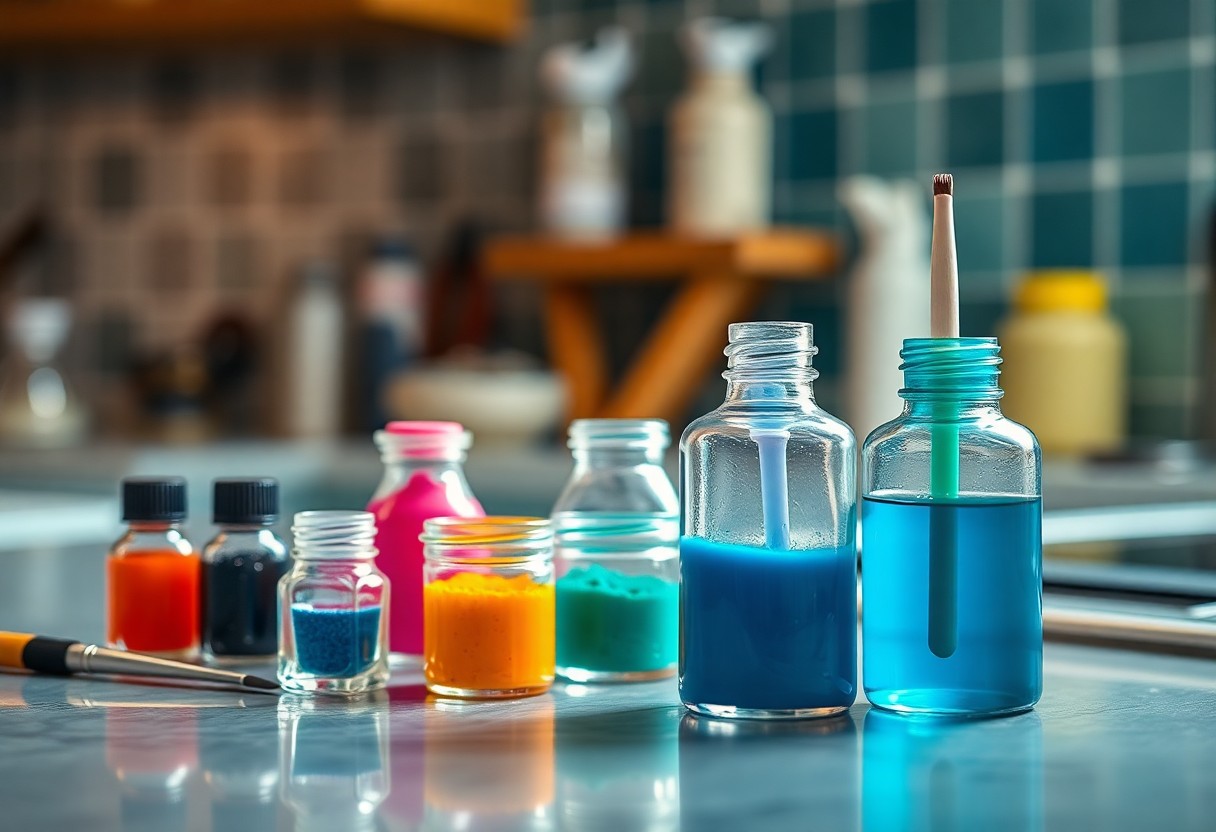
A variety of materials will help you create your own nail polish at home. You will need a base ingredient, colorants, a mixing bowl, a whisk or stirrer, a funnel, and empty nail polish bottles. Additionally, you may want gloves and a protective covering to keep your workspace clean. Having all these items ready will make your nail polish-making experience much smoother.

Base Ingredients

Between the important components, a clear nail polish base or clear polish is fundamental. This forms the foundation of your custom polish, giving it the right consistency and finish. You can also consider using a mixture of clear polish and glitter for added effect.

Colorant Options

An array of colorants provides you with endless possibilities to personalize your nail polish. You can utilize eye shadows, pigments, or even food coloring for vibrant shades. Just be sure to test the colorants for skin safety and how they blend with the base ingredients.

Plus, you can combine different colorants to achieve unique shades that reflect your personal style. Start with small amounts to see how they mix, adjusting as you go. Don’t hesitate to explore textures and finishes by adding glitter or shimmer; this adds depth to your creation. The world of colorants is exciting, so let your imagination run wild while crafting your custom nail polish!

Tools Required

The right tools are crucial to make your own nail polish at home effectively. You will need a mixing bowl, spatula, and pipettes for precise measurements. Additionally, don’t forget to grab empty nail polish bottles for your finished product. For more tips and insights on crafting your own polish, check out this guide on how to make your own polish? : r/RedditLaqueristas.

Mixing Equipment

By using quality mixing equipment, you ensure that your nail polish has the right consistency and color. A glass mixing bowl provides a smooth surface, while a small spatula is perfect for combining your ingredients thoroughly. Investing in pipettes will also help you measure your liquids accurately, making it easier to replicate your favorite shades.

Storage Containers

One important aspect of making your own nail polish is finding the right storage containers. The containers you choose will directly impact the longevity and usability of your polish.

Storage is crucial; you want to house your homemade nail polish in airtight containers to prevent drying out or separation. Clear glass bottles are ideal as they allow you to see the color clearly, and they maintain the integrity of the polish. Always label your containers with the shade or ingredients to easily identify them later. Investing in quality storage will preserve your creations and ensure they remain vibrant and ready for use when you need them.

Step-by-Step Guide

Many DIY enthusiasts find making nail polish at home rewarding and fun. Below is a simple step-by-step guide to help you create your personalized polish.

Step-by-Step Process

StepAction
1Gather your materials.
2Create the base.
3Add color.
4Mix thoroughly.
5Transfer to a bottle.
6Let it settle before use.

Creating the Base

StepbyStep, begin by combining a clear nail polish or a base of your choice with a mixing medium such as a few drops of clear nail lacquer. This provides the smooth consistency needed for your final product.

Adding Color

Any vibrant color can be achieved by carefully incorporating different pigments or mica powders. This addition allows you to customize the shade to fit your style.

Base choices vary, from clear nail polish to mixing mediums like white polish or a clear topcoat. Depending on your desired opacity or finish, you can experiment with these bases. If you prefer a sheer finish, use fewer color pigments, while more will provide a bolder look. This experimentation is what makes creating your nail polish a unique and enjoyable experience!

Customization Techniques

To personalize your nail polish, experiment with various colors and finishes. You can follow this guide on how to Make Your Own Custom Color Nail Polish, allowing you to create shades that perfectly match your style. Try blending different color pigments, or add base coats for a glossy finish, ensuring your polish is uniquely yours.

Glitter and Effects

An easy way to elevate your homemade nail polish is by adding glitter or special effects. Use fine glitter for a subtle shimmer, or opt for larger flakes for a bold statement. You can also incorporate items like sequins or small beads to create a textured look, making your nail polish stand out.

Scent Additives

To add a delightful twist to your custom nail polish, consider incorporating scent additives. Fragrances can transform your nails into a sensory experience, making each application more enjoyable.

Additives such as important oils or fragrance oils can be simply combined with your nail polish mixture. Choose scents that resonate with you, whether it be floral, fruity, or fresh. Ensure you use cosmetic-grade oils for safety, and start with just a few drops, as a little goes a long way. Enjoy your captivating fragrance while showcasing stunning nails!

Safety Considerations

Your safety should always be a priority when making DIY nail polish at home. Be sure to work in a well-ventilated area to minimize inhalation of fumes and avoid using ingredients that may cause allergic reactions. Wearing gloves is also advisable to protect your skin from potential irritation. Always read labels carefully and follow proper instructions to ensure a safe and enjoyable crafting experience.

Skin Sensitivity

Skin sensitivities can vary greatly from person to person. Before applying any homemade nail polish, it’s wise to perform a patch test on a small area of your skin to check for allergic reactions. If you experience redness, itching, or discomfort, discontinue use and consider alternative formulations that are gentler on the skin.

Ventilation and Cleanup

Between crafting sessions, maintaining a clean and well-ventilated workspace is necessary. Open windows or use fans to ensure fresh air circulates, reducing the likelihood of harmful vapors accumulating. Always have paper towels or a designated surface to catch spills, and dispose of waste materials properly to minimize clutter and potential hazards.

At the end of your nail polish-making session, carefully clean all utensils and surfaces with appropriate solvents to prevent cross-contamination of ingredients. Ensure any containers used are sealed tightly and stored in a safe, dry place away from direct sunlight. Taking these extra steps will help maintain both your health and the integrity of your homemade products.

Troubleshooting Common Issues

Keep in mind that creating your own nail polish can come with its share of challenges. From achieving the right texture to maintaining vibrant colors, identifying problems early can help you refine your process. If you encounter any issues, don’t get discouraged—adjustments can lead to a perfect batch of polish that showcases your unique style.

Consistency Problems

Among the most common issues is consistency, where your polish may end up too thick or thin. If your polish feels runny, try adding a little more pigment or base, which can help thicken it. Conversely, if it’s too thick, mix in a few drops of nail polish remover to achieve a smoother blend. Always test the polish on a nail after adjustments to ensure the desired consistency.

Color Fading

Among the challenges you might face, color fading is particularly frustrating, as it can diminish the look of your polish over time. Factors like exposure to sunlight and the quality of your ingredients can play a significant role in this issue.

In fact, using higher-quality pigments can help maintain color vibrancy, while storing your polish in a cool, dark place can prevent fading caused by light exposure. Additionally, applying a clear topcoat regularly can provide protection and keep your color looking fresh for longer. By being mindful of these factors, you can preserve the beauty of your nail polish for weeks to come.

To wrap up

Presently, making your own nail polish at home is an enjoyable and creative process that allows you to express your personal style while ensuring the ingredients are safe for you. By choosing your favorite colors, blending them with a base and a few simple additives, you can achieve unique shades tailored to your preferences. Whether you seek a shimmering finish or a matte look, the possibilities are endless. With just the right tools and ingredients, you can commence on a fun DIY journey that ultimately adds a personal touch to your beauty routine.

Q: What ingredients do I need to make my own nail polish at home?

A: To make your own nail polish, you will need a few key ingredients: a clear base polish (or clear nail polish), powdered pigments in your desired colors (like eyeshadow or mica powder), and a mixing tool (such as a small spatula or a toothpick). Optionally, you can add a few drops of crucial oils for scent or nail strengthening, and glitter for extra sparkle. Make sure to work in a well-ventilated area and ensure all tools are clean.

Q: Can I customize the color of my homemade nail polish?

A: Yes, you can customize the color of your nail polish! Start with a clear base polish and gradually mix in your chosen powdered pigments or crushed eyeshadow until you achieve the desired shade. Test the color on a small area or a nail wheel before applying it fully to ensure it matches your preference. The combination of different colors can also create unique shades, so feel free to experiment with various mixtures!

Q: How do I store my homemade nail polish to keep it fresh?

A: To keep your homemade nail polish fresh and usable, store it in a cool, dark place away from direct sunlight. Use a small glass or plastic container with a tight-sealing lid to prevent air from entering and to avoid thickening. Label the container with the creation date and color for easy identification. If your polish starts to thicken over time, you can dilute it with a few drops of clear polish or nail polish thinner to restore its consistency.

How to Create a Spa-Like Nail Care Experience at Home

There’s something undeniably luxurious about a spa day, and you can replicate that feeling in your own home with the right approach to nail care. With a few simple steps and necessary tools, you can transform your nail routine into an indulgent experience. Not only will this elevate your self-care game, but it will also leave your nails looking and feeling their best. If you’re seeking inspiration, check out this I would like to create an at home spa experience for my … guide for more tips. Let’s probe how you can create a serene spa-like atmosphere right in your bathroom!

Key Takeaways:

  • Set the Ambiance: Create a calming environment by using soft lighting, soothing music, and pleasant scents to replicate a spa atmosphere.
  • Essential Tools: Invest in quality nail care tools such as clippers, files, and buffers to enhance your DIY experience and ensure professional-looking results.
  • Hydration and Moisture: Use moisturizers and cuticle oils generously during your nail care routine to keep your hands and nails healthy and pampered.

Understanding the Basics of Nail Care

At the heart of a spa-like nail care experience is understanding the basics of nail care. This involves recognizing the various elements that contribute to your nail health, including proper hygiene, regular maintenance, and hydration. By practicing these fundamental principles, you can elevate your nail care routine from ordinary to extraordinary, mimicking the pampering of a professional spa right in the comfort of your home.

Importance of Nail Health

After all, maintaining healthy nails is not just about aesthetics; it’s an necessary aspect of your overall well-being. Healthy nails can indicate good nutrition and hydration, while neglected nails may lead to infections or other health issues. Prioritizing nail care helps you present an image of attentiveness and self-care that contributes to your confidence and self-esteem.

Essential Tools for Nail Care

Careful consideration of the tools you use is fundamental to effective nail care. Having the right items on hand ensures that your manicure and pedicure can be performed with skill and precision. Invest in quality nail clippers, files, cuticle pushers, and moisturizers to enhance your at-home experience.

And to create a spa-like experience, consider incorporating additional tools such as a pumice stone for rough skin, a buffer for shine, and an excellent nail polish remover. These necessarys not only facilitate a more complete care routine but also contribute to the overall quality of your nail care experience. By ensuring you have the best tools at your disposal, you set the foundation for achieving beautifully maintained nails that reflect your personal style.

Setting the Mood for a Spa Experience

Assuming you are ready to transform your home into a serene escape, setting the mood is important for a spa-like nail care experience. Start by decluttering your space and dimming the lights to create a calming environment. Soft music, gentle lighting, and the absence of distractions will transport you to a peaceful oasis, allowing you to fully immerse yourself in self-care.

Creating a Relaxing Atmosphere

By incorporating elements that promote tranquility, you can enhance your nail care routine. Consider adding plush towels, your favorite cozy blanket, and comfortable seating to encourage relaxation. A warm soak for your hands or feet can also significantly elevate your experience, making you feel pampered and rejuvenated throughout your treatment.

Benefits of Aromatherapy

Across various cultures, aromatherapy has long been celebrated for its ability to promote relaxation and well-being. By utilizing important oils, you can enhance your at-home spa experience, lifting your mood and reducing stress while caring for your nails.

Considering the impact of scent on your emotional state, integrating important oils such as lavender, eucalyptus, or chamomile into your spa session can provide a soothing effect. These fragrances can help alleviate anxiety and create a calming ambiance, allowing you to focus on nurturing your nails in a blissful state. You can easily diffuse these oils or add a few drops to your warm water soak, enriching the overall experience even further.

Step-by-Step Nail Treatment Process

Many people overlook the importance of a comprehensive nail care routine at home. Here’s a simple step-by-step process to help you achieve that spa-like experience:

StepAction
1.Preparing Your Nails
2.Exfoliation and Moisturization
3.Nail Care and Polish

Preparing Your Nails

To get started, clean your nails thoroughly by removing any old polish and washing your hands. Trim and file your nails to your desired shape, ensuring that they are even and free from snags. Soaking your nails in warm, soapy water can help soften the cuticles, making it easier to push them back gently.

Exfoliation and Moisturization

Process your fingers and hands through a gentle exfoliation followed by moisturization. Apply a scrub or a DIY mixture of sugar and olive oil to your hands and nails to remove dead skin. Rinse and pat dry, then apply a rich hand cream to nourish your skin.

In fact, exfoliating your hands and nails not only rejuvenates the skin but also prepares them for better absorption of moisturizers. Incorporating this step regularly can prevent dryness and keep your hands looking youthful and vibrant. By focusing on this aspect of nail care, you ensure your skin remains supple, allowing for a smoother overall nail treatment experience. Don’t skip this crucial process to maintain healthy and beautiful nails!

Nail Art and Design Techniques

After mastering basic nail care, you can elevate your at-home experience by exploring various nail art and design techniques. These creative approaches not only allow you to express your personality but also give you stunning results that can be customized for any occasion. Use simple tools and techniques to transform your nails into miniature canvases, ensuring that each design reflects your unique style and flair.

Simple DIY Nail Art Ideas

By incorporating simple DIY nail art ideas into your routine, you can create beautiful designs without needing professional skills. Try using dotting tools, tape, or sponges to achieve colorful gradients, geometric shapes, or cute patterns. You can even experiment with press-on decals or nail stamps to add intricate designs with ease, making your nail art both fun and accessible.

Tools for Professional-Looking Results

After you’ve decided on your nail art, investing in the right tools will further enhance your results and provide a polished finish. Gather necessarys like fine-tipped brushes, dotting tools, nail tape, and a good quality top coat for lasting designs. These tools will help you achieve precision and detail that are often seen in salon treatments, empowering you to create stunning nail art right at home.

But don’t limit yourself to just basic tools; consider expanding your collection with specialized items like a nail art palette, nail brush cleaners, or UV lamps if you enjoy working with gel polish. These professional-grade tools can help elevate your skills by making it easier to achieve intricate designs with clean lines and refined finishes. With the right equipment at hand, you’ll find that your creativity knows no bounds, allowing you to explore and develop your own signature nail art style.

Maintaining Your Spa-Like Experience

Unlike traditional nail salons, creating a spa-like experience at home means you have the freedom to maintain your ambiance and routine. To enhance your pampering, consider incorporating tips from Pamper Yourself: Tips for Creating an At-Home Spa …. This will help ensure your experience is both relaxing and rejuvenating every time you treat yourself to nail care.

Regular Nail Care Routine

Regular maintenance of your nails is key to enjoying a spa-like experience at home. Establishing a weekly routine that includes cleaning, trimming, and moisturizing your nails will keep them looking fresh and healthy while enhancing your overall self-care enjoyment.

How to Extend the Life of Your Nail Design

Routine care can significantly extend the life of your nail design. By implementing simple practices, you will preserve your manicure’s integrity and appearance, allowing you to enjoy your beautiful nails for longer periods.

In fact, using a top coat regularly can help protect your nails from chips and scratches, maintaining that fresh-off-the-salon look. Additionally, avoiding harsh chemicals and using gloves while cleaning can prevent your nail polish from dulling or chipping prematurely. Keeping your hands moisturized will not only feel soothing but also aid in prolonging the vibrancy of your nail design, ensuring you can enjoy your at-home experience to the fullest.

Frequently Asked Questions

Not all home nail care experiences are created equally. If you’re curious about elevating your nail routine, you might find helpful insights on how to turn your nail salon into a mini spa experience in this How To Turn Your Nail Salon Into A Mini Spa Experience article.

Common Nail Care Myths

For many, nail care can be surrounded by misconceptions. You may have heard that cutting your cuticles is crucial for nail health—you can actually promote better growth by pushing them back gently instead. Likewise, the idea that natural nails don’t need any product is misleading; regular moisturizing is key to keep them strong.

Tips for Specific Nail Concerns

To address specific nail concerns effectively, first, identify the issues you’re experiencing. Consider the following tips:

  • If you have brittle nails, incorporate a strengthening base coat into your routine.
  • For peeling nails, keep them hydrated with nourishing oils.
  • Avoid using your nails as tools to prevent breakage.

Recognizing your nail type can guide you in choosing the correct products and techniques for care.

A few additional strategies can also improve nail health based on your specific concerns:

  • For discolored nails, consider a whitening base coat.
  • If you’re prone to hangnails, regularly moisturize your hands and nail beds.

Recognizing these factors will empower you to create a tailored nail care regimen!

To Wrap Up

So, by incorporating a few necessary elements such as proper preparation, quality products, and relaxing ambience, you can easily transform your at-home nail care routine into a spa-like experience. Focus on creating a serene environment with soothing music and dim lighting, while choosing nourishing treatments that enhance the health of your nails and skin. With these strategies, you’ll enjoy not just beautiful nails, but also a moment of tranquility and self-care that elevates your overall well-being.

FAQ

Q: What supplies do I need to create a spa-like nail care experience at home?

A: To set up your spa-like nail care experience, gather the following supplies:
– Nail clippers and a nail file for trimming and shaping your nails.
– A cuticle pusher and cuticle oil to care for your cuticles.
– Nail buffer for smoothing the surface of your nails.
– A foot basin or bowl for soaking your feet, along with warm water and Epsom salts or crucial oils for soothing effects.
– Moisturizing lotion or hand cream to keep your skin hydrated.
– Optional: nail polish and topcoat if you wish to add a pop of color to your nails.
Creating an inviting atmosphere with soft towels, scented candles, and relaxing music can also enhance the experience.

Q: How can I achieve the best relaxation during my at-home nail care session?

A: To maximize relaxation during your nail care session, start by creating a serene environment. Dim the lights and play soft music or nature sounds to help set the mood. Consider lighting a scented candle or using an crucial oil diffuser to fill the space with calming aromas. Before you begin, make sure you are comfortable—consider setting up in a cozy chair or recliner. Take deep breaths and focus on the process, enjoying each step as you pamper your hands or feet. Taking breaks between steps to simply enjoy the moment can further enhance relaxation.

Q: How often should I have a spa-like nail care experience at home?

A: The frequency of your at-home nail care experience can vary based on personal preferences and lifestyle. A good rule of thumb is to treat yourself to a spa day every few weeks for maintenance and relaxation. Regular upkeep, such as trimming and shaping your nails, can be done weekly or bi-weekly, while a thorough at-home spa treatment can be reserved for special occasions or as a stress-relieving ritual. Listen to your nails and skin; if you notice any dryness or discomfort, it might be a good time for a spa session to restore health and vitality.

Top Travel Kits for Nail Care on the Go

Many travelers overlook the importance of nail care while on the road, yet maintaining healthy, well-groomed nails contributes significantly to your overall appearance. Whether you’re jet-setting for business or leisure, investing in a quality travel kit can make all the difference. This post will guide you through the top travel kits that ensure your nails remain fabulous and well-maintained during your adventures. With the right tools at your disposal, you’ll feel confident and polished no matter where you go.

Key Takeaways:

  • Compact Designs: Look for travel kits that offer space-saving arrangements for easy packing.
  • Essential Tools: Select kits that include key nail care tools like clippers, files, and cuticle pushers.
  • Quality Materials: Opt for kits made from durable materials to withstand travel conditions and last longer.
  • Multi-functionality: Some kits come with integrated tools for added convenience and versatility.
  • Easy Clean-Up: Choose products that allow for quick and hassle-free clean-up to maintain hygiene on the go.

Essential Nail Care Tools

A good travel kit for nail care includes a variety of imperative tools that ensure your nails remain well-groomed, no matter where you are. Investing in the right tools will not only keep your nails looking their best but also make your overall experience more enjoyable. From clippers to files, having these items on hand allows you to address any nail-related concerns quickly and efficiently, providing the care that your nails deserve while you’re on the go.

Nail Clippers

To maintain neat and tidy nails, a reliable pair of nail clippers should be a key component of your travel kit. Compact and easy to use, nail clippers allow you to trim any unwanted length and shape your nails effectively, ensuring a polished look while you’re away from home.

Nail Files

After trimming your nails, using a quality nail file is imperative to smoothing out any rough edges. Nail files come in various grits, allowing you to choose the right level of abrasiveness for your nails. Soft files work well for natural nails, while harsher files are ideal for acrylic or gel nails. Keeping a nail file in your travel kit will help you achieve the perfect finish, ensuring your nails look and feel their best at all times.

A good nail file can also help prevent nail breakage and splits, allowing you to maintain a healthy appearance as you travel. Consider bringing a small, lightweight nail file that fits easily in your travel kit, providing you with the convenience and reliability you need to keep your nails in top shape. With just a few swipes, you can transform your nails from ragged to refined, ensuring you feel confident and polished wherever you may be.

Complete Travel Kits for Nail Care

The perfect travel companion for nail care, a complete travel kit ensures that all importants are packed in one sleek package. Consider the Tweezerman & Tom Bachik Nail Care Travel Set, which offers everything you need to maintain your manicure while on the move.

Best All-in-One Kits

Travel kits that bundle all the necessary tools allow you to keep your nails in top shape effortlessly. These kits often include clippers, files, and cuticle tools to meet your nail care needs at home or away.

Affordable Options

To find a great nail care kit that fits your budget, look for options that still deliver quality tools without breaking the bank. There are plenty of brands that offer economical kits that provide important tools you need on the go.

Kits priced affordably can include all the importants without compromising on quality. Check out those that feature durable materials and well-designed tools, ensuring that your nail care routine remains effective even when you’re traveling. By investing in an affordable kit, you can enjoy salon-quality care wherever your journey takes you.

Specialty Kits for Nail Art

Your nail art journey doesn’t have to pause when you travel. Specialty kits designed specifically for nail art can help you unleash your creativity anywhere. One excellent option is the 8 Piece Travel Manicure Set – Barbasol, which includes all the vital tools to create stunning designs on the go. These kits often feature everything from dotting tools to nail brushes, ensuring you have what you need to express your style, no matter where you find yourself.

Art Supplies

After you pack your vital nail care items, you’ll want to include some specialized art supplies. Look for miniature nail polishes, nail art pens, and nail striping tape that can easily fit in your travel bag. These items are designed to help you create intricate designs, allowing for full artistic expression while ensuring portability. Opt for water-based or quick-dry formulas for added convenience, so you can change your style without the wait.

Decorate on the Go

Along with basic tools, having art supplies ready means you can transform plain nails into eye-catching designs whenever inspiration strikes. Whether you’re at a café, waiting for a flight, or relaxing at the beach, these kits allow you to personalize your look instantly. Look for travel-friendly options that are easy to use and can fit in your purse, making your nail art adventures spontaneous.

Further featuring mobile convenience, many nail art kits now come with multi-functional tools that combine several functions, saving space and lightening your load. This compact yet comprehensive approach enables you to explore endless design possibilities while on the move. From seasonal themes to playful styles, having everything you need to decorate on the go means you can always nail your look, wherever you may be.

Eco-Friendly Travel Options

All eco-conscious travelers can now enjoy convenient nail care solutions that prioritize sustainability. Exploring eco-friendly travel kits not only reduces your carbon footprint, but also promotes a healthier planet. With a range of options available, you can maintain your nail care routine without compromising your values while on the go.

Sustainable Products

At the heart of eco-friendly travel kits are sustainable products, which are made using environmentally responsible ingredients and materials. These products often feature natural, organic formulations free from harmful chemicals, making them safe for both you and the environment. By choosing these sustainable products, you contribute to a greener planet while keeping your nails looking stunning.

Zero-Waste Kits

ZeroWaste kits offer an innovative approach to nail care by ensuring that every component is reusable, recyclable, or compostable. These kits allow you to maintain your nail routine without creating excess waste. Opting for zero-waste solutions not only benefits the environment but also encourages you to rethink the way you consume personal care products.

This commitment to zero-waste practices means that you can enjoy your nail care regimens without contributing to the growing problem of plastic waste. Many zero-waste kits include items like bamboo nail files, refillable polish bottles, and biodegradable wipes, making them a practical choice for eco-conscious travelers. With these options, you can easily travel while doing your part to protect the planet, ensuring that your beauty routine aligns with your values.

Tips for Packing Nail Care Kits

For an efficient nail care kit while traveling, consider the following tips to keep your vitals organized and accessible:

  • Utilize a compact travel case.
  • Prioritize multi-functional tools.
  • Keep liquids in travel-sized containers.
  • Use pouches to separate items.
  • Regularly declutter your kit.

Recognizing the importance of keeping your nails in top shape while on the go will enhance your travel experience.

Maximizing Space

Along with choosing the right size travel case, consider rolling or folding your tools to maximize space. You can also place soft items like cotton balls or wipes in between tools to prevent them from shifting during travel. This will not only save space but also ensure your items remain secure.

TSA Regulations

Careful attention to TSA regulations will streamline your airport experience. Always check the size and volume limits for liquids, as most airlines permit only 3.4 ounces (100 milliliters) or less in your carry-on. Additionally, certain nail tools may need to be checked in rather than carried on, especially sharp implements.

Plus, staying informed about updated TSA guidelines will help you avoid potential delays at security checkpoints. Make sure your items are easily accessible in your bag, as you might need to take them out for screening. Following these regulations can ensure that your travel plans go smoothly without any unexpected hiccups.

User Reviews and Recommendations

Despite the wide array of travel nail care kits available, user reviews can provide invaluable insight into which options truly stand out. Many customers appreciate kits that prioritize compactness without sacrificing quality, offering tools that are both durable and effective. Look for those praised for their ease of use, as these can enhance your on-the-go nail care experience. Recommendations often highlight kits that include necessary items like cuticle oils and buffers, ensuring you have everything you need to keep your nails looking their best, even when you’re away from home.

Best-Selling Kits

Against popular belief, not every travel nail kit is created equal, and the best-sellers tend to sell for a reason. These kits showcase an ideal balance of value and functionality, often featuring reliable brands that nail enthusiasts trust. They frequently come highly rated for their effectiveness and convenience, making them favored choices among frequent travelers or anyone looking to maintain healthy nails on the go.

Expert Picks

Any nail care connoisseur understands the importance of expert recommendations, particularly when it comes to travel kits. Experts often suggest versatile kits that offer a complete nail care solution without taking up too much space in your travel bag. These selections usually feature high-quality tools that cater to both maintenance and beautification, ensuring you leave no nail behind in your grooming routine.

With a careful selection process, experts narrow down their top picks based on quality, portability, and overall value. They often choose kits that include all the necessarys, such as a nail clipper, file, buffer, and a nourishing oil. By choosing expert-recommended travel kits, you’ll benefit from tried-and-tested products that keep your nails in top condition, no matter where your journey takes you. Their insights can empower you to make informed choices that enhance your nail care regimen on the move.

Final Thoughts on Travel Nail Care Kits

Now that you’re armed with the knowledge of the best travel nail care kits, you can make informed decisions to keep your nails looking fabulous while on the go. With a well-chosen kit in your bag, maintaining your nail health and style becomes effortless, no matter where your adventures take you. Prioritize quality and versatility in your selection, ensuring that you’ve got everything from nail clippers to polish removers at your fingertips. Enjoy every trip with confidence, knowing your nails will always shine.

FAQ

Q: What should I look for in a travel nail care kit?

A: When choosing a travel nail care kit, consider a few key features. First, ensure it is compact and lightweight for easy packing and portability. Look for high-quality tools, such as clippers, scissors, and buffers, made from durable materials that are rust-resistant. Also, check for included items like cuticle pushers, nail files, and polish remover, as these can help you maintain your nail health while on the go. Lastly, consider a kit with a secure case to keep everything organized and protected during travel.

Q: Are travel nail care kits suitable for professional use?

A: Yes, many travel nail care kits can be tailored for professional use, though it’s imperative to choose a high-quality kit designed for frequent use. Professional kits often include specialized tools that provide better results and durability. Make sure to select a kit that includes all necessary tools and meets hygiene standards to ensure safety and effectiveness during professional nail care services.

Q: Can I customize my travel nail care kit?

A: Absolutely! Customizing your travel nail care kit is an excellent way to tailor it to your specific needs and preferences. You can select specific tools that you find most useful, such as your favorite nail clippers or a preferred nail file. Additionally, you can include your favorite shades of nail polish, treatments, or other personal care items. Many brands also offer the option to build a bespoke kit, allowing you to curate the perfect set for your travels.

Skip to content