Inails Near Me Global

How to Build a Relationship with Your Nail Technician

Nail care is not just about aesthetics; it’s also an opportunity to connect with a professional who can enhance your self-care routine. Building a relationship with your nail technician can lead to better services, personalized recommendations, and a more enjoyable experience. In this guide, you will discover effective strategies to foster a strong bond with your technician, ensuring that every visit is not only about getting your nails done but also about creating a lasting partnership that enhances your overall beauty journey.
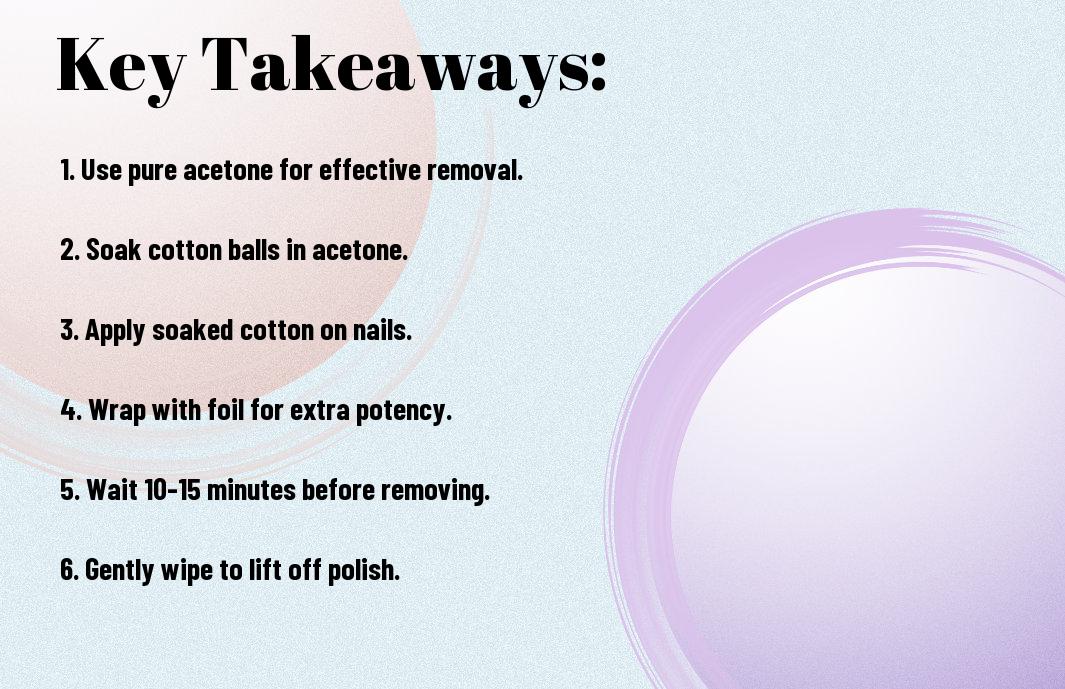
Key Takeaways:

  • Communicate Openly: Share your preferences and any concerns regarding your nails to ensure better service.
  • Be Respectful: Treat your nail technician with kindness and patience, recognizing their skills and expertise.
  • Establish Trust: Build a rapport over time by visiting regularly and discussing your nail care journey.

Understanding the Role of Your Nail Technician

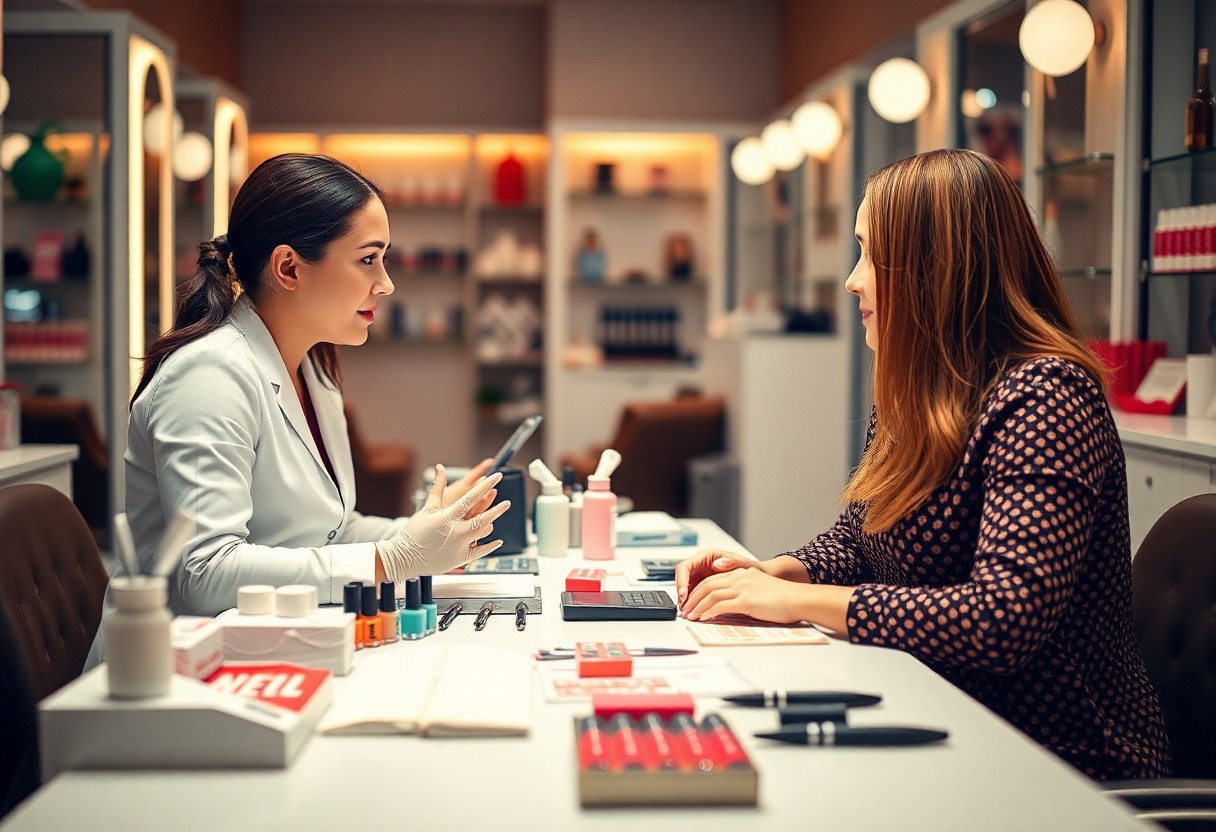
Before you step into your next appointment, it’s important to understand that your nail technician is not just there to make your nails look beautiful. They are skilled professionals who provide services that range from basic manicures to intricate nail art. The relationship you build with them can enhance your experience and even lead to customized treatments that suit your unique preferences. For more insight into this dynamic, take a moment to explore the concept of Tiny Luxury in your nail appointments.

The Technician’s Skills and Expertise

The expertise of your nail technician goes beyond mere aesthetics; they possess knowledge about nail health, sanitation practices, and the latest trends. Their skills enable them to assess your nail type and recommend suitable treatments, ensuring your nails not only look fabulous but also remain healthy. By becoming familiar with their specialized techniques, you can have more informed conversations about your nails and treatments.

Building Trust and Communication

Your relationship with your nail technician hinges on open communication and mutual respect. By expressing your needs, preferences, and any concerns, you create an environment of trust that enhances your overall experience. This dialogue fosters a deeper understanding between you and your technician, allowing them to tailor their services to your specific desires, resulting in a more satisfying outcome.

Building trust is vital for a lasting relationship with your nail technician. Share your goals and past experiences, and don’t hesitate to ask questions about products and techniques. When you convey your preferences clearly, your technician can better meet your needs, leading to a more personalized and enjoyable nail experience. Over time, as you both develop a mutual understanding, your appointments can evolve into a collaborative process, where you can explore new styles and care practices together.

Setting Expectations

Even when you’re excited about your nail appointments, it’s imperative to set clear expectations with your nail technician. This not only helps to ensure that you both have a mutual understanding of what to expect but also creates a more relaxed and enjoyable experience. Clear communication about your needs, preferences, and any concerns will pave the way for a positive relationship with your technician.

Discussing Your Nail Goals

On your first visit, take the time to discuss your nail goals with your technician. Be honest about what you want to achieve, whether it’s a specific design, a particular shape, or even the durability of your nails. This conversation lays the foundation for their understanding of your preferences and allows them to provide tailored suggestions that align with your lifestyle.

Understanding Services and Pricing

Understanding the range of services and their associated pricing can help you feel more informed and confident in your choices. It’s important to ask your nail technician about what each service entails and any extras that may be needed, such as nail art or gel finishes. This clarity will allow you to make the best decisions when it comes to your nail care while also managing your budget effectively.

Nail technicians often offer a variety of services, including basic manicures, gel applications, and specialized nail art. Each service can vary in price based on the complexity and the products used. By inquiring about the options and pricing structure, you ensure that you can select the services that best suit your needs and budget. Don’t hesitate to ask about package deals or loyalty programs that may provide additional value over time.

Regular Visits and Consistency

To build a strong relationship with your nail technician, it’s important to commit to regular visits and consistency. This not only helps you maintain beautiful nails but also allows your technician to get to know your preferences better. Consistent appointments can lead to personalized experiences that enhance your satisfaction. For tips on building clientele, check out How to Build Clientele as a Nail Technician Fast in 2024?.

The Importance of Frequent Appointments

One of the best ways to establish a good rapport with your nail technician is by scheduling frequent appointments. Regular visits create an opportunity for open communication, allowing your technician to understand your style and preferences. Over time, this familiarity helps them deliver a tailored experience that meets your needs and keeps you coming back.

Developing a Routine

Behind the scenes, developing a routine can significantly enhance your relationship with your nail technician. When you set a specific schedule for your visits, it allows them to anticipate your needs and ensure their services consistently align with your expectations. You’ll both benefit from this predictability, which fosters trust and a sense of partnership.

Consistency in your routine leads to improved communication and understanding between you and your nail technician. By visiting regularly, you can provide feedback and discuss any changes you want. This two-way interaction will enable your technician to fine-tune their techniques and approach, resulting in a more satisfying experience. Over time, this partnership will transform your nail services into something truly special.

Open Communication

Many nail technicians appreciate open communication, which helps establish a comfortable and trusting relationship. When you express your preferences and expectations clearly, it enables your technician to provide you with the best possible service tailored to your needs. Make it a practice to openly discuss your desires, whether they involve nail shape, design, or any specific concerns you may have. This dialogue cultivates a positive atmosphere and can lead to better results during your appointments.

Providing Feedback

By offering constructive feedback during or after your appointments, you help your nail technician understand what you like and what could be improved. Whether it’s admiring a particular design or suggesting a change, your input is invaluable. This not only enhances your experience but also enables your technician to grow in their craft, ultimately benefiting both of you.

Addressing Concerns and Preferences

Feedback is imperative for nurturing your relationship with your nail technician. When you openly address any concerns or preferences, you demonstrate that you value their expertise and skills. Do not hesitate to bring up any discomfort or dissatisfaction with past services. Your technician will appreciate your honesty and may be able to adjust their techniques or approaches to accommodate your needs.

In addition, sharing your concerns and preferences builds a stronger bond with your technician. It shows that you trust their judgment and expertise, encouraging them to go the extra mile for you. The more they understand your tastes and apprehensions, the better equipped they become to provide a personalized service. This collaborative environment ensures that each visit leaves you feeling satisfied and confident in your nail care experience.

Building Personal Rapport

Once again, establishing a personal connection with your nail technician can enhance your overall experience and ensure you feel valued during each visit. By fostering open communication, you can create a comfortable environment where both you and your technician feel at ease. This personal rapport can lead to better service and more tailored nail care that aligns with your preferences.

Getting to Know Each Other

Before stepping into nail services, take a moment to exchange casual conversation with your technician. Ask about their day, and share a little about yourself—like your favorite hobbies or why you enjoy nail art. Simple questions can pave the way for a more personalized experience and help you both feel at home in the salon.

Sharing Personal Stories

By sharing bits of your life and experiences, you create a bond that goes beyond the nail appointment. This exchange can shift the focus from merely getting your nails done to enjoying a shared moment that adds value to your visit.

To further solidify this connection, don’t hesitate to open up about your personal interests or experiences that may resonate with your technician. Discuss your favorite nail designs, your thoughts on trends, or even travel stories. Such exchanges can lead to a deeper understanding of each other’s preferences and build a foundation of trust that enhances your overall nail care experience.

Supporting Their Business

Now that you have established a rapport with your nail technician, consider supporting their business beyond just your appointment. Regularly booking your services not only shows loyalty but also helps them thrive in a competitive market. Additionally, discussing new services or products that interest you can provide valuable feedback, ultimately strengthening your relationship.

Referrals and Reviews

Along with your loyalty, sharing your positive experiences through referrals and reviews can significantly impact your nail technician’s business. If you’re satisfied, encourage friends and family to try their services. Leaving a glowing review online can attract new clients and show your technician that you genuinely value their work.

Engaging with Their Online Presence

Around social media, engaging with your nail technician’s online presence is another beneficial way to support them. Liking, sharing, and commenting on their posts not only boosts their visibility but also fosters a sense of community. This interaction can help you stay updated on their latest offerings and promotions while showing your appreciation for their artistry.

For instance, when they post a new nail design or a special promotion, replying with encouragement or sharing your own experiences can create a meaningful dialogue. This engagement not only enhances your connection but also encourages others to participate, fostering an online community around their brand. Your proactive involvement can make them feel valued and recognized, contributing positively to their business growth.

Conclusion

Drawing together a strong relationship with your nail technician can significantly enhance your overall experience. By communicating openly about your preferences and concerns, you create a foundation of trust. Show appreciation for their work and be consistent with appointments to foster a lasting partnership. Engaging in friendly conversation during visits can also help build rapport. For additional insights, check out these 10 Tips for Building Client Trust and Loyalty that can further improve your client-technician relationship.

FAQ

Q: How can I effectively communicate my preferences to my nail technician?

A: Establishing open lines of communication is key to a successful relationship with your nail technician. When you first arrive, take a moment to discuss any specific styles or colors you are considering. Bring inspiration photos if possible; they can provide a visual guide that helps convey what you’re aiming for. It’s also helpful to express any concerns you may have about previous experiences, such as nail damage or allergic reactions to certain products. By being clear and honest with your preferences, you can help your technician understand your individual style and needs better.

Q: How can I show appreciation for my nail technician’s work?

A: Showing appreciation can go a long way in building a positive relationship. One of the simplest ways to do this is by leaving a generous tip after your service; this is often seen as a sign of respect for the technician’s hard work. You might also consider complimenting them directly on the quality of their work, whether it’s the precision of their nail art or the refreshing ambiance they create during your appointment. For a more personal touch, you can write a thank-you note or recommend them to friends or on social media platforms, reinforcing your satisfaction and loyalty.

Q: Is it beneficial to have regular appointments with the same nail technician?

A: Yes, maintaining a consistent appointment schedule with the same nail technician can be highly beneficial. Regular visits establish a sense of familiarity, which can lead to a deeper understanding of your nail care needs. Over time, your technician will become more attuned to your preferences and any specific challenges you may have, allowing for more tailored services. Moreover, building this rapport could make your appointments more enjoyable, as your technician will know what you like and you can share updates about your life, creating a friendly atmosphere.

How to Create a Spa-Like Nail Care Experience at Home

There’s something undeniably luxurious about a spa day, and you can replicate that feeling in your own home with the right approach to nail care. With a few simple steps and necessary tools, you can transform your nail routine into an indulgent experience. Not only will this elevate your self-care game, but it will also leave your nails looking and feeling their best. If you’re seeking inspiration, check out this I would like to create an at home spa experience for my … guide for more tips. Let’s probe how you can create a serene spa-like atmosphere right in your bathroom!

Key Takeaways:

  • Set the Ambiance: Create a calming environment by using soft lighting, soothing music, and pleasant scents to replicate a spa atmosphere.
  • Essential Tools: Invest in quality nail care tools such as clippers, files, and buffers to enhance your DIY experience and ensure professional-looking results.
  • Hydration and Moisture: Use moisturizers and cuticle oils generously during your nail care routine to keep your hands and nails healthy and pampered.

Understanding the Basics of Nail Care

At the heart of a spa-like nail care experience is understanding the basics of nail care. This involves recognizing the various elements that contribute to your nail health, including proper hygiene, regular maintenance, and hydration. By practicing these fundamental principles, you can elevate your nail care routine from ordinary to extraordinary, mimicking the pampering of a professional spa right in the comfort of your home.

Importance of Nail Health

After all, maintaining healthy nails is not just about aesthetics; it’s an necessary aspect of your overall well-being. Healthy nails can indicate good nutrition and hydration, while neglected nails may lead to infections or other health issues. Prioritizing nail care helps you present an image of attentiveness and self-care that contributes to your confidence and self-esteem.

Essential Tools for Nail Care

Careful consideration of the tools you use is fundamental to effective nail care. Having the right items on hand ensures that your manicure and pedicure can be performed with skill and precision. Invest in quality nail clippers, files, cuticle pushers, and moisturizers to enhance your at-home experience.

And to create a spa-like experience, consider incorporating additional tools such as a pumice stone for rough skin, a buffer for shine, and an excellent nail polish remover. These necessarys not only facilitate a more complete care routine but also contribute to the overall quality of your nail care experience. By ensuring you have the best tools at your disposal, you set the foundation for achieving beautifully maintained nails that reflect your personal style.

Setting the Mood for a Spa Experience

Assuming you are ready to transform your home into a serene escape, setting the mood is important for a spa-like nail care experience. Start by decluttering your space and dimming the lights to create a calming environment. Soft music, gentle lighting, and the absence of distractions will transport you to a peaceful oasis, allowing you to fully immerse yourself in self-care.

Creating a Relaxing Atmosphere

By incorporating elements that promote tranquility, you can enhance your nail care routine. Consider adding plush towels, your favorite cozy blanket, and comfortable seating to encourage relaxation. A warm soak for your hands or feet can also significantly elevate your experience, making you feel pampered and rejuvenated throughout your treatment.

Benefits of Aromatherapy

Across various cultures, aromatherapy has long been celebrated for its ability to promote relaxation and well-being. By utilizing important oils, you can enhance your at-home spa experience, lifting your mood and reducing stress while caring for your nails.

Considering the impact of scent on your emotional state, integrating important oils such as lavender, eucalyptus, or chamomile into your spa session can provide a soothing effect. These fragrances can help alleviate anxiety and create a calming ambiance, allowing you to focus on nurturing your nails in a blissful state. You can easily diffuse these oils or add a few drops to your warm water soak, enriching the overall experience even further.

Step-by-Step Nail Treatment Process

Many people overlook the importance of a comprehensive nail care routine at home. Here’s a simple step-by-step process to help you achieve that spa-like experience:

StepAction
1.Preparing Your Nails
2.Exfoliation and Moisturization
3.Nail Care and Polish

Preparing Your Nails

To get started, clean your nails thoroughly by removing any old polish and washing your hands. Trim and file your nails to your desired shape, ensuring that they are even and free from snags. Soaking your nails in warm, soapy water can help soften the cuticles, making it easier to push them back gently.

Exfoliation and Moisturization

Process your fingers and hands through a gentle exfoliation followed by moisturization. Apply a scrub or a DIY mixture of sugar and olive oil to your hands and nails to remove dead skin. Rinse and pat dry, then apply a rich hand cream to nourish your skin.

In fact, exfoliating your hands and nails not only rejuvenates the skin but also prepares them for better absorption of moisturizers. Incorporating this step regularly can prevent dryness and keep your hands looking youthful and vibrant. By focusing on this aspect of nail care, you ensure your skin remains supple, allowing for a smoother overall nail treatment experience. Don’t skip this crucial process to maintain healthy and beautiful nails!

Nail Art and Design Techniques

After mastering basic nail care, you can elevate your at-home experience by exploring various nail art and design techniques. These creative approaches not only allow you to express your personality but also give you stunning results that can be customized for any occasion. Use simple tools and techniques to transform your nails into miniature canvases, ensuring that each design reflects your unique style and flair.

Simple DIY Nail Art Ideas

By incorporating simple DIY nail art ideas into your routine, you can create beautiful designs without needing professional skills. Try using dotting tools, tape, or sponges to achieve colorful gradients, geometric shapes, or cute patterns. You can even experiment with press-on decals or nail stamps to add intricate designs with ease, making your nail art both fun and accessible.

Tools for Professional-Looking Results

After you’ve decided on your nail art, investing in the right tools will further enhance your results and provide a polished finish. Gather necessarys like fine-tipped brushes, dotting tools, nail tape, and a good quality top coat for lasting designs. These tools will help you achieve precision and detail that are often seen in salon treatments, empowering you to create stunning nail art right at home.

But don’t limit yourself to just basic tools; consider expanding your collection with specialized items like a nail art palette, nail brush cleaners, or UV lamps if you enjoy working with gel polish. These professional-grade tools can help elevate your skills by making it easier to achieve intricate designs with clean lines and refined finishes. With the right equipment at hand, you’ll find that your creativity knows no bounds, allowing you to explore and develop your own signature nail art style.

Maintaining Your Spa-Like Experience

Unlike traditional nail salons, creating a spa-like experience at home means you have the freedom to maintain your ambiance and routine. To enhance your pampering, consider incorporating tips from Pamper Yourself: Tips for Creating an At-Home Spa …. This will help ensure your experience is both relaxing and rejuvenating every time you treat yourself to nail care.

Regular Nail Care Routine

Regular maintenance of your nails is key to enjoying a spa-like experience at home. Establishing a weekly routine that includes cleaning, trimming, and moisturizing your nails will keep them looking fresh and healthy while enhancing your overall self-care enjoyment.

How to Extend the Life of Your Nail Design

Routine care can significantly extend the life of your nail design. By implementing simple practices, you will preserve your manicure’s integrity and appearance, allowing you to enjoy your beautiful nails for longer periods.

In fact, using a top coat regularly can help protect your nails from chips and scratches, maintaining that fresh-off-the-salon look. Additionally, avoiding harsh chemicals and using gloves while cleaning can prevent your nail polish from dulling or chipping prematurely. Keeping your hands moisturized will not only feel soothing but also aid in prolonging the vibrancy of your nail design, ensuring you can enjoy your at-home experience to the fullest.

Frequently Asked Questions

Not all home nail care experiences are created equally. If you’re curious about elevating your nail routine, you might find helpful insights on how to turn your nail salon into a mini spa experience in this How To Turn Your Nail Salon Into A Mini Spa Experience article.

Common Nail Care Myths

For many, nail care can be surrounded by misconceptions. You may have heard that cutting your cuticles is crucial for nail health—you can actually promote better growth by pushing them back gently instead. Likewise, the idea that natural nails don’t need any product is misleading; regular moisturizing is key to keep them strong.

Tips for Specific Nail Concerns

To address specific nail concerns effectively, first, identify the issues you’re experiencing. Consider the following tips:

  • If you have brittle nails, incorporate a strengthening base coat into your routine.
  • For peeling nails, keep them hydrated with nourishing oils.
  • Avoid using your nails as tools to prevent breakage.

Recognizing your nail type can guide you in choosing the correct products and techniques for care.

A few additional strategies can also improve nail health based on your specific concerns:

  • For discolored nails, consider a whitening base coat.
  • If you’re prone to hangnails, regularly moisturize your hands and nail beds.

Recognizing these factors will empower you to create a tailored nail care regimen!

To Wrap Up

So, by incorporating a few necessary elements such as proper preparation, quality products, and relaxing ambience, you can easily transform your at-home nail care routine into a spa-like experience. Focus on creating a serene environment with soothing music and dim lighting, while choosing nourishing treatments that enhance the health of your nails and skin. With these strategies, you’ll enjoy not just beautiful nails, but also a moment of tranquility and self-care that elevates your overall well-being.

FAQ

Q: What supplies do I need to create a spa-like nail care experience at home?

A: To set up your spa-like nail care experience, gather the following supplies:
– Nail clippers and a nail file for trimming and shaping your nails.
– A cuticle pusher and cuticle oil to care for your cuticles.
– Nail buffer for smoothing the surface of your nails.
– A foot basin or bowl for soaking your feet, along with warm water and Epsom salts or crucial oils for soothing effects.
– Moisturizing lotion or hand cream to keep your skin hydrated.
– Optional: nail polish and topcoat if you wish to add a pop of color to your nails.
Creating an inviting atmosphere with soft towels, scented candles, and relaxing music can also enhance the experience.

Q: How can I achieve the best relaxation during my at-home nail care session?

A: To maximize relaxation during your nail care session, start by creating a serene environment. Dim the lights and play soft music or nature sounds to help set the mood. Consider lighting a scented candle or using an crucial oil diffuser to fill the space with calming aromas. Before you begin, make sure you are comfortable—consider setting up in a cozy chair or recliner. Take deep breaths and focus on the process, enjoying each step as you pamper your hands or feet. Taking breaks between steps to simply enjoy the moment can further enhance relaxation.

Q: How often should I have a spa-like nail care experience at home?

A: The frequency of your at-home nail care experience can vary based on personal preferences and lifestyle. A good rule of thumb is to treat yourself to a spa day every few weeks for maintenance and relaxation. Regular upkeep, such as trimming and shaping your nails, can be done weekly or bi-weekly, while a thorough at-home spa treatment can be reserved for special occasions or as a stress-relieving ritual. Listen to your nails and skin; if you notice any dryness or discomfort, it might be a good time for a spa session to restore health and vitality.

The Best LED Lamps for DIY Gel Nails

Most DIY enthusiasts know that selecting the right LED lamp is important for achieving salon-quality gel nails at home. With an array of options available, it can be overwhelming to determine which lamp will best suit your needs. This guide will help you navigate through the various features and specifications of the top LED lamps, ensuring you find the perfect fit to enhance your nail art experience and achieve long-lasting results.

Key Takeaways:

  • Wattage Matters: Higher wattage LED lamps significantly reduce curing time, improving efficiency for gel nails.
  • Versatile Designs: Look for LED lamps that accommodate different nail sizes and have adjustable settings for various gel types.
  • Safety Features: Many of the best LED lamps come with built-in timers and auto shut-off options for safe and effective use.

Understanding LED Lamps

The world of gel nails has evolved significantly with the introduction of LED lamps. These devices offer a quicker curing time than traditional UV lamps, making them a popular choice among nail enthusiasts. If you want to examine deeper into your options, you can check the 7 Best UV Lamp for Gel Nails, Tested and Reviewed 2024. Investing in a high-quality LED lamp will elevate your DIY gel nail experience dramatically.

How LED Lamps Work

For LED lamps, the magic lies in their specific wavelengths that activate the photoinitiators in gel polish, causing it to cure quickly and efficiently. Unlike traditional lamps, LED devices use light-emitting diodes to produce this light, resulting in faster drying times and energy efficiency that benefits both you and the environment.

Benefits of Using LED Lamps for Gel Nails

Below are some notable advantages of utilizing LED lamps for your gel nail applications. They not only cure your gel polish quickly but also produce fewer harmful emissions compared to traditional UV lamps. Additionally, LED lamps have a longer lifespan, saving you money in the long run.

Consequently, incorporating LED lamps into your nail care routine means less waiting time, enhancing your overall experience while also promoting health and safety for your skin. With faster curing times, you can enjoy well-built gel nails without the risk of damaging your skin over prolonged exposure to UV light. This efficiency and effectiveness make LED lamps an necessary tool for every DIY nail artist.

Key Features to Consider

It’s imperative to evaluate certain features when selecting the best LED lamp for DIY gel nails. Consider the following key aspects:

  • Wattage
  • Curing time
  • Size and design
  • Safety features
  • Light modes
  • User-friendly interface
  • Durability
  • UV/LED dual functionality

Assume that these features align with your specific needs to achieve professional results at home.

Wattage and Curing Time

An important aspect to evaluate is the wattage and curing time of the LED lamp. Higher wattage generally means quicker curing times, allowing you to complete your gel nail application more efficiently. Most good quality LED lamps range between 36 to 48 watts, ensuring optimal performance. Select a lamp that matches the polish brand you’re using, as some may require specific wattage to cure properly.

Size and Design

After considering wattage, think about the size and design of your LED lamp. Compact models are more portable and easier to store, while larger ones can accommodate both hands or feet simultaneously. Choose a design that matches your workspace, ensuring it’s both functional and aesthetically pleasing. A lightweight and sleek lamp can enhance your DIY experience.

It’s important to find a balance between compactness and usability. Consider how often you will be using the lamp and the space available in your home. A larger lamp may provide convenience but could take up valuable counter space. On the other hand, a portable lamp allows for easy transport, making it ideal for travel but might be limited in features. The right size and design should cater to your specific needs as a DIY nail enthusiast.

Safety Features

Besides performance, pay attention to the safety features of the LED lamp. Look for models with heat resistance and automatic shut-off capabilities, which prevent overheating during long sessions. UV protection filters are also beneficial, as they minimize skin exposure to harmful rays.

Understanding safety features can significantly enhance your nail treatment experience. By choosing a lamp equipped with protective measures, you can confidently perform at-home gel manicures without worrying about potential harm. Features like cooling technologies ensure that the device stays safe to use, while thoughtful design limits exposure to UV rays, allowing you to prioritize your health alongside achieving beautiful nails.

Top Recommended LED Lamps

Your choice of an LED lamp can make or break your DIY gel nail experience. With a variety of options on the market, it’s imperative to select a lamp that suits your specific needs. The best LED lamps offer effective curing times, user-friendly designs, and durability to ensure that your gel nails look flawless and last longer. Whether you are a beginner or a pro, you’ll find the perfect product to elevate your manicure game.

Budget-Friendly Options

On a budget? You’re in luck! There are several affordable LED lamps that deliver excellent value without sacrificing quality. These options are perfect for those who want to achieve salon-quality nails at home without breaking the bank. Many budget-friendly lamps still offer impressive curing times and last a long time, making them ideal for both occasional use and regular manicurists.

Professional-Grade Choices

One way to elevate your nail game is by investing in a professional-grade LED lamp. These lamps are designed for frequent use and often come with advanced features such as multiple timer settings, built-in heat dissipation, and higher wattage for faster curing. They provide an exceptional user experience and ensure that your gel nails achieve the perfect finish every time.

To maximize your nail art capabilities, choosing a professional-grade LED lamp is a smart investment. These lamps typically offer superior curing efficiency, allowing you to spend less time waiting and more time creating beautiful nails. Many have durable designs that can withstand heavy use, making them ideal for someone who loves to experiment with different gel colors and styles. With their advanced technology and superior performance, professional-grade lamps provide you with the tools needed to achieve salon results right from the comfort of your home.

Step-by-Step Guide for Using LED Lamps

Not every LED lamp works the same way; understanding the correct approach can greatly enhance your DIY gel nails experience. Below is a simple guideline to follow:

StepAction
1Prepping Your Nails
2Applying Base Coat
3Curing Process
4Applying Color Gel
5Curing Process
6Finishing Top Coat
7Final Curing

Prepping Your Nails

The preparation of your nails is crucial for achieving a long-lasting manicure. Start by removing any old polish, gently pushing back your cuticles, and buffing the nail surface for proper adhesion. Cleaning your nails with rubbing alcohol ensures they are free from oils and debris, promoting better results.

Curing Process

Above all, the curing process solidifies your gel manicure. After applying each coat of polish, slide your hands into the LED lamp and cure them according to the manufacturer’s recommended time, usually between 30-60 seconds.

For instance, if you choose a gel polish that requires 30 seconds for curing, keep your fingers inside the LED lamp without interruption. This helps the gel harden effectively, avoiding any smudges or dents. Pay attention to the lamp’s power, as a higher wattage usually means faster curing times, allowing you to complete your gel manicure quickly and efficiently. Always follow the specific instructions of your gel products for the best results.

Maintenance and Care for LED Lamps

Many users overlook the importance of maintaining their LED lamps, but proper care can extend the life of your device and enhance its performance. Regularly check the lamp for dust and debris accumulation, which can impact curing efficiency. Ensure that you follow the manufacturer’s guidelines for usage and maintenance to avoid common damages and ensure optimal results for your DIY gel nails.

Cleaning and Storage

Care for your LED lamp by regularly cleaning its surface with a soft cloth and gentle cleanser. This prevents the buildup of nail products and keeps the lamp functioning at its best. When storing your lamp, keep it in a cool, dry place away from direct sunlight and extreme temperatures to prolong its longevity.

Troubleshooting Common Issues

Across the lifespan of your LED lamp, you may encounter some common issues that can affect its performance. Understanding these problems and knowing how to address them will help you keep your lamp in top condition.

Common issues include inconsistent curing times, which could be due to a dirty lamp or bulb failure. If your nails are not curing completely, ensure that the sensor is functioning properly and that the lamp is free from debris. If the light doesn’t turn on or flashes, this may indicate a problem with the power source or an internal fault. In such cases, inspect the power cord for damage and consult the manufacturer’s support if necessary.

Consumer Reviews and Feedback

Despite varying opinions, consumer reviews often highlight the importance of LED lamps in achieving salon-quality gel nails at home. You’ll find comprehensive insights in 7 Best LED Lamps for a Pro-Level, At-Home Manicure. Users discuss factors such as speed, durability, and ease of use, helping you make an informed decision tailored to your personal nail care routine.

Popular Brands and Models

Above all, well-known brands like Gel-ish, MelodySusie, and SUNUV consistently receive high marks for their reliability and performance. These models often come with user-friendly features and innovative designs that cater to both novices and experienced users, ensuring your DIY gel nail experience will be smooth and enjoyable.

User Experiences

After using various LED lamps, many users report significant satisfaction with the results. They emphasize that effective lamps not only cure the gel quickly but also leave a high-shine finish that lasts. With detailed feedback on ease of setup and operation, you can quickly determine which lamp fits your needs best.

In fact, firsthand accounts indicate that user experiences can vary widely based on individual preferences and expectations. Some users appreciate lamps with multiple settings for different types of gels, while others prioritize compact, travel-friendly designs. By reviewing these experiences, you can pinpoint which features will enhance your own DIY gel nail journey.

To wrap up

On the whole, choosing the right LED lamp for your DIY gel nails can significantly enhance your manicure experience. With various options available, it’s important to consider factors like wattage, design, and curing time to find the perfect fit for your needs. By investing in a high-quality lamp, you can achieve salon-worthy results right at home. For more insights on selecting the best nail lamp, check out The 10 Best UV & LED Nail Lamps 2024: Your Buyer’s Guide.

FAQ

Q: What are the key features to look for in a LED lamp for DIY gel nails?

A: When opting for a LED lamp for DIY gel nails, there are several important features to consider:
1. Wattage: A higher wattage (36W or more) typically means faster curing times. Look for lamps that can provide a consistent and efficient cure for your gel polish.
2. Curing Modes: Many lamps come with multiple curing modes, such as low heat settings for sensitive skin, or specific timers that can accommodate different types of gel formulations.
3. Design: Consider the lamp’s design and shape, as this can impact how comfortably you can fit your hands inside. A larger or open design can make curing all fingers easier and more convenient.

Q: How long should I cure my gel nails under an LED lamp?

A: The curing time for gel nails under an LED lamp generally ranges from 30 to 60 seconds, depending on the specific gel polish you are using. Always check the manufacturer’s instructions for the recommended curing time for both the base coat and the color layers. Additionally, the more layers you apply, the longer you may need to cure them. Different brands may have variations, so it’s advisable to ensure compatibility with your chosen products for the best results.

Q: How do I maintain my LED lamp for long-lasting performance?

A: To ensure your LED lamp performs effectively over time, follow these maintenance tips:
1. Cleaning: Regularly clean the interior of the lamp using rubbing alcohol and a lint-free cloth to remove any residue from gel polish.
2. Bulb Replacement: Although LED bulbs last longer than traditional UV bulbs, it’s important to check them periodically. If you notice a decrease in curing efficiency, it may be time to replace the bulbs.
3. Storage: Store the lamp in a dry, cool place when not in use, to prevent overheating or damage. Also, avoid using it in humid areas to prolong its lifespan.

How to Remove Glitter Nail Polish Without Hassle

Nail polish can add a fun touch to your manicure, but removing that stubborn glitter can often feel like a daunting task. You might find that traditional methods leave behind remnants of sparkle that refuse to budge. Fear not—this guide will equip you with simple, effective techniques to easily remove glitter nail polish without damaging your nails. Get ready to say goodbye to the mess and hello to clean, polished nails!

Key Takeaways:

  • Acetone Method: Use pure acetone nail polish remover for a quick and effective removal of glitter polish.
  • Cotton Ball Approach: Soak a cotton ball with remover and press it against the nail for a minute to loosen the glitter.
  • Aluminum Foil Trick: Wrap the cotton ball-covered nails in aluminum foil to enhance the effectiveness and speed up the process.

Understanding Glitter Nail Polish

Your experience with glitter nail polish can be both fun and frustrating. With its shimmering effect, it adds a delightful touch to your manicure. However, understanding its components helps in managing the removal process better. Keep in mind that not all glitter polishes are created equal, making it imperative to identify what you’re dealing with.

The Different Types of Glitter Nail Polish

Your options for glitter nail polish range widely. Here’s a brief overview:

TypeDescription
Fine GlitterCreates a subtle shimmer effect.
Chunky GlitterFeatures larger pieces for a bolder look.
Holographic GlitterGives a rainbow-like effect under light.
Metallic GlitterShiny, reflective finish for dramatic flair.
Gel GlitterProvides a longer-lasting, glossy effect.

After identifying your type of glitter polish, you’ll be better prepared for its removal.

Why It’s Tough to Remove

Understanding the formulation of glitter nail polish sheds light on why it can be difficult to remove. Many glitter polishes contain larger particles and longer-lasting bases that adhere firmly to your nails. This means typical nail polish removers might not be enough.

Plus, the varying sizes of glitter particles complicate matters. While finer glitters may come off easily, chunky or larger glitters tend to cling stubbornly, often requiring more intense scrubbing or specialized removers. As a result, you may find yourself spending more time and effort than expected when trying to achieve a clean slate for your next manicure.

Essential Tools and Materials

Assuming you want to remove glitter nail polish easily, having the right tools and materials at hand makes all the difference. You’ll need high-quality nail polish remover, either acetone or non-acetone, cotton balls, and some aluminum foil. For a helpful tip on enhancing your removal process, check out this Remove Glitter Nail Polishes Quicker With This Little Trick.

Remover Options: Acetone vs. Non-Acetone

Around the nail care community, acetone is renowned for its powerful ability to dissolve nail polish quickly and effectively. While it can be harsh on your nails and cuticles, non-acetone removers are gentler but may take a bit longer to work. Choose the one that best suits your needs and sensitivity, so you can tackle that glitter without the fuss.

Cotton Balls and Foil Method

Balls of cotton soaked in nail polish remover can be your best friend when it comes to glitter removal. This method involves saturating cotton balls with your chosen remover and pressing them against your nails, then wrapping each fingertip in aluminum foil. This process helps the remover penetrate the glitter layers for more effective removal.

But this method goes beyond simple soaking; the foil traps heat, which aids in breaking down the stubborn glitter particles even more. Allow the cotton balls to sit for around 10 to 15 minutes before gently twisting the foil off. This should leave your nails glitter-free, making the entire process much simpler and less frustrating.

Step-by-Step Guide for Hassle-Free Removal

Despite the challenge of removing glitter nail polish, following this step-by-step guide will make the process much easier. Each step is designed to ensure you can remove glitter polish without unnecessary fuss. Use the table below to organize your materials and method for a seamless experience:

Materials & Methods

MaterialsMethods
Acetone or Nail Polish RemoverSoak a cotton ball or pad
Cotton Balls or PadsPress firmly on your nails
Aluminum Foil (optional)Wrap nails for better removal
Cuticle OilMoisturize nails and cuticles afterward

Preparing Your Workspace

On starting your glitter polish removal, make sure your workspace is well-organized. Lay down an old towel or paper to catch any spills, and keep your nail polish remover and cotton balls easily accessible. Having everything in place will make the process smoother and prevent mess.

Application Techniques

By utilizing the right application techniques, you can expedite the removal of glitter nail polish. Ensure to saturate your cotton ball or pad with nail polish remover and apply it generously to each nail. This maximizes the contact area and helps break down the glitter more effectively.

Plus, don’t rush this process; letting the remover soak into your nails for about 10-15 seconds will significantly ease glitter removal. Once the time is up, gently wipe the polish away with the cotton ball, and repeat if necessary until your nails are clean.

Tips for Stubborn Glitter

StepbyStep, some glitter polishes can be particularly difficult to remove. Follow these tips to tackle stubborn glitter effectively:

  • Soak your nails for a longer period.
  • Use a strong acetone remover for enhanced effectiveness.
  • Consider filing the surface of the polish lightly to break the seal.

After using these techniques, you’ll find it much easier to remove even the most stubborn glitter polish.

With additional effort, you can make glitter polish removal even more manageable. Here are some more tips for tackling stubborn glitter:

  • Try soaking multiple cotton balls and wrapping them with foil for better adherence.
  • After soaking, gently scrape the glitter off with an orange stick.
  • Be patient and repeat the process until all remnants are gone.

After mastering these methods, you will feel confident tackling any glitter nail polish challenge in the future.

Alternative Methods

After trying traditional nail polish removers, you may want to explore alternative methods that can effectively remove glitter nail polish without excessive scrubbing. These methods can not only save you time but also protect your nails from damage, making your polish removal experience much more pleasant. In this section, you’ll discover some creative approaches to effortlessly get rid of stubborn glitter.

Using Soaking Techniques

One effective way to remove glitter nail polish is by soaking your nails in a suitable solution. Start by saturating cotton balls with acetone or a non-acetone nail polish remover, then place them on your nails. Wrap your fingers in aluminum foil to trap heat and moisture, allowing the solution to break down the glitter more easily. After about 10-15 minutes, gently wipe away the polish, and you’ll notice significantly less residue.

Natural Remedies for Removal

By opting for natural remedies, you can remove glitter nail polish using ingredients you may already have at home. Common household items such as lemon juice and vinegar can serve as effective alternatives to commercial removers.

Alternative remedies like lemon juice and vinegar create a solvent that can help dissolve glitter polish. Simply mix equal parts of fresh lemon juice and vinegar, then soak your nails in the solution for about 10 minutes. This method not only helps lift the glitter but is also gentler on your nails and skin. For an added boost, you can use a soft toothbrush to gently scrub away any remaining polish. Embracing these natural options can lead to a less abrasive and more environmentally friendly approach to nail care.

Aftercare for Your Nails

Now that you’ve successfully removed your glitter nail polish, it’s time to focus on aftercare to restore your nails and skin. Glitter polish can often leave your nails feeling dry and damaged, so taking the necessary steps to nourish and protect them is vital for maintaining their health. Implementing a proper aftercare routine ensures your nails remain strong and vibrant for your next manicure.

Moisturizing Your Nails and Skin

Aftercare for your nails involves applying a quality moisturizer to both your nails and surrounding skin. This helps to combat any dryness or brittleness caused by the nail polish remover. Use a rich cuticle oil or hand cream that contains nourishing ingredients like Vitamin E or jojoba oil to keep your nails and skin hydrated.

Protecting Against Future Damage

Below are some effective strategies to shield your nails from future damage. Regular use of gloves while cleaning or handling harsh chemicals can significantly reduce wear and tear on your nails. Additionally, consider applying a base coat before using nail polish, as this creates a barrier that protects your natural nails. Strengthening treatments can also be beneficial; look for products specifically designed to fortify your nails.

Nails are more susceptible to damage without proper care and protection, so embracing these habits will help maintain their integrity. Be mindful of the products you expose your nails to and prioritize using gentle formulas. Regularly trimming your nails and keeping them filed will also prevent chipping and splitting, allowing you to enjoy healthier nails in the long run.

Common Mistakes to Avoid

Once again, many people overlook vital steps in the glitter nail polish removal process. You should avoid soaking your nails too quickly in acetone, using ineffective wipes, or trying to scrape off the polish. To enhance your understanding of the best techniques, visit How to Remove Glitter Nail Polish Without a Hassle.

Rushing the Removal Process

An effective removal method requires patience. Skimming through the steps will only make the process harder and might lead to more frustration. Give your nails adequate time to soak to ensure the glitter breaks down, which ultimately makes the entire experience smoother for you.

Using Incorrect Tools

Above all, using the right tools is vital for achieving a hassle-free glitter nail polish removal. If you rely on incorrect applicators or sturdy scrubs, you run the risk of damaging your nails or surrounding skin.

Also, avoid using regular nail polish removers that are not specifically formulated for removing glitter. They often do not have the strength needed to break down the glitter particles effectively. Invest in quality cotton balls and acetone-saturated pads to simplify your removal process and leave your nails looking healthy and pristine.

To wrap up

With these considerations, you can effectively remove glitter nail polish without hassle. Opt for products designed for stubborn formulas, and use strategic techniques like soaking cotton balls and wrapping your fingers. If you need more ideas, check out What are some tips for removing glittery nail polish? to enhance your approach. By following these steps, you’ll achieve clean nails in no time!

FAQ

Q: What products can I use to easily remove glitter nail polish?

A: To effectively remove glitter nail polish, you can use products such as acetone-based nail polish remover, which is particularly effective against thick glitter. If you prefer a gentler option, look for non-acetone removers, but be prepared for a longer removal process. Additionally, some specialty glitter polish removers are available in stores; these are specifically designed to break down glitter particles.

Q: What techniques can I use to enhance the glitter nail polish removal process?

A: One effective technique is to soak a cotton ball or pad in your chosen nail polish remover and place it on your nail, wrapping it with aluminum foil to keep it in place. Leave it on for about 10-15 minutes; this allows the remover to penetrate the polish, making it easier to wipe away. Another method is to gently buff the top layer of the glitter polish with a nail file before applying the remover, which can expedite the process.

Q: Are there any tips for avoiding damage to my nails during glitter polish removal?

A: Yes, to protect your nails during the removal process, ensure you moisturize your nails and cuticles afterward with a nourishing oil or cream. Additionally, try to avoid excessive scrubbing or using rough materials to remove the polish. It helps to use a gentle approach, allowing the remover to do the work rather than forcing the polish off. After removal, applying a strengthening base coat can further maintain nail health.

A Beginner’s Guide to Nail Wraps

Many people are discovering the effortless beauty of nail wraps, a versatile alternative to traditional nail polish. If you’re looking to elevate your manicure game without the hassle of drying time and lengthy salon visits, nail wraps may be the perfect solution for you. This guide will walk you through everything you need to know, from types and application techniques to tips for durability, ensuring your nails look fabulous with minimal effort. Get ready to unlock the secrets of stunning nail art at your fingertips!

Key Takeaways:

  • Application Process: Nail wraps are easy to apply; simply clean your nails, choose the right size wrap, and adhere them securely for a professional look.
  • Variety of Designs: They come in numerous styles and patterns, allowing you to easily switch up your nail art without the mess of polish.
  • Durability: Nail wraps can last from a week to several weeks depending on care, providing a longer-lasting manicure than traditional nail polish.

What Are Nail Wraps?

Before stepping into the world of nail wraps, it’s necessary to understand what they are. Nail wraps are adhesive designs that you apply directly to your nails, offering a quick and easy way to achieve a polished look without the need for traditional nail polish. To learn more, check out The Beginner’s Guide to Nail Wraps: Everything You Need ….

Definition and Purpose

Behind the simplicity of nail wraps lies their innovative design. They allow you to effortlessly embellish your nails with various colors and patterns, providing a salon-quality appearance right at home. Their primary purpose is to enhance the beauty of your nails while delivering a long-lasting finish.

Types of Nail Wraps

Wraps come in a variety of forms, allowing you to choose the style that suits your aesthetic. Here are the main types:

  • Vinyl wraps
  • Gel wraps
  • Polish strips
  • Nail foils
  • 3D wraps

This selection caters to different preferences and occasions.

Vinyl wrapsDurable, flexible, and easy to apply
Gel wrapsOffer a glossy finish, can be cured with a UV light
Polish stripsQuick to apply, mimics the look of nail polish
Nail foilsUnique designs, applied with a special adhesive
3D wrapsAdd dimension and texture for a standout look

Indeed, the variety of nail wraps can be overwhelming, but it allows you to express your individuality. Here’s a quick overview of the types:

  • Classic prints
  • Seasonal designs
  • Metallic finishes
  • Floral patterns
  • Artistic styles

This diversity ensures that there’s a nail wrap for every personality and event.

Classic printsTimeless designs that never go out of style
Seasonal designsThemes that reflect holidays or seasons
Metallic finishesAdds a dazzling effect to your nails
Floral patternsPerfect for a feminine touch to your look
Artistic stylesUnique wraps that showcase creative designs

Benefits of Using Nail Wraps

One of the most appealing aspects of nail wraps is their ability to provide a quick and beautiful manicure without the need for extensive salon visits. You can achieve a professional look from the comfort of your home while saving time and money. Additionally, nail wraps offer unique designs that allow you to express your personal style effortlessly while ensuring your nails remain in pristine condition.

Durability and Longevity

Against traditional nail polish, nail wraps are renowned for their impressive durability. You can expect your nail wraps to last for several weeks without chipping or fading, providing you with a longer-lasting solution. This resilience makes them an ideal choice for anyone looking to maintain their manicure without frequent touch-ups.

Variety of Designs and Styles

Against monotonous nail polish options, nail wraps offer an expansive array of designs and styles that cater to every taste. From bold patterns to delicate motifs, you can find wraps that suit any occasion or outfit effortlessly. This versatility means you can switch up your look as often as you like, providing endless opportunities for you to showcase your creativity.

Indeed, the variety of designs available is one of the standout features of nail wraps. You have access to countless themes, colors, and artistic patterns, from chic minimalist styles to vibrant, eye-catching graphics. This diversity enables you to select the perfect wrap for special events, holidays, or simply to reflect your mood, making your nail art journey as exciting and unique as you are.

How to Apply Nail Wraps

Despite their relatively simple application process, achieving a professional look with nail wraps requires careful attention to detail. Selecting the right size and ensuring your natural nails are prepped properly will set the foundation for a flawless finish. With the right techniques, you can easily enjoy a chic manicure that lasts for weeks.

Preparation of Natural Nails

Before applying nail wraps, it’s important to prepare your nails properly. Start by cleaning your nails thoroughly, removing any old polish, dirt, or oils. Next, gently push back your cuticles and file your nails to your desired shape. Finally, buff the surface of your nails lightly to create a smooth base for the wraps to adhere properly.

Step-by-Step Application Process

To successfully apply your nail wraps, follow this step-by-step process:

Step-by-Step Application Process

1. Choose the Right SizeSelect a wrap that fits your nail size perfectly.
2. Peel Off the BackingCarefully remove the adhesive backing from the wrap.
3. Place the Wrap on Your NailAlign the wrap with your cuticle and press down gently.
4. Smooth Out BubblesUse your fingers or a cuticle stick to flatten any bubbles.
5. Trim Excess WrapUse scissors to carefully trim away any overhang.
6. Seal the EdgesApply a top coat for durability and shine.

Another important aspect of the application process is ensuring you seal the edges properly. This will not only enhance the longevity of your nail wraps but also prevent lifting or chipping. After trimming the excess, applying a thin layer of top coat will provide an added layer of protection while giving your wraps a glossy finish. Trust the process, and soon you’ll have beautifully decorated nails that turn heads.

Tips for Keeping Nail Wraps Looking Great

All it takes is a little care and attention to keep your nail wraps looking fabulous. Follow these imperative tips:

  • Avoid soaking your nails in water for prolonged periods.
  • Use gloves while cleaning or doing dishes.
  • Apply a clear topcoat every few days for added shine.
  • Keep your nails trimmed to minimize wear.

This will ensure your wraps maintain their vibrant appearance and stay intact longer.

Maintenance and Care

With regular maintenance, your nail wraps can last longer and look their best. Be sure to clean your nails before application to remove any oils, and always apply wraps on clean, dry nails. For added protection, consider applying cuticle oil regularly to keep both your nails and wraps in top condition.

Avoiding Common Mistakes

About the most common mistakes people make when applying nail wraps is overlooking preparation. Preparation is key to a smooth application and lasting wear. Ensure your nails are clean, dry, and free of any oils before starting. Additionally, avoid pulling on the wraps, as this can cause them to lift. Always follow the manufacturer’s instructions to achieve the best results.

Looking out for these simple missteps can save you time and enhance the longevity of your nail wraps. Prioritizing proper application techniques and avoiding excessive moisture or rough handling will keep your beautiful designs intact. You should also allow ample time for the wraps to adhere properly, securing them against chips and damage.

Removing Nail Wraps Safely

Keep your nails healthy and strong by following the right technique when removing nail wraps. Improper removal can lead to damage or irritation. Always take your time and use the appropriate tools to ensure a smooth and safe removal process.

Tools Needed for Removal

One of the first steps in safely removing your nail wraps is gathering the necessary tools to make the process easier and more effective.

Tools

Acetone or Non-Acetone Nail Polish RemoverCotton Balls or Pads
Aluminum FoilPusher or Orange Stick
Buffing BlockMoisturizer or Cuticle Oil

Step-by-Step Removal Process

The process of removing your nail wraps should be systematic to ensure your nails remain undamaged. Follow these steps carefully.

Removal Steps

1. Soak cotton in acetone.2. Place the soaked cotton on your nails.
3. Wrap with aluminum foil.4. Wait 10-15 minutes.
5. Gently push off the wrap.6. Buff and moisturize your nails.

Hence, following each step accurately is paramount in preventing damage. The soaking process allows the adhesive to dissolve, making it easier to lift off the wraps without harsh scraping. If any residue remains, simply buff it away gently using a buffing block. Don’t forget to apply a moisturizer or cuticle oil afterward to nourish your nails and cuticles, ensuring they stay hydrated and healthy.

Frequently Asked Questions

Now, as you explore the world of nail wraps, you may have some common questions. To help you out, we have compiled answers to some inquiries you might have. If you want a deeper understanding, check out The Ultimate Guide to Nail Wraps: Elevate Your Nail Art … for more detailed information.

Can Nail Wraps Damage Natural Nails?

Asked about the safety of nail wraps, you’ll be pleased to know that when applied and removed correctly, they should not damage your natural nails. Ensuring that you follow application instructions carefully will help maintain the health of your nails while enjoying beautiful designs.

How Long Do Nail Wraps Last?

Around two weeks is the typical lifespan of nail wraps, depending on your lifestyle and how well you care for them. Various factors can influence this duration, such as exposure to water or oils and the nature of your daily activities.

Due to their adhesive nature, nail wraps can endure common wear and tear, but maintaining proper care plays a significant role in their longevity. Avoiding excessive heat or moisture and using gloves during chores can help your nail wraps last longer. Regular touch-ups on any chipped edges can also extend their wear, showcasing your stylish nails for as long as possible.

To wrap up

So, as you explore the world of nail wraps, you’ll discover a fun and creative way to enhance your manicure with ease. By selecting the right materials, applying them correctly, and caring for them properly, you can achieve lasting, salon-quality results at home. Don’t hesitate to experiment with different designs and techniques to find what works best for your personal style. With practice, you can master the art of nail wraps and enjoy beautiful nails anytime you desire.

Q: What are nail wraps and how do they work?

A: Nail wraps are thin, pre-cut pieces of adhesive material that are designed to adhere directly to the surface of your nails. They come in various designs, colors, and finishes, allowing you to achieve a polished look without the need for traditional nail polish. To use them, simply select your desired design, peel off the backing, and press the wrap onto your natural nail, smoothing out any bubbles as you go. Finally, you can file off any excess wrap for a perfect fit.

Q: How long do nail wraps typically last?

A: The longevity of nail wraps can vary based on the brand and how well you apply them, but they generally last anywhere from one to two weeks. Proper application and care can enhance their lifespan. To ensure your nail wraps last longer, avoid exposing your hands to excessive moisture and use gloves while doing household chores. Additionally, applying a top coat can help protect the wraps and extend their wear.

Q: Can I remove nail wraps easily, and what is the best method?

A: Yes, nail wraps can be removed easily. The best method involves using a gentle nail polish remover, preferably one that is acetone-free to minimize damage to your natural nails. Soak a cotton ball with the remover, place it on your nail, and wrap it in aluminum foil for a few minutes. This allows the adhesive to soften, making it easier to peel off the wraps without damaging your nails. If any residue remains, you can buff it away with a nail file.

Skip to content