Inails Near Me Global

How Smoking Impacts Nail Health

You may not realize that smoking can have significant effects on your nail health. The harmful chemicals in cigarettes not only weaken your nails but can also lead to various discoloration and growth issues. As you continue to smoke, your body’s circulation decreases, which impacts the supply of crucial nutrients to your nails. Understanding how smoking affects your nails can help you make informed decisions about your health and well-being.

Key Takeaways:

  • Reduced Blood Flow: Smoking constricts blood vessels, leading to decreased circulation which can negatively affect nail growth and health.
  • Dullness and Discoloration: The chemicals in cigarettes can cause nails to appear yellowed and dull, impacting their aesthetic quality.
  • Increased Risk of Infections: Smoking can weaken the immune system, making nails more susceptible to fungal infections and other nail disorders.

The Effects of Smoking on Nail Growth

Before delving into the specifics, it’s important to recognize that smoking can severely hinder your nail growth. The toxins in cigarettes disrupt the healthy function of your body, leading to a variety of nail issues. You may find that your nails become brittle, slow to grow, or develop unsightly ridges due to the negative impact of nicotine and harmful chemicals.

Impaired Blood Circulation

Behind the scenes, smoking damages your blood vessels, leading to impaired circulation. This affects the delivery of crucial nutrients and oxygen to your fingertips. As a result, your nails may not receive the support they need to grow robustly and healthily, making them more susceptible to breakage and other problems.

Nutritional Deficiencies

Smoking not only harms your overall health but also leads to nutritional deficiencies that can impact your nail growth. It reduces the absorption of important vitamins and minerals, which are crucial for maintaining strong and healthy nails. Without proper nutrients, your nails can become thin and weak.

Due to the impact of smoking on nutrient absorption, you might experience a lack of vital elements like vitamin C, biotin, and zinc. These deficiencies can lead to slow nail growth, discoloration, and increased brittleness. By quitting smoking, you can enhance your body’s ability to absorb these nutrients effectively, allowing your nails to regain their strength and vitality over time.

Nail Texture and Appearance

One significant way smoking affects your nails is by altering their texture and overall appearance. Smokers may notice uneven nail surfaces, ridges, or an unhealthy sheen, which can detract from your hands’ aesthetics. These changes are often the result of diminished blood flow and the introduction of harmful toxins from tobacco into your system, which compromises your nail health.

Discoloration

To understand how smoking influences nail color, consider that nicotine and tar can stain your nails, leading to a yellowish tint. This discoloration isn’t merely cosmetic but also a reflection of the toxins within your body. As you continue smoking, these stains can deepen, making it difficult for your nails to regain their natural hue.

Brittleness and Weakness

By smoking, you may notice that your nails become increasingly brittle and weak over time. This fragility can lead to frequent breakage, splitting, and peeling, which not only affects their appearance but can also cause discomfort.

The tendency of nails to become brittle and weak when you smoke is associated with the reduction of nutrients reaching your fingertips due to impaired circulation. Smoking restricts blood vessels, meaning less oxygen and fewer vital vitamins reach your nails. This lack of nourishment leads to the deterioration of the nail structure, making them prone to damage. Addressing this issue often requires you to cease smoking and adopt a healthier lifestyle that promotes better circulation and nail strength.

Smoking and Nail Diseases

Many studies link smoking to various nail diseases, as the harmful substances in cigarettes can compromise blood circulation, leading to nail discoloration and deformities. Additionally, smoking weakens your immune system, increasing the risk of developing infections. For deeper insights, check out How Smoking Affects Your Good Looks – Health Beat.

Fungal Infections

On top of the various diseases, smoking can elevate your chances of fungal nail infections. These infections thrive in compromised environments like those created by smoking, making your nails more susceptible to damage and discoloration.

Psoriasis

By smoking, you also risk exacerbating existing conditions like psoriasis, which can lead to painful and unsightly nail changes. This chronic skin condition often affects your nails, causing pitting and discoloration, further affecting their health.

The impact of smoking on psoriasis is significant because it can lead to inflammation and complicate treatment. When you smoke, the toxins make it harder for your body to heal itself, resulting in increased symptoms and flare-ups that affect both your skin and nails. Quitting smoking may help improve your overall skin health and reduce psoriasis severity.

Impact on Nail Care and Hygiene

Keep your nails healthy and aesthetically pleasing by understanding the impact of smoking. The harmful chemicals in tobacco can hinder the effectiveness of your nail care routine, making it necessary to prioritize hygiene. For more information, check out this study on Toenail Nicotine Levels as a Biomarker of Tobacco Smoke.

Difficulty in Maintaining Nail Health

Any attempts you make to maintain healthy nails can be compromised by smoking. The toxins in tobacco contribute to discoloration and brittle nails, making it challenging to achieve your desired appearance. This impact requires you to pay closer attention to your nail care routine.

Increased Risk of Infections

Any exposure to smoking can elevate your risk of infections, particularly fungal and bacterial, in your nails. These infections develop more readily when your nails are weak or damaged, which can frequently happen due to smoking. You may find that these conditions not only hinder your nail appearance but can also lead to discomfort and further health issues.

A thorough understanding of how smoking affects your nail health can empower you to make proactive choices. By fostering good hygiene practices and considering the potential rise in infections, you can mitigate some of the adverse effects of smoking on your nails. Taking steps like regular manicures, keeping your nails trimmed, and using antifungal products may support your nail integrity despite the smoking habit.

Psychological Aspects of Nail Damage

Unlike healthy nails, damaged nails can profoundly affect your psychological well-being. Research indicates that smoking contributes to nail damage, as evidenced by Toenail nicotine levels as a biomarker of tobacco smoke. The visible deterioration of nails may lead to feelings of shame and low self-worth, ultimately impacting your mental health and social interactions.

Self-Esteem and Personal Image

By neglecting your nail health, you may find that your self-esteem diminishes. Damaged nails can lead you to feel self-conscious, which may hinder your interactions and confidence in personal and professional settings.

Behavioral Changes Related to Smoking

Above addressing nail health, smoking may lead you to develop habits that negatively impact your overall hygiene and grooming practices. As your smoking habit continues, you may find yourself less motivated to care for your nails, creating a cycle of damage.

Behavioral changes linked to smoking can manifest in various ways, including neglecting nail care routines and avoiding situations where your hands are visible. This disinterest in grooming may stem from feelings of defeat related to smoking’s toll on your body, including your nails. You may also find yourself engaging in further harmful habits to cope with the psychological burden of smoking and its visible effects on your nails.

Strategies for Improvement

Not only can quitting smoking improve your overall health, but it can also significantly enhance the health of your nails. By eliminating tobacco from your life, you allow your body to restore circulation and nutrient delivery, resulting in stronger and healthier nails. Combine this with a commitment to regular nail care, and you’ll set the stage for noticeable improvement.

Quitting Smoking

Around 70% of smokers express a desire to quit, and doing so can lead to immediate benefits for your nail health. As you kick the habit, your fingers will begin to experience better blood flow, which nourishes your nails. The sooner you quit, the faster you’ll see a change.

Nail Care Regimens

Along with quitting smoking, implementing a comprehensive nail care regimen can greatly enhance your nails’ appearance and health. This involves regular trimming, moisturizing your cuticles, ensuring proper hydration, and using high-quality nail products that promote strength and shine.

In fact, adopting a nail care regimen isn’t just about aesthetics; it’s a form of self-care that directly impacts the health of your nails. By keeping your nails trimmed and shaped, you prevent breakage and splitting. Incorporating moisturizers or oils can help combat dryness and brittleness, providing crucial nutrients. Additionally, regular manicures can improve blood circulation in the nail beds, promoting growth and strength. All these practices will boost your confidence while ensuring your nails look their best.

Conclusion

As a reminder, smoking significantly affects your nail health, leading to discoloration, brittleness, and increased risk of infections. The harmful chemicals in cigarettes not only weaken your nails but also hinder their growth and overall appearance. Understanding the impact of your smoking habit on your nails can motivate you to prioritize healthier choices for better nail care and overall well-being.

FAQ

Q: How does smoking directly affect the appearance of my nails?

A: Smoking can lead to discoloration of the nails due to the tar and nicotine present in cigarettes. These substances can stain the nails, often giving them a yellowish hue. Additionally, smoking can restrict blood flow to the extremities, potentially causing nails to become brittle or develop ridges, making them less healthy and attractive in appearance.

Q: Can smoking increase the risk of nail infections or diseases?

A: Yes, smoking can weaken the immune system, making the body more susceptible to infections, including fungal and bacterial infections that can affect the nails. The reduced blood circulation caused by smoking may also hinder the body’s ability to fight off these infections, leading to a higher risk of nail-related issues.

Q: Are there any benefits to quitting smoking for my nail health?

A: Quitting smoking can significantly improve nail health over time. Once you stop smoking, the body begins to repair itself, increasing blood flow and nourishing the nails. This can lead to healthier growth, improved color, and decreased risk of infections. With time and care, many individuals notice a marked improvement in both the health and appearance of their nails after quitting.
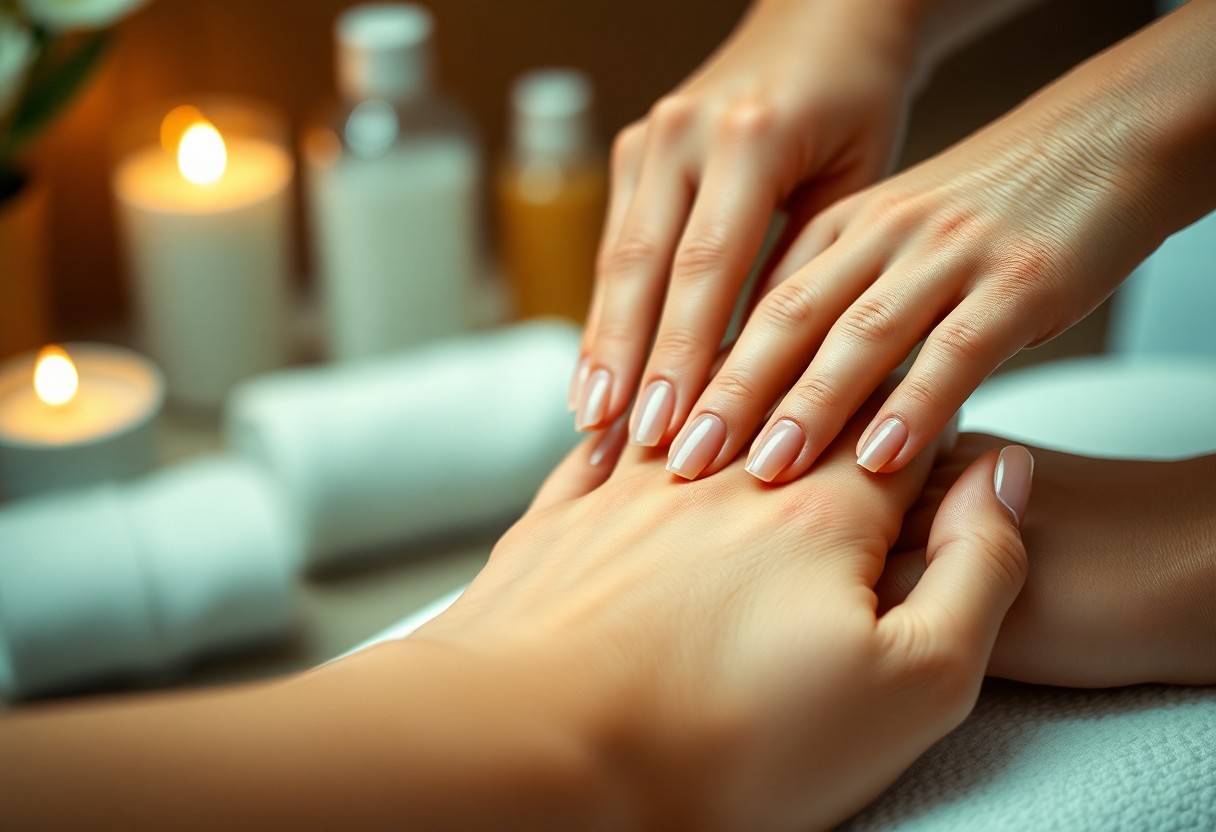
The Benefits of Regular Nail Massage for Growth

Most people overlook the impact of nail massage on the health and growth of their nails. By incorporating regular nail massage into your grooming routine, you can significantly enhance blood circulation to your nail bed, promoting faster and healthier nail growth. This simple practice not only strengthens your nails but also provides relaxation and stress relief for your daily life. Understanding the benefits of nail massage can empower you to take better care of your nails, ultimately leading to a more polished and vibrant appearance.

Key Takeaways:

  • Enhanced blood circulation: Regular nail massage promotes better blood flow to the nail bed, supplying crucial nutrients and oxygen necessary for healthy growth.
  • Reduced stress: Engaging in nail massage can help alleviate stress levels, contributing indirectly to healthier nails as reduced stress is linked to overall well-being.
  • Improved nail flexibility: Consistent massage can enhance the flexibility of the nails, reducing the risk of breakage and encouraging stronger growth over time.

Understanding Nail Growth

The process of nail growth is a fascinating aspect of your body’s natural renewal system. Nails grow from the nail matrix, located underneath the cuticle area, where new cells are produced. As these cells multiply and push older cells forward, they form the hard structure of the nail. Generally, your nails grow about 1/8 inch per month, although this rate can vary based on several factors, such as age, health, and genetics.

Anatomy of the Nail

Any understanding of nail growth begins with recognizing the anatomy of your nails. Each nail comprises several parts: the nail plate (the visible part), the nail bed (the skin beneath), the cuticle (protective layer), and the nail matrix (where growth occurs). These components work together to support nail health and growth.

Factors Affecting Nail Growth

After learning about nail growth, it’s important to understand various factors that can influence the rate at which your nails grow. These can include:

  • Your age
  • Your overall health
  • Your diet
  • Your hydration levels
  • Your lifestyle and habits

Recognizing these factors helps you identify ways to support and enhance your nail growth.

Growth can also be affected by environmental factors and daily habits. For instance, exposure to chemicals, frequent handwashing, or using harsh nail products can weaken your nails and hinder their growth. Ensuring you provide your body with adequate nutrients and hydration can support optimal nail health. Consider the following:

  • Prioritize a balanced diet rich in vitamins and minerals
  • Avoid biting or picking at your nails
  • Limit exposure to harsh chemicals
  • Stay hydrated

Recognizing these influences allows you to actively promote stronger and healthier nails.

The Science Behind Nail Massage

Clearly, nail massage involves a combination of techniques that stimulate blood circulation and promote the health of your nails. This practice not only enhances the growth of your nails but also improves the overall condition of your cuticles. For more on the advantages, you can explore The Benefits of Massage During a Manicure.

Physiological Benefits

Benefits of regular nail massage include increased blood flow to the nail bed, providing necessary nutrients and oxygen. This stimulation encourages cell regeneration, improving the strength and duration of your nail’s growth cycle.

Psychological Benefits

Beside the physical advantages, nail massage offers important psychological benefits that enhance your overall well-being. The relaxation you experience during a massage can significantly reduce stress and anxiety, creating a moment of tranquility in your busy life.

Nail massage not only serves as a pampering experience but also as a valuable self-care ritual that promotes mental clarity and emotional balance. By taking time for this activity, you can cultivate a sense of mindfulness, providing you a break from daily pressures and reaffirming self-worth in maintaining your personal grooming.

Techniques for Effective Nail Massage

Unlike ordinary hand massages, nail massage requires specific techniques to stimulate nail growth. Begin by gently pushing back the cuticles with a soft tool, then use your fingertips to apply pressure around the nail bed. Circular motions are especially effective to enhance blood circulation. You can also alternate between a soft pinch and a gentle glide down the nail plate to further encourage growth. Consistency in these practices will yield the best results over time.

Recommended Methods

The use of daily massage routines can significantly promote healthy nail growth. Aim for five to ten minutes of dedicated time where you focus on each nail individually. Applying a nourishing oil or lotion during the process not only provides hydration but also boosts the stimulation of the nail matrix. Be sure to engage in this practice at least three to four times a week for optimal benefits.

Tools and Products for Nail Massage

Before you begin your nail massage, consider the various tools and products available that can enhance your experience. A quality cuticle pusher, a soft brush, and a moisturizing oil or lotion specifically formulated for nails can make a significant difference in your massage routine.

Nail oils rich in vitamins such as E, A, and B can provide vital nutrients that promote growth and strength. Look for products that contain natural ingredients like jojoba or almond oil, which help moisturize and soften both the nail and surrounding skin. Additionally, a soft-bristled brush can be useful for gently exfoliating dead skin around your nails, ensuring a clean and healthy environment for growth. Investing in these tools and products will aid in achieving the best results for your nail care routine.

Frequency and Duration of Nail Massage

To maximize the benefits of nail massage, you should incorporate it into your routine several times a week. Consistency is key, as regular massage helps stimulate blood circulation and promote nail growth. Aim for at least 10 to 15 minutes per session, allowing the oils you use to deeply nourish the nail bed while encouraging healthy growth.

Optimal Schedule

One effective approach is to perform nail massages three to four times a week. This schedule allows adequate time for your nails and cuticles to benefit from the revived circulation without overwhelming them. You can easily integrate this self-care ritual into your existing routine, perhaps during your evening relaxation time.

Precautions to Consider

Beside enjoying the benefits of nail massages, it’s imperative to take specific precautions. Be attentive to any signs of irritation or injury during your sessions, as overly aggressive massage can lead to damage rather than improvement.

Optimal nail massage should be gentle and soothing. Make sure to use the right techniques that focus on the cuticles and surrounding skin, avoiding excessive pressure that could harm your nails. If you face pre-existing nail conditions or tenderness, consult a healthcare professional before incorporating massage into your routine. Your nails will appreciate the care, provided you stay mindful of their limits.

Common Myths About Nail Massage

Keep in mind that many misconceptions surround nail massage, leading to a lack of understanding about its benefits. Some people believe that massaging nails can cause them to break or weaken, while others think it won’t have any impact on growth. It’s necessary to separate fact from fiction in order to fully appreciate how regular nail massage can contribute to healthier, stronger nails.

Debunking Misconceptions

Behind these myths is a misunderstanding of how nail structure and growth work. Nail massage promotes blood circulation to the nail bed, which nourishes and revitalizes the surrounding tissues. This stimulation can actually enhance nail strength and encourage growth, contrary to popular belief.

Evidence-Based Insights

After examining various studies, you’ll find that nail massage has been shown to improve circulation and promote healthier nail growth. Research indicates that regular massage not only reduces the appearance of ridges but also strengthens the overall nail structure.

Plus, studies highlight that consistent nail care, including massage, can lead to visibly healthier nails over time. It’s not just anecdotal; scientific backing suggests improved blood flow to the nail matrix enhances growth potential and overall nail health. By incorporating nail massage into your regular routine, you’re actively taking steps towards stronger, more resilient nails.

Incorporating Nail Massage into Your Routine

After you establish a general nail care regimen, incorporating nail massage can significantly enhance your results. Try incorporating a few minutes of massage into your routine twice a week, perhaps during your manicures or while applying lotion. Focus on your cuticles and the nail bed to stimulate blood flow and encourage growth.

Tips for Consistency

Around your busy schedule, finding time for nail massage can be challenging, but it’s necessary for maintaining consistent self-care. To make it easier, try these tips:

  • Set a specific day and time each week dedicated to nail care.
  • Keep your massage oils or lotions in visible locations.
  • Pair your nail massage with relaxing activities, like watching TV.

Any small effort you dedicate will gradually become part of your self-care routine.

Enhancing Overall Nail Care

To maximize the benefits of nail massage, consider it as a complementary practice to your overall nail care. Proper hydration and nourishment are necessary for healthy nails, so using quality oils or lotions during your massage will further enhance your results. Additionally, regular massage can prevent common issues like brittleness and breakage, leading to stronger, healthier nails.

Routine massage not only fosters nail growth but also promotes overall nail health by improving circulation and rejuvenating the cuticles. This added attention ensures your nails receive the right nutrients and care as they grow. By integrating nail massage with your daily and weekly nail care practices, you create a holistic approach that supports and enhances your nail strength and appearance.

Final Words

On the whole, incorporating regular nail massages can significantly enhance your nail growth by increasing blood circulation and promoting nutrient absorption. By dedicating a few minutes each week to massage your nails and cuticles, you enable a healthier environment for growth. Consider exploring additional tips and methods to support your nail care regime by checking out this article on Making nails grow faster: Home remedies, diet, and myths. Your nails will thank you for the extra attention and care.

Q: What are the main benefits of regular nail massage for growth?

A: Regular nail massage helps stimulate blood circulation to the nail bed, which promotes healthier and faster nail growth. By increasing blood flow, the nails receive more oxygen and vital nutrients, supporting their overall health. Additionally, it can help to strengthen the nails, making them less prone to breakage and damage.

Q: How often should I perform nail massages for optimal growth?

A: For optimal results, it is recommended to perform nail massages at least 2 to 3 times a week. You can incorporate a short massage into your nail care routine by using your fingers or a specialized tool. Taking a few minutes each session to gently knead the nail bed and the skin around it can have a significant impact on nail growth over time.

Q: Can specific oils enhance the benefits of nail massage?

A: Yes, using specific oils during nail massage can enhance the benefits further. Oils such as jojoba, almond, or olive oil can moisturize and nourish both the nails and the surrounding cuticles, helping to prevent dryness and brittleness. These oils are rich in vitamins and fatty acids that support healthy nail growth, so combining massage techniques with the application of nourishing oils can yield excellent results.

How to Create Geometric Nail Art at Home

It’s easier than you think to elevate your nails with stunning geometric designs that you can create right at home. With a few simple tools and techniques, you can transform your manicure into a work of art that showcases your personal style. In this blog post, you’ll learn how to master various geometric patterns, choose the right color combinations, and apply your designs with precision, making nail art an enjoyable and creative experience that you can proudly show off. Let’s explore the step-by-step guide to achieving those chic geometric looks you adore.

Key Takeaways:

  • Tools: Equip yourself with quality tools like striping tape, dotting tools, and nail brushes to achieve precise geometric designs.
  • Color Combination: Choose a well-coordinated color palette that enhances your geometric patterns, creating contrast and visual interest.
  • Practice Techniques: Familiarize yourself with basic nail art techniques, such as freehand drawing and using stencils, to improve your geometric creations.

Tools and Materials Needed

While creating stunning geometric nail art at home, you’ll need a few vital tools and materials. Gather items like nail polish, nail tape, a brush for detailing, and a dotting tool to help achieve those intricate designs. For a comprehensive guide and tips on techniques, check out this Tutorial: Edgy Geometric Nail Art and elevate your nail game.

Essential Nail Art Supplies

Besides the basic nail polish colors, having a base coat, top coat, and nail dryer will enhance the longevity and finish of your designs. You should also invest in high-quality nail tape for straight-line designs and a stable surface for applying your art.

Optional Accessories for Precision

Essential tools like fine detail brushes and striping brushes can significantly improve the quality of your geometric nail art. These precision accessories allow you to create sharper lines and more intricate patterns.

This added precision can make all the difference when you want to elevate your nail art to the next level. A fine detail brush is perfect for small designs or touch-ups, while striping brushes help create those delicate lines that define geometric patterns. Utilizing these tools can help you achieve a salon-quality finish from the comfort of your home.

Preparing Your Nails

If you want to ensure a flawless foundation for your geometric nail art, preparing your nails is vital. Start by gently removing any old polish and trimming your nails to your desired length. Buff the surface to create a smooth canvas, and wash your hands thoroughly to eliminate any residue. Finish by pushing back your cuticles and applying a moisturizing hand cream to keep your skin looking healthy.

Nail Care and Maintenance

At the heart of stunning nail art is proper nail care and maintenance. Regularly moisturizing your hands and nails will help maintain their health and prevent them from becoming brittle or breaking. Invest in a high-quality cuticle oil to nourish the area around your nails, and incorporate a buffing routine to promote shine and smoothness.

Choosing the Right Base Coat

Careful selection of a base coat is vital for your nail art. A good base coat not only protects your natural nails from staining but also creates an optimal surface for the colors to adhere properly.

In addition to protection, a quality base coat can enhance the longevity of your geometric nail art. Look for one that is specifically designed to prevent chipping and peeling, as this will help your design last longer. Many base coats also have additional benefits, such as nourishing ingredients or strengthening properties, which can help maintain the integrity of your nails over time. Choose a base coat that suits your nail type for the best results.

Basic Geometric Patterns

After you familiarize yourself with the vitals of geometric nail art, it’s time to explore basic patterns. Popular designs include strips, triangles, and grids that are easy to master yet look stunning. For a detailed guide, check out Easy Geometric Nail Art- Tutorial – Allure Delight. These patterns serve as a foundation for more intricate designs and will help build your confidence in nail art.

Simple Lines and Shapes

Above all, simple lines and shapes are a great starting point for your nail art journey. Using striping tape or a fine brush, you can create clean lines and basic shapes that form the backbone of more complex designs. Experiment with different colors to enhance the visual interest of your manicure.

Combining Shapes for Unique Designs

Unique designs emerge when you combine various shapes and patterns. You can play with different sizes and orientations of triangles, squares, and circles to create depth and dimensionality. Mixing color schemes and finishes, such as matte and glossy, can further enhance the uniqueness of your nail art.

Simple combinations of shapes can lead to eye-catching designs that elevates your nail art game. Start with two or three basic shapes and play around with their arrangement. For instance, layering triangles over circles can create a dynamic look, while alternating colors can add vibrancy. Don’t hesitate to explore different combinations, as this process is where your creativity can truly shine!

Advanced Techniques

For those looking to elevate their geometric nail art, incorporating advanced techniques can make all the difference. Explore these methods:

Advanced Techniques

  1. Using Nail Tape for Clean Lines
  2. Stamping and Stencils
  3. Water Marbling
  4. Ombre Effects
  5. Fine Detailing with Brushes

Using Tape for Clean Lines

Between colors or designs, using tape can help you achieve clean and crisp lines that elevate the overall look of your nails. Choose a fine tape, apply it carefully, and paint over it for impressive results.

Stamping and Stencils

Using stamping plates and stencils allows you to recreate intricate designs easily and quickly. These tools can be a game changer when you’re aiming for geometric precision.

A stamping kit usually includes a plate with various designs, a stamper, and a scraper. To use, simply apply polish to the design, scrape off the excess, and press it onto your nail. Stencils can be utilized to create unique shapes and styles, ensuring your geometric art stands out. Mastering these techniques will provide you with endless possibilities for creativity in your nail art.

Color Selection and Combination

Many factors contribute to achieving stunning geometric nail art, and color selection is one of the most vital. Choosing the right colors not only enhances the overall look but also sets the mood of your design. Consider using a mix of bold hues and soft pastels for a balanced effect, or go for an all-monochrome palette for a sleek, modern feel.

Choosing a Color Palette

An effective color palette can create a stunning backdrop for your geometric designs. To select your palette, think about your personal style and the season. Use color theory to choose complementary colors that amplify each other, ensuring a visually appealing outcome.

Tips for a Harmonious Design

Tips for achieving a harmonious design include focusing on balance and contrast. You can achieve this by following these suggestions:

  • Choose three to five colors for a cohesive look.
  • Utilize shades and tones of your chosen colors to add depth.
  • Mix matte and glossy finishes for varied texture.

Thou can enhance your artistic expression through color harmony!

For instance, you may want to experiment with varying tones of the same color for a gradient effect. This approach showcases depth while remaining visually calming. Additionally, consider these strategies:

  • Incorporate a neutral base to anchor bold colors.
  • Use color blocking to create definite sections in your design.
  • Test your palette on a nail wheel before applying to avoid surprises.

Thou can elevate your nail art with careful color choices!

Application and Finishing Touches

Despite the intricate designs you may plan, proper application and finishing touches are crucial for a professional-looking geometric nail art. Start by ensuring your nails are clean and dry, then use striping tape or stencils to outline your desired shapes. Carefully fill in each section with polish, allowing adequate drying time between layers to prevent smudging. Once satisfied with the design, add your finishing touches for an eye-catching effect.

Applying Nail Polish Effectively

With a steady hand, apply the base color to ensure an even canvas for your geometric designs. Use a quality brush; a thin one can help you maneuver in tight spaces, while a wider brush covers larger areas quickly. It’s best to apply multiple thin coats rather than one thick layer, as this helps prevent bubbles and ensures a smooth, flawless finish.

Top Coats and Drying Techniques

The right top coat can elevate your nail art by adding shine and protection. After your design has dried fully, apply a layer of quick-dry top coat to lock in your masterpiece and prevent chipping. You can also speed up the drying process using cold air from a fan or placing your hands in a bowl of ice water for a few minutes. Ensure the top coat is applied evenly for that polished professional look.

To maximize the longevity of your nail art, choose a high-quality top coat that suits your style, whether you’re looking for a glossy or matte finish. Pay attention to drying techniques as well; letting your nails air dry for a bit, followed by using rapid-dry sprays, can help significantly. This way, you not only enhance the look of your geometric design but also ensure it remains intact and vibrant for days to come.

Conclusion

Conclusively, creating geometric nail art at home is an enjoyable and rewarding process that allows you to express your unique style. By gathering the right tools, choosing your favorite colors, and practicing simple techniques such as tape or dotting, you can achieve stunning designs that turn your nails into a canvas. With patience and creativity, you’ll soon master this art form, transforming your manicure into a bold statement that showcases your personality and flair.

Q: What supplies do I need to create geometric nail art at home?

A: To create geometric nail art at home, you will need the following supplies: a base coat and top coat to protect your nails, nail polish in various colors for your design, striping tape or nail art tape to create precise lines, a dotting tool or a fine brush for intricate designs, and a cleanup brush or cotton swabs soaked in nail polish remover for any mistakes. Additionally, a palette or small dishes to mix colors or pour polish can be helpful for more complex designs.

Q: How can I achieve straight lines for my geometric nail art?

A: Achieving straight lines is vital for geometric nail art. You can use striping tape to help create precise lines. First, apply a base color and let it dry completely. Then, place the striping tape in the desired pattern on your nails, ensuring it adheres well. Paint over the tape with a contrasting color, and once it’s dry, carefully remove the tape to reveal clean lines. If you prefer freehand designs, use a fine brush to paint the lines slowly and steadily, allowing each section to dry before adding the next.

Q: What techniques can I use to add depth to my geometric nail art?

A: To add depth to your geometric nail art, try using techniques such as layering and shading. Start with a base coat, then apply one or two base colors for your geometric shapes. After that, you can create a 3D effect by using lighter or darker shades of the same color to add dimension. For example, use a lighter polish to highlight certain areas and a darker shade to create shadows. You can also incorporate glitter or metallic polishes to enhance the design further. Applying a matte top coat over certain areas while keeping others glossy can create an interesting contrast and more depth in your artwork.

Floral Nail Designs for Every Season

Just because the seasons change doesn’t mean your nail art has to be boring! Embrace the beauty of nature with stunning floral nail designs that inspire your creativity all year round. Whether you’re looking for vibrant blooms for summer or muted petals for fall, there’s a style that fits every occasion. Explore more with The FLOWER nail art playlist by Robin Moses to elevate your nail game and express your personality through floral patterns that speak to the essence of each season.

Key Takeaways:

  • Seasonal Inspiration: Floral nail designs can be tailored to reflect the colors and blooms of each season, blending seasonal themes into your manicure.
  • Techniques and Styles: Various techniques such as watercolor, stamping, or hand-painting can create stunning floral patterns that showcase your creativity.
  • Versatility: Floral designs can be adapted to suit both casual and formal occasions, making them a versatile option for any wardrobe.

Spring Floral Nail Designs

Before you embrace the vibrant blooms of spring, consider how floral nail designs can be the perfect way to freshen up your look. This season invites you to use lighter colors and intricate patterns that reflect the beauty of nature awakening. From soft pastels to bold blossoms, your nails can showcase the spirit of spring in a stylish and fun manner.

Pastel Petals

One of the most enchanting ways to welcome spring is with pastel petals on your nails. Soft hues like lavender, baby blue, and blush pink create a delicate backdrop for floral designs. Consider accentuating your manicure with tiny flower decals or hand-painted blooms for a whimsical touch that complements the season’s revival.

Blooming Florals

Across your fingertips, you can showcase an array of blooming florals that embody the essence of spring. Choose bold colors that pop, such as vibrant pinks or sunny yellows, to add a cheerful dimension to your nails.

Spring is all about renewal, and what better way to express that than with eye-catching floral patterns? You might opt for larger floral designs that take center stage or a mix of smaller flowers scattered across your nails for a more playful approach. Incorporate some nail art techniques like gradient backgrounds or negative space to highlight your blooming florals. This season, let your nails reflect the beauty and freshness of nature in full bloom.

Summer Floral Nail Designs

While summer brings a burst of color and warmth, it’s the perfect opportunity for you to experiment with vibrant floral nail designs. Embracing the sunny vibes, you can elevate your nail game with playful patterns, lively hues, and fresh floral accents that reflect the beauty of the season. Whether you prefer bold designs or subtle touches, summer is your canvas to express creativity through floral motifs that capture the essence of sun-kissed days.

Vibrant Blossoms

Below are some stunning ideas to inspire you for your summertime floral nails, featuring bright colors and bold designs that bring your fingertips to life. Think sunny yellows, fiery oranges, and electric pinks, combined with various floral patterns that create a striking visual effect. You can opt for nail art featuring daisies, sunflowers, or peonies to make a statement that resonates with the joys of summer.

Tropical Inspiration

Designs infused with tropical inspirations can also enhance your summer manicure. You can feature exotic flowers like hibiscus and orchids, alongside vibrant greens and turquoise shades that mimic lush landscapes. The bright combinations not only highlight the floral elements but also embrace the fun and upbeat nature of summer vacation vibes.

Due to the exotic beauty of tropical flowers, your nail designs can reflect an endless summer getaway. Think of vibrant colors accentuated with intricate patterns, showcasing palm leaves and bright blossoms. These designs transport you to paradise, making your nails the focal point of any summer outing. You’ll find that incorporating tropical motifs into your summer nail art allows for endless creativity and helps you celebrate the season in style.

Autumn Floral Nail Designs

Keep your nails in tune with the season by embracing the beauty of autumn floral designs. Rich tones and intricate patterns speak to the essence of fall, allowing you to showcase the vibrant hues of nature. From deep reds to golden yellows, these designs will complement your autumn wardrobe and add a touch of elegance to your look.

Warm Hues

Behind every stunning autumn floral nail design lies an array of warm hues that capture the spirit of the season. Think about incorporating shades like burnt orange, deep burgundy, and golden yellows, which reflect the radiant leaves falling from trees. These colors not only enhance your nails but also bring out the glow of your skin, creating a harmonious balance.

Rustic Florals

Across your nails, rustic floral designs can evoke the cozy charm of autumn. This style often features muted colors and earthy tones, creating a more relaxed and naturalistic vibe. You can mix and match flowers like daisies, chrysanthemums, and wildflowers with subtle leaf accents for a complete look that embodies the essence of fall.

Florals in rustic designs often draw inspiration from the season’s natural elements. You can use colors like dusty rose, olive green, and taupe to craft an organic feel that resonates with autumn. Incorporating small details such as bark textures or gold foil further enhances the rustic charm, making your nails the ideal accessory for cozy sweaters and warm drinks. By blending these elements, your nail art can evoke the serene beauty of the autumn landscape, perfect for any seasonal gathering.

Winter Floral Nail Designs

For chilly days, winter floral nail designs bring a cozy touch to your style. These designs incorporate muted tones and delicate floral patterns, perfect for embracing the season’s beauty. By blending classic winter shades with intricate floral motifs, you can elevate your nail art game and complement your winter wardrobe beautifully.

Frosty Blooms

Nail designs featuring frosty blooms can create a unique winter aesthetic. Think white and blue color palettes with floral elements that evoke a sense of cold beauty. Sparkling accents and frost-like textures can enhance this look, giving your nails a stunning, icy finish that captures the essence of winter.

Elegant Winter Florals

Against the backdrop of winter’s serenity, elegant florals in your nail designs can make a bold statement. Utilizing warm hues like burgundy, deep green, and gold, you can create sophisticated floral patterns that convey warmth and elegance throughout the colder months.

Plus, incorporating subtle metallic accents or matte finishes can add depth to your elegant winter florals. Consider adding gold or silver leaf details to mimic the shimmer of frost on petals, which can elevate your design while ensuring that your nails remain the focal point. Exploring different layering techniques will also help you achieve a refined look that is perfectly suited for holiday events or cozy gatherings.

Nail Art Techniques for Floral Designs

Unlike traditional nail painting, floral nail designs benefit from various innovative techniques that can enhance both the look and durability of your art. From hand-painting delicate petals to utilizing tools that provide texture, these methods allow you to express creativity in a way that resonates with every season. Mastering techniques such as watercolor or stamping can elevate your nail art game, creating stunning, seasonal styles that you’ll love to show off.

Watercolor Methods

For a light and airy floral design, watercolor methods are perfect. You can achieve a soft, blended effect on your nails by using diluted polish or water-based gel. Simply apply a base coat, then dip a brush into your desired colors and create gentle strokes to mimic the flowy aesthetic of watercolor paintings. Layers can build depth, allowing you to perfect your spring blooms or summer flowers.

Stamping Techniques

Among the various nail art techniques, stamping stands out for its efficiency and detail. With stamping plates featuring intricate floral designs, you can easily transfer beautiful images onto your nails. This method is especially useful for beginners or anyone looking for consistent results. By applying polish to the plate and scraping off the excess, you ensure that the design is perfectly aligned and ready to impress.

Hence, stamping techniques not only provide a quick way to achieve complex floral designs but also offer endless versatility. You can combine different colors and patterns to create unique sections or complete nail sets that reflect personal style. With just a little practice, you can master the placement and pressure needed to make every flower stand out beautifully on your nails. Experiment with various designs to find the ones that resonate with you most, ensuring your nail art is always fresh and seasonal.

Choosing the Right Base Color

Not all nail designs are created equal, and the base color you choose plays a pivotal role in bringing your floral art to life. Opt for a shade that enhances the vibrancy of your floral patterns. Light pastels are excellent for a soft, feminine touch, while bold, darker hues create a striking contrast. Whichever you pick, ensure it complements the floral elements to achieve a harmonious look.

Complementary Colors for Floral Designs

For floral designs, selecting complementary colors can elevate your nail art. You want the base color to contrast beautifully with the colors of your flowers, creating a balanced and eye-catching look. Consider colors opposite each other on the color wheel, like lavender with yellow, or coral with teal, to enhance the visual appeal of your floral motifs.

Seasonal Color Trends

Against common belief, seasonal color trends can greatly influence your floral nail design choices. Each season introduces new color palettes inspired by fashion and environmental changes, making your floral nails fresh and relevant. By staying updated on these trends, you can choose a base color that reflects the essence of the season and showcases your floral art at its best.

Choosing colors in alignment with seasonal trends allows your floral nail designs to feel timely and chic. Spring often embraces pastel shades like soft pinks and light greens, while summer leans towards vibrant corals and bright yellows. For autumn, warm earthy tones like burnt orange and deep burgundy add richness, and winter features cool blues and silvers. By incorporating these seasonal palettes into your base colors, your floral designs will resonate beautifully with the time of year.

Conclusion

Following this guide, you can elevate your nail game with floral designs that suit every season. Whether it’s the vibrant blooms of spring, the sunny florals of summer, the warm hues of autumn, or the cool elegance of winter, there are countless ways to express your personal style through floral nail art. Use these ideas to inspire your next manicure, and embrace the beauty of nature on your fingertips throughout the year.

Q: What are some popular floral nail design trends for spring?

A: Spring is the perfect time to embrace vibrant colors and intricate floral patterns. Popular trends include delicate pastel shades with floral accents, such as cherry blossoms or daisies. Ombre techniques using soft color transitions or watercolor effects can create a dreamy floral look. Additionally, 3D elements like raised flower stickers or gems can add a fun dimension to the design.

Q: How can I transition my floral nail designs from summer to fall?

A: Transitioning from summer to fall can be achieved by adjusting your color palette and floral motifs. For summer, bright and bold colors like hot pinks and sunny yellows work well, featuring flowers like sunflowers or tropical blooms. As fall approaches, shift to richer tones like burgundy, mustard, and deep greens. Incorporate seasonal flowers like chrysanthemums or foliage designs that reflect the changing seasons, blending summer vibrancy with autumnal warmth.

Q: Are there any tips for maintaining floral nail designs throughout the seasons?

A: To maintain your floral nail designs, start with a high-quality base coat to protect your nails and the artwork. Applying a top coat regularly will help preserve the design and add shine. When engaging in activities that may chip your nails, consider wearing gloves. If you notice any wear, nail art pens can be used for quick touch-ups. Additionally, keeping your nails moisturized can enhance the overall look and help the design last longer.

Neon Nail Art – Bright Ideas for Bold Looks

Artistic expression takes on a vibrant twist with neon nail art, perfect for those looking to make a statement. You can elevate your style and showcase your personality through these electrifying designs. From simple pops of color to intricate patterns, there’s something for everyone. Whether you’re preparing for a special event or just want to update your look, neon nails are a fun choice. For inspiration, check out Glow Up This Summer with 25 Neon Nail Ideas – The Pink Issue.

Key Takeaways:

  • Vibrant Colors: Neon nail art utilizes bright, eye-catching colors that make a statement and elevate your overall look.
  • Creativity: This art form encourages creativity with various techniques like ombre, stripes, and geometric patterns that can be customized to personal style.
  • Seasonal Trends: Neon colors often align with seasonal trends, making them perfect for summer and festival vibes, enhancing your nail game year-round.

The History of Neon Nail Art

The origins of neon nail art can be traced back to the 1980s when fluorescent colors surged in popularity, influenced by the vibrant aesthetics of pop culture and street fashion. You can find inspiration from the evolution of these styles in this collection of 35+ Bold & Beautiful Designs For Neon Purple Nails. Since then, neon shades have consistently made a comeback, combining modern techniques with playful colors to create stunning nail art that captures attention.

Evolution of Nail Trends

On your journey through nail art, you’ll notice how trends have transformed dramatically over the years, from simple solid colors to elaborate designs with nail enhancements. Each era brought new influences and styles—from the classic French manicure to the more adventurous nail art seen today. You can explore the creative ways in which techniques have evolved to accommodate diverse personal expressions through nail designs.

The Rise of Neon Colors

Trends have shifted immensely, with bright neon colors becoming a staple in the cosmetics industry. Nail art enthusiasts like you have embraced these vivid hues as a way to make bold statements and reflect individuality. Neon shades not only illuminate your nails but also create an eye-catching canvas for intricate designs and patterns.

But beyond their aesthetic appeal, the rise of neon colors signifies a cultural shift towards self-expression and creativity. With the resurgence of 80s and 90s nostalgia, you may find that neon shades evoke a sense of playfulness and vibrancy, allowing you to experiment with daring looks and combinations. Whether you opt for a subtle neon accent or a full set, the choice is yours to showcase your unique personality through captivating nail art.

Tools and Materials Needed

Any nail art project begins with a solid foundation of tools and materials. For your neon nail art, you’ll need a variety of crucial items, including nail polishes, base and top coats, and various nail art brushes. Additionally, consider having dotting tools, nail tape, and sponges on hand to create intricate designs and layers that stand out. Investing in high-quality supplies will ensure a more professional finish and durability for your bold nail looks.

Essential Nail Art Supplies

With the right set of crucial nail art supplies, you can unleash your creativity and achieve stunning neon designs. Your toolkit should include a clear base coat, a glossy top coat, and an assortment of colorful neon polishes. It’s also beneficial to have nail art brushes for fine details, dotting tools for creating patterns, and nail art tape for clean lines. These supplies will help you explore various techniques and styles, making your neon nail art truly unique.

Choosing the Right Neon Polishes

Beside your tools, selecting the right neon polishes is key to achieving vibrant and eye-catching designs. Opt for polishes that offer rich pigmentation and smooth application, ensuring an even color payoff with minimal coats. Look for formulas that dry quickly and have lasting power, so your nail art looks fresh for longer. Testing different brands will help you find the perfect shades and finishes that resonate with your personal style.

A variety of neon polish brands are available, but pay attention to key features like opacity and finish. Polishes with a crème finish typically provide a classic look, while shimmery or glitter options can add extra flair to your designs. It’s worthwhile to experiment with layering different hues to create custom colors, enhancing your overall neon nail art experience. Don’t hesitate to mix and match to find combinations that express your personality and style best.

Techniques for Neon Nail Art

For captivating neon nail art, mastering various techniques can elevate your look. Whether you’re aiming for a simple design or an intricate masterpiece, incorporating different methods will allow you to express your creativity. Experiment with blending, layering, and unique designs to make your neon colors pop, leaving a lasting impression.

Ombre Effects

Any neon lover will appreciate the sleek transition of colors offered by ombre effects. This technique involves blending two or more neon shades, creating a stunning gradient that draws the eye. You can achieve this by using a makeup sponge to lightly dab colors onto your nails, ensuring a smooth and cohesive finish.

Stripes and Patterns

Before venturing into the world of stripes and patterns, it’s important to decide on the colors you want to use. Neon shades pair beautifully with each other, allowing for endless possibilities. From bold lines and geometric shapes to whimsical designs, you can easily customize your nail art. Adding contrasting colors can really make your patterns stand out, making your nails the center of attention.

Patterns can bring an exciting dimension to your neon nail art. Use striping tape or nail guides to create precise lines and shapes, ensuring a polished look. Experiment with different geometrical designs or playful motifs to showcase your personality. Combining neon shades with contrasting colors or even metallics can create eye-catching designs that make a statement. With a little practice, you’ll find that creating unique patterns is not only enjoyable but also offers plenty of room to express your individual style.

Inspiration: Popular Neon Nail Designs

Keep your creativity flowing with vibrant neon nail designs that make a statement. From geometric patterns to ombre effects, the options are endless when incorporating those eye-catching hues. You can mix and match bright colors for a playful look or opt for a bold, solid neon that truly captures attention. Explore various textures and finishes, including matte and gloss, to find the perfect combination that reflects your unique style.

Seasonal and Thematic Ideas

Popular neon nail designs can also tie into seasonal themes, making them ideal for any occasion. For summer, consider beach-inspired nail art with bright yellows and pinks, while autumn brings the opportunity for neon leaves bursting with color. Winter holidays can inspire neon snowflakes or festive designs, and spring is perfect for floral motifs in vibrant shades. Transform your nails each season by experimenting with themed neon designs that embody the spirit of the moment.

Celebrity Styles

Along with personal creativity, you can draw inspiration from celebrity styles who sport fabulous neon nails. Many popular figures often showcase bold nail art on their social media platforms and during events, making neon nails a fashionable trend. From daring color combinations to intricate designs, you can look to your favorite stars for ideas that elevate your nail game and keep your style fresh.

Considering the influence of celebrities on nail trends, you can leverage their styles to inspire your own creativity. Many celebrities experiment with unique designs, such as neon French tips, accent nails, or layered hues that create a stunning visual effect. Browsing their looks not only keeps you updated on popular trends but also offers a plethora of ideas to personalize your own neon nail art. Whether you’re inspired by the minimalist style of one star or the elaborate designs of another, there’s plenty to discover and try for your own nail artistry.

Caring for Your Neon Nail Art

Now that you’ve created your stunning neon nail art, it’s important to care for it to maintain its vibrant appearance. Neon colors can fade or chip quickly if not properly cared for, so employing the right techniques will ensure your nails stay fabulous for longer. This includes using appropriate top coat products and exploring ways to protect your nails from daily wear and tear.

Tips for Longevity

Below are some simple yet effective tips to extend the life of your neon nails:

  • Apply a quality top coat every couple of days.
  • Avoid exposing your nails to harsh chemicals.
  • Wear gloves while doing household chores.

Thou can follow these guidelines for a longer-lasting neon look!

Maintenance and Touch-Ups

About maintaining your neon nail art, regular touch-ups and maintenance will keep your nails looking fresh. Neon colors can show wear quickly, so a bit of attention is vital. Make sure to fix any chips or dull spots by applying a matching neon polish and topping it off with a clear coat.

This simple process can not only help in restoring your nails to their original glory but also keep them looking chic and vibrant. By dedicating a few minutes for maintenance, you ensure that your neon nail art remains a standout feature, showcasing your bold fashion sense effortlessly.

Neon Nail Art for Different Occasions

Once again, neon nail art shines bright as a versatile option for various occasions. Whether you aim to make a statement at a party or keep it chic for the office, there are endless possibilities to incorporate vibrant, eye-catching designs into your look. Tailoring your neon style to fit the occasion can elevate your outfit while showcasing your personal flair.

Everyday Looks

An everyday neon look can be effortlessly chic. Opt for subtle accents, such as neon tips or a single bold color against a neutral base. This approach allows you to brighten your daily routine without overwhelming your ensemble, making your nails a fun yet polished accessory.

Special Events and Celebrations

Across special events and celebrations, neon nail art can turn heads and spark conversations. These bright shades serve as the perfect canvas for intricate designs, glitter accents, or playful patterns that reflect your festive spirit and style. Whether you’re heading to a wedding, birthday, or a night out with friends, your neon nails can bring a sense of fun and excitement to the occasion.

Considering the significance of special events, your nail art can truly reflect your personality and mood. You might choose bold neon colors that resonate with the theme of the celebration, or layer neon hues for a striking ombre effect. Incorporating fun elements like rhinestones or stencils can enhance the overall look, making your nails a standout feature. Let your creativity flow and don’t shy away from experimenting with different designs to find the perfect match for your special occasion.

Conclusion

Upon reflecting on the vibrant world of neon nail art, you can embrace a unique avenue for self-expression that truly stands out. These bold colors not only enhance your look but also allow you to experiment with countless designs that suit your style. By incorporating neon shades into your nail care routine, you can elevate your aesthetic and showcase your personality through eye-catching patterns and techniques. So, unleash your creativity and let your nails shine bright with confidence and flair!

Q: What materials are needed for Neon Nail Art?

A: To create stunning Neon Nail Art, you’ll need a few crucial materials. Start with a base coat to protect your nails. Then, gather a selection of neon nail polishes in various colors. Nail art brushes or dotting tools will help create intricate designs, while nail tape can assist in achieving clean lines. For finishing touches, a glossy top coat will enhance the vibrancy of the colors and provide a durable finish. Optional items include nail stencils for easier patterns and a UV lamp if you choose gel neon polishes.

Q: How can I make my Neon Nail Art last longer?

A: To prolong the life of your Neon Nail Art, it is important to follow a few best practices. First, always start with a clean, dry nail surface, applying a quality base coat to create a strong foundation. After painting your neon designs, seal them with a top coat to protect against chipping and fading. Consider avoiding prolonged exposure to water and chemicals, as these can weaken the polish. Regular touch-ups using a clear top coat can also help maintain the vibrancy of the neon colors over time.

Q: Are there any tips for blending and layering neon colors?

A: Blending and layering neon colors can create stunning effects in your nail art. For smooth transitions, use a makeup sponge to dab on different neon shades, allowing them to blend into one another. Start with a light color, applying it first, followed by darker shades, and be sure to allow each layer to dry before applying the next. To achieve unique designs, consider using nail art brushes for detailed layering and patterns. Experiment with different combinations to find the look that excites you the most!

Skip to content