Inails Near Me Global

How to Safely Remove Acrylic Nails at Home

It’s crucial to know the right techniques for safely removing acrylic nails at home to avoid damaging your natural nails. With the right tools and careful steps, you can ensure that your nails stay healthy while eliminating those artificial extensions. This guide will walk you through the process, providing you with the knowledge and confidence to perform the task effectively without needing professional help. Get ready to reclaim your natural nails with these straightforward tips!
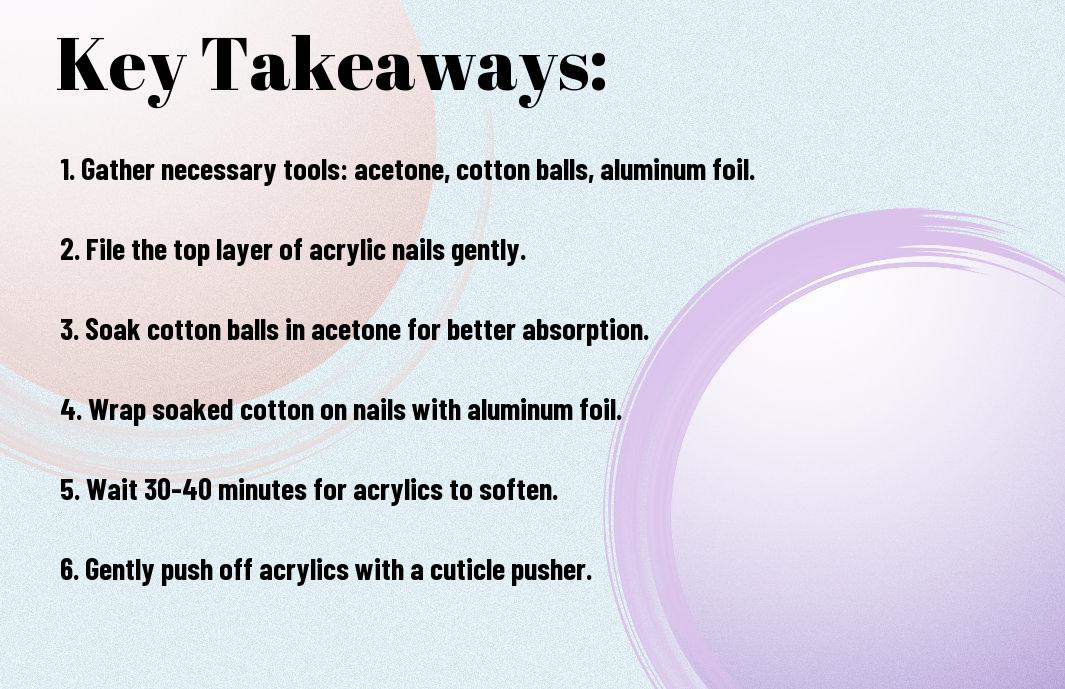
Key Takeaways:

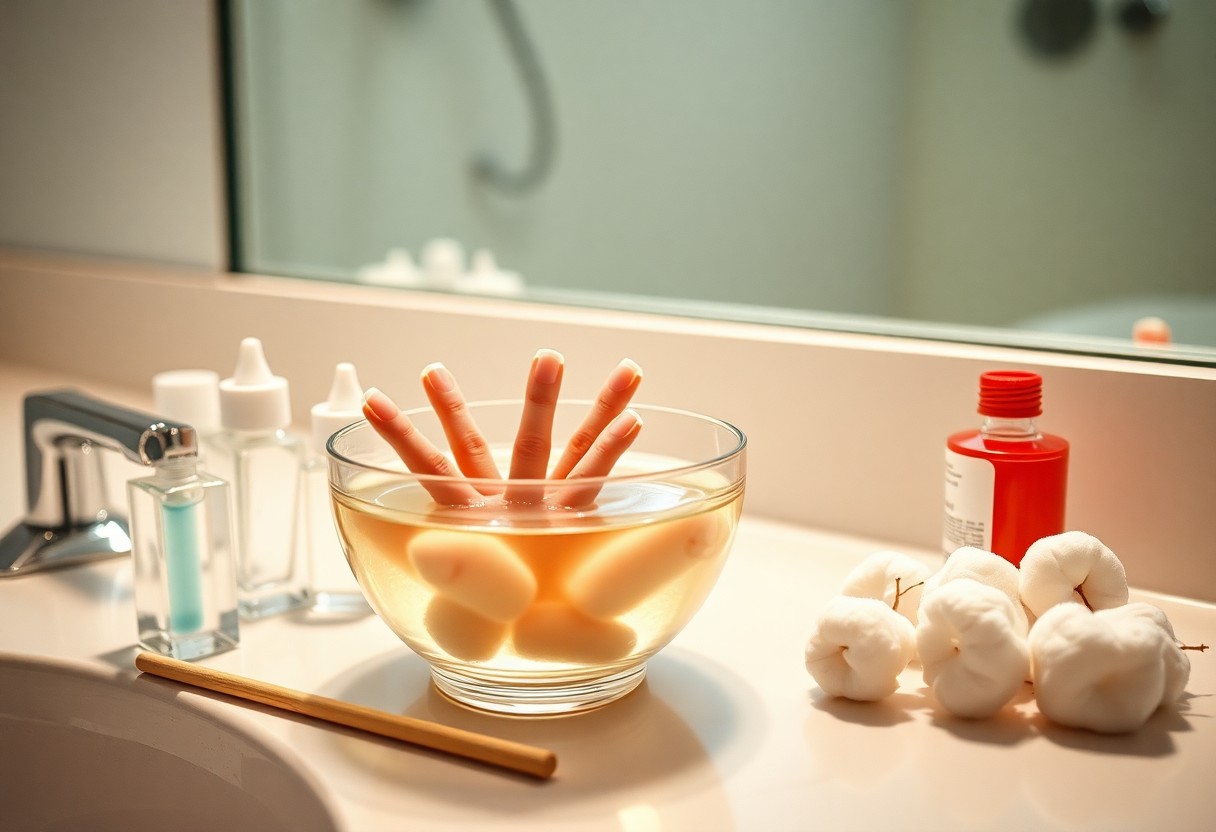
  • Soaking Method: Use acetone or a nail polish remover containing acetone to soak your acrylic nails. This helps to break down the adhesive, making it easier to remove the nails without damage.
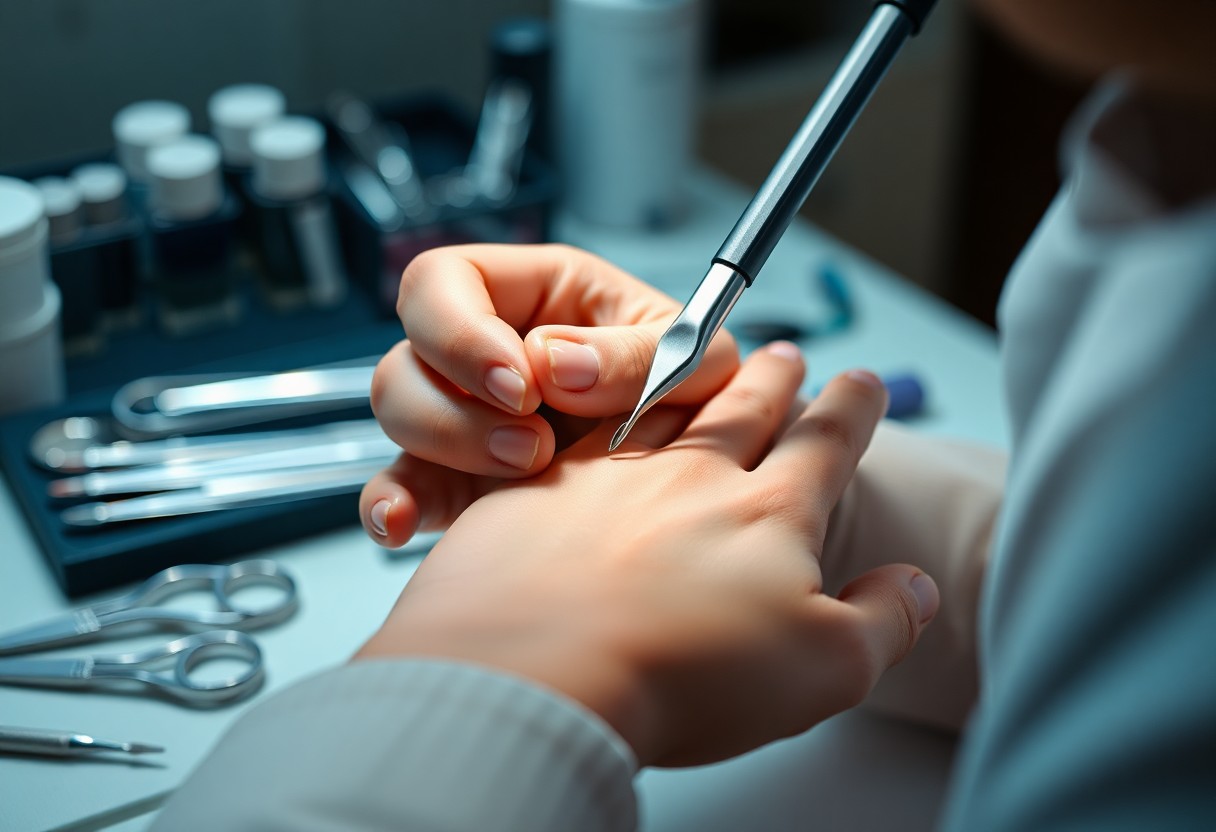
  • Gentle Scraping: After soaking, gently scrape off the acrylic using a wooden cuticle stick. Avoid using metal tools to prevent harming your natural nails.
  • Aftercare: Moisten your nails and cuticles with oil or lotion post-removal to nourish and restore hydration to your nails and skin.

Understanding Acrylic Nails

The acrylic nails trend continues to be popular due to their versatility and ability to enhance the beauty of your hands. These artificial nails are created by combining a liquid monomer and a powder polymer, forming a durable coating over your natural nails. This process allows for various shapes and lengths, catering to your personal style. However, while acrylic nails can be fabulous, there are times when removal becomes necessary for the health and well-being of your natural nails.

What Are Acrylic Nails?

The acrylic nails are synthetic enhancements that offer a polished appearance and can be customized to suit your aesthetic preferences. They are crafted by mixing a liquid and powder to form a hard protective layer over your natural nails. This method not only adds length but also strength, allowing your nails to withstand daily activities without breaking easily. With various colors and designs available, acrylic nails can be tailored to match your style.

Common Reasons for Removal

Below are some common reasons why you may consider removing your acrylic nails. Changes in personal style, natural nail growth, and damage to the acrylic or your underlying nail are just a few reasons. Feeling discomfort or noticing signs of lifting can also prompt you to seek removal. Maintaining the health of your natural nails is important, as excessive wear and tear can lead to further issues.

Reasons for removing acrylic nails can vary based on personal preference and nail health. You may decide to remove them if your nails have grown out significantly, as this can create an undesirable gap between your cuticle and the acrylic. Moreover, if you experience any discomfort or if the acrylic nails are at risk of breaking, it’s best to have them removed. Additionally, you might wish to switch from acrylics to a more natural nail approach or alter your nail look for a special occasion. Keeping an eye on the condition of your natural nails is necessary to ensure they remain healthy and strong.

Preparing for the Removal Process

You should take some time to prepare before attempting to remove your acrylic nails at home. This means gathering all the necessary tools and choosing a suitable environment where you can work efficiently, ensuring that you are comfortable and free from distractions. Proper preparation will not only make the process easier but will also help protect your natural nails and surrounding skin during removal.

Tools and Materials Needed

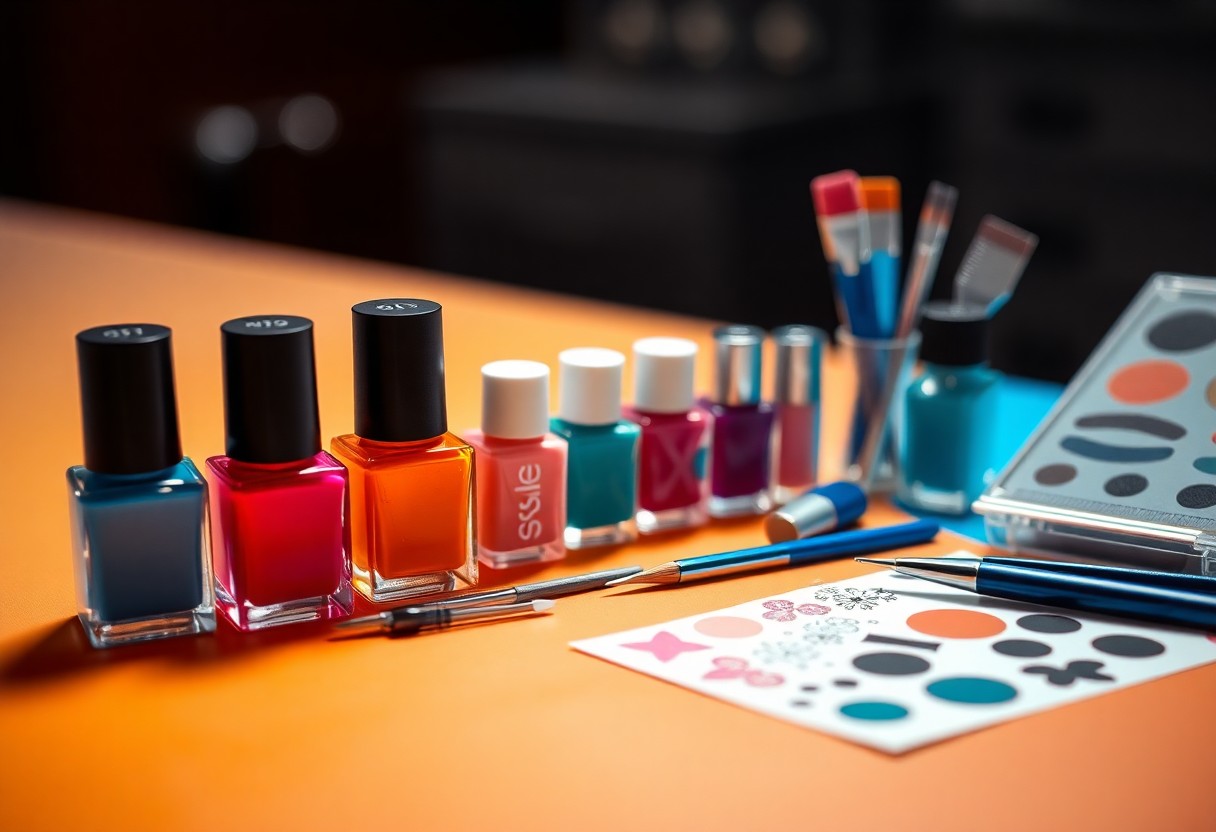
Needed for the removal process are acetone, cotton balls or pads, aluminum foil, a nail file, a wooden cuticle stick, and a bowl. Having a good pair of scissors on hand can also be useful for trimming the acrylic nails if they are particularly long. Ensure that all your tools are clean and ready to use to promote safety and hygiene.

Choosing the Right Environment

Above all, you’ll want to select a clean and well-ventilated space for removing your acrylic nails. Ideally, this should be a table where you can lay out all your tools and materials. Having good lighting will help you see what you’re doing, while a surface that is easy to clean will make cleanup after the process simpler. Avoiding damp or cluttered places will help you maintain focus and protect your belongings from any accidental spills.

At the same time, ensure that your chosen environment is free from distractions. Consider playing soothing music or keeping your phone out of reach to help you focus on the task at hand. A calm atmosphere can make the process more pleasant and allow you to execute each step with care, ultimately leading to a more successful removal of your acrylic nails.

Step-by-Step Removal Process

Once again, it’s important to follow a cautious approach when removing acrylic nails at home. Below is a structured guide to help you through the process effectively.

Step-by-Step Guide

Step 1Gather supplies: acetone, cotton balls, aluminum foil, a nail file, and a cuticle pusher.
Step 2File the top layer of the acrylic nails to break the seal.
Step 3Soak cotton balls in acetone and place them on your nails.
Step 4Wrap your fingertips with aluminum foil to hold the cotton balls in place.
Step 5Leave on for 15-30 minutes, then gently scrape off the softened acrylic.
Step 6Clean your nails and moisturize your hands.

Soaking Method

About 75% of the time, the soaking method is the preferred approach for removing acrylic nails. This method involves immersing your fingertips in acetone to dissolve the acrylic material gently. It’s a simple and effective way to tackle the adhesive without damaging your natural nails.

Nail File Method

An alternative to soaking, the nail file method can be used for quicker removal. This technique allows you to file away the acrylic layers gradually, although it requires more caution to avoid harming your natural nail beneath.

Step by step, to utilize the nail file method, start by filing the surface of the acrylic to reduce thickness. Be sure to use a coarse nail file to penetrate the layers without applying excessive pressure. Once you notice the acrylic getting weaker, carefully work your way down to the natural nail, taking breaks as needed to avoid damaging your nail bed. This method might take longer, but it lets you maintain better control throughout the removal process.

Aftercare for Your Natural Nails

To ensure the health of your natural nails post acrylic removal, it’s crucial to incorporate specific aftercare practices. Focus on nourishing and protecting your nails to promote healing and regain their strength. Maintaining a consistent regimen will help you achieve healthier, more resilient nails over time.

Moisturizing and Hydrating

Below are several ways to keep your nails and cuticles well-hydrated. Apply a high-quality cuticle oil or moisturizing cream regularly to help replenish moisture stripped away during the acrylic application and removal process. This will keep your nails flexible and prevent breakage.

Strengthening Treatments

An effective way to enhance your nail health is through strengthening treatments. Look for products specifically designed to fortify and promote growth, such as nail strengtheners and growth serums. These can provide your nails with the nutrients they need to recover quickly.

This approach often involves using formulas rich in proteins, vitamins, and crucial oils aimed at repairing any damage caused during acrylic wear. You might also consider biotin supplements to promote healthy nail growth from within. Regular use of strengthening treatments will help your nails regain their strength and resilience, ensuring they look their best in no time.

Common Mistakes to Avoid

All too often, people make avoidable mistakes while attempting to remove acrylic nails. It’s necessary to be mindful of your approach to ensure you don’t damage your natural nails or cause undue pain. Taking the right steps will lead to a more successful and safer removal process.

Rushing the Removal

Behind the urge to free yourself from acrylic nails, rushing the removal process can lead to painful consequences, including damaged nails and skin. Take your time and allow the necessary products to work effectively before moving onto the next step.

Using Harsh Chemicals

At times, damaging chemicals might seem like a quick solution for removing acrylic nails. However, using these substances can have adverse effects on your nails and skin, leading to irritation or long-term damage.

And it’s best to opt for acetone, which is widely recommended for gentle acrylic nail removal. While it effectively breaks down the acrylic material, ensure you use a pure form and avoid any products containing unnecessary additives or harsh chemicals. By sticking to safer options, you not only protect your natural nails but also maintain the health of your skin around them.

Frequently Asked Questions

Unlike what some might believe, safely removing acrylic nails at home can be straightforward with the right techniques. Many people have questions regarding the process, tools needed, and potential risks. If you’re unsure about how to start, you can find helpful guidance on how to safely remove acrylic nails at home. It’s important to approach this task carefully to maintain the health of your natural nails while ensuring a smooth removal process.

Conclusion

With this in mind, you can safely remove your acrylic nails at home by following the appropriate steps. Ensure you gather the necessary materials, soak your nails properly, and avoid aggressive methods that could damage your natural nails. By taking your time and being gentle, you can successfully remove the acrylics while maintaining the health of your nails. If you encounter any issues, don’t hesitate to consult a professional for assistance.

FAQ

Q: How can I safely remove acrylic nails at home?

A: To safely remove acrylic nails at home, start by gathering your supplies: nail file, cotton balls, acetone, foil, and a cuticle pusher. First, file the top layer of the acrylic to break the seal. Soak a cotton ball in acetone and place it on each nail, then wrap it in foil to keep the heat in. Leave it on for about 30 minutes. Once soft, gently push the acrylic off your nail using the cuticle pusher. If there’s any resistance, re-soak and wait a little longer.

Q: Is it safe to use regular nail polish remover instead of acetone?

A: Regular nail polish remover typically contains acetone but at a lower concentration. While it may work for some, it can take much longer to dissolve acrylic nails, and may not remove them completely. For the best results and faster removal, it’s advisable to use 100% acetone, which is specifically designed for dissolving acrylics.

Q: How do I prevent damage to my natural nails during the removal process?

A: To protect your natural nails, it’s important to avoid pulling or prying off the acrylic. Always follow the soaking method, as this minimizes trauma to your nails. Additionally, consider applying cuticle oil or a strengthening treatment to your nails and cuticles after the removal to help replenish moisture and encourage recovery.

Q: What should I do if the acrylic nails are not coming off easily?

A: If the acrylics are resistant to removal, do not force them off as this can cause damage to your natural nails. Instead, re-soak them by applying more acetone and wrapping the nails in foil again. If necessary, give them an extra 10 to 15 minutes to break down further. Patience is key to a safe removal process.

Q: What aftercare should I perform once the acrylic nails are removed?

A: After removing acrylic nails, it’s vital to care for your natural nails. Start by gently buffing the surface to smooth out any ridges. Consider applying a moisturizing hand cream and cuticle oil to nourish your nails and skin. Additionally, allowing some time for your natural nails to breathe before applying new enhancements is a good practice to ensure their health.

Must-Have Tools for Nail Art Enthusiasts

Nail art is not just a trend; it’s a form of self-expression that allows you to show off your creativity. To help you achieve stunning designs, you need the right tools in your arsenal. In this blog post, we’ll explore the imperative tools every nail art enthusiast should have, from brushes and dotting tools to stampers and nail tape. With these imperatives, you can elevate your nail art game and create beautiful manicures that turn heads. Let’s examine the must-have tools that will transform your nail art experience!

Key Takeaways:

  • Nail Brushes: Essential for precision detailing and intricate designs, a variety of brushes can help create different effects, from fine lines to bold strokes.
  • Dotting Tools: Perfect for creating unique patterns and accents, these tools allow for easy placement of dots and can enhance your nail art with minimal effort.
  • Nail Stencils and Striping Tape: These tools simplify the process of achieving clean, geometric designs and help in creating complex patterns without the hassle.

Essential Nail Art Tools

The right tools can make all the difference in achieving stunning nail art. To ensure you have everything you need for creative designs, consider investing in high-quality crucials, from brushes to embellishments. Whether you are a novice or a seasoned artist, these tools will help transform your ideas into beautiful nail creations.

Nail Brushes

Any nail art enthusiast knows the importance of having a variety of brushes at your disposal. Different brushes serve distinct purposes—fine brushes for intricate details, flat brushes for broader strokes, and acrylic brushes for 3D designs. Invest in a set of brushes to elevate your nail designs and allow your creativity to flow.

Dotting Tools

Before you explore your nail art projects, ensure you have dotting tools on hand. These handy instruments come with various-sized tips, allowing you to create dots, flowers, and other intricate designs with ease. Their versatility makes them a staple in any nail artist’s toolkit.

Nail dotting tools are excellent for adding decor and detailing to your nail art. With a bit of practice, you can create stunning patterns and designs, from simple polka dots to elaborate floral motifs. They are perfect for mixing colors and adding finesse to your artwork.

Striping Tape

Around your workspace, striping tape should be a constant companion in your nail art endeavors. This thin, adhesive tape allows for clean lines and geometric designs, making it easier for you to achieve professional-looking results at home. Plus, it’s available in various colors and finishes to match your creations.

Striping tape is exceptionally versatile and can be used to create precise designs or to mask off areas of your nails. You can layer it for unique effects or combine it with colors for a vibrant contrast. Striping tape simplifies the process of achieving those intricate patterns you admire in salon nail art.

Nail Art Products

It’s imperative for any nail art enthusiast to have a well-stocked selection of nail art products. These items not only enhance your designs but also ensure that you can express your creativity and achieve professional-looking results. From nail polishes to gels and acrylics, the right products will elevate your nail art game to new heights.

Nail Polishes

Any nail art collection should start with a diverse range of nail polishes. Look for high-quality brands that offer vibrant colors, various finishes such as matte, glossy, or metallic, and quick-drying options. A good assortment will enable you to mix and match colors for endless design possibilities.

Gel and Acrylic Products

Between gel and acrylic options, you can achieve stunning, long-lasting nail designs. Both types offer unique benefits—gels provide a natural look with a flexible finish, while acrylics are known for their durability and strength. Choosing the right product depends on your aesthetic preference and how intricate your nail art will be.

Nail gels typically cure under UV or LED lights, creating a glossy finish that resists chipping. These are perfect for detailed nail art or nail extensions. On the other hand, acrylic products offer a strong base that can be molded into various shapes, making them ideal for adding dimension to your art. Using both mediums allows you to explore seemingly endless design options while ensuring your nails stay healthy and beautiful.

Tools for Nail Decoration

Not only do nail tools enhance your artistry, but they also help you achieve professional-looking results at home. From stencils to embellishments, investing in the right nail decoration tools will allow you to explore various styles and techniques effortlessly. Elevate your designs through the use of creative elements that really make your manicures stand out.

Stencils and Nail Vinyls

Any nail artist will appreciate the convenience and precision that stencils and vinyls bring to your nail decoration process. These handy tools help you create clean, sharp designs effortlessly, allowing for intricate patterns without the risk of messy applications. With an array of designs available, you can easily customize your nail art according to your style preferences.

Rhinestones and Studs

After mastering basic designs, you can elevate your nail art with rhinestones and studs, which add that extra pop of glamour. These embellishments can be used to accentuate specific areas or cover the entire nail for a dazzling effect, making them perfect for special occasions or everyday sparkle.

Vinyls and studs come in various shapes and sizes, allowing you to experiment with different looks. When applying rhinestones, consider using a dotting tool or nail glue for precision placement. Studs can be easily pressed into wet polish, ensuring a lasting bond. With the right technique, you can transform any manicure into a stunning work of art, making it unique and personalized to your taste.

Nail Care Essentials

Once again, achieving stunning nail art begins with proper nail care. To ensure your designs look polished and last longer, it’s necessary to incorporate a few key products into your routine. Healthy nails set the foundation for the creative expression of nail art, so prioritize investing in quality nail care necessarys that nourish and maintain the integrity of your nails while providing a smooth canvas for your artistry.

Base and Top Coats

The right base and top coats can enhance the longevity and vibrancy of your nail art. Base coats create a protective layer, preventing staining from color polishes and ensuring a smooth surface for application. Similarly, top coats seal your designs, providing a glossy finish and extending wear, so you can enjoy your creations without worrying about chipping or fading.

Nail Files and Buffers

Between nail art sessions, you need to keep your nails in tip-top shape, and this is where quality nail files and buffers come in. They help you achieve the ideal shape and smooth edges while also allowing you to prepare your nails for application. An effective filing routine can prevent snags and breakage, making for a healthier canvas for your designs.

Buffers enhance your nail care routine by smoothing and shining the surface of your nails. They work by gently refining ridges, promoting a sleek finish that not only improves the overall appearance but also prepares your nails for polish application. A good buffer can also even out your nail surface, resulting in a flawless manicure and giving your nail art an extra shine that is bound to impress.

Storage Solutions

Keep your nail art tools organized and easily accessible with smart storage solutions. Investing in the right storage can streamline your nail art process, allowing you to focus more on creativity and less on clutter. A well-organized system can save you time and energy, helping you maintain a clean workspace and keep your products in optimal condition.

Organizers for Nail Tools

Between various brushes, dotting tools, and nail files, it’s important to have a reliable organizer for your nail tools. Consider using a tackle box or a tiered cosmetic organizer to keep everything separated and easy to find. Labeling sections can further enhance your efficiency, helping you quickly locate what you need when inspiration strikes.

Nail Art Racks

For an eye-catching display while ensuring easy access, nail art racks are an excellent choice for your collection of polishes and tools. These racks not only showcase your favorite colors but also allow for efficient organization.

And, when you opt for nail art racks, consider those that can accommodate various bottle sizes and include compartments for your additional tools. They can be wall-mounted or stand-alone, depending on your available space. Having your products displayed helps you effortlessly select your favorite shades while maintaining a tidy workspace, elevating your entire nail art experience.

DIY vs. Professional Nail Art Tools

For nail art enthusiasts, choosing between DIY and professional tools can be a challenge. DIY tools offer affordability and accessibility, allowing you to experiment with different designs from home. However, professional nail art tools, like those found in the Must-Have Essentials for Nail Art Design, provide higher precision and durability, making them ideal for more intricate projects. Ultimately, it depends on your skill level and what kind of nail art experience you desire.

Cost vs. Quality

At the intersection of cost and quality, you must consider what you need for your nail art practice. While budget-friendly DIY options can work well for beginners, investing in higher-quality tools can yield better results and longer-lasting designs. Quality tools often lead to a more enjoyable and efficient experience, meaning you may save money in the long run by not needing frequent replacements.

When to Invest in Professional Tools

Among various factors, your growing interest and skill in nail art can indicate when it’s time to invest in professional tools. As you refine your techniques and explore more complex designs, the benefits of professional-grade tools become apparent in the results and overall enjoyment of your craft.

Due to the enhanced performance and precise outcomes offered by professional tools, consider making the switch when you find yourself frequently engaging in nail art or taking on challenging designs. Investing in quality tools can elevate your projects, making them not only more enjoyable but also rewarding. Once you reach a level where DIY tools no longer meet your needs and you desire higher precision, it’s a clear sign to explore professional options.

Must-Have Tools for Nail Art Enthusiasts

Drawing together the necessarys for your nail art journey, having the right tools can transform your creative experience. From precision brushes and dotting tools to stamping kits and nail strips, equipping yourself with these must-have items will enhance your skill and elevate your designs. As you experiment, you’ll find that each tool contributes to achieving remarkable results. Investing in quality tools not only improves your technique but also increases your enjoyment in creating stunning nail art, making every manicure a masterpiece.

FAQ

Q: What are the vital tools needed for nail art?

A: The must-have tools for nail art include a set of nail brushes, dotting tools, striping tape, a nail file, and a good quality top coat. Nail brushes come in various sizes for detailing and painting, while dotting tools help create dots and intricate designs. Striping tape is vital for clean lines, and a nail file helps shape the nails before any art is applied. Finally, a top coat seals the design and adds shine.

Q: How do I choose the right nail brushes for intricate designs?

A: When dicking out nail brushes, look for options that have fine bristles for detailed work and varied shapes such as fan brushes, liner brushes, and flat brushes. The size of the brush matters too; smaller brushes are better for precise details, while larger brushes are suitable for broader strokes. It’s also beneficial to invest in brushes made from quality materials, as they provide better control and durability during your nail art sessions.

Q: Can I use regular nail polish for nail art, or do I need special products?

A: While regular nail polish can be used for nail art, using specialized nail art polish or gel can improve your results. Nail art-specific polishes often have a thicker consistency that makes it easier to create intricate designs. Additionally, gel polishes provide a longer-lasting finish, but they require a UV or LED lamp for curing. Therefore, it’s a personal choice based on your nail art goals and preferences.

Q: What is the purpose of nail tape, and how is it used?

A: Nail tape, also known as stripping tape, is used to create clean lines and geometric designs in nail art. It can be applied to the nail before painting, serving as a barrier to ensure that polish only adheres to specific areas. Once the polish has dried, the tape can be gently removed to reveal sharp, defined edges. This tool is especially popular for creating striped patterns and abstract art.

Q: How can I maintain my nail art tools for longevity?

A: To keep your nail art tools in good condition, always clean them after each use. Brushes should be washed with warm water and mild soap, and then reshaped to maintain their form. Store tools in a cool, dry place away from direct sunlight to prevent damage. For dotting tools and other metal implements, ensure they are sanitized and dried properly to avoid rust or contamination. Regular maintenance will extend the life of your nail art tools significantly.

The Best Nail Brushes for Intricate Designs

Brushes play a vital role in achieving stunning nail art, especially when it comes to intricate designs. With the right tools in your arsenal, you can elevate your nail game and create detailed patterns that stand out. This guide will introduce you to some of the best nail brushes available, tailored specifically to meet your creative needs. From fine detailing to flawless strokes, discover how these brushes can enhance your artistry and help you achieve the nail designs you’ve always dreamed of.

Key Takeaways:

  • Brush Types: Choose the right type of brush, such as detail, liner, or fan brushes, for creating intricate nail designs.
  • Quality Materials: Opt for brushes made from high-quality materials, like synthetic or natural hair, to ensure smooth application and durability.
  • Size Matters: Select varying brush sizes to achieve different levels of detail and precision in your nail art.

Understanding Nail Brushes

While selecting the right nail brush is important for achieving intricate designs, understanding the various types and materials can significantly enhance your nail art experience. Each brush serves a distinct purpose, whether for fine lines or broader strokes, and knowing their differences helps you choose the right tool for your design vision.

Types of Nail Brushes

While there are numerous types of nail brushes available, familiarizing yourself with the most common can streamline your artistry.

  • Lining brushes for detailed designs
  • Detail brushes for fine work
  • Flat brushes for filling and shading
  • Fan brushes for texture effects
  • Dotting tools for perfect dots

The right brush can elevate your nail art to new heights.

TypePurpose
Lining BrushCreating precise lines
Detail BrushAdding intricate details
Flat BrushFilling larger areas
Fan BrushProducing texture and effects

About the overall design process, understanding the nuances of each brush type can significantly impact the results of your nail artistry.

Materials Used in Nail Brushes

Brushes come in various materials, each influencing the performance and feel during application. The materials play a key role in how the brush interacts with both the polish and your nails.

For instance, natural bristles offer a soft touch that smoothly glides over your nails, making them ideal for blending and applying polish. Synthetic brushes, on the other hand, are often more durable, providing precision for intricate details without losing their shape. Choosing between these materials depends on your style and technique, so it’s good to experiment with both types to find what works best for your specific needs.

Features to Look for in Nail Brushes

Some crucial features to consider when selecting nail brushes include bristle quality, handle design, and ease of cleaning. A good nail brush should provide precision and control, allowing you to create intricate designs effortlessly. Investing in high-quality brushes not only enhances your artistry but also ensures that your tools last longer. Pay attention to the unique attributes of each brush to find the perfect match for your nail art needs.

Bristle Quality

Before choosing a nail brush, evaluate the bristle quality as it significantly affects the application and results. Opt for brushes made of synthetic or natural hair that provide flexibility and durability. High-quality bristles enable you to create fine lines, detailed patterns, and smooth strokes, enhancing the overall appearance of your nail designs.

Handle Design

One important aspect to consider is the handle design of the brush. A comfortable and ergonomic handle allows for better grip and control, making intricate designs more manageable. This is especially important for lengthy sessions, as a well-designed handle can help reduce hand fatigue.

Look for nail brushes with handles that fit well in your hand; this will enhance your precision during application. Some brushes feature a tapered or oval shape, providing additional comfort and preventing slippage. A lightweight handle can also contribute to extended use without discomfort, allowing you to focus on perfecting your unique creations without distractions.

Top Nail Brushes for Intricate Designs

Not all nail brushes are created equal, especially when it comes to intricate designs. You want brushes that offer precision and control, making them ideal for creating stunning nail art. Explore the best options at Nail Art Brushes | Professional Quality at Wholesale Price to elevate your skills and achieve the perfect look.

Fine Detail Brushes

Among the most crucial tools in your nail art arsenal are fine detail brushes. These brushes excel at creating intricate designs, allowing you to draw fine lines, delicate patterns, and tiny embellishments with ease. The precision of these brushes enables you to achieve professional-looking results, making them a must-have for any nail artist.

Flat and Angular Brushes

On the other hand, flat and angular brushes play a pivotal role in achieving various nail art techniques. These brushes are perfect for applying larger areas of color, creating gradients, and achieving sharp lines. Their unique shapes provide versatility, empowering you to experiment with different styles and designs.

Also, flat and angular brushes can be used for techniques like nail stripping and filling in designs. Their ability to cover larger areas effortlessly allows you to create stunning effects while maintaining clean lines. Whether you are doing a classic French tip or a more modern design, investing in high-quality flat and angular brushes will significantly enhance your nail artistry.

How to Care for Your Nail Brushes

Once again, taking care of your nail brushes ensures they remain effective for intricate designs and can prolong their lifespan. Proper maintenance not only keeps your brushes in prime condition but also enhances the quality of your nail art. For additional tips, you can find suggestions from fellow enthusiasts in this Help! Looking for good nail art brushes! discussion.

Cleaning Techniques

About cleaning your nail brushes, it’s vital to do so immediately after use. Rinse them with warm water and mild soap to remove paint and product residue, gently shaping the bristles back into their original form. For stubborn remnants, a specialized brush cleaner can be effective.

Storage Tips

By properly storing your nail brushes, you protect their bristles from damage and maintain their shape. Here are some helpful storage suggestions:

  • Keep brushes upright in a holder to avoid bending the bristles.
  • Store them in a cool, dry place away from direct sunlight.
  • Consider using a brush pouch to keep them organized and clean.

This will ensure easy access and longevity of your tools.

With thoughtful storage practices, you can further prolong the life of your brushes. Consider these additional tips:

  • Avoid mixing brushes with other tools to prevent accidental damage.
  • Invest in a dedicated drawer or case to keep your nail art supplies organized.
  • Regularly check and clean the storage area to prevent dust buildup.

This will help maintain the quality of your tools for future projects.

Common Mistakes to Avoid

After selecting the perfect nail brush for your intricate designs, it’s important to navigate some common pitfalls to ensure the best results. Many beginners overlook details like cleaning and brush selection, leading to frustrating experiences and less-than-perfect nail art. By being aware of these mistakes, you can enhance your nail art technique and achieve the stunning results you desire.

Improper Cleaning

Common cleaning errors can significantly impact the performance and longevity of your nail brushes. Neglecting to clean your brushes after each use can lead to build-up of acrylics and polish, compromising the fine tip and precision needed for intricate designs.

Using the Wrong Brush for the Job

Above all, using the wrong brush type for your specific design can hinder your creative process and outcome. Each brush serves a unique purpose, whether it’s for detailed line work, filling in color, or creating intricate patterns.

Cleaning your brushes after each use is key to maintaining their effectiveness. If you regularly switch techniques or designs, having the right brush for each specific task will improve your outcomes. For instance, a detailer brush is ideal for fine lines, while a flat brush suits larger areas. Knowing the distinctions between brushes will elevate your nail art game and help you avoid frustration during your creative process.

Recommendations from Professionals

Now that you know the importance of having the right tools, professionals recommend opting for a variety of brush shapes and sizes to achieve precision in your intricate nail designs. From detail brushes for fine lines to flat brushes for filling in larger areas, having a well-rounded selection can elevate your nail art game. Don’t hesitate to invest a bit more in high-quality brushes to ensure longevity and performance in your work.

Tips from Nail Artists

From various nail artists, you can gain invaluable insights to enhance your nail art skills. Here are some tips they swear by:

  • Choose brushes based on specific design needs.
  • Clean your brushes after each use for longevity.
  • Practice on a nail wheel before applying on yourself or clients.

This can lead to a mastery of techniques that truly stand out.

Popular Brands

Nail artists often gravitate towards reputable brands that consistently deliver quality. With options like Kolinsky, Creative, and OPI, you can find brushes that meet your standards for intricate designs. Each brand offers unique brush shapes and bristle types, catering to different techniques and preferences. Investing in brushes from these brands ensures you’re equipped with tools that professionals trust, ultimately enhancing the quality of your artwork.

Final Words

The best nail brushes for intricate designs can elevate your nail art game significantly. By selecting the right brushes that suit your style and skill level, you can achieve stunning details and precision in your artwork. Investing in quality brushes tailored for fine lines, dot work, and other intricate techniques will enhance both your results and enjoyment of the process. With the right tools at your disposal, you have the potential to create mesmerizing nail art that truly reflects your creativity.

FAQ

Q: What types of nail brushes are best for intricate designs?

A: The best nail brushes for intricate designs typically include detail brushes, striping brushes, and oval or flat brushes. Detail brushes have fine tips suitable for creating tiny lines and intricate patterns. Striping brushes are designed with long, thin bristles that help in painting straight lines or stripes. Oval and flat brushes can be used for filling in larger areas while still allowing precision work. Choosing the right type of brush largely depends on the specific design technique you are looking to achieve.

Q: How do I choose the right size brush for detailed nail art?

A: When identifying a brush size for detailed nail art, consider the complexity of your design. For very fine and detailed work, a small detail brush with a thin tip is ideal. For slightly larger designs, a medium-sized brush can be more versatile. It’s advisable to have a variety of sizes on hand, as different designs may require different brush dimensions for optimal results.

Q: Are synthetic or natural hair brushes better for nail art?

A: Both synthetic and natural hair brushes have their advantages for nail art. Synthetic brushes are often more durable, easy to clean, and less prone to damage from acrylics and gel paints. They also maintain their shape better over time. Natural hair brushes, such as those made from Kolinsky sable, can provide a softer touch and excellent paint retention, which is beneficial for blending colors. Ultimately, the choice depends on personal preference and the specific techniques you plan to use.

Q: Can I use regular paintbrushes for nail art?

A: While you can technically use regular paintbrushes for nail art, it is generally not recommended. Nail art brushes are specifically designed for the unique curvature and small size of nails, which allows for better control and precision. Regular paintbrushes may have different bristle stiffness and shapes that could make it difficult to achieve the intricate details typical in nail art. It’s best to invest in brushes specifically made for this purpose to ensure the best results.

Q: How do I clean and maintain my nail brushes for intricate designs?

A: Proper cleaning and maintenance of your nail brushes are important for their longevity and performance. After each use, clean your brushes with a suitable brush cleaner or acetone immediately to remove any paint or gel. For stubborn residue, gently swirl the brush in the cleaner until it loosens. Reshape the bristles and lay the brushes flat to dry to maintain their shape. Avoid leaving brushes soaking in cleaner for extended periods, as this can damage the bristles. Regular care will ensure that your brushes remain effective for detailed nail artistry.

How to Use a Cuticle Pusher Like a Pro

There’s a right way to use a cuticle pusher that can elevate your nail care routine and enhance the appearance of your nails. By learning the proper techniques, you can effectively push back your cuticles without damaging the sensitive skin around them. In this guide, you will discover step-by-step instructions, tips, and best practices to help you gain confidence and achieve salon-worthy results at home. Let’s examine the imperative methods for using a cuticle pusher like a pro!

Key Takeaways:

  • Choose the Right Tool: Select a high-quality cuticle pusher that fits your comfort and technique, whether it’s metal, plastic, or wood.
  • Technique Matters: Apply gentle pressure and push back cuticles softly to avoid injury. Use the flat side of the pusher for safer application.
  • Prep the Nails: Soak your nails in warm water or use cuticle oil beforehand to soften the cuticles for easier pushing.

Understanding Cuticles

The cuticles are the thin layers of skin that form a protective barrier at the base of your nails. They serve an necessary function by protecting the nail matrix from bacteria and other harmful elements, ensuring your nails can grow healthy and strong. A proper understanding of cuticles is vital for maintaining great nail health, making them an integral part of your manicure routine.

What Are Cuticles?

Along with framing your nails, cuticles consist of dead skin cells that seal the area where your skin meets the nail. This protective layer helps prevent pathogens from entering the nail bed, which can lead to infections or other nail issues. Understanding the structure and role of cuticles is necessary for anyone looking to achieve a polished and professional look.

Importance of Cuticle Care

At your fingertips, cuticle care plays a vital role in maintaining the health and appearance of your nails. Proper care not only prevents hangnails and infections but also promotes stronger nail growth and a smoother appearance. Neglecting cuticles can lead to dryness, which may cause uncomfortable cracking or peeling, ultimately detracting from your manicure.

This thoughtful attention to cuticle care can elevate your overall nail health. By routinely moisturizing and gently pushing back your cuticles, you create space for your nails to grow without obstruction. Furthermore, caring for your cuticles can enhance the look of your manicure, allowing nail polish to adhere better and ensuring a longer-lasting finish. Your nails are an extension of your personal style, so investing a little time in cuticle care can greatly improve your nail aesthetic.

Types of Cuticle Pushers

Some of the most common types of cuticle pushers include:

TypeDescription
Metal Cuticle PushersDurable and easy to clean, perfect for professional use.
Plastic PushersLightweight and affordable, suitable for home use.
Silicone PushersGentle on the skin, ideal for sensitive cuticles.
Wooden PushersTraditional and biodegradable, often used in nail salons.
Combination ToolsIncludes both pushing and scraping features for versatility.

Assume that selecting the right type depends on your specific needs and preferences, ensuring effective nail care.

Metal Cuticle Pushers

For those looking for durability and precision, metal cuticle pushers are an excellent choice. Often made of stainless steel, they provide a firm grip and allow you to push back cuticles effectively. Due to their non-porous nature, they are easy to sanitize, making them a favorite among professionals and enthusiasts alike.

Plastic and Silicone Pushers

Cuticle pushers made of plastic and silicone offer a more gentle touch, perfect for at-home use. They are lightweight and less likely to cause damage to your nails or skin, making them ideal for sensitive cuticles.

Further, plastic pushers are typically more affordable and disposable, while silicone options can be reused. Both types are excellent for beginners, as they minimize the risk of injury while still allowing for effective nail care. You can also find them in various shapes and sizes, enhancing your ability to find the perfect fit for your grooming routine.

Preparing for Cuticle Care

To ensure a smooth and effective cuticle care experience, it’s necessary to prepare both your hands and nails properly. Start by creating a clean workspace and gathering all necessary tools and products. This will set you up for a less rushed and more enjoyable session, allowing you to focus on achieving beautifully manicured nails. To maintain the health of your cuticles, also consider soaking your hands for a few minutes before getting started, as this will soften the skin and make the process much easier.

Tools and Products Needed

Across the nail care spectrum, having the right tools and products is key to a professional finish. Essential items include a quality cuticle pusher, cuticle oil or cream, nail clippers, and a sanitizing solution. You may also want to include a nail file and buffer for the finishing touches. With these tools at your disposal, you can effectively care for your cuticles, ensuring they look healthy and well-groomed.

Prepping Your Nails

About preparing your nails, taking the time to treat them well will enhance your overall nail care routine. Start by washing your hands thoroughly to remove any dirt or oil that may interfere with the process. Next, use a gentle exfoliator or scrub to soften the skin around your nails. Ensure that your nails are dry before starting any cuticle care, as this will help you avoid damaging your skin during the process.

In addition, giving your nails a brief soak in warm, soapy water can further soften your cuticles, making them easier to push back. After soaking, pat your hands dry with a soft towel. This preparation will help you achieve a more precise and effective cuticle care session. It’s about setting the perfect stage to elevate your nail grooming, leading to a polished and professional look.

Step-by-Step Guide to Using a Cuticle Pusher

After gathering your tools, follow this simple step-by-step guide to effectively use a cuticle pusher:

StepAction
1Soak your nails in warm, soapy water to soften cuticles.
2Gently dry your hands and push back the cuticles, starting from the base of the nail.
3Use the flat side to scrape away any dead skin.
4Moisturize your cuticles with oil or cream.

The Correct Technique

With a steady hand, hold the cuticle pusher at a 45-degree angle against the cuticle. Apply gentle pressure while pushing back the cuticle, ensuring you don’t force it. Move slowly to avoid any discomfort or injury. Your goal is to reveal the healthy nail bed without damaging the skin.

Timing and Frequency

Timing is important when using a cuticle pusher, as it impacts overall nail health. Ideally, you should push back your cuticles once every two weeks, allowing them enough time to grow naturally and remain healthy. However, your individual nail growth may vary, so adjust your routine accordingly to prevent over-trimming.

Technique plays a pivotal role in how effective your cuticle care is. Regularly assessing your timing and frequency can lead to better nail health. Observing your cuticle growth will help you adapt your care schedule. If you notice excessive overgrowth, you might need to adjust when you push back your cuticles to maintain a clean appearance without compromising skin integrity.

Common Mistakes to Avoid

Despite your best intentions, using a cuticle pusher can lead to mistakes that may harm your nails. Avoid pushing back too aggressively or ignoring important safety practices, as these actions can result in discomfort or injury. Instead, approach your cuticle care with a gentle touch and mindfulness towards your nail health to ensure the best results.

Over-pushing and Damage

About over-pushing when using a cuticle pusher, it’s important to maintain a delicate balance. Aggressive pushing can lead to significant damage to the nail bed and cuticle, causing pain and increasing the risk of infections. Always assess your cuticles and push back with a gentle hand for healthier outcomes.

Inadequate Cleaning and Maintenance

Across your nail care routine, it’s important to prioritize the cleaning and maintenance of your tools, including your cuticle pusher. Failing to sanitize your equipment can lead to the transfer of bacteria and fungi, compromising your nail health.

Due to improper cleaning practices, residue and germs can accumulate on your cuticle pusher, posing a risk to your nails and skin. Make it a habit to thoroughly clean your tools with alcohol or soap and water after each use. This simple step will help you maintain hygiene and prevent unwanted infections, ensuring your nail care routine is both effective and safe.

Tips for Professional-Level Results

Now you can elevate your cuticle care routine to achieve that salon-perfect look by following these expert tips:

  • Always use a sanitized cuticle pusher to prevent infection.
  • Employ gentle pressure; avoid forcing the cuticles back.
  • Push back cuticles after a warm soak for easier manipulation.
  • Use tools specifically designed for the task to ensure precision.
  • Finish with a quality cuticle oil for added moisture.

Any of these practices can greatly enhance your at-home nail care experience.

Enhancing Your Technique

The key to using a cuticle pusher effectively lies in mastering your technique. Make sure to hold the pusher at a slight angle to gently guide your cuticles back without causing damage. Work in small sections, allowing you to focus on precision, and light pressure ensures the health of your nails while achieving a polished look.

Aftercare for Healthy Nails

To maintain the integrity of your nails and enhance their overall health, always implement a solid aftercare routine following your cuticle care session. This includes applying a nourishing cuticle oil and a protective base coat to lock in moisture.

In fact, incorporating a regular aftercare regimen can significantly improve the appearance and texture of your nails. Opt for high-quality oils and creams that contain vitamins and natural ingredients for optimal benefits. By prioritizing aftercare, you ensure that your nails remain healthy, strong, and ready for their next pampering session.

Conclusion

With these considerations, you can effectively use a cuticle pusher like a pro. Start by softening your cuticles with a soak or oil, then gently push them back using the right technique to avoid damage. Always clean your tools before and after use to maintain hygiene. By following these steps and incorporating proper care for your nails, you’ll achieve a polished look while protecting the health of your nail bed. Embrace the art of nail care, and enjoy the confidence it brings!

FAQ

Q: What is a cuticle pusher and what is its purpose?

A: A cuticle pusher is a tool used in nail care to push back the cuticles on your nails. Its purpose is to help maintain the health and appearance of your nails by preventing excess cuticle buildup and promoting a clean, polished look. It allows for better application of nail polish and enhances the overall manicure experience.

Q: How do I choose the right cuticle pusher for my nails?

A: When identifying a cuticle pusher, consider the material and design that best suits your needs. There are metal, wooden, and plastic options available. Metal pushers are durable and can provide precise results, while wooden pushers are gentle on the skin. Make sure the tool has a comfortable grip and a shape that fits the natural contour of your nails for optimal effectiveness.

Q: What is the correct technique for using a cuticle pusher?

A: To use a cuticle pusher effectively, start with clean, dry nails. Soak your fingers in warm water for a few minutes to soften the cuticles. Gently position the cuticle pusher at the base of the nail and push back the cuticles using a gentle, sweeping motion. Avoid applying too much pressure to prevent injury. Use the flat edge for pushing back and the pointed end for cleaning under the nails if necessary.

Q: How often should I use a cuticle pusher?

A: It’s advisable to use a cuticle pusher every 1-2 weeks as part of your nail care routine. Overuse can lead to irritation or damage to the cuticles, so listen to your nails and adjust the frequency based on their condition. If you notice excessive buildup, a more frequent approach may be necessary, but always ensure to treat your cuticles gently.

Q: Can I use a cuticle pusher on my toenails as well?

A: Yes, you can use a cuticle pusher on your toenails if you follow the same principles of careful handling. Be mindful that toe cuticles may be thicker, so it’s important to be gentler and only push back the cuticles without causing any discomfort. Regular maintenance of toenails is as important as fingernails for overall foot health.

Skip to content