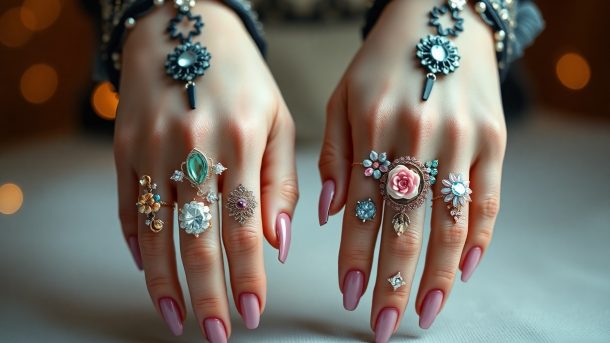
Accessories can transform your manicure from ordinary to extraordinary, and 3D nail accessories are a fantastic way to achieve bold, eye-catching designs. In this guide, you’ll learn how to expertly incorporate these captivating elements into your nail art, allowing you to express your creativity and showcase your unique style. Whether you’re a seasoned nail enthusiast or a beginner, you’ll discover tips and techniques that will elevate your nail game to new heights. Get ready to impress with stunning, dimensional nail designs that are sure to turn heads.
Key Takeaways:
- Choose the Right Accessories: Select 3D nail accessories that complement your design theme, such as charms, studs, or decals.
- Preparation is Key: Ensure your nails are properly prepped—cleaned, shaped, and polished—before applying any 3D elements for better adhesion.
- Layering Techniques: Experiment with layering different accessories to create depth and dimension in your nail art.
- Secure Application: Use a high-quality topcoat or nail glue to secure the 3D elements and prolong the longevity of your designs.
- Play with Placement: Get creative with the arrangement of your accessories, placing them strategically for a unique look that stands out.
How to Select the Right 3D Nail Accessories
Before stepping into your next nail art venture, it’s imperative to choose the right 3D nail accessories that will complement your design vision. Explore inspiration like I love this set! I want to recreate it but what do I use to get … to narrow your options down.
Factors to Consider
One of the primary aspects to think about is how the accessories will harmonize with your base design. Consider the following:
- Size of the accessories
- Theme of your nail art
- Color palette
- Material quality
- Ease of application
Knowing these factors can elevate your nail design game significantly.
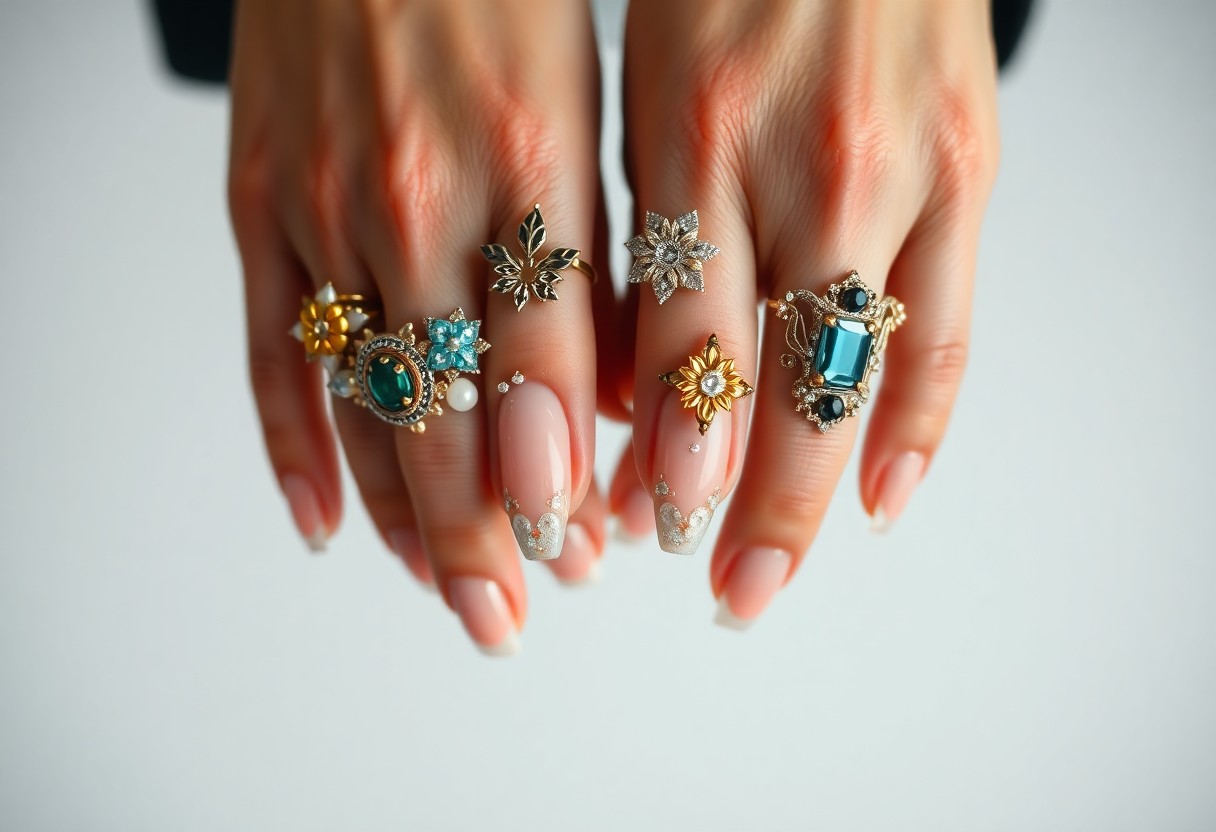
Types of 3D Nail Accessories Available
Any nail artist can benefit from understanding the various types of 3D nail accessories that are out there. Explore the following categories:
- Rhinestones
- Studs
- Fimo slices
- Charms
- 3D gels
Perceiving the options will allow you to make informed decisions for your nail art projects.
Here’s a detailed breakdown of the types of 3D nail accessories available:
| Type | Description |
|---|---|
| Rhinestones | Shiny, faceted stones that add sparkle. |
| Studs | Metallic pieces that provide a trendy look. |
| Fimo Slices | Thinly sliced polymer clay for intricate designs. |
| Charms | Decorative items that enhance the theme. |
| 3D Gels | Textured gels for raised designs. |
Factors to consider extend beyond aesthetics; practical elements also play a significant role. When identifying the appropriate accessories, assess:
- Durability
- Weight
- Application ease
- Removal process
- Skin sensitivity
Perceiving these additional aspects can lead to a more enjoyable nail art experience.
How to Prepare Your Nails for 3D Designs
Even if you’re excited about adding stunning 3D elements to your nails, preparation is key to achieving a flawless look. Start by ensuring your natural nails are strong and healthy, as this will provide a solid foundation for the design. You’ll want to clean and shape your nail beds properly to enhance the longevity of your 3D accessories.
Essential Nail Care Tips
Assuming you are committed to giving your nails the best care, consider these vital tips:
- Moisturize your cuticles regularly.
- File your nails gently to avoid chipping.
- Keep your nails trimmed and neat.
- Protect your nails from harsh chemicals.
Any extra love you give your nails will enhance the overall appearance of your designs.
Preparing Your Nail Surface
Prepare your nail surface by removing any old polish and ensuring your nails are clean and dry. This step is vital for adhesion, as a polished surface will not allow 3D elements to stick properly. Using a gentle nail file, lightly buff the surface to create a rough texture that helps the adhesive bond. Additionally, applying a primer can significantly improve the durability of your design.
The nail surface must be smooth yet slightly textured for optimal results. Buffing not only prepares the surface but also promotes better adhesion for the 3D accessories. Evaluating your base coat choice is also vital; a good quality base coat will offer extra protection and create a barrier between your nail and any potential damage from adhesives or embellishments. So, take your time with the preparation to enjoy beautiful, long-lasting 3D nail designs!
How to Apply 3D Nail Accessories
Unlike traditional nail art, applying 3D nail accessories can elevate your design to a breathtaking new level. To ensure a flawless application, you should start with a well-prepared nail surface and a steady hand. Carefully choosing the right adhesive and understanding placement techniques will yield stunning results that capture attention.
Step-by-Step Application Guide
Application of 3D nail accessories requires precision and care. Follow this guide for perfect results:
| Step | Description |
| 1 | Prep your nails by cleaning and buffing the surface. |
| 2 | Choose your desired 3D accessories and arrange them for placement. |
| 3 | Apply a base coat or gel polish for added adhesion. |
| 4 | Use nail glue or gel to affix your accessories securely. |
| 5 | Seal with a top coat to add shine and longevity. |
Tips for Perfect Placement
Assuming you want your 3D nail accessories to look professional, placement is key. A well-placed accessory not only enhances your design but also ensures durability. Consider these tips to make the most of your application:
- Test the layout before applying any glue.
- Use tweezers for precise placement without smudging your polish.
- Start with larger pieces and build around them for a balanced look.
The final outcome will greatly depend on how strategically you place your accessories.
For instance, positioning larger accessories towards the center of the nail often creates a focal point, while smaller pieces can fill in gaps or complement the overall design. Make sure to pay attention to the balance of your design:
- Consider the weight of the accessories; heavier items should be placed strategically.
- Keep symmetry in mind for a polished appearance.
- Don’t overcrowd; sometimes less is more in nail art.
The right placement will ensure that your art stands out beautifully while maintaining its integrity.
How to Combine 3D Accessories with Nail Art
Despite their bold presence, integrating 3D nail accessories with your nail art can elevate your designs seamlessly. Start by choosing a base color that complements the accessories, and consider using a matte finish for a striking contrast. Layering is key—try incorporating traditional nail techniques like ombre or marbling before adding 3D elements. This not only adds dimension but also creates a cohesive look that showcases the best of both worlds.
Creative Design Ideas
With a little imagination, you can blend 3D accessories into various themes. For a whimsical touch, consider using tiny butterflies or flowers on a pastel base for a garden-inspired look. Alternatively, geometric shapes can add an edgy flair to a sleek, monochrome manicure. Think outside the box to ensure your designs stand out!
Matching Colors and Patterns
Assuming you’re aiming for a polished look, matching colors and patterns is key to ensuring that your 3D accessories harmonize with your overall design. Beyond merely coordinating hues, consider how textures can complement or contrast with your base colors. Utilizing shades in your accessories that reflect the base color can unify the look while adding depth.
A strong color matching strategy involves selecting shades that are either analogous or complementary. For example, if you’re using gold 3D embellishments, a deep burgundy or dark emerald base can create a stunning contrast. Additionally, patterns like stripes or polka dots can be paired with simpler 3D accessories for a balanced yet dynamic design. Utilize color wheels to explore possibilities that resonate with your personal style while keeping your nail art cohesive.
How to Maintain Your 3D Nail Designs
Not maintaining your 3D nail designs can lead to unsightly chips and a dull appearance. To keep your stunning creations looking their best, proper care and preventive measures are crucial. You need to adopt a routine that protects both your natural nails and the 3D accessories you’ve applied.
Caring for Your Nails
Now that you’ve adorned your nails with eye-catching 3D accessories, it’s important to focus on caring for them. Keep your nails clean and moisturized to promote healthy growth, and gently remove any debris without damaging the design. Avoid harsh chemicals and always use gloves when doing household chores to keep your nails in top condition.
Preventing Damage to Accessories
For the longevity of your 3D accessories, taking preventive measures is key. Limit exposure to water and avoid nail-related activities that can put pressure on the embellishments. Using a top coat can help seal and protect the design, ensuring it withstands daily wear and tear.
Your nail accessories can be delicate, so treat them with care. When working with your hands, consider wearing protective gloves to prevent snagging or bending the 3D elements. Additionally, refrain from using your nails as tools, as this can easily lead to damage. By being mindful of how you handle your hands, you can enjoy your vibrant designs for longer.
Tips for Common Challenges
Many enthusiasts may encounter challenges while incorporating 3D nail accessories into their designs. To help you overcome these hurdles, consider the following tips:
- Practice placement before applying glue.
- Use a dotting tool for precision.
- Seal designs with a top coat for longevity.
- Choose the right adhesive for different materials.
Any common issues can be tackled with patience and the right approach.
Troubleshooting Application Issues
Common issues that arise when applying 3D nail accessories include misalignment and lifting edges. To resolve this, ensure you have the proper adhesive and use tools like tweezers for accurate placement. Allow sufficient drying time before moving on to the next steps of your nail art to achieve a flawless finish.
Fixing Accidental Damage
Application errors can happen, and it’s important to know how to handle them effectively. If you notice a 3D accessory has come loose or has been damaged, assess the situation quickly to prevent further issues.
Damage can often be fixed by gently reattaching the accessory with a suitable adhesive. If the accessory is broken, consider replacing it with a similar one to maintain your design’s integrity. Should the adhesive fail, you can remove any excess with acetone and reapply it carefully. Polish off the edges after reattachment to blend seamlessly with your existing design. Your goal is to restore the overall appearance while ensuring everything stays secure.
Conclusion
From above, you have learned how to elevate your nail art using 3D nail accessories for stunning, dramatic designs. By selecting the right 3D elements, experimenting with placement, and pairing them thoughtfully with color and texture, you can create captivating looks that reflect your personal style. Embrace your creativity as you incorporate these accessories into your nail routines, and enjoy the compliments that come from your unique nail artistry.
FAQ
Q: What are 3D nail accessories and how can they enhance my nail designs?
A: 3D nail accessories are decorative elements used in nail art that add depth and dimension to your designs. These can include items such as gems, beads, spikes, flowers, and charms. By incorporating these accessories, you can create eye-catching, dramatic nail designs that stand out. They can elevate simple manicures into stunning works of art, allowing for unique personalization and expression.
Q: How do I properly apply 3D nail accessories to ensure they stay in place?
A: To apply 3D nail accessories effectively, start with a well-prepared nail canvas, ensuring nails are clean, shaped, and polished. Use a strong nail adhesive or gel to attach the accessories securely. For larger items, it may help to apply a layer of topcoat over them to seal them in place. If using a UV gel technology, curing the design under a UV lamp can offer additional durability. Lastly, avoid excessive pressure or friction on the nails to maintain their integrity over time.
Q: Can I mix and match different types of 3D nail accessories, or should I stick to a theme?
A: Mixing and matching different types of 3D nail accessories is encouraged, as it can lead to creative and personalized nail art. However, it’s advisable to maintain some cohesion in your design. You can achieve this by using a similar color palette or theme that ties the various accessories together. For instance, if you have floral designs, adding small gems in coordinating colors can create harmony while keeping the look dynamic and interesting. Experimentation can lead to stunning results!