Many individuals are discovering the creative world of nail stamping, a technique that allows you to effortlessly adorn your nails with stunning designs. If you’re new to nail art, this guide will help you navigate the basics of nail stamping, including tips and tools you’ll need to get started. Whether you’re looking to enhance your nail game for a special occasion or simply want to express your personal style, you’ll find valuable insights here. For a more detailed exploration, check out The Art of Nail Stamping: A Beginner’s Guide.
Key Takeaways:
- Tools: Essential items for nail stamping include a stamping plate, liquid polish, and the stamper itself.
- Technique: Proper technique involves applying polish to the plate, scraping excess off, and pressing the stamper onto the nail for a clear image.
- Practice: Achieving perfect nail designs may require repeated attempts, so patience and practice are key for mastering the art of nail stamping.
What is Nail Stamping?
Before entering into the fun world of nail art, it’s important to understand what nail stamping is. Nail stamping is a technique that uses specially designed plates and a stamping tool to transfer intricate designs onto your nails. This method allows you to create stunning patterns quickly and easily, making nail art accessible to everyone, even if you’re a beginner.
History of Nail Stamping
Between the early 2000s and today, nail stamping has gained immense popularity as a creative way to decorate nails. Initially developed in Japan, this technique was brought to the Western market through various beauty brands, allowing enthusiasts like yourself to easily replicate professional-looking nail designs at home.
How Nail Stamping Works
At its core, nail stamping involves using a design plate, a silicone stamp, and nail polish. The process consists of applying polish to the plate, scraping off the excess with a card, and then pressing the stamp onto the design before transferring it to your nail.
History of nail stamping is fascinating, as it highlights the evolution of nail art techniques over time. The stamping process starts by applying your chosen nail polish to a metal or acrylic plate, which contains various designs. Once you scrape off the excess polish with a scraper card, the remaining polish settles only in the etched design areas. You then use a silicone stamp to pick up the pattern and transfer it onto your nail, allowing for endless creative possibilities. Experiment with different colors and patterns to find styles that express your unique personality.
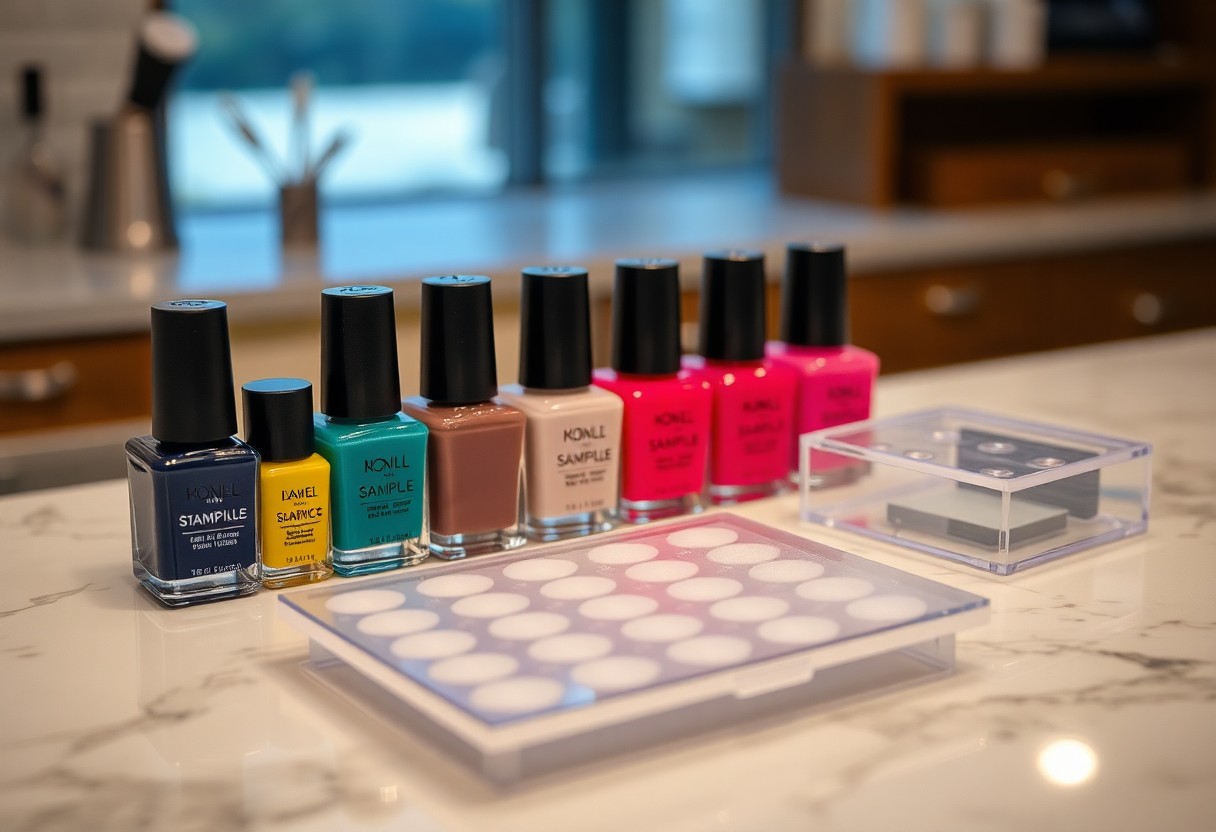
Essential Tools and Materials
If you’re looking to master nail stamping, you’ll need to gather some imperative tools and materials. From plates to polishes, having the right items at your disposal will make the stamping process much smoother. This guide will help you identify what you need to get started on your nail art journey effectively.
Plates
Tools like stamping plates come in various designs featuring intricate patterns, allowing you to create stunning nail art. Choose plates that resonate with your style, as they serve as the canvas for your creative vision.
Stamps and Scrapers
Below are two vital tools in your nail stamping kit: the stamper and the scraper. The stamper picks up the design from the plate, while the scraper removes excess polish, ensuring a clean transfer.
At the heart of a successful stamping experience is the quality of your stamper and scraper. A soft, flexible stamper is ideal, as it easily conforms to the shape of your nail for a perfect application. Pair this with a sturdy scraper that efficiently spreads nail polish across the plate without damaging the design.
Nail Polishes
Across the world of nail stamping, the types of nail polishes you choose significantly influence the outcome of your designs. Opt for polishes that are pigmented and specifically labeled for use with stamping, as they adhere better to the plates and create vibrant results.
Materials also play a role in defining how well your nail art turns out. Stamping polishes are often thicker, ensuring they transfer well onto your nails. Experimenting with various colors and finishes will enhance your designs, allowing you to create a unique look every time. Choose a palette that reflects your personality and complements your style to make your nail art truly stand out.
Step-by-Step Guide to Nail Stamping
After familiarizing yourself with the necessary tools, it’s time to investigate the step-by-step process of nail stamping. Follow this guide for seamless results.
| Step | Description |
| 1 | Prepare your nails properly. |
| 2 | Apply a base coat and let it dry. |
| 3 | Choose your stamping plate and design. |
| 4 | Apply polish to the design on the plate. |
| 5 | Scrape the excess polish. |
| 6 | Stamp the design onto your nail. |
| 7 | Finish with a top coat for longevity. |
Preparing Your Nails
An effective nail stamping session begins with prepping your nails. Start by removing any old polish and ensuring your nails are clean and free of oils. Shape your nails to your desired length and buff the surface gently. Applying a base coat not only protects your nails but also provides a smooth canvas for stamping, so let it dry completely before moving on to the next step.
Stamping Techniques
Against general belief, nail stamping can be simplified by mastering a few techniques. A steady hand and patience are your best friends here.
Stamping involves using a special plate and a rubber stamp to transfer designs onto your nails. One effective technique is to apply a generous amount of polish on the desired design before quickly scraping off the excess. Be gentle, as too much pressure can ruin the design. When pressing the stamp onto your nail, aim to apply even pressure for a perfect transfer. Practicing with different designs will help you gain confidence and refine your skills for impeccable results.
Common Mistakes and How to Avoid Them
Your nail stamping journey can be filled with pitfalls, but by understanding common mistakes, you can elevate your skills. One common issue is inconsistent images; however, with practice and the right techniques, you can achieve flawless designs. Another frequent mistake is messy application, which can ruin the overall look of your manicure. By identifying these problems early, you’ll enhance your nail art experience and achieve beautiful results.
Inconsistent Images
With nail stamping, inconsistency in image transfer can lead to a disappointing outcome. To achieve better results, make sure to thoroughly clean your stamping plate and use a high-quality stamp that picks up polish evenly. Practice different pressure levels when applying the stamp to your nail, and always work quickly, as some polishes dry fast and can affect image transfer.
Messy Application
Across your nail stamping project, messy application can detract from the overall design. This usually happens when excess polish remains on the skin around your nailbed, making the finish look unpolished. Taking time to prep your nails with a barrier, like liquid latex, can help minimize cleanup afterward. Also, ensure you’re using the right amount of polish on your stamping plate to avoid unnecessary smudging.
Even with careful planning, messy application can still occur. To minimize this, use a smaller brush or a clean-up tool with acetone to tidy up around your nail edges after stamping. Being mindful of your angle and pressure while applying polish to the plate can also help prevent overflow. A touch of patience during the process will ultimately lead to a polished look.
Tips for Successful Nail Stamping
Once again, nail stamping can be a rewarding yet challenging venture, so keep these helpful tips in mind for the best results:
- Ensure your nails are clean and dry.
- Use high-quality stamping polish for better transfer.
- Practice your timing while applying the stamp.
- Apply pressure evenly when stamping.
- Don’t forget to clean your plates after each use.
Recognizing these key points will make your nail stamping experience enjoyable and successful.
Choosing the Right Products
Across the world of nail stamping, choosing the right products is important for achieving beautiful designs. Look for stamping polishes that are thicker and more pigmented, as they transfer more easily to your nails. Additionally, invest in good quality plates that are etched deeply, ensuring your designs will pick up more accurately. The right tools can make all the difference, so take the time to research and select wisely.
Maintenance of Tools
Besides choosing the right products, maintaining your tools is important for long-lasting performance. Always clean your stamping plate immediately after use with acetone or nail polish remover to remove any leftover polish. Use a lint-free cloth or a dedicated stamping pad for cleaning to avoid scratching the plate’s surface. Store your tools in a cool and dry place to prevent damage.
Right maintenance not only prolongs the life of your stamping tools but also ensures that they perform at their best every time you indulge in your nail art adventures. Regularly inspect your plates for any scratches or damaged areas, and replace them if necessary. A clean and well-kept setup will guarantee smoother application and more precise designs.
Creative Design Ideas for Nail Stamping
Not only is nail stamping a fun way to express your creativity, but it also opens up endless possibilities for unique designs. You can explore different color combinations, motifs, and styles to elevate your nail art game. For more inspiration, check out the Beginners Guide to Nail Stamping – Nail Arts in Minutes, which provides amazing tips and ideas for your next stamping session.
Seasonal Themes
Before venturing into specific designs, consider incorporating seasonal themes into your nail stamping. Whether it’s pastel colors and florals for spring, vibrant hues for summer, warm tones for autumn, or cozy patterns for winter, aligning your nail art with the seasons can make your manicure feel fresh and relevant.
Mixing Patterns
Any good nail art enthusiast will tell you that mixing patterns adds depth and personality to your nails. By blending geometric designs with florals or stripes with polka dots, you can create visually striking nail art that showcases your unique style.
Themes that blend contrasting patterns can elevate your nail art to new heights. For instance, pairing delicate lace designs with bold graphic shapes not only adds interest but also allows you to showcase your artistic creativity. Experiment with different plate designs and colors to unleash your inner nail artist and create stunning combinations that draw attention.
Conclusion
Presently, you have all the foundational knowledge to look into nail stamping, a creative and enjoyable way to elevate your nail art skills. With a variety of tools and techniques at your disposal, you can effortlessly express your personality through stunning nail designs. As you practice and experiment, you’ll refine your skills and discover endless possibilities for your manicures. Embrace the journey, and let your creativity shine in every stamped design you create!
FAQ
Q: What is nail stamping?
A: Nail stamping is a nail art technique that involves transferring intricate designs onto the nails using a special plate, a scraper, and a stamper. The designs are etched onto a metal or plastic plate, and you pick up the desired design with the stamper after applying nail polish to the plate and scraping off the excess. This method allows for easy and precise application of detailed patterns.
Q: Do I need any special tools for nail stamping?
A: Yes, to get started with nail stamping, you will need a few necessary tools: a nail stamping plate that features multiple designs, a stamper to transfer the design, a scraper to remove excess polish from the plate, and appropriate nail polish that works well with stamping (typically highly pigmented and quick-drying). Optional tools include a cleaning brush for the plates and a top coat to seal your design.
Q: Can I use any nail polish for stamping?
A: Not all nail polishes are suitable for stamping. It is recommended to use specially formulated nail stamping polishes, which are thicker and have a higher pigment concentration. However, you can also use regular nail polishes that are opaque and quick-drying. Avoid fast-drying top coats as they may not adhere well to the stamping process.
Q: What are some tips for achieving a successful nail stamping design?
A: For a successful nail stamping experience, consider these tips: clean your stamping plates with alcohol to remove any residue; apply a thin layer of polish to the design, ensuring it covers the grooves; use a firm yet gentle scraping motion to remove excess polish; and roll the stamper onto the design instead of pressing to ensure it picks up the pattern effectively. Practice makes perfect, so don’t hesitate to try multiple times!
Q: How do I properly care for my stamping tools and plates?
A: To maintain your stamping tools and plates in good condition, clean them after each use with a gentle nail polish remover or rubbing alcohol to remove any residual polish. Store stamping plates in a flat position to avoid scratches, and ensure the stamper is kept clean and stored in a dust-free environment. Regular maintenance will extend the life of your stamping tools and ensure optimal performance.