nails

The Importance of Letting Your Nails Breathe

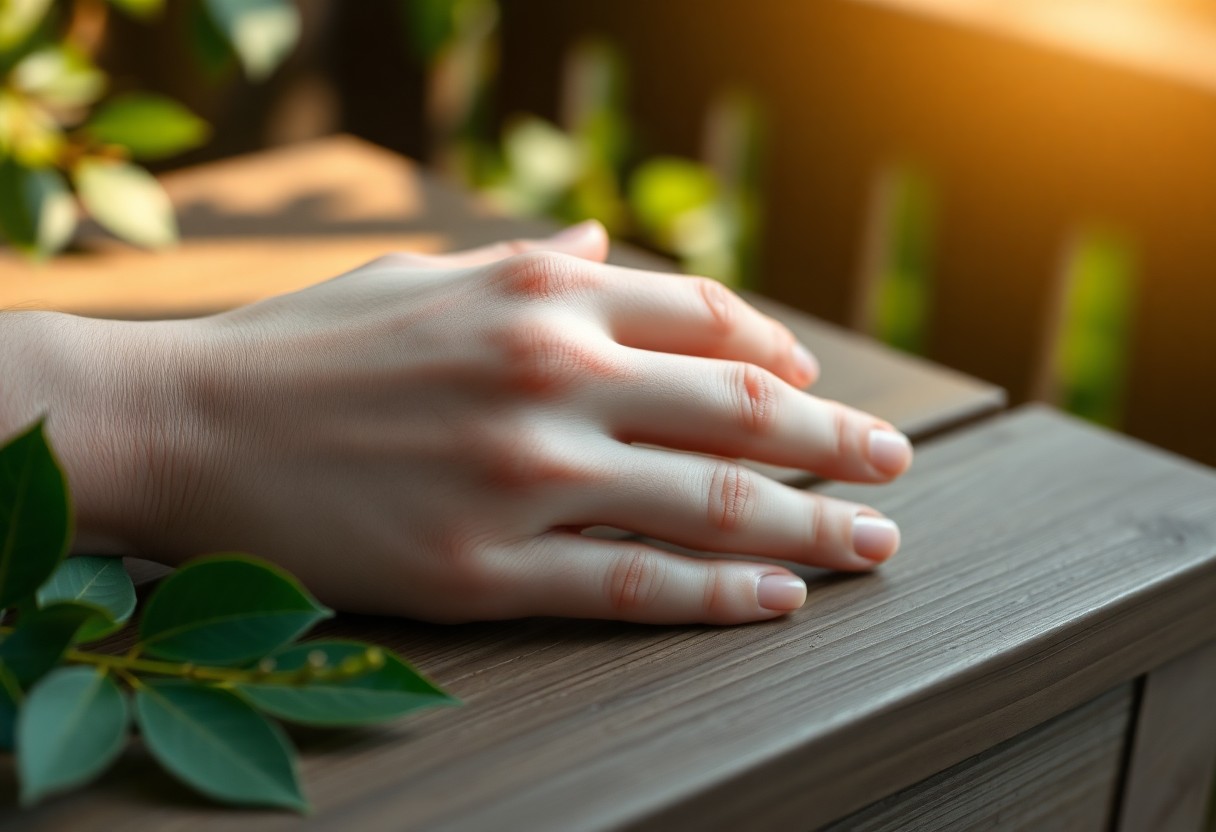
Most people spend a significant amount of time maintaining their nails, but few consider the importance of giving them a break from polish and enhancements. Your nails, like your skin, require air and rest to remain healthy and strong. Over time, continuous application of products can lead to discoloration, weakening, and even infections. By allowing your nails to breathe periodically, you can promote better overall nail health and ensure they look their best. Understanding this balance is key to maintaining beautiful, resilient nails.
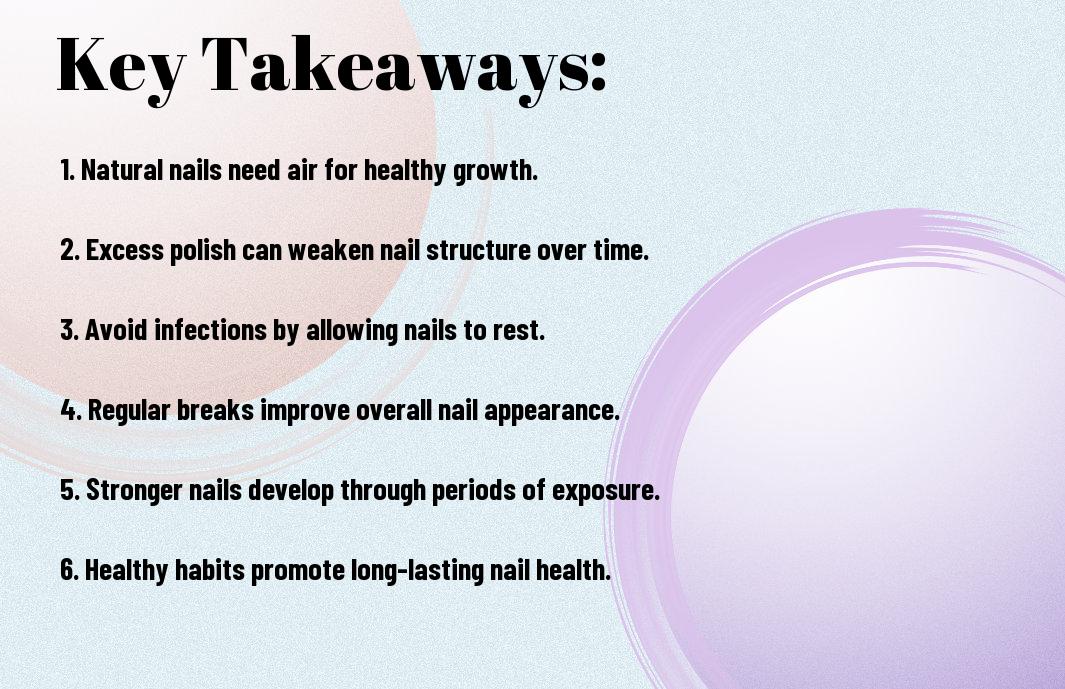
Key Takeaways:

  • Nail Health: Allowing your nails to breathe helps prevent issues such as discoloration, brittleness, and fungal infections.
  • Product Accumulation: Frequent use of nail polish and artificial nails can lead to buildup, making it important to give your nails breaks.
  • Natural Strength: Taking breaks from nail products promotes stronger and healthier nail growth over time.

Understanding Nail Health

To achieve and maintain healthy nails, it is imperative to understand the factors that contribute to their condition. Nail health is impacted by various elements, including lifestyle choices, environmental factors, and personal grooming habits. By prioritizing your nail’s needs and recognizing warning signs, you can ensure your nails remain strong and vibrant while preventing issues that may arise from neglect or overexposure to certain products.

Anatomy of the Nail

On each finger, your nails consist of several parts, including the nail plate, nail bed, cuticle, and matrix. The nail plate is the visible hard part of the nail, while the nail bed is the soft tissue beneath it that provides support. The cuticle protects the base of the nail and prevents infections, while the matrix is the area where new nail cells are produced. Understanding these components can help you care for your nails more effectively.

Common Nail Issues

With neglect and improper care, you may encounter various nail issues, such as brittleness, discoloration, and fungal infections. These concerns can be exacerbated by harsh treatments, lack of moisture, and exposure to chemicals. Being aware of these common problems allows you to make better choices in your nail care routine.

Another frequent issue is nail fungus, often resulting from damp conditions and poor hygiene. This can lead to discoloration, thickening, and potential pain, warranting attention. Brittle nails may arise from overexposure to nail polish and removers, which strip imperative moisture. Additionally, discoloration can signal an underlying health issue, leading you to seek professional guidance for effective solutions. Regular maintenance and understanding the signs of nail distress will help you keep your nails in optimal condition.

Benefits of Letting Your Nails Breathe

Some of the primary benefits of allowing your nails to breathe include enhanced strength, improved health, and a reduced risk of infections. By taking breaks from polish or artificial nails, you enable your nails to recover and rejuvenate, promoting overall nail vitality. This practice not only contributes to the aesthetics of your hands but also supports the natural growth and resilience of your nails.

Improved Nail Strength

Along with giving your nails a chance to recover, letting them breathe promotes improved nail strength. This break from polish allows your natural nails to regain their robustness and reduces brittleness, enabling them to grow stronger and healthier over time.

Prevention of Fungal Infections

Along with fostering growth, allowing your nails to rest helps prevent fungal infections that can thrive in a moist, dark environment, often created by the frequent use of nail polish. By minimizing such conditions, you significantly lower your chances of developing these infections.

Fungal infections can lead to discoloration, thickening, and even detachment of your nails. These infections often arise when nails are covered for extended periods, creating a warm, damp space for fungi to flourish. By giving your nails time to breathe, you not only reduce the risk of these infections but also promote better nail hygiene and overall nail health.

How to Practice Nail Breathing

Now that you understand the benefits of letting your nails breathe, it’s time to incorporate nail breathing into your routine. Start by giving your nails a break from nail polish and artificial enhancements. Set aside specific days where you allow your natural nails to be free. This practice not only enhances their health but also gives you a chance to appreciate their natural beauty.

Recommended Time Frames

Among the best practices for nail breathing is to aim for at least one full week every month without any polish or enhancements. This time frame allows your nails to recuperate, strengthen, and regain their natural oils, promoting healthier growth and overall appearance.

Skincare at Home

Above the benefits of letting your nails breathe, you should also consider how to care for your nails during this period. Implementing a regular skincare routine will enhance their strength and resilience, ensuring they remain healthy and beautiful even when free from polish.

It’s beneficial to incorporate nourishing oils, such as jojoba or almond oil, into your nail care regimen. Gently massage these oils into your nails and cuticles daily to provide hydration and prevent brittleness. Additionally, maintaining proper hygiene by keeping your nails clean and trimmed will further support their health. Utilizing a strengthening nail serum can also help reinforce your natural nails during this breathing period, making it easier for them to flourish.

Myths About Nail Breathe

Despite common beliefs, the idea that your nails need to “breathe” is largely a myth. Your nails are made of keratin, a protein that does not require exposure to air for health. Therefore, avoiding polish or enhancements won’t necessarily improve the condition of your nails. Instead, it’s important to focus on proper nail care and maintenance to keep them strong and healthy.

Misconceptions

An often-held misconception is that artificial nails suffocate your natural nails. In reality, the health of your nails is not dependent on air exposure; instead, it is affected by the products you use and how well you care for them. Regularly moisturizing and maintaining a balanced diet can be far more beneficial for your nails.

Facts vs. Fiction

Below the surface, the truth about nail health is much different than popular beliefs suggest. Your nail bed does not need fresh air, and while nails can become damaged through neglect or harsh chemicals, this isn’t related to their ability to “breathe.” Understanding that nail care is about nourishment and protection allows you to make informed choices for maintaining your nails.

Due to the widespread myths surrounding nail breathing, many people mistakenly avoid nail polish or enhancements, believing they are doing harm. In reality, it’s important to focus on the products you use. Choosing high-quality, non-toxic polishes and regularly hydrating your nails and cuticles can lead to healthier nails, regardless of whether you wear polish or not. Prioritize nourishment and care over outdated beliefs for the best results.

Alternative Nail Care Practices

For those seeking healthier nails, alternative nail care practices can be beneficial. Incorporating natural treatments and allowing your nails time to rejuvenate can enhance their strength and appearance. Look into options like important oils or nourishing oil treatments that promote growth while giving your nails a break from conventional polish and acrylics.

Choosing the Right Products

About selecting nail products, it’s important to choose those free from harmful chemicals such as formaldehyde, toluene, and dibutyl phthalate. Opt for polishes and removers with natural ingredients that support nail health and hydration while minimizing damage to your nails and cuticles.

Regular Nail Maintenance

The key to strong and beautiful nails lies in regular maintenance. This includes regular trimming, gentle filing, and moisturizing your cuticles to promote healthy growth. By establishing a routine that prioritizes care, you will prevent breakage and keep your nails looking their best.

Products like cuticle oil and hand creams can be invaluable during your nail maintenance routine. These items keep your nails hydrated, preventing brittleness and chipping. Additionally, consider using a strengthening base coat before applying polish to protect and nurture your nails. Regular maintenance not only enhances the aesthetic appeal but also contributes to overall nail health, leading to more resilient and attractive nails.

The Role of Diet in Nail Health

Your diet plays a significant role in the health and appearance of your nails. Nutrient-rich foods help strengthen your nails and promote growth while deficiencies can lead to brittleness and breakage. If you’ve noticed your nails are struggling, it might be time to assess your diet. Be sure to check out 5 signs from your nails that you should take a break from …

Nutrients for Strong Nails

Along with a varied diet, specific nutrients are vital for maintaining strong and healthy nails. Biotin, protein, and minerals like zinc and iron help build nail strength and resilience. Incorporate foods such as eggs, nuts, and leafy greens to give your nails the boost they need.

Hydration and Nail Vitality

Before focusing on treatments for nail strength, consider the role hydration plays in your nail vitality. Adequate water intake is important for nourishing your nails and keeping them from becoming brittle or dry.

Hydration not only benefits your overall health but also impacts the moisture balance in your nails. When you are well-hydrated, your nails are less likely to become fragile and are more likely to maintain their flexibility. Aim to drink enough water throughout the day to help keep your nails healthy and vibrant.

Summing up

To wrap up, allowing your nails to breathe is crucial for their health and your overall nail care routine. By taking breaks from nail polish and treatments, you enable your nails to recover, maintain their strength, and prevent issues like discoloration and brittleness. Regularly incorporating downtime into your nail care regimen ensures that your nails remain vibrant and resilient. Prioritizing this aspect of nail maintenance will ultimately lead to improved nail health and a more polished look when you choose to adorn them again.

FAQ

Q: Why is it important for my nails to have a break from polish?

A: Letting your nails breathe gives them a chance to recover from the effects of nail polish and other products. Prolonged use of nail polish, especially without breaks, can lead to yellowing, brittleness, and even thinning of the nails. Giving them a break allows them to regain their strength and moisture.

Q: How often should I allow my nails to breathe?

A: It is recommended to take a break from nail polish for at least a week after every four to six weeks of continuous application. This allows the nails to restore their natural beauty and health. Everyone’s nails are different, so listen to your body and adjust as needed based on how your nails look and feel.

Q: What signs indicate that my nails need a break?

A: If you notice your nails becoming discolored, fragile, or developing ridges, it may be time for a break. Other signs include excessive peeling or splitting. These symptoms can be indicators that the nails are not healthy and require a period of recovery to restore their natural integrity.

Q: Do my nails actually benefit from fresh air?

A: While nails do not literally ‘breathe’ like skin does, allowing them to be free from coatings allows any trapped moisture to evaporate. This can improve their overall condition, as excessive layers of polish can create an environment that promotes dryness and damage.

Q: Are there any products I should use when giving my nails a break?

A: During a break from polish, consider using nail oils or strengthening treatments to nourish and hydrate your nails. These products can help improve the health of your nails and promote growth, making them more resilient for when you decide to wear polish again.

How to Recreate Celebrity Nail Looks at Home

Most people admire the stunning nail designs sported by their favorite celebrities but feel that achieving those looks at home is daunting. You don’t need to be a professional nail artist to master these trendy styles; all you need is the right tools, techniques, and a bit of creativity. This guide will help you break down popular celebrity nail looks and provide step-by-step instructions to recreate them effortlessly. Get ready to bring a touch of Hollywood glamour to your fingertips without stepping foot in a salon!

Key Takeaways:

  • Research your favorite celebrity nail designs by browsing social media platforms like Instagram and Pinterest, as many celebrities share their manicure looks online.
  • Gather tools, such as high-quality nail polish, nail art brushes, dotting tools, and decals to achieve the desired look, ensuring you invest in the right materials for a salon-quality finish.
  • Practice your application technique by experimenting with different styles and designs at home, which will help you build confidence and improve your skills over time.

Essential Tools and Products

A variety of tools and products can help you recreate stunning celebrity nail looks in the comfort of your home. Start with a solid foundation by investing in quality nail polishes, crucial grooming tools, and nail art supplies. With the right items on hand, you’ll be able to achieve salon-worthy designs that elevate your manicure game and make you feel fabulous.

Nail Care Basics

Among the first steps in achieving a celebrity-inspired manicure is proper nail care. Ensure your nails are clean and trimmed, and consider using a nourishing cuticle oil to keep your cuticles healthy. Regularly exfoliating and moisturizing your hands will enhance the overall appearance of your nails, giving them that flawless look that celebs often flaunt.

Must-Have Nail Art Supplies

By stocking your beauty arsenal with crucial nail art supplies, you can easily create intricate designs that wow. These may include nail brushes, dotting tools, striping tape, and nail decals. With a well-curated collection, you’ll be equipped to experiment and elevate your nail art skills while recreating looks inspired by your favorite stars.

At the heart of nail art creativity is the right set of must-have supplies. Nail brushes allow you to create detailed designs, while dotting tools help you achieve perfect polka dots and intricate patterns. Striping tape can be invaluable for precise lines, and nail decals provide an easy way to add flair without the need for advanced techniques. With these tools at your disposal, you’ll feel empowered to bring celebrity nail looks to life in your very own home manicure routine.

Popular Celebrity Nail Looks

Clearly, celebrity nail looks often set trends that many aspire to replicate. From stylish patterns to eye-catching colors, these designs inspire creativity and personal expression in your nail care routine. Whether you’re aiming for glam or something more understated, there’s a multitude of iconic styles that you can easily recreate at home. With the right products and techniques, you can bring a touch of celebrity flair to your fingertips.

Iconic Styles to Emulate

Nail art has reached new heights with celebrities showcasing stunning designs that capture attention. From the timeless elegance of a classic red manicure to the bold sophistication of geometric patterns, you can draw inspiration from the styles worn by stars like Zendaya and Kylie Jenner. Emulate these iconic looks by selecting a signature color and implementing unique accents that reflect your personality, combining a touch of celebrity glam with your own twist.

Seasonal Trends from the Stars

Below, the seasonal nail trends set by celebrities can help you choose your next manicure idea, keeping your nails fashionable all year round. From vibrant summer hues to warm autumn shades, each season brings fresh opportunities to express yourself through nail art. Paying attention to what your favorite stars are wearing can guide you in selecting colors and designs that perfectly match the season’s vibe.

Even more exciting, many celebrities collaborate with nail brands to release seasonal collections that showcase trendy colors and exclusive designs. By following these trends, you can elevate your nail game and stay in sync with what’s hot. Whether it’s pastel shades for spring or dark, moody tones for fall, incorporating elements from your favorite celebrity trends allows you to keep your nails on point while expressing your unique style.

Step-by-Step Guides for DIY

Not all celebrity nail looks are out of reach! With the right techniques, you can recreate these stunning designs at home. Here’s a simplified breakdown to guide you through each style:

Nail LookSteps to Recreate
Ombre Effect1. Apply a base coat. 2. Use a makeup sponge and two polish colors. 3. Dab onto nails. 4. Seal with topcoat.
Marble Nails1. Apply a base coat. 2. Drop polish colors in water. 3. Swirl with a toothpick. 4. Dip your nail. 5. Topcoat.

Technique for Each Look

At each step, focus on achieving even coverage and precision. For the ombre effect, use a light hand when applying polish with the sponge for a seamless blend. In the marble technique, be quick while swirling in the water—practice makes perfect!

Tips for Flawless Application

By paying attention to details, you can elevate your nail game. Here are some crucial tips for flawless application:

  • Always start with a clean nail surface.
  • Use a base coat to protect your nails.
  • Layer polishes gradually for a smoother finish.

This can make a noticeable difference in the longevity of your manicure.

And to further enhance your skills, keep in mind these pointers:

  • Invest in quality tools for precision.
  • Allow each layer to dry completely.
  • Practice on a disposable nail wheel for technique.

This will help boost your confidence and refine your application skills.

Color Theory and Nail Health

Keep in mind that understanding color theory can elevate your nail game while ensuring the health of your nails. The right shades can complement your skin tone and enhance your overall appearance. Additionally, choosing high-quality, non-toxic polishes can prevent nail damage, allowing you to flaunt your favorite celebrity-inspired looks without compromising the integrity of your nails.

Choosing the Right Shades

Among the plethora of shades available, it’s crucial to find those that not only reflect current trends but also harmonize with your complexion. Warmer skin tones often look stunning with earthy tones and yellows, whereas cooler skin tones might shine in jewel tones and metallics. Take time to experiment and find hues that make your nails pop and feel uniquely yours.

Nail Care for Longevity

Behind every stunning nail look is a commitment to proper nail care and maintenance. This includes regular moisturizing, hydration, and the occasional break from polish to prevent brittleness. Implementing a routine that includes cuticle oil and nail strengtheners can also significantly enhance the durability of your nail art.

Hence, prioritizing your nail care routine is key to achieving longevity in both your nail health and your stunning celebrity-inspired designs. Incorporate practices like avoiding overly aggressive filing and using gloves during household chores to minimize damage. By giving your nails the attention they deserve, you can ensure that they’re not just a canvas for beautiful colors but remain strong and healthy for all your nail art needs.

Common Mistakes to Avoid

For a flawless nail recreation, steer clear of common mistakes that can sabotage your efforts. Poor preparation, skipping base coats, and rushing through the process can lead to unsatisfactory results. Check out this guide on CELEBRITY NAIL STRIP LOOK TO RECREATE AT HOME for helpful tips and tricks to get it right.

Application Errors

Across the nail art community, application errors are often the biggest hurdle. You may apply products too thickly, forget to properly prep your nails, or overlook the importance of curing time for gel nails. These blunders can lead to chips, peeling, and uneven finishes, making it difficult to achieve that celebrity look.

Maintenance Gone Wrong

Mistakes in nail maintenance can severely impact the longevity of your at-home manicure. Neglecting regular upkeep—such as moisturizing your cuticles and avoiding harsh chemicals—can cause your nails to weaken and your polish to chip. Ensuring you have consistent care routines not only enhances the appearance of your nails but also keeps them healthy.

Further, your nail health directly influences how long your nail art will last. Monitor your nails for signs of breakage or wear, as these can ruin the overall look. Engaging in regular habit, such as applying cuticle oil and choosing gentle cleansers, will help maintain your nails and keep your designs looking fresh. With proper care, you can enjoy your recreated celebrity nail looks for longer.

Customizing Looks to Fit Your Style

After you’ve found inspiration from your favorite celebrity nail looks, it’s time to make those designs your own. Tailor the colors and shapes to reflect your style, whether that means opting for bolder hues or a more minimalist approach. Consider your lifestyle and how much maintenance you’re willing to commit to, allowing you to create a unique nail design that not only looks great but also fits your personality and daily routine.

Personalizing Celebrity Designs

On your journey to customizing celebrity nail designs, take a moment to analyze the elements you love most. Whether it’s the color palette, nail shape, or embellishments, use these features as a base. Feel free to swap out colors or add your favorite patterns—after all, it’s your nails that should shine!

Experimenting with Nail Art

Beside customizing celebrity designs, you can explore nail art as a fun and creative way to express yourself. Consider incorporating different techniques, such as ombré, marbling, or even simple dot patterns, to enhance your nail look. 

Even if you’re new to nail art, practicing on a few practice nails can help you build confidence in your skills. Look online for tutorials or step-by-step guides that match your selected design. Don’t shy away from mixing and matching techniques; blending styles can lead to stunning results. Use different tools like dotting tools or brushes to create unique textures and effects. Let your imagination run wild, and you’ll soon discover that your nails can become a canvas for your creativity.

Final Words

Hence, you can effortlessly recreate stunning celebrity nail looks at home with the right tools, techniques, and inspiration. Explore various styles, gather the necessary materials, and don’t hesitate to experiment with colors and designs that resonate with your personal style. For some fresh ideas, check out this resource for 10 Celebrity Nail Looks You Can Recreate at Home featuring trendy spring nails. Enjoy the creative process, and let your nails be a canvas for your unique expression!

FAQ

Q: What tools and materials do I need to recreate celebrity nail looks at home?

A: To recreate celebrity nail looks, you will need a few important tools and materials. Start with a good quality nail file, cuticle pusher, and buffer to prep your nails. Invest in a base coat and a top coat for longevity and shine. You will also need nail polish in the colors of your choice, nail art brushes, dotting tools, and potentially nail stickers or gems for embellishments. A UV lamp is necessary if you are using gel polish. Having a clean workspace and some cotton swabs or pads with nail polish remover will also help tidy up any mistakes.

Q: How can I find the right nail design inspired by a celebrity?

A: To find the right nail design inspired by a celebrity, browse social media platforms like Instagram and Pinterest where many celebrities showcase their nail art. You can also check beauty magazines or follow nail art blogs that feature celebrity designs. Once you find a look you love, save a photo as a reference. Pay attention to the color palette and the techniques used, such as ombre, negative space, or intricate nail art, so you can replicate it effectively.

Q: Are there any specific techniques for replicating intricate nail designs?

A: Yes, replicating intricate nail designs requires some specific techniques. For detailed designs, start with a solid base coat. Use nail art brushes for fine details and line work, as these will give you more control. Dotting tools are excellent for creating dots and small patterns. If you are trying a stamp design, a nail stamping kit can provide various patterns and images effortlessly. Practice on a piece of paper or a nail wheel before applying it to your nails to build confidence in your technique.

Q: How do I ensure my nail designs last longer?

A: To ensure your nail designs last longer, start with a clean nail surface free from oils or old polish. Apply a high-quality base coat to protect your nails. Use two thin layers of color polish rather than one thick layer, as this helps prevent chipping. After applying your design, seal it with a top coat to enhance shine and durability. Lastly, try to avoid exposure to harsh chemicals or excessive water, as this can weaken the polish and cause it to chip.

Q: What troubleshooting tips can I follow if my nail art doesn’t turn out as expected?

A: If your nail art doesn’t turn out as expected, there are several troubleshooting tips you can follow. Firstly, if your polish is streaky, ensure you are using thin layers and allowing each layer to dry completely before adding another. If your designs smear or smudge, consider using quick-drying top coats. If you make a mistake, a small brush dipped in nail polish remover can clean up the edges for a more polished look. Finally, don’t get discouraged; some designs take practice, so give yourself the grace to experiment and improve over time!

How to Match Your Nails to Your Seasonal Wardrobe

It’s necessary to consider how your nails can complement your seasonal wardrobe, enhancing your overall style and keeping your look cohesive. By understanding color theory and the latest trends, you can easily coordinate your nail designs with your outfits for any season. Whether you prefer bold hues for summer or subtle shades for fall, this guide will provide you with practical tips to ensure your nails are always in sync with your fashion choices. Elevate your style game by learning how to effortlessly match your nails to the colors and patterns of the season.

Key Takeaways:

  • Color Coordination: Choose nail colors that complement the predominant shades in your seasonal wardrobe to create a cohesive look.
  • Seasonal Trends: Stay updated on seasonal trends, as colors and finishes often change with the seasons, allowing you to keep your style fresh.
  • Textures and Finishes: Experiment with different nail textures such as matte or glossy, and consider seasonal designs, like florals for spring or metallics for winter, to enhance your style.

Understanding Seasonal Colors

For anyone looking to elevate their style, understanding seasonal colors is vital. Each season brings unique hues that reflect the environment, from the vivid greens and florals of spring to the warm and earthy tones of autumn. By aligning your nail colors with these seasonal palettes, you can create a cohesive look that enhances your wardrobe and showcases your personal style. This connection not only keeps your appearance fresh but also adds an element of thoughtfulness to your overall aesthetic.

The Color Wheel and Seasonal Palettes

Understanding the color wheel is the first step in exploring seasonal palettes. The color wheel illustrates how different colors interact and complement each other. By identifying the dominant colors of each season—such as pastels for spring or rich jewel tones for winter—you can select nail shades that harmonize beautifully with your clothing. This knowledge allows you to play with contrasts and complements, ensuring your nails and outfits are perfectly aligned.

Influences of Seasonality on Color Choices

Understanding how the seasons influence your color choices helps you make intentional decisions. Each season evokes different feelings and moods, which are often mirrored in colors; for instance, summer is lively and bright, while winter leans towards deeper, more muted shades. These natural shifts should guide your nail selections, ensuring that every detail in your look resonates with the seasonal vibe.

Seasonal shifts not only dictate the colors you see in nature but also reflect your lifestyle. In spring, you might gravitate towards pastel pinks and yellows that evoke freshness and new beginnings. Meanwhile, summer invites bolder colors like corals and bright blues that mirror the vibrant outdoors. As fall approaches, you may find earthy tones such as browns and deep reds more appealing, reflecting the changing leaves. With winter comes richer hues like navy and burgundy that evoke warmth against the cold backdrop. By considering these influences, your nail choices will harmonize seamlessly with the season, enhancing your overall style.

Matching Nail Colors to Seasonal Trends

Clearly, pairing your nail colors with seasonal trends not only enhances your style but also showcases your creativity. As the seasons change, so do the colors that resonate with the mood and atmosphere around you. Staying attuned to these shifts allows you to seamlessly integrate your nails into your overall wardrobe. From refreshing pastels to opulent jewel tones, each season brings with it the opportunity to express yourself through an array of vibrant hues.

Spring: Pastels and Brights

About spring nails, think soft pastels and cheerful brights that reflect the blossoming nature around you. Colors like baby blue, lavender, and hot pink can add that playful joy to your look. These shades not only embody the spirit of renewal but also complement floral patterns and lighter fabrics that dominate your spring wardrobe.

Summer: Bold and Vibrant Shades

Seasonal selections for summer are all about embracing bold, saturated colors. Bright reds, sunny yellows, and electric blues can make a striking statement against your sun-kissed skin. These vivacious hues exude energy, perfectly matching your adventurous summer outings and flirty outfits.

Considering summer’s intense heat, opt for long-lasting formulas that resist chips and fading. You want your nails to stay vibrant even through beach days and late-night barbecues. Pairing your bold nail shades with printed dresses or denim shorts makes it easy to evoke a fun, carefree vibe. Don’t shy away from incorporating nail art or patterns to elevate your look even further.

Fall: Rich and Earthy Tones

Colors for fall transition into warm, earthy tones that reflect the changing leaves. Think deep burgundy, burnt orange, and olive green that harmonize beautifully with the essence of autumn. These shades can easily complement your layering pieces and cozy fabrics, enhancing your seasonal aesthetic.

But fall doesn’t have to be limited to muted hues; consider mixing in metallics or a pop of color! Rich jewel tones, like emerald and sapphire, can accentuate both casual and formal outfits. Layering textures and patterns allows you to create a cohesive look that showcases your individual style while remaining in tune with the season.

Winter: Dark and Jewel Tones

Below, winter calls for deep, luxurious shades, such as midnight blue, plum, and rich gold. These colors not only feel sophisticated but also reflect the coziness of the season. Dark hues can be especially flattering against the stark winter landscape and pair wonderfully with your winter wardrobe of heavy knits and tailored coats.

Brights during winter can beautifully contrast against the monochrome tones often seen in winter fashion. Incorporating jewel tones can brighten your overall look while providing a lavish finish to your nails. So whether you’re attending a holiday party or simply enjoying the season, let your nails shine with opulence while staying cohesive with your outfits.

Nail Art Inspiration for Each Season

After selecting the perfect colors for your seasonal wardrobe, it’s time to draw inspiration from the essence of each season. Vibrant florals for spring, sun-soaked designs for summer, warm earthy tones for fall, and icy motifs for winter can all elevate your look. By integrating nail art that reflects seasonal themes, you ensure that your nails remain a stylish extension of your fashion choices, serving as the finishing touch to your overall aesthetic.

Seasonal Patterns and Designs

One exciting way to enhance your nail art is by incorporating seasonal patterns and designs. Think playful polka dots for spring, palm leaves for summer, plaids for fall, and snowflakes for winter. These seasonal motifs can not only coordinate beautifully with your outfits but also express your personal style and creativity. Let your nails be a canvas that tells the story of the changing seasons!

Incorporating Textures and Finishes

By exploring different textures and finishes, you can add depth and dimension to your seasonal nail art. Matte topcoats, glossy finishes, or even glitter overlays bring a unique flair to your designs, allowing you to personalize your nails while keeping them in line with seasonal trends.

Textures play a vital role in nail aesthetics and can elevate even the simplest designs. Consider adding a matte finish to a rich winter color for an elegant touch, or a glossy topcoat over vibrant summer hues for that eye-catching shine. Embellishments like rhinestones or foils can further enhance your seasonal look, making your nails stand out. Experimenting with various textures will not only keep your nail art fresh, but also anchor your style to the seasonal themes you’ll embrace throughout the year.

Tools and Products for Nail Matching

Despite the wide variety of nail products available, selecting the right tools can significantly enhance your nail matching experience. You’ll need necessarys like a high-quality base coat, top coat, and nail files, in addition to nail polishes that align with your season’s color palette. Investing in a good set of brushes and an efficient drying lamp can also elevate your nail art techniques, making your manicures not just stylish but also long-lasting.

Essential Nail Care and Prep

Besides selecting the right colors, preparing your nails is vital for an impeccable look. Start by cleaning your nails thoroughly and trimming any uneven edges. Applying a nourishing cuticle oil will hydrate your cuticles, while a base coat is key to preventing staining and ensuring longevity in your nail color. These foundational steps will help your nails look vibrant and your color choices truly stand out.

Recommended Nail Polishes and Brands

An array of nail polish brands cater to seasonal aesthetics, but a few stand out for their quality and color range. Look for brands like Essie, OPI, and Zoya, which offer seasonal collections that align with the latest trends. Each of these brands provides a wide selection of colors, ensuring that you will find the perfect match for your wardrobe. You’ll find that their formulas deliver excellent coverage and durability, allowing you to flaunt your customized look with pride.

Hence, choosing nail polishes from these reputable brands not only enhances your style but also aligns your nails with seasonal moods. With a reputation for quality, these brands often release limited editions that perfectly capture seasonal colors, ensuring you can keep your nails fresh and relevant. Explore their collections and experiment with textures like matte or glossy finishes to create unique looks tailored to your complete outfit.

Tips for Maintaining Nail Color Throughout the Seasons

Unlike your wardrobe, your nail color can be a canvas for seasonal expression that lasts. To keep your nails vibrant:

  • Apply a quality base coat to prevent chipping.
  • Use a top coat for added shine and protection.
  • Keep your nails moisturized to prevent dryness.
  • Limit exposure to harsh chemicals and prolonged water contact.
  • Reapply nail polish and top coat every week for longevity.

The more effort you put into maintaining your nails, the more they’ll enhance your seasonal style. For inspiration, check out Autumn is Nature’s Way of Showing Off—Your Nails ….

Protection Against Seasonal Elements

Color can fade and chip due to seasonal conditions like dry air or humidity. Shield your nails from these elements by wearing gloves during harsh weather and using hand creams that nourish and protect while locking in moisture. If you’re in an environment with changing temperatures, be mindful of how your nails react and adjust your routine accordingly.

Regular Maintenance and Touch-Ups

Protection isn’t just about external factors; it also involves regular upkeep of your nails. To maintain a polished look, schedule routine manicures or do touch-ups at home every week. This ensures chips and cracks are addressed promptly, keeping your nails looking fresh and vibrant.

Indeed, regular maintenance goes beyond just applying polish. You should also file your nails regularly to prevent breakage and to maintain their desired shape. Incorporate moisturizing treatments into your routine to nourish and strengthen your nails, and consider using a strengthening base coat to protect against seasonal wear and tear. By investing a little time into maintaining your nails, you can enjoy their beauty throughout the season.

To wrap up

From above, it’s clear that matching your nails to your seasonal wardrobe enhances your overall style. By paying attention to color palettes, incorporating trends, and selecting nail art that reflects your fashion choices, you can create a cohesive look. As you transition between seasons, rotate your nail polish shades and designs to align with the mood of your outfits. This way, you can express your personality and keep your style fresh and exciting all year round.

FAQ

Q: How do I choose nail colors that complement my seasonal wardrobe?

A: To choose nail colors that complement your seasonal wardrobe, start by analyzing the primary colors in your clothing for that season. For spring, light pastels and vibrant hues work well, while summer is perfect for bold and bright colors. In autumn, opt for earthy tones and deep shades, and for winter, consider rich, dark colors and metallics. Look for shades that echo the tones of your clothing or mix in hues that contrast for a fashionable pop.

Q: What are some tips for coordinating nail art with seasonal outfits?

A: Coordinating nail art with seasonal outfits can be fun and creative. For example, during spring, floral designs or abstract patterns in pastel colors can enhance a fresh look. Summer might call for bright geometric designs or beach-themed art. In fall, try incorporating leaf motifs or warm gradients, while winter designs can include snowflakes, holiday themes, or glitter. Just ensure the colors and patterns echo or contrast wisely with your wardrobe for a cohesive style.

Q: Are there specific nail finishes that work better for certain seasons?

A: Yes, different nail finishes can enhance your seasonal style. In spring and summer, a glossy or high-shine finish feels vibrant and fresh. Matte finishes can offer a chic and stylish alternative for fall and winter, providing depth and a modern touch. Glitter and metallic finishes are perfect for winter festivities, while sheers and creams are ideal for a light summer vibe. Choosing the right finish can elevate the overall look of your nails alongside your outfits.

Q: How can I maintain my nail color throughout the season?

A: To maintain your nail color throughout the season, start with a good base coat to protect your nails and help the color adhere better. After applying your chosen nail color, finish with a top coat for shine and longevity. Additionally, consider using quick-dry formulas or gel polishes that resist chips and fading. Regular touch-ups and moisturizing your hands and cuticles can also keep your nails looking fresh and vibrant as you transition through seasonal outfits.

Q: Is it okay to mix and match nail colors with different seasonal outfits?

A: Absolutely! Mixing and matching nail colors with different seasonal outfits can showcase your personal style. It’s an opportunity to experiment with trends and express your creativity. Don’t hesitate to mix seasonal colors or use accent nails with contrasting shades to add uniqueness. Just ensure that the final combination feels balanced and enjoyable to you. Have fun with the process, allowing your nails to reflect your mood and personality throughout the season!

Creating Galaxy Nails – A Step-by-Step Guide

Most people admire the beautiful and mystical look of galaxy nails, but you can easily create this stunning design at home with a little practice. In this informative guide, you’ll learn step-by-step how to achieve the mesmerizing hues and sparkles of the universe on your fingertips. With just a few tools and some creativity, your nails will become a canvas for cosmic art. For additional inspiration, check out How To: Galaxy Nails ⋆ Beauty Nerd By Night for tips and tricks!

Key Takeaways:

  • Preparation: Start with clean, dry nails and apply a base coat to ensure a smooth application and enhance longevity.
  • Blending Colors: Use a sponge to dab on vibrant colors like purples, blues, and blacks to create a cosmic gradient, blending them for an ethereal look.
  • Finishing Touches: Add glitter or star stickers for added dimension, and seal the design with a top coat for a glossy finish.

Necessary Materials

Before you start creating your galaxy nails, make sure you have all the necessary materials on hand. Gather the right colors, tools, and additives that will bring your cosmic designs to life. For a helpful visual guide, check out this Easy Galaxy Nail Art Tutorial 💫 that showcases the necessarys you’ll need to get started.

Base Coats and Colors

Necessary base coats and colors form the foundation of your galaxy nail art. You should have a clear base coat to protect your nails, as well as a selection of dark shades like deep navy or black to create the backdrop of your galaxy. Additionally, vibrant hues like purples, blues, and pinks will help mimic the beauty of the universe. Investing in high-quality nail polishes will ensure your design shines bright.

Nail Art Tools

The tools you use will significantly impact the precision and detail of your galaxy nails. Essential tools include a dotting tool, makeup sponges, and nail brushes for creating intricate designs. A fan brush can be particularly effective for blending colors, while striping tape can help you achieve clean edges and lines. The right tools allow you to express your creativity and achieve stunning results in your nail art.

Hence, choosing the appropriate tools will enhance your artistry and improve your overall experience in creating galaxy nails. Tools such as sponges for blending colors or dotting tools for adding star-like details will elevate your designs. Don’t shy away from experimenting with different products to find what works best for you and your preferred style. With the right tools, you’ll be well on your way to achieving a splendid galaxy nail look.

Preparing Your Nails

Assuming you want your galaxy nails to look stunning, the first step is preparing your nails properly. This ensures a smooth application and helps your design last longer. Start by removing any old nail polish and gently pushing back your cuticles. Clean the nail beds thoroughly to eliminate any oils or residue to give your manicure a flawless base. Once your nails are ready, you can focus on maintaining their health to enhance the overall polish appearance.

Nail Care Routine

Preparing your nails also involves establishing a regular nail care routine. This includes moisturizing your cuticles and applying a strengthening treatment if needed. Keep your nails trimmed and shaped consistently to maintain their strength and aesthetics. Making this part of your routine means your nails will be healthier and more resilient, providing the perfect canvas for your galaxy nail art.

Applying the Base Coat

For a perfect application of your galaxy nails, applying a high-quality base coat is important. The base coat not only protects your nails from staining but also helps the polish adhere better and last longer. It creates an even surface that allows your creative designs to shine through.

Applying a base coat is simple but vital for achieving the best results. After your nails are clean and dry, apply a thin layer of base coat, ensuring you cover the entire nail evenly without flooding the cuticles. Allow it to dry completely before moving on to your nail art. This way, you provide the perfect foundation for vibrant colors, which enhances the overall look of your galaxy design.

Creating the Galaxy Effect

Unlike regular nail art, achieving a galaxy effect requires a blend of vibrant colors and textures to mimic the beauty of the cosmos. Start with a dark base color, such as black or deep blue, to represent the night sky. Then, layering various shades will give your nails that stunning, otherworldly appearance. This process involves creativity and patience, but the results will be nothing short of stellar.

Color Application Techniques

Against using a single brush throughout your design, consider employing different tools, like sponges or nail dotters, to apply your colors. Sponging allows you to create soft transitions between hues, while dotters can be used for creating the shimmering stars scattered across your galaxy. Mixing these techniques will enhance the overall effect and add dimension to your nails.

Blending Colors for Depth

Galaxy nail design relies on how effectively you blend colors for depth and richness. Start by layering lighter colors over darker ones, allowing some of the base to peek through. This method creates an illusion of space and gives your design a dynamic quality that captivates the eye.

At this stage, don’t hesitate to experiment with various color combinations; your palette can include purples, blues, pinks, and whites. Use a makeup sponge to dab on layers of color, lightly blending them together as you go. Aim for a gradient effect where colors transition smoothly into each other, mimicking the vastness of outer space. By varying pressure and sponge placement, you’ll achieve a multi-dimensional look, providing depth that resembles swirling galaxies.

Adding Stars and Highlights

All you need to do now is add some fun stars and highlights to your galaxy nails. This last step will truly bring your design to life. Whether you prefer tiny dots replicating stars or sparkly accents, your galactic theme will shine. Gather your tools and prepare to add those magical details that will elevate your nail art.

Dotting Techniques

Beside using a fine brush, dotting tools can help you create perfect little stars across your nails. You can utilize different sizes of dotting tools to achieve various star sizes. Start by dipping your dotting tool into white or silver polish, and gently press it onto your nails to form stars, clusters, or even constellations.

Using Glitter and Foils

Highlights like glitter and foils can add the finishing touch to your galaxy nails, giving them a twinkling effect that mimics the night sky. Applying these elements strategically will enhance the overall cosmic impact.

Stars often complement the deep hues of your galaxy nails exquisitely. To achieve this, sprinkle fine glitter over your wet polish for a more uniform shine, or use larger glitter particles for added texture. Foil pieces can be added sparingly for a striking contrast; simply tear small bits and press them onto the tacky surface of your design. These accents will create dimension, making your nail art truly out of this world!

Finishing Touches

Despite the vibrant galaxy design already on your nails, finishing touches bring everything together. This final layer enhances the shine and preserves the intricate work you’ve done. By following these simple steps, you’ll ensure your galaxy nails not only look stunning but also last longer. Let’s examine the details!

Top Coat Application

Along with making your galaxy nails shine, applying a quality top coat is important for protecting your artwork. Choose a gel or regular top coat, and apply it gently over your design using smooth strokes. This step seals everything in, enhancing the depth of colors and adding a glossy finish to your nails.

Drying and Curing Times

Among the different finishes, drying and curing times can vary significantly depending on the products used. If you’re using traditional polish, allow your nails to air dry for at least 30 minutes. If you opt for a gel top coat, follow your product’s instructions for curing, typically 60-90 seconds under a UV/LED lamp.

Coat your nails thoroughly, as the right drying or curing time ensures that your design sets perfectly, preventing smudging or chipping. Patience is key; rushing through this step may compromise your beautiful galaxy nails. If you’re using a gel top coat, ensure the lamp is properly maintained for optimal results. Allowing sufficient drying time will extend the life of your manicure, keeping your galaxy nails looking fresh and vibrant for days to come.

Care and Maintenance of Galaxy Nails

Many factors can affect the longevity of your galaxy nails, so it’s important to implement proper care and maintenance. Regularly moisturizing your hands and cuticles will help keep your nails healthy and prevent breakage. Additionally, avoid harsh chemicals and detergents that could wear down your vibrant designs. A topcoat applied every few days can also protect your nail art while providing a beautiful shine, ensuring your galaxy nails remain stunning for as long as possible.

Protecting Your Design

With a few simple precautions, you can protect your galaxy nail design from wear and tear. Wearing gloves while doing chores, like washing dishes or cleaning, helps shield your nails from potential damage. Additionally, steer clear of activities that could cause accidental chips or impacts. Taking these steps will contribute to the longevity of your stunning nail art.

Repairing Chips and Damage

Nails are not immune to wear, and chips or damage may occur over time. To quickly fix any imperfections, you can use a small amount of nail polish that matches your design. Gently apply it to the affected area while blending it into the surrounding polish. Finish with a topcoat to seal the repair and restore the glossy finish.

Chips can detract from the overall beauty of your galaxy nails, but they are easily fixable. For larger areas of damage, consider applying a sponge technique to replicate the galaxy effect, gently blending colors to match your original design. Once you’re satisfied with the touch-up, ensure you coat the repaired area with a topcoat for protection. This simple upkeep strategy helps maintain the stunning visual appeal of your galaxy nails even as they endure daily wear.

To wrap up

Following this step-by-step guide, you can easily create stunning galaxy nails that showcase your creativity and skill. By gathering the right materials and carefully layering colors, you’ll achieve a beautiful cosmic effect anyone would admire. Don’t hesitate to experiment with different shades and designs to make your galaxy nails truly unique to your style. Enjoy the process and the compliments that are sure to come your way!

FAQ

Q: What materials and tools do I need to create galaxy nails?

A: To create stunning galaxy nails, you will need the following materials: a base coat, black nail polish (or dark blue/purple), various nail polishes in cosmic colors (such as white, pink, blue, and purple), a makeup sponge, a top coat, and optional glitter or star decals. Tools include a small brush or dotting tool for finer details and a sponge for blending colors.

Q: How do I prepare my nails for galaxy nail art?

A: Start by prepping your nails through filing and shaping them to your desired length. Next, push back the cuticles gently and cleanse your nails with nail polish remover to eliminate any oils. Apply a base coat to protect your natural nails and allow it to dry completely before proceeding with the galaxy design.

Q: Can I create galaxy nails without using a sponge?

A: While using a makeup sponge is a common technique for applying the blend of colors seamlessly, you can also use a brush or your fingers to dab on the colors. However, using a sponge tends to give a softer gradient effect, which is ideal for mimicking a galaxy. If you prefer not to use a sponge, be sure to tap lightly for the best result.

Q: What techniques should I use to get the best blend of colors on my nails?

A: To achieve a beautiful color blend for galaxy nails, start with a layer of dark polish as your base. Once dry, apply the chosen colors to your sponge, ensuring they are layered next to each other without much overlap. Dab the sponge onto your nail, rotating it as you go to create a more natural, blended effect. You can repeat this process with additional layers until you achieve the desired intensity.

Q: How can I make my galaxy nails last longer?

A: To ensure your galaxy nails stay vibrant and chip-free, always begin with a good base coat that protects your nails. After applying your galaxy design, seal it with a high-quality top coat to provide shine and durability. Avoid exposing your nails to harsh chemicals and wear gloves while doing chores. Additionally, apply the top coat every few days for ongoing protection and to maintain the shine.

How to Add Rhinestones to Your Nail Designs

Rhinestones can transform your nail designs into eye-catching masterpieces that stand out. By incorporating these sparkling embellishments, you can elevate your manicure and showcase your unique style. In this post, you’ll learn practical tips and techniques to effectively add rhinestones to your nails, ensuring they stay in place and look fabulous. For a step-by-step guide, check out How to Attach Rhinestones to Nails: 13 Steps (with Pictures). Get ready to shine with your stunning nail art!

Key Takeaways:

  • Choose the right size: Select rhinestones that complement the nail design and the size of the nails for a balanced look.
  • Adhesive options: Use a strong nail adhesive or gel to securely attach rhinestones, ensuring they last longer without easily falling off.
  • Placement techniques: Experiment with different placements, like accent nails or patterns, to enhance your overall nail design creativity.

Choosing the Right Rhinestones

For creating stunning nail designs, selecting the right rhinestones is vital. The variety available in terms of colors, sizes, and finishes allows you to personalize your look. Consider the overall aesthetic you want to achieve and how the rhinestones will complement your base colors and patterns. Your choice can elevate a simple design into a dazzling statement piece.

Types of Rhinestones

With different types of rhinestones on the market, you can choose options that best fit your style. Here are some popular types:

  • Glass rhinestones
  • Acrylic rhinestones
  • Crystal rhinestones
  • Flatback rhinestones
  • Self-adhesive rhinestones

This makes it easy to find the perfect option for your nail art project.

TypeCharacteristics
GlassBrilliant shine, durable
AcrylicLightweight, budget-friendly
CrystalHigh-quality, premium shine
FlatbackEasy to apply, versatile
Self-adhesiveNo glue needed, convenient

Sizing Considerations

About choosing the right size of rhinestones, it is important to consider the scale of your nail design. Going for oversized stones can create a bold statement, while smaller options can add subtle elegance. Evaluate how the size aligns with the rest of your nail art to achieve a balanced look.

Rhinestones come in various sizes typically measured in millimeters. For nails, popular sizes range from 1mm to 5mm, depending on the detail you wish to portray. Make sure to assess your nail shape and design style to ensure that the rhinestones you choose enhance your overall look rather than overpower it. Mixing different sizes can also create an eye-catching effect, helping you to achieve the perfect design.

Preparing Your Nails

While getting your nails ready for rhinestone embellishments, it’s necessary to ensure they are clean and well-maintained. Start with removing any previous nail polish and gently push back the cuticles. Trim and file your nails to your desired shape, ensuring they are smooth and even. This preparation not only gives a polished look but also provides a clean canvas for the rhinestones to adhere to, enhancing the overall outcome of your nail design.

Nail Care Basics

By focusing on nail care basics, you lay the foundation for a great rhinestone design. Keep your nails well-hydrated by applying cuticle oil regularly, as this promotes healthy growth and strengthens your nails. Additionally, using a gentle scrub can help remove dead skin around the nails, ensuring a fresh appearance.

Selecting a Base Color

Selecting your base color is an important step in nail design. Choose a shade that complements the rhinestones you plan to use, as this will enhance the overall look of your nails. A neutral color can provide a chic backdrop, while bold shades can make your rhinestones pop.

At the same time, consider your personal style and the occasion when choosing your base color. Lighter shades such as pastels or whites create an elegant look, making them ideal for special events. Conversely, vibrant colors like reds or blues can add a fun and playful touch. Test a few swatches on your nails to ensure you’re happy with your color choice before proceeding with the rhinestones.

Tools and Materials Needed

Unlike other nail art techniques, adding rhinestones requires specific tools and materials to achieve the best results. You will need quality rhinestones in various sizes and shapes, a reliable adhesive, and nail tools like a picker or dotting tool to help place the stones precisely. Additionally, consider having a clean-up brush and a top coat to secure your design and provide a professional finish.

Essential Tools

At the very least, you will need a rhinestone picker tool, which makes it easier to handle small gems, and a dotting tool for precise placement. Nail tweezers can also be helpful to pick up and position your rhinestones accurately without any mess. A clean-up brush is useful for tidying up any excess adhesive around the rhinestones.

Recommended Adhesives

Any strong adhesive that can hold your rhinestones in place is suitable for nail designs. Some popular choices include nail glue, gel top coat, or clear-drying craft glue. Each type offers unique benefits, allowing for flexibility in your designs.

For instance, nail glue provides a strong hold and is specifically formulated for use on nails, ensuring your rhinestones stay in place longer. Gel top coat not only attaches rhinestones but also adds a glossy finish to your designs. Clear-drying craft glue is a great option if you’re looking for something more accessible, but ensure it is safe for use on nails to avoid any damage. Choose the adhesive that best fits your crafting style and the durability you desire.

Techniques for Applying Rhinestones

All nail designs can benefit from the strategic application of rhinestones. Whether you want a simple accent or an intricate pattern, understanding these techniques will help elevate your nail game. Choose the method that suits your style and skill level, and let your creativity shine by embedding these sparkling gems into your manicures.

Simple Placement Methods

Along with traditional nail polish, you can easily incorporate rhinestones into your designs using straightforward placement methods. Start by selecting a nail glue or a gel base coat, apply a tiny dot onto your nail, and carefully place each rhinestone where you want it. Use a toothpick or rhinestone picker for precision, and finish with a top coat to secure your design.

Advanced Design Techniques

Techniques for advanced design allow you to create stunning, eye-catching patterns using rhinestones. You can achieve elaborate artistry by employing tools and methods that require more skill but yield beautiful results. Consider trying out the following techniques:

Advanced Design Techniques

  1. Gradient Placement: Mix sizes and colors for a blended effect.
  2. Negative Space: Create designs that leave parts of the nail unembellished.
  3. Layering: Stack multiple rhinestones for depth.
  4. Geometric Patterns: Arrange stones in precise, angular designs.
  5. 3D Shapes: Combine rhinestones with other embellishments for a multidimensional look.

With these advanced techniques, you can craft unique nail art that captures attention. Combining your skills with creativity opens up a world of possibilities in rhinestone design. You can start by selecting a geometric shape, carefully mapping out your design on paper, and then translating it onto your nails with rhinestones. This strategic approach makes the process manageable and enjoyable.

Steps for Advanced Design Techniques

  1. Sketch your desired design on paper.
  2. Gather rhinestones of various sizes and colors.
  3. Practice the layout with dotting tools before applying glue.
  4. Use a top coat to seal and protect your design.
  5. Experiment with placement for personalized style.

Aftercare for Rhinestone Nails

Not properly caring for your rhinestone nails can lead to premature peeling and loss of your dazzling accents. To extend the life of your design, avoid exposing your nails to excessive water and harsh chemicals. Use gloves when doing dishes or cleaning, and be gentle when you wash your hands. Regularly apply a nourishing cuticle oil to keep your nails and the surrounding skin healthy and hydrated.

Maintaining Your Design

On a daily basis, be mindful of how you interact with surfaces. Avoid scraping your nails against hard objects and opt for a light touch when typing or using your phone. This attention will help maintain the integrity of your rhinestone accents, ensuring that they stay sparkling for longer.

Removing Rhinestones Safely

By taking the right approach, you can safely remove rhinestones without damaging your nails. Begin by softening the adhesive used for the rhinestones. You can do this with a generous application of acetone or a special nail polish remover designed for rhinestone removal.

In fact, be sure to soak a cotton ball in acetone and place it over the rhinestones for a few minutes to allow the glue to loosen. Afterward, gently lift the rhinestones with a wooden stick or cuticle pusher. Avoid pulling or yanking, as this can cause damage to your natural nail. Cleanse your nails afterward and apply a nourishing treatment to restore moisture and health to your nails and cuticles.

Creative Design Ideas

Once again, let your imagination run wild with rhinestone nail designs! Combine various shapes and sizes of rhinestones to create stunning patterns or incorporate them into intricate nail art. You can embellish the tips of your nails or create unique designs using negative space. The key is to blend rhinestones with your chosen colors and styles to achieve an overall cohesive look that truly reflects your personality.

Themed Nail Designs

On your journey to fabulous nail art, consider adopting themed designs that resonate with your personality or current occasions. Whether you’re celebrating a holiday, a special event, or just expressing yourself, using rhinestones as accents can elevate your nail art game. Choose colors and shapes of rhinestones that complement your theme for a polished, chic effect.

Mixing and Matching Rhinestones

One of the most exciting aspects of nail design is the ability to mix and match rhinestones. You can create a playful look by combining different colors, sizes, and shapes. This allows you to express your unique style and creativity while ensuring your nail design stands out.

Further, mixing and matching rhinestones opens up endless possibilities for your nail designs. Experiment with contrasting colors and textures to create dynamic patterns. Pair larger stones with smaller ones for an eye-catching effect, or use similar shades for a more subtle approach. Don’t hesitate to explore various placements, layering rhinestones in a gradient or clustering them together for added drama. Your nails can be a canvas for your artistic flair, letting your creativity shine through with every design you create.

Summing up

Now that you’ve learned the steps to add rhinestones to your nail designs, you can elevate your nail game with stunning embellishments. Whether you choose to apply a few strategically placed stones or create intricate patterns, the key is to ensure they are securely fixed with the right adhesive. Practice will make perfect, and soon you’ll find yourself experimenting with different sizes and colors to match your personal style. Enjoy the creativity and make your nails truly stand out!

FAQ

Q: What types of rhinestones are best for nail designs?

A: When identifying rhinestones for nail designs, consider the type of adhesive you will be using. Flat-back rhinestones are ideal as they sit well on the nail surface. Crystal or glass rhinestones provide a more glamorous look, while acrylic rhinestones are lighter and can be easier to work with. Additionally, ensure to choose a size that complements the design – smaller sizes for intricate patterns and larger stones as focal points.

Q: How do I properly apply rhinestones to my nails?

A: To apply rhinestones, first, create your desired nail design and allow the base coat to dry completely. Use a dotting tool or a toothpick dipped in nail glue to pick up the rhinestone. Place it gently onto the nail where you want it to stick. Make sure to press down slightly to secure a stronger bond. Once you’ve applied all rhinestones, seal the design with a top coat to protect them and enhance their shine.

Q: Can I use regular nail polish with rhinestones?

A: Yes, you can use regular nail polish with rhinestones. However, for better adhesion and a long-lasting effect, it’s recommended to use a nail glue designed specifically for embellishments. After painting your nails with regular polish, allow it to dry before adding rhinestones to ensure they adhere well. Once you’ve finished your design, apply a top coat to protect both the polish and the rhinestones.

Q: How do I remove rhinestones from my nails without damaging the polish?

A: To safely remove rhinestones, soak a cotton ball in acetone nail polish remover and press it against your nail for a few seconds to loosen the adhesive. Gently peel the rhinestone off using a pair of tweezers or your fingers. If residue is left, you can use a small amount of remover on a cotton swab to clean it up. Be gentle to avoid damaging the underlying nail polish.

Q: Are rhinestones safe to use on natural nails?

A: Yes, rhinestones are safe to use on natural nails if applied correctly. It’s important to apply them using a safe adhesive and avoid excessive pressure when attaching them. Always ensure that you follow up with a top coat to seal the rhinestones and protect your natural nails. If you experience any adverse reactions or discomfort, remove them immediately and consult with a nail professional.

Skip to content