nails

Gradient Nails – A Fresh Look for Every Occasion

Just when you thought your nail game couldn’t get any better, gradient nails come in to add that perfect touch of sophistication and style. This versatile trend allows you to showcase your creativity, matching shades that complement your outfit for any event. Whether you want a subtle blend or a bold statement, gradient nails are your go-to for a refreshed look. To get inspired, check out these 29 Ombré Nail Ideas That Modernize the Colorful Mani and discover how you can elevate your manicure today!

Key Takeaways:

  • Versatility: Gradient nails offer a stunning and customizable style that can suit any occasion, from casual outings to formal events.
  • Color Blending: The technique allows for unique combinations of colors, creating visually appealing transitions that enhance the overall look.
  • Easy Application: With various methods available, gradient nails can be achieved at home or professionally, making them accessible for everyone.

What Are Gradient Nails?

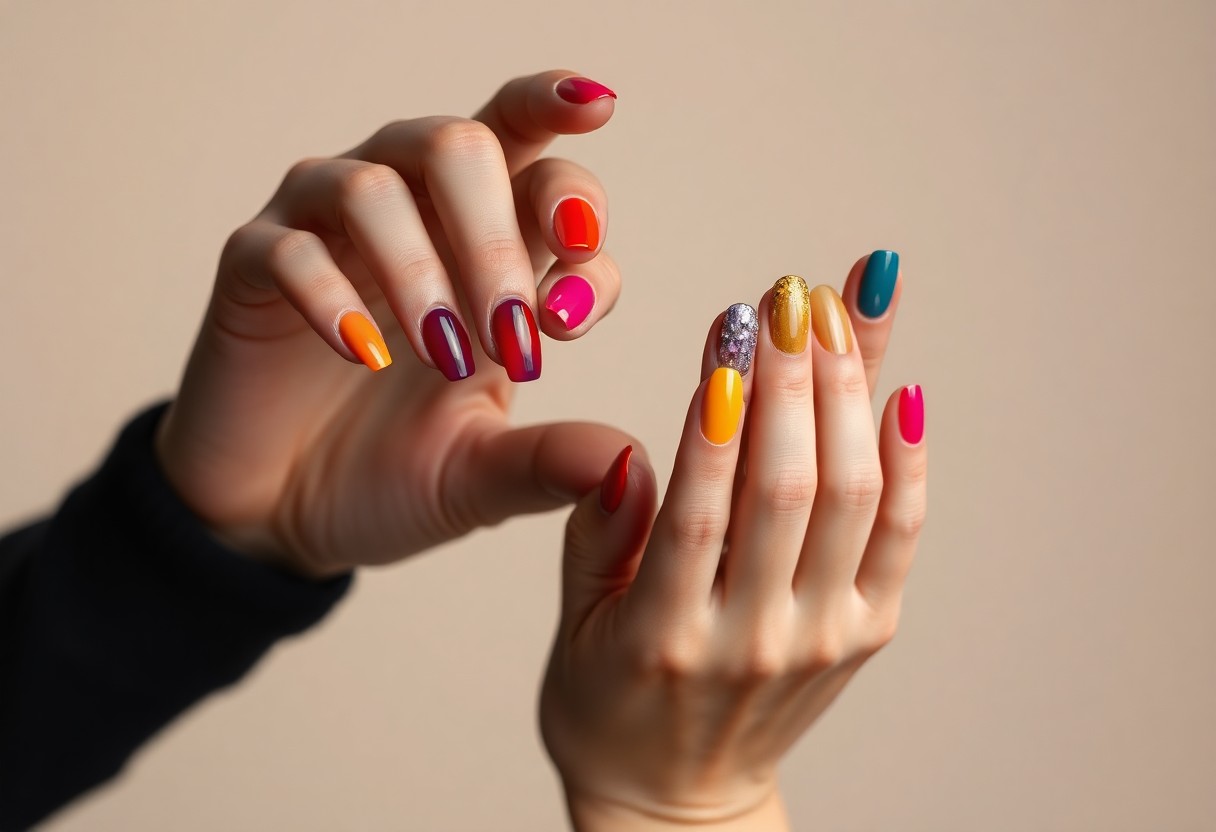
Your nails can be a canvas for creativity, and gradient nails offer a stunning way to showcase your personal style. This trend merges two or more colors that blend seamlessly from one to the next, creating an eye-catching and dynamic effect. Perfect for various occasions, gradient nails can elevate your look while allowing you to express your individuality.

Definition and Overview

Above all, gradient nails, often referred to as ombre nails, are a nail art technique where colors transition smoothly. Typically, this technique features darker shades at one end that gradually blend into lighter shades towards the other, creating a visually appealing gradient effect. The result is a polished and sophisticated look that is versatile enough for both casual and formal settings.

Popular Techniques

Any nail artist can create gradient nails using several popular techniques, including the sponge method, brush blending, and airbrushing. Each method offers a unique approach, allowing you to experiment with various colors, finishes, and styles.

Also, the sponge method is one of the most popular techniques, where you apply selected polish colors onto a cosmetic sponge and dab it onto your nails for a soft gradient. Brush blending involves using a nail art brush to gently mix colors directly on the nail, allowing greater control. For those seeking a more professional finish, airbrushing can create flawless gradients quickly. No matter your preferred technique, you can achieve stunning results that make your nails stand out.

Choosing the Right Colors

One of the most exciting aspects of gradient nails is selecting the right colors that resonate with your personality and the occasion. Consider your wardrobe, skin tone, and even your mood when picking shades. You have the opportunity to create stunning combinations that range from subtle ombres to vibrant blends, allowing you to express yourself uniquely for any event. Don’t hesitate to experiment with both pastel and bold colors to find what works best for your personal style.

Seasonal Color Trends

Seasonal trends can greatly influence your choice of colors for gradient nails. In spring and summer, fresh pastels or bright hues can evoke feelings of warmth and joy, while autumn and winter often call for deeper, more muted tones. By aligning your nail color palette with the current season, you not only stay trendy but also enhance the overall aesthetic of your look.

Complementary vs. Contrasting Colors

For your gradient nails, it’s important to understand the difference between complementary and contrasting colors. Complementary colors sit opposite each other on the color wheel, creating a harmonious blend. In contrast, you can choose colors that are adjacent for a seamless look or opt for stark contrasts to make a bold statement. Both approaches can yield beautiful results, depending on the vibe you want to achieve.

A well-thought-out color strategy can significantly elevate your gradient nails. When you use complementary colors, you create a soft transition that is pleasing to the eye, making it perfect for events that call for elegance and sophistication. On the other hand, contrasting colors can deliver a striking and edgy look, ideal for making a statement at parties or casual gatherings. Consider the mood and setting when deciding on your color mix, and don’t hesitate to play around with different combinations to find what resonates with you.

Tools and Materials Needed

Once again, achieving the stunning gradient nail effect requires some crucial tools and materials. You’ll need a few key items to ensure your nails look flawless for any occasion. Gather your nail polish, sponge, a base coat, top coat, and any additional tools like tape or a dotting tool to create clean edges and enhance your design. With these supplies on hand, you’re ready to start your gradient journey!

Essential Nail Art Supplies

Tools for creating gradient nails are quite simple. You’ll need quality nail polishes in your desired colors, a makeup sponge for blending, and base and top coats to ensure longevity and shine. Additionally, having a nail file, cuticle pusher, and possibly some stencils or tape can help achieve precise lines and clean outcomes. Having these crucials will make your nail art process smooth and enjoyable.

Recommended Brands and Products

Around the world of nail art, there are several brands that stand out for their quality and ease of use. Popular choices include O.P.I, Essie, and Zoya for their vibrant colors and smooth application. You might also want to try makeup sponges from reputable beauty brands to ensure they effectively blend your polishes. These products will elevate your gradient nails to the next level.

In fact, experimenting with different brands can help you discover the best formulation for your gradient techniques. You’ll find that some polishes blend more seamlessly, while others may have better staying power. Trying out various top and base coats can also make a significant difference in the overall finish and durability of your nail art. So, don’t hesitate to explore and find what works best for you!

Step-by-Step Guide to Applying Gradient Nails

Despite the seemingly intricate process, achieving beautiful gradient nails is straightforward and fun. Follow these steps to create a stunning look that works for any occasion.

StepAction
1Preparation and Base Coat
2Gradient Application Techniques
3Top Coat Finish

Preparation and Base Coat

Behind every great manicure is proper preparation. Begin by cleaning your nails and pushing back the cuticles. Apply a quality base coat to protect your nails and create a smooth canvas for the gradient effect.

Gradient Application Techniques

Step-by-step, you can create seamless gradient nails using various techniques. The most popular methods include the sponge technique and the brush technique, allowing you to customize your look.

Plus, using the sponge technique, you can easily blend two or more nail polish colors. Simply apply each polish in stripes on a makeup sponge, dab it onto your nails, and repeat until you achieve your desired blend. The brush technique, on the other hand, entails using a nail art brush to manually blend colors directly onto your nail. Experiment with both methods to find which one gives you the gradient you love most!

Maintenance and Care for Gradient Nails

For maintaining your stunning gradient nails, it’s imperative to implement a proper care routine. Regularly moisturize your cuticles and hands to keep your nails healthy and the gradient looking fresh. You can check out this link on First time doing gradient nails. How did I do? for additional tips from the community. Keeping your nails clean and avoiding harsh chemicals will also contribute to their longevity.

Tips for Longevity

Between applying top coats and avoiding excessive wear, here are some tips to extend the life of your gradient nails:

  • Use a high-quality top coat to seal your design.
  • Avoid using your nails as tools to minimize chipping.
  • Wear gloves while doing chores to protect your nails.

The more care you provide, the longer your gradient nails will stay vibrant.

How to Fix Common Issues

Beside proper maintenance, you might encounter some common issues with your gradient nails. If you experience smudging or fading, consider applying a fresh coat of clear polish over the design to restore its appearance. In case of chipping, use a small amount of polish to touch up the affected area as closely as possible to the original gradient.

Care for your gradient nails involves acting promptly to maintain their beauty. If uneven blending occurs, gently sponge over the area to correct it. For those pesky bubbles, lightly file the surface after polishing and reapply a top coat to level it out. Your attention to these details can keep your nails looking their best.

Gradient Nails for Different Occasions

Keep your style versatile with gradient nails, as they can elevate your look for any event, from casual outings to formal celebrations. Choose color combinations that suit the mood and setting, allowing you to express your personality while keeping your nails on-trend.

Everyday Looks

By opting for subtle gradient designs in soft pastels or neutral shades, you can create everyday looks that enhance your overall vibe without being overpowering. These understated styles are both chic and appropriate for any day-to-day setting, whether at work or during errands.

Special Events and Celebrations

Across various special occasions, gradient nails offer a stunning way to complement your outfit. Bold colors and intricate transitions can transform your look for parties, weddings, and festive gatherings. Whether you prefer glitter accents or vibrant hues, gradient nails are a fantastic choice to add a touch of elegance.

Consequently, choosing gradient nails for celebrations allows you to play with colors and techniques that reflect the energy of your events. Think about using metallic shades or a bold ombre effect to turn heads at your next gathering. Matching your nail colors with your outfit can enhance your look, creating a cohesive style that showcases your attention to detail and flair for fashion.

To wrap up

So, if you’re looking to elevate your nail art game, gradient nails offer a fresh look that can suit any occasion. From subtle to bold, this technique allows you to express your personality and creativity through color blending. Explore different color combinations to find your perfect match, and don’t shy away from experimenting. For some stunning inspiration, check out this Stunning Deep Purple to Lilac Gradient Nails for Every … to spark your next manicure idea!

Q: What are gradient nails and how are they created?

A: Gradient nails, often referred to as ombre nails, are a nail art technique that blends two or more colors seamlessly for a soft transition effect. This look can be achieved using various methods, such as a makeup sponge to dab colors onto the nail, or through the use of nail brushes for a more controlled application. The colors typically blend from light to dark or from one shade to another, allowing for endless creativity in design.

Q: What occasions are best suited for gradient nails?

A: Gradient nails are versatile and can be styled for numerous occasions. They are perfect for casual outings, formal events, weddings, and seasonal festivities. The beauty of gradient nails is that they can be customized to suit different themes and personal styles. For example, lighter pastel gradients can evoke a playful, spring vibe, while deeper jewel tones can add sophistication for evening affairs.

Q: How can I maintain my gradient nails for lasting wear?

A: To ensure your gradient nails maintain their fresh look, applying a high-quality top coat is important, as it not only enhances the shine but also protects against chipping. Additionally, moisturizing your hands and cuticles can help prevent any peeling or damage to the nails. It’s advisable to avoid prolonged exposure to water and harsh chemicals, as they can cause wear and tear on the design. Regular touch-ups with the top coat can also prolong the vibrancy of the gradient effect.

Foil Nails – The Latest Must-Try Trend

You can elevate your manicure game with the latest trend in nail art: foil nails. This innovative technique adds a touch of glamour and sophistication, making it a perfect choice for any occasion. Whether you prefer metallic, holographic, or colorful foils, the options are endless. If you’re eager to stay ahead of the beauty curve, check out how to Embrace the Autumn 2024 Nail Trends in Style | ADORA NAIL and incorporate foil nails into your next look!

Key Takeaways:

  • Versatile Designs: Foil nails allow for a variety of creative designs, ranging from bold patterns to subtle accents.
  • Easy Application: The application process is straightforward, making it accessible for both professionals and DIY enthusiasts.
  • Long-lasting Shine: Foil nails provide a unique reflective finish that enhances durability and eye-catching appeal.

What Are Foil Nails?

The latest beauty trend taking the nail art world by storm is foil nails. This technique involves applying metallic, reflective foil to your nails, creating a dazzling finish that captures attention. Foil nails can be designed in various styles, from minimalist accents to full coverage, allowing you to express your creativity while flaunting a luxurious look. With their shiny and unique appearance, foil nails are perfect for any occasion, whether you’re dressing up for a night out or just want to add some flair to your everyday look.

Definition and Overview

Behind the captivating appearance of foil nails lies a simple yet innovative application process. Foil nails typically involve using adhesive glue, allowing metallic foil sheets to stick seamlessly onto your nail surface. The result is a glossy, eye-catching finish that enhances your manicure. Whether you prefer gold, silver, or vibrant hues, foil nails elevate your style and provide a striking contrast to traditional nail polish.

History and Evolution

Behind the modern fascination with foil nails is a long history of experimenting with nail art techniques. Foil has been used in cosmetics for decades, initially seen in designs on theatrical and runway models. Over time, the craft has evolved, making its way into everyday beauty routines. You may even recall the emergence of metallic nail polishes, which paved the way for the more intricate foil application techniques we see today. As nail art gained popularity through social media, foil nails quickly became a favorite, showcasing your personal style and pushing the limits of nail creativity.

Consequently, the evolution of foil nails reflects not only shifts in beauty trends but also advancements in nail technology. The introduction of specialized foil adhesives and diverse foil designs has made it easier for you to achieve stunning results at home or in a salon. As nail artists continue to innovate, you’re likely to see even more exciting variations of foil nails emerge, solidifying their status as a must-try trend in the world of nail art.

Types of Foil Nails

You can explore a variety of stunning foil nail designs that can enhance your manicure. Here are some popular types:

Chromo FoilProduces a mirror-like finish.
Matte FoilGives a sophisticated, non-reflective look.
Patterned FoilFeatures unique designs, perfect for customization.
Color FoilA variety of colors for bold statements.
Transparent FoilAdds elegance without overpowering your base color.

The Nails with Foil trend offers endless creativity to showcase your style.

Metallic Foil Variations

Against the shimmering options, metallic foil variations provide a luxurious touch to your nails, often available in gold, silver, and rose gold shades. These options are perfect for creating bold and eye-catching designs, ensuring that your nails stand out from the crowd.

Glitter and Holographic Foils

Foils combined with glitter or holographic features add a sparkle that is hard to resist. These options reflect light in fun ways, making your nails shimmer and shine from every angle. Perfect for festive occasions or simply expressing your unique style, these foils elevate your manicure to new heights.

At any event, using glitter and holographic foils turns heads and captures attention with dazzling effects. The dynamic shimmer trails can transform simple nail art into striking masterpieces, making them an crucial choice for those seeking to express creativity through their nails.

Application Techniques

Now that you’ve embraced the foil nail trend, mastering the application techniques is key to achieving that stunning finish. Whether in a salon or at home, the right approach will ensure your foil nails stay vibrant and beautiful. You’ll want to prep your nails properly, using a base coat to not only protect your natural nails but also to help the foil adhere better. With a steady hand and a little practice, you can flaunt foil nails that are sure to turn heads.

Salon Methods

One of the best ways to achieve flawless foil nails is by visiting a professional salon. Experienced nail technicians use specialized tools and techniques to apply the foil accurately and evenly. They typically start with a clean nail, apply base and color coats, and then carefully lay the foil, ensuring it’s perfectly crafted to your desired design. This method not only guarantees longevity but also gives you access to professional-grade products.

DIY at Home

After understanding the salon methods, you might be tempted to try foil nails in the comfort of your home. With the right tools and materials, you can create stunning designs just like the professionals. Investing in good quality foil, adhesive, and a steady topcoat will help you achieve salon-worthy results without the appointment.

Even if you’re new to nail art, starting your DIY foil nails journey can be both fun and rewarding. To begin, gather your supplies: nail polish in your chosen colors, nail foil, adhesive, a small brush, and a topcoat. Ensure your nails are clean and shaped before applying a base coat. After allowing it to dry, apply the adhesive where you’d like the foil to adhere, let it become tacky, and then gently press the foil onto it. Finish with a topcoat for a glossy, protected look. With a bit of practice, you’ll be able to create unique and eye-catching designs that reflect your personal style.

Maintenance and Longevity

Despite their stunning aesthetic, foil nails require proper care for lasting wear. Regular maintenance ensures that your chic look remains intact while also preventing damage to your natural nails. Dedicating a little time to follow specific practices will help enhance their longevity and keep your nails looking fabulous.

Tips for Long-lasting Wear

Below are some tips to ensure your foil nails stand the test of time:

  • Avoid prolonged exposure to water.
  • Use gloves when doing household chores.
  • Limit the use of nail polish removers with harsh chemicals.
  • Apply a top coat regularly to protect the foil.

This attention to detail will significantly increase your foil nails’ lifespan.

Removal Process

Across the board, removing foil nails requires a gentle touch to maintain your natural nail integrity. It’s imperative to avoid peeling or pulling, which can lead to damage. Instead, soak a cotton ball in acetone, place it on the nail, and wrap it with foil. Leave it on for about 10-15 minutes to dissolve the adhesive before gently pushing off the remnants.

Maintenance of your nails during the removal process is just as important as application. The key is to be patient; rushing can lead to breakage or damage to your natural nail bed. Afterward, nourish your nails with a hydrating oil or cream to restore moisture, ensuring they remain healthy post-removal.

Popular Designs and Inspirations

Many nail art enthusiasts are embracing foil nails for their unique and versatile styles. From elegant metallic accents to vibrant color combinations, the possibilities are endless. Popular designs often include marbled effects, geometric patterns, and abstract art that showcase the reflective qualities of foil. Consider mixing various foil colors for a dazzling ombré effect, or try pairing foil with matte finishes for a striking contrast that will turn heads.

Seasonal Trends

About each season brings new opportunities to experiment with foil nails. In autumn, warm golds and copper tones are in vogue as they beautifully complement rich fall colors. Winter is ideal for icy blues and silvers combined with glitter, evoking a frosty wonderland. As spring arrives, pastel shades paired with floral foil designs breathe freshness into your nail art, while summer calls for vibrant hues that capture the sun’s energy.

Celebrity Styles

At the forefront of nail trends, celebrities often set the stage for cutting-edge foil nail art. They frequently showcase stunning designs at red carpet events, offering inspiration for your next manicure. You can adapt their looks to suit your personality, whether through bold colors or delicate, understated styles that exude elegance.

Also, many stars experiment with layering techniques that incorporate different materials alongside foil, such as matte or glossy polishes. Celebrities have also been known to embrace intricate patterns or personalize their foil designs with symbols and motifs that reflect their individuality. By staying tuned in to their styles, you can easily elevate your nail game and make a statement, just like your favorite icons.

Why Choose Foil Nails?

Unlike traditional nail designs, foil nails offer a unique and eye-catching aesthetic that can elevate your overall look. This innovative trend allows you to experiment with various patterns and colors while adding a touch of glamour. Whether you’re attending a special event or simply want to enhance your everyday style, foil nails are a versatile option that will leave your fingertips sparkling and gleaming.

Benefits and Advantages

After trying foil nails, you’ll discover they provide a long-lasting finish that resists chipping, making them perfect for those with a busy lifestyle. In addition to their durability, they offer an endless array of design possibilities, giving you a chance to express your personal style more creatively. You’ll appreciate the ease of application and removal, making foil nails a convenient choice for your nail routine.

Eco-Friendly Options

The beauty industry is evolving, and eco-friendly foil nail options have emerged for those who prioritize sustainability. These alternatives are often made from non-toxic materials, allowing you to enjoy stunning nails without compromising your commitment to the environment. By choosing eco-friendly products, you can feel confident that your nail artistry is aligned with your values.

Hence, opting for eco-friendly foil nails not only enhances your style but also contributes positively to your environmental footprint. Many brands are now developing biodegradable foils and water-based adhesives that reduce chemical exposure and environmental impact. By selecting these sustainable options, you can enjoy your nail art while supporting eco-conscious practices, ensuring that beauty doesn’t come at the cost of our planet.

Final Words

Ultimately, foil nails offer you a unique way to elevate your manicure game with their stunning metallic finishes and intricate designs. This trend not only provides a bold statement but also allows for endless customization to match your personal style. As you explore this innovative technique, you’ll find that foil nails can transform any look, making them a must-try for your next beauty routine. Don’t hesitate to experiment with different colors and patterns to truly make them your own!

FAQ

Q: What are foil nails and how are they different from traditional nail designs?

A: Foil nails are a trendy nail art technique that involves applying metallic or holographic foil to the nails, creating a striking and reflective finish. Unlike traditional nail designs which typically use polish, foil nails rely on adhesive or special top coats to adhere the foil to the nail surface. This method allows for unique textures and patterns that can be mixed and matched, making them a popular choice for those looking to stand out.

Q: How can I apply foil nails at home?

A: Applying foil nails at home is a fun and straightforward process. First, start with clean and dry nails. Apply a base coat and let it dry. Next, use a special foil adhesive or a gel top coat to coat your nails where you want the foil to stick. Once the adhesive is tacky (but not fully dry), apply pieces of the foil using your fingertips or a tool, pressing down gently to ensure it sticks. Finish off with a top coat to seal the design and enhance its longevity.

Q: How long do foil nails last, and how can I maintain them?

A: The longevity of foil nails typically varies depending on factors like the application method and daily activities, but they can generally last up to a week or more with proper care. To maintain them, avoid excessive exposure to water and harsh chemicals, as this can weaken the foil’s adherence. Regularly applying cuticle oil can help keep your nails healthy and minimize chipping. If you notice any lifting, you may gently press the foil back down or consider reapplying the top coat for a quick fix.

The Best LED Lamps for DIY Gel Nails

Most DIY enthusiasts know that selecting the right LED lamp is important for achieving salon-quality gel nails at home. With an array of options available, it can be overwhelming to determine which lamp will best suit your needs. This guide will help you navigate through the various features and specifications of the top LED lamps, ensuring you find the perfect fit to enhance your nail art experience and achieve long-lasting results.

Key Takeaways:

  • Wattage Matters: Higher wattage LED lamps significantly reduce curing time, improving efficiency for gel nails.
  • Versatile Designs: Look for LED lamps that accommodate different nail sizes and have adjustable settings for various gel types.
  • Safety Features: Many of the best LED lamps come with built-in timers and auto shut-off options for safe and effective use.

Understanding LED Lamps

The world of gel nails has evolved significantly with the introduction of LED lamps. These devices offer a quicker curing time than traditional UV lamps, making them a popular choice among nail enthusiasts. If you want to examine deeper into your options, you can check the 7 Best UV Lamp for Gel Nails, Tested and Reviewed 2024. Investing in a high-quality LED lamp will elevate your DIY gel nail experience dramatically.

How LED Lamps Work

For LED lamps, the magic lies in their specific wavelengths that activate the photoinitiators in gel polish, causing it to cure quickly and efficiently. Unlike traditional lamps, LED devices use light-emitting diodes to produce this light, resulting in faster drying times and energy efficiency that benefits both you and the environment.

Benefits of Using LED Lamps for Gel Nails

Below are some notable advantages of utilizing LED lamps for your gel nail applications. They not only cure your gel polish quickly but also produce fewer harmful emissions compared to traditional UV lamps. Additionally, LED lamps have a longer lifespan, saving you money in the long run.

Consequently, incorporating LED lamps into your nail care routine means less waiting time, enhancing your overall experience while also promoting health and safety for your skin. With faster curing times, you can enjoy well-built gel nails without the risk of damaging your skin over prolonged exposure to UV light. This efficiency and effectiveness make LED lamps an necessary tool for every DIY nail artist.

Key Features to Consider

It’s imperative to evaluate certain features when selecting the best LED lamp for DIY gel nails. Consider the following key aspects:

  • Wattage
  • Curing time
  • Size and design
  • Safety features
  • Light modes
  • User-friendly interface
  • Durability
  • UV/LED dual functionality

Assume that these features align with your specific needs to achieve professional results at home.

Wattage and Curing Time

An important aspect to evaluate is the wattage and curing time of the LED lamp. Higher wattage generally means quicker curing times, allowing you to complete your gel nail application more efficiently. Most good quality LED lamps range between 36 to 48 watts, ensuring optimal performance. Select a lamp that matches the polish brand you’re using, as some may require specific wattage to cure properly.

Size and Design

After considering wattage, think about the size and design of your LED lamp. Compact models are more portable and easier to store, while larger ones can accommodate both hands or feet simultaneously. Choose a design that matches your workspace, ensuring it’s both functional and aesthetically pleasing. A lightweight and sleek lamp can enhance your DIY experience.

It’s important to find a balance between compactness and usability. Consider how often you will be using the lamp and the space available in your home. A larger lamp may provide convenience but could take up valuable counter space. On the other hand, a portable lamp allows for easy transport, making it ideal for travel but might be limited in features. The right size and design should cater to your specific needs as a DIY nail enthusiast.

Safety Features

Besides performance, pay attention to the safety features of the LED lamp. Look for models with heat resistance and automatic shut-off capabilities, which prevent overheating during long sessions. UV protection filters are also beneficial, as they minimize skin exposure to harmful rays.

Understanding safety features can significantly enhance your nail treatment experience. By choosing a lamp equipped with protective measures, you can confidently perform at-home gel manicures without worrying about potential harm. Features like cooling technologies ensure that the device stays safe to use, while thoughtful design limits exposure to UV rays, allowing you to prioritize your health alongside achieving beautiful nails.

Top Recommended LED Lamps

Your choice of an LED lamp can make or break your DIY gel nail experience. With a variety of options on the market, it’s imperative to select a lamp that suits your specific needs. The best LED lamps offer effective curing times, user-friendly designs, and durability to ensure that your gel nails look flawless and last longer. Whether you are a beginner or a pro, you’ll find the perfect product to elevate your manicure game.

Budget-Friendly Options

On a budget? You’re in luck! There are several affordable LED lamps that deliver excellent value without sacrificing quality. These options are perfect for those who want to achieve salon-quality nails at home without breaking the bank. Many budget-friendly lamps still offer impressive curing times and last a long time, making them ideal for both occasional use and regular manicurists.

Professional-Grade Choices

One way to elevate your nail game is by investing in a professional-grade LED lamp. These lamps are designed for frequent use and often come with advanced features such as multiple timer settings, built-in heat dissipation, and higher wattage for faster curing. They provide an exceptional user experience and ensure that your gel nails achieve the perfect finish every time.

To maximize your nail art capabilities, choosing a professional-grade LED lamp is a smart investment. These lamps typically offer superior curing efficiency, allowing you to spend less time waiting and more time creating beautiful nails. Many have durable designs that can withstand heavy use, making them ideal for someone who loves to experiment with different gel colors and styles. With their advanced technology and superior performance, professional-grade lamps provide you with the tools needed to achieve salon results right from the comfort of your home.

Step-by-Step Guide for Using LED Lamps

Not every LED lamp works the same way; understanding the correct approach can greatly enhance your DIY gel nails experience. Below is a simple guideline to follow:

StepAction
1Prepping Your Nails
2Applying Base Coat
3Curing Process
4Applying Color Gel
5Curing Process
6Finishing Top Coat
7Final Curing

Prepping Your Nails

The preparation of your nails is crucial for achieving a long-lasting manicure. Start by removing any old polish, gently pushing back your cuticles, and buffing the nail surface for proper adhesion. Cleaning your nails with rubbing alcohol ensures they are free from oils and debris, promoting better results.

Curing Process

Above all, the curing process solidifies your gel manicure. After applying each coat of polish, slide your hands into the LED lamp and cure them according to the manufacturer’s recommended time, usually between 30-60 seconds.

For instance, if you choose a gel polish that requires 30 seconds for curing, keep your fingers inside the LED lamp without interruption. This helps the gel harden effectively, avoiding any smudges or dents. Pay attention to the lamp’s power, as a higher wattage usually means faster curing times, allowing you to complete your gel manicure quickly and efficiently. Always follow the specific instructions of your gel products for the best results.

Maintenance and Care for LED Lamps

Many users overlook the importance of maintaining their LED lamps, but proper care can extend the life of your device and enhance its performance. Regularly check the lamp for dust and debris accumulation, which can impact curing efficiency. Ensure that you follow the manufacturer’s guidelines for usage and maintenance to avoid common damages and ensure optimal results for your DIY gel nails.

Cleaning and Storage

Care for your LED lamp by regularly cleaning its surface with a soft cloth and gentle cleanser. This prevents the buildup of nail products and keeps the lamp functioning at its best. When storing your lamp, keep it in a cool, dry place away from direct sunlight and extreme temperatures to prolong its longevity.

Troubleshooting Common Issues

Across the lifespan of your LED lamp, you may encounter some common issues that can affect its performance. Understanding these problems and knowing how to address them will help you keep your lamp in top condition.

Common issues include inconsistent curing times, which could be due to a dirty lamp or bulb failure. If your nails are not curing completely, ensure that the sensor is functioning properly and that the lamp is free from debris. If the light doesn’t turn on or flashes, this may indicate a problem with the power source or an internal fault. In such cases, inspect the power cord for damage and consult the manufacturer’s support if necessary.

Consumer Reviews and Feedback

Despite varying opinions, consumer reviews often highlight the importance of LED lamps in achieving salon-quality gel nails at home. You’ll find comprehensive insights in 7 Best LED Lamps for a Pro-Level, At-Home Manicure. Users discuss factors such as speed, durability, and ease of use, helping you make an informed decision tailored to your personal nail care routine.

Popular Brands and Models

Above all, well-known brands like Gel-ish, MelodySusie, and SUNUV consistently receive high marks for their reliability and performance. These models often come with user-friendly features and innovative designs that cater to both novices and experienced users, ensuring your DIY gel nail experience will be smooth and enjoyable.

User Experiences

After using various LED lamps, many users report significant satisfaction with the results. They emphasize that effective lamps not only cure the gel quickly but also leave a high-shine finish that lasts. With detailed feedback on ease of setup and operation, you can quickly determine which lamp fits your needs best.

In fact, firsthand accounts indicate that user experiences can vary widely based on individual preferences and expectations. Some users appreciate lamps with multiple settings for different types of gels, while others prioritize compact, travel-friendly designs. By reviewing these experiences, you can pinpoint which features will enhance your own DIY gel nail journey.

To wrap up

On the whole, choosing the right LED lamp for your DIY gel nails can significantly enhance your manicure experience. With various options available, it’s important to consider factors like wattage, design, and curing time to find the perfect fit for your needs. By investing in a high-quality lamp, you can achieve salon-worthy results right at home. For more insights on selecting the best nail lamp, check out The 10 Best UV & LED Nail Lamps 2024: Your Buyer’s Guide.

FAQ

Q: What are the key features to look for in a LED lamp for DIY gel nails?

A: When opting for a LED lamp for DIY gel nails, there are several important features to consider:
1. Wattage: A higher wattage (36W or more) typically means faster curing times. Look for lamps that can provide a consistent and efficient cure for your gel polish.
2. Curing Modes: Many lamps come with multiple curing modes, such as low heat settings for sensitive skin, or specific timers that can accommodate different types of gel formulations.
3. Design: Consider the lamp’s design and shape, as this can impact how comfortably you can fit your hands inside. A larger or open design can make curing all fingers easier and more convenient.

Q: How long should I cure my gel nails under an LED lamp?

A: The curing time for gel nails under an LED lamp generally ranges from 30 to 60 seconds, depending on the specific gel polish you are using. Always check the manufacturer’s instructions for the recommended curing time for both the base coat and the color layers. Additionally, the more layers you apply, the longer you may need to cure them. Different brands may have variations, so it’s advisable to ensure compatibility with your chosen products for the best results.

Q: How do I maintain my LED lamp for long-lasting performance?

A: To ensure your LED lamp performs effectively over time, follow these maintenance tips:
1. Cleaning: Regularly clean the interior of the lamp using rubbing alcohol and a lint-free cloth to remove any residue from gel polish.
2. Bulb Replacement: Although LED bulbs last longer than traditional UV bulbs, it’s important to check them periodically. If you notice a decrease in curing efficiency, it may be time to replace the bulbs.
3. Storage: Store the lamp in a dry, cool place when not in use, to prevent overheating or damage. Also, avoid using it in humid areas to prolong its lifespan.

How to Match Your Nails to Your Party Dress

Many party-goers might overlook the importance of coordinating their nails with their party dress, but this detail can elevate your overall look significantly. By paying attention to colors, patterns, and finishes, you can create a cohesive and polished ensemble. This guide will provide you with practical tips and inspiring ideas to help you choose the perfect nail design that complements your outfit, ensuring that you shine bright and express your personal style at any celebration.

Key Takeaways:

  • Color Coordination: Choose a nail polish color that complements or contrasts with your party dress for a cohesive look.
  • Nail Art: Consider intricate designs or embellishments that can enhance the style of your dress, adding a creative touch.
  • Occasion Approach: Match your nails to the party’s theme or vibe, whether it’s glamorous, casual, or festive, to elevate your overall appearance.

Understanding Color Theory

Before exploring into nail color choices, it’s important to grasp the fundamentals of color theory. This will help you make informed decisions that enhance your party dress without clashing. If you’re in doubt about whether your nails should match your outfit or vice versa, check out this What should I choose, nails match outfit or… discussion for insights.

The Basics of Color Coordination

Basics of color coordination start with understanding the color wheel and how different hues interact. Familiarize yourself with primary, secondary, and tertiary colors, as well as warm and cool tones. This knowledge will help you create harmonious looks for any occasion.

Complementary vs. Contrasting Colors

With complementary colors, you can create a bold statement by pairing colors opposite each other on the color wheel. Contrasting colors, on the other hand, allow you to draw attention to your outfit’s main features. Understanding how to balance these two approaches can elevate your overall look.

Indeed, choosing between complementary and contrasting colors depends on the effect you wish to achieve. Complementary colors, like blue and orange, create a striking harmony, while contrasting colors, such as red and green, can offer a lively clash that draws the eye. Use these principles to either match your nails to your party dress or to create an unexpected yet stylish twist that showcases your personal flair.

Nail Shapes and Their Impact

It’s necessary to understand how nail shapes can complement your party dress. The shape of your nails can influence the overall aesthetic and elegance of your look. For insights on color combinations, you can check out this discussion on (Closed) Help! What color nail polish goes with this dress?. Whether you opt for classic or trendy styles, coordinating your nail shapes with your outfit enhances your overall appearance.

Popular Nail Shapes

For a stunning look, popular nail shapes include stiletto, almond, square, and round. Each shape offers a distinct vibe; for instance, stiletto nails are bold and edgy, while almond nails exude elegance. Choosing the right shape can elevate your style and draw attention to your dress.

Choosing the Right Shape for Your Dress

At the same time, the shape of your nails should harmonize with your dress style. For example, if you are wearing a sleek, elegant dress, opting for almond or oval-shaped nails can create a polished look. On the other hand, if you’re sporting a fun, playful dress, stiletto or coffin nails can add an element of surprise. Assessing the neckline, fabric, and overall vibe of your attire can help you make an informed decision that enhances your ensemble.

Nail shapes can dramatically transform your look, embodying the essence of your dress. If your dress has sharp lines or geometric patterns, you might want to complement it with square or coffin shapes for balance. Alternatively, flowing fabrics call for softer shapes like almond or oval to match their elegance. Ultimately, your nails should reflect your style while seamlessly aligning with your outfit’s character, making your entire ensemble cohesive.

Nail Art Techniques

Keep your nails looking fabulous by exploring various nail art techniques that can elevate your party look. From simple to more intricate designs, you can easily find the right style to complement your dress and showcase your personality. Whether you prefer stickers or freehand designs, nail art allows you to express yourself while matching your attire perfectly.

Simple Designs for Beginners

Between classic dots, stripes, or a solid color, simple designs are perfect if you’re just starting with nail art. Easy to replicate, these styles require minimal tools and effort, making them a go-to choice for any party occasion. You can mix and match colors to find the perfect design that pairs well with your dress.

Advanced Techniques for Statement Nails

After mastering the basics, you may want to experiment with more advanced techniques to create statement nails that stand out. Techniques such as ombre effects, marbling, and 3D embellishments can make your nail game strong. These styles add a unique flair, helping you elevate your overall party look without overwhelming your outfit.

Advanced Techniques Table

TechniqueDescription
OmbreGradient effect blending two or more colors.
MarblingSwirling two or more colors together for a unique look.
3D EmbellishmentsAdding gems, glitter, or charms for a dimensional effect.
Negative SpaceLeaving parts of your nail bare for an edgy contrast.

Further, you can try combining different advanced techniques to achieve a layered look that truly embodies your style. Mixing ombre with 3D embellishments, for instance, can create an eye-catching nail design that serves as the perfect conversation starter at any party. Don’t hesitate to experiment with your favorite hues and designs to make your nails an extension of your fashion statement. Here are some ideas to inspire you:

Ideas for Statement Nails Table

IdeaDescription
Glitter FadeStart with a solid color and fade glitter at the tips.
Color BlockUse tape to create bold blocks of color on your nails.
Floral AccentsAdd floral designs for a chic touch to your nails.
Geometric PatternsUtilize tape or stamps for trendy shapes and lines.

Choosing the Right Finish

After selecting the perfect color for your nails, the next step is choosing the right finish to complement your party dress. The finish of your nail polish can significantly affect the overall impact of your look, adding dimension and flair. Whether you prefer something subtle or bold, consider how the finish aligns with the fabric, texture, and style of your outfit to make a cohesive statement.

Matte vs. Glossy

Above all, deciding between matte and glossy finishes can set the tone for your overall appearance. Glossy nails offer a classic and polished look, which can work wonders with shiny fabrics, while matte finishes lend a modern, understated vibe that pairs beautifully with textured or more matte materials. Choose according to the overall mood you wish to establish for the event.

Glitter and Specialty Finishes

One option you might explore is glitter and specialty finishes, which can add a playful touch to your nail design. These finishes can include holographic or metallic elements that elevate your nails, making them stand out in a crowd. Consider them as a way to express your personal style and bring an exciting twist to your ensemble.

In fact, integrating glitter or specialty finishes can transform your nails into eye-catching accessories. When choosing this option, think about how it complements your dress. For instance, if your dress has sequins, a glittery nail can echo that theme beautifully. Specialty finishes like chrome or pearl can also serve as chic alternatives, adding depth and a hint of luxury to your overall look. Just be sure to balance the level of sparkle to avoid overwhelming your outfit.

Seasonal Considerations

For an effortless look that stands out, consider the season when coordinating your nails with your party dress. Each season brings a unique vibe that can enhance your overall aesthetic. In spring, opt for pastel shades or floral designs, while summer calls for vibrant hues. Autumn invites rich jewel tones, and winter offers the elegance of deep colors or metallics. Aligning your nail polish with the seasonal palette can create a harmonious balance that elevates your ensemble.

Seasonal Color Palettes

Around each season, specific colors emerge as favorites that can guide your nail choices. Spring often showcases soft pinks and light greens, summer shines with bright reds and yellows, fall favors warm oranges and browns, and winter delights in deep blues and silvers. By selecting nail colors that correspond with the season, you create an overall cohesive look that expresses both style and seasonal spirit.

Matching Trends with Your Dress

Behind the scenes of every stunning party look is an awareness of current nail trends that can complement your dress beautifully. From ombre effects to intricate nail art, staying updated on popular styles helps you choose a design that resonates with your overall outfit. Whether your dress features a bold print or a classic silhouette, a trendy nail design can elevate the look and showcase your attention to detail.

This attention to current trends allows you to express your personality and style through your nails, enhancing your overall appearance. For instance, if your dress embraces a floral pattern, incorporating small flower designs or a gradient effect can echo this theme. By paying close attention to fashion events and social media, you can discover trending nail styles that will seamlessly mesh with your party dress, helping you make a lasting impression.

Maintenance Tips for Your Manicure

Your manicure deserves the right upkeep to stay fresh and beautiful for your party. Here are some maintenance tips to ensure your nails remain in perfect shape:

  • Apply a top coat every few days to prolong the life of your manicure.
  • Keep your hands moisturized to prevent dry cuticles and cracked nails.
  • Wear gloves when doing household chores to protect your polish.
  • Limit exposure to water, as it can weaken the polish.

Perceiving your nails as an extension of your style will keep them looking beautiful.

Long-lasting Polish Techniques

About achieving a flawless, long-lasting manicure starts with the prep work. Begin by cleaning your nails thoroughly and pushing back your cuticles. Using a quality base coat, apply thin layers of polish and allow ample drying time between coats. Finally, seal with a top coat to enhance shine and longevity.

Quick Fixes for Nail Emergencies

Your nails can sometimes encounter unexpected mishaps. Knowing how to handle nail emergencies can save the day and keep you looking polished.

Nail emergencies, like a sudden chip or a smudge before an event, can be stressful. A trusty quick fix is to keep a small bottle of nail polish that matches your manicure in your bag. If a chip occurs, simply dab a bit of polish to fill in the gap. For smudges, you can smooth over the surface with a clear top coat to restore shine. This handy solution ensures you’ll always put your best hand forward!

Summing up

So, when matching your nails to your party dress, consider the color palette, texture, and embellishments. Choose shades that either complement or contrast thoughtfully with your outfit for a polished look. Pay attention to the style of your dress; a more intricate design could benefit from simpler nail art, while a minimalist dress might call for bolder nail designs. Lastly, ensure your nails are neat and well-groomed, as they are an extension of your overall style. With these tips, you’ll enhance your ensemble and exude confidence at any gathering.

Q: What factors should I consider when choosing a nail color to match my party dress?

A: When selecting a nail color to harmonize with your party dress, consider the following factors: First, analyze the color palette of your dress. If it’s a solid color, you can either match it closely or choose a contrasting shade for a pop. For patterned dresses, select a color that picks up on one of the hues in the pattern. Second, think about the dress’s style—an elegant gown might pair well with classic shades like reds or nudes, while a fun, flirty dress might allow for bolder colors or nail art. Lastly, consider the season and the vibe of the event; lighter, pastel colors are great for spring/summer, while deep, rich tones are often suitable for fall/winter celebrations.

Q: Should I opt for nail art or stick to solid colors for my nails?

A: The choice between nail art and solid colors depends on your personal style and the formality of the party. For a more formal event, solid colors or subtle nail art, such as a delicate line or small embellishments, may better complement your dress. On the other hand, if you are attending a casual or festive gathering, you might embrace bolder nail art, like geometric patterns or glittery finishes, which add a fun flair and can act as a conversation starter. Always ensure that your nail design aligns with the overall look and feel of your outfit for a cohesive appearance.

Q: How can I ensure my nails look polished and coordinated with my dress throughout the party?

A: To keep your nails looking polished during the event, first, ensure they are well-groomed before applying any polish. Regularly maintain your nails by trimming and filing them to your desired shape. For a longer-lasting manicure, consider using a base coat to prevent chipping and a top coat to seal in your color. Choosing high-quality nail polish can also make a big difference in durability. If you’re concerned about upkeep during the party, opt for a color that is less likely to show chips, such as darker shades or patterns. Lastly, carry a small bottle of the polish you used for minor touch-ups if needed throughout the event.

The Pros and Cons of Hybrid Gel Nails

Most people seeking a long-lasting manicure are considering hybrid gel nails, which combine the benefits of traditional nail polish and gel. This innovative approach offers durability and a polished look, yet it comes with its own set of challenges. In this post, you will explore the various advantages and disadvantages of hybrid gel nails, helping you make an informed decision about whether they’re the right choice for your nail care routine.

Key Takeaways:

  • Durability: Hybrid gel nails offer a long-lasting finish that is more resistant to chipping compared to traditional nail polish.
  • Application: The process of applying hybrid gel nails requires a UV or LED lamp for curing, which can be a pro or con depending on personal preference.
  • Removal Process: While removal can be straightforward, it often requires soaking in acetone, which may weaken the natural nails if not done carefully.

The Pros and Cons of Hybrid Gel Nails

While traditional nail enhancements have their appeal, hybrid gel nails offer a modern twist, combining the benefits of both gel and regular nail polish. This innovative nail system provides a long-lasting finish with a glossy appearance, making it a popular choice among beauty enthusiasts. By understanding how hybrid gels work, you can make informed decisions about your nail care routine.

Definition and Composition

Before delving deeper into hybrid gel nails, it’s important to understand their composition. Hybrid gel nails consist of a blend of gel and conventional polish, giving you the durability of gel with the ease of application similar to regular nail varnish. Formulated with advanced polymers, these gels provide flexibility, allowing for a chip-resistant finish that lasts longer than traditional nail polish.

Application Process

Definition of hybrid gel application involves several precise steps to achieve the best results. You start by preparing your nails, ensuring they are clean and dry. Next, a base coat is applied followed by the hybrid gel color of your choice, which is then cured under a UV or LED light. Finally, a top coat seals the look and adds extra shine, completing the process with durability and glamour.

The application process is straightforward but requires attention to detail for optimal results. First, ensure your nail bed is free from oils and debris, as this allows for better adhesion. After applying the base coat, you will cure it under a UV or LED lamp, which sets the foundation. You can then apply your chosen color layer, curing between applications to build up depth and color vibrancy. This meticulous approach not only enhances the longevity of your nails but also ensures the final product looks polished and flawless.

Advantages of Hybrid Gel Nails

Some of the key advantages of hybrid gel nails include their exceptional strength, versatility, and quick drying time. These hybrids combine the best features of regular nail polish and traditional gel, giving you a long-lasting, high-gloss finish that resists chipping. Whether you’re looking for a daily wear option or something more vibrant for a special occasion, hybrid gel nails offer an array of benefits that enhance both aesthetics and durability.

Durability and Longevity

At the heart of hybrid gel nails is their unmatched durability. Unlike regular nail polish, which can chip and fade within days, hybrid gel formulations adhere effectively to your natural nails, providing a robust finish that lasts for weeks. This longevity means you can enjoy your flawless nail look without the frequent need for touch-ups.

Versatility in Design

Below the surface of hybrid gel nails lies a world of design possibilities. You can choose from vibrant colors, intricate nail art, or sophisticated finishes that fit any occasion. The adaptability of hybrid gels allows you to express your individual style while keeping your nails looking perfectly manicured.

Further expanding on the versatility in design, hybrid gel nails enable you to experiment with various techniques such as ombre, glitter, or negative space. Additionally, they can be easily layered, enabling you to combine textures and colors to match your outfit or mood effortlessly. With hybrid gels, your creativity knows no bounds, making each manicure unique and personalized.

Quick Drying Time

Durability is enhanced by the quick drying time of hybrid gel nails. Your manicure doesn’t have to be a time-consuming process; with hybrid gels, you’ll appreciate how quickly they set under UV or LED light, allowing you to resume your daily activities almost immediately after application.

Understanding the quick drying time of hybrid gel nails can significantly benefit your nail care routine. The rapid setting process not only minimizes the risk of smudging but also streamlines the overall experience, making it possible for you to enjoy a stunning manicure without waiting around. Whether you are busy or just prefer efficiency, these gels cater to your lifestyle while keeping your nails looking fabulous.

Disadvantages of Hybrid Gel Nails

Now, while hybrid gel nails offer numerous benefits, there are drawbacks to consider. The potential for damage to your natural nails, removal process challenges, and cost considerations can impact your decision. For insights on managing these issues, refer to Hybrid gel recommendations? : r/GelNails.

Potential for Damage to Natural Nails

Above all, hybrid gel nails can lead to damage if not applied or removed properly. Continuous use without breaks allows the gel to weaken your natural nail structure, making them prone to chipping and splitting.

Removal Process Challenges

By opting for hybrid gel nails, you may encounter challenges during the removal process. If not handled correctly, the removal can be time-consuming and may result in further damage to your nails.

It is imperative to follow the right techniques for hybrid gel removal, preferably using acetone and the appropriate tools. If you decide to do it yourself, be cautious and patient, as hasty efforts can harm your natural nails.

Cost Considerations

Cost plays a significant role when choosing hybrid gel nails, as they often come with a higher price tag than traditional manicures. On top of that, frequent applications and potential repair sessions can add up quickly.

Challenges arise in budgeting for hybrid gel nails, especially if you frequent a salon. You must weigh the advantages of durability and aesthetic appeal against the ongoing expenses associated with maintaining your manicure.

Comparison with Traditional Nail Options

Your choice between hybrid gel nails and traditional options significantly affects the durability and aesthetics of your manicure. The table below outlines key differences to help you make an informed decision.

Nail TypeProperties
Hybrid Gel NailsLong-lasting, quick-drying, flexible
Traditional Gel NailsDurable, requires curing, less flexible
Acrylic NailsStrong, customizable, can be bulky

Gel Nails vs. Hybrid Gel Nails

Nails done with traditional gel polish provide a glossy finish and excellent durability, but they require UV light to cure, and removal can be challenging. In contrast, hybrid gel nails combine the enduring qualities of gel with the ease of application, making them quicker to apply and remove without compromising on shine and longevity.

Acrylic Nails vs. Hybrid Gel Nails

To enhance your nail game, consider the differences between acrylic nails and hybrid gel nails. Acrylic nails are known for their strength and ability to cover imperfections, but they can feel heavy and require a longer application process compared to the lighter, flexible feel of hybrid gel nails.

Also, acrylic nails are sculpted using a liquid and powder mixture, leading to a longer curing time. In contrast, hybrid gel nails are applied similarly to traditional polish but have the longevity of gel formulations. This results in a lighter, more natural feel on the fingers, while still offering impressive durability and a gorgeous finish. Your preference may hinge on thickness and comfort, making hybrid gels a fantastic middle ground for modern nail enthusiasts.

Safety and Health Considerations

For anyone considering hybrid gel nails, it’s important to be aware of potential health risks and safety measures. The application and removal process can expose you to chemicals that may cause irritation or long-term health issues. Ensuring safe practices while applying or removing these nails can help mitigate risks, allowing you to enjoy the aesthetic benefits without compromising your wellbeing.

Allergies and Reactions

Safety is a priority when it comes to hybrid gel nails, as some individuals may experience allergic reactions or skin irritations. It’s advisable to test for allergies beforehand, especially if you have sensitive skin. Signs of an adverse reaction can include redness, swelling, or itching at the site of application. Consulting a dermatologist may help if you experience concerning symptoms.

Tips for Proper Application and Removal

About achieving the best results with hybrid gel nails, proper application and removal are key to maintaining your nail health. Following best practices can help you avoid damage and achieve a long-lasting finish. Key tips include:

  • Choose a reputable salon with experienced technicians.
  • Always use quality products that are free from harsh chemicals.
  • Employ gentle techniques during both application and removal.
  • Ensure your nails are clean and dry before application.

Perceiving the importance of these practices can enhance your experience and nail health.

Due to the nature of hybrid gel products, it’s important to follow a few best practices to ensure a safe and effective experience. Here are some additional recommendations to consider:

  • Use a base coat to protect your natural nails.
  • Limit UV exposure by using LED lamps appropriately.
  • Maintain regular nail health by taking breaks between applications.
  • Hydrate your cuticles and nails with oils or creams.

Perceiving these guidelines will significantly improve the health of your nails over time.

Expert Opinions and Trends

Once again, experts in the nail care industry have highlighted the growing popularity of hybrid gel nails, pointing to their blend of durability and flexibility as key selling points. As nail technicians refine their skills and product formulations become more sophisticated, you’ll find an increasing number of salons offering advanced hybrid options. Keeping an eye on these trends can help you make informed decisions about your nail care routine and find styles that resonate with current aesthetics.

Industry Insights

Behind the surge in hybrid gel popularity is a shift in consumer preferences towards long-lasting yet low-maintenance nail solutions. Industry professionals observe that more clients are opting for hybrid formulations because they reduce the need for frequent touch-ups while still offering a beautiful, polished look. This trend emphasizes the importance of both quality products and skilled application techniques to achieve optimal results.

Future of Hybrid Gel Nails

Around the corner, the future of hybrid gel nails promises even more innovation, with advancements in formulation and application methods on the rise. You can expect enhancements in the way these products adhere to your natural nails, offering greater durability and improved wear time.

Indeed, as technology evolves, hybrid gel nail products will likely become more eco-friendly and incorporate high-performance ingredients, catering to conscious consumers like you. Additionally, salons are expected to adopt more sustainable practices, making it easier for you to enjoy stylish nails while being mindful of your environmental impact. Embracing these innovations will not only elevate your nail care routine but also keep you ahead in beauty trends, making hybrid gel nails a trendy choice for your next manicure.

Final Words

With these considerations in mind, you can weigh the pros and cons of hybrid gel nails to determine if they are the right choice for your manicure needs. While they offer durability and a glossy finish, you should also account for potential damage and maintenance requirements. For a deeper exploration of this topic, check out this discussion on Hybrid gel polish vs traditional potted gels. Ultimately, making an informed choice will lead to healthier and more beautiful nails.

Q: What are the main advantages of hybrid gel nails?

A: Hybrid gel nails offer several benefits that make them a popular choice among those looking for long-lasting and beautiful manicures. Firstly, they combine the flexibility of regular nail polish with the durability of gel, allowing for a manicure that can last up to two weeks or more without chipping. Secondly, the application process involves less UV exposure compared to traditional gel nails, making them a safer option for those concerned about UV light. Finally, hybrid gels usually require less filing of the natural nail, which can help to maintain nail health and prevent damage.

Q: Are there any disadvantages associated with hybrid gel nails?

A: While hybrid gel nails have several benefits, they also come with some downsides. One of the main concerns is that they can sometimes be difficult to remove, requiring specific products or techniques to prevent damage to the natural nail. Additionally, hybrid gels may not be as glossy or shiny as traditional gel nails, which can affect their overall appearance. Lastly, they might not provide the same level of adhesion on certain nail types, leading to premature lifting or chipping.

Q: How do hybrid gel nails compare to traditional gel and regular nail polish?

A: Hybrid gel nails differ from traditional gel and regular nail polish in terms of application, durability, and removal. Traditional gel nails require a more extensive application process and a longer curing time under UV or LED lights, whereas hybrid gel nails often cure faster and are easier to apply. In terms of durability, hybrid gels strike a balance between the long-lasting properties of traditional gel nails and the short-term wear of regular nail polish. As for removal, hybrid gel nails can be a middle ground as they generally require soaking or specific remover products, unlike the simple wipe-off of regular nail polish but are often less intensive than traditional gels.

Skip to content