Nail

Top Nail Stamping Kits for Beginners

Many aspiring nail artists like you are seeking ways to elevate your manicure game without having to invest in expensive salon services. Nail stamping kits offer an accessible way to create intricate designs at home, making them perfect for beginners. In this blog post, we will explore the top nail stamping kits currently available, helping you choose the best set to unleash your creativity and enhance your nail art experience. Get ready to create stunning nail designs that will impress everyone!

Key Takeaways:

  • Affordability: Many beginner kits come at a reasonable price, making it easy to start without a large investment.
  • Ease of Use: Top kits often include user-friendly instructions and tools, helping newcomers master nail stamping techniques quickly.
  • Variety of Designs: Quality stamping kits provide a wide range of plates with unique patterns, allowing for endless creativity.
  • Compatibility: It’s important to choose kits that work well with various nail polishes to ensure optimal results.
  • Durability: Look for kits that offer high-quality materials, as they ensure better performance and longer-lasting results.

Understanding Nail Stamping Kits

Before entering into the world of nail art, it’s necessary to understand what nail stamping kits are and how they can elevate your manicure game. Nail stamping kits provide you with the tools to create detailed and intricate designs on your nails, making it a fun and accessible option for both beginners and seasoned enthusiasts.

What is Nail Stamping?

Between simple polish applications and elaborate nail art techniques lies nail stamping. This method involves transferring pre-designed patterns from a metal plate onto your nails using a special stamping tool, allowing you to achieve professional-quality designs with minimal effort.

Key Components of a Stamping Kit

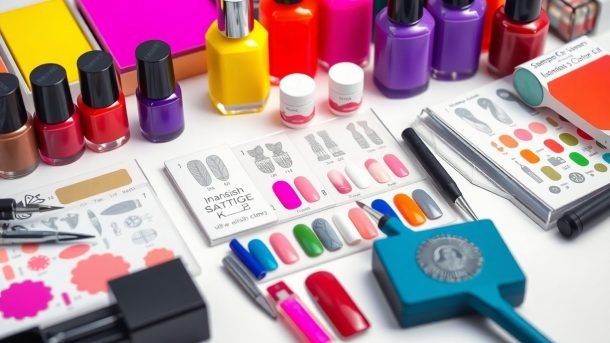
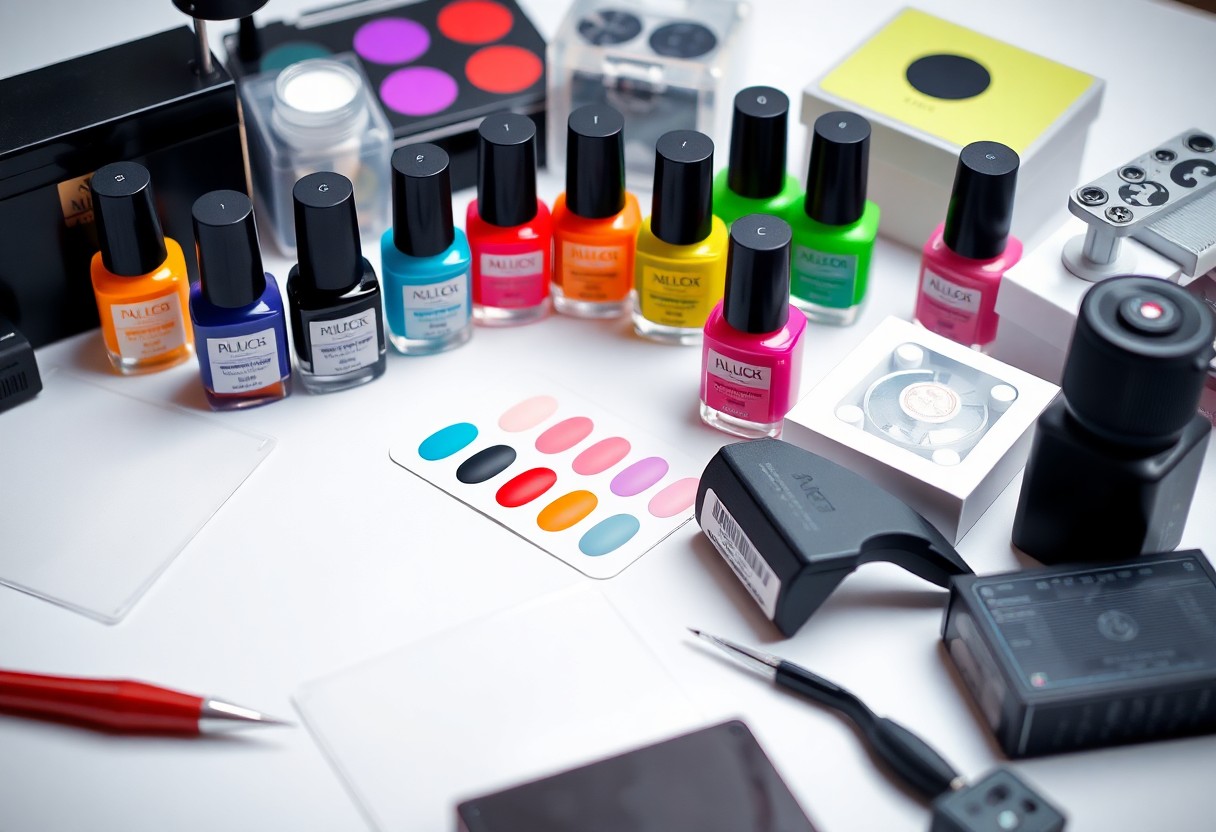
Nail stamping kits typically include several key components that facilitate the stamping process. These include a stamping plate, a scraper, and a stamper, which work together to help you transfer stunning designs to your nails effortlessly.

It’s important to familiarize yourself with each component of your stamping kit to maximize its potential. The stamping plate holds a variety of designs etched into the surface, while the scraper helps remove excess polish from the plate. The stamper is then used to pick up the design and transfer it to your nails. Each piece plays a vital role in ensuring a seamless nail art experience, setting you up for success in your stamping journey.

Benefits of Nail Stamping for Beginners

Some of the key benefits of nail stamping for beginners include its accessibility, ease of use, and the ability to achieve intricate designs without professional training. Nail stamping allows you to create salon-quality nail art at home, increasing your confidence and creativity. This technique also saves time compared to traditional nail art methods, allowing you to experiment with various looks effortlessly. Additionally, nail stamping kits come with a variety of designs, ensuring you have the tools you need to express your unique style.

Easy to Use

Among the many advantages of nail stamping, its simplicity stands out. You won’t need extensive training or artistic skills to create beautiful nail art. Simply choose a design, apply polish to the plate, scrape off the excess, and transfer the image onto your nail with a stamper. This straightforward process makes it easy for anyone, regardless of experience, to enjoy stunning nail art. The quick application means you’ll spend less time at your manicure station and more time showing off your creations.

Versatile Designs

Below the surface of nail stamping lies a world of versatile designs that cater to every occasion and personal style. From elegant florals to bold geometric patterns, the options are limitless. Each stamping plate often features multiple designs, allowing you to mix and match for a unique look every time. Whether you’re dressing up for a special event or keeping it casual for everyday wear, nail stamping gives you the flexibility to update your look as often as you like.

Even if you’re new to the world of nail art, the vast array of designs available through stamping can inspire your creativity. You can find plates featuring seasonal themes, trendy motifs, or classic patterns, ensuring there’s something suitable for every mood. Customizing your nails becomes an enjoyable exploration of your taste, with opportunities to layer colors or mix designs for standout results. This versatility makes nail stamping a fun and engaging activity that you can adapt to any style or occasion.

Top Nail Stamping Kits Reviewed

Once again, you are exploring into the world of nail art with our curated list of top nail stamping kits designed specifically for beginners. These kits have been chosen for their ease of use, quality, and effectiveness, allowing you to effortlessly achieve stunning nail designs. Whether you’re looking to make a subtle statement or go all out with intricate patterns, our reviews will help you select the perfect kit that suits your style and needs.

Kit 1: Features and Pros

After examining various options, Kit 1 stands out due to its comprehensive selection of plates and tools. It features various designs that cater to multiple styles, making it an ideal choice for beginners. The kit also includes a stamper and scraper for easy application, ensuring you can create beautiful nail art without any hassle.

Kit 2: Features and Pros

Against many competitors, Kit 2 impresses with its high-quality stainless steel plates and precision tools. This kit offers a fantastic range of floral and geometric designs, perfect for diverse nail art styles. The durable materials used in the applicator allow for consistent results, helping you achieve that salon-quality polish right at home.

Further, Kit 2’s ergonomic design makes it comfortable to use, and its compact size means you can easily store it in your nail art collection. The excellent customer reviews highlight how straightforward the stamping process is, making it a wonderful choice for anyone who wants reliable results without spending too much time learning the technique.

Kit 3: Features and Pros

Pros of Kit 3 include an extensive array of unique designs and a user-friendly interface. The kit comes with everything you need—from the stamping plate to the tools—allowing you to explore your creativity fully. It’s designed to simplify the application process, which is perfect for those who are just starting out.

With Kit 3, you not only get a fantastic value for your money, but the quality of the stamping plates guarantees that your nail art will last longer than traditional methods. The included instruction booklet is a bonus, guiding you through each step to ensure your designs turn out flawless every time.

Tips for Effective Nail Stamping

Many beginners face challenges in nail stamping, but with the right approach, you can achieve beautiful designs. Here are some useful tips:

  • Choose high-quality stamping plates and polishes.
  • Ensure your nails are clean and dry before starting.
  • Practice your technique to find the right pressure when stamping.
  • Use a good scraper and stamper for better results.
  • Apply a top coat carefully to prevent smudging.

Perceiving these guidelines will set you on the path to stunning nail art.

Techniques for Success

On your journey to mastering nail stamping, consider leveraging various techniques that enhance your skills. Experiment with different angles and speeds while scraping the polish, and try using a silicone stamper for better pickup. Additionally, practice regularly to build confidence and perfect your hand-eye coordination. Consistent application will greatly improve your nail art creations.

Common Mistakes to Avoid

Across the nail stamping community, certain mistakes can hinder your progress. One of the most common errors is using the wrong type of polish, as regular nail polish may not transfer well and can lead to frustrations. Additionally, not cleaning your stamping tools can result in smeared designs, while pressing too lightly can prevent proper transfer of the image.

With attention to detail and awareness of these pitfalls, you can enhance your nail stamping experience. Be careful not to rush through the process; give each layer adequate time to dry, and always clean your stamper and scraper after use to maintain their effectiveness. Taking these precautions will significantly elevate your nail art game.

Where to Purchase Nail Stamping Kits

For those eager to look into the world of nail art, finding the right nail stamping kit is necessary. You can explore options and make an informed choice by checking out the 9 Best Nail Stamping Kits: Which Is Right for You? to start your journey.

Online Retailers

Beside popular e-commerce platforms like Amazon and eBay, you can find a variety of nail stamping kits at dedicated beauty websites. These online retailers often provide extensive customer reviews, which can help guide your purchasing decision and ensure you get quality products.

Local Beauty Supply Stores

Along with online shopping, local beauty supply stores can be an excellent option for finding nail stamping kits. These stores typically carry a curated selection of beauty products, allowing you to see the kits in person and ask for expert advice from staff.

A visit to your neighborhood beauty supply store offers a hands-on experience where you can evaluate the quality and variety of nail stamping kits available. Plus, shopping locally means you can often take your purchase home the same day and start experimenting with your nail art right away. Don’t hesitate to ask the staff for recommendations based on your skill level and preferences for an optimal shopping experience.

To wrap up

The top nail stamping kits for beginners simplify the art of nail design, enabling you to unleash your creativity with ease. With a variety of options available, you can find a kit that fits your style and skill level. Investing in a quality Nail Stamping Kit empowers you to achieve salon-quality nails at home, ensuring that your manicures are always on point. Enjoy the process of experimenting with different stamps and designs, and let your nails reflect your personality.

Q: What should I look for in a nail stamping kit as a beginner?

A: When choosing a nail stamping kit as a beginner, consider a few key elements: ease of use, quality of tools, and variety of designs. Look for kits that include a reliable stamper and scraper, as these are imperative for successful stamping. Additionally, kits that offer a range of stamping plates with various designs will provide you with more creative options. It’s also beneficial to read customer reviews to ensure the kit is user-friendly and delivers good results.

Q: Can I use regular nail polish with a stamping kit?

A: Yes, you can use regular nail polish with a stamping kit, but for the best results, it is recommended to use specially formulated stamping polish. Stamping polishes are typically thicker and more pigmented, which allows for better transfer of the design onto the stamper and subsequently onto your nails. If you do use regular nail polish, opt for quick-drying formulas to prevent smudging during the stamping process.

Q: How do I clean my stamping tools after use?

A: Proper cleaning of your stamping tools is important for maintaining their function and longevity. After use, gently scrape off any excess polish from the stamper and scraper using a lint-free cloth or a cotton pad. To clean the stamping plates, use acetone or a specialized nail polish remover, which will help remove the remaining polish without damaging the plates. Make sure to rinse and dry your tools thoroughly before storing them to avoid any residue buildup.

Winter-Themed Nail Designs for Cozy Vibes

Nail art can transform your look and elevate your mood during the chilly winter months. Embracing winter-themed nail designs not only enhances your personal style but also brings a touch of coziness to your overall vibe. In this blog post, you’ll discover a variety of creative winter nail designs that capture the essence of the season, from frosty patterns to festive motifs. Get ready to cozy up with your favorite nail colors and techniques that will keep your spirits high all winter long!

Key Takeaways:

  • Color Palette: Embrace winter shades such as icy blues, deep reds, and soft whites to evoke a cozy atmosphere.
  • Textures: Incorporate texture elements like matte finishes, glitters, or 3D decals to add depth and interest.
  • Themes: Capture the essence of winter with design motifs, including snowflakes, pine trees, and holiday symbols.
  • Nail Shapes: Opt for comfortable nail shapes like oval or almond to create a warm, inviting feel.
  • Layering Techniques: Play with layering colors and designs to create a unique and stylish nail art that stands out.

Popular Winter Color Palettes

For the ultimate winter nail designs, embracing popular color palettes can help elevate your style while capturing that cozy vibe. Rich jewel tones, icy pastels, and classic dark shades create a perfect backdrop for creative nail art. Check out 50 Cute Winter Nail Designs to Warm Up Your Style (+ 10 … for inspiration on incorporating these hues into your winter looks!

Classic Winter Shades

Along with seasonal favorites like deep reds, dark greens, and elegant navy, classic winter shades often include warm neutrals like taupe or winter whites. These timeless colors not only evoke a sense of warmth but also blend seamlessly with winter fashion, making them ideal for any occasion.

Trending Colors for the Season

By incorporating trending colors into your nail designs, you can keep your style fresh and fashionable. Shades like icy blue, muted lavender, and rich burgundy are particularly popular this winter, offering a modern twist on traditional color palettes.

To elevate your winter nail game, consider experimenting with the latest trends. Subtle metallics and deep, opulent colors are not only stylish but also versatile enough to match various outfits. Opting for a gradient effect or a mix of textures can create stunning looks that highlight these on-trend shades, ensuring your nails make a statement throughout the chilly season.

Festive Nail Art Techniques

Even as the holidays approach, you can elevate your winter nail game with a variety of festive techniques. From intricate designs to simple patterns, experimenting with different methods can help you create unique looks that embrace the season’s spirit. Whether you choose to go bold or subtle, the right techniques will ensure your nails are a true reflection of your cozy winter vibes.

Snowflake Designs

After you master basic nail art techniques, snowflake designs are a fun way to add a touch of winter magic to your nails. With a white or silver polish, you can create delicate snowflakes on a pastel or dark base. You can use a thin nail art brush or even a dotting tool to achieve the intricate details that make these designs truly stunning.

Holiday-Inspired Patterns

Above all, holiday-inspired patterns are a delightful way to incorporate festive cheer into your nails. From candy canes to Christmas ornaments, there are endless possibilities for designs that reflect your favorite holiday symbols. Adding these eye-catching elements can create a joyful and whimsical vibe that complements your overall winter aesthetic.

Indeed, holiday-inspired patterns allow you to express your personality while celebrating the season. You can experiment with alternating designs on each nail to showcase a variety of motifs, or keep it cohesive with a single theme. Using a mix of colors that evoke the spirit of the holidays—like deep greens, rich reds, and golds—will enhance the festive feel. Plus, using nail stickers or stencils can make the process easier and more accessible, enabling you to achieve stunning results without requiring advanced skills.

Cozy Textures for Your Nails

Keep your winter nail game strong with cozy textures that evoke the warmth and comfort of the season. From soft matte finishes to eye-catching glitter, these designs will not only elevate your style but also keep your spirits high during the chilly months. Embrace the snug vibes of winter with textured nails that feel as good as they look.

Matte Finishes

Among the myriad of nail aesthetics, matte finishes offer a unique, cozy feel that’s perfect for winter. This understated texture creates a soft, velvety appearance that complements a wide range of winter shades, from deep burgundies to frosty blues. The absence of shine gives your nails an elegant, modern look, making them incredibly versatile for both everyday wear and special occasions.

Glitter and Gloss

Textures can transform your winter nail designs, and there’s nothing quite like the festive appeal of glitter and gloss. These shimmering elements not only catch the light but also bring a lively vibrancy to your overall look.

For instance, combining a glossy base with sparkling glitter tips creates a stunning contrast that captures the essence of winter celebrations. You can opt for dense glitter for a bold statement or a subtle sprinkle for a more understated sparkle. Experimenting with different glitter sizes and finishes allows you to customize your look, ensuring your nails stand out throughout the coziest season.

Seasonal Nail Accessories

Your winter nail design can reach new heights with seasonal accessories that add flair and personality. Whether you prefer subtle or bold accents, incorporating accessories such as nail gems, stickers, and nail art tape can enhance your look and create a cozy winter vibe. With these additions, your nails can effortlessly reflect the charm of the season, making for a beautiful extension of your style.

Nail Gems and Stickers

Against the backdrop of a serene winter landscape, nail gems and stickers can offer a delightful sparkle to your manicure. Choose winter-themed designs like snowflakes, snowmen, or holiday ornaments to make your nails shine. These accessories are an excellent, easy way to add some holiday cheer without needing extensive nail art skills.

Tape and Stencils for Easy Designs

Nail art tape and stencils can simplify your designing process, allowing you to create intricate patterns and shapes effortlessly. These tools come in various widths and materials, so you can achieve great visual effects with just a few strokes of polish.

Also, using tape and stencils gives you the freedom to experiment with geometric patterns, stripes, and even winter motifs. By placing tape strategically before applying polish, you can achieve crisp lines for a professional-looking finish. Stencils can be especially helpful for creating seasonal designs, as they guide you through complex patterns without the stress of freehand painting. Embrace your creativity while ensuring a polished, cozy look perfect for winter.

Nail Care Tips for Winter

Now is the perfect time to elevate your nail care routine during the winter months. With cold, dry weather, your nails require extra attention to remain healthy. Here are some crucial tips:

  • Use a quality cuticle oil to maintain hydration.
  • Apply a protective base coat before polish to shield your nails.
  • Limit exposure to hot water by wearing gloves while washing dishes.
  • Moisturize your hands regularly to reduce drying.

Assume that a little extra care goes a long way in maintaining your nails’ health this winter.

Moisturizing and Hydration

Any skincare routine should include consistent moisturizing, especially in winter. You should apply a thick hand cream daily to combat dryness, focusing on your cuticles and nails. Consider keeping a small tube of lotion in your bag for on-the-go hydration, ensuring that your hands stay supple, and your nails remain strong.

Preventing Breakage in Cold Weather

An effective strategy to protect your nails from breakage is to avoid exposing them to extreme temperature changes. Sudden shifts from warmth to cold can make your nails more brittle. Maintain a balanced diet rich in vitamins and minerals, as this supports nail strength. Applying strengthening treatments can also provide additional protection.

A balanced and nutritious diet plays an crucial role in preventing nail breakage during cold weather. You should incorporate foods high in biotin, zinc, and omega-3 fatty acids, which promote stronger nail growth. Additionally, regular use of protective gloves when engaging in outdoor activities can shield your nails from harsh elements, reducing the risk of damage and ensuring they remain resilient throughout winter.

DIY Winter Nail Designs

Many people enjoy getting creative with their nails during the winter season, making it the perfect time to explore DIY winter nail designs. From snowflakes to cozy sweaters, you can easily transform your nail art into a festive masterpiece. With the right techniques and a little bit of practice, you can achieve stunning winter-themed designs at home, making your nails a reflection of the cozy vibes that come with the season.

Step-by-Step Tutorials

The following table breaks down a few easy-to-follow winter nail design tutorials:

DesignTutorial Steps
Snowflakes1. Apply a base coat. 2. Paint nails white or light blue. 3. Use a fine brush for snowflake details. 4. Seal with topcoat.
Cozy Sweater1. Paint a base color (e.g., pastel). 2. Use a dotting tool for texture. 3. Create sweater patterns. 4. Apply a matte topcoat.

Tools You’ll Need

With the right tools, you can elevate your DIY winter nail designs to the next level. Essential items include nail polish in winter shades, a base and top coat, fine brushes, dotting tools, and nail tape for precision work. Having these tools on hand will ensure your creativity knows no bounds.

In addition to the basic nail tools, consider adding a few embellishments like rhinestones or glitter to make your design pop. Investing in quality nail polish will also help you achieve a stunning finish that lasts. With these necessary items, you are well-equipped to create your own winter-themed nail art at home, perfect for those chilly days ahead.

Conclusion

With this in mind, you can elevate your winter look with charming nail designs that perfectly capture the cozy vibes of the season. From snowflakes to sparkling icicles, your nails can reflect the beauty of winter and enhance your overall style. Embrace rich colors and intricate patterns to bring warmth and creativity to your manicure. As you embrace these winter-themed nail designs, you’ll not only feel festive but also elevate your confidence as you navigate through the season.

FAQ

Q: What are some popular winter-themed nail designs?

A: Winter-themed nail designs often include motifs such as snowflakes, Christmas trees, and reindeer. Other popular designs feature cozy patterns like knitted textures, plaid prints, and icicle effects. Color palettes typically lean towards cool tones, with shades of blue, white, and silver, but warm hues like burgundy and forest green can also evoke a cozy vibe. Glitter and matte finishes are frequently used to add dimension and flair to the overall look.

Q: How can I achieve a cozy vibe with my winter nail art?

A: To achieve a cozy vibe with winter nail art, consider using warm colors and soft textures. Techniques such as adding a matte top coat can create a snug feel. Incorporating designs that reflect winter comforts, like steaming mugs, blankets, or fluffy snow, can enhance the cozy aesthetic. You may also use nail wraps or decals featuring winter motifs to simplify the process while still achieving a charming look. Finally, adding embellishments like rhinestones or textured nail foils can help evoke warmth and charm.

Q: How long does a winter-themed manicure typically last?

A: The longevity of a winter-themed manicure can vary based on the products used and your daily activities. Generally, a professional gel manicure can last between two to three weeks without chipping, while traditional nail polish may last about five to seven days. To extend the life of your winter-themed nails, consider applying a good top coat, keeping your nails moisturized, and avoiding harsh chemicals or excessive hand washing. Regular touch-ups can also help maintain the design and keep your manicure looking fresh throughout the season.

Skip to content