Nail

How to Remove Glitter Nail Polish Without Hassle

Nail polish can add a fun touch to your manicure, but removing that stubborn glitter can often feel like a daunting task. You might find that traditional methods leave behind remnants of sparkle that refuse to budge. Fear not—this guide will equip you with simple, effective techniques to easily remove glitter nail polish without damaging your nails. Get ready to say goodbye to the mess and hello to clean, polished nails!

Key Takeaways:

  • Acetone Method: Use pure acetone nail polish remover for a quick and effective removal of glitter polish.
  • Cotton Ball Approach: Soak a cotton ball with remover and press it against the nail for a minute to loosen the glitter.
  • Aluminum Foil Trick: Wrap the cotton ball-covered nails in aluminum foil to enhance the effectiveness and speed up the process.

Understanding Glitter Nail Polish

Your experience with glitter nail polish can be both fun and frustrating. With its shimmering effect, it adds a delightful touch to your manicure. However, understanding its components helps in managing the removal process better. Keep in mind that not all glitter polishes are created equal, making it imperative to identify what you’re dealing with.

The Different Types of Glitter Nail Polish

Your options for glitter nail polish range widely. Here’s a brief overview:

TypeDescription
Fine GlitterCreates a subtle shimmer effect.
Chunky GlitterFeatures larger pieces for a bolder look.
Holographic GlitterGives a rainbow-like effect under light.
Metallic GlitterShiny, reflective finish for dramatic flair.
Gel GlitterProvides a longer-lasting, glossy effect.

After identifying your type of glitter polish, you’ll be better prepared for its removal.

Why It’s Tough to Remove

Understanding the formulation of glitter nail polish sheds light on why it can be difficult to remove. Many glitter polishes contain larger particles and longer-lasting bases that adhere firmly to your nails. This means typical nail polish removers might not be enough.

Plus, the varying sizes of glitter particles complicate matters. While finer glitters may come off easily, chunky or larger glitters tend to cling stubbornly, often requiring more intense scrubbing or specialized removers. As a result, you may find yourself spending more time and effort than expected when trying to achieve a clean slate for your next manicure.

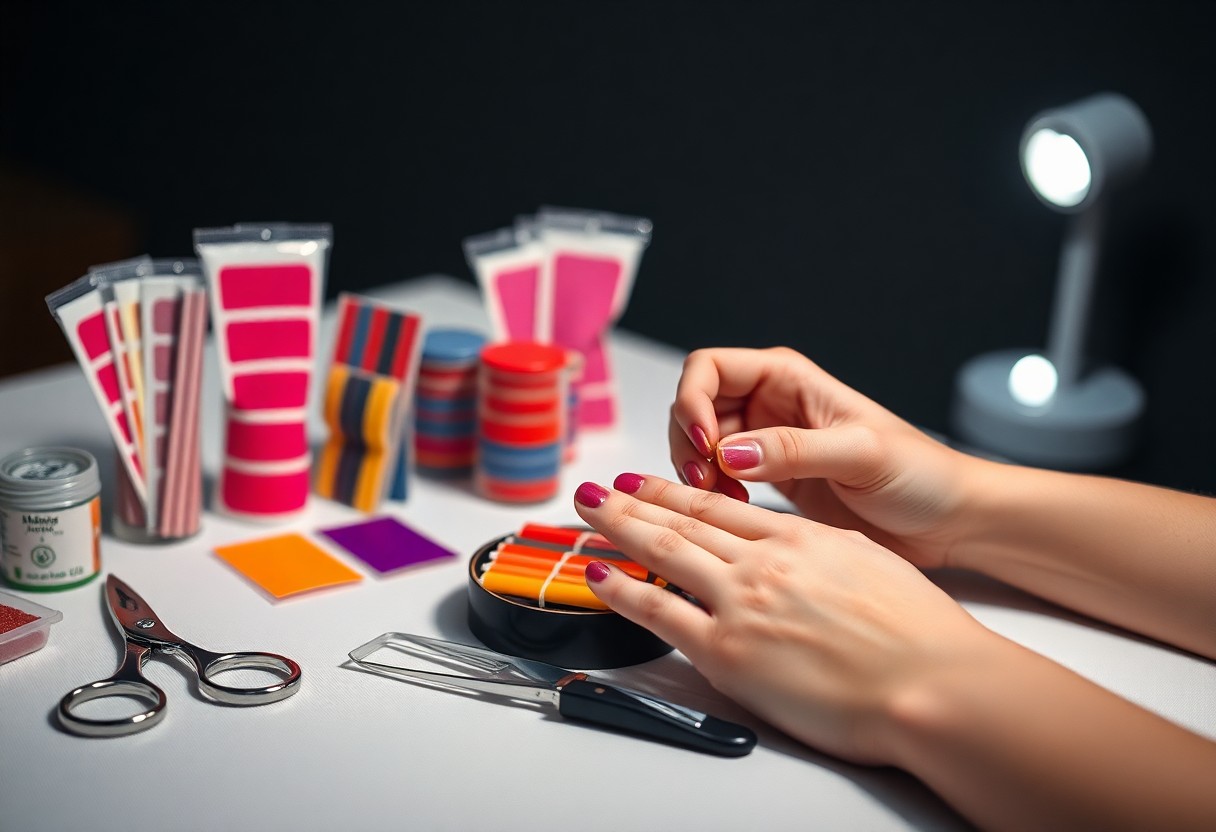
Essential Tools and Materials

Assuming you want to remove glitter nail polish easily, having the right tools and materials at hand makes all the difference. You’ll need high-quality nail polish remover, either acetone or non-acetone, cotton balls, and some aluminum foil. For a helpful tip on enhancing your removal process, check out this Remove Glitter Nail Polishes Quicker With This Little Trick.

Remover Options: Acetone vs. Non-Acetone

Around the nail care community, acetone is renowned for its powerful ability to dissolve nail polish quickly and effectively. While it can be harsh on your nails and cuticles, non-acetone removers are gentler but may take a bit longer to work. Choose the one that best suits your needs and sensitivity, so you can tackle that glitter without the fuss.

Cotton Balls and Foil Method

Balls of cotton soaked in nail polish remover can be your best friend when it comes to glitter removal. This method involves saturating cotton balls with your chosen remover and pressing them against your nails, then wrapping each fingertip in aluminum foil. This process helps the remover penetrate the glitter layers for more effective removal.

But this method goes beyond simple soaking; the foil traps heat, which aids in breaking down the stubborn glitter particles even more. Allow the cotton balls to sit for around 10 to 15 minutes before gently twisting the foil off. This should leave your nails glitter-free, making the entire process much simpler and less frustrating.

Step-by-Step Guide for Hassle-Free Removal

Despite the challenge of removing glitter nail polish, following this step-by-step guide will make the process much easier. Each step is designed to ensure you can remove glitter polish without unnecessary fuss. Use the table below to organize your materials and method for a seamless experience:

Materials & Methods

MaterialsMethods
Acetone or Nail Polish RemoverSoak a cotton ball or pad
Cotton Balls or PadsPress firmly on your nails
Aluminum Foil (optional)Wrap nails for better removal
Cuticle OilMoisturize nails and cuticles afterward

Preparing Your Workspace

On starting your glitter polish removal, make sure your workspace is well-organized. Lay down an old towel or paper to catch any spills, and keep your nail polish remover and cotton balls easily accessible. Having everything in place will make the process smoother and prevent mess.

Application Techniques

By utilizing the right application techniques, you can expedite the removal of glitter nail polish. Ensure to saturate your cotton ball or pad with nail polish remover and apply it generously to each nail. This maximizes the contact area and helps break down the glitter more effectively.

Plus, don’t rush this process; letting the remover soak into your nails for about 10-15 seconds will significantly ease glitter removal. Once the time is up, gently wipe the polish away with the cotton ball, and repeat if necessary until your nails are clean.

Tips for Stubborn Glitter

StepbyStep, some glitter polishes can be particularly difficult to remove. Follow these tips to tackle stubborn glitter effectively:

  • Soak your nails for a longer period.
  • Use a strong acetone remover for enhanced effectiveness.
  • Consider filing the surface of the polish lightly to break the seal.

After using these techniques, you’ll find it much easier to remove even the most stubborn glitter polish.

With additional effort, you can make glitter polish removal even more manageable. Here are some more tips for tackling stubborn glitter:

  • Try soaking multiple cotton balls and wrapping them with foil for better adherence.
  • After soaking, gently scrape the glitter off with an orange stick.
  • Be patient and repeat the process until all remnants are gone.

After mastering these methods, you will feel confident tackling any glitter nail polish challenge in the future.

Alternative Methods

After trying traditional nail polish removers, you may want to explore alternative methods that can effectively remove glitter nail polish without excessive scrubbing. These methods can not only save you time but also protect your nails from damage, making your polish removal experience much more pleasant. In this section, you’ll discover some creative approaches to effortlessly get rid of stubborn glitter.

Using Soaking Techniques

One effective way to remove glitter nail polish is by soaking your nails in a suitable solution. Start by saturating cotton balls with acetone or a non-acetone nail polish remover, then place them on your nails. Wrap your fingers in aluminum foil to trap heat and moisture, allowing the solution to break down the glitter more easily. After about 10-15 minutes, gently wipe away the polish, and you’ll notice significantly less residue.

Natural Remedies for Removal

By opting for natural remedies, you can remove glitter nail polish using ingredients you may already have at home. Common household items such as lemon juice and vinegar can serve as effective alternatives to commercial removers.

Alternative remedies like lemon juice and vinegar create a solvent that can help dissolve glitter polish. Simply mix equal parts of fresh lemon juice and vinegar, then soak your nails in the solution for about 10 minutes. This method not only helps lift the glitter but is also gentler on your nails and skin. For an added boost, you can use a soft toothbrush to gently scrub away any remaining polish. Embracing these natural options can lead to a less abrasive and more environmentally friendly approach to nail care.

Aftercare for Your Nails

Now that you’ve successfully removed your glitter nail polish, it’s time to focus on aftercare to restore your nails and skin. Glitter polish can often leave your nails feeling dry and damaged, so taking the necessary steps to nourish and protect them is vital for maintaining their health. Implementing a proper aftercare routine ensures your nails remain strong and vibrant for your next manicure.

Moisturizing Your Nails and Skin

Aftercare for your nails involves applying a quality moisturizer to both your nails and surrounding skin. This helps to combat any dryness or brittleness caused by the nail polish remover. Use a rich cuticle oil or hand cream that contains nourishing ingredients like Vitamin E or jojoba oil to keep your nails and skin hydrated.

Protecting Against Future Damage

Below are some effective strategies to shield your nails from future damage. Regular use of gloves while cleaning or handling harsh chemicals can significantly reduce wear and tear on your nails. Additionally, consider applying a base coat before using nail polish, as this creates a barrier that protects your natural nails. Strengthening treatments can also be beneficial; look for products specifically designed to fortify your nails.

Nails are more susceptible to damage without proper care and protection, so embracing these habits will help maintain their integrity. Be mindful of the products you expose your nails to and prioritize using gentle formulas. Regularly trimming your nails and keeping them filed will also prevent chipping and splitting, allowing you to enjoy healthier nails in the long run.

Common Mistakes to Avoid

Once again, many people overlook vital steps in the glitter nail polish removal process. You should avoid soaking your nails too quickly in acetone, using ineffective wipes, or trying to scrape off the polish. To enhance your understanding of the best techniques, visit How to Remove Glitter Nail Polish Without a Hassle.

Rushing the Removal Process

An effective removal method requires patience. Skimming through the steps will only make the process harder and might lead to more frustration. Give your nails adequate time to soak to ensure the glitter breaks down, which ultimately makes the entire experience smoother for you.

Using Incorrect Tools

Above all, using the right tools is vital for achieving a hassle-free glitter nail polish removal. If you rely on incorrect applicators or sturdy scrubs, you run the risk of damaging your nails or surrounding skin.

Also, avoid using regular nail polish removers that are not specifically formulated for removing glitter. They often do not have the strength needed to break down the glitter particles effectively. Invest in quality cotton balls and acetone-saturated pads to simplify your removal process and leave your nails looking healthy and pristine.

To wrap up

With these considerations, you can effectively remove glitter nail polish without hassle. Opt for products designed for stubborn formulas, and use strategic techniques like soaking cotton balls and wrapping your fingers. If you need more ideas, check out What are some tips for removing glittery nail polish? to enhance your approach. By following these steps, you’ll achieve clean nails in no time!

FAQ

Q: What products can I use to easily remove glitter nail polish?

A: To effectively remove glitter nail polish, you can use products such as acetone-based nail polish remover, which is particularly effective against thick glitter. If you prefer a gentler option, look for non-acetone removers, but be prepared for a longer removal process. Additionally, some specialty glitter polish removers are available in stores; these are specifically designed to break down glitter particles.

Q: What techniques can I use to enhance the glitter nail polish removal process?

A: One effective technique is to soak a cotton ball or pad in your chosen nail polish remover and place it on your nail, wrapping it with aluminum foil to keep it in place. Leave it on for about 10-15 minutes; this allows the remover to penetrate the polish, making it easier to wipe away. Another method is to gently buff the top layer of the glitter polish with a nail file before applying the remover, which can expedite the process.

Q: Are there any tips for avoiding damage to my nails during glitter polish removal?

A: Yes, to protect your nails during the removal process, ensure you moisturize your nails and cuticles afterward with a nourishing oil or cream. Additionally, try to avoid excessive scrubbing or using rough materials to remove the polish. It helps to use a gentle approach, allowing the remover to do the work rather than forcing the polish off. After removal, applying a strengthening base coat can further maintain nail health.

A Beginner’s Guide to Nail Wraps

Many people are discovering the effortless beauty of nail wraps, a versatile alternative to traditional nail polish. If you’re looking to elevate your manicure game without the hassle of drying time and lengthy salon visits, nail wraps may be the perfect solution for you. This guide will walk you through everything you need to know, from types and application techniques to tips for durability, ensuring your nails look fabulous with minimal effort. Get ready to unlock the secrets of stunning nail art at your fingertips!

Key Takeaways:

  • Application Process: Nail wraps are easy to apply; simply clean your nails, choose the right size wrap, and adhere them securely for a professional look.
  • Variety of Designs: They come in numerous styles and patterns, allowing you to easily switch up your nail art without the mess of polish.
  • Durability: Nail wraps can last from a week to several weeks depending on care, providing a longer-lasting manicure than traditional nail polish.

What Are Nail Wraps?

Before stepping into the world of nail wraps, it’s necessary to understand what they are. Nail wraps are adhesive designs that you apply directly to your nails, offering a quick and easy way to achieve a polished look without the need for traditional nail polish. To learn more, check out The Beginner’s Guide to Nail Wraps: Everything You Need ….

Definition and Purpose

Behind the simplicity of nail wraps lies their innovative design. They allow you to effortlessly embellish your nails with various colors and patterns, providing a salon-quality appearance right at home. Their primary purpose is to enhance the beauty of your nails while delivering a long-lasting finish.

Types of Nail Wraps

Wraps come in a variety of forms, allowing you to choose the style that suits your aesthetic. Here are the main types:

  • Vinyl wraps
  • Gel wraps
  • Polish strips
  • Nail foils
  • 3D wraps

This selection caters to different preferences and occasions.

Vinyl wrapsDurable, flexible, and easy to apply
Gel wrapsOffer a glossy finish, can be cured with a UV light
Polish stripsQuick to apply, mimics the look of nail polish
Nail foilsUnique designs, applied with a special adhesive
3D wrapsAdd dimension and texture for a standout look

Indeed, the variety of nail wraps can be overwhelming, but it allows you to express your individuality. Here’s a quick overview of the types:

  • Classic prints
  • Seasonal designs
  • Metallic finishes
  • Floral patterns
  • Artistic styles

This diversity ensures that there’s a nail wrap for every personality and event.

Classic printsTimeless designs that never go out of style
Seasonal designsThemes that reflect holidays or seasons
Metallic finishesAdds a dazzling effect to your nails
Floral patternsPerfect for a feminine touch to your look
Artistic stylesUnique wraps that showcase creative designs

Benefits of Using Nail Wraps

One of the most appealing aspects of nail wraps is their ability to provide a quick and beautiful manicure without the need for extensive salon visits. You can achieve a professional look from the comfort of your home while saving time and money. Additionally, nail wraps offer unique designs that allow you to express your personal style effortlessly while ensuring your nails remain in pristine condition.

Durability and Longevity

Against traditional nail polish, nail wraps are renowned for their impressive durability. You can expect your nail wraps to last for several weeks without chipping or fading, providing you with a longer-lasting solution. This resilience makes them an ideal choice for anyone looking to maintain their manicure without frequent touch-ups.

Variety of Designs and Styles

Against monotonous nail polish options, nail wraps offer an expansive array of designs and styles that cater to every taste. From bold patterns to delicate motifs, you can find wraps that suit any occasion or outfit effortlessly. This versatility means you can switch up your look as often as you like, providing endless opportunities for you to showcase your creativity.

Indeed, the variety of designs available is one of the standout features of nail wraps. You have access to countless themes, colors, and artistic patterns, from chic minimalist styles to vibrant, eye-catching graphics. This diversity enables you to select the perfect wrap for special events, holidays, or simply to reflect your mood, making your nail art journey as exciting and unique as you are.

How to Apply Nail Wraps

Despite their relatively simple application process, achieving a professional look with nail wraps requires careful attention to detail. Selecting the right size and ensuring your natural nails are prepped properly will set the foundation for a flawless finish. With the right techniques, you can easily enjoy a chic manicure that lasts for weeks.

Preparation of Natural Nails

Before applying nail wraps, it’s important to prepare your nails properly. Start by cleaning your nails thoroughly, removing any old polish, dirt, or oils. Next, gently push back your cuticles and file your nails to your desired shape. Finally, buff the surface of your nails lightly to create a smooth base for the wraps to adhere properly.

Step-by-Step Application Process

To successfully apply your nail wraps, follow this step-by-step process:

Step-by-Step Application Process

1. Choose the Right SizeSelect a wrap that fits your nail size perfectly.
2. Peel Off the BackingCarefully remove the adhesive backing from the wrap.
3. Place the Wrap on Your NailAlign the wrap with your cuticle and press down gently.
4. Smooth Out BubblesUse your fingers or a cuticle stick to flatten any bubbles.
5. Trim Excess WrapUse scissors to carefully trim away any overhang.
6. Seal the EdgesApply a top coat for durability and shine.

Another important aspect of the application process is ensuring you seal the edges properly. This will not only enhance the longevity of your nail wraps but also prevent lifting or chipping. After trimming the excess, applying a thin layer of top coat will provide an added layer of protection while giving your wraps a glossy finish. Trust the process, and soon you’ll have beautifully decorated nails that turn heads.

Tips for Keeping Nail Wraps Looking Great

All it takes is a little care and attention to keep your nail wraps looking fabulous. Follow these imperative tips:

  • Avoid soaking your nails in water for prolonged periods.
  • Use gloves while cleaning or doing dishes.
  • Apply a clear topcoat every few days for added shine.
  • Keep your nails trimmed to minimize wear.

This will ensure your wraps maintain their vibrant appearance and stay intact longer.

Maintenance and Care

With regular maintenance, your nail wraps can last longer and look their best. Be sure to clean your nails before application to remove any oils, and always apply wraps on clean, dry nails. For added protection, consider applying cuticle oil regularly to keep both your nails and wraps in top condition.

Avoiding Common Mistakes

About the most common mistakes people make when applying nail wraps is overlooking preparation. Preparation is key to a smooth application and lasting wear. Ensure your nails are clean, dry, and free of any oils before starting. Additionally, avoid pulling on the wraps, as this can cause them to lift. Always follow the manufacturer’s instructions to achieve the best results.

Looking out for these simple missteps can save you time and enhance the longevity of your nail wraps. Prioritizing proper application techniques and avoiding excessive moisture or rough handling will keep your beautiful designs intact. You should also allow ample time for the wraps to adhere properly, securing them against chips and damage.

Removing Nail Wraps Safely

Keep your nails healthy and strong by following the right technique when removing nail wraps. Improper removal can lead to damage or irritation. Always take your time and use the appropriate tools to ensure a smooth and safe removal process.

Tools Needed for Removal

One of the first steps in safely removing your nail wraps is gathering the necessary tools to make the process easier and more effective.

Tools

Acetone or Non-Acetone Nail Polish RemoverCotton Balls or Pads
Aluminum FoilPusher or Orange Stick
Buffing BlockMoisturizer or Cuticle Oil

Step-by-Step Removal Process

The process of removing your nail wraps should be systematic to ensure your nails remain undamaged. Follow these steps carefully.

Removal Steps

1. Soak cotton in acetone.2. Place the soaked cotton on your nails.
3. Wrap with aluminum foil.4. Wait 10-15 minutes.
5. Gently push off the wrap.6. Buff and moisturize your nails.

Hence, following each step accurately is paramount in preventing damage. The soaking process allows the adhesive to dissolve, making it easier to lift off the wraps without harsh scraping. If any residue remains, simply buff it away gently using a buffing block. Don’t forget to apply a moisturizer or cuticle oil afterward to nourish your nails and cuticles, ensuring they stay hydrated and healthy.

Frequently Asked Questions

Now, as you explore the world of nail wraps, you may have some common questions. To help you out, we have compiled answers to some inquiries you might have. If you want a deeper understanding, check out The Ultimate Guide to Nail Wraps: Elevate Your Nail Art … for more detailed information.

Can Nail Wraps Damage Natural Nails?

Asked about the safety of nail wraps, you’ll be pleased to know that when applied and removed correctly, they should not damage your natural nails. Ensuring that you follow application instructions carefully will help maintain the health of your nails while enjoying beautiful designs.

How Long Do Nail Wraps Last?

Around two weeks is the typical lifespan of nail wraps, depending on your lifestyle and how well you care for them. Various factors can influence this duration, such as exposure to water or oils and the nature of your daily activities.

Due to their adhesive nature, nail wraps can endure common wear and tear, but maintaining proper care plays a significant role in their longevity. Avoiding excessive heat or moisture and using gloves during chores can help your nail wraps last longer. Regular touch-ups on any chipped edges can also extend their wear, showcasing your stylish nails for as long as possible.

To wrap up

So, as you explore the world of nail wraps, you’ll discover a fun and creative way to enhance your manicure with ease. By selecting the right materials, applying them correctly, and caring for them properly, you can achieve lasting, salon-quality results at home. Don’t hesitate to experiment with different designs and techniques to find what works best for your personal style. With practice, you can master the art of nail wraps and enjoy beautiful nails anytime you desire.

Q: What are nail wraps and how do they work?

A: Nail wraps are thin, pre-cut pieces of adhesive material that are designed to adhere directly to the surface of your nails. They come in various designs, colors, and finishes, allowing you to achieve a polished look without the need for traditional nail polish. To use them, simply select your desired design, peel off the backing, and press the wrap onto your natural nail, smoothing out any bubbles as you go. Finally, you can file off any excess wrap for a perfect fit.

Q: How long do nail wraps typically last?

A: The longevity of nail wraps can vary based on the brand and how well you apply them, but they generally last anywhere from one to two weeks. Proper application and care can enhance their lifespan. To ensure your nail wraps last longer, avoid exposing your hands to excessive moisture and use gloves while doing household chores. Additionally, applying a top coat can help protect the wraps and extend their wear.

Q: Can I remove nail wraps easily, and what is the best method?

A: Yes, nail wraps can be removed easily. The best method involves using a gentle nail polish remover, preferably one that is acetone-free to minimize damage to your natural nails. Soak a cotton ball with the remover, place it on your nail, and wrap it in aluminum foil for a few minutes. This allows the adhesive to soften, making it easier to peel off the wraps without damaging your nails. If any residue remains, you can buff it away with a nail file.

Nail Art Ideas for Your Engagement Party

There’s a world of creativity waiting for you when it comes to nail art for your engagement party. Your nails can complement your celebration and show off your personality and style as you prepare for this monumental occasion. To inspire you, explore these 10 Engagement nail art ideas that perfectly blend elegance and fun, ensuring your fingertips are just as fabulous as you are on your special day.

Key Takeaways:

  • Personalization: Incorporate elements that represent your relationship, such as initials, dates, or meaningful symbols.
  • Themes: Choose colors and designs that complement your engagement party’s theme, whether it’s romantic, modern, or vintage.
  • Trendy Techniques: Experiment with popular nail art techniques like ombre, glitter accents, or negative space for a fashionable look.

Trending Nail Art Styles for Engagement Parties

Your engagement party is the perfect opportunity to showcase your style, and trending nail art can be an exceptional way to elevate your look. From timeless designs to vibrant hues, the right nail art will complement your ensemble and make a statement that reflects your personality. Embrace the latest styles that not only enhance your bridal glow but also offer a glimpse into your unique aesthetic. So, whether you prefer classic elegance or bold pops of color, there’s a nail art design waiting for you to explore.

Classic and Elegant Designs

Any engagement party is the perfect occasion to opt for classic and elegant nail designs. Think soft pastels, elegant nudes, or a subtle French manicure that exudes sophistication. These timeless choices offer a polished appearance that beautifully complements your attire while ensuring your nails remain an elegant focus without overshadowing your overall look.

Bold and Colorful Choices

Elegant nail art doesn’t mean you have to shy away from color. Bold and colorful choices can showcase your personality and bring a vibrant edge to your engagement party ensemble. Whether you opt for ombre effects, striking gem accents, or a mix of vivid shades, these nail art styles are sure to attract attention and express your excitement for the celebration. Due to their eye-catching nature, bold designs can make a powerful statement, enhancing your overall look and adding a fun flair to your special day.

Seasonal Nail Art Inspirations

One way to elevate your engagement party look is by choosing seasonal nail art that resonates with the time of year. Consider exploring The Best Engagement Nail Inspiration 2024 to find the perfect design that suits your celebration.

Spring and Summer Themes

On sunny days, fresh floral designs and pastel colors can bring an uplifting vibe to your nails. Think about soft pinks, mint greens, or creamy yellows that capture the essence of blooming flowers and warm weather, making your engagement party even more enchanting.

Fall and Winter Aesthetics

Any autumn or winter celebration offers a unique chance to showcase deep, rich colors and intricate patterns on your nails. Embrace jewel tones like emerald green or ruby red, and incorporate elements like metallic accents or snowflake designs for a festive touch.

For instance, consider a chic deep plum base with golden glitter tips for a luxurious feel, or opt for a warm caramel hue accented with delicate white snowflakes for a winter wonderland theme. These designs not only reflect the season but also add a sophisticated flair to your overall look during your engagement festivities.

Incorporating Personal Touches

Now that you’re ready to elevate your engagement party with stunning nail art, consider incorporating personal touches that reflect your unique style and relationship. Custom designs and thoughtful details can truly make your nails stand out and resonate with the special occasion.

Custom Designs and Monograms

Custom nail art designs and monograms are a fantastic way to showcase your personality and commitment. You can ask your nail artist to create unique designs that represent shared interests or significant memories, or even feature your initials or engagement date for a personal twist that adds meaning to your look.

Matching with Wedding Colors

Incorporating your wedding colors into your nail art can beautifully bridge your engagement and upcoming celebration. It’s an opportunity to establish a cohesive theme early on while allowing you to express your style through vibrant hues or elegant pastels that complement your color palette.

Also, tying your nails to your bridal theme helps set the tone for your entire celebration. By choosing shades that mirror your wedding colors, you create a harmonious look that enhances your overall aesthetic. This coordination can go a long way in giving your engagement party a polished feel, highlighting your attention to detail as you prepare for the big day.

DIY Nail Art Tips and Techniques

Keep your engagement party nails looking stunning with these DIY nail art tips and techniques:

  • Start with clean, dry nails for better polish adherence.
  • Use a base coat to protect your nails.
  • Experiment with different colors and designs to find what suits you.
  • Apply topcoat to enhance shine and longevity.
  • Practice your techniques on a fake nail if you’re new to nail art.

Recognizing your unique style can elevate your nail art experience.

Essential Tools and Supplies

Techniques for beautiful nail art begin with the right tools. Here’s what you’ll need:

Tools and Supplies

Nail polishChoose a variety of colors.
Nail art brushesFor precise designs.
Dotting toolsCreate dots and intricate patterns.
TapeFor clean lines and shapes.
Top and base coatTo protect your design.

Step-by-Step Tutorials

Techniques for nail art can be simplified with easy-to-follow tutorials. Here are a few popular styles:

Popular Nail Art Styles

French tipsA classic look with a modern twist.
OmbreBlending two or more colors together.
StripesUsing tape for clean, straight lines.
Floral designsIncorporate floral patterns for a romantic touch.
Geometric shapesCreate chic, modern art.

Considering your engagement theme will help you choose nail art styles. Each tutorial can guide you step-by-step, ensuring you feel confident and ready to showcase your creative flair at your engagement party. Personalize your designs to match your colors, and don’t hesitate to blend different techniques to create a look that’s uniquely yours.

Nail Care Before the Big Day

For a flawless look on your engagement day, investing time in nail care is crucial. A well-manicured set of nails will not only complement your overall aesthetic but also boost your confidence. Start your grooming regime weeks in advance to ensure your nails are healthy, strong, and ready for your special occasion.

Preparation and Maintenance

For the best results, begin by exfoliating your cuticles and moisturizing regularly to prevent dryness. Consider treating your nails to a nourishing soak and applying a strengthening polish or oil. Regular filing and buffing will also keep your nails looking neat and polished leading up to the engagement party.

Protecting Your Nails

Around your engagement festivities, it’s vital to prioritize nail protection to prevent breakage or chipping. Be mindful of the tasks you undertake and wear gloves to safeguard your nails during chores or activities that may cause damage.

Nails deserve proper care, especially when preparing for an event as significant as your engagement party. To protect against breaks and chips, consider using a top coat on your polish and avoid using your nails as tools. Additionally, maintain your nail strength by incorporating a biotin supplement into your routine, which can help promote growth and durability. With just a little effort, you can ensure your nails not only look great but also stay healthy for the big day.

Professional Nail Art Services

To ensure your engagement party nails are nothing short of spectacular, consider scheduling an appointment with a professional nail artist. These experts have the skills and tools to create intricate designs that will complement your wedding aesthetic, expressing your personal style. With their extensive experience, they can guide you through a variety of nail art options, making your nails a standout feature on your big day.

Choosing the Right Nail Artist

On your journey to find the perfect nail artist, take the time to research local salons and professionals. Look at their portfolios, read reviews, and ask for recommendations from friends. Ensure that their style aligns with your vision; this will ensure you get the nail art that fits your engagement theme beautifully.

What to Expect from a Nail Appointment

Behind the scenes of a nail appointment, you can expect a consultation where your artist discusses your preferences and shows you various designs. They will then prepare your nails, which usually includes shaping, cuticle care, and applying base layers before the nail art process begins. This personalized approach is aimed at delivering results tailored specifically to you.

But don’t be surprised if the appointment lasts longer than you expect, especially if you’re opting for detailed designs. Be prepared to relax; some artists incorporate a soothing atmosphere with calming music and comfortable seating. You might also receive tips on nail aftercare to ensure your beautiful art lasts leading up to your special day. This investment not only elevates your nail game but also offers a luxurious experience in anticipation of your engagement celebration.

Summing up

Summing up, choosing the right nail art for your engagement party can elevate your overall look and make your special day even more memorable. Consider designs that reflect your personality and the theme of your celebration, whether it’s elegant, whimsical, or trendy. From classic French tips with a twist to intricate designs featuring your wedding colors, there are endless possibilities to express your style. Whichever you choose, ensure your nails are well-groomed and perfectly polished to add that final touch of sophistication.

Q: What are some popular nail art designs suitable for an engagement party?

A: Popular nail art designs for an engagement party often include elegant and romantic themes. Some ideas include soft pastel colors with floral patterns, classic French tips adorned with glitter, or ombre effects that transition from light to dark shades. You might also consider adding gemstones or pearl accents for a touch of glam. Metallic colors like gold or rose gold can align well with the engagement theme, making them a sophisticated choice.

Q: How can I choose a nail art design that complements my engagement outfit?

A: To choose a nail art design that complements your engagement outfit, start by considering the color palette and style of your attire. If your outfit features intricate lace or embroidery, opt for a subtle nail design such as nude shades with delicate lace patterns or accents that echo the details of your dress. For bold or colorful outfits, you can select a nail art design that incorporates similar hues or geometric shapes to create a cohesive look. If your engagement theme has specific colors, incorporating those into your nail art can enhance overall aesthetics.

Q: Should I opt for professional nail art services or DIY my engagement party nails?

A: The choice between professional nail art services and DIY nails depends on your comfort and desired outcome. If you’re looking for intricate designs or patterns, visiting a professional nail technician may be the best way to achieve a flawless look. However, if you enjoy crafting and have some nail art skills, doing it yourself can be a fun and personal touch. Consider practicing nail art techniques on your own before the engagement party or use easy-to-follow nail art kits. Ultimately, go with what makes you feel best and fits your schedule leading up to the event.

How to Repair a Cracked Acrylic Nail

Just like any other beauty treatment, acrylic nails can encounter some mishaps, including cracks. If you find yourself with a cracked acrylic nail, you don’t need to panic—there are simple steps you can follow to restore it. This guide will walk you through the process, ensuring your nails look flawless again. For a quick technique, you can check out this detailed resource on how to Repair a Cracked Acrylic Nail in Two Minutes – Technique.

Key Takeaways:

  • Assess the Damage: Before starting the repair, evaluate the extent of the crack to determine if a simple fix or a complete replacement of the nail is needed.
  • Use Proper Tools: Gather crucial tools such as nail glue, a file, and a buffing block for an effective repair process.
  • Seal the Crack: Apply nail glue carefully into the crack, smooth it out, and allow it to dry completely to ensure a strong bond.

Understanding Acrylic Nails

To appreciate the maintenance involved with acrylic nails, it’s important to understand their composition and functionality. Acrylic nails are artificial nails created using a mixture of liquid monomer and powder polymer, which hardens when applied over your natural nails. They provide strength and versatility for various nail enhancements, enabling you to achieve different shapes and lengths while protecting your natural nails from damage.

What Are Acrylic Nails?

Between the myriad of nail options available, acrylic nails stand out for their durability and adaptability. They are popular for those who desire long-lasting, elegant nails with a polished look. Achieved through an application process that includes sculpting and shaping, acrylics can be customized to fit your preferred style, making them a go-to choice for many nail enthusiasts.

Common Issues with Acrylic Nails

Beside the appealing aesthetic, acrylic nails can encounter several issues that you should be aware of to maintain their integrity. Common concerns include lifting, cracking, and chipping, which can arise from various factors such as improper application, inadequate aftercare, or even lifestyle habits that put stress on your nails.

Consequently, being informed about these common issues can help you take proactive measures to preserve the quality of your acrylic nails. For instance, ensuring that your acrylic nails are properly applied and regularly maintained can prevent lifting, while being cautious during daily activities can minimize the risk of chipping. By understanding these challenges, you can better care for your acrylics and enjoy their benefits longer.

Diagnosing the Crack

Assuming you notice a crack in your acrylic nail, the first step is to accurately diagnose its nature. Understanding the type and extent of the crack will guide your repair efforts and help you determine whether professional assistance is required. Inspect your nail closely and note any other signs of damage, such as lifting or discoloration, which may indicate a more serious problem.

Types of Cracks

Assuming you’re familiar with common types of cracks, here are some categories to consider:

  • Surface Cracks: Minor, generally aesthetic.
  • Deep Cracks: Extend through multiple layers and require more extensive repair.
  • Split Nails: More severe, may involve loss of nail integrity.
  • Chips: Small areas where the acrylic has broken away.
  • Fissures: Hairline fractures that can worsen over time.

Thou should assess your nail carefully to identify any of these issues.

Type of CrackDescription
Surface CracksMinor with no structural damage.
Deep CracksPotential to separate the nail from the natural nail.
Split NailsInvolves a significant loss of integrity.
ChipsSmall portions missing from the edge of the nail.

Assessing Damage Severity

Crack identification is a key part of assessing damage severity. It’s important to evaluate how deep the crack goes and whether it affects the overall structure and appearance of your nail. Is the crack merely cosmetic, or does it lead to the natural nail being exposed? Carefully consider if the surrounding area shows redness, swelling, or infection signs, as these may require immediate attention.

Assessing the severity of the damage involves looking at various factors, including the type and location of the crack, how deep it penetrates, and any accompanying symptoms. A good rule of thumb is to visualize whether the crack compromises the nail’s functionality or aesthetics. If you notice significant impairment in any form, it is wise to consult a professional before attempting a DIY repair. Treat your nails with the care they deserve, ensuring they remain healthy and beautiful.

Tools and Materials Needed

Unlike other nail repair methods, fixing a cracked acrylic nail requires specific tools and materials to achieve a seamless finish. Gather items such as a nail file, buffer, nail glue, a repair wrap, and cuticle oil to ensure a smooth and effective repair process. Having the right supplies will help you restore your nail to its former beauty and maintain its integrity.

Essential Repair Tools

Between the various tools you’ll use, a nail file and buffer are imperative for smoothing the surface of the damaged area. A pair of scissors can also be handy for trimming any ragged edges. Additionally, nail glue will be required to bond the pieces together securely.

Recommended Products

Beside these tools, you may want to consider specific products that enhance your repair efforts, such as professional-grade nail glue or specialized acrylic repair kits.

Products like high-quality nail glue often provide stronger adhesion, preventing future cracks or breaks. Acrylic repair kits typically include everything needed for a comprehensive fix, including wraps or fiberglass patches that can reinforce the nail. Investing in these products not only makes your repair easier but also helps maintain the longevity of your acrylic nails.

Step-by-Step Repair Process

Now that you’ve identified the issue, follow these steps to effectively repair your acrylic nail. For more insights on similar experiences, check out My acrylic nail has cracked through the middle and …

Information Breakdown

StepDescription
1. Preparing the NailEnsure the area around the crack is clean and dry.
2. The Repair TechniqueUse an acrylic repair kit or bonding agent.
3. Finishing TouchesShape and polish the repaired nail.

Preparing the Nail

To prepare your nail for repair, first clean the cracked area with a gentle nail cleanser to remove oils or debris. You’ll want to gently buff around the crack with a fine buffer, which will help the adhesive bond better to your acrylic nail.

The Repair Technique

The next step involves applying a suitable acrylic repair product. Carefully follow the manufacturer’s instructions to ensure a proper application.

A well-applied acrylic repair product will fill in the crack seamlessly. Make sure to apply it evenly, using a small brush or a toothpick to push the material into the crack and smooth it out. Allow the product to cure completely before moving on to the next step.

Finishing Touches

Between applications, check the repair to ensure it has set correctly. Once dry, file the nail gently to reshape it, and buff the surface until smooth.

Further refinements can involve applying a top coat for shine and durability. This also helps blend the repaired area with the existing acrylic, making the repair less noticeable.

Preventing Future Damage

Despite the occasional mishap, you can take effective measures to keep your acrylic nails intact and prevent future damage. Adopting a few simple habits will enhance the longevity of your nails and reduce the chances of cracking or lifting. Regular maintenance and careful interactions with your environment play key roles in preserving the quality of your acrylics.

Proper Care Tips

Below are some proper care tips to consider for your acrylic nails:

  • Keep your nails moisturized with cuticle oil.
  • Avoid using your nails as tools for opening or prying.
  • Limit exposure to harsh chemicals and detergents.
  • Wear gloves during cleaning tasks or when using chemicals.
  • Schedule regular maintenance appointments with your nail technician.

Knowing how to care for your nails can significantly extend their life and appearance.

Best Practices for Acrylic Nails

Between your appointments, you can adopt best practices to maintain the health and integrity of your acrylic nails. These practices help prevent damage while ensuring your nails always look their best.

Best practices for acrylic nails include avoiding excessive moisture and ensuring your hands are always clean and dry. Be mindful of any activities that can put stress on your nails, such as typing or using your phone, and try to minimize force during these actions. Regularly trim and file your natural nails before your appointment to keep them healthy. Additionally, be sure to apply sunscreen to your hands to protect against UV rays, which can weaken the acrylic over time. These effective approaches will help you enjoy stunning nails while minimizing the risk of damage.

When to Seek Professional Help

Your DIY repair skills may be impressive, but there are situations where seeking professional help is the best option. If the crack is deep, near the nail bed, or accompanied by pain, you should consult a nail technician or dermatologist. Attempting to fix it yourself could lead to further damage or infection. Additionally, if multiple nails are cracked, it might indicate an underlying issue that requires expert assessment. Don’t hesitate to get professional advice to ensure your nails remain healthy and beautiful.

Summing up

Summing up, repairing a cracked acrylic nail can be a straightforward process if you follow the proper steps. You should clean the area, apply a nail glue or acrylic resin for reinforcement, and shape it to match your natural nail. Don’t forget to file the edges for a smooth finish. For more detailed guidance, check out How to Handle a Snapped Acrylic Nail: Repair Tips. By taking these measures, you can maintain the integrity of your nails while ensuring they look flawless.

Q: What materials do I need to repair a cracked acrylic nail?

A: To repair a cracked acrylic nail, you will need the following materials:
– Nail file or buffer to smooth the surface
– Clear nail glue or acrylic nail repair kit
– An acrylic brush (if using acrylic powder and liquid)
– Acrylic powder and liquid (if doing a more extensive repair)
– Nail tips or a piece of a plastic nail (for larger cracks)
– A small pair of scissors (optional for trimming)
– Cuticle oil (optional for hydration)
– Rubbing alcohol and lint-free wipes for sanitation

Q: How can I repair a minor crack in my acrylic nail at home?

A: For a minor crack, start by carefully filing the area around the crack to smooth it out. Clean the nail with rubbing alcohol using a lint-free wipe. Next, apply a small amount of clear nail glue over the crack and let it dry completely. Once the glue is dry, you can shape and buff the nail to make it look natural. Finish by applying a topcoat for added protection and shine.

Q: Can I repair a severe crack or break in my acrylic nail myself?

A: Yes, a severe crack or break can be repaired at home, but it may require more materials and effort. Start by assessing the damage. If the nail is entirely broken off, you will need to use a nail tip. First, file the remaining acrylic down to create a smooth surface. Then, apply the nail tip to the broken area with nail glue. Once secure, you may need to apply a thin layer of acrylic over the tip using an acrylic powder and liquid for a seamless finish. Afterward, shape, buff, and polish your nail to blend it with the rest. For larger damages, consider visiting a nail technician for a more polished result.

Bright and Cheerful Nail Art for Spring

Over the vibrant days of spring, it’s the perfect time for you to refresh your nail art with bright and cheerful designs that reflect the season’s beauty. From bold florals to playful pastels, you can express your creativity and mood through your manicure. Looking for inspiration? Check out this guide to 30 Pretty Spring Nail Design Ideas You’ll Want to … to explore exciting styles that will have your nails ready for all your springtime adventures.

Key Takeaways:

  • Color Palette: Bright pastels and vibrant shades are perfect for spring nail art, reflecting the cheerful spirit of the season.
  • Floral Designs: Incorporating flowers into your nail art is a popular trend, as it embodies the essence of springtime.
  • Geometric Patterns: Fun geometric shapes add a modern twist to nail art, making them visually appealing and trendy.
  • Nail Length Variety: Whether short or long, there are numerous nail art styles suited for different nail lengths, allowing for versatility.
  • DIY Techniques: With simple tools and techniques, anyone can create beautiful spring designs at home without needing professional help.

Trending Spring Colors

For this spring, you can expect a beautiful array of trending colors that will brighten your nail game. Think soft pinks, sunny yellows, and refreshing greens, all designed to evoke the spirit of renewal and growth that characterizes the season. Embrace these lively hues to infuse a dose of joy into your daily look, allowing your nails to reflect the vitality and cheerfulness of spring.

Pastel Palettes

The perfect choice for a soft and sophisticated look is a pastel palette, featuring shades like lavender, mint, and baby blue. These gentle colors blend seamlessly, giving your nails a fresh, delicate appearance that invites tranquility and elegance as the weather warms up.

Vibrant Hues

Colors like electric blue, tangerine, and fuchsia stand out and demand attention, making your nails the focal point of your spring style. These lively shades uplift your mood while showcasing your bold personality, resulting in a dazzling array of nail art possibilities.

For instance, you might experiment with vibrant nail art techniques like ombre or geometric designs, combining different hues to create eye-catching contrast. By mixing approaches, such as matte and glossy finishes or even adding glitter to vibrant bases, you can elevate your nail look into a true statement piece this spring.

Fun Nail Art Techniques

Even if you’re a beginner, experimenting with fun nail art techniques can elevate your manicure game this spring. From playful patterns to creative embellishments, your nails can become a canvas for your personality. Techniques like dots, dashes, and various stamping methods can add unique flair to your look, making your nails a focal point of your spring outfit.

Dots and Dashes

Around your nails, you can create charming designs with simple dots and dashes. Using a dotting tool or a bobby pin, add colorful dots in a random or patterned arrangement for a playful vibe. Dashes can be added with a fine nail brush to create geometric patterns or even abstract art. Mixing different colors will make your nails pop and add a cheerful touch to your spring style.

Stamping and Stickers

With nail stamping and stickers, achieving intricate designs has never been easier. These techniques allow you to apply vivid patterns and detailed images to your nails in a fraction of the time it would take to paint them manually. A stamping plate featuring various designs can transform your solid-colored nails into a masterpiece with just a few swipes. Stickers, on the other hand, come in endless varieties, allowing you to personalize your nail art with minimal effort.

Stamping is all about precision and creativity. You’ll start by applying a base coat, then use a stamping plate to pick up your chosen design with a special stamping polish. Press the stamped image onto your nail, and voila! For stickers, simply peel and apply them to your dry nails, before sealing with a top coat for longevity. Both methods offer a world of possibilities to showcase your style while making nail art accessible and fun!

Seasonal Themes

All around you, spring brings vibrant colors and new life, making it the perfect time to explore seasonal nail art themes. Embrace lively hues like pastel pinks, sunny yellows, and fresh greens that reflect the rejuvenation of nature. Whether it’s incorporating elements of spring holidays or showcasing your favorite seasonal motifs, your nails can be a canvas for these cheerful designs that capture the essence of the season.

Floral Designs

Behind every stunning spring nail art design lies the timeless beauty of floral patterns. You can opt for delicate blossoms or bolder flower motifs, reflecting the blooming flowers of the season. Using various techniques such as water marbling or stamping, you can achieve intricate and unique floral designs that will brighten your overall look.

Nature-Inspired Art

NatureInspired art allows you to draw from the stunning landscapes and vibrant colors of the season. From lush green leaves to vivid sunsets, your nails can echo the beauty surrounding you. Incorporating elements such as butterflies, ladybugs, or even raindrops will create a whimsical touch that complements your spring vibe.

Plus, this approach not only showcases your creativity but also connects you with nature’s wonders. Experiment with various textures like matte finishes or glossy top coats to evoke the feel of leaves or flowers. Incorporating mixed media like sequins or glitter can further enhance your designs, making your nails more visually appealing and celebrating the vibrant life of spring.

Nail Care Tips for Spring

Keep your nails looking stunning this season by following these imperative nail care tips:

  • Moisturize your cuticles regularly.
  • Use a strengthening base coat before applying polish.
  • Give your nails a break from polish for at least a few days.
  • Stay hydrated by drinking plenty of water.
  • Check out spring nail inspo: bright & colorful – Lemon8 for ideas.

After you incorporate these tips, your nails will radiate spring cheer!

Hydration and Nourishment

Among the best ways to maintain nail health is through proper hydration and nourishment. Ensure you apply a rich cuticle oil and a nourishing hand cream to keep both your nails and skin supple. Consuming foods rich in biotin and protein can also foster nail growth, providing strength and shine as you sport your vibrant spring designs.

Protection Against the Elements

Beside enhancing your nail aesthetics, protecting your nails from the spring elements is equally imperative. Elements like sun exposure, wind, and water can lead to drying out your nails and cuticles, making them prone to breakage.

Spring brings a delightful mix of sunshine and showers, which can impact your nail health. To shield your nails, consider wearing gloves while gardening or cleaning, and don’t forget to apply sunscreen to your hands when you’re outdoors. Incorporating a protective top coat can additionally help safeguard your chosen nail designs from chips and fading, allowing you to enjoy your flourishing nail art longer.

DIY Nail Art Ideas

Unlike the complexity you might expect, creating your own nail art can be incredibly simple and fun! With a few everyday tools and supplies, you can express your creativity and showcase vibrant spring designs right at your fingertips. Dive into basic techniques to elevate your manicure game, allowing your personality to shine through as you experiment with colors and patterns. From dotting to striping, the possibilities are endless!

Simple Spring Designs

Against the backdrop of spring’s vibrant blooms, you can easily create designs that are light and cheerful. Think floral patterns, polka dots, and pastel color combinations to mimic the freshness of the season. With just a steady hand and a few colors, you’ll find that these designs are both charming and effortless to apply.

Advanced Techniques for the Enthusiast

Nail art enthusiasts can take things to the next level by exploring advanced techniques that add depth and detail to your creations. Techniques such as marbling, stamping, and 3D embellishments can transform your nails into miniature canvases that showcase your artistic flair. Be sure to gather the right tools and materials to master these advanced methods.

Essential Tools for Advanced Techniques

1. Nail Art BrushesFor detailed designs and intricate patterns
2. Dotting ToolsCreate dots and fine details on your nails
3. Stamping KitsEasily transfer designs onto your nails
4. Striping TapePerfect for making straight lines and patterns
5. Nail Glitters and StickersAdd texture and fun elements

In addition to the tools, knowledge of the techniques is vital for achieving stunning results. Here are some methods you can incorporate into your nail art routine:

Techniques to Explore

1. Water MarblingCreating swirling patterns with nail polish in water
2. Ombre EffectBlending two or more colors for a gradient look
3. Nail StampingQuickly applying pre-designed images onto your nails
4. 3D Nail ArtIncorporating rhinestones or decals for a creative pop
5. Matte FinishesGive your design a unique twist with a matte topcoat

Professional Nail Art Services

To elevate your spring nail game, consider opting for professional nail art services. Skilled nail technicians can bring your visions to life with intricate designs and vibrant colors. If you’re looking for inspiration, check out 47 Cute Spring Nails Designs + Nail Art Ideas We …. Professional services ensure precision and quality that might be challenging to achieve on your own, allowing you to show off stunning nails that perfectly embody the cheerful spirit of the season.

What to Look For

One of the key factors to consider when searching for a professional nail artist is their portfolio. Look for artists who showcase diverse designs that resonate with your style, ensuring they can meet your expectations while experimenting with contemporary trends.

Top Nail Art Trends This Spring

Any spring season brings a wave of fresh trends in nail art, and this year is no exception. Bright pastels, floral motifs, and geometric patterns are making a significant comeback. You will find a blend of classic and modern elements, offering you the perfect opportunity to express your personality through your nails.

Understanding the top nail art trends can help you make informed choices for your spring manicures. This season focuses on bold color combinations, such as bright yellows and soft pinks, combined with playful designs like abstract shapes and botanical prints. Additionally, the incorporation of negative space art allows your manicures to feel light and airy, complementing the overall spring aesthetic. Stay updated with these exciting trends to ensure your nails are as vibrant and cheerful as the season itself.

To wrap up

Conclusively, as you embrace the vibrant spirit of spring, bright and cheerful nail art can be a delightful way to express your personality. By experimenting with bold colors, floral patterns, and unique designs, you can elevate your look and enhance your mood. This season, don’t hesitate to let your creativity shine, making your nails an extension of your positive energy. Dive into the world of spring nail art and enjoy the transformation it brings to your style and outlook.

FAQ

Q: What are some popular colors for spring nail art designs?

A: For spring, bright and cheerful colors are a must! Popular choices include pastel shades like soft pinks, mint greens, baby blues, and lilacs, as well as vibrant colors such as coral, sunny yellows, and lively oranges. These colors evoke a sense of freshness and vibrancy, making them perfect for the season.

Q: What nail art techniques work best for achieving a spring look?

A: Various techniques can be employed to create delightful spring nail art. French tip designs with pastel colors are timeless favorites. Additionally, floral patterns, polka dots, and ombre effects can add a playful touch. Water marbling and using nail stickers or decals featuring spring themes like flowers or butterflies are also excellent ways to embrace the season.

Q: How can I make my spring nail art last longer?

A: To ensure your bright and cheerful spring nail art lasts, start with a good base coat to protect your nails. Follow up with high-quality nail polish and allow each layer to dry thoroughly before applying the next. Finish with a top coat to seal the design and add shine. It’s also advisable to avoid using your nails as tools and to wear gloves when doing household chores to prevent chipping and wear.

Skip to content