household

Can You Do Nail Art with Household Items

Nail art doesn’t have to be expensive or require professional tools; you can unleash your creativity using everyday household items. From rubber bands to tape, the possibilities are endless when it comes to achieving stunning designs right at home. In this post, you’ll discover various techniques and items you can use to elevate your nail game without breaking the bank. Get ready to transform your nails with what you already have in your beauty arsenal!

Key Takeaways:

  • Creativity is key: Household items like plastic bags, sponge, and tape can be used to create unique nail art designs.
  • Accessibility: You don’t need expensive tools or products; everyday materials can help achieve beautiful nail art.
  • Experimentation: Trying out different techniques with common items can lead to innovative and fun nail art styles.

Exploring Household Items for Nail Art

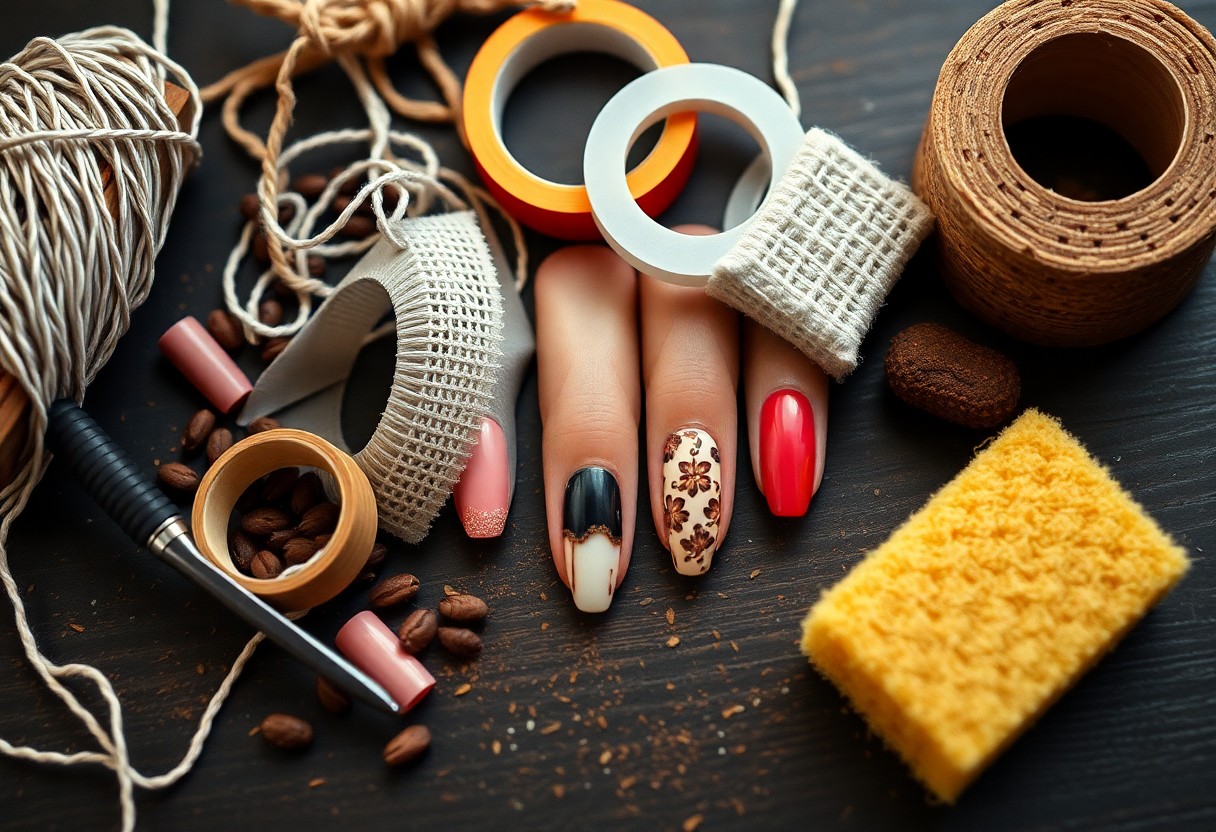
To unleash your creativity, exploring household items for nail art can transform your manicures into mini masterpieces. With just a few everyday products, you can achieve intricate designs that rival salon quality. From kitchen supplies to crafting tools, you’ll be amazed at the resources available right at home. Embrace the DIY spirit, and let your imagination run wild as you discover how to use these common items to elevate your nail art game.

Common Kitchen Supplies

Across your kitchen, you can find a treasure trove of supplies that can be used for stunning nail art. Items like toothpicks, sponges, and even plastic wrap can help you create unique patterns and textures. Using a simple sponge, for instance, allows you to dab on colors for an eye-catching ombre effect, while toothpicks can be utilized for fine detailing. By looking around your kitchen, you can easily access tools that enhance your nail artistry without spending a dime.

Crafting Tools and Their Uses

Below, you’ll discover that various crafting tools can elevate your nail art skills significantly. Items such as paintbrushes, dotting tools, and scissors can create intricate designs that showcase your artistic side. Craft paint and nail tape can also be utilized to achieve sharp lines and fun embellishments, adding that professional touch you desire. The beauty of using crafting tools is that they are readily available, and with just a bit of creativity, they can make your nail designs stand out.

At home, you likely have an assortment of crafting tools that can be repurposed for nail art. For example, paintbrushes can be used for detailed line work, while dotting tools are perfect for creating polka dots or intricate designs. Additionally, craft scissors can assist in achieving clean edges when working with tape or stickers, while old makeup sponges can help you blend colors seamlessly. By utilizing these tools creatively, you can experiment with various techniques to enhance your nail art projects effectively.

Techniques for Nail Art with Household Items

Clearly, you can unleash your creativity by using various techniques for nail art with household items. From using a simple toothpick to create intricate designs to utilizing tape for crisp lines, the options are limitless. If you’re unsure where to begin, check out Where to start with DIY nail art? : r/RedditLaqueristas for some inspiration and tips!

Stamping and Printing Methods

Above all, stamping and printing methods can create stunning designs on your nails effortlessly. You can use everyday items like sponge applicators or kitchen sponges to apply polishes and create eye-catching patterns. By experimenting with different objects around your home, you’ll achieve unique looks that stand out.

Creating Patterns and Designs

About your patterns and designs, there are several innovative techniques to explore. Using brushes, dots, or even straws can help you achieve various effects and textures that elevate your nail art game.

It’s beneficial to practice creating patterns with objects like old toothbrushes, forks, or even the ends of your makeup brushes. Each household item can offer a different texture and look, allowing you to explore your artistic side. Experimenting with various colors and layering techniques will inspire you to develop a unique style that reflects your personality and taste.

Safety and Precautions

Despite the fun of experimenting with nail art, it’s important to prioritize safety and precautions. Always keep your workspace clean and ensure proper ventilation when using any household materials. For ideas on getting started, check out 8 nail art designs you can DIY at home with limited tools … to inspire your creativity without compromising safety.

Ensuring Non-Toxic Materials

The materials you use for nail art should be non-toxic and safe for your skin. Look for products that are labeled as free from harmful chemicals. Common household items such as food coloring, hand sanitizer, and vinegar can often serve as effective alternatives to commercial nail art supplies.

Avoiding Skin Reactions

The potential for skin reactions should always be taken seriously. Pay close attention to how your skin reacts to various materials, especially if you have sensitive skin or allergies. Always perform a patch test on a small area before applying any item directly to your nails or cuticles. If you notice any irritation, discontinue use immediately.

Skin reactions can range from mild redness and irritations to allergic responses. It’s wise to avoid using items like glue, paint, or chemicals not meant for nail use. Always assume that any material could cause a reaction, especially if you are trying something new. Being cautious can help you enjoy your DIY nail art experience without any discomfort.

Tips for Successful Nail Art

Now, to elevate your nail art game, keep these tips in mind:

  • Start with a clean canvas – ensure your nails are dry and free from polish.
  • Use thin layers of polish for better control and quicker drying.
  • Experiment with different household items to create unique designs.
  • Be patient and allow each layer to dry properly.

Recognizing the importance of practice will help you improve your skills over time.

Preparing Your Nails

Any successful nail art starts with proper nail preparation. Clean your nails thoroughly, shape them to your desired length, and push back cuticles for a polished look. It’s vital to apply a base coat to shield your nails from staining and to create a smooth surface for the art.

Finishing Touches and Top Coats

Before showcasing your beautiful designs, finish with a top coat to seal in your artwork. This step adds shine and helps prevent chipping, ensuring your nail art looks fresh for longer.

Another important aspect of finishing touches is the careful application of your top coat. Use smooth, even strokes to avoid disturbing your design. This clear coat not only enhances the shine but also provides a protective layer, allowing your creativity to stand the test of time. Additionally, consider using a quick-dry top coat if you’re in a hurry; it will help speed up the final drying process without sacrificing quality.

Creative Ideas and Inspiration

Your journey into household nail art can be both fun and fulfilling. Explore everyday items—like coffee filters for a tie-dye effect, or scotch tape for geometric patterns—to unleash your imagination. The possibilities are endless; from simple polka dots to intricate designs, let your creativity shine through. Plus, don’t hesitate to mix and match techniques for a truly unique look that reflects your personal style.

Seasonal and Themed Designs

Against the backdrop of each season, you can create stunning themed nail designs using items from home. For instance, in autumn, leaves can inspire warm color palettes, while winter can evoke thoughts of snowflakes and icy blue hues. By incorporating these elements, your nails can embody the spirit of each holiday or celebration, making your artistic expression timely and relevant.

Social Media Trends

Seasonal nail art often finds inspiration from trending designs across platforms like Instagram and TikTok. Creative influencers showcase innovative techniques that can spark your imagination. By keeping an eye on these trends, you can not only stay relevant but also make use of household items to replicate popular styles.

Social media’s influence on nail art trends encourages you to engage with a community of enthusiasts and experiment with viral designs. You can find tutorials on how to create vibrant ombre effects with kitchen sponges or patterned prints with plastic wrap. By participating in these trends, you not only enhance your skills but also connect your creations with a broader audience. Whether you’re trying out the latest nail hacks or sharing your own, social media platforms are a valuable resource for inspiration and ideas.

Final Words

With these considerations in mind, you can effectively create stunning nail art using everyday household items. Explore your creativity by utilizing tools like toothbrushes, sponges, or even plastic wrap to achieve unique designs. Experimenting at home allows you to personalize your nail art without the need for expensive supplies. By using common objects, you not only save money but also embrace a fun, DIY approach to beauty. So gather your household items and transform your nails into a canvas for your artistic expression.

FAQ

Q: Can I really use household items for nail art?

A: Absolutely! Household items can be a fantastic resource for creating unique nail art. Items like toothpicks, sponges, tape, and even kitchen utensils can be utilized to achieve a variety of designs, from dots to stripes and more intricate patterns.

Q: What common household items are best for making nail art?

A: Some of the best household items for nail art include:
– Toothpicks: Perfect for detailed designs or dotting.
– Sponges: Great for creating gradient effects.
– Tape: Helps in making clean lines or geometric designs.
– Old makeup brushes: Useful for painting techniques or adding finesse.
– Paper clips: Can be bent into various shapes for unique nail decorations.

Q: How can I clean up after using household items for nail art?

A: Cleaning up after your DIY nail art is easy. For items like sponges or brushes, simply wash them with soap and water. For sticky tape residue, a bit of nail polish remover applied to a cotton ball can help clean surfaces. Always ensure to work on a covered surface to make cleanup simpler.

Q: Are the designs made with household items durable?

A: The durability of nail art using household items largely depends on the type of nail polish used, as well as the top coat application. Using high-quality nail polish and a strong top coat will help your designs last longer, regardless of whether you used professional tools or everyday items.

Q: Can I create intricate designs with household items?

A: Yes, you can create intricate designs with household items! While it may take a bit more practice and creativity, you can achieve complex patterns using tools like toothpicks for detail work or sponges for textured backgrounds. The key is being patient and experimenting with different techniques to find what works best for your style.

Creating Nail Art Using Only Household Items

You can unleash your creativity and transform your nails using items you already have at home. This informative guide will show you how to create stunning nail art without needing expensive tools or supplies. With just a few simple household items, you can achieve impressive designs that reflect your personal style. If you’re unsure where to begin, check out Where to start with DIY nail art? : r/RedditLaqueristas for tips and inspiration.

Key Takeaways:

  • Innovative Tools: Household items like forks, sponges, and straws can be repurposed as unique nail art tools.
  • Affordable Materials: Utilize common products like cooking oil or glue to create nail art designs without buying special supplies.
  • Endless Creativity: Experiment with colors and techniques using items you already have, allowing for personalized styles.
  • Simple Techniques: Basic methods like dotting, sponging, or striping can achieve beautiful effects easily.
  • Cleansing Options: Household items like vinegar can assist in nail preparation and cleanup processes effectively.

Essential Household Items for Nail Art

To begin on your nail art journey, gather a few important household items that can elevate your creative process. These items are often found around your home and can help you achieve stunning designs without the need for specialized tools. From brushes to sponges, you can explore various techniques and styles using everyday items, making nail art accessible and enjoyable for everyone.

Common Tools and Their Uses

For your nail art project, consider using common tools like toothpicks, cotton swabs, and scissors. Toothpicks can create fine lines and intricate details, while cotton swabs are excellent for cleaning up mistakes or creating stippled effects. Scissors can be used to cut tape for precise designs or even to craft custom nail stickers from household materials.

Suggested Household Products

Their effectiveness in nail art lies in the creativity of the materials you already own. Nail polish remover, kitchen sponges, and adhesive tape are fantastic for creating unique textures and patterns. Nail polish remover can help with cleanup and can be mixed with polishes to create fading effects. Sponges can create gradient looks, while tape helps with geometric designs.

This versatility of household products opens up endless possibilities for your nail art. You can use nail polish remover not just for cleanup but also as a tool for blending colors. A kitchen sponge allows you to dab on various shades, achieving beautiful gradients with ease. Additionally, using tape can create clean lines for those intricate designs that require precision. By tapping into these everyday items, you can unleash your creativity and transform your nails into a canvas without breaking the bank!

Basic Techniques for Nail Art

Clearly, mastering the basic techniques of nail art will elevate your DIY manicure skills. You can create beautiful designs using common household items and a bit of creativity. Whether you’re a beginner or just looking to refresh your skills, familiarizing yourself with different methods will help you express your personal style while enjoying the nail art process.

Painting Techniques

At the heart of nail art lies the painting techniques you will employ to create stunning designs. You can use regular nail polish, markers, or even kitchen utensils like a toothbrush to achieve splatter effects. Practice your brush strokes and experiment with layering colors to develop unique patterns that stand out.

Stamping and Stenciling Methods

For a more intricate look, stamping and stenciling methods can bring your nail designs to life. Utilizing everyday items like sponge, tape, or even plastic lids, you can create impressive patterns in no time.

Another effective approach involves creating your own stencils or stamps using simple materials like stickers or cutouts. Once you’ve made your stencil, just apply nail polish over it and peel it off to reveal your design. This technique allows for precision and creativity, giving you the freedom to experiment with different shapes, colors, and patterns. Enjoy the process and let your imagination run wild!

Creative Nail Art Ideas

All you need is a little imagination and some household items to create stunning nail art. From simple designs to intricate patterns, the possibilities are endless. Explore your creativity by utilizing items like paper clips, toothbrushes, and even sponges to achieve unique effects. You can express your individual style and make your nails stand out with these fun nail art ideas!

Simple Designs for Beginners

To get started with nail art, focus on easy and straightforward designs that build your confidence. Simple dotting, stripes, and color blocking can be done with basic supplies, helping you ease into the world of nail art. Feel free to experiment with different colors and techniques!

Advanced Techniques for Experienced Users

After mastering the basics, you can probe advanced nail art techniques that require more creativity and skill. Techniques such as marbling, gradient effects, and stamping can elevate your art game significantly. These methods give you the opportunity to create intricate designs that truly showcase your unique flair.

Advanced Techniques Overview

TechniqueDescription
MarblingCreating a swirling effect by mixing two or more nail polish colors.
Gradient EffectBlending two colors from light to dark for a smooth transition.
StampingUsing a stamper to transfer designs onto your nails for intricate patterns.

Consequently, incorporating advanced techniques can drastically enhance your nail art game and allow you to express your creativity in more sophisticated ways. By investing time to practice these methods, you will build your skills and confidence. Here’s how you can start:

  1. Gather tools such as a nail art brush, sponge, or stamping plate.
  2. Choose a color palette that inspires you.
  3. Experiment with different techniques on a practice nail or wheel.
Further Techniques To Try

TechniqueDescription
WatercolorUsing diluted nail polish to create soft, blended color effects.
Negative SpaceLeaving parts of your natural nail exposed for a minimalist design.

Maintenance and Care for Nail Art

Many people overlook the importance of proper maintenance for their intricate nail art. Keeping your nails protected can enhance their appearance and longevity. Regularly apply a clear top coat to seal in your designs and shield them from chips. For more inspiration, check out these 8 nail art designs you can DIY at home with limited tools and colors.

How to Make Your Nail Art Last

Your nail art can stay vibrant and intact for a longer time by taking a few simple steps. Ensure your nails are clean and prepped before applying any polish. After creating your design, seal it with a quality top coat and reapply it every few days to maintain shine and durability.

Proper Removal Techniques

Beside caring for your nail art, knowing how to remove it safely is also important. Using the right removal technique can prevent damage to your nails and cuticles, ensuring they remain healthy.

In fact, to effectively remove your nail art, soak a cotton ball in acetone or nail polish remover and press it onto your nail for a few seconds before gently wiping it away. Avoid harsh scraping, which can weaken your nails. If your art is particularly intricate, consider soaking your nails in the remover instead, allowing the designs to dissolve gradually without harm.

Troubleshooting Common Issues

Keep your nail art looking flawless by addressing common issues promptly. If you encounter bubbling or smudging, ensure your polish layers are thin and allow ample drying time between each coat. If you’re not satisfied with the outcome, don’t fear; you can fix most issues with a little creativity and patience.

Fixing Mistakes

Troubleshooting mistakes in your nail art can be easy with a bit of finesse. If you accidentally smudge your design, use a clean brush dipped in acetone to gently erase the mistake. Alternatively, add a creative design overlay or strategically place some rhinestones to distract from any errors.

Addressing Durability Problems

After applying your nail art, you may notice that it doesn’t last as long as you’d like. To enhance the durability of your designs, always start with a solid base coat and finish with a top coat to seal your artwork and protect it from chips and wear.

Problems with durability often arise from not prepping your nails properly. Ensure your nails are clean and dry before application, as oils and residues can weaken the bond. Additionally, avoid using products that contain harsh chemicals or excessive water exposure as they may cause your designs to lift or chip prematurely. Keeping your nails trimmed and maintaining a consistent routine will also contribute to longer-lasting nail art.

Tips for Inspiration and Design

Once again, tapping into your creativity can transform everyday objects into stunning nail art. Consider these tips for fresh inspiration:

  • Browse social media for popular designs
  • Take note of colors in your wardrobe
  • Mix and match items from your kitchen
  • Explore nature for unique patterns

This process can help you discover fantastic ideas. For more suggestions, check out What are some of the nail art ideas/design to try at home?

Finding Ideas in Everyday Life

Against the backdrop of your daily routine, inspiration can come from unexpected places. Look around your home—your favorite book covers, patterned curtains, or even the design on a mug can give you a spark for your next nail art creation. Don’t hesitate to experiment with textures and motifs you encounter daily.

Following Trends with Household Resources

An exciting way to engage with nail art is to stay on trend using items you already have. By observing the latest styles on social media or beauty blogs, you can adapt those designs with household materials. Customizing trending patterns allows you to create personalized looks without the need for expensive tools.

Ideas for following trends can include items like plastic wrap for gradients or using tape for geometric shapes. Look closely at current nail art trends and translate them using household products, such as sponges, cotton swabs, or even food items. This approach not only saves money but allows you to express your creativity uniquely and personally.

Conclusion

Upon reflecting on your journey to create nail art using only household items, it’s clear that your creativity knows no bounds. By utilizing everyday materials, you unlock endless possibilities to express yourself through vibrant designs and unique styles. You can confidently explore various techniques that enhance not just your nails, but also your resourcefulness. With each creation, you not only beautify your nails but also discover the joy of inventiveness right at your fingertips.

FAQ

Q: What household items can I use to create nail art?

A: There are a variety of household items that can be repurposed for nail art. Common items include toothpicks and bobby pins, which can be used to create intricate designs. Tape can be cut into various shapes to create clean lines or patterns. A makeup sponge can be used for sponging techniques, blending colors smoothly. Additionally, you can use cotton swabs for dotting and small brushes for finer details. Nail polish bottles themselves, with their brush applicators, can also be utilized for creating nail art designs.

Q: How can I achieve a marble effect using household items?

A: To create a marble effect using household items, start by selecting two or three nail polish colors. Apply a base coat to your nails as a foundation. Once dry, drop small amounts of each polish onto a disposable plate or piece of aluminum foil. Take a toothpick or a bobby pin and swirl the colors gently to create a marbled pattern. Then, quickly press your nails onto the swirling paint or use a makeup sponge to dab the design onto your nails, ensuring even coverage. Finish with a top coat to seal your design and enhance its longevity.

Q: Can I use food items for nail art designs?

A: Yes, food items can be an unexpected source of creativity for nail art. For example, you can use the ends of fruits like strawberries or apples to create unique stamp designs by dipping them into nail polish and pressing them onto your nails. Alternatively, spices like cinnamon can create textured effects when mixed with clear nail polish and applied over a base color. Just ensure that whatever food item you use is clean and safe for contact with your nails. It’s a fun way to explore nail art using items you already have at home!

Skip to content