Gel

Gel vs. Regular Nail Polish – Which Is Right for You

Gel nail polish offers a long-lasting alternative to traditional regular nail polish, but which one is truly the best fit for your lifestyle? Understanding the differences in application, durability, drying time, and removal processes can help you make an informed choice that suits your preferences and needs. In this article, you’ll explore the pros and cons of both types, so you can find the perfect nail solution to match your style and routine.

Key Takeaways:

  • Durability: Gel nail polish typically lasts longer than regular nail polish, often remaining chip-free for up to two weeks or more.
  • Application Process: Gel polishes require a UV or LED light for curing, while regular polishes air-dry, making them more convenient for quick applications.
  • Removal: Regular nail polish usually comes off easily with standard removers, whereas gel polish requires soaking or special removal techniques, which can be time-consuming.

Understanding Nail Polish Types

The world of nail polish offers a variety of options to suit your style and needs. Each type has its distinct characteristics and application methods. Below is a table that elucidates the key differences between gel and regular nail polish:

FeatureGel Nail Polish
DurabilityLasts up to 2-3 weeks
ApplicationRequires UV/LED light to cure
RemovalNeeds soaking or professional removal
FinishHigh gloss and chip-resistant

Regular Nail Polish

One of the most traditional options, regular nail polish is known for its ease of application and removal. It usually comes in a wide range of colors and finishes, making it ideal for quick touch-ups or at-home manicures. While it may chip more easily than its gel counterpart, you can refresh or change your look effortlessly, allowing for versatility in your nail style.

Gel Nail Polish

At its core, gel nail polish is designed for longevity and durability. It requires a specialized application procedure, including the use of a UV or LED lamp to cure the polish, which creates a hard, glossy finish that resists chipping. Second only to professional treatments, this type of polish is great if you want long-lasting wear without the hassle of frequent touch-ups.

Polish options vary greatly, with gel formulas often providing a more professional finish. While they initially take longer to apply due to the curing process, the benefits include extended wear and fewer chips. Gel polish is perfect for those with a busy lifestyle who desire a beautiful, long-lasting manicure without the continuous upkeep that regular nail polish demands.

Application Techniques

Even though both gel and regular nail polish applications may seem similar, they require distinct methods for optimal results. Understanding these techniques will help you achieve your desired look while preserving the health of your nails.

Regular Nail Polish Application

An effective regular nail polish application starts with clean, filed nails. You begin by applying a base coat to protect your nails, followed by two coats of your chosen color, allowing each to dry in between. Finally, finish off with a top coat for shine and longevity.

Gel Nail Polish Application

Above all, gel nail polish requires a specific application process that includes curing under a UV or LED lamp. You first prepare your nails with a cleanse and a base coat, followed by two thin layers of gel color, curing each layer in between. Finish with a top coat and cure one last time.

With gel nail polish, the curing process is what sets it apart. Each layer needs exposure to a UV or LED lamp to harden, which not only prolongs the wear of the polish but also provides a high-gloss finish. Be sure to use a gel-specific remover when it’s time to change colors, as conventional nail polish removers won’t work on gel. Following these steps ensures a smooth and professional-looking finish that can last up to two weeks or more.

Durability and Longevity

To understand the differences between gel and regular nail polish, it’s important to examine their durability and longevity. Gel polish typically lasts longer than traditional nail polish, which may chip or fade more quickly. While both options boast appealing aesthetics, you should consider your lifestyle to determine which will hold up better for you over time.

How Long Does Each Last?

Any person who has tried both polish types may notice that gel nails can last up to two weeks or longer without chipping, while regular nail polish often lasts about five to seven days before showing signs of wear. If you lead an active lifestyle, gel may be better suited for your needs.

Factors Affecting Longevity

Longevity is influenced by several factors that determine how well your nail polish holds up over time. The type of activities you engage in, the brand of polish used, and your nail health can all affect how long your manicure lasts. Consider these elements:

  • Your daily routine and activities
  • The quality and brand of polish
  • Your nail care habits

The choice between gel and regular polish will ultimately depend on how these factors align with your lifestyle.

A deeper understanding of the factors affecting longevity can help you make an informed decision. For example, if you frequently expose your hands to water, gel polish may withstand wear and tear more effectively. Additionally, using a top coat can enhance the durability of regular polish. Keep these points in mind:

  • Your exposure to harsh chemicals
  • Your nail preparation and care routine
  • Application technique

The right choice relies on your personal habits and preferences.

Removal Process

Unlike regular nail polish, which comes off easily with a simple remover, gel nail polish requires a more involved process to safely remove it and protect your natural nails. Understanding the differences in removal techniques can help you decide which option is best for you.

Removing Regular Nail Polish

On average, removing regular nail polish is a straightforward task. All you need is a good-quality nail polish remover and some cotton pads. Simply soak the cotton in the remover, press it onto your nail, and wipe away the polish. It’s quick and hassle-free.

Removing Gel Nail Polish

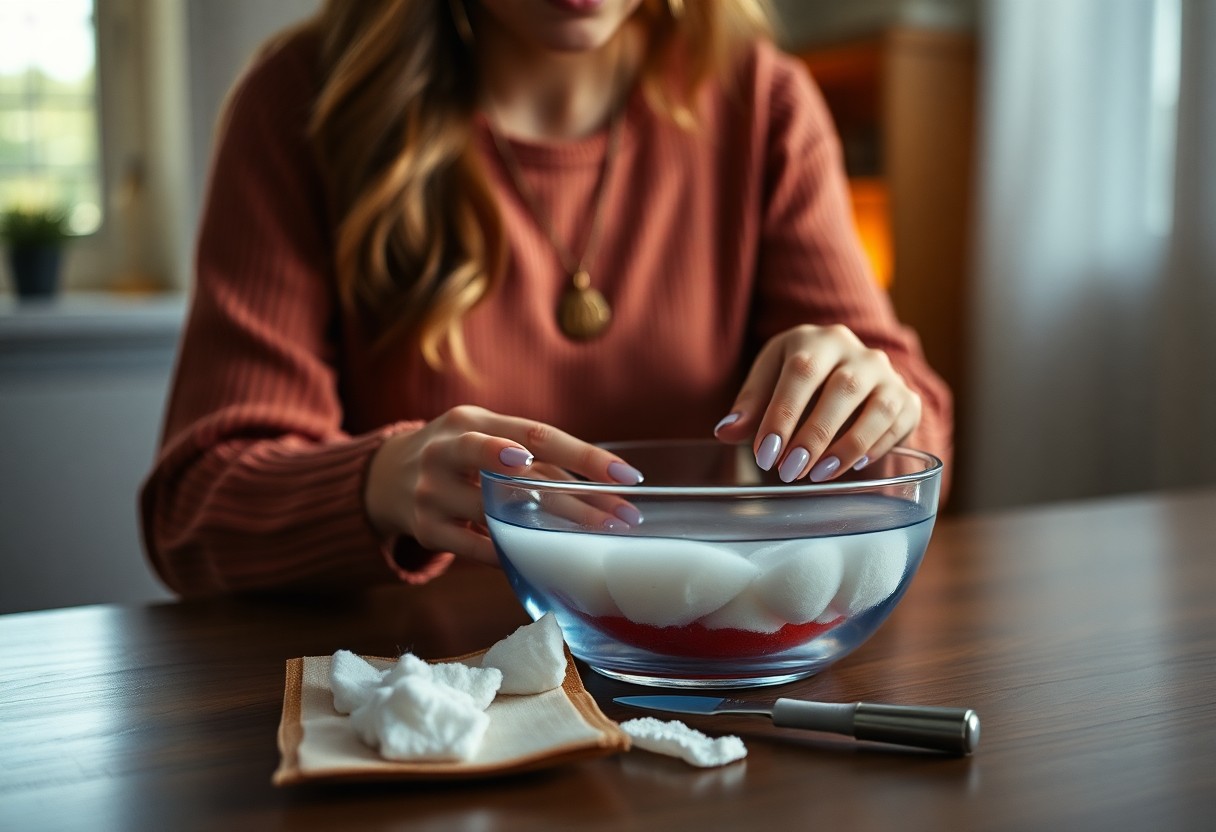
For gel nail polish, the removal process takes more time and care. You typically need to soak your nails in acetone or use specialized gel polish remover, often with the help of cotton pads and aluminum foil to wrap your fingertips. This method allows the acetone to penetrate the gel and dissolve it effectively.

This process can take around 10 to 15 minutes. After soaking, you may need to gently push the gel off with a wooden or plastic cuticle pusher, being careful not to damage your natural nails. If stubborn bits remain, soaking may be required again. Proper removal not only ensures the health of your nails but also allows for a fresh, polished look with your next manicure.

Cost Comparison

For those deciding between gel and regular nail polish, understanding the cost can significantly influence your choice. Check out this comprehensive comparison in the article Gel Nail Polish Vs. Classic Nail Polish: Which Is Better?. The table below outlines the typical price variations you can expect.

TypeAverage Cost
Regular Nail Polish$5 – $15
Gel Nail Polish$15 – $30

Price of Regular Nail Polish

Any beauty enthusiast knows that regular nail polish is generally more affordable, with prices ranging from $5 to $15 per bottle. This accessibility makes it a popular choice for those who enjoy frequent color changes without breaking the bank.

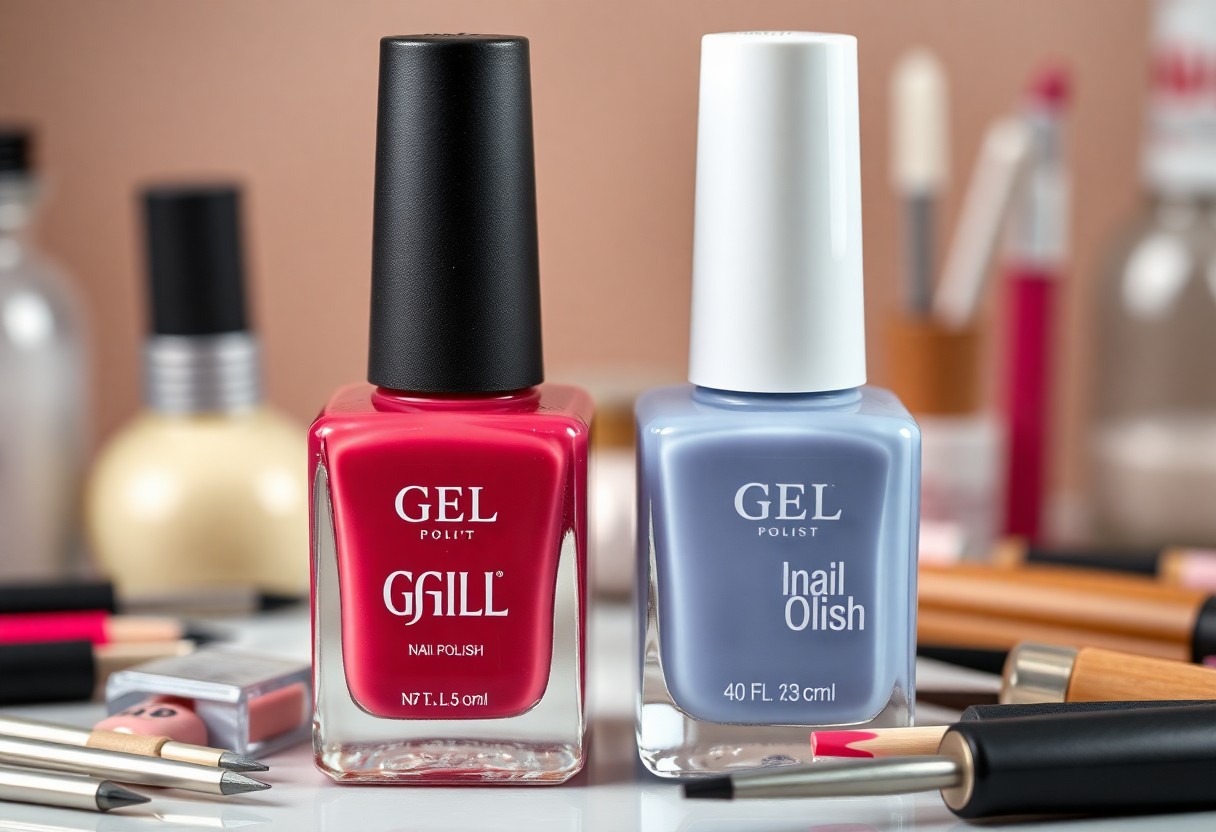
Price of Gel Nail Polish

An investment in gel nail polish typically ranges from $15 to $30. While it may seem more expensive upfront, many believe the longevity and durability justify the price.

To further elaborate, the higher initial cost of gel nail polish often offsets the expense over time. Due to its long-lasting nature, you may find yourself purchasing fewer bottles compared to regular polish, making it a more economical choice in the long run. Additionally, the extra time and effort required for application and removal can contribute to overall savings, especially if you prefer at-home manicures.

Health and Safety Considerations

Your choice between gel and regular nail polish can impact your nail health. Regular nail polish is easier to remove and typically less damaging to your nails when used correctly. However, gel polish requires a UV or LED lamp for curing, raising concerns about potential skin exposure to UV light. Additionally, prolonged use of gel formulas can lead to nail brittleness or weakening. It’s vital to consider these factors and prioritize nail care in your nail routine, no matter your choice.

Ingredients in Regular Nail Polish

Between conventional solvents, pigments, and additives, regular nail polish tends to include various chemical components. Most formulas contain toluene, formaldehyde, and dibutyl phthalate (DBP), which have faced scrutiny for potential health risks. Many brands now offer “3-free” or “5-free” options, which skip out on these contentious ingredients, making them a safer choice for your nails and overall health.

Ingredients in Gel Nail Polish

Ingredients in gel nail polish can vary widely, often including methacrylates, which allow the polish to harden under UV or LED light. While these compounds create a durable finish, they may also pose challenges for those with sensitive skin or allergies. Carefully selecting a gel polish, preferably from reputable brands, can help minimize potential allergic reactions and maintain nail health.

Ingredients in gel nail polish are often designed to enhance durability and shine, hardening through the curing process. This means they generally contain more chemicals compared to regular options, which can be concerning for some users. While the result is long-lasting and chip-resistant, be aware of the base and top coats that may include harmful additives or allergens. Always examine the ingredient list to choose a gel polish that aligns with your health and safety preferences.

Summing up

From above, you can see that choosing between gel and regular nail polish ultimately depends on your lifestyle, preferences, and nail health. If you desire long-lasting wear and a glossy finish, gel polish may be the best fit for you. However, if you prefer easy removal and a wider color selection, regular nail polish is a great choice. Assess your needs and weigh the pros and cons to find what aligns best with your beauty routine and nail care goals.

FAQ

Q: What are the main differences between gel and regular nail polish?

A: The key differences between gel and regular nail polish lie in their formulations and application processes. Gel nail polish is a thicker formula that requires curing under a UV or LED light, which helps it to bond better with the nail and achieve a longer-lasting finish. In contrast, regular nail polish air-dries and typically chips faster. Additionally, gel polish offers a glossy finish that lasts longer without fading, while regular polish may require more frequent touch-ups.

Q: How long do gel nails last compared to regular nail polish?

A: Gel nails generally last anywhere from two to three weeks without significant chipping or wear, making them a popular choice for those seeking long-lasting results. Regular nail polish, however, typically lasts about five to seven days before signs of chipping appear. Individual wear can vary based on lifestyle factors such as activities, exposure to water, and nail care habits.

Q: Is the removal process different for gel and regular nail polish?

A: Yes, the removal process differs significantly between gel and regular nail polish. Gel polish requires soaking the nails in acetone, often wrapped in cotton and foil, followed by gentle scraping or buffing to remove any residue. This process can take more time and may be best performed by a professional to prevent damage to the natural nail. Regular nail polish can be easily removed with typical nail polish remover in just a few minutes, making it a more convenient option for some.

Q: Are there any health risks associated with using gel nail polish?

A: While gel nail polish is safe for most people, there are some considerations to keep in mind. Prolonged UV exposure from curing lamps may increase the risk of skin damage over time. Therefore, applying sunscreen to the hands prior to using a UV lamp is advisable. Also, improper removal can lead to nail damage, so it’s important to follow the correct procedures. For those with sensitive skin or allergies, patch testing the product first can help avoid adverse reactions.

Q: Which one is easier to apply at home: gel or regular nail polish?

A: Regular nail polish is generally easier to apply at home since it only requires a basic application and air drying. Gel polish, while providing a longer-lasting result, necessitates a UV or LED light for curing, which can complicate the process for beginners. However, with practice and the right tools, applying gel polish can be mastered at home as well. Those new to nail care might find starting with regular polish more user-friendly and gradually transitioning to gel polish as they become more comfortable.

How to Remove Gel Nails Safely at Home

With the right techniques and tools, you can effectively remove gel nails at home without causing damage to your natural nails. This guide will walk you through the imperative steps to ensure a safe and efficient removal process, allowing you to enjoy beautiful, healthy nails. You’ll learn how to prepare your nails, what products to use, and tips for aftercare, ensuring your nails remain in optimal condition. Follow these instructions carefully, and you can achieve salon-quality results from the comfort of your home.

Key Takeaways:

  • Soak your nails in acetone or a gel nail remover to break down the gel polish effectively.
  • Gently file the top layer of gel polish before soaking to accelerate the process and reduce time.
  • Moisturize your nails and cuticles afterward to restore hydration and prevent damage.

Understanding Gel Nails

While gel nails have become a popular choice for their durability and glossy finish, it’s necessary to understand what they are and how to remove them properly. Gel nails are a type of artificial nail enhancement that requires curing under a UV or LED lamp, allowing them to bond strongly to your natural nails. This strength and flexibility make them appealing, but it also means that improper removal can lead to damage to your natural nails.

What Are Gel Nails?

Nails are coated with a special gel that hardens when exposed to UV or LED light, creating a long-lasting and shiny finish. This type of nail enhancement comes in various colors and designs, making it a favorite among those looking for both beauty and durability in their nail care routine.

Why Gel Nails Need Proper Removal

Before attempting to remove gel nails, it’s important to understand the potential damage that can occur from improper techniques. Without the correct approach, you could end up weakening your natural nails, causing peeling or breakage. Proper removal methods help preserve the integrity of your nails and ensure they remain healthy after the gel is off.

What you might not realize is that the way gel nails bond to your natural nails can lead to some difficulties during removal. The gel formula is designed to adhere strongly, which can create challenges if not handled correctly. Choosing the right removal method, such as soaking or using specific tools, is vital to ensure your nails stay intact and healthy. Always take your time and follow through with the steps to avoid any unwanted damage.

Tools Required for Safe Removal

Some imperative tools will make your gel nail removal process easier and safer at home. You’ll need acetone, cotton balls, aluminum foil, a nail file, and a cuticle pusher. If you’re looking for more detailed guidance, check out How Do I remove Gel Nail-polish at home? for tips from fellow enthusiasts.

Essential Items

For a successful gel nail removal, ensure you have acetone, which acts as the solvent to break down the gel, cotton balls for application, and aluminum foil to wrap them. A nail file and cuticle pusher are also necessary to gently buff and push back any remaining gel residue from your nails.

Optional Accessories

Items like a nail buffer, hydration oils, and a manicure set can enhance your gel removal experience, but they aren’t mandatory. A nail buffer can smooth out any roughness after you’ve removed the gel, while hydration oils can restore moisture to your nails and cuticles.

Plus, having a manicure set on hand can be helpful if you want to tidy up your nails post-removal. These accessories allow you to pamper your hands, making the entire process not just practical but also enjoyable. Socializing with friends for a DIY nail care session can add a fun twist to this routine. Make sure to take the time to care for your nails after removal to keep them healthy and strong.

Step-by-Step Guide to Remove Gel Nails

Now, let’s walk through the process of safely removing your gel nails at home. Follow these important steps to ensure a smooth and hassle-free experience:

StepsDescription
1. Preparing Your WorkspaceSet up a clean area with all your tools ready.
2. Soaking ProcessSoak your nails to break down the gel polish.
3. Gentle Removal TechniquesCarefully remove the gel without damaging your nails.

Preparing Your Workspace

With a proper workspace setup, you can ensure a smooth removal process. Choose a well-lit area and lay down a towel or old newspaper to catch any spills. Gather all necessary tools such as cotton balls, acetone, aluminum foil, and a cuticle pusher for easy access.

Soaking Process

Below, you will learn how to successfully soak your nails to loosen the gel polish. This step is vital for easing the removal and minimizing damage to your natural nails.

Soaking your gel nails in acetone is the most effective method to dissolve the polish. Soak cotton balls in acetone and place them on each nail, wrapping them in aluminum foil to maintain moisture and heat for 10-15 minutes. This allows the acetone to penetrate the gel, making it easier to lift off without excessive scrubbing.

Gentle Removal Techniques

Techniques for removing gel nails should prioritize the health of your natural nails. Use a cuticle pusher to gently scrape away the softened gel after soaking.

Removal of gel nails requires a light touch to ensure you don’t damage your natural nails. Once the gel has softened, gently push off the remnants with a cuticle pusher, taking care not to force anything. If there are stubborn areas, you can repeat the soaking process or use a buffer, always being cautious to preserve your nail’s integrity.

Aftercare for Your Natural Nails

Unlike the brief indulgence of gel nails, caring for your natural nails after removal is imperative to maintain their health and appearance. Gel nails can leave your natural nails weakened, so prioritize aftercare routines that support recovery. Implementing good habits now will ensure your nails grow stronger, and more resilient, ultimately allowing your natural beauty to shine through.

Nourishing Your Nails

Between treatments, it’s beneficial to nourish your nails and cuticles with oils and creams. Look for products rich in vitamin E, jojoba oil, or almond oil. Regular application will help restore moisture and elasticity, promoting healthier nail growth.

Avoiding Damage

Your nails are particularly vulnerable right after removing gel nails, so take steps to avoid unnecessary trauma. Gently trim and file any rough edges, but steer clear of aggressive filing or biting. Proper care will minimize the risk of splits or breaks, allowing your natural nails to recover fully.

Another way to avoid damage is to limit exposure to harsh chemicals and prolonged water immersion. Wearing gloves while cleaning and using gentle nail products can significantly benefit the health of your nails. Additionally, maintain a balanced diet rich in vitamins and minerals to support strong nail growth from within.

Common Mistakes to Avoid

After deciding to remove your gel nails at home, it’s important to steer clear of certain missteps that could cause damage to your natural nails or prolong the process. Avoiding these common mistakes will help ensure a safer and more effective removal experience, allowing your nails to stay healthy and looking their best.

Rushing the Process

Across many nail care routines, eagerness can lead to hasty decisions. When removing gel nails, rushing can cause harm to your nails, potentially causing splits or tears. Take your time and follow each step carefully to prevent unnecessary damage.

Using Non-Safe Products

For optimal nail health, you must use the right products when removing gel nails. Using harsh solvents or non-acetone removers can strip your nails of their natural moisture and integrity.

This is why it’s important to choose products specifically formulated for gel removal. Look for acetone-based removers that are gentle and effective or nail wraps that are designed to break down the gel safely. Always read the labels and choose reputable brands to ensure you’re protecting your nails throughout the process.

When to Seek Professional Help

Many people may find themselves in situations where removing gel nails at home becomes challenging. If you experience significant discomfort, excessive time spent trying to remove them, or are uncertain about the process, it’s best to consult a professional. They can safely remove your gel nails and provide any necessary care for your natural nails to prevent further damage.

Signs You Need Assistance

Seek immediate help if you notice signs such as persistent pain, bleeding, or infection. If the gel nails are lifted but won’t budge, trying to force them off could lead to serious nail damage or injury. Your well-being should always come first, so don’t hesitate to reach out for professional support if needed.

Finding a Qualified Technician

Seek a reputable nail technician who specializes in gel nail services. Look for technicians who have positive reviews, proper certifications, and experience in gel nail removal. You can often find recommendations through friends or beauty forums, ensuring they have a good track record with safe practices.

The right technician will not only remove your gel nails safely but can also offer helpful advice for maintaining your nails afterward. Prioritize finding someone who takes hygiene seriously and provides a comfortable environment. Little research can make a significant difference in your experience and the health of your nails.

Final Words

To wrap up, safely removing gel nails at home requires patience and the right techniques. Start by gathering acetone, cotton balls, aluminum foil, a nail file, and cuticle oil. Ensure you soak your nails adequately, gently file the surface, and follow up with moisturizing treatments for your cuticles. By taking your time and using the proper methods, you can protect your natural nails while achieving a clean gel removal. With these steps, you can confidently handle gel nail removal at home, ensuring your nails remain healthy and beautiful.

FAQ: How to Remove Gel Nails Safely at Home

Q: What supplies do I need to remove gel nails at home?

A: To remove gel nails safely at home, you will need the following supplies:
– Acetone (100% pure acetone is recommended)
– Cotton balls or pads
– Aluminum foil or gel nail wraps
– Nail file or buffer
– Cuticle oil or hand moisturizer (for aftercare)

Q: What is the step-by-step process for removing gel nails?

A: The step-by-step process for removing gel nails is as follows:
1. Start by gently filing the topcoat of your gel nails to break the seal. Be careful not to file too deeply.
2. Soak a cotton ball in acetone and place it directly on each nail.
3. Wrap each finger with aluminum foil or use gel nail wraps to hold the cotton in place.
4. Allow the nails to soak for about 10-15 minutes.
5. Once the gel has softened, gently push it off using an orangewood stick or a cuticle pusher.
6. If needed, repeat the process for any stubborn spots.
7. Finish by washing your hands and applying cuticle oil or hand moisturizer.

Q: Are there any risks associated with removing gel nails at home?

A: Yes, there are some risks involved in removing gel nails at home. It’s important to avoid damaging the natural nail bed while removing the gel. Over-filing or using excessive force can lead to thin and weak nails. Additionally, acetone can dry out the skin and nails, so it is recommended to hydrate afterward. Always follow the steps carefully to minimize risks.

Q: How can I tell when the gel nails are ready to be removed?

A: Gel nails are ready to be removed when they appear dull and have softened significantly after soaking in acetone. You should be able to gently push the gel off using a cuticle pusher. If there’s still resistance, continue soaking them for a few more minutes.

Q: What can I do to care for my nails after removing gel polish?

A: After removing gel polish, it’s crucial to take care of your nails. Apply cuticle oil generously to nourish the nail bed. Additionally, consider using a strengthening nail treatment or polish to help restore the health of your nails. Stay hydrated and avoid further nail enhancements for a week to allow your natural nails to recover.

Gel vs. Acrylic Nails – Pros and Cons

Many people find themselves torn between gel and acrylic nails when choosing the perfect manicure. Each option has its own set of advantages and disadvantages, making it important for you to understand what best suits your lifestyle and preferences. In this post, we will explore the pros and cons of both gel and acrylic nails, helping you make an informed decision for your next nail enhancement. Dive in to discover what fits your beauty routine and lasts the best for your day-to-day activities.

Key Takeaways:

  • Longevity: Acrylic nails often last longer than gel nails, making them a preferred choice for durability.
  • Appearance: Gel nails typically offer a more natural look and shine compared to acrylics, appealing to those seeking a less artificial finish.
  • Removal Process: Gel nails can be easier to remove, but both methods require care to avoid damaging the natural nail.

Understanding Gel Nails

A gel nail is a popular manicure option that provides a glossy finish and long-lasting wear. They are cured under a UV or LED light, making them more durable than traditional nail polish. If you’re curious about the differences, check out What’s the Difference Between Gel Nails and Acrylics? for a detailed comparison.

Composition and Features

After understanding the basics, you’ll find that gel nails are made from a combination of polymers and resins that create a flexible and natural-looking finish. These components work together to give your nails strength and shine without the bulkiness often associated with acrylics.

Application Process

Across the beauty industry, the application process for gel nails is favored for its efficiency. Your nail technician will first prep your natural nails, apply a base coat, and then cure it under UV or LED light. Following this, colored gel polish is layered on and cured again until your desired look is achieved.

In addition, each layer of gel is crucial to achieving that smooth finish. Although the curing time is quick, the process may require several layers for optimal color and durability. Once all layers are applied and cured, a top coat seals the gel, ensuring it lasts for weeks without chipping.

Understanding Acrylic Nails

You may find acrylic nails to be a popular choice for enhancing your natural nails with added length and strength. These artificial nails are made by combining a liquid acrylic and a powder, which creates a durable layer over your existing nails. You can find them in various shapes and styles, making it easy to customize your look.

Composition and Features

One of the standout features of acrylic nails is their composition, which consists of a combination of liquid monomer and powder polymer. This mixture creates a hard, protective layer that not only adds length and versatility to your nails but also provides a strong foundation that resists chipping and breaking.

Application Process

Across the beauty industry, the application of acrylic nails involves a meticulous process that ensures a flawless finish. A nail technician will first prepare your natural nails by cleaning and shaping them, followed by applying a primer to enhance adhesion. After that, the acrylic mixture is applied to your nails, sculpting the desired shape and length.

Another important aspect of the application process is the drying technique. Once the acrylic has been applied, it hardens quickly, usually within minutes, thanks to the reaction between the monomer and polymer. The technician may then buff and shape the nails for a smooth finish, followed by applying polish or nail art as you desire. This careful application results in sturdy nails that can last for several weeks with proper care.

Pros of Gel Nails

Keep in mind that gel nails offer several benefits, making them a popular choice among nail enthusiasts. They provide a natural look, flexibility, and a high-gloss finish that can last for weeks without chipping. With their lightweight formula, gel nails feel more comfortable than other types, giving you a beautiful and polished appearance without sacrificing durability.

Durability

Nails enhanced with gel products are known for their remarkable durability. They can withstand daily activities without easily chipping or breaking, ensuring that your manicure remains intact for longer periods. This longevity makes gel nails an appealing option for those with busy lifestyles who still want their nails to look perfect.

Aesthetic Appeal

One of the standout features of gel nails is their aesthetic appeal. The glossy finish creates a vibrant and polished look that enhances the natural beauty of your nails. With a variety of colors and designs available, you can easily customize your gel nails to suit any occasion or personal style.

Consequently, the aesthetic qualities of gel nails deliver not just beauty, but also versatility. You can achieve intricate designs, vibrant colors, and a smooth finish that elevates your overall look. This makes gel nails a favorite among fashion-forward individuals who want to express their personality through their manicured nails. Whether you prefer classic shades or trendy patterns, gel nails contribute to a polished and elegant appearance.

Cons of Gel Nails

To fully understand the downsides of gel nails, you should consider the potential drawbacks. While they offer a beautiful finish and durability, the process can be time-consuming, and the exposure to UV light during curing might raise concerns about skin damage. Additionally, if not done correctly, gel nails can weaken your natural nails over time, leading to breakage. It’s crucial to weigh these factors before deciding on gel nails for your next manicure.

Removal Process

Nails can be challenging to remove when it comes to gel applications, requiring a soaking procedure that can be quite time-intensive. You may need to visit a salon for safe removal, as improper techniques can damage your natural nails. The process typically involves soaking in acetone, which can be drying and potentially irritating to your skin. Regular upkeep is necessary, so consider how this might affect your nail health.

Cost Implications

Above all, weighing the financial aspect of gel nails is vital for your budgeting. Initial application costs can be higher than other types of manicures, and the need for regular maintenance and professional removal adds up over time.

Cost can be a significant factor when choosing gel nails. While the initial investment in gel nails might seem justified due to their longevity and aesthetic appeal, the recurring appointments for fills and maintenance can gradually increase your overall spending. Moreover, if you opt for salon removal instead of DIY methods, you will incur additional expenses. Evaluate these costs to ensure they align with your beauty budget and priorities.

Pros of Acrylic Nails

Your journey into the world of nails might lead you to acrylics, which offer a variety of advantages. Acrylic nails are robust and durable, making them a popular choice for those who desire long-lasting wear. They can withstand daily wear and tear, providing you with a beautiful manicure that stays intact longer than other options. Additionally, the application process allows for intricate designs that can elevate your style.

Customization Options

Acrylic nails give you limitless customization options. You can choose from various shapes, lengths, and colors to craft a look that’s uniquely yours. Whether you prefer a classic French tip or a bold, artistic design, the versatility of acrylics enables you to express your personal style.

Longevity

Around three to six weeks, acrylic nails maintain their stunning appearance, depending on how well you care for them. This extended wear makes them ideal for those who want to enjoy a polished look without frequent trips to the salon.

Due to their durable nature, acrylic nails can last several weeks without significant chipping or wear. This longevity is particularly beneficial for those with busy lifestyles or individuals who frequently find themselves working with their hands. Regular maintenance, such as fills or touch-ups, can further extend their lifespan while ensuring your nails continue to look fresh and fabulous.

Cons of Acrylic Nails

All nail enhancements come with their downsides, and acrylic nails are no exception. While they are popular for their durability and variety, they can pose some significant drawbacks. Issues such as damage to natural nails, potential allergic reactions, and strong odors can make you rethink your choice. Understanding these cons can help you make an informed decision about whether acrylic nails are the right fit for you.

Damage to Natural Nails

One of the most significant concerns with acrylic nails is the potential damage they can inflict on your natural nails. The application process involves filing the nail surface to create a bond, which can thin and weaken your nails over time. Additionally, if acrylics are improperly removed or maintained, it can lead to brittleness, splits, and even permanent damage to your natural nail bed, necessitating time for recovery.

Odor and Allergies

An important aspect to consider is the odors and potential allergic reactions associated with acrylic nails. The chemicals used in applying acrylics, especially the acrylic liquid, often release strong fumes that can be unpleasant to breathe in. Those with sensitive skin or respiratory issues may find themselves experiencing irritation or reactions, highlighting the need for caution when opting for acrylic nails.

Odor from acrylic nails can be quite strong, stemming from substances like acetone and the monomer used in the process. This smell may linger in the salon even after your appointment. If you are sensitive to strong scents, you might find the experience uncomfortable. Moreover, allergies can manifest in various ways, from skin irritation to respiratory difficulties, making it imperative for you to consider your health history before choosing acrylic nails.

Final Words

Upon reflecting on the pros and cons of gel and acrylic nails, you have several factors to consider when choosing the best option for your needs. Gel nails offer a more natural look and flexibility, while acrylics provide strength and durability. Your lifestyle, budget, and personal preferences are key influences in this decision. It’s vital to weigh these aspects carefully, ensuring that your choice aligns with your desires for maintenance and appearance. Ultimately, understanding these differences empowers you to make an informed decision for your nail care journey.

FAQ

Q: What are the main differences between gel and acrylic nails?

A: The main differences between gel and acrylic nails lie in their composition and application process. Acrylic nails are created using a mixture of liquid monomer and powder polymer, which hardens when exposed to air. Gel nails, on the other hand, are made from a semi-solid gel that requires curing under a UV or LED lamp. This difference in curing affects the overall finish and durability of the nails—acrylic nails tend to be thicker and stronger, while gel nails offer a more natural, shiny appearance.

Q: What are the pros of choosing gel nails over acrylic nails?

A: Gel nails offer a number of advantages compared to acrylics. Firstly, they tend to look more natural, providing a glossier finish that mimics the appearance of natural nails. Additionally, gel nails are less prone to chipping and provide more flexibility, making them less likely to break. Moreover, the curing process creates a strong bond, which can result in a longer-lasting manicure without the strong chemicals often associated with acrylics.

Q: What are the drawbacks of using acrylic nails?

A: While acrylic nails provide a strong and durable option for nail enhancement, there are some drawbacks to consider. The application process can be more invasive, as it often involves filing down the natural nail to create a strong bond. This can lead to potential damage or thinning of the natural nail over time. Additionally, acrylics can have a strong odor during application due to the chemicals used, which might be off-putting to some individuals. Lastly, if not applied or removed properly, they can risk lifting and cause damage to the natural nail.

Q: Are gel nails easier to maintain than acrylic nails?

A: Generally, gel nails are considered easier to maintain than acrylic nails. They require less filing and can be less prone to lifting due to their flexibility, which allows them to withstand daily activities better. Regular upkeep typically involves minimal maintenance, as the growth gap from the cuticle area is less noticeable compared to that of acrylic nails. However, both types of nails require regular fills or maintenance every two to three weeks, depending on individual nail growth.

Q: Can I remove gel nails at home, or should I seek professional help?

A: While it is possible to remove gel nails at home, it is often recommended to seek professional help to avoid damaging the natural nails. The best practice for removal involves soaking the nails in acetone to loosen the gel before gently pushing it off. At home, this process can lead to mishaps if not done carefully. Professionals have experience and tools that can make the process quicker and safer, ensuring that your natural nails remain intact and healthy.

How to Extend the Life of Your Gel Manicure

Manicure longevity is a priority for many, especially with the vibrant look and durability of gel polish. To ensure your gel manicure stays flawless for as long as possible, there are several key practices you can adopt. From proper aftercare to mindful habits, you can significantly enhance the durability and appearance of your nails. This guide will provide you with crucial tips and techniques to help you enjoy your gel manicure to the fullest, maintaining its shine and chip-free finish for weeks on end.

Key Takeaways:

  • Moisturize your hands and cuticles regularly to prevent dryness and peeling, which can lead to the gel manicure chipping.
  • Avoid hot water exposure for prolonged periods, as it can weaken the adhesion of the gel polish.
  • Use gloves while cleaning or doing household chores to protect your manicure from harsh chemicals and abrasives.

Understanding Gel Manicures

The gel manicure is a popular nail treatment that combines traditional nail polish with a gel formula. This innovative process often involves curing the gel under a UV or LED light, resulting in a glossy finish that lasts longer than standard polish. Gel manicures are known for their durability and resistance to chipping, which makes them a favorite among those seeking a long-lasting manicure.

What are Gel Manicures?

Below are the crucial elements of gel manicures. They are typically applied in multiple layers, including a base coat, color, and top coat. Each layer is cured under a special light to form a hard, protective coating that helps retain shine and prevent wear. This method not only allows for intricate designs but also promotes healthy nail growth by providing a strong barrier against external damage.

Benefits of Gel Manicures

Behind the allure of gel manicures lie several advantages that make them an ideal choice for many. The long-lasting nature of gel polish means that you can enjoy fresh, vibrant nails for up to two weeks or more without frequent touch-ups. Additionally, gel manicures are less prone to chipping, providing you with a stress-free experience, especially for those with busy lifestyles.

But the benefits don’t stop there. You’ll also appreciate the quick drying time offered by gel manicures, as the curing process means you won’t have to worry about smudging your nails right after application. Furthermore, many gel formulas offer a glossy finish that can elevate your overall look. For individuals who frequently engage in activities that wear down traditional polish, gel manicures present a strategic solution to maintain beautiful nails while minimizing maintenance efforts.

Preparing Your Nails

Some crucial steps can help you prepare your nails for a gel manicure, ensuring a longer-lasting finish. Start by cleaning your nails thoroughly, removing old polish, and gently pushing back your cuticles. As you get ready, check out How to Make Gel Nails Last Longer: 18 Tips that Work for additional techniques that can enhance your manicure longevity.

Pre-Manicure Care

Before starting your gel manicure, it is vital to ensure your nails are in the best condition. This includes trimming and shaping your nails to your desired length and style. Take the time to exfoliate and moisturize your hands, which not only helps with the application process but also contributes to the overall appearance of your nails.

Choosing the Right Products

Besides proper nail care, selecting high-quality products can significantly affect the durability of your gel manicure. Invest in a reputable gel polish and base coat, as cheap products may not provide the same adhesion and longevity. Make sure to choose products that are specifically designed for gel applications to ensure the best results.

Preparing for your manicure involves more than just the application; it’s about using the right tools and products to support your nail health. Opt for a gel polish that is known for its staying power, and pair it with a reliable top coat. Additionally, consider using a nourishing cuticle oil to maintain the health of your nails and surrounding skin as this can help keep your manicure looking fresh and vibrant for longer.

Application Techniques

For a long-lasting gel manicure, mastering application techniques is key. Start by prepping your nails correctly, ensuring they are clean, dry, and free of oils. Use a base coat to create a smooth surface for better adhesion. Apply thin layers of gel polish, allowing each layer to cure properly under the UV or LED lamp for optimal results. This attention to detail will enhance the overall durability of your manicure.

Proper Gel Application

Between each coat, be mindful of how you apply the polish. Use even strokes, starting from the center of the nail and working your way to the edges. This technique prevents pooling at the cuticles, which can lead to lifting. Keeping a steady hand and applying thin layers will help your manicure adhere better and last longer.

Curing Process Best Practices

Below the surface of your gel manicure lies the importance of the curing process. Properly curing each layer not only hardens the gel but also ensures it bonds well to your natural nail. Make sure to follow the guidelines provided with your gel products regarding the duration and type of lamp needed for curing.

But don’t rush the curing process. It’s imperative to ensure that the gel polish is fully cured to achieve optimal strength and longevity. If your gel polish feels tacky after curing, it may not be fully set, which can lead to premature chipping or lifting. Always make sure to check the manufacturer’s instructions for the right curing time, and ensure that your lamp is functioning properly. Taking the time for this step pays off in the longevity of your manicure.

Maintaining Your Manicure at Home

Many people seek ways to prolong the life of their gel manicure, and caring for your nails at home can make all the difference. By implementing a few simple habits, you can keep your nails looking fresh and shiny for weeks. This includes protecting your hands from excessive moisture, using gentle cleansers, and applying cuticle oil regularly to nourish your nails.

Daily Care Routine

Your daily care routine is necessary for maintaining the integrity of your gel manicure. Be sure to wash your hands with mild soap and keep them moisturized without soaking them too much in water. Incorporate a hydrating lotion that is free of harsh chemicals and a quick-drying topcoat to maintain the shine and protect the color.

Dealing with Chips and Peeling

Your gel manicure may be prone to chips and peeling over time, especially if your hands are frequently exposed to harsh conditions. Be attentive to any signs of damage and take immediate action to minimize the effects on your manicure.

But if you do encounter chips or peeling, there are ways to mitigate the damage. You can use a brush-on gel topcoat to smooth over the affected area, sealing it and preventing further chipping. For significant issues, consider visiting your nail technician for a repair or a fill-in. Taking prompt action not only enhances the appearance of your manicure but also extends its lifespan.

Protecting Your Manicure

Unlike regular nail polish, gel manicures require additional care to maintain their shine and prevent chipping. To protect your manicure, be mindful of your hands’ daily exposure to elements that can cause wear and tear. Simple precautions can significantly stretch the longevity of your gel polish, ensuring your nails look their best for weeks on end.

Avoiding Damage in Daily Activities

Protecting your manicure starts with being attentive to your daily activities. Avoid using your nails as tools; this includes opening cans or scraping off labels. Instead, use appropriate instruments designed for the task. Be gentle while typing or handling items, as excessive force can lead to chipping.

Tips for Special Occasions

About special events, you want your gel manicure to shine just as brightly as the occasion. To keep your nails looking pristine, consider these tips:

  • Apply a top coat before attending an event to enhance longevity.
  • Carry a small nail file for quick fixes on the go.
  • Avoid harsh chemicals like bleach, as they can dull your manicure.
  • Be cautious with foods that stain and always keep a napkin handy.

Assume that taking these precautions will help retain your manicure’s beauty during special occasions.

At events where you want to make a lasting impression, always plan ahead for your manicure care. Here are additional strategies to consider:

  • Choose less abrasive seating arrangements to avoid scratching your nails.
  • Bring your own set of utensils or glassware to prevent unintentional damage.
  • Take breaks to ensure your hands stay relaxed and avoid accidental contact with rough surfaces.

Assume that these proactive measures will keep your nails looking fabulous throughout your event.

Regular Care and Removal

Once again, regular care and proper removal are imperative to prolong the life of your gel manicure. Maintaining the health of your nails helps you enjoy your polished look longer, while also preventing damage to the natural nail. Moisturizing your cuticles, avoiding harsh chemicals, and wearing gloves while doing household chores can significantly aid in keeping your gel manicure looking fresh and vibrant.

How to Safely Remove Gel Manicure

Among the key steps for safely removing your gel manicure, it’s important to avoid picking or peeling the polish off, as this can damage your natural nails. Instead, soak a cotton ball in acetone, place it on the nail, and wrap it with aluminum foil. After 10-15 minutes, gently slide off the gel with an orange stick.

Aftercare for Healthy Nails

Below, prioritize aftercare for your nails post-manicure. Once you’ve removed the gel polish, nourish your nails and cuticles with a good quality cuticle oil or moisturizer to promote healing and hydration.

And, maintain this routine consistently to keep your nails strong and healthy. Consider regular breaks between gel manicures to allow your nails to breathe and recover. Additionally, incorporating biotin or other vitamins into your diet can further enhance the resilience of your nails, ensuring they remain in top condition for your next gel manicure.

Summing up

On the whole, extending the life of your gel manicure involves a combination of proper application, maintenance, and care. Ensure your nails are clean and well-prepped before applying your gel polish, and always seal the edges to prevent chipping. After your manicure, protect your nails by avoiding excessive moisture and harsh chemicals. Additionally, regularly moisturize your hands and cuticles to keep them healthy. By following these steps, you can enjoy your beautiful gel manicure for a longer period, saving you time and money while looking fabulous.

FAQ

Q: How can I protect my gel manicure from chipping?

A: To protect your gel manicure from chipping, avoid using your nails as tools. Be gentle when tapping or pressing on surfaces, and use gloves when doing household chores or working with harsh chemicals. Additionally, applying a top coat every few days can add an extra layer of protection.

Q: What should I avoid doing after getting a gel manicure?

A: After getting a gel manicure, it’s best to avoid soaking your nails in water for extended periods, as excess moisture can weaken the gel. Steer clear of activities that may cause your nails to experience trauma, such as opening cans or digging into hard materials with your fingertips.

Q: How should I care for my nails between gel manicures?

A: Caring for your nails between gel manicures involves keeping them moisturized and healthy. Use a cuticle oil daily to hydrate the cuticles and surrounding skin. Additionally, consider a nail strengthener to reinforce the nail bed, and maintain a balanced diet to support overall nail health.

Q: Can I use regular nail polish over my gel manicure?

A: It’s not recommended to apply regular nail polish over a gel manicure as it can weaken the gel and lead to chipping. If you desire to change your color, it’s best to remove the gel properly and start fresh with a new gel application.

Q: How often should I consider getting a gel manicure touch-up?

A: It’s advisable to schedule a touch-up for your gel manicure every 2 to 4 weeks, depending on how quickly your nails grow. Regular maintenance helps prevent lifting and keeps your nails looking fresh. Monitoring for any signs of wear can also guide you on when to go in for a refill.

Common Myths About Gel and Acrylic Nails

Most people have encountered various myths about gel and acrylic nails that can lead to confusion when choosing the right option for your nails. Whether you’re a novice or a seasoned nail enthusiast, understanding the truth behind these popular enhancements is crucial for making informed decisions and maintaining healthy nails. In this post, we’ll debunk some of the most prevalent misconceptions, providing you with the facts you need to enhance your nail experience while keeping your nails looking fabulous.

Key Takeaways:

  • Damage: Many believe that gel and acrylic nails cause significant damage to natural nails, but with proper application and care, they can be safe and non-damaging.
  • Longevity: There’s a myth that gel nails last longer than acrylics; however, the longevity of each depends on factors like nail care and personal lifestyle rather than the product itself.
  • Maintenance: Some think that maintenance for gel and acrylic nails is excessively high; in reality, regular fills and careful upkeep can keep them looking great without too much effort.

Myth 1: Gel Nails Are More Damaging Than Acrylics

A common belief is that gel nails are more damaging to your natural nails than acrylics. However, this isn’t necessarily true. The actual damage depends more on the application and removal process than the product itself. When applied and removed correctly, gel nails can be less harmful than acrylics since they typically require less filing of your natural nail. It’s important to choose a skilled technician who follows proper techniques to minimize any potential damage, whether you opt for gel or acrylic nails.

Myth 2: Acrylic Nails Last Longer Than Gel Nails

For many, the belief that acrylic nails last longer than gel nails is prevalent, but that’s not necessarily the case. Gel nails can be just as durable, with proper application and care, often lasting up to three weeks or more. Factors such as your lifestyle, nail care routine, and the skills of your nail technician play significant roles in longevity. If you’re looking to bust more myths around gel nails, check out the Common Gel Nail Myths Debunked | Miss Dolla Blog USA for more insights.

Myth 3: You Can’t Soak Off Acrylic Nails

One of the common misconceptions about acrylic nails is that you can’t soak them off. In reality, you can safely remove acrylic nails by soaking them in acetone. By doing so, the acrylic begins to break down, allowing you to gently peel or scrape it off without damaging your natural nails. It’s necessary to give yourself enough soaking time and to follow the right procedure for removal to maintain the health of your nails. Using the right techniques ensures your nails stay strong after the acrylics are gone.

Myth 4: Gel Nails Don’t Chip or Break

It’s a common misconception that gel nails are impervious to chipping or breaking. While gel nails are more flexible and durable than traditional polish, they are not indestructible. Your daily activities, like typing or household chores, can expose your nails to stress, leading to chips or breaks if proper care isn’t taken. To prolong the life of your gel nails, consider using gloves during heavy-duty tasks and avoid using your nails as tools. Understanding this reality will help you maintain the integrity of your beautiful nails without disappointment.

Myth 5: Both Nail Types Require the Same Maintenance

While many believe that gel and acrylic nails require similar maintenance, the truth reveals significant differences. Recognizing these differences can help you better care for your nails and prolong their beauty.

Nail TypeMaintenance Requirements
Gel NailsNeed regular touch-ups every 2-3 weeks.
Acrylic NailsRequire fills every 3-4 weeks, based on growth.
Gel NailsLess prone to lifting, easier upkeep.
Acrylic NailsMore maintenance due to potential lifting.
Gel vs AcrylicGel needs less frequent, but more specialized upkeep.

Assume that understanding the maintenance differences will enhance your nail care experience and ensure your nails always look their best.

Myth 6: You Can’t Customize Nail Designs with Gel

There’s a misconception that gel nails limit your creative potential, but that’s far from the truth. In fact, gel polish can be easily customized with a variety of colors, textures, and nail art techniques. Whether you prefer intricate designs, gradients, or even 3D embellishments, gel nails provide a versatile canvas for your personal style. You can experiment with different finishes, like matte or glossy, and incorporate glitter or foils to make your nails truly unique. So, embrace your creativity and let your gel nails become an extension of your personality!

Conclusion

Now that you are equipped with the facts about common myths surrounding gel and acrylic nails, you can make informed decisions about your nail care. Understanding the differences in application, durability, and safety will help you choose the best option for your lifestyle and nail health. Embrace your nail journey with knowledge, ensuring that your choices enhance both your appearance and well-being.

FAQ

Q: Are gel and acrylic nails the same?

A: No, gel and acrylic nails are not the same. Gel nails are made using a gel formula that requires UV or LED light to cure and harden, giving them a glossy finish. Acrylic nails, on the other hand, are made from a combination of a liquid monomer and a powder polymer, which hardens when exposed to air. Each has different applications and results, catering to various preferences.

Q: Do gel and acrylic nails damage natural nails?

A: Both gel and acrylic nails can potentially cause damage to natural nails if not applied or removed correctly. However, when applied properly by a trained professional and removed safely, the risk of damage can be minimized. It’s vital to practice good nail care and allow natural nails to rest between applications.

Q: Can you get acrylic nails if you have weak or damaged nails?

A: Yes, you can get acrylic nails even if you have weak or damaged nails. In fact, acrylics can provide a protective layer, helping to shield the natural nails while they recover. However, it’s important to consult with a nail technician who can assess your nail health and provide tailored advice based on your specific situation.

Q: Do gel and acrylic nails require maintenance?

A: Yes, both gel and acrylic nails require maintenance. Typically, they need to be refilled or “infilled” every two to three weeks as the natural nails grow. Additionally, regular touch-ups can help maintain their appearance and prevent lifting or chipping. Proper care can also extend the longevity of the enhancements.

Q: Can I paint over my gel or acrylic nails?

A: Yes, you can paint over gel or acrylic nails. Many people choose to apply regular nail polish or gel polish for added color and design. However, it’s important to use a remover that is suitable for the type of enhancement to avoid damaging the nails during future maintenance or removal. Using a topcoat can also protect both the polish and the underlying enhancements.

Skip to content