There’s a right way to use a cuticle pusher that can elevate your nail care routine and enhance the appearance of your nails. By learning the proper techniques, you can effectively push back your cuticles without damaging the sensitive skin around them. In this guide, you will discover step-by-step instructions, tips, and best practices to help you gain confidence and achieve salon-worthy results at home. Let’s examine the imperative methods for using a cuticle pusher like a pro!
Key Takeaways:
- Choose the Right Tool: Select a high-quality cuticle pusher that fits your comfort and technique, whether it’s metal, plastic, or wood.
- Technique Matters: Apply gentle pressure and push back cuticles softly to avoid injury. Use the flat side of the pusher for safer application.
- Prep the Nails: Soak your nails in warm water or use cuticle oil beforehand to soften the cuticles for easier pushing.

Understanding Cuticles
The cuticles are the thin layers of skin that form a protective barrier at the base of your nails. They serve an necessary function by protecting the nail matrix from bacteria and other harmful elements, ensuring your nails can grow healthy and strong. A proper understanding of cuticles is vital for maintaining great nail health, making them an integral part of your manicure routine.
What Are Cuticles?
Along with framing your nails, cuticles consist of dead skin cells that seal the area where your skin meets the nail. This protective layer helps prevent pathogens from entering the nail bed, which can lead to infections or other nail issues. Understanding the structure and role of cuticles is necessary for anyone looking to achieve a polished and professional look.
Importance of Cuticle Care
At your fingertips, cuticle care plays a vital role in maintaining the health and appearance of your nails. Proper care not only prevents hangnails and infections but also promotes stronger nail growth and a smoother appearance. Neglecting cuticles can lead to dryness, which may cause uncomfortable cracking or peeling, ultimately detracting from your manicure.
This thoughtful attention to cuticle care can elevate your overall nail health. By routinely moisturizing and gently pushing back your cuticles, you create space for your nails to grow without obstruction. Furthermore, caring for your cuticles can enhance the look of your manicure, allowing nail polish to adhere better and ensuring a longer-lasting finish. Your nails are an extension of your personal style, so investing a little time in cuticle care can greatly improve your nail aesthetic.
Types of Cuticle Pushers
Some of the most common types of cuticle pushers include:
| Type | Description |
|---|---|
| Metal Cuticle Pushers | Durable and easy to clean, perfect for professional use. |
| Plastic Pushers | Lightweight and affordable, suitable for home use. |
| Silicone Pushers | Gentle on the skin, ideal for sensitive cuticles. |
| Wooden Pushers | Traditional and biodegradable, often used in nail salons. |
| Combination Tools | Includes both pushing and scraping features for versatility. |
Assume that selecting the right type depends on your specific needs and preferences, ensuring effective nail care.
Metal Cuticle Pushers
For those looking for durability and precision, metal cuticle pushers are an excellent choice. Often made of stainless steel, they provide a firm grip and allow you to push back cuticles effectively. Due to their non-porous nature, they are easy to sanitize, making them a favorite among professionals and enthusiasts alike.
Plastic and Silicone Pushers
Cuticle pushers made of plastic and silicone offer a more gentle touch, perfect for at-home use. They are lightweight and less likely to cause damage to your nails or skin, making them ideal for sensitive cuticles.
Further, plastic pushers are typically more affordable and disposable, while silicone options can be reused. Both types are excellent for beginners, as they minimize the risk of injury while still allowing for effective nail care. You can also find them in various shapes and sizes, enhancing your ability to find the perfect fit for your grooming routine.
Preparing for Cuticle Care
To ensure a smooth and effective cuticle care experience, it’s necessary to prepare both your hands and nails properly. Start by creating a clean workspace and gathering all necessary tools and products. This will set you up for a less rushed and more enjoyable session, allowing you to focus on achieving beautifully manicured nails. To maintain the health of your cuticles, also consider soaking your hands for a few minutes before getting started, as this will soften the skin and make the process much easier.
Tools and Products Needed
Across the nail care spectrum, having the right tools and products is key to a professional finish. Essential items include a quality cuticle pusher, cuticle oil or cream, nail clippers, and a sanitizing solution. You may also want to include a nail file and buffer for the finishing touches. With these tools at your disposal, you can effectively care for your cuticles, ensuring they look healthy and well-groomed.
Prepping Your Nails
About preparing your nails, taking the time to treat them well will enhance your overall nail care routine. Start by washing your hands thoroughly to remove any dirt or oil that may interfere with the process. Next, use a gentle exfoliator or scrub to soften the skin around your nails. Ensure that your nails are dry before starting any cuticle care, as this will help you avoid damaging your skin during the process.
In addition, giving your nails a brief soak in warm, soapy water can further soften your cuticles, making them easier to push back. After soaking, pat your hands dry with a soft towel. This preparation will help you achieve a more precise and effective cuticle care session. It’s about setting the perfect stage to elevate your nail grooming, leading to a polished and professional look.
Step-by-Step Guide to Using a Cuticle Pusher
After gathering your tools, follow this simple step-by-step guide to effectively use a cuticle pusher:
| Step | Action |
| 1 | Soak your nails in warm, soapy water to soften cuticles. |
| 2 | Gently dry your hands and push back the cuticles, starting from the base of the nail. |
| 3 | Use the flat side to scrape away any dead skin. |
| 4 | Moisturize your cuticles with oil or cream. |
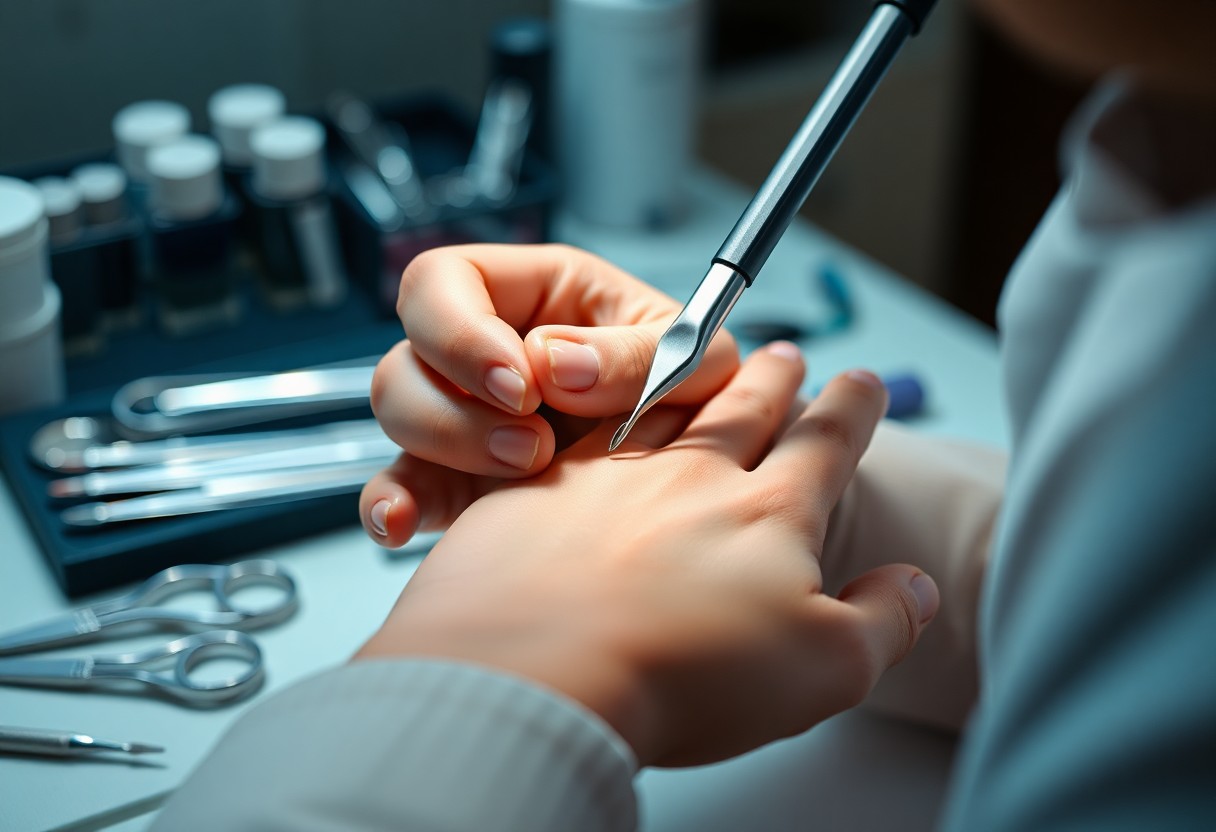
The Correct Technique
With a steady hand, hold the cuticle pusher at a 45-degree angle against the cuticle. Apply gentle pressure while pushing back the cuticle, ensuring you don’t force it. Move slowly to avoid any discomfort or injury. Your goal is to reveal the healthy nail bed without damaging the skin.
Timing and Frequency
Timing is important when using a cuticle pusher, as it impacts overall nail health. Ideally, you should push back your cuticles once every two weeks, allowing them enough time to grow naturally and remain healthy. However, your individual nail growth may vary, so adjust your routine accordingly to prevent over-trimming.
Technique plays a pivotal role in how effective your cuticle care is. Regularly assessing your timing and frequency can lead to better nail health. Observing your cuticle growth will help you adapt your care schedule. If you notice excessive overgrowth, you might need to adjust when you push back your cuticles to maintain a clean appearance without compromising skin integrity.
Common Mistakes to Avoid
Despite your best intentions, using a cuticle pusher can lead to mistakes that may harm your nails. Avoid pushing back too aggressively or ignoring important safety practices, as these actions can result in discomfort or injury. Instead, approach your cuticle care with a gentle touch and mindfulness towards your nail health to ensure the best results.
Over-pushing and Damage
About over-pushing when using a cuticle pusher, it’s important to maintain a delicate balance. Aggressive pushing can lead to significant damage to the nail bed and cuticle, causing pain and increasing the risk of infections. Always assess your cuticles and push back with a gentle hand for healthier outcomes.
Inadequate Cleaning and Maintenance
Across your nail care routine, it’s important to prioritize the cleaning and maintenance of your tools, including your cuticle pusher. Failing to sanitize your equipment can lead to the transfer of bacteria and fungi, compromising your nail health.
Due to improper cleaning practices, residue and germs can accumulate on your cuticle pusher, posing a risk to your nails and skin. Make it a habit to thoroughly clean your tools with alcohol or soap and water after each use. This simple step will help you maintain hygiene and prevent unwanted infections, ensuring your nail care routine is both effective and safe.
Tips for Professional-Level Results
Now you can elevate your cuticle care routine to achieve that salon-perfect look by following these expert tips:
- Always use a sanitized cuticle pusher to prevent infection.
- Employ gentle pressure; avoid forcing the cuticles back.
- Push back cuticles after a warm soak for easier manipulation.
- Use tools specifically designed for the task to ensure precision.
- Finish with a quality cuticle oil for added moisture.
Any of these practices can greatly enhance your at-home nail care experience.
Enhancing Your Technique
The key to using a cuticle pusher effectively lies in mastering your technique. Make sure to hold the pusher at a slight angle to gently guide your cuticles back without causing damage. Work in small sections, allowing you to focus on precision, and light pressure ensures the health of your nails while achieving a polished look.
Aftercare for Healthy Nails
To maintain the integrity of your nails and enhance their overall health, always implement a solid aftercare routine following your cuticle care session. This includes applying a nourishing cuticle oil and a protective base coat to lock in moisture.
In fact, incorporating a regular aftercare regimen can significantly improve the appearance and texture of your nails. Opt for high-quality oils and creams that contain vitamins and natural ingredients for optimal benefits. By prioritizing aftercare, you ensure that your nails remain healthy, strong, and ready for their next pampering session.
Conclusion
With these considerations, you can effectively use a cuticle pusher like a pro. Start by softening your cuticles with a soak or oil, then gently push them back using the right technique to avoid damage. Always clean your tools before and after use to maintain hygiene. By following these steps and incorporating proper care for your nails, you’ll achieve a polished look while protecting the health of your nail bed. Embrace the art of nail care, and enjoy the confidence it brings!
FAQ
Q: What is a cuticle pusher and what is its purpose?
A: A cuticle pusher is a tool used in nail care to push back the cuticles on your nails. Its purpose is to help maintain the health and appearance of your nails by preventing excess cuticle buildup and promoting a clean, polished look. It allows for better application of nail polish and enhances the overall manicure experience.
Q: How do I choose the right cuticle pusher for my nails?
A: When identifying a cuticle pusher, consider the material and design that best suits your needs. There are metal, wooden, and plastic options available. Metal pushers are durable and can provide precise results, while wooden pushers are gentle on the skin. Make sure the tool has a comfortable grip and a shape that fits the natural contour of your nails for optimal effectiveness.
Q: What is the correct technique for using a cuticle pusher?
A: To use a cuticle pusher effectively, start with clean, dry nails. Soak your fingers in warm water for a few minutes to soften the cuticles. Gently position the cuticle pusher at the base of the nail and push back the cuticles using a gentle, sweeping motion. Avoid applying too much pressure to prevent injury. Use the flat edge for pushing back and the pointed end for cleaning under the nails if necessary.
Q: How often should I use a cuticle pusher?
A: It’s advisable to use a cuticle pusher every 1-2 weeks as part of your nail care routine. Overuse can lead to irritation or damage to the cuticles, so listen to your nails and adjust the frequency based on their condition. If you notice excessive buildup, a more frequent approach may be necessary, but always ensure to treat your cuticles gently.
Q: Can I use a cuticle pusher on my toenails as well?
A: Yes, you can use a cuticle pusher on your toenails if you follow the same principles of careful handling. Be mindful that toe cuticles may be thicker, so it’s important to be gentler and only push back the cuticles without causing any discomfort. Regular maintenance of toenails is as important as fingernails for overall foot health.
