Art

Tips for Expanding Your Nail Art Portfolio

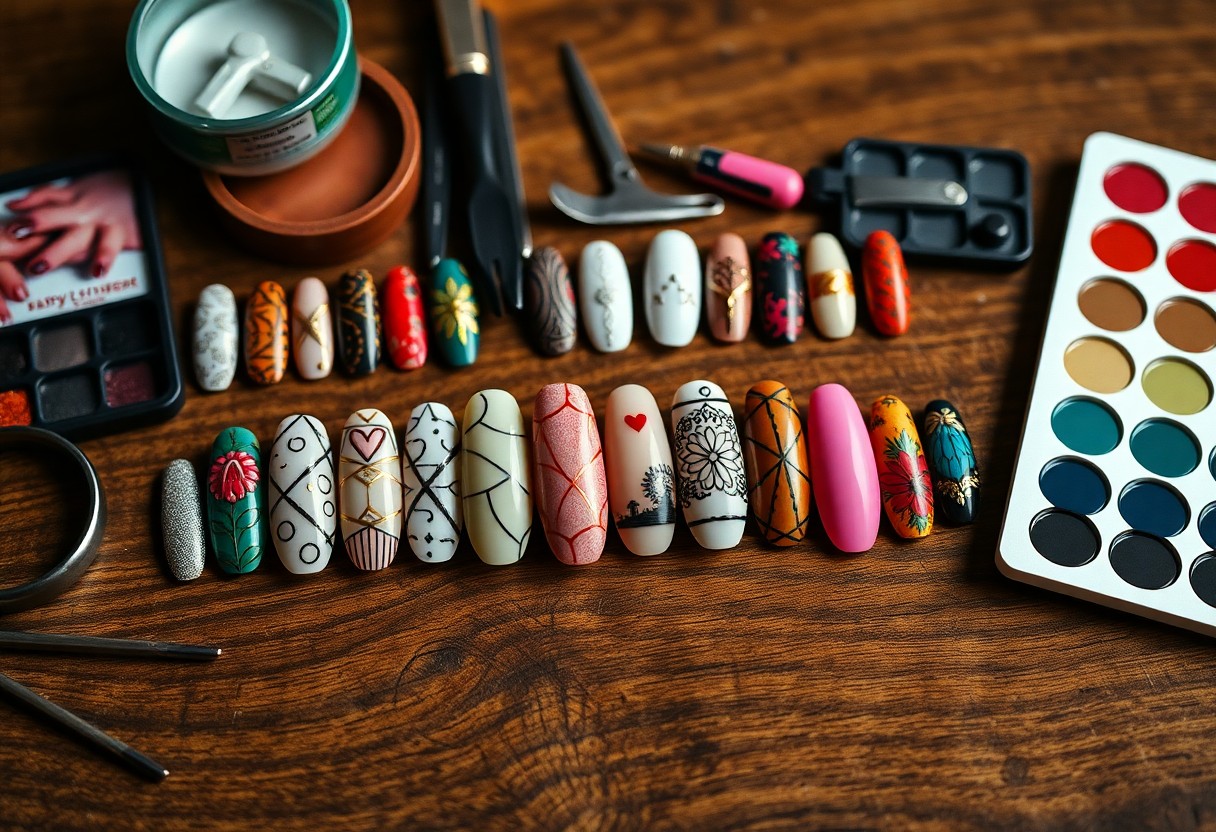
You can elevate your nail art portfolio by experimenting with new techniques and styles that showcase your creativity and expertise. By continually pushing your boundaries and learning from others in the industry, like checking out insights on how to grow skills : r/Nailtechs, you will not only develop your talent but also attract a broader clientele. This blog post will provide effective strategies to enhance your portfolio and ultimately boost your career as a nail artist.

Key Takeaways:

  • Diverse Techniques: Experiment with various techniques such as stamping, marbling, and hand-painting to showcase versatility.
  • Themed Collections: Create themed sets of nail art that tell a story or align with current trends and events.
  • Social Media Engagement: Share your work on platforms like Instagram and Pinterest to reach a broader audience and gain inspiration.
  • Client Feedback: Seek feedback from clients to understand their preferences and adjust your portfolio accordingly.
  • Continuous Learning: Attend workshops or online courses to stay updated with the latest nail art trends and techniques.

Understanding Your Current Portfolio

Your nail art portfolio serves as a reflection of your unique style and expertise. Taking time to evaluate your existing work will highlight your strengths and areas for improvement. By understanding what you currently have, you can strategically plan your growth and ensure you’re showcasing your best creations to potential clients and followers.

Assessing Your Skills

For a thorough assessment, take an unbiased look at your technique, creativity, and variety. Consider factors such as precision, color application, and the complexity of designs. This evaluation will help you identify what you excel at and what skills you might want to enhance to elevate your portfolio further.

Identifying Your Niche

Skills play a significant role in defining your niche within the nail art industry. By recognizing what makes your artistry distinct, you can carve out a specific segment that resonates with your style and attracts your target audience. Understanding your niche allows you to focus on your strengths and cater your work to a particular demographic, ensuring you stand out in a saturated market.

In fact, pinpointing your niche can significantly streamline your creative process. When you have a clear direction, you can hone your skills and develop unique designs tailored to your audience’s preferences. This focused approach not only boosts your confidence as an artist but also establishes you as an authority in your chosen area, potentially leading to collaborations and increased visibility in the nail art community.

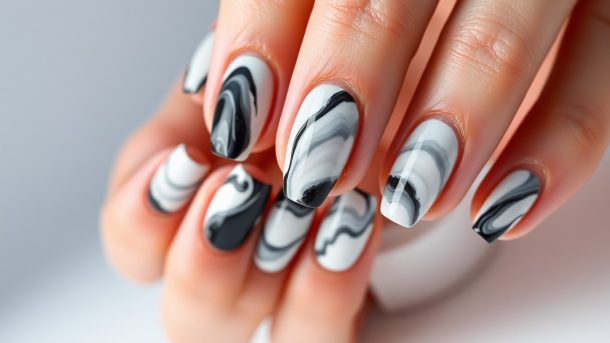
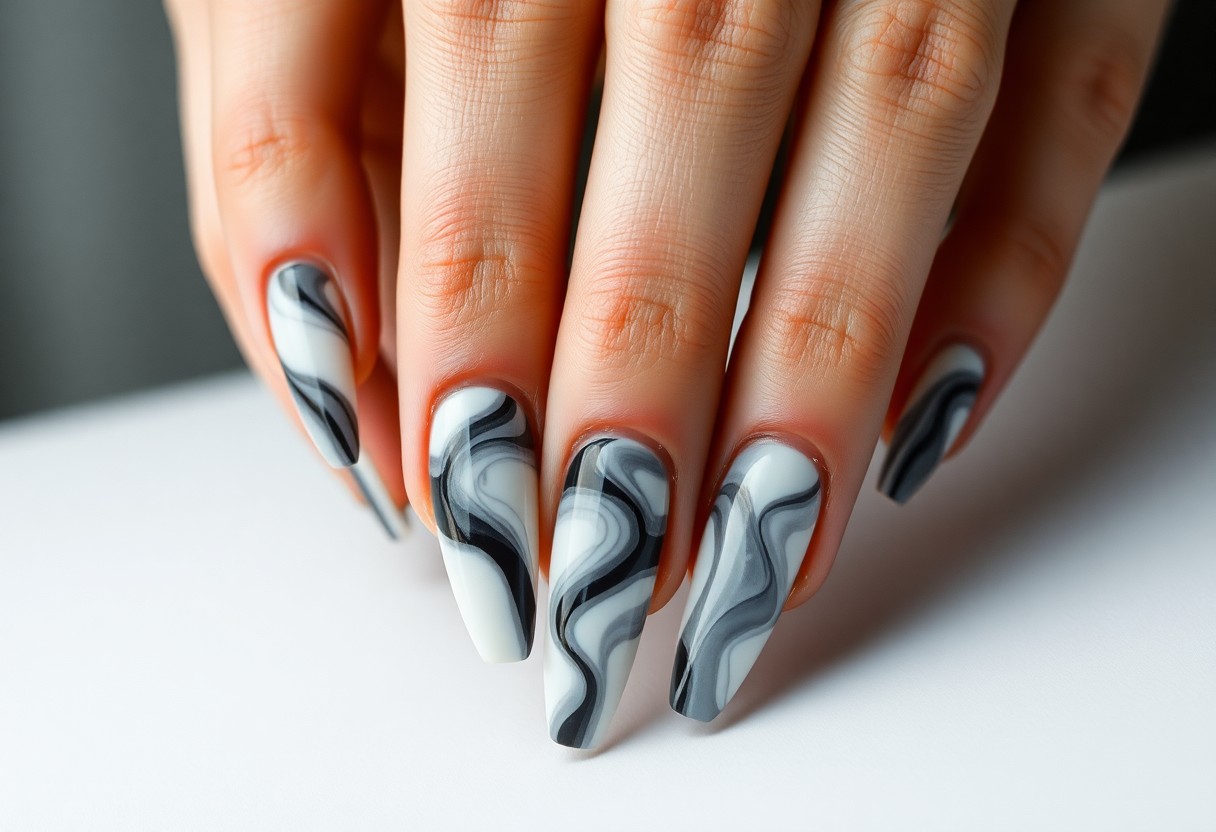
Exploring New Techniques

There’s a world of artistic possibilities waiting for you in nail art. Delving into new techniques can elevate your portfolio and set your work apart. Experimenting with styles, colors, and methods not only enhances your skills but also sparks creativity. Don’t hesitate to try innovative techniques, as they will allow you to express your unique artistic vision and keep your designs fresh.

Learning Advanced Nail Art Methods

Any enthusiast wanting to advance their nail art skills should consider exploring more complex techniques. Here are some advanced methods you can experiment with:

Advanced MethodsDescription
3D Nail ArtAdd dimension with sculpting gels or acrylics.
Water MarbleCreate swirls and patterns using water and nail polish.
Foil ApplicationAdd metallic foil for an eye-catching finish.
Ombré TechniquesBlend colors for a gradient effect on your nails.

Incorporating Mixed Media

Any nail artist can expand their portfolio by incorporating mixed media into their designs. This innovative approach allows you to combine various materials, textures, and techniques to create unique nail art.

Mixed media in nail art can include everything from adding gems, stickers, or natural elements like dried flowers to utilizing textiles or even metallics. This approach enriches your designs, offering depth and intrigue. You can blend painting techniques with physical objects, which not only enhances your creativity but also encourages you to think outside the box. As you explore mixed media, you’ll find endless opportunities to showcase your style and artistry in your nail art portfolio.

Keeping Up with Trends

Now, staying current with nail art trends is crucial for maintaining a vibrant and appealing portfolio. Regularly explore social media platforms, nail art blogs, and industry events to discover new styles and techniques. Engaging with the latest trends not only elevates your creative skills but also attracts clients who are seeking contemporary, eye-catching designs.

Following Industry Influencers

Industry leaders play a significant role in shaping nail art trends, making it beneficial for you to follow their work. By observing their techniques, color combinations, and styles, you can gather inspiration for your portfolio. Social influencers often share tips and tutorials, giving you an insider’s view of emerging trends. Engage with their content to stay informed and inspired.

Experimenting with Seasonal Styles

Along with following trends, consider incorporating seasonal styles into your nail art repertoire. Each season brings unique color palettes, themes, and festive ideas that can resonate with your clients. This not only enhances your portfolio but also helps you stay relevant as buzz around seasonal designs often increases during specific times of the year.

Understanding seasonal styles allows you to provide fresh nail art options that reflect the current mood and celebrations. For example, warm tones and holiday motifs in winter or bright, vibrant colors in summer can draw attention and attract diverse clientele. Keeping your designs adaptable and aligned with the seasons positions you as a versatile artist who can cater to changing tastes throughout the year.

Building a Strong Online Presence

Many nail artists overlook the importance of a strong online presence in showcasing their skills and attracting new clients. By implementing effective strategies, such as those mentioned in this 25 Nail salon marketing ideas to grow your clientele, you can enhance your visibility and build a loyal following.

Utilizing Social Media Platforms

Beside creating stunning nail art, leveraging social media is an effective way to showcase your work and engage with potential clients. Platforms like Instagram and Facebook allow you to share your designs, connect with fellow artists, and reach a wider audience.

Creating a Professional Website

Utilizing a professional website can serve as your online portfolio, effectively displaying your nail art and services. A well-designed website allows potential clients to explore your previous work, pricing, and availability while providing a contact method for inquiries.

Presence on the web is necessary for building credibility and attracting new business. Make sure your website features high-quality images of your work, an easy-to-navigate layout, and relevant information such as your services, prices, and testimonials from happy clients. Implementing SEO strategies can also help improve your website’s visibility in search engine results, making it easier for clients to find you.

Networking with Other Artists

To thrive in the nail art community, networking with other artists is necessary. Engage with fellow creators to exchange ideas, techniques, and inspirations. Attend local nail art events or workshops where you can meet talented professionals and enthusiasts alike. Building these connections can lead to collaborative opportunities and lasting friendships that enrich your artistic journey.

Joining Nail Art Communities

Below are some great ways to immerse yourself in nail art communities. Online platforms like social media groups and forums provide spaces to share your work, seek feedback, and find inspiration from other artists. Participating actively in these communities can also help you stay updated on trends and techniques.

Collaborating on Projects

Between two talented artists, collaboration can generate breathtaking nail art designs, pushing your creative boundaries. Partnering with another artist opens up opportunities to learn new techniques, combine styles, and even reach a wider audience. You can blend your unique perspectives to create something that neither of you could achieve individually, ultimately enhancing your portfolio.

Nail collaborations can take several forms, like joint tutorials, mutual social media takeovers, or co-hosting workshops. Choose projects that resonate with both you and your partner to ensure a seamless creative process. This collaboration can also lead to exciting promotional opportunities, allowing both artists to gain visibility and attract new followers. Don’t hesitate to reach out to artists whose work you admire; they may be just as eager to collaborate with you!

Seeking Professional Education

Not all nail artists rely solely on their own experimentation to develop their skills. Seeking professional education can provide you with valuable techniques, innovative ideas, and up-to-date trends that will elevate your nail art portfolio. Investing time in learning from seasoned professionals can help you master various styles and improve your overall craftsmanship.

Attending Workshops and Classes

Before venturing into your nail art career, you should consider attending workshops and classes that focus on different techniques and styles. These hands-on experiences allow you to learn directly from experts while also networking with fellow nail artists. Engaging in such environments fosters creativity and allows you to refine your skills through constructive feedback.

Investing in Certification Programs

Classes and training programs that offer certification can significantly enhance your credibility as a nail artist. Investing in formal education not only sharpens your skills but also boosts your confidence when presenting your work to clients. Certifications signify a commitment to professional development, which can lead to new opportunities in your nail art career.

Further, completing certification programs from reputable institutions often provides you with a comprehensive understanding of nail techniques, health, safety regulations, and customer service. These credentials can open doors to advanced career paths, such as becoming a nail technician instructor or working in high-end salons. Additionally, a certification on your portfolio sets you apart from the competition, reassuring clients of your qualifications and skill set in the nail art industry.

Conclusion

As a reminder, expanding your nail art portfolio involves consistent practice, experimentation, and engagement with the nail art community. By showcasing your unique style and techniques on social media and attending workshops or classes, you can enhance your skills and attract a wider audience. Additionally, documenting your work and staying updated with the latest trends will help you diversify your offerings. Keep pushing your creative boundaries, and your portfolio will grow into a vibrant reflection of your artistic journey.

FAQ

Q: What are some effective ways to diversify my nail art portfolio?

A: To diversify your nail art portfolio, consider incorporating different styles and techniques. Experiment with various nail shapes, such as stiletto, almond, and square, to showcase versatility. Include a range of designs, from abstract art to themed nail art for holidays and events. You can also explore different mediums, such as gel polish, acrylics, and nail wraps. By featuring a mix of classic and trendy designs, you can appeal to a broader audience and demonstrate your adaptability as an artist.

Q: How can I keep my portfolio updated with current nail art trends?

A: Staying updated with current nail art trends involves regular research and engagement with the nail art community. Follow influencers, trendsetters, and brands on social media platforms like Instagram and TikTok, where nail art trends often emerge. Attend nail art workshops, online classes, or industry events to gain insights and techniques from fellow artists. Engaging in platforms like Pinterest and nail art blogs can also inspire you to implement the latest trends in your work, ensuring your portfolio remains fresh and relevant.

Q: Should I include client feedback or testimonials in my nail art portfolio?

A: Yes, including client feedback or testimonials can significantly enhance your nail art portfolio. Positive reviews add credibility and can influence potential customers positively. Consider creating a section that features quotes or brief testimonials from satisfied clients, along with images of the nail designs you created for them. This not only showcases your skills but also highlights your professionalism and ability to meet client expectations, making your portfolio more compelling to prospective clients.

How to Master Negative Space Nail Art

There’s a captivating world of nail art waiting for you, and mastering negative space techniques can elevate your designs from ordinary to extraordinary. By embracing the skin of your nails as part of the art, you can create striking contrasts and unique styles that stand out. In this guide, you will learn the important tools, techniques, and tips to effortlessly create stunning negative space nail art that showcases your creativity and style. Let’s investigate the exciting process of transforming your nails into a canvas of artistic expression!

Key Takeaways:

  • Understanding Negative Space: Negative space refers to the areas on the nail that are left unpainted, creating a contrast between the polish and the natural nail.
  • Precision Tools: Invest in quality tools like fine brushes and striping tape to achieve clean lines and precise designs.
  • Color Choices: Choose complementary colors that enhance the effect of negative space. Lighter shades can highlight the design, while darker shades create a striking contrast.
  • Design Techniques: Explore various techniques such as geometric patterns, floral designs, or minimalist art to effectively utilize negative space.
  • Practice Is Key: Consistent practice will improve your skills and confidence, allowing you to experiment with more complex negative space designs over time.

Understanding Negative Space Nail Art

Before you investigate the creative world of nail art, it’s necessary to grasp the concept of negative space. This technique involves deliberately leaving parts of your nails unpolished, allowing for a striking contrast between the nail surface and the chosen colors. Negative space can highlight unique designs and patterns, making your nail art truly stand out.

What is Negative Space?

An necessary aspect of nail art, negative space refers to the areas of your nail that are intentionally left bare. It creates a balance between the polished and unpolished, offering a fresh and modern look. This technique can be used in various designs, from simple shapes to intricate patterns, empowering you to express your style.

Importance of Negative Space in Nail Art

If you want to add depth and dimension to your nail designs, incorporating negative space is key. By playing with contrasts and visual lines, negative space can elevate your nail art from basic to breathtaking.

Negative space allows for your creativity to shine, as it provides breathing room within your designs. This technique can make bold colors pop, draw attention to specific shapes, or enhance the overall design aesthetic without overwhelming the viewer. Embracing negative space in your nail art can lead to innovative looks, setting you apart from the crowd.

Essential Tools and Supplies

The right tools and supplies are vital for creating stunning negative space nail art. Begin with a base coat to protect your nails, then select your favorite nail polish colors, top coat for a glossy finish, and nail art tape for clean lines. Cotton pads and nail polish remover are imperative for cleanup, and a good set of dotting tools can help add intricate designs. With these items at hand, you’ll be well-prepared to master this artistic technique.

Nail Polish Choices

Any color palette can work for negative space nail art, but it’s best to choose polishes that complement your design. Opt for a mix of vibrant hues and subtle shades to allow the negative space to pop. Metallics and pastels often work beautifully together, while bold primary colors can create a striking contrast. Ultimately, the choice of polish will set the tone for your overall nail art creation.

Brushes and Stencils

There’s a variety of brushes and stencils available that can elevate your negative space nail art game. Using fine-tipped brushes allows for intricate detailing, while wider brushes are perfect for fills and broader strokes. Nail art stencils are excellent for achieving precise shapes, making it easier to maintain the integrity of the negative space. Experimenting with different tools will give you the versatility to explore various styles and techniques.

Understanding how to use brushes and stencils effectively will greatly enhance your nail art results. Fine detail brushes are ideal for creating sharp lines and intricate designs, giving your artwork a professional finish. Stencils, on the other hand, simplify the process of producing uniform shapes, allowing you to fill in colors cleanly without worrying about messing up the negative spaces. By pairing the right brush sizes with suitable stencils, you can unleash your creativity and develop your unique nail art style with confidence.

Step-by-Step Guide to Creating Negative Space Nail Art

Not only is negative space nail art visually stunning, but it also allows your natural nails to shine through. Follow this simple step-by-step guide to create your own stunning design:

StepDescription
1Gather your supplies: nail polish, tape, and topcoat.
2Prepare your nails by cleaning and buffing.
3Apply a base coat and let it dry completely.
4Use tape to create your desired negative space design.
5Fill in the exposed areas with your chosen color and allow to dry.
6Remove the tape carefully and finish with a topcoat.

Preparing Your Nails

One important aspect to achieving beautiful negative space nail art is to ensure that your nails are well-prepared. Start by removing any old polish, then shape your nails as desired. Buff the surface to smooth out any ridges, and apply a nourishing base coat to protect your nails and create a stable foundation for the polish.

Application Techniques

Techniques vary, but finding the right one for your design can elevate your nail art. You might consider using tape or nail stencils to define the negative space areas precisely, ensuring clean lines. Alternatively, a fine brush can help you create intricate designs without the need for tape.

For instance, if you choose to use tape, place it strategically to create geometric patterns. This will help you achieve sharp edges where the color meets the negative space. Additionally, you can experiment with matte and glossy finishes to enhance visual interest within your design. This combination will ensure that your negative space nail art stands out beautifully.

Tips for Perfecting Your Negative Space Design

Despite the simplicity of negative space nail art, executing it perfectly can be tricky. Here are some tips to elevate your designs:

  • Use high-quality striping tape for clean lines.
  • Practice your design on paper before nail application.
  • Invest in good brushes for detailed work.
  • Apply a top coat to enhance the design’s longevity.

Any mistakes can be fixed by practicing and refining your techniques.

Common Mistakes to Avoid

Your negative space designs can easily fall flat if you make some common mistakes. Overloading your nails with too many colors or patterns can clutter the look. Failing to apply a base coat can affect the adhesion of the polish, leading to chipping and peeling. Additionally, not allowing each layer to dry completely often results in smudging or blending of colors.

Experimenting with Techniques

Designing negative space art allows for creativity, so don’t hesitate to experiment. Consider using sponges for a gradient effect, or stencils for intricate designs. You can also try using a dotting tool for unique patterns or layering different finishes like matte and glossy. The key is to try different combinations and techniques to see what resonates with your style.

Avoid sticking to one technique as it may limit your creativity. Instead, feel free to mix and match methods like combining negative space with watercolor effects or incorporating embellishments like studs and gems. Experimenting will not only expand your skills but also allow you to discover new and exciting looks that enhance your nail art collection.

Factors Influencing Successful Negative Space Nail Art

Many aspects can impact the outcome of your negative space nail art. Paying attention to these factors will help ensure a flawless design:

  • Nail shape and length
  • Type of polish used
  • Application technique
  • Design complexity

Assume that by mastering these elements, you’ll enhance the beauty of your nail art. For more detailed guidance, check out this Tutorial – Negative Space Nail Art.

Nail Shape and Length

Nail shape and length play a significant role in negative space nail art. Longer nails typically provide more canvas for intricate designs, while short nails can create elegantly simple patterns. Your chosen shape, whether it’s square, almond, or stiletto, can also impact how effectively the negative space is showcased.

Lifestyle Considerations

The way you live your life should influence your nail art choices. If you have an active lifestyle, opting for simpler designs may be a better fit, as they will wear better over time. Frequent exposure to water or harsh chemicals can also affect the longevity of your nail art. Understanding your daily routines and commitments will help you decide on the best negative space designs that suit your lifestyle while keeping your nails looking beautiful.

Understanding how your daily activities impact your nails is vital for selecting the right negative space art. If you work in a hands-on job or participate in sports, consider designs that are more resilient and easier to maintain. Conversely, if you have a desk job or enjoy low-activity pursuits, you might be free to explore complex designs that require more upkeep. Ultimately, aligning your nail art choices with your lifestyle will ensure that you can enjoy your beautiful nails without compromising practicality.

Popular Negative Space Nail Art Designs

Now, let’s explore some of the most popular negative space nail art designs that you can easily recreate at home or at the salon. From chic geometric patterns to elegant floral motifs, negative space allows you to play with contrasts and create striking visual effects. Incorporating these designs into your nail routine can elevate your overall look and make a fashion statement while still maintaining a minimalist vibe.

Simple Patterns

One of the easiest ways to start with negative space nail art is by using simple patterns. You can play with stripes, polka dots, and triangles to create a clean and modern design. Choose a base color that complements your skin tone, and use nail tape for precision.

Advanced Techniques

Techniques in negative space nail art can become quite elaborate, allowing you to showcase your artistic flair. By experimenting with various tools and styles, your designs can incorporate intricate elements that appeal to a sophisticated aesthetic.

Advanced Techniques

1. StampingUse a nail stamping kit to create detailed designs.
2. WatermarbleUtilize the watermarble technique for a unique blend of colors.
3. Ombre EffectBlend two or more colors for a stunning ombre effect.
4. LayeringLayer multiple colors of polish to create depth.

Advanced negative space techniques can help you achieve stunning designs that captivate attention. Experimenting with different tools and intricate methods can give your nails a professional touch. By practicing, you’ll enhance your skills and create artful expressions on your fingertips.

  1. Find the right tools for precision.
  2. Pick a color palette that speaks to you.
  3. Practice your techniques on a nail wheel.
  4. Watch tutorials to learn innovative styles.
Advanced Techniques

1. Dotting ToolsUse for creating intricate dots and patterns.
2. Striping BrushesGreat for detailed lines and fine designs.
3. SpongesFor blending colors seamlessly.
4. Nail TapeHelpful for achieving clean, sharp lines.

Final Words

Hence, mastering negative space nail art allows you to showcase your creativity while exploring minimalistic designs. By experimenting with different shapes, colors, and techniques, you can develop your own unique styles. Pay attention to your skill set and practice consistently to refine your abilities. With the right tools and a touch of patience, you’ll be able to create stunning negative space designs that reflect your personality and artistry. Dive into this exciting style and let your nails become a canvas for your imagination.

Q: What is negative space nail art and how do I get started?

A: Negative space nail art is a technique that involves leaving parts of your natural nail exposed while incorporating nail polish, designs, or embellishments in specific patterns. To get started, you’ll need a few basic tools: a base coat, nail polish in your desired colors, tape or stencils for creating shapes, and a top coat for finishing. Begin by applying a base coat to protect your nails. Once dry, use tape or stencils to create shapes, ensuring that sections of your natural nail remain bare. Paint over the design, remove the tape or stencils while the polish is still wet, and finish with a top coat for shine and durability.

Q: What types of designs work best for negative space nail art?

A: Negative space nail art provides a versatile canvas for various designs. Geometric shapes, such as triangles, stripes, and squares, are popular because they create clean lines that contrast well with the exposed nail. Floral designs with negative space can also create a beautiful effect, as can abstract patterns. Consider using a combination of matte and glossy finishes to add dimension to your designs. Experimenting with different colors and shapes will help you find what resonates best with your personal style.

Q: How can I make my negative space nail art last longer?

A: To extend the life of your negative space nail art, start with a good quality base coat to create a strong foundation. Ensure that each layer of polish is fully dry before applying the next coat or before removing any tape or stencils. For added durability, apply a top coat to protect your design and add shine. Additionally, avoid activities that may chip or wear down your nails, such as excessive exposure to water or physical labor, and consider using cuticle oil regularly to keep your nails and skin healthy.

The Best Techniques for Creating Marble Nail Art

Most nail art enthusiasts are drawn to the captivating beauty of marble designs, which can elevate your manicure to a whole new level. In this post, you will learn the best techniques for creating stunning marble nail art that looks professional and chic. From selecting the right colors to mastering the swirling method, this guide will equip you with the vital skills and tips needed to impress with your nail designs. Get ready to transform your nails and showcase your creativity with these expert techniques!

Key Takeaways:

  • Base Coat: Start with a quality base coat to ensure longevity and a smooth canvas for marble effect.
  • Color Selection: Choose contrasting colors for the best marble effect; commonly used colors include white, black, and pastels.
  • Water Technique: Use the water marbling technique by dropping nail polish into water and swirling it for a unique design.
  • Dotting Tools: Implement dotting tools or toothpicks to create delicate patterns and details in the marble design.
  • Top Coat: Apply a high-quality top coat to seal in your design and provide a glossy finish.

Understanding Marble Nail Art

As you examine into the art of marble nail designs, it’s vital to comprehend its unique allure and the techniques that set it apart. Marble nail art creates a mesmerizing effect that mimics the swirls and patterns of real marble, often incorporating a mix of colors to achieve a fluid and dynamic look. For a comprehensive guide, check out this Easy Marble Nail Art Tutorial | Unique and Gorgeous Design.

What is Marble Nail Art?

Against the backdrop of various nail art styles, marble nail art stands out due to its organic, flowing patterns. This technique involves blending multiple polish colors to mimic the intricate look of natural marble, resulting in a stunning, one-of-a-kind design on your nails.

History and Evolution of Marble Nail Art

Nail art has continuously evolved, and marble nail art is no exception. Emerging from the desire for innovative and intricate designs, this technique has gained popularity in salons and among DIY enthusiasts alike. With advancements in nail artistry tools and products, the methods to achieve marble effects have become more accessible, allowing you to experiment and express your creativity freely.

Marble nail art first became prominent in the beauty industry alongside the rise of nail art trends in the early 2000s. Initially, it was a labor-intensive process that required skill and practice. Over the years, with the advent of new tools such as water marbling kits and gel polishes, creating stunning marble effects has become simpler and more versatile. This evolution has contributed to its enduring popularity, making it a favorite among both professionals and nail art enthusiasts like you.

Essential Tools for Marble Nail Art

One of the key elements in creating stunning marble nail art is having the right tools at your disposal. Essential tools include a base coat to protect your nails, nail polish in various colors, a water bowl for the marbling technique, and a dotting tool or toothpick for swirling the colors. Having these tools organized and ready can significantly streamline your process, allowing you to focus on your creative expression.

Nail Polish Selection

Across the board, choosing the right nail polish is crucial for beautiful marble effects. Opt for high-quality, fast-drying polishes that are opaque to create bold designs. Look for colors that complement each other for a cohesive look or offer striking contrast for a more dynamic appearance. Make sure to check that the polish is water marbling compatible, as not all formulas work well for this technique.

Needed Accessories

One of the most important accessories for marble nail art is a plastic or glass bowl filled with room-temperature water. Additionally, you’ll want to have tape or a brush for clean-up, a good top coat for sealing your designs, and cotton swabs or pads for any necessary corrections.

Another handy accessory is a nail separator to keep your fingers organized while you work. This simple tool can prevent smudging and ensure that you have clean lines as you create your marble effect. Also, consider having a straw on hand; it can be used to blow air into the water to create unique patterns by manipulating the polish. With these accessories, your marble nail art experience will be much smoother and more enjoyable.

Basic Techniques for Marble Nail Art

Once again, mastering marble nail art can take your manicure to the next level. Start by exploring the foundational techniques that will help you achieve stunning results. If you’re looking for guidance, check out this detailed guide on How To Marble Nails | 4 Ways for step-by-step instructions and tips.

Water Marble Technique

Behind this captivating technique is the use of water to blend different nail polish colors. You begin by dropping polish onto the water surface, then using a toothpick to swirl the colors together. Dip your nails into the design and watch as the beautiful patterns transfer onto your nails, creating a unique look every time.

Dry Marble Technique

Along this innovative path, you’ll find that the dry marble technique involves using dry polish to create a marbled effect. You can apply various colors directly onto your nail and then use a brush or tool to swirl them together without water. This method allows for more control and creativity in your designs.

Also, the dry marble technique is particularly beneficial if you’re looking to avoid the mess that water marble can sometimes create. Since this method relies on the application of dry polish, you can create intricate designs using minimal materials and time. Experimenting with different color combinations and application styles can lead to endless creative possibilities for your marble nail art.

Advanced Techniques and Variations

Many nail artists seek to enhance their marble designs with sophisticated techniques. Here’s a breakdown of some advanced options you can try:

TechniqueDescription
Water MarbleUtilizes a water-filled container to create swirling patterns with nail polish.
Dry MarbleEmploys a dotting tool to blend colors directly on the nail.
Ombre MarbleCombines the ombre effect with marble techniques for a stunning look.
Neglected MarbleLeaves sections of the nail free of polish for unique designs.

Ombre Marble Effect

Between blending vibrant colors, you can create an ombre effect paired with classic marble. Start with a light base color, then use a sponge to dab darker shades, transitioning smoothly to achieve a gradient feel. The mix adds depth and complexity to your marble art.

Glitter and Foil Enhancements

Across your marble designs, you can incorporate glitter and gold foil to elevate your nail art game. By adding a sprinkle of glitter or pieces of foil, you can create a whimsical touch that brings out the marble effect beautifully.

It’s imperative to strategically place your glitter and foil accents to complement your marble designs rather than overwhelm them. Consider applying a few flecks along the cuticle or in half-moon shapes. This approach will not only enhance your nail art but also add texture and dimension to your overall look, making your manicure truly stand out.

Tips for a Perfect Marble Finish

Unlike traditional nail art, achieving a beautiful marble finish requires precision and technique. To ensure your design turns out flawlessly, keep these tips in mind:

  • Use room temperature water for optimal fluidity.
  • Work quickly to prevent drying before you swirl.
  • Utilize a high-quality topcoat for a glossy finish.
  • Experiment with colors for unique patterns.

Any adjustments can lead to improved results and a stunning marble look.

Common Mistakes to Avoid

Perfecting marble nail art can be challenging, and avoiding common pitfalls is crucial for success. Ensure you avoid bubbles in your water, as they can disrupt your design. Also, don’t use too much polish as it may create a muddy appearance. Lastly, steer clear of thick coats that can smudge the marble effect.

Patience and Practice: Key to Success

Marble nail art demands not only skill but also patience. As you practice, you will become more familiar with the ideal water-to-polish ratio and the right timing for swirling. The more you experiment with different colors and techniques, the more confident you will become in creating beautiful designs.

At first, you may find the process frustrating; however, consistent practice will lead to improvement. Consider setting aside dedicated time for practice to explore various effects and styles. Document your progress, as this will help you recognize what works best for you. Over time, your marble nail art skills will develop, leading to consistently stunning results. Don’t be disheartened by initial challenges—your dedication will pay off!

Nail Care Before and After

Your nail care routine is important for achieving beautiful marble nail art. Prior to applying your design, make sure your nails are clean and well-groomed to ensure the polish adheres properly. Similarly, after completing your nail art, a proper aftercare routine will help maintain the integrity and longevity of your design, keeping your nails looking fresh and vibrant for longer.

Preparing Your Nails

Nail preparation begins with cleansing your nails of any old polish and oils. Gently buff the surface to create a smooth canvas for your marble technique. Push back cuticles and trim any excess to avoid interference with your design. This foundational step is key to ensuring a flawless finish.

Aftercare for Longevity

Longevity of your marble nail art relies heavily on the aftercare you implement. To preserve the beauty of your design, be mindful of how you handle your nails in the days following application.

Aftercare involves applying a topcoat every few days to seal and protect your art from chips and wear. Additionally, moisturizing your cuticles and nails with a quality oil will keep them hydrated and healthy, reducing brittleness. Avoid using your nails as tools to prevent unnecessary damage, and wear gloves during chores involving water or harsh chemicals to further preserve your stunning marble design.

Summing up

From above, you can see that creating stunning marble nail art requires understanding the best techniques, such as water marbling, using a dotting tool, or stamping. Each method offers its unique effects and can elevate your nail design. By choosing the right colors and practicing these techniques, you can easily achieve that sophisticated marble look. Embrace your creativity, and with each application, you’ll refine your skills and develop your signature style for breathtaking nails that stand out.

Q: What materials do I need to create marble nail art?

A: To create stunning marble nail art, you will need a few important materials. Start with a base coat and your choice of nail polish colors. It’s best to use at least two or three contrasting colors to achieve the desired marble effect. Additionally, prepare a nail art sponge or a small brush for the application. You will also need a small bowl of water, as the water marbling technique involves dipping. Lastly, ensure you have a top coat to seal your design once finished.

Q: What is the water marbling technique, and how is it done?

A: The water marbling technique is a popular method for creating marble nail art. To execute this technique, pour room temperature water into a small bowl. Drop the nail polish colors onto the surface of the water, allowing them to spread and create a marbled design. Use a toothpick or a similar tool to swirl the colors together. Once you have your desired design, dip your nail into the water, making sure to align it correctly with the marbled pattern. Carefully remove your finger and clean up the edges before applying a top coat for a glossy finish.

Q: How can I make my marble nail art last longer?

A: To extend the longevity of your marble nail art, start with a quality base coat, as this helps the polish adhere better to your nails. After applying your marble design, let it dry completely before adding a top coat to prevent smudging. Consider using a gel top coat for an extra layer of protection and shine. Additionally, avoid exposing your nails to excessive moisture or harsh chemicals, and always carry a small bottle of top coat to touch up any chips that may occur.

Skip to content