Nail art can elevate your Halloween look to the next level, allowing you to express your creativity in a fun and festive way. With countless designs to choose from, you can easily find styles that complement your costume perfectly. Whether you’re dressing up as a classic witch or a spooky skeleton, coordinating your nails with your outfit enhances your overall appearance. In this post, you’ll discover a variety of nail art ideas that will help you stand out this Halloween while showcasing your unique style.
Key Takeaways:
- Creativity is key when designing nail art that complements your Halloween costume. Incorporate colors and themes from your outfit for a cohesive look.
- Technique matters; explore different methods such as stamping, freehand painting, or nail wraps to achieve stunning designs effortlessly.
- Accessorizing with nail art can elevate your Halloween ensemble. Consider adding 3D elements like rhinestones, studs, or even glow-in-the-dark polish for extra flair.
Choosing the Right Nail Art Design
To create a cohesive look for your Halloween costume, selecting the right nail art design is vital. Consider the overall theme and mood of your outfit, as well as the message you want to convey. Your nails can serve as the perfect finishing touch, enhancing your costume and showcasing your creativity. Aim for a design that complements your ensemble, whether it’s elegant, spooky, or vibrant. With countless options available, you can easily find nail art that harmonizes with your Halloween aesthetic.
Coordinating Colors and Themes
Design your nail art to align with the colors and themes of your Halloween costume. Consider the color palette of your outfit and aim for shades that either match or create an interesting contrast. For instance, if you’re going for a classic witch look with black and purple, using nail polish in those hues will create a seamless connection between your nails and costume. Alternatively, if you’re dressing as a more vibrant character, incorporate bright or metallic colors to add extra flair and excitement.
Popular Halloween Motifs
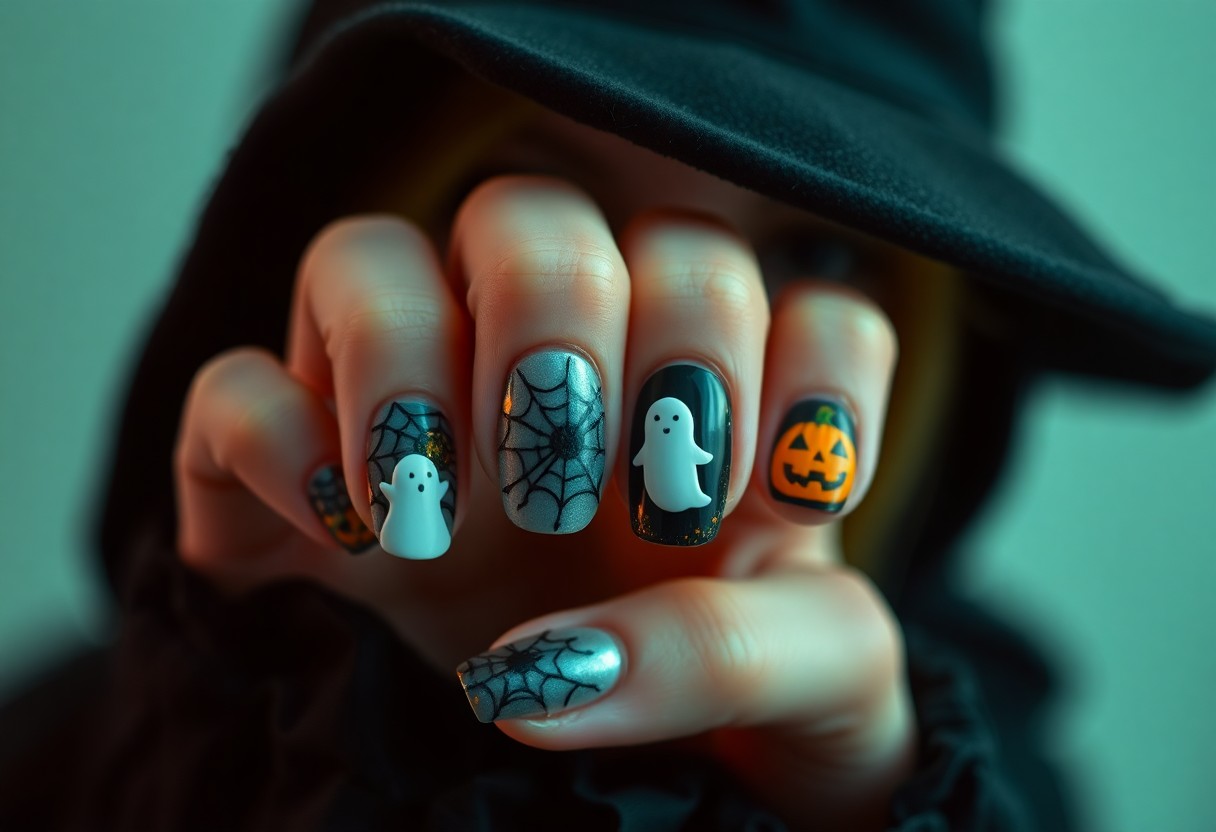
Design your nails with popular Halloween motifs to elevate your festive look. Classics like pumpkins, skulls, ghosts, and bats can add a playful touch to your style. These designs can be achieved through nail stamping, hand painting, or even nail wraps, giving you versatility in application. Whether you opt for intricately detailed designs or minimalist representations, incorporating these motifs can make your nails a standout element of your costume.
But you can also get creative by combining various motifs for a unique twist. For example, a spooky nail set featuring alternating designs of ghosts and pumpkins can create a fun yet unified theme. You might also consider abstract interpretations, like spider webs, or using glitter to mimic the glimmer of Halloween magic. By mixing and matching motifs while keeping your overall costume in mind, you can craft a mesmerizing nail art look that leaves a lasting impression.
Nail Art Techniques for Halloween
Some of the most exciting nail art techniques can transform your Halloween look from ordinary to extraordinary. Whether you want a spooky, playful, or elegant flair, incorporating these techniques into your nail art can enhance your overall costume. From freehand designs to fun stickers and decals, there are endless ways to express your Halloween spirit through your nails!
Freehand Painting
Halloween offers the perfect opportunity to unleash your creativity with freehand painting. You can create intricate designs, such as cobwebs, ghosts, or pumpkins, directly on your nails. Using fine brushes and nail polish, you can layer colors and establish texture, bringing a unique touch that matches your costume. The key is to practice your designs beforehand for a polished finish on the big night!
Stickers and Decals
With the right stickers and decals, you can achieve an eye-catching Halloween nail design in no time. These accessories come in various themes, including witches, bats, and skulls, allowing you to effortlessly enhance your Halloween vibe.
For instance, opting for glow-in-the-dark decals can add an extra layer of excitement to your nails, making them stand out in dim lighting. You can easily apply these stickers over a base color, or mix and match them with freehand designs for a more personalized touch. Stickers are a great option if you’re short on time or looking for a hassle-free way to achieve festive nail art.
Tools and Materials Needed
Despite the intricate designs you may envision for your Halloween nail art, the right tools and materials can make all the difference. Gathering your supplies in advance will streamline the process, ensuring you can focus on creativity and fun. From basic polishes to specialty tools, having everything within reach will help you transform your nails into a stylish part of your costume, making your Halloween look truly unforgettable.
Essential Nail Art Supplies
By starting with the necessary nail art supplies, you lay a strong foundation for your designs. You’ll need a base coat and top coat for protection and longevity, along with a variety of nail polish colors to match your costume. Nail brushes and dotting tools will allow you to create unique patterns, while nail strips or stencils can help you achieve precision. Don’t forget to stock up on remover and cotton pads for easy clean-up!
Optional Accessories for Flair
Against the backdrop of your Halloween costume, optional accessories can elevate your nail art to new heights. Consider embellishments like rhinestones, glitter, or nail stickers to add a touch of drama and sparkle to your designs. These items can be easily applied to enhance your nails while providing extra texture and depth that are sure to catch the eye.
In addition to rhinestones and glitter, you might explore other embellishments such as nail wraps, which can feature Halloween-themed prints, or themed charms that can be glued onto your nails for added detail. Mixing and matching these accessories allows you to personalize your nail art further, creating a cohesive look that reflects your unique style and Halloween spirit. The possibilities are endless, so let your imagination run wild for the perfect finishing touch!
Step-by-Step Nail Art Tutorials
After deciding on your Halloween costume, it’s time to bring your nail art to life! Follow these step-by-step tutorials to create stunning designs that will complement your look perfectly.
| Materials Needed | Instructions |
| Nail polish (various colors) | Start with a base coat to protect your nails. |
| Nail art tools (dotting tools, brushes) | Use a thin brush for intricate designs. |
| Top coat | Finish with a top coat for shine and durability. |
| Nail stickers or stamps | Apply stickers after base coat but before top coat. |
Classic Halloween Designs
By incorporating classic Halloween motifs, you can easily enhance your festive attire. Designs like ghosts, pumpkins, and spider webs offer timeless appeal, making them excellent choices for your nails. Use white, orange, black, and purple polishes to bring these designs to life, ensuring your nails are just as spooky as your costume.
Creative and Unique Ideas
For those looking to stand out, consider some innovative nail art designs. Explore themes like the galaxy, horror movie characters, or even a whimsical twist on traditional designs. By pushing the boundaries of conventional nail art, you can create a breathtaking showcase that keeps everyone intrigued and engaged.
For instance, you might use a makeup sponge to blend different colors for a galaxy effect, incorporating glitter for added sparkle. Alternatively, try using nail stickers or stamps featuring intricate designs inspired by your favorite horror films. This creativity not only showcases your artistic side but also ties in beautifully with your Halloween festivities, leaving a lasting impression.
Care and Maintenance for Halloween Nails
Your Halloween nail art is a fun way to complete your costume, but it requires proper care and maintenance. To keep your nails looking fresh and fabulous throughout the festivities, be sure to avoid excessive exposure to water and harsh chemicals. Moisturize your hands and nails regularly, and opt for non-acetone removers when taking off your polish to minimize damage. A little extra attention can go a long way in preserving your spooky nail designs.
Ensuring Longevity
Around Halloween, ensuring the longevity of your nail art can enhance its appearance throughout the night. Use a high-quality top coat over your designs to seal in the look and provide additional protection. Reapplying this top coat every few days will also help maintain shine and prevent chipping, allowing you to enjoy your festive nails without worrying about wear and tear.
Easy Removal Tips
Among the various nail art techniques, some can be stubborn to remove, so having a plan is necessary. Here are some tips for easy removal of your Halloween nails:
- Soak your nails in warm water for a few minutes to soften the polish.
- Use a non-acetone remover to gently dissolve the nail art.
- Consider wrapping your fingers in cotton soaked in remover for stubborn designs.
Perceiving how each technique impacts your nails will help you choose the best method for your specific designs.
Due to the creative nature of Halloween, you might have used multiple layers of polish or intricate designs that can complicate removal. In such cases, it is wise to use these strategies:
- Opt for a base coat under your nail art to protect your natural nails.
- Gently buff your nails before applying polish to aid in removal.
- If you experience stubborn residue, repeat the soaking process until the polish comes off.
Perceiving the length of time your design has been on your nails can also guide you in choosing the right removal techniques.
Summing up
Following this guide, you can elevate your Halloween costume with stunning nail art that perfectly complements your look. From spooky designs to whimsical patterns, the right nail art can enhance your overall appearance and showcase your creativity. Whether you opt for intricate details or simple accents, your nails will be a standout feature of your Halloween ensemble, helping you create a memorable and cohesive costume that captures the spirit of the season.
FAQ
Q: How can I choose nail art that complements my Halloween costume?
A: When opting for nail art for your Halloween costume, consider the colors and themes of your outfit. If you’re dressing as a witch, you might opt for dark, moody colors with glitter accents. For a brighter costume, like a butterfly, vibrant colors with floral designs can harmonize beautifully. Additionally, using elements from your costume, such as decals or stencils related to your theme, can enhance your overall look.
Q: What nail art techniques work best for Halloween?
A: Several techniques can elevate your Halloween nail art, including nail stamping, water marbling, and freehand painting. Nail stamping allows you to apply intricate designs quickly, while water marbling creates unique, swirling patterns. Freehand painting is perfect for detailed designs like pumpkins, ghosts, or spider webs. Consider mixing techniques for a standout result that truly captures the Halloween spirit.
Q: How can I make my Halloween nail art last longer?
A: To extend the lifespan of your Halloween nail art, start with a good quality base coat to protect your natural nails. After applying your designs, seal them with a top coat for durability and shine. Additionally, avoid harsh chemicals and wear gloves when doing chores to minimize chipping and wear. Reapplying top coat every few days can also help maintain your nails’ appearance throughout the Halloween festivities.
Q: Can I incorporate nail art into a simple costume?
A: Absolutely! Nail art can elevate even the simplest costumes. For instance, a basic black dress can be enhanced with glossy black nails adorned with silver spider webs or orange and black accents for a Halloween theme. Nail art provides the perfect opportunity to add personality and flair, regardless of the complexity of your outfit.
Q: What are some easy Halloween nail art designs for beginners?
A: Beginners can start with simple designs like polka dots, stripes, or one-color gradients in traditional Halloween colors like orange, black, and purple. Using nail stickers or decals can also simplify the process without the need for advanced skills. Another easy idea is to use sponges to create a sponge-painted ombre effect resembling a night sky, which can be accented with tiny white dots for stars or little ghosts.