Just like any other beauty treatment, acrylic nails can encounter some mishaps, including cracks. If you find yourself with a cracked acrylic nail, you don’t need to panic—there are simple steps you can follow to restore it. This guide will walk you through the process, ensuring your nails look flawless again. For a quick technique, you can check out this detailed resource on how to Repair a Cracked Acrylic Nail in Two Minutes – Technique.
Key Takeaways:
- Assess the Damage: Before starting the repair, evaluate the extent of the crack to determine if a simple fix or a complete replacement of the nail is needed.
- Use Proper Tools: Gather crucial tools such as nail glue, a file, and a buffing block for an effective repair process.
- Seal the Crack: Apply nail glue carefully into the crack, smooth it out, and allow it to dry completely to ensure a strong bond.
Understanding Acrylic Nails
To appreciate the maintenance involved with acrylic nails, it’s important to understand their composition and functionality. Acrylic nails are artificial nails created using a mixture of liquid monomer and powder polymer, which hardens when applied over your natural nails. They provide strength and versatility for various nail enhancements, enabling you to achieve different shapes and lengths while protecting your natural nails from damage.
What Are Acrylic Nails?
Between the myriad of nail options available, acrylic nails stand out for their durability and adaptability. They are popular for those who desire long-lasting, elegant nails with a polished look. Achieved through an application process that includes sculpting and shaping, acrylics can be customized to fit your preferred style, making them a go-to choice for many nail enthusiasts.
Common Issues with Acrylic Nails
Beside the appealing aesthetic, acrylic nails can encounter several issues that you should be aware of to maintain their integrity. Common concerns include lifting, cracking, and chipping, which can arise from various factors such as improper application, inadequate aftercare, or even lifestyle habits that put stress on your nails.
Consequently, being informed about these common issues can help you take proactive measures to preserve the quality of your acrylic nails. For instance, ensuring that your acrylic nails are properly applied and regularly maintained can prevent lifting, while being cautious during daily activities can minimize the risk of chipping. By understanding these challenges, you can better care for your acrylics and enjoy their benefits longer.
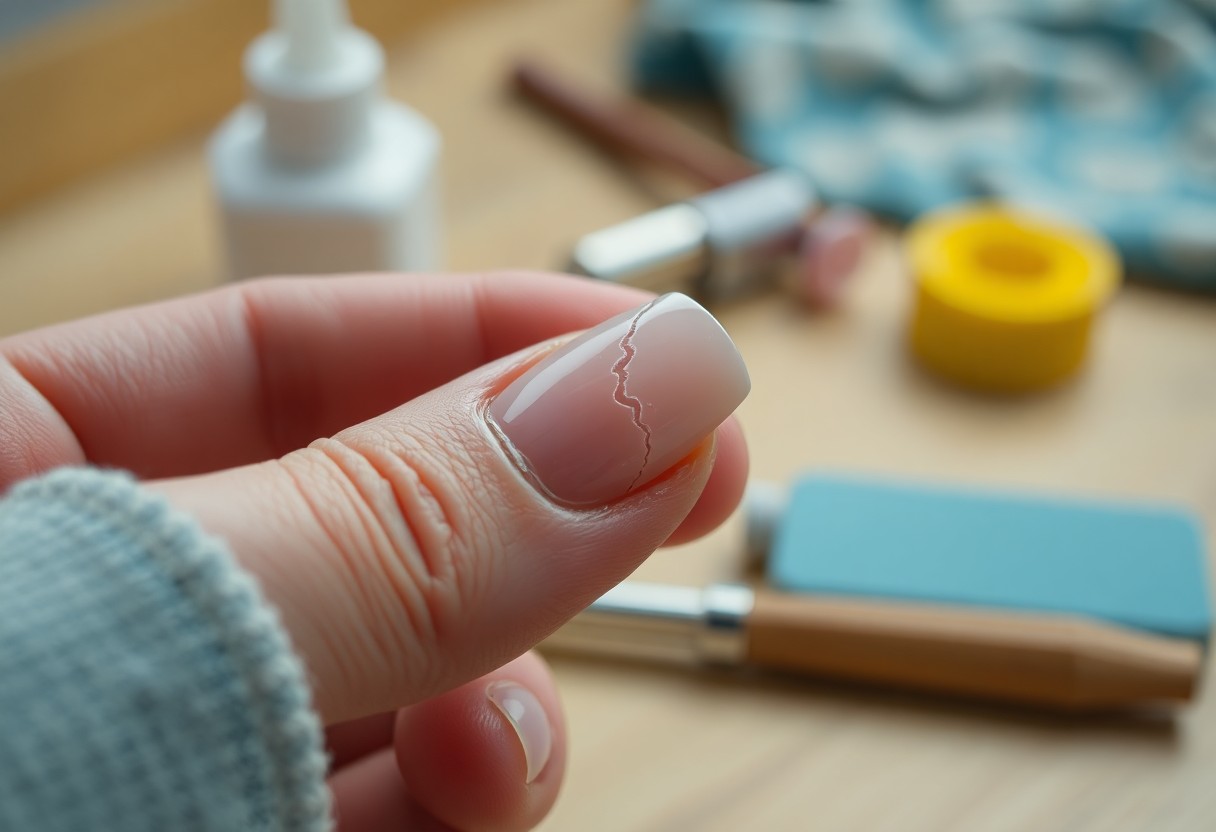
Diagnosing the Crack
Assuming you notice a crack in your acrylic nail, the first step is to accurately diagnose its nature. Understanding the type and extent of the crack will guide your repair efforts and help you determine whether professional assistance is required. Inspect your nail closely and note any other signs of damage, such as lifting or discoloration, which may indicate a more serious problem.
Types of Cracks
Assuming you’re familiar with common types of cracks, here are some categories to consider:
- Surface Cracks: Minor, generally aesthetic.
- Deep Cracks: Extend through multiple layers and require more extensive repair.
- Split Nails: More severe, may involve loss of nail integrity.
- Chips: Small areas where the acrylic has broken away.
- Fissures: Hairline fractures that can worsen over time.
Thou should assess your nail carefully to identify any of these issues.
| Type of Crack | Description |
| Surface Cracks | Minor with no structural damage. |
| Deep Cracks | Potential to separate the nail from the natural nail. |
| Split Nails | Involves a significant loss of integrity. |
| Chips | Small portions missing from the edge of the nail. |
Assessing Damage Severity
Crack identification is a key part of assessing damage severity. It’s important to evaluate how deep the crack goes and whether it affects the overall structure and appearance of your nail. Is the crack merely cosmetic, or does it lead to the natural nail being exposed? Carefully consider if the surrounding area shows redness, swelling, or infection signs, as these may require immediate attention.
Assessing the severity of the damage involves looking at various factors, including the type and location of the crack, how deep it penetrates, and any accompanying symptoms. A good rule of thumb is to visualize whether the crack compromises the nail’s functionality or aesthetics. If you notice significant impairment in any form, it is wise to consult a professional before attempting a DIY repair. Treat your nails with the care they deserve, ensuring they remain healthy and beautiful.
Tools and Materials Needed
Unlike other nail repair methods, fixing a cracked acrylic nail requires specific tools and materials to achieve a seamless finish. Gather items such as a nail file, buffer, nail glue, a repair wrap, and cuticle oil to ensure a smooth and effective repair process. Having the right supplies will help you restore your nail to its former beauty and maintain its integrity.
Essential Repair Tools
Between the various tools you’ll use, a nail file and buffer are imperative for smoothing the surface of the damaged area. A pair of scissors can also be handy for trimming any ragged edges. Additionally, nail glue will be required to bond the pieces together securely.
Recommended Products
Beside these tools, you may want to consider specific products that enhance your repair efforts, such as professional-grade nail glue or specialized acrylic repair kits.
Products like high-quality nail glue often provide stronger adhesion, preventing future cracks or breaks. Acrylic repair kits typically include everything needed for a comprehensive fix, including wraps or fiberglass patches that can reinforce the nail. Investing in these products not only makes your repair easier but also helps maintain the longevity of your acrylic nails.
Step-by-Step Repair Process
Now that you’ve identified the issue, follow these steps to effectively repair your acrylic nail. For more insights on similar experiences, check out My acrylic nail has cracked through the middle and …
Information Breakdown
| Step | Description |
| 1. Preparing the Nail | Ensure the area around the crack is clean and dry. |
| 2. The Repair Technique | Use an acrylic repair kit or bonding agent. |
| 3. Finishing Touches | Shape and polish the repaired nail. |
Preparing the Nail
To prepare your nail for repair, first clean the cracked area with a gentle nail cleanser to remove oils or debris. You’ll want to gently buff around the crack with a fine buffer, which will help the adhesive bond better to your acrylic nail.
The Repair Technique
The next step involves applying a suitable acrylic repair product. Carefully follow the manufacturer’s instructions to ensure a proper application.
A well-applied acrylic repair product will fill in the crack seamlessly. Make sure to apply it evenly, using a small brush or a toothpick to push the material into the crack and smooth it out. Allow the product to cure completely before moving on to the next step.
Finishing Touches
Between applications, check the repair to ensure it has set correctly. Once dry, file the nail gently to reshape it, and buff the surface until smooth.
Further refinements can involve applying a top coat for shine and durability. This also helps blend the repaired area with the existing acrylic, making the repair less noticeable.
Preventing Future Damage
Despite the occasional mishap, you can take effective measures to keep your acrylic nails intact and prevent future damage. Adopting a few simple habits will enhance the longevity of your nails and reduce the chances of cracking or lifting. Regular maintenance and careful interactions with your environment play key roles in preserving the quality of your acrylics.
Proper Care Tips
Below are some proper care tips to consider for your acrylic nails:
- Keep your nails moisturized with cuticle oil.
- Avoid using your nails as tools for opening or prying.
- Limit exposure to harsh chemicals and detergents.
- Wear gloves during cleaning tasks or when using chemicals.
- Schedule regular maintenance appointments with your nail technician.
Knowing how to care for your nails can significantly extend their life and appearance.
Best Practices for Acrylic Nails
Between your appointments, you can adopt best practices to maintain the health and integrity of your acrylic nails. These practices help prevent damage while ensuring your nails always look their best.
Best practices for acrylic nails include avoiding excessive moisture and ensuring your hands are always clean and dry. Be mindful of any activities that can put stress on your nails, such as typing or using your phone, and try to minimize force during these actions. Regularly trim and file your natural nails before your appointment to keep them healthy. Additionally, be sure to apply sunscreen to your hands to protect against UV rays, which can weaken the acrylic over time. These effective approaches will help you enjoy stunning nails while minimizing the risk of damage.
When to Seek Professional Help
Your DIY repair skills may be impressive, but there are situations where seeking professional help is the best option. If the crack is deep, near the nail bed, or accompanied by pain, you should consult a nail technician or dermatologist. Attempting to fix it yourself could lead to further damage or infection. Additionally, if multiple nails are cracked, it might indicate an underlying issue that requires expert assessment. Don’t hesitate to get professional advice to ensure your nails remain healthy and beautiful.
Summing up
Summing up, repairing a cracked acrylic nail can be a straightforward process if you follow the proper steps. You should clean the area, apply a nail glue or acrylic resin for reinforcement, and shape it to match your natural nail. Don’t forget to file the edges for a smooth finish. For more detailed guidance, check out How to Handle a Snapped Acrylic Nail: Repair Tips. By taking these measures, you can maintain the integrity of your nails while ensuring they look flawless.
Q: What materials do I need to repair a cracked acrylic nail?
A: To repair a cracked acrylic nail, you will need the following materials:
– Nail file or buffer to smooth the surface
– Clear nail glue or acrylic nail repair kit
– An acrylic brush (if using acrylic powder and liquid)
– Acrylic powder and liquid (if doing a more extensive repair)
– Nail tips or a piece of a plastic nail (for larger cracks)
– A small pair of scissors (optional for trimming)
– Cuticle oil (optional for hydration)
– Rubbing alcohol and lint-free wipes for sanitation
Q: How can I repair a minor crack in my acrylic nail at home?
A: For a minor crack, start by carefully filing the area around the crack to smooth it out. Clean the nail with rubbing alcohol using a lint-free wipe. Next, apply a small amount of clear nail glue over the crack and let it dry completely. Once the glue is dry, you can shape and buff the nail to make it look natural. Finish by applying a topcoat for added protection and shine.
Q: Can I repair a severe crack or break in my acrylic nail myself?
A: Yes, a severe crack or break can be repaired at home, but it may require more materials and effort. Start by assessing the damage. If the nail is entirely broken off, you will need to use a nail tip. First, file the remaining acrylic down to create a smooth surface. Then, apply the nail tip to the broken area with nail glue. Once secure, you may need to apply a thin layer of acrylic over the tip using an acrylic powder and liquid for a seamless finish. Afterward, shape, buff, and polish your nail to blend it with the rest. For larger damages, consider visiting a nail technician for a more polished result.