Nail Problems and Solutions

How to Prevent Hangnails and Heal Them Quickly

With the right techniques, you can effectively prevent hangnails and promote faster healing when they do occur. Hangnails can be irritating and uncomfortable, often leading to more significant issues if neglected. This guide will provide you with practical tips to maintain healthy nails and skin around them, as well as remedies to soothe and heal hangnails swiftly, ensuring your hands stay in tip-top shape. By incorporating these methods into your daily routine, you can minimize the impact of hangnails on your life.

Key Takeaways:

  • Moisturization: Keep your hands and cuticles well-hydrated to minimize the risk of hangnails.
  • Gentle Grooming: Use proper nail care tools and techniques to avoid damaging the cuticles while trimming nails.
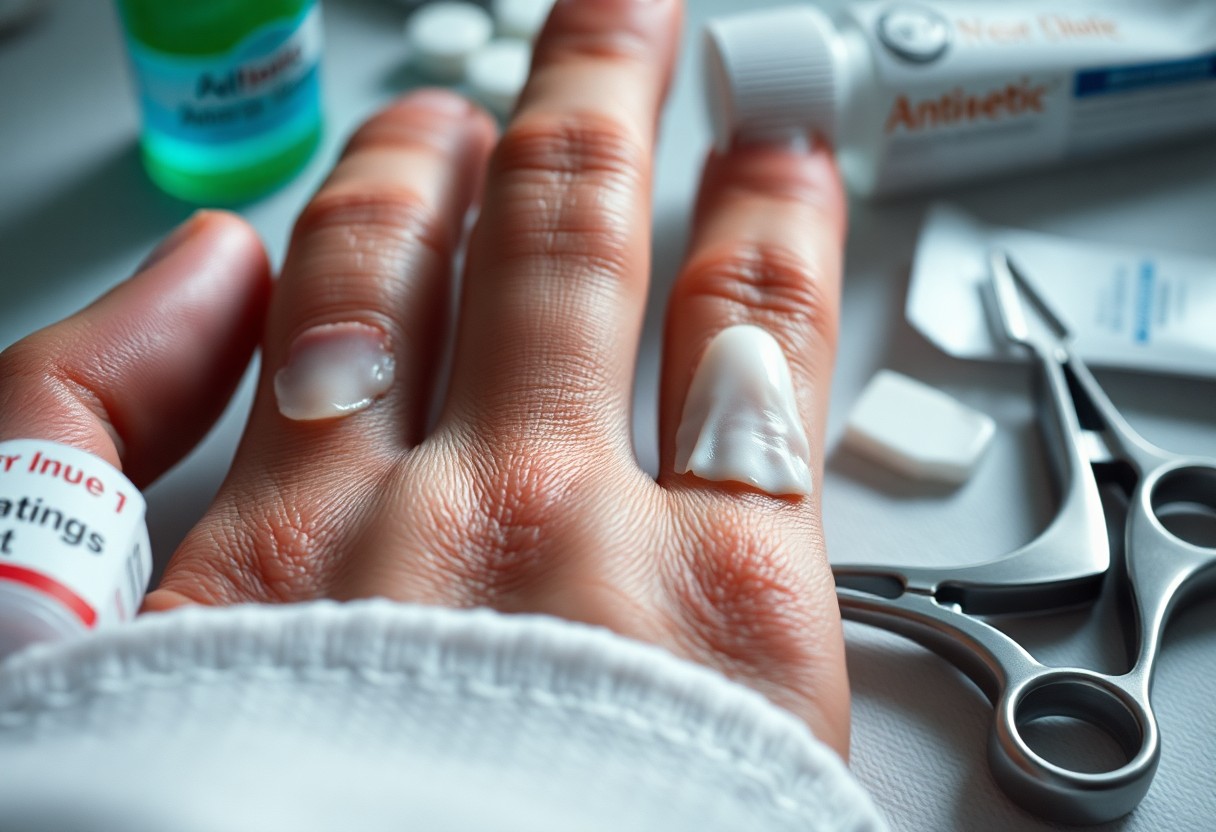
  • Quick Treatment: Address hangnails immediately with antiseptic and bandaging to promote healing and prevent infection.

Understanding Hangnails

For those unfamiliar, hangnails are small pieces of skin that tear away from the base of your fingernails. They can be both uncomfortable and unsightly, often leading to irritation and sometimes even infection. Understanding what they are and what causes them is imperative in preventing and effectively treating them.

What Are Hangnails?

About hangnails, they occur when the skin surrounding your nails becomes dry, leading to small, often painful tears. These hangnails stick out and can snag on clothing or other materials, further aggravating the skin and creating the potential for more serious issues if left untreated.

Causes of Hangnails

On various occasions, hangnails can result from a range of factors such as dry skin, excessive nail biting, and environmental conditions. They may also be more common in individuals who frequently wash their hands or use harsh chemicals without proper protection.

Hence, maintaining healthy skin around your nails is vital in preventing hangnails. Factors like lack of moisture, biting your nails, and exposure to cold or dry air contribute to the development of hangnails. It’s imperative to keep your hands hydrated and practice good nail hygiene to minimize their occurrence. Making simple changes in your daily routine can greatly improve your nail health.

Prevention Techniques

While preventing hangnails may seem simple, it requires consistent efforts and a few effective routines. Keeping your nails trimmed and your cuticles healthy is vital. For more insights, check out How To Get Rid Of Hangnails (and 5 Tips To Prevent Them) to fortify your prevention strategies.
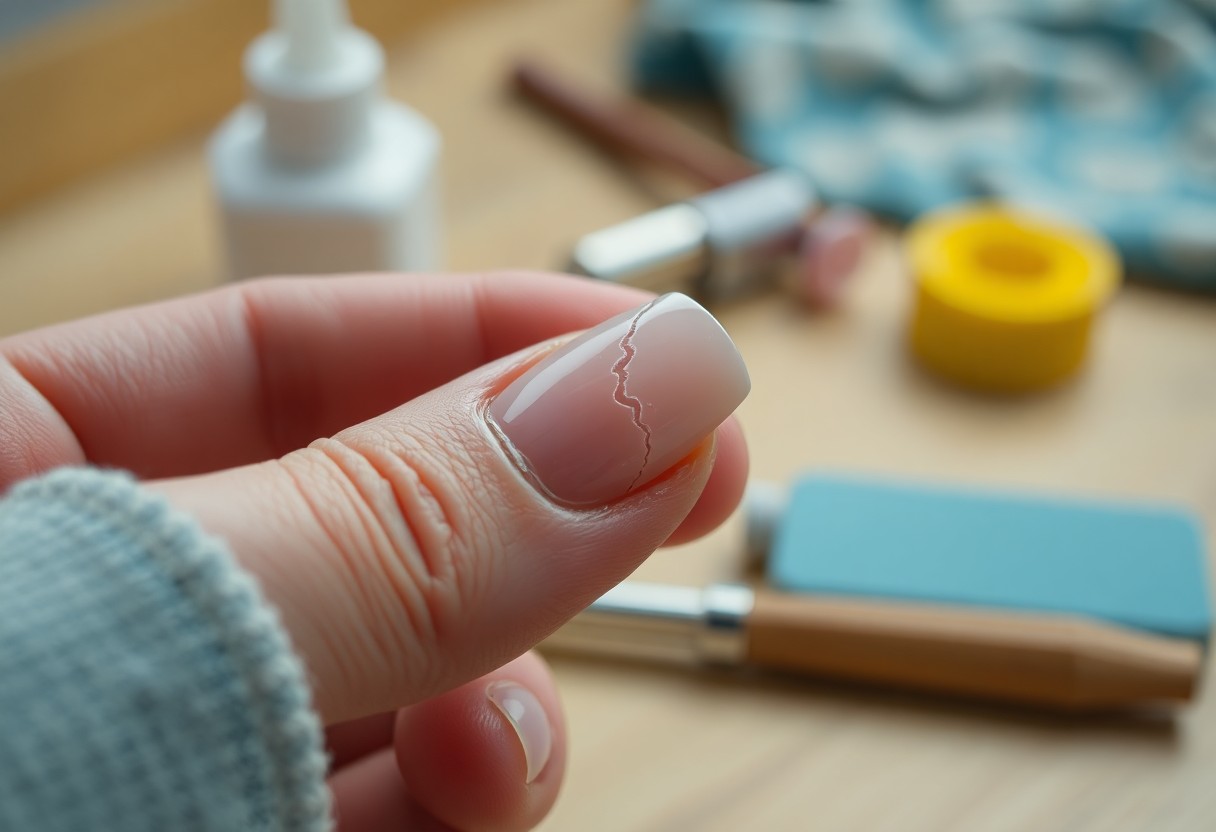
Proper Nail Care

An important part of prevention involves proper nail care. Trim your nails regularly and avoid biting or tearing at them, as this can lead to painful hangnails. Use a gentle nail file to smooth out edges and prevent snags that could lead to hangnails.

Hydration and Moisturization

Above all, keeping your skin and nails hydrated is vital for preventing hangnails. Dry skin and cuticles can easily lead to hangnails, so applying moisturizer daily can significantly reduce your risk.

Prevention techniques should also include using hand creams or oils specifically formulated for nails and cuticles. Look for products that contain nourishing ingredients like jojoba oil or vitamin E. Regularly massaging these products into your hands not only hydrates but can stimulate circulation, promoting healthier nail growth.

Quick Relief for Existing Hangnails

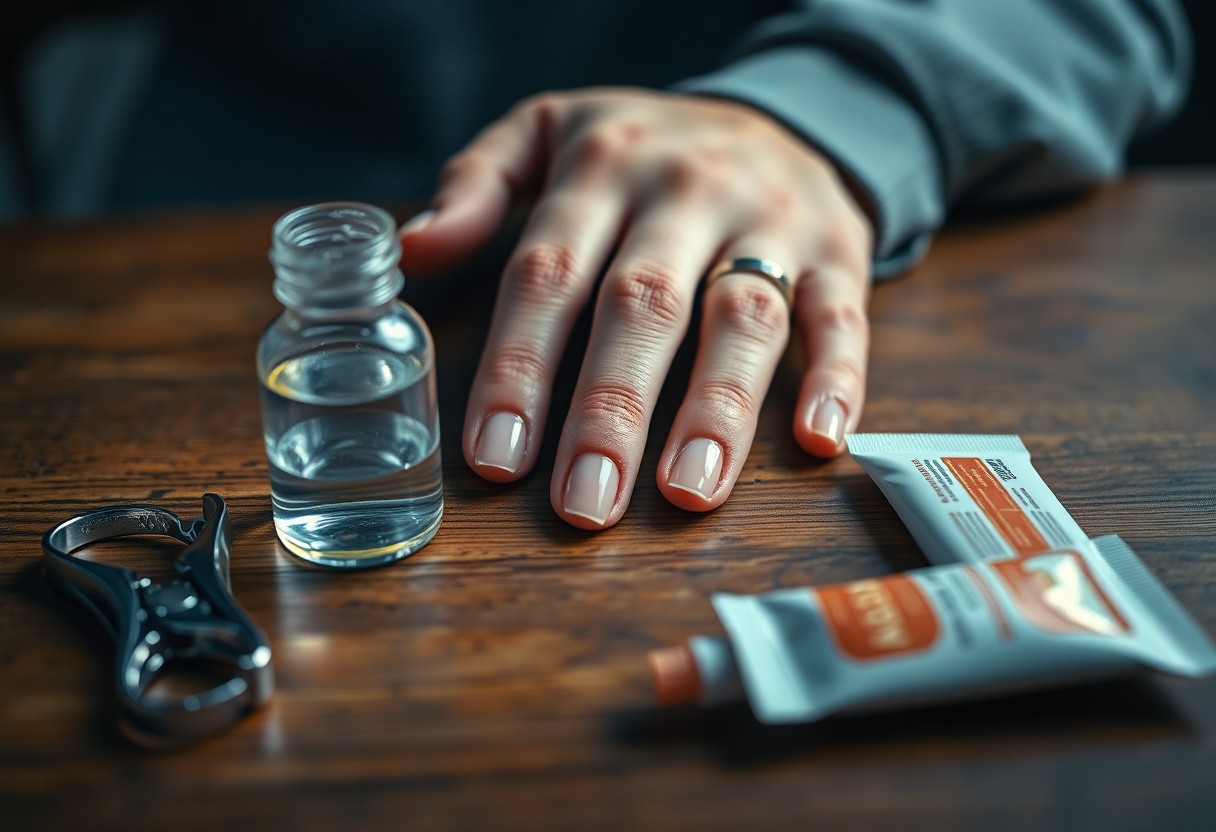
Unlike many nail issues, hangnails can be particularly bothersome and painful when they occur. To find quick relief, you should gently pull the hangnail away from the skin using a clean pair of nail clippers or scissors, ensuring that you don’t tug at it excessively, which could cause further irritation. Applying a soothing ointment or a bit of hand cream can also help alleviate discomfort and promote healing.

First Aid for Hangnails

Along with proper trimming, first aid for hangnails involves cleansing the area with warm water and mild soap. This step removes any debris and helps you avoid infection. After cleaning, applying a topical antibiotic can also protect your skin while it heals. To minimize pain, you can use a cold compress on the area.

Home Remedies

Quick remedies can also provide relief from hangnails. One effective option is to soak your fingers in warm, soapy water for several minutes. This softens the hangnail and surrounding skin, making it easier to trim. Additionally, using natural oils, such as olive or coconut oil, can moisturize the area and speed up recovery.

First, using these home remedies regularly can prevent future hangnails and promote overall nail health. Keep your nails trimmed and moisturize daily to maintain softness. Consider using a hand cream containing aloe vera or vitamin E, which not only nourishes the skin but also helps strengthen your nails, reducing the chances of hangnails developing in the first place.

When to Seek Professional Help

After trying various home remedies for hangnails without success, it may be time to consult a healthcare professional. If your hangnails persist, worsen, or are accompanied by severe pain, swelling, or discharge, seeking medical advice is advisable. A doctor or dermatologist can provide targeted treatments and ensure that an underlying issue isn’t contributing to the problem.

Signs of Infection

By staying attentive to your hangnails, you can identify signs of infection, which may include increased redness, warmth, swelling, and pus around the affected area. If you notice any of these symptoms, it’s important to take action promptly to prevent further complications.

Recommended Treatments

When your hangnail develops into an infection or does not improve, professional treatment options may be necessary. Your healthcare provider might suggest topical antibiotics, oral medications, or drain any accumulated pus. Furthermore, they could perform procedures to remove any damaged tissue, promoting a faster healing process.

Infection can escalate quickly if not properly managed, leading to more severe complications like cellulitis or chronic issues. Therefore, it’s imperative to follow the recommended treatments diligently and take preventive measures seriously to keep hangnails and infections at bay. Regularly moisturizing your cuticles and maintaining nail hygiene can also enhance your overall nail health.

Daily Habits for Healthy Nails

Your nail health largely depends on your everyday practices. Consistently keeping your nails clean and well-groomed can prevent hangnails. Make it a habit to trim your nails regularly, be cautious when handling tools, and moisturize your hands and cuticles to maintain optimal hydration. Avoid biting your nails or picking at your cuticles, as these behaviors can lead to damage and infection. Incorporating these mindful habits into your daily routine will play a significant role in maintaining healthy nails.

Diet and Nutrition

Among the many factors that influence nail health, your diet plays a vital role. Consuming a balanced diet rich in vitamins and minerals, specifically biotin, zinc, and protein, can support stronger nails. Foods like eggs, nuts, leafy greens, and fish will provide your body with the necessary nutrients for optimal nail growth and resilience. Additionally, staying hydrated is crucial for preventing dryness and brittleness, so drink plenty of water throughout the day.

Protective Measures

Protective measures are crucial in safeguarding your nails from damage and hangnails. Simple precautions such as wearing gloves when doing chores or using harsh chemicals can significantly reduce the risk of injury and drying out the nail beds. It’s also advisable to avoid exposing your nails to excessive moisture from prolonged soaking in water. By being mindful of your nail environment and taking sensible precautions, you can maintain healthy nails and reduce the likelihood of hangnails.

Diet plays a significant role in nail health. Incorporating foods rich in vitamins and minerals helps in the repair and growth of your nails. Focus on including sources of omega-3 fatty acids, vitamins A and C, and iron in your meals. These nutrients contribute to the integrity and strength of your nails, reducing the chances of developing hangnails. Regularly assessing your dietary habits and making necessary adjustments can lead to lasting improvements in your nail health.

Conclusion

Drawing together the best practices for preventing and healing hangnails, you can maintain healthy nail beds by keeping your hands moisturized and avoiding biting or picking at your nails. When hangnails occur, promptly trim them carefully to prevent further injury, and treat the area with antiseptic and a soothing cream. By adopting these habits, you can minimize hangnail occurrences and ensure your hands remain in great condition.

Q: What are hangnails and what causes them?

A: Hangnails are small, torn pieces of skin that occur alongside the nails, typically at the cuticle area. They can be caused by several factors, including dry skin, biting your nails, excessive exposure to water or harsh chemicals, or even trauma to the fingers. Environmental factors, such as cold weather or low humidity, can also contribute to the development of hangnails.

Q: What are some effective methods to prevent hangnails?

A: To prevent hangnails, it’s important to keep your hands and cuticles moisturized. Regularly apply a good quality hand cream or cuticle oil, especially after washing your hands or when exposed to cold weather. Avoid biting your nails or picking at the skin around them. Wearing gloves while doing chores that involve water or cleaning products can also help protect your hands. Additionally, maintaining a balanced diet rich in vitamins can promote healthy skin and nails.

Q: How can I heal hangnails quickly if they occur?

A: If you do get a hangnail, it’s important to address it promptly. First, gently trim any loose skin with sanitized scissors or nail clippers to prevent further tearing. Clean the area with soap and water, and pat it dry. Applying an antibiotic ointment can help prevent infection. Keeping the area moisturized with cuticle oil or a healing balm can aid recovery. If the hangnail appears infected, or if you experience significant pain, consider consulting a healthcare provider for further treatment options.

Common Nail Infections and How to Treat Them

There’s a good chance that you might encounter nail infections at some point in your life, whether it’s a fungal nail infection or a bacterial issue. Understanding these common conditions is imperative for maintaining healthy nails. In this post, you’ll learn about the various types of nail infections, their symptoms, and effective treatment options. For detailed information on Fungal nail infection, as well as preventative measures, stay tuned to ensure your nails remain in top shape.

Key Takeaways:

  • Identify Symptoms: Common nail infections such as fungal infections or paronychia often present symptoms like discoloration, swelling, and pain.
  • Treatment Options: Treatment may involve topical antifungal medications for fungal infections, while bacterial infections might require oral antibiotics.
  • Preventive Care: Maintaining good nail hygiene and avoiding trauma can significantly reduce the risk of nail infections.

Types of Nail Infections

Before understanding how to treat nail infections, it’s necessary to know the different types. Common types include:

  • Fungal Nail Infections
  • Bacterial Nail Infections
  • Viral Nail Infections

This knowledge will help you identify and address your specific nail infection effectively.

Type of InfectionDescription
FungalCommonly caused by nail fungi, leading to discoloration and thickening.
BacterialResult from bacterial growth, often causing pain and swelling.
ViralLess common, usually resulting from viruses like HPV.
LocalizedAffects a specific area of the nail or skin surrounding it.
SystemicAffecting the overall health, requiring more comprehensive treatment.

Fungal Nail Infections

Types of fungal nail infections are primarily caused by dermatophytes, yeasts, or molds. Symptoms include nail discoloration, thickening, and brittleness. Treatment may involve topical antifungal medications or oral prescriptions if severe.

Bacterial Nail Infections

Across different contexts, bacterial nail infections can occur when bacteria penetrate damaged skin, leading to conditions like paronychia. Symptoms often include redness, swelling, and sometimes pus formation stemming from an infection.

Nail infections can worsen if left untreated, affecting not only your nails but also surrounding tissue. If you notice persistent symptoms or severe pain, consulting a healthcare provider is advisable for potential drainage or antibiotic treatment.

Viral Nail Infections

Among the various types of nail infections, viral infections are often less common but can still cause significant discomfort. They are typically caused by viruses like HPV, which can lead to warts around the nail area.

Nail infections caused by viruses may spread easily and require careful treatment to avoid transmission to others. Consulting a healthcare professional is important for accurate diagnosis and effective management strategies.

Symptoms of Nail Infections

It is necessary to be aware of the symptoms of nail infections, as early detection can lead to more effective treatment. Typically, signs may include discoloration, thickening, or separation of your nail from the nail bed. You might also notice an unusual odor or swelling around the affected nail. Understanding these symptoms will help you identify an infection promptly.

Visual Indicators

Visual signs of nail infections can manifest in various ways. Your nails may turn yellow, green, or even black, depending on the type of infection. You may also observe changes in nail texture, such as crumbling or flaking, which can indicate an underlying issue. Being vigilant about these visual indicators can help you address nail infections early.

Associated Pain and Discomfort

Associated pain is a common symptom of nail infections that can significantly affect your daily activities. You may experience throbbing sensations or tenderness around the nail, especially when pressure is applied. This discomfort can make it challenging to wear shoes or engage in certain activities.

Plus, if left untreated, associated pain can escalate, leading to increased swelling or even the development of pus, further complicating the infection. Being attentive to these discomforts not only helps you seek timely care but also aids in alleviating any complications that may arise. Prioritizing your foot health is vital for maintaining your overall well-being.

Risk Factors for Nail Infections

Now that you are aware of nail infections, it’s important to understand the risk factors involved. Common factors that can increase your likelihood of developing a nail infection include:

  • Frequent exposure to moisture
  • Injury or trauma to the nail
  • Improper nail care or hygiene
  • Wearing tight or ill-fitting footwear
  • Diabetes or compromised immune system

Thou should take measures to mitigate these risks to keep your nails healthy.

Pre-existing Health Conditions

Across various studies, it has been found that certain health conditions can heighten your risk for nail infections. Conditions like diabetes, psoriasis, and circulatory issues can impair your immune system, making it harder for your body to fight off infections. If you manage any of these conditions, it’s vital to monitor your nails closely and consult a healthcare professional if you notice any abnormalities.

Environmental and Lifestyle Influences

Nail infections can also stem from environmental and lifestyle choices you make. Both personal habits and surrounding conditions play a significant role in maintaining nail health. Factors such as open-toed footwear, communal showers, and nail products containing harsh chemicals can contribute to your vulnerability.

It’s important to create a nurturing environment for your nails. Maintaining dry, clean conditions and protecting your hands and feet from harsh chemicals can help reduce the risk of infections. Additionally, consider investing in quality footwear and practicing good hygiene in communal spaces to further shield your nails from exposure. By fostering these healthy habits, you can significantly lower the risk of developing nail infections.

Treatment Options for Nail Infections

Despite the discomfort nail infections can cause, various treatment options are available to help restore the health of your nails. From topical applications to oral medications, it’s important to choose the right approach for your condition. For more information on treating nail fungus, refer to Nail fungus: Diagnosis and treatment.

Over-the-Counter Remedies

Against many mild nail infections, over-the-counter remedies like antifungal creams and ointments can be effective. These treatments typically contain active ingredients such as clotrimazole or terbinafine, which work by eliminating the fungi causing the infection. Always follow the application instructions for best results.

Prescription Medications

One effective treatment for more severe nail infections often includes prescription medications, which your doctor may recommend after a thorough assessment. These medications can either be topical solutions applied directly to the nail or oral antifungal pills that treat the infection systemically.

In fact, prescription medications like itraconazole or fluconazole may be necessary for persistent infections which do not respond to over-the-counter treatments. Your healthcare provider can evaluate the severity of your infection and suggest the appropriate course of action, ensuring a more comprehensive treatment plan and better outcomes for your nail health.

Home Remedies

The use of home remedies continues to garner interest as a potential way to manage nail infections. Natural options such as tea tree oil, apple cider vinegar, or garlic have antifungal properties that could help in mild cases. Always ensure proper hygiene when applying these remedies to avoid further contamination.

At times, combining these home remedies with medical treatments may enhance healing. While some people report positive results from these natural options, it’s wise to consult with your healthcare provider before starting any at-home treatments to ensure they complement your overall health plan effectively.

Prevention of Nail Infections

Not taking proper precautions can lead to unwanted nail infections. You can significantly lower your risk by practicing sound hygiene and being mindful when engaging in activities that put your nails at risk. For more information about Fungal nail infection, consider regular check-ups and maintaining cleanliness.

Personal Hygiene Practices

Along with basic cleaning, maintaining your personal hygiene can help prevent nail infections. Make sure to wash your hands regularly, especially after using public facilities or touching potentially contaminated surfaces. Always dry your hands and feet thoroughly after washing, as moisture can promote the growth of harmful organisms.

Nail Care Tips

To keep your nails healthy and free from infections, follow these vital nail care tips:

  • Keep your nails trimmed and clean.
  • Avoid biting your nails.
  • Wear protective gloves when engaging in gardening or cleaning tasks.

This will help you maintain good nail health.

With consistent attention to nail care, you can enhance your overall nail health. Consider incorporating the following practices into your routine:

  • Moisturize your nails and cuticles regularly.
  • Choose breathable nail products.
  • Limit exposure to harsh chemicals.

This approach will support your nails in staying strong and infection-free.

When to Seek Medical Attention

All nail infections can vary in severity, and it’s important to know when to seek medical help. If you experience severe pain, swelling, or redness around your nails, or if the infection does not improve within a few days, it’s advisable to consult a healthcare professional. Additionally, if you notice pus or discharge, or if your symptoms are accompanied by fever or chills, you should seek immediate medical attention. These could be signs that the infection is worsening or spreading.

Warning Signs

Any changes to your nails or surrounding skin that are unusual should not be overlooked. Common warning signs of a nail infection include persistent redness, swelling, tenderness, and the presence of pus or discharge. If your nail becomes discolored, starts to separate from the nail bed, or if you experience increased pain, these could also indicate an infection that requires prompt medical evaluation.

Professional Treatment Options

Among the various treatment options available for nail infections, medical professionals can provide tailored care based on the severity and type of infection. Your healthcare provider may prescribe antifungal medications for fungal infections or antibiotics for bacterial infections. In more severe cases, drainage of abscesses or infected material may be necessary to facilitate healing.

Attention to proper treatment is crucial for effectively managing nail infections. Your doctor may recommend topical treatments such as creams or ointments, which can be applied directly to the affected area. Oral medications may also be prescribed for deeper infections. It’s important to follow your healthcare provider’s instructions closely and complete the full course of any prescribed medications, ensuring a comprehensive recovery and reducing the risk of recurrence.

Final Words

With this in mind, addressing common nail infections promptly can save you from discomfort and more severe complications. Whether it’s a fungal infection, ingrown nail, or bacterial infection, recognizing the symptoms early allows for effective treatments, such as topical antifungals or proper nail care. Always consult a healthcare professional if you notice persistent issues, as they can provide tailored advice and potential prescription options. Taking proactive measures for your nail health can significantly improve your overall well-being.

FAQ

Q: What are the common signs of nail infections?

A: Common signs of nail infections include discoloration of the nail (usually yellow or green), thickening of the nail, separation of the nail from the nail bed, swelling or redness around the nail, and sometimes pain or discomfort in the affected area. In severe cases, pus may also accumulate under the nail.

Q: What are the typical causes of nail infections?

A: Nail infections can be caused by various factors including fungi, bacteria, or yeast. Fungal infections, like onychomycosis, are particularly common and can occur due to excessive moisture, injury, or poor hygiene. Bacterial infections often arise from cuts or injuries to the nail area. Other contributing factors may include underlying health conditions such as diabetes and immune system disorders.

Q: How can I effectively treat a nail infection at home?

A: For mild cases of nail infections, home treatments can be effective. Soaking the affected nail in warm, soapy water can help reduce swelling and pain. Applying over-the-counter antifungal creams or ointments as directed may help treat fungal infections. It’s also important to keep the nails clean and dry, and to avoid manicures or artificial nails until the infection has resolved. If symptoms persist or worsen, consulting a healthcare professional is recommended for prescription medications or further treatment options.

How to Repair a Cracked Acrylic Nail

Just like any other beauty treatment, acrylic nails can encounter some mishaps, including cracks. If you find yourself with a cracked acrylic nail, you don’t need to panic—there are simple steps you can follow to restore it. This guide will walk you through the process, ensuring your nails look flawless again. For a quick technique, you can check out this detailed resource on how to Repair a Cracked Acrylic Nail in Two Minutes – Technique.

Key Takeaways:

  • Assess the Damage: Before starting the repair, evaluate the extent of the crack to determine if a simple fix or a complete replacement of the nail is needed.
  • Use Proper Tools: Gather crucial tools such as nail glue, a file, and a buffing block for an effective repair process.
  • Seal the Crack: Apply nail glue carefully into the crack, smooth it out, and allow it to dry completely to ensure a strong bond.

Understanding Acrylic Nails

To appreciate the maintenance involved with acrylic nails, it’s important to understand their composition and functionality. Acrylic nails are artificial nails created using a mixture of liquid monomer and powder polymer, which hardens when applied over your natural nails. They provide strength and versatility for various nail enhancements, enabling you to achieve different shapes and lengths while protecting your natural nails from damage.

What Are Acrylic Nails?

Between the myriad of nail options available, acrylic nails stand out for their durability and adaptability. They are popular for those who desire long-lasting, elegant nails with a polished look. Achieved through an application process that includes sculpting and shaping, acrylics can be customized to fit your preferred style, making them a go-to choice for many nail enthusiasts.

Common Issues with Acrylic Nails

Beside the appealing aesthetic, acrylic nails can encounter several issues that you should be aware of to maintain their integrity. Common concerns include lifting, cracking, and chipping, which can arise from various factors such as improper application, inadequate aftercare, or even lifestyle habits that put stress on your nails.

Consequently, being informed about these common issues can help you take proactive measures to preserve the quality of your acrylic nails. For instance, ensuring that your acrylic nails are properly applied and regularly maintained can prevent lifting, while being cautious during daily activities can minimize the risk of chipping. By understanding these challenges, you can better care for your acrylics and enjoy their benefits longer.

Diagnosing the Crack

Assuming you notice a crack in your acrylic nail, the first step is to accurately diagnose its nature. Understanding the type and extent of the crack will guide your repair efforts and help you determine whether professional assistance is required. Inspect your nail closely and note any other signs of damage, such as lifting or discoloration, which may indicate a more serious problem.

Types of Cracks

Assuming you’re familiar with common types of cracks, here are some categories to consider:

  • Surface Cracks: Minor, generally aesthetic.
  • Deep Cracks: Extend through multiple layers and require more extensive repair.
  • Split Nails: More severe, may involve loss of nail integrity.
  • Chips: Small areas where the acrylic has broken away.
  • Fissures: Hairline fractures that can worsen over time.

Thou should assess your nail carefully to identify any of these issues.

Type of CrackDescription
Surface CracksMinor with no structural damage.
Deep CracksPotential to separate the nail from the natural nail.
Split NailsInvolves a significant loss of integrity.
ChipsSmall portions missing from the edge of the nail.

Assessing Damage Severity

Crack identification is a key part of assessing damage severity. It’s important to evaluate how deep the crack goes and whether it affects the overall structure and appearance of your nail. Is the crack merely cosmetic, or does it lead to the natural nail being exposed? Carefully consider if the surrounding area shows redness, swelling, or infection signs, as these may require immediate attention.

Assessing the severity of the damage involves looking at various factors, including the type and location of the crack, how deep it penetrates, and any accompanying symptoms. A good rule of thumb is to visualize whether the crack compromises the nail’s functionality or aesthetics. If you notice significant impairment in any form, it is wise to consult a professional before attempting a DIY repair. Treat your nails with the care they deserve, ensuring they remain healthy and beautiful.

Tools and Materials Needed

Unlike other nail repair methods, fixing a cracked acrylic nail requires specific tools and materials to achieve a seamless finish. Gather items such as a nail file, buffer, nail glue, a repair wrap, and cuticle oil to ensure a smooth and effective repair process. Having the right supplies will help you restore your nail to its former beauty and maintain its integrity.

Essential Repair Tools

Between the various tools you’ll use, a nail file and buffer are imperative for smoothing the surface of the damaged area. A pair of scissors can also be handy for trimming any ragged edges. Additionally, nail glue will be required to bond the pieces together securely.

Recommended Products

Beside these tools, you may want to consider specific products that enhance your repair efforts, such as professional-grade nail glue or specialized acrylic repair kits.

Products like high-quality nail glue often provide stronger adhesion, preventing future cracks or breaks. Acrylic repair kits typically include everything needed for a comprehensive fix, including wraps or fiberglass patches that can reinforce the nail. Investing in these products not only makes your repair easier but also helps maintain the longevity of your acrylic nails.

Step-by-Step Repair Process

Now that you’ve identified the issue, follow these steps to effectively repair your acrylic nail. For more insights on similar experiences, check out My acrylic nail has cracked through the middle and …

Information Breakdown

StepDescription
1. Preparing the NailEnsure the area around the crack is clean and dry.
2. The Repair TechniqueUse an acrylic repair kit or bonding agent.
3. Finishing TouchesShape and polish the repaired nail.

Preparing the Nail

To prepare your nail for repair, first clean the cracked area with a gentle nail cleanser to remove oils or debris. You’ll want to gently buff around the crack with a fine buffer, which will help the adhesive bond better to your acrylic nail.

The Repair Technique

The next step involves applying a suitable acrylic repair product. Carefully follow the manufacturer’s instructions to ensure a proper application.

A well-applied acrylic repair product will fill in the crack seamlessly. Make sure to apply it evenly, using a small brush or a toothpick to push the material into the crack and smooth it out. Allow the product to cure completely before moving on to the next step.

Finishing Touches

Between applications, check the repair to ensure it has set correctly. Once dry, file the nail gently to reshape it, and buff the surface until smooth.

Further refinements can involve applying a top coat for shine and durability. This also helps blend the repaired area with the existing acrylic, making the repair less noticeable.

Preventing Future Damage

Despite the occasional mishap, you can take effective measures to keep your acrylic nails intact and prevent future damage. Adopting a few simple habits will enhance the longevity of your nails and reduce the chances of cracking or lifting. Regular maintenance and careful interactions with your environment play key roles in preserving the quality of your acrylics.

Proper Care Tips

Below are some proper care tips to consider for your acrylic nails:

  • Keep your nails moisturized with cuticle oil.
  • Avoid using your nails as tools for opening or prying.
  • Limit exposure to harsh chemicals and detergents.
  • Wear gloves during cleaning tasks or when using chemicals.
  • Schedule regular maintenance appointments with your nail technician.

Knowing how to care for your nails can significantly extend their life and appearance.

Best Practices for Acrylic Nails

Between your appointments, you can adopt best practices to maintain the health and integrity of your acrylic nails. These practices help prevent damage while ensuring your nails always look their best.

Best practices for acrylic nails include avoiding excessive moisture and ensuring your hands are always clean and dry. Be mindful of any activities that can put stress on your nails, such as typing or using your phone, and try to minimize force during these actions. Regularly trim and file your natural nails before your appointment to keep them healthy. Additionally, be sure to apply sunscreen to your hands to protect against UV rays, which can weaken the acrylic over time. These effective approaches will help you enjoy stunning nails while minimizing the risk of damage.

When to Seek Professional Help

Your DIY repair skills may be impressive, but there are situations where seeking professional help is the best option. If the crack is deep, near the nail bed, or accompanied by pain, you should consult a nail technician or dermatologist. Attempting to fix it yourself could lead to further damage or infection. Additionally, if multiple nails are cracked, it might indicate an underlying issue that requires expert assessment. Don’t hesitate to get professional advice to ensure your nails remain healthy and beautiful.

Summing up

Summing up, repairing a cracked acrylic nail can be a straightforward process if you follow the proper steps. You should clean the area, apply a nail glue or acrylic resin for reinforcement, and shape it to match your natural nail. Don’t forget to file the edges for a smooth finish. For more detailed guidance, check out How to Handle a Snapped Acrylic Nail: Repair Tips. By taking these measures, you can maintain the integrity of your nails while ensuring they look flawless.

Q: What materials do I need to repair a cracked acrylic nail?

A: To repair a cracked acrylic nail, you will need the following materials:
– Nail file or buffer to smooth the surface
– Clear nail glue or acrylic nail repair kit
– An acrylic brush (if using acrylic powder and liquid)
– Acrylic powder and liquid (if doing a more extensive repair)
– Nail tips or a piece of a plastic nail (for larger cracks)
– A small pair of scissors (optional for trimming)
– Cuticle oil (optional for hydration)
– Rubbing alcohol and lint-free wipes for sanitation

Q: How can I repair a minor crack in my acrylic nail at home?

A: For a minor crack, start by carefully filing the area around the crack to smooth it out. Clean the nail with rubbing alcohol using a lint-free wipe. Next, apply a small amount of clear nail glue over the crack and let it dry completely. Once the glue is dry, you can shape and buff the nail to make it look natural. Finish by applying a topcoat for added protection and shine.

Q: Can I repair a severe crack or break in my acrylic nail myself?

A: Yes, a severe crack or break can be repaired at home, but it may require more materials and effort. Start by assessing the damage. If the nail is entirely broken off, you will need to use a nail tip. First, file the remaining acrylic down to create a smooth surface. Then, apply the nail tip to the broken area with nail glue. Once secure, you may need to apply a thin layer of acrylic over the tip using an acrylic powder and liquid for a seamless finish. Afterward, shape, buff, and polish your nail to blend it with the rest. For larger damages, consider visiting a nail technician for a more polished result.

How to Repair a Nail That’s Split Down the Middle

Most nail issues can be fixed with a little care, and a split nail is no exception. If you find yourself dealing with a nail that’s split down the middle, you can take steps to repair it effectively. With the right tools and techniques, you can help restore your nail’s appearance and prevent further damage. For inspiration, you might want to check out this post about someone who split their thumbnail right down to about halfway. Let’s look into the process of repairing your split nail!

Key Takeaways:

  • Assess the Damage: Evaluate the severity of the split to determine if it can be repaired or if professional help is needed.
  • Gather Supplies: Collect crucial items such as nail glue or adhesive, a buffer, and a nail file.
  • Apply Adhesive: Carefully apply a small amount of glue to the split area and press the nail together, ensuring a secure bond.
  • File and Shape: Once the adhesive has dried, use a file to smooth out any rough edges and shape the nail as desired.
  • Protect the Nail: Finish with a clear nail polish or top coat to seal the repair and enhance durability.

Understanding Split Nails

Your nails can experience splitting for various reasons, often signaling underlying health or environmental issues. A split nail not only compromises your aesthetic but can also cause discomfort and lead to more severe nail problems if not addressed. Understanding the nature of split nails enables you to take appropriate action and improve your nail health in the long run.

Common Causes of Nail Splitting

While there are numerous reasons for nail splitting, some of the most prevalent causes include harsh environmental factors, such as frequent exposure to water or chemicals, and physical trauma from nail care practices. Nutritional deficiencies, particularly in vitamins and minerals, can also compromise the nails’ integrity, allowing them to split more easily. Being aware of these factors helps you prevent future occurrences.

Factors That Contribute to Nail Health

Factors that contribute to nail health go beyond external care; they also involve your lifestyle and dietary choices. Ensuring you maintain a balanced diet rich in crucial nutrients supports your nails’ strength and resilience. Incorporating practices that promote good hygiene and protecting your nails from injury can also have a positive impact. You will find that the following elements are vital for nail health:

  • Adequate hydration
  • Balanced diet rich in vitamins, particularly biotin
  • Regularly moisturizing hands and nails
  • Using gloves during household chores

Perceiving these factors can significantly enhance the strength and appearance of your nails, helping you to avoid splits in the future.

Common Nail Care Practices

Common nail care practices play an crucial role in maintaining healthy nails. Simple routines that incorporate gentle care can help you avoid unnecessary damage. Consider the following tips for maintaining your nails:

  • Trimming nails regularly
  • Avoiding excessive use of acrylics or gels
  • Choosing non-toxic nail products
  • Keeping nails dry and clean

Perceiving the importance of these practices will lead to improved nail health, making splitting less likely. Your commitment to proper nail care can enhance the beauty and resilience of your nails overall.

How to Identify the Severity of the Split

Clearly, identifying the severity of a split nail is key to determining the right course of action. Start by examining the depth and length of the split. Minor splits, which are typically superficial and do not reach the nail bed, can often be treated at home. However, splits that extend deeper and cause pain or expose the nail bed may require immediate attention to prevent infection and ensure proper healing.

Minor Splits vs. Severe Splits

Assuming your nail is split, it’s important to differentiate between minor and severe splits. Minor splits are generally shallow and may only affect the outer layers of the nail, while severe splits can penetrate deeper into the nail bed and may require more intricate care. Assessing these differences will help you choose the appropriate treatment method.

When to Seek Professional Help

You should consider seeking professional help if the split is severe or accompanied by excessive pain, bleeding, or signs of infection, such as redness and swelling around the nail. Proper evaluation by a medical professional can mitigate further complications and ensure your nail heals correctly.

Help is available if you find yourself unsure about managing a split nail. A healthcare professional can assess the condition of your nail and recommend the best treatment options, including possible procedures to repair or protect your nail. Don’t hesitate to seek assistance if you’re concerned about your nail’s health or if home remedies aren’t effective; timely intervention can prevent complications and promote better recovery.

Immediate Care for a Split Nail

Despite the discomfort a split nail can cause, addressing it promptly can minimize further damage. First, you should assess the severity of the split. If you notice excessive pain or bleeding, it’s wise to consult a healthcare professional. If the split is minor, you can begin immediate care by cleaning the area, securing it to prevent infection, and protecting the nail for healing.

Cleaning the Affected Area

An important first step is to gently cleanse the split area with soap and water. This helps prevent infection and ensures that any dirt or debris is removed. After washing, pat the nail dry with a clean towel and avoid any harsh chemicals that could irritate the skin further.

Protecting the Nail

Split nails are vulnerable, so it’s vital to protect them from further injury. You can use a bandage or adhesive strips to cover the area and keep it secure. This acts as a barrier, shielding your nail from potential irritants and adds support while it heals.

Another effective method for protecting the nail is to consider using a nail glue or a specialized nail repair kit. These products can bond the split edges together, providing additional stability and support. Make sure to follow the instructions carefully and avoid using heavy products that may exacerbate the split. Keeping the nail protected will promote faster healing and reduce the risk of complications.

Repair Techniques for Split Nails

To fix a split nail, several effective techniques can be employed based on the severity of the damage. You can opt for quick solutions or more durable methods to restore the nail’s integrity. It’s vital to act promptly to prevent further splitting and discomfort. By using either nail glue or applying a nail patch, you can extend the life of your nail while it grows out and heals.

Using Nail Glue

Some individuals find success using nail glue to bind the split edges together. Ensure that you clean the area around the split, and once dry, apply a thin layer of glue directly to the split, pressing the edges together gently. Allow the glue to cure before applying polish for a smoother appearance.

Applying a Nail Patch

Now, applying a nail patch is another effective way to secure a split nail. This method involves using a small piece of fabric, such as a tea bag or silk, to reinforce the damaged area. Cut a thin strip of the fabric, then apply a layer of nail glue over the split. Place the fabric over the glue while it’s still damp and add another layer of glue on top to complete the bond.

Nails that have been patched with fabric can regain strength and support, allowing you to go about your daily activities without worrying about further damage. After the patch has dried, you can shape and polish the nail as desired. This technique not only covers the split but also prevents it from worsening, facilitating a smoother healing process as your nail grows out. Always ensure that the patch is applied seamlessly to blend in with your natural nail for an aesthetically pleasing result.

Preventive Tips for Nail Health

Now, maintaining healthy nails is imperative to prevent splits and breaks. To strengthen your nails and keep them looking good, consider the following tips:

  • Moisturize your nails and cuticles regularly.
  • Avoid excessive exposure to water and harsh chemicals.
  • Use gloves while doing household chores.
  • Keep your nails trimmed and filed to avoid snags.

Knowing what actions to take can greatly improve the overall health of your nails. For further insights on maintaining nail integrity, check out Split Nail Repair: DIY Fixes and Professional Treatments.

Daily Care Routines

Assuming you establish a daily routine will help you keep your nails in top shape. Simple tasks such as moisturizing your hands and applying cuticle oil can significantly enhance nail resilience. Make it a habit to inspect your nails for any signs of damage and respond accordingly to avoid further issues.

Nutrition and Hydration

There’s a strong link between your diet and the health of your nails. Incorporating foods rich in biotin, protein, and omega-3 fatty acids can promote stronger, healthier nails. Additionally, staying hydrated is imperative, as it helps maintain nail flexibility and prevents brittleness.

Nail health is often a reflection of your overall well-being. Foods such as eggs, nuts, and green leafy vegetables not only provide necessary nutrients but also fortify your nails against splitting and breaking. Staying adequately hydrated by drinking enough water daily also supports nail strength. When you take care of your body from the inside out, you’ll likely see positive changes in your nails over time.

Long-Term Nail Health Strategies

Many people overlook the importance of long-term nail health, which can lead to recurring issues. To maintain healthy nails, prioritize a balanced diet rich in vitamins and minerals, stay hydrated, and consider supplements like biotin. Incorporating good nail care habits into your routine will help prevent future splits and damage.

Avoiding Harmful Practices

Now, it’s necessary to avoid practices that can jeopardize your nail health. Steer clear of biting your nails, using harsh chemicals, or subjecting your nails to excessive moisture. Opting for gentle nail products and wearing gloves when cleaning can protect your nails from damage.

Regular Nail Maintenance

Health is key to maintaining strong and beautiful nails. Regular maintenance includes trimming your nails to a manageable length, filing them to avoid snags, and moisturizing your cuticles. Incorporating these practices not only helps prevent splits but also promotes overall nail strength.

Strategies for effective nail maintenance include setting a routine for nail care, such as weekly trimming and filing. Use high-quality nail tools and ensure they are cleaned regularly to reduce the risk of bacteria. Applying a nourishing oil or cream to your cuticles and nails can enhance moisture retention, while wearing gloves during household chores protects your nails from damage. By committing to these practices, you can significantly improve the health and appearance of your nails over time.

Conclusion

Following this guide, you can effectively repair a nail that’s split down the middle, ensuring it remains healthy and aesthetically pleasing. By using common household items and a bit of patience, you can mend your nail and promote proper healing. Always keep your nails trimmed and moisturized to prevent future splits, and consider maintaining a balanced diet rich in vitamins to support nail strength. With these tips, your nails can look their best and minimize damage in the long run.

Q: What are the best methods to repair a split nail?

A: To repair a split nail, you can use several effective methods. One of the simplest ways is to apply a piece of tape or a tea bag over the split, securing it with clear nail polish. First, trim the nail to a manageable length, then cut a piece of tape or a tea bag slightly larger than the split. Place it over the affected area and seal it with a coat of clear nail polish. This method provides temporary support and protection as the nail grows out. Additionally, if the split is deep, consider using a nail glue or gel to reattach the split edges before sealing it with a protective layer.

Q: How can I prevent my nails from splitting in the future?

A: To prevent nails from splitting, focus on maintaining their health. Regularly moisturizing your hands and cuticles will help keep them hydrated and less prone to breakage. Additionally, try to avoid exposing your nails to harsh chemicals found in cleaning products by wearing gloves. Incorporating a balanced diet rich in vitamins, particularly biotin, zinc, and protein, can also support nail strength. Lastly, avoid harsh nail treatments and limit the use of artificial nails, as these can weaken your natural nails over time.

Q: When should I seek professional help for a split nail?

A: If a split nail causes significant pain, bleeding, or if there are signs of infection such as swelling, redness, or pus, it’s advisable to see a healthcare provider or a dermatologist. Additionally, if the nail splits deep enough to expose the nail bed or if there’s persistent discomfort, professional guidance can prevent complications. A nail specialist can provide advanced treatment options that you might not be equipped to handle at home, ensuring proper healing and care for your nails.

How to Avoid Staining Your Nails with Dark Polish

Polish can beautifully enhance your nails, but dark shades often leave unsightly stains that can be difficult to remove. To ensure your manicure looks flawless without the worry of discoloration, you need to take a few simple yet effective precautions. In this guide, you’ll discover practical tips and tricks to protect your nails while enjoying your favorite deep hues. With the right approach, you can maintain your nail health and keep your polish looking perfect.

Key Takeaways:

  • Base Coat: Always apply a clear base coat before using dark nail polish to create a barrier and prevent staining.
  • Quality Polish: Choose high-quality dark polishes, as they often contain fewer harmful pigments that can lead to staining.
  • Application Techniques: Use thin layers when applying dark polish; this not only helps with drying time but reduces the risk of staining.
  • Frequent Breaks: Give your nails a break from darker colors to help mitigate potential staining over time.
  • Removal Method: When removing polish, opt for acetone-free removers which tend to be less harsh on your nails and skin.

Understanding the Factors that Cause Nail Staining

The causes of nail staining can be attributed to various factors that you should be aware of to protect your nails. These include:

  • The pigments used in dark nail polishes
  • The duration of polish wear
  • Your natural nail health and condition
  • Environmental influences such as chemicals and moisture

Perceiving and addressing these factors can help minimize staining and keep your nails looking their best.

Composition of Dark Nail Polish

Even though dark nail polishes are popular for their striking appearance, their composition often includes pigments that can easily penetrate the nail surface, leading to discoloration. This means that the deeper the shade, the higher the risk of staining.

Interaction with Natural Nail Oils

Nail oils naturally present on your nails can interact with dark polish in ways that may contribute to staining. These oils can absorb some of the pigments found in your polish, causing your nails to take on a discolored appearance over time.

Staining can occur more prominently if nail oils are left unaddressed. When you apply dark polish over unprepared nails, the oils can mix with the polish, leading to increased absorption of pigments. It’s advised to ensure your nails are clean and dry to mitigate this interaction and maintain their natural appearance.

How to Prepare Your Nails for Dark Polish

While preparing your nails for dark polish, start with clean, dry nails to create a smooth canvas. Remove any old polish and gently buff your nails to enhance adhesion. Ensure your nails are well-shaped and hydrated to avoid any peeling or breakage, setting the stage for a flawless application.

Proper Nail Care Routine

For a solid nail care routine, regularly file, buffer, and moisturize your nails and cuticles. Incorporate weekly treatments like oils or creams to keep your nails healthy, reducing the risk of stains. Consistency will help maintain the integrity of your nails, ensuring they look their best, even beneath dark polish.

Using Base Coats Effectively

On the other hand, applying a base coat is vital when you plan to wear dark nail polish. It not only protects your nails from potential staining but also helps your polish last longer and enhances its color vibrancy.

This base coat serves as a barrier between your nail and the dark pigments in the polish. Choose a high-quality, stain-resistant base coat and apply it evenly across your nail surface. Allow it to dry completely before applying your dark polish for best results. By taking this extra step, you significantly minimize the chances of discoloration and support healthier nails in the long run.

Tips for Applying Dark Nail Polish

All nail enthusiasts know the struggle of dark polish staining your nails. To minimize this risk, consider the following tips:

  • Choose a high-quality base coat to create a protective barrier.
  • Apply polish in thin layers for even coverage.
  • Seal the tips of your nails to prevent chipping and staining.
  • Be cautious with your polish application technique to avoid over-saturation.

Perceiving dark nail polish should be a treat, not a cause for post-manicure regret.

Ideal Application Techniques

To achieve a flawlessly painted dark nail while preventing stains, start by ensuring your nails are clean and dry. Use short, even strokes while applying polish. Focus on the center of the nail first, then gently work towards the edges, making sure to cap the tips. This method helps to keep the polish primarily on the nail surface, reducing chances of absorption into the nail bed.

Recommended Tools and Products

On your quest to prevent staining, the right tools and products play a significant role. Invest in a good quality base coat that’s specifically formulated to prevent staining, and use a top coat that provides strong sealing properties. Also, a small nail brush can help clean up any smudges for a polished finish.

Application of these tools can significantly enhance your nail care routine. A base coat acts as a shield, creating a barrier that absorbs the potential of dark pigments. Using a top coat will not only add shine but also seal the polish, which can discourage any trace of staining. By ensuring you have the right tools at your disposal, you can enjoy your dark nail looks without the stress of aftermath discoloration.

Post-Application Care

Despite your best efforts to prevent staining from dark nail polish, proper post-application care plays a vital role in maintaining the integrity of your nails. Allow your nails to dry completely after application, as this reduces the likelihood of polish transfer. Additionally, incorporating a clear top coat not only enhances the shine but also acts as a barrier between the dark polish and your nails, further protecting them from potential staining.

Protecting Your Nails After Polish

After painting your nails, consider wearing gloves when doing household chores or using harsh chemicals. This not only protects your freshly polished nails from potential damage but also minimizes the risk of staining from various substances. Keeping your nails moisturized with cuticle oil can help maintain their natural health while creating a barrier against dark pigments.

Appropriate Remover Choices

There’s a variety of nail polish removers available, and choosing the right one can impact the health of your nails post-polish. Opt for acetone-free removers, as they are generally gentler on both your nails and the surrounding skin. This reduces the chance of dryness and discoloration while ensuring that the dark polish is removed effectively without lingering stains.

The right nail polish remover can make a significant difference. Acetone-free formulas are less harsh and are designed to break down polish without stripping away moisture from your nails. They often contain nourishing ingredients that help maintain your nails’ integrity after the removal process. Selecting a high-quality remover not only enhances your nail care routine but also aids in preventing dark stains from setting in, keeping your nails looking pristine.

Alternative Solutions

Many individuals struggle with the potential of stained nails from dark polish. Fortunately, there are effective alternatives you can explore. By choosing less staining shades or utilizing nail foils and wraps, you can flaunt a trendy look while minimizing color transfer on your natural nails. Additionally, these options provide you with a variety of styles and finishes without the worry of long-term stains.

Choosing Less Staining Shades

Even if dark shades are your favorite, lighter or pastel colors are less likely to leave a stain on your nails. Opting for neutrals or softer hues can not only reduce the risk of staining but also offer a chic, sophisticated appearance. Some brands even offer specially formulated polishes designed to prevent nail discoloration, allowing you to maintain stylish nails without the fear of long-lasting damage.

Using Nail Foils or Wraps

Staining your nails can be avoided by considering the trendy alternative of nail foils or wraps. These options provide a protective barrier between your natural nails and the polish, significantly minimizing the chances of discoloration. With an array of designs and finishes available, they allow you to achieve vibrant nail looks without the risks associated with traditional dark polishes.

Using nail foils or wraps is not only a stylish choice but also a practical one for maintaining the health of your nails. They are typically easier to apply and can be removed without the harsh chemicals often associated with regular nail polish removal. In addition, many foils and wraps boast a wear time comparable to traditional polishes, offering you the best of both worlds in terms of aesthetics and nail care. Consider this versatile option to enjoy the benefits without worrying about pesky stains.

Common Mistakes to Avoid

Not paying attention to your nail care routine can lead to unsightly stains from dark polish. Avoid these common mistakes to ensure your nails look their best and remain protected from discoloration.

Skipping Base Coats

With a proper base coat, you create a barrier between your nails and the polish, which prevents any staining. Always opt for a good-quality base coat that suits your nail type to keep your nails healthy and vibrant.

Poor Nail Prep Practices

Assuming that a quick swipe of polish is all you need can lead to problems. Proper nail prep involves cleaning, buffing, and moisturizing your nails to create an ideal surface for polish adhesion and protection.

A well-prepped nail surface ensures that your polish adheres better and lasts longer, reducing the chances of staining. Start by removing any old polish, followed by gently pushing back cuticles and filing your nails for a smooth edge. Don’t forget to clean your nails with a nail cleanser to eliminate oils and residue before applying any base coat or polish. Taking the time to prep your nails effectively will not only help avoid stains but also enhance the overall appearance of your manicure.

To wrap up

Taking this into account, you can successfully avoid staining your nails with dark polish by applying a protective base coat, limiting prolonged exposure, and ensuring proper nail care. By following these tips, your nails will maintain their natural beauty without the worry of discoloration. For additional insights, you can check out this Just wanted to share my tip to prevent staining that may offer further guidance.

FAQ

Q: What steps can I take before applying dark nail polish to prevent staining?

A: To avoid staining your nails when using dark polish, start by applying a good base coat specifically designed for this purpose. Base coats often have protective ingredients that create a barrier between your nails and the polish. Additionally, consider using a clear strengthening formula which can also help diminish the risk of discoloration. Allow each layer of base coat to dry completely before applying your polish.

Q: Are there specific types of dark nail polishes that are less likely to cause stains on my nails?

A: Yes, some dark nail polishes are formulated to be less prone to staining. Look for products labeled as ‘anti-stain’ or those that contain conditioning ingredients. Brands that offer high-quality, long-wear formulas often include components that minimize the risk of nail discoloration. Checking online reviews and recommendations can also help you identify which brands have good stain-free options.

Q: How should I properly remove dark nail polish to avoid damaging my nails?

A: To effectively remove dark nail polish while reducing the risk of nail damage or staining, use an acetone-free remover. Soak a cotton pad with the remover and press it onto the nail for a few seconds before gently wiping it away; this technique helps to lift the polish more efficiently. After removal, wash your hands and follow up with a nourishing nail oil or cuticle oil to keep your nails hydrated and resilient against future staining.

Skip to content