Nail Art Tutorials

Nail Art Tutorials

Easy DIY Nail Art for Beginners

Most people think nail art requires professional skills or expensive tools, but that couldn’t be further from the truth. With just a few basic supplies and some easy techniques, you can create stunning nail designs right at home. This guide will introduce you to simple yet eye-catching DIY nail art ideas that are perfect for beginners. From minimalist designs to vibrant patterns, you’ll discover how to elevate your manicure game without breaking the bank or spending hours of your time. Get ready to express your creativity and give your nails a fabulous makeover!
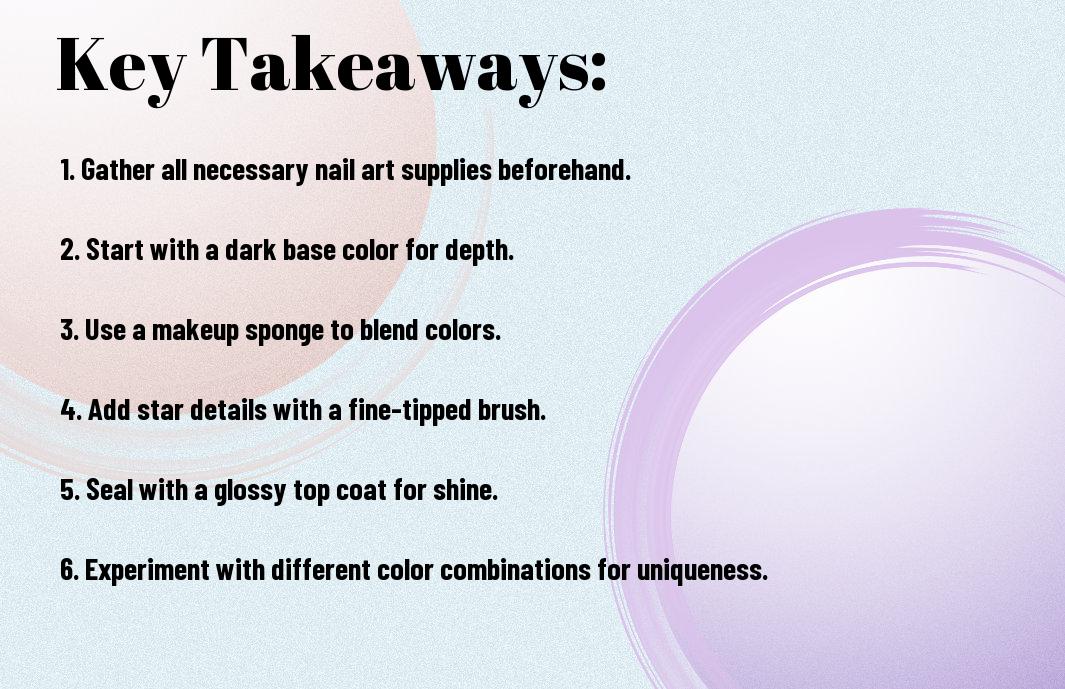
Key Takeaways:

  • Simple Techniques: Start with basic designs like dots, stripes, or simple shapes that are easy to master.
  • Tools and Supplies: Invest in important nail art tools, such as dotting tools, striping brushes, and tape, which can enhance your designs.
  • Practice Makes Perfect: Regular practice will improve your skills and allow you to explore more intricate designs over time.

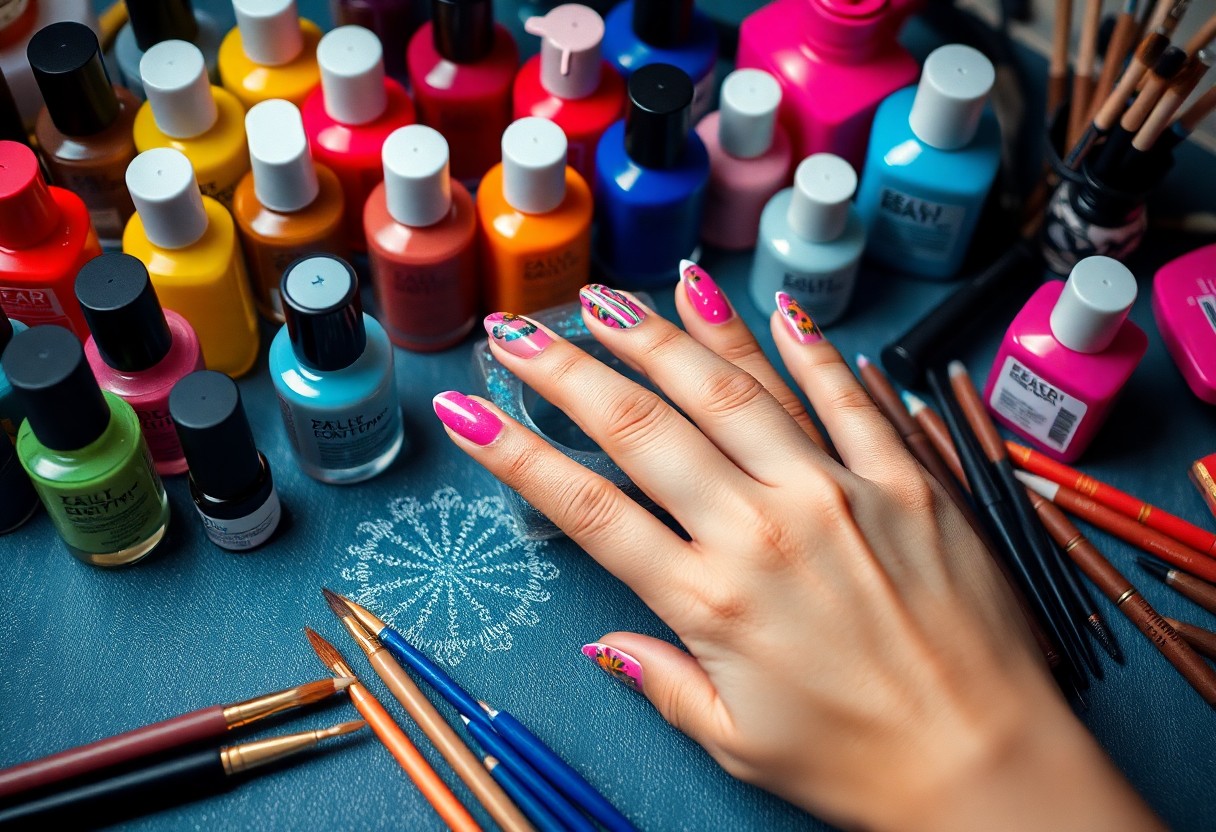
Essential Tools and Supplies

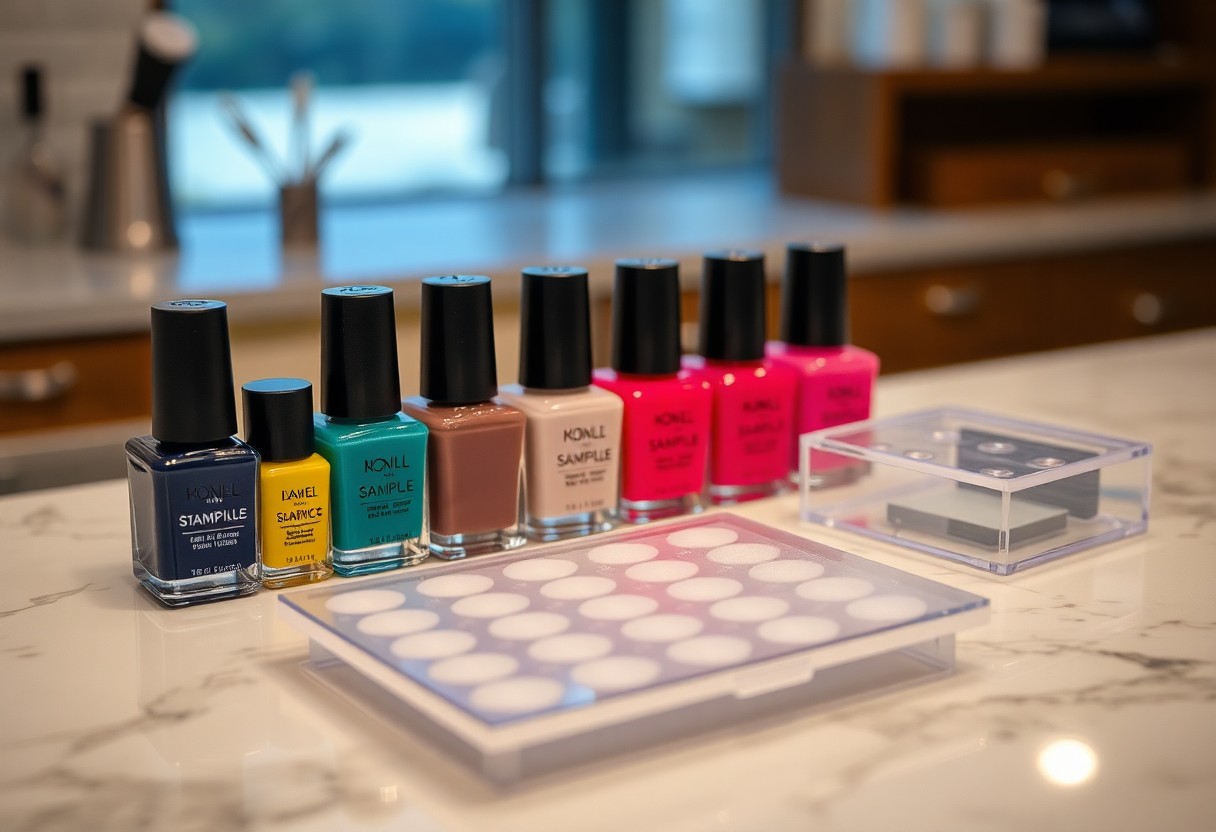
A successful DIY nail art session begins with having the right tools and supplies at your disposal. By gathering imperative items, you can ensure a smooth and enjoyable experience, making it easier to create beautiful designs at home. From brushes to dotting tools, having the right equipment will help you achieve salon-worthy results with ease.

Must-Have Nail Art Tools

Below is a list of must-have nail art tools that will elevate your DIY experience. Start with a set of nail art brushes for detailed work, a dotting tool for creating unique patterns, and nail tape for clean lines. Having a nail file, buffer, and top coat will also help you achieve a polished finish on your designs.

Recommended Nail Polish Brands

Any nail art aficionado knows the importance of using quality nail polish brands. Investing in reliable polishes will not only enhance the vibrancy of your designs but also ensure longevity and durability. Popular choices include OPI, Essie, and Sally Hansen, known for their wide range of colors and formulas. These brands often provide excellent coverage and chip resistance, so you can enjoy your nail art longer.

To create stunning nail art, select polishes that offer both rich pigmentation and user-friendly application. OPI is praised for its extensive color palette and smooth application, while Essie’s long-lasting formula is perfect for intricate designs. Sally Hansen is great for beginners who want a variety of affordable options. By choosing these reputable brands, you can achieve beautiful, lasting nail art with ease and confidence.

Basic Nail Art Techniques

Any aspiring nail artist should start by mastering a few basic techniques that will serve as the foundation for your creative endeavors. Exploring these methods will help you build confidence and develop your unique style. With just a few tools and a bit of practice, you can create stunning nail designs that are sure to impress.

Dots and Stripes

At the heart of many nail art designs, dots and stripes are easy techniques that add playful elements to your manicure. You can achieve this look with a dotting tool or even a toothpick for perfect dots, while a striping brush or tape can help you create clean, sharp lines. Combining colors and varying sizes will give your designs depth and character.

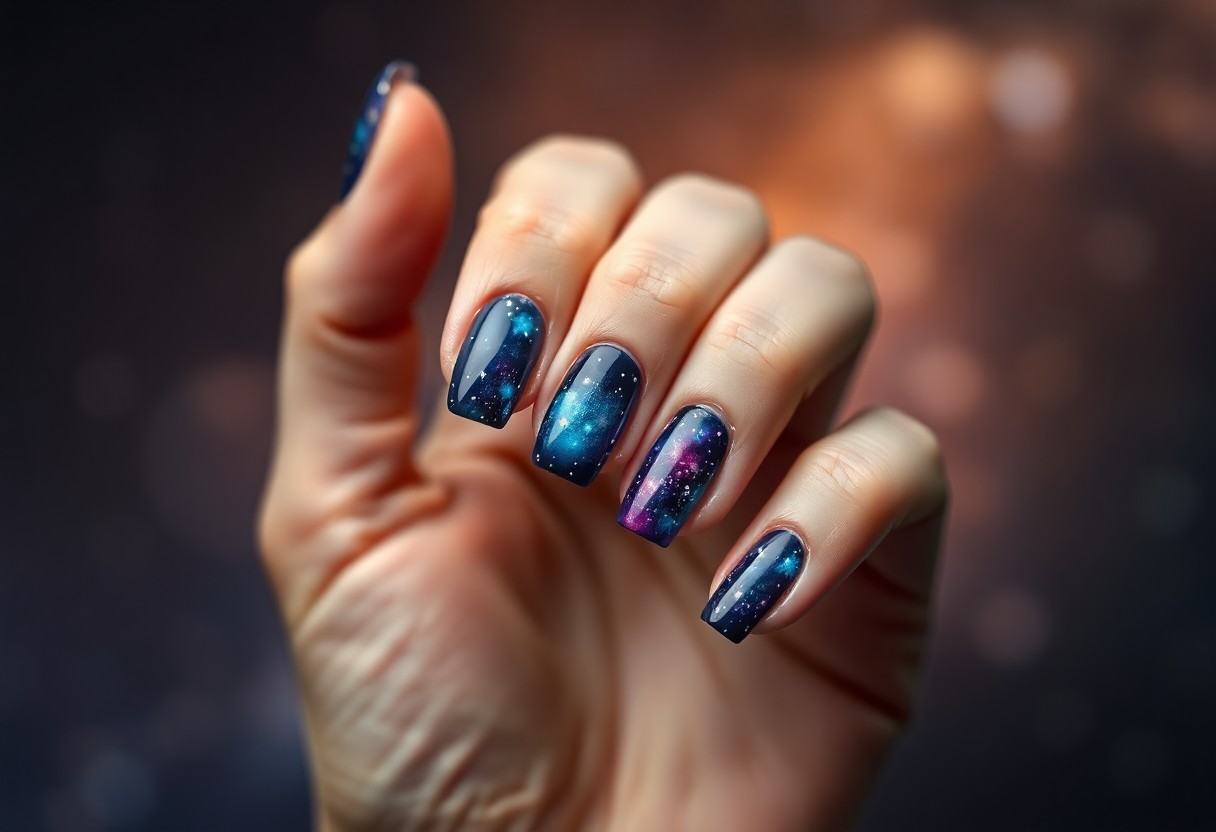
Sponging and Ombre Effects

Before venturing into more complex designs, sponging and ombre effects can elevate your nail art game with minimal effort. This technique involves using a makeup sponge to blend colors seamlessly, creating a gradient look that can be both subtle and bold. The ombre effect allows for endless color combinations, enabling you to express your personality through your nails.

Nail sponging is all about layering colors to achieve that beautiful gradient effect. Start by choosing two or more complementary nail polish colors. Apply a base coat and let it dry. Then, using a makeup sponge, dab the colors onto the sponge, blending them slightly before pressing it onto your nails. Repeat the process until you’re satisfied with the results, and finish with a top coat for a smooth finish. Experimenting with different colors and techniques will help you discover your favorite ombre style!

Easy Nail Art Designs for Beginners

Despite being a newcomer to nail art, you can create stunning designs that add flair to your look. By starting with simple techniques, you can build your skills and confidence. Whether you prefer playful patterns or sleek styles, there are countless easy designs that cater to all tastes and allow your creativity to shine. In no time, you’ll be impressing yourself and others with your fabulous manicured nails.

Floral Patterns

Below are a few simple floral patterns you can try. Using a dotting tool or a toothpick, you can create beautiful flowers on your nails in just minutes. Choose vibrant colors for a bold look or soft pastels for a more delicate touch. With practice, you’ll find that these designs are not only fun to create but also enhance your overall style.

Geometric Shapes

Between stripes, triangles, and squares, geometric shapes provide an endless variety of nail art options that are easy for you to implement. These designs can be created using tape or simply painting them freehand, making them versatile for beginners. You’ll find that geometric patterns offer a modern touch to your nails while allowing for creativity in color combinations.

Easy geometric designs can be achieved by experimenting with shapes and colors on your nails. Start with a base coat, then use tape to section off areas for different colors. You can create triangles, stripes, or even checkerboard patterns. This technique not only gives your nails a sleek appearance but also encourages you to play with symmetry and color contrast, enhancing your overall nail art skills.

Tips for Achieving Professional-Looking Results

All beginners can achieve stunning nail art with a few professional tips. Start by ensuring your workspace is tidy and well-lit, and always invest in quality tools. Here are some imperatives:

  • Use a good quality base coat.
  • Take your time when applying polish.
  • Practice steady hand techniques.
  • Experiment with various nail art tools.

Knowing these simple strategies will elevate your nail art game significantly.

Nail Prep and Base Coating

Above all, proper nail prep is key to achieving a flawless finish. Start by cleaning your nails, pushing back cuticles, and buffing the surface lightly. This ensures better adhesion of the base coat. A good base coat not only protects your nails from staining but also provides a smooth canvas for your artistic designs. Apply it evenly, allowing ample drying time before moving to the next step.

Top Coats and Finishing Techniques

Above all, a quality top coat is imperative for sealing your nail art and ensuring durability. A glossy top coat will enhance shine and protect your design from chipping. Consider using a matte top coat for a different finish, or even experimenting with textured top coats for added flair. Finish with a tidy clean-up around the edges for a professional look.

Indeed, the right top coat can make all the difference in your nail art’s longevity and appearance. After applying your designs, wait until everything is completely dry before adding the top coat. This prevents smudging and maintains the integrity of your artwork. Try layering different top coats for unique effects, and don’t shy away from experimenting with finishing techniques, like adding decals or gems, to truly make your designs stand out.

Troubleshooting Common Nail Art Issues

Unlike the occasional mishaps you may face when trying out DIY nail art, there are straightforward fixes for common problems. If you’re struggling with techniques or designs, check out this article on 39 Easy Nail Designs Even Beginners Can Do at Home for helpful tips and tricks.

Smudges and Mistakes

Above all, don’t panic if you make a mistake or smudge your design. Use a small brush dipped in nail polish remover to carefully clean up any errors without disturbing the overall look. If a design is too messy, consider adding some nail art stickers or glitter on top to cover it up.

Ensuring Longevity of Your Design

For a flawless finish that lasts, take the time to seal your nail art with a top coat. This will not only enhance the shine but also protect your design from chips and scratches.

This extra step can make a significant difference in keeping your nail art looking fresh for longer. Make sure to reapply the top coat every few days to maintain its vibrant look. Additionally, avoiding excessive water exposure and using gloves for household chores can further help your manicure endure daily wear and tear.

Inspiration and Resources

Now that you’re ready to launch on your nail art journey, it’s time to find inspiration and gather resources that will help spark your creativity. From colorful designs to intricate patterns, there are plenty of sources to ignite your artistic flair. Explore a variety of platforms and communities to see what resonates with your style, and don’t hesitate to experiment with your own unique twist!

Social Media and Online Communities

Social media platforms like Instagram and Pinterest are treasure troves of nail art inspiration. You can follow nail artists and enthusiasts who share their latest creations and techniques. Don’t shy away from submerging into online communities dedicated to nail art; these spaces provide an opportunity for sharing your work, receiving feedback, and connecting with fellow nail art lovers. Engaging with these communities can elevate your skills and inspire new ideas.

Recommended YouTube Channels and Blogs

Communities dedicated to nail art can also be found in the form of YouTube channels and blogs run by experienced nail artists. These platforms often provide step-by-step tutorials that cater to all skill levels, making it easy for you to learn new techniques at your own pace. With specific channels focusing on beginner-friendly projects, you can quickly discover tips and tricks that will make your DIY nail art projects a breeze.

Online resources like YouTube offer a wealth of content, from comprehensive tutorials to unique nail art challenges. You can explore popular channels that specialize in beginner-friendly designs or follow blogs filled with tips and tricks for mastering various techniques. By engaging with these platforms, you’ll find yourself inspired and equipped with the skills you need to create beautiful nail art that turns heads.

Final Words

As a reminder, engaging in easy DIY nail art is a fun and creative way to express yourself while enhancing your manicure skills. You don’t need to be an expert to achieve beautiful designs; simple tools and techniques can yield stunning results. Experiment with different colors, patterns, and textures to find what suits your style best. With practice, you can elevate your nail art game and impress friends and family with your artistic flair. Enjoy the process, and let your imagination shine through your nails!

FAQ

Q: What materials do I need to start with easy DIY nail art?

A: To get started with easy DIY nail art, you’ll need a few basic materials: nail polish in various colors, a clear topcoat, a base coat, nail art brushes or dotting tools, and adhesive tape for clean lines. You may also want to have cotton balls and nail polish remover on hand for corrections and cleanups.

Q: Are there any beginner-friendly nail art designs that I can try?

A: Yes! There are numerous simple designs perfect for beginners. You might want to try polka dots, stripes, or a French manicure variation. You can also experiment with sponge gradients or use tape to create geometric patterns. These designs require minimal skill and can look very polished with a little practice.

Q: How can I make my nail art last longer?

A: To extend the longevity of your nail art, start by applying a base coat to protect your nails and provide a good surface for polish adherence. After completing your design, finish with a high-quality clear topcoat to seal in your artwork. Be sure to let each layer dry completely to avoid smudging. Additionally, avoid exposing your nails to harsh chemicals and wear gloves when doing household chores.

Q: What should I do if my nail art smudges or doesn’t turn out as planned?

A: If your nail art smudges or doesn’t meet your expectations, don’t worry! You can use a nail polish remover to correct mistakes. If the design is really uninspiring, you can apply a fresh coat of polish over the entire nail and start again. Alternatively, consider covering up the design with a glitter polish or other embellishments for a fresh look.

Q: Can I use regular nail polish for nail art, or should I use special types?

A: You can definitely use regular nail polish for DIY nail art! Many designs can be achieved using standard nail polish. However, some nail art enthusiasts prefer using specially formulated nail art polishes, which may have a finer brush or different consistency that makes intricate designs easier to create. Ultimately, it comes down to personal preference and the specific look you are trying to achieve.

How to Create Marble Nail Art in 5 Easy Steps

Marble nail art can elevate your manicure, giving it a stylish and eye-catching look. With just a few simple techniques, you can achieve stunning marble designs right at home. In this guide, I’ll walk you through five easy steps that will help you create beautiful marble nails with minimal effort. Whether you’re a nail art novice or an experienced enthusiast, you’ll find this process straightforward and enjoyable. Gather your tools, and let’s get started on your journey to mastering this chic nail art trend!

Key Takeaways:

  • Choose Your Colors: Select 2-3 nail polish colors that will blend well together for the marble effect.
  • Water Technique: Use a cup of room temperature water to create the marble pattern by dropping the nail polish onto the surface.
  • Finish with Top Coat: Seal your design with a top coat to enhance shine and longevity.

Materials Needed

Before you explore creating stunning marble nail art, it’s vital to gather all the necessary materials. This will not only streamline the process but also help you achieve the best results. You’ll need specific nail polish colors, tools, and supplies to bring your marble nail art to life!

Nail Polish Colors

Materials play a vital role in achieving the perfect marble effect. Choose at least three contrasting nail polish colors that complement each other. Classic combinations include black, white, and a pop of color like pink or blue, but feel free to get creative with your selection!

Tools and Supplies

Among the vital items you’ll need are a small bowl of water, a toothpick or dotting tool, and a base coat and top coat for added durability. Additionally, a quick-drying top coat can help seal your design and prevent smudging.

In addition to those items, you might find it helpful to have small pieces of tape or a makeup brush to clean up any excess polish around your nails. Having cotton swabs and nail polish remover on hand is also advisable for easy cleanup of any mistakes. With these tools and supplies, you’re well on your way to mastering the marble nail art technique!

Step 1: Prepare Your Nails

Even the most beautiful marble nail art requires a well-prepared canvas. Start by ensuring your nails are clean and shaped, as this will enhance the overall look of your design. Neglecting this step can lead to an uneven finish, making it more challenging to achieve that flawless marble effect.

Clean and Shape

An necessary part of preparing your nails is cleaning and shaping them. Begin by removing any old polish and debris with a gentle nail polish remover. Then, shape your nails using a nail file to your desired length and style – whether square, oval, or almond. A well-groomed nail will serve as the ideal foundation for your marble art.

Apply Base Coat

By applying a base coat, you create a protective layer that helps the nail polish adhere better and prevents staining. This step is vital, as it allows your marble design to last longer while maintaining the vibrancy of the colors you choose. A base coat also smoothens out any imperfections on your nails, ensuring a flawless application of your marble nail art.

Consequently, applying the base coat is not just about protection; it also enhances the longevity and appearance of your nail art. Choose a high-quality base coat that suits your nail type, and apply a thin, even layer to each nail. Allow the base coat to dry completely before moving on to the next steps. This will ensure that the subsequent layers adhere effectively and that your masterpiece remains intact.

Step 2: Choose Your Colors

Once again, selecting the right colors is an imperative part of achieving stunning marble nail art. Think about the aesthetic you want to create, whether it be bold and vibrant or soft and serene. Choose contrasting colors to enhance the marble effect, or opt for shades within the same color family for a more subtle look. Your chosen colors should also reflect your personal style and complement your skin tone.

Color Selection Tips

The following tips may help you choose the perfect colors for your marble design:

  • Consider a color wheel to find complementary shades.
  • Test out colors on a small piece of paper.
  • Think about the season or occasion you are painting your nails for.
  • Don’t shy away from metallic or glittery finishes for added depth.

This approach will enhance your overall design and make your nail art truly pop.

Suggested Color Combinations

Bespoke combinations can elevate your nail art game. Some popular pairings include classic black and white for a timeless look, vibrant pink and gold for a glamorous flair, or deep blue and silver for a cool effect. You can also create a unique blend using earthy tones like taupe and olive green for a natural vibe.

Hence, experimenting with different combinations can lead you to discover your signature marble style. Consider the mood you want to convey, and don’t be afraid to mix unexpected hues. Finding your perfect combination can make a significant difference in the overall impact of your nail art, making it uniquely yours.

Step 3: Create the Marble Effect

Not all marble effects are created equal, and achieving that stunning swirl can be a game-changer for your nail art. For this step, you’ll focus on the actual creation of your marble pattern using the method of your choice, bringing together the colors you’ve chosen. Patience is key as you experiment with various techniques to find the perfect design that suits your style.

Water Marbling Technique

One effective method for achieving a beautiful marble look involves the water marbling technique. Start by filling a small cup with room-temperature water, then drop your chosen nail polishes onto the surface. Use a toothpick or a similar tool to swirl the colors together, creating a marbled effect. Dip your nail into the design, ensuring it captures the desired pattern and finish with a top coat to seal your work.

Alternative Techniques

Between the water marbling and other creative approaches, you can explore several alternative techniques to achieve a marbled effect on your nails. Some popular methods include the sponge technique, using a plastic bag, or even a paintbrush to swirl the colors directly on your nail.

In fact, these alternative techniques can provide unique results while also being more accessible for beginners. For instance, using a sponge allows you to dab colors together, creating a textured effect without the complexity of water marbling. The plastic bag technique involves applying polish onto a bag and dabbing it onto your nails, offering more control over the design. Experimenting with these methods can lead you to discover the best technique for your personal style and expertise level.

Step 4: Applying Top Coat

Many nail art enthusiasts overlook the significance of the top coat, but it plays a vital role in enhancing the final look of your marble nails. This clear polish not only adds a beautiful shine but also seals in your design, ensuring its longevity and preventing chipping. A properly applied top coat can elevate your marble nail art, making it appear professional and well-crafted.

Importance of Top Coat

Between the intricate designs and layers of polish, a good top coat serves as a protective barrier that keeps your nails looking fresh for longer. It also enhances the depth and vibrancy of your marble effect, making colors pop. Without it, your masterpiece may dull faster, losing that stunning look you worked hard to achieve.

Application Tips

Any successful top coat application starts with a gentle approach to avoid disturbing your marble design. Follow these imperative tips to ensure a flawless finish:

  • Apply the top coat only after your design is completely dry.
  • Use a clean brush to pick up a small amount of top coat.
  • Apply a thin layer; thicker coats can lead to smudging.
  • Seal the edges of your nails to prevent chipping.

Assume that you will need to reapply top coat every few days to maintain the shine and protection of your nail art.

And as you apply your top coat, keep in mind some additional tips for the best results. Start from the base of your nail and work your way to the tip, applying the polish smoothly in one stroke. Avoid overworking the top coat, as this can disturb the marble design underneath. Allow each layer to dry completely before adding more. This not only improves your overall outcome but also extends the life of your nail art:

  • Choose a quick-drying top coat to save time.
  • Avoid using oil-based removers between applications.
  • Practice patience by allowing drying time between layers.

Assume that with proper care, your marble nail art can dazzle for weeks to come.

Step 5: Finishing Touches

All great marble nail art deserves a flawless finish. To seal your design, apply a clear top coat to protect your artwork and enhance the glossy appearance. For more tips, check out How to Create Your Own Marble Nail Art. Once dry, your nails will not only look stunning but also last longer.

Clean-Up Tips

With a little attention, you can make your nails look polished and professional. Use a small brush dipped in nail polish remover to tidy up any smudges around your cuticles. Follow these steps:

  • Dip a brush into nail polish remover.
  • Gently brush away excess polish.
  • Repeat until nails are clean.

The end result will be tidy and beautifully marbled nails.

Nail Care After Art

Around the final touches, don’t forget to care for your nails. Applying cuticle oil can keep your nails nourished and healthy, while regular moisturizing helps maintain their strength. This ensures your artistry doesn’t just look good but also promotes nail health in the long run.

Another effective way to maintain nail health after your artistic session is by avoiding harsh cleaning products and excessive water exposure. Wearing gloves during chores can protect your nails while allowing your new marble design to shine. Regular hydration and a balanced diet will also contribute to stronger nails, ensuring that your beautiful nail art lasts as long as possible.

Conclusion

Conclusively, creating stunning marble nail art is an achievable process that requires just a few steps. By following the outlined techniques for preparation, design, and application, you can easily transform your nails into eye-catching works of art. Take your time and experiment with colors to find the perfect marble effect that complements your style. With practice and patience, you’ll elevate your nail art skills and impress others with your creativity. Enjoy the process and have fun personalizing your marble designs!

FAQ: How to Create Marble Nail Art in 5 Easy Steps

Q: What materials do I need to create marble nail art?

A: To create marble nail art, you will need the following materials: two or three nail polish colors of your choice, a base coat, a top coat, a small bowl of water, a toothpick or a dotting tool for design manipulation, and nail tape to protect your cuticles if desired. Ensure your workspace is covered with old newspapers or a plastic sheet for easy cleanup.

Q: How do I prepare my nails before starting the marble nail art?

A: It’s important to start with clean and dry nails. First, remove any old nail polish and shape your nails with a file. Next, apply a base coat to protect your nails and enhance polish adhesion. Let it dry completely to ensure a smooth finish. This preparation helps the marble effect to stand out better and makes the overall nail art last longer.

Q: What technique should I use to create the marble effect in the water?

A: To achieve the marble effect, drop your selected nail polish colors into the bowl of water one at a time. Start with one color, then add the next color, allowing them to spread slightly on the surface before adding the third. Use the toothpick or dotting tool to gently swirl and create your desired marble pattern. Make sure the colors blend well without becoming too muddled.

Q: How do I apply the marbled design to my nails?

A: Once your marble design is created in the water, dip your nail into the water at an angle. Ensure that your nail covers the desired area of the marble pattern. After dipping, lift your nail out of the water and clean up any excess polish around your nail with a cotton swab or a brush dipped in nail polish remover. Repeat this step for each nail, ensuring not to disturb the marble pattern too much.

Q: What steps should I follow after applying the marble nail art?

A: After applying the marble design, allow your nails to dry completely before applying a top coat. The top coat not only seals the design but also adds shine. It’s advisable to use a quick-dry top coat to speed up the drying process. Make sure to clean up any excess around your nails, and remove any nail tape if you used it before applying the top coat. Finally, allow your nails to dry thoroughly to enjoy your beautiful marble nail art!

The Beginner’s Guide to Nail Stamping

Many individuals are discovering the creative world of nail stamping, a technique that allows you to effortlessly adorn your nails with stunning designs. If you’re new to nail art, this guide will help you navigate the basics of nail stamping, including tips and tools you’ll need to get started. Whether you’re looking to enhance your nail game for a special occasion or simply want to express your personal style, you’ll find valuable insights here. For a more detailed exploration, check out The Art of Nail Stamping: A Beginner’s Guide.

Key Takeaways:

  • Tools: Essential items for nail stamping include a stamping plate, liquid polish, and the stamper itself.
  • Technique: Proper technique involves applying polish to the plate, scraping excess off, and pressing the stamper onto the nail for a clear image.
  • Practice: Achieving perfect nail designs may require repeated attempts, so patience and practice are key for mastering the art of nail stamping.

What is Nail Stamping?

Before entering into the fun world of nail art, it’s important to understand what nail stamping is. Nail stamping is a technique that uses specially designed plates and a stamping tool to transfer intricate designs onto your nails. This method allows you to create stunning patterns quickly and easily, making nail art accessible to everyone, even if you’re a beginner.

History of Nail Stamping

Between the early 2000s and today, nail stamping has gained immense popularity as a creative way to decorate nails. Initially developed in Japan, this technique was brought to the Western market through various beauty brands, allowing enthusiasts like yourself to easily replicate professional-looking nail designs at home.

How Nail Stamping Works

At its core, nail stamping involves using a design plate, a silicone stamp, and nail polish. The process consists of applying polish to the plate, scraping off the excess with a card, and then pressing the stamp onto the design before transferring it to your nail.

History of nail stamping is fascinating, as it highlights the evolution of nail art techniques over time. The stamping process starts by applying your chosen nail polish to a metal or acrylic plate, which contains various designs. Once you scrape off the excess polish with a scraper card, the remaining polish settles only in the etched design areas. You then use a silicone stamp to pick up the pattern and transfer it onto your nail, allowing for endless creative possibilities. Experiment with different colors and patterns to find styles that express your unique personality.

Essential Tools and Materials

If you’re looking to master nail stamping, you’ll need to gather some imperative tools and materials. From plates to polishes, having the right items at your disposal will make the stamping process much smoother. This guide will help you identify what you need to get started on your nail art journey effectively.

Plates

Tools like stamping plates come in various designs featuring intricate patterns, allowing you to create stunning nail art. Choose plates that resonate with your style, as they serve as the canvas for your creative vision.

Stamps and Scrapers

Below are two vital tools in your nail stamping kit: the stamper and the scraper. The stamper picks up the design from the plate, while the scraper removes excess polish, ensuring a clean transfer.

At the heart of a successful stamping experience is the quality of your stamper and scraper. A soft, flexible stamper is ideal, as it easily conforms to the shape of your nail for a perfect application. Pair this with a sturdy scraper that efficiently spreads nail polish across the plate without damaging the design.

Nail Polishes

Across the world of nail stamping, the types of nail polishes you choose significantly influence the outcome of your designs. Opt for polishes that are pigmented and specifically labeled for use with stamping, as they adhere better to the plates and create vibrant results.

Materials also play a role in defining how well your nail art turns out. Stamping polishes are often thicker, ensuring they transfer well onto your nails. Experimenting with various colors and finishes will enhance your designs, allowing you to create a unique look every time. Choose a palette that reflects your personality and complements your style to make your nail art truly stand out.

Step-by-Step Guide to Nail Stamping

After familiarizing yourself with the necessary tools, it’s time to investigate the step-by-step process of nail stamping. Follow this guide for seamless results.

StepDescription
1Prepare your nails properly.
2Apply a base coat and let it dry.
3Choose your stamping plate and design.
4Apply polish to the design on the plate.
5Scrape the excess polish.
6Stamp the design onto your nail.
7Finish with a top coat for longevity.

Preparing Your Nails

An effective nail stamping session begins with prepping your nails. Start by removing any old polish and ensuring your nails are clean and free of oils. Shape your nails to your desired length and buff the surface gently. Applying a base coat not only protects your nails but also provides a smooth canvas for stamping, so let it dry completely before moving on to the next step.

Stamping Techniques

Against general belief, nail stamping can be simplified by mastering a few techniques. A steady hand and patience are your best friends here.

Stamping involves using a special plate and a rubber stamp to transfer designs onto your nails. One effective technique is to apply a generous amount of polish on the desired design before quickly scraping off the excess. Be gentle, as too much pressure can ruin the design. When pressing the stamp onto your nail, aim to apply even pressure for a perfect transfer. Practicing with different designs will help you gain confidence and refine your skills for impeccable results.

Common Mistakes and How to Avoid Them

Your nail stamping journey can be filled with pitfalls, but by understanding common mistakes, you can elevate your skills. One common issue is inconsistent images; however, with practice and the right techniques, you can achieve flawless designs. Another frequent mistake is messy application, which can ruin the overall look of your manicure. By identifying these problems early, you’ll enhance your nail art experience and achieve beautiful results.

Inconsistent Images

With nail stamping, inconsistency in image transfer can lead to a disappointing outcome. To achieve better results, make sure to thoroughly clean your stamping plate and use a high-quality stamp that picks up polish evenly. Practice different pressure levels when applying the stamp to your nail, and always work quickly, as some polishes dry fast and can affect image transfer.

Messy Application

Across your nail stamping project, messy application can detract from the overall design. This usually happens when excess polish remains on the skin around your nailbed, making the finish look unpolished. Taking time to prep your nails with a barrier, like liquid latex, can help minimize cleanup afterward. Also, ensure you’re using the right amount of polish on your stamping plate to avoid unnecessary smudging.

Even with careful planning, messy application can still occur. To minimize this, use a smaller brush or a clean-up tool with acetone to tidy up around your nail edges after stamping. Being mindful of your angle and pressure while applying polish to the plate can also help prevent overflow. A touch of patience during the process will ultimately lead to a polished look.

Tips for Successful Nail Stamping

Once again, nail stamping can be a rewarding yet challenging venture, so keep these helpful tips in mind for the best results:

  • Ensure your nails are clean and dry.
  • Use high-quality stamping polish for better transfer.
  • Practice your timing while applying the stamp.
  • Apply pressure evenly when stamping.
  • Don’t forget to clean your plates after each use.

Recognizing these key points will make your nail stamping experience enjoyable and successful.

Choosing the Right Products

Across the world of nail stamping, choosing the right products is important for achieving beautiful designs. Look for stamping polishes that are thicker and more pigmented, as they transfer more easily to your nails. Additionally, invest in good quality plates that are etched deeply, ensuring your designs will pick up more accurately. The right tools can make all the difference, so take the time to research and select wisely.

Maintenance of Tools

Besides choosing the right products, maintaining your tools is important for long-lasting performance. Always clean your stamping plate immediately after use with acetone or nail polish remover to remove any leftover polish. Use a lint-free cloth or a dedicated stamping pad for cleaning to avoid scratching the plate’s surface. Store your tools in a cool and dry place to prevent damage.

Right maintenance not only prolongs the life of your stamping tools but also ensures that they perform at their best every time you indulge in your nail art adventures. Regularly inspect your plates for any scratches or damaged areas, and replace them if necessary. A clean and well-kept setup will guarantee smoother application and more precise designs.

Creative Design Ideas for Nail Stamping

Not only is nail stamping a fun way to express your creativity, but it also opens up endless possibilities for unique designs. You can explore different color combinations, motifs, and styles to elevate your nail art game. For more inspiration, check out the Beginners Guide to Nail Stamping – Nail Arts in Minutes, which provides amazing tips and ideas for your next stamping session.

Seasonal Themes

Before venturing into specific designs, consider incorporating seasonal themes into your nail stamping. Whether it’s pastel colors and florals for spring, vibrant hues for summer, warm tones for autumn, or cozy patterns for winter, aligning your nail art with the seasons can make your manicure feel fresh and relevant.

Mixing Patterns

Any good nail art enthusiast will tell you that mixing patterns adds depth and personality to your nails. By blending geometric designs with florals or stripes with polka dots, you can create visually striking nail art that showcases your unique style.

Themes that blend contrasting patterns can elevate your nail art to new heights. For instance, pairing delicate lace designs with bold graphic shapes not only adds interest but also allows you to showcase your artistic creativity. Experiment with different plate designs and colors to unleash your inner nail artist and create stunning combinations that draw attention.

Conclusion

Presently, you have all the foundational knowledge to look into nail stamping, a creative and enjoyable way to elevate your nail art skills. With a variety of tools and techniques at your disposal, you can effortlessly express your personality through stunning nail designs. As you practice and experiment, you’ll refine your skills and discover endless possibilities for your manicures. Embrace the journey, and let your creativity shine in every stamped design you create!

FAQ

Q: What is nail stamping?

A: Nail stamping is a nail art technique that involves transferring intricate designs onto the nails using a special plate, a scraper, and a stamper. The designs are etched onto a metal or plastic plate, and you pick up the desired design with the stamper after applying nail polish to the plate and scraping off the excess. This method allows for easy and precise application of detailed patterns.

Q: Do I need any special tools for nail stamping?

A: Yes, to get started with nail stamping, you will need a few necessary tools: a nail stamping plate that features multiple designs, a stamper to transfer the design, a scraper to remove excess polish from the plate, and appropriate nail polish that works well with stamping (typically highly pigmented and quick-drying). Optional tools include a cleaning brush for the plates and a top coat to seal your design.

Q: Can I use any nail polish for stamping?

A: Not all nail polishes are suitable for stamping. It is recommended to use specially formulated nail stamping polishes, which are thicker and have a higher pigment concentration. However, you can also use regular nail polishes that are opaque and quick-drying. Avoid fast-drying top coats as they may not adhere well to the stamping process.

Q: What are some tips for achieving a successful nail stamping design?

A: For a successful nail stamping experience, consider these tips: clean your stamping plates with alcohol to remove any residue; apply a thin layer of polish to the design, ensuring it covers the grooves; use a firm yet gentle scraping motion to remove excess polish; and roll the stamper onto the design instead of pressing to ensure it picks up the pattern effectively. Practice makes perfect, so don’t hesitate to try multiple times!

Q: How do I properly care for my stamping tools and plates?

A: To maintain your stamping tools and plates in good condition, clean them after each use with a gentle nail polish remover or rubbing alcohol to remove any residual polish. Store stamping plates in a flat position to avoid scratches, and ensure the stamper is kept clean and stored in a dust-free environment. Regular maintenance will extend the life of your stamping tools and ensure optimal performance.

How to Master French Tips with a Twist

Over the course of your journey to mastering French, you may have encountered a multitude of tips and techniques. This guide will provide you with innovative strategies that not only enhance your language skills but also keep the learning process enjoyable and engaging. By incorporating these unique approaches into your routine, you will find yourself navigating the complexities of the French language with greater ease and confidence. Let’s probe effective methods that can transform your language learning experience and steer you toward fluency.

Key Takeaways:

  • Engage with Entertainment: Incorporate French films, music, and books into your learning to make it more enjoyable and relatable.
  • Experiment with Conversation: Practice speaking with native speakers or language exchange partners to enhance fluency and confidence.
  • Utilize Digital Tools: Leverage language apps and online resources to tailor your practice and track progress effectively.

Understanding French Grammar: Essential Rules

While stepping into French grammar, you’ll discover a structured framework that can enhance your communication skills. Understanding articles, gender, and agreements between nouns and adjectives is vital for crafting accurate sentences. Familiarizing yourself with these important rules will allow you to express yourself more confidently and engage with the French language on a deeper level.

Verb Conjugation Simplified

After grasping the fundamentals of French grammar, focusing on verb conjugation can significantly improve your fluency. Conjugation involves changing the form of a verb to correspond with different subjects, tenses, and moods. By mastering regular and irregular verb patterns, you’ll be able to construct both simple and complex sentences effortlessly.

Noun and Adjective Agreement

Between nouns and adjectives, agreement ensures that both elements match in gender and number, making your sentences coherent and grammatically correct. In French, nouns are either masculine or feminine, and adjectives must change their endings accordingly. This agreement enhances your overall comprehension of the language while preventing common errors in conversation and writing.

Verb forms play a significant role in the agreement of nouns and adjectives in French. For example, if you describe a masculine noun, the adjective must take a masculine form, and similarly for feminine nouns. This relationship not only solidifies the clarity of your message but also aligns with the natural flow of the language. Paying attention to these details will help you construct sentences that resonate with authenticity.

Building Vocabulary: Creative Techniques

Any effective language learner knows building vocabulary is fundamental to mastering French. You can enhance your word bank with innovative methods that make learning engaging. Consider using various creative techniques such as thematic word lists or mnemonics to help you retain and recall new vocabulary effortlessly. By integrating these methods into your study routine, you’ll find that expanding your knowledge of French words becomes both enjoyable and efficient.

Thematic Word Lists

On creating thematic word lists, you categorize vocabulary based on themes such as travel, food, or emotions. This structured approach allows you to learn words in context, making it easier for you to recall them during conversations. For instance, when preparing for a trip to France, gathering relevant words and phrases connected to sightseeing can boost your confidence in everyday interactions.

Using Mnemonics for Retention

Behind every successful learner is a solid strategy for memorization, and mnemonics can be your best friend. These memory aids create associations between new vocabulary and familiar concepts, enhancing your ability to recall words effortlessly. By crafting vivid pictures or clever phrases, you make the learning process enjoyable and personalized, setting yourself up for long-term retention.

Further elaborating on using mnemonics for retention, you might find it helpful to develop personalized stories or images that link the French words to their meanings. For example, if you’re learning the word “chat” (cat), you could visualize a funny scene with a cat chasing a chatty bird. This imaginative connection not only reinforces your understanding but also makes the vocabulary stick in your mind. As you use mnemonics, you’ll notice that your vocabulary expands quickly, and the words become a natural part of your French conversations.

Listening Comprehension: Strategies to Enhance Skills

Now, enhancing your listening comprehension in French can significantly boost your language mastery. To improve your understanding, immerse yourself in diverse auditory environments where French is spoken. Engage with conversations at varying speeds, focusing on different accents and contexts. This exposure will refine your auditory skills while building your confidence in real-world scenarios.

Engaging with French Media

With engaging films, podcasts, music, and TV shows, you can immerse yourself in the rhythm and nuances of the French language. Choose media that aligns with your interests, as this will keep you motivated and excited. By actively seeking out French content, you not only improve comprehension but also develop a deeper cultural appreciation, enriching your overall learning experience.

Active Listening Exercises

Media such as audiobooks, online lectures, or news broadcasts can serve as effective tools for active listening exercises. You should select short segments and concentrate on understanding what’s being said without relying on subtitles or transcripts. This method encourages you to pick up on context, vocabulary, and pronunciation naturally, helping to solidify your grasp on the language.

Exercises such as repeating phrases, summarizing content, or conducting targeted listening sessions can elevate your active listening skills. Start with slower-paced material to develop your confidence, then gradually increase difficulty. Engage in partner practice or utilize language exchange platforms to test your understanding and receive instant feedback. This approach not only sharpens your listening abilities but also enhances overall language fluency.

Speaking Practice: Finding Your Voice

Not finding your voice in French can be a challenge, but practicing consistently can help. Engage with resources that spark your interest – for example, check out this Enhance Your Nails with a Twist on French Manicure video to get inspired while you learn! Embrace conversations that excite you, and you’ll be speaking like a native in no time.

Language Exchange Partners

After you’ve gained some basics, seek out a language exchange partner. They can offer you real-time practice and cultural insights, enhancing your fluency. You could meet through online communities or language exchange apps, ensuring your speaking practice is reciprocal and enjoyable.

Utilizing Technology for Speaking

Beside finding partners, technology can amplify your speaking practice. Many platforms offer language speaking prompts, where you can record yourself and receive feedback from native speakers or AI tools designed to improve your pronunciation.

With language learning apps like Tandem or HelloTalk, you’ll find interactive features that let you speak directly with native French speakers from around the world. Additionally, consider using video call platforms for live conversations to simulate real-life dialogues, making your learning experience dynamic and effective. The more you practice speaking with diverse technology tools, the more comfortable you’ll become in expressing yourself in French.

Cultural Immersion: Learning through Context

Despite the incredible amount of language resources available, true mastery of French often comes from immersing yourself in the culture. Engaging with locals, experiencing traditional events, and participating in community activities will deepen your understanding of language in its natural context. This approach allows you to grasp slang, idioms, and nuances that textbooks simply can’t provide, helping you communicate with authenticity and confidence.

Exploring French Cuisine and Literature

Learning about French cuisine and literature offers a delightful way to connect with the language. By venturing into classic novels and culinary traditions, you can broaden your vocabulary while also understanding cultural references and social norms. Cooking traditional recipes in French and discussing them with others further enhances your language skills and appreciation for French culture.

Traveling through Virtual Experiences

Before you set off on your journey to master French, consider how virtual experiences can transport you to France from the comfort of your home. Online cooking classes, virtual museum tours, and language exchange platforms create unique opportunities to engage with the language and culture. This modern method not only enriches your comprehension but also makes learning enjoyable and accessible.

Through virtual experiences, you can explore bustling Parisian streets or the serene countryside of Provence at your own pace. Enjoy dining experiences that showcase regional cuisines or participate in live-streamed cultural events led by French speakers. This immersive technology allows you to practice conversational skills and interact with native speakers, making your language journey both effective and engaging.

Maintaining Motivation: Tips for Long-Term Success

To keep your French learning journey exciting, incorporate a variety of methods and engagement strategies. Here are some tips to maintain your motivation:

  • Mix up your learning resources, such as apps, books, and videos.
  • Join French-speaking groups online or locally.
  • Set a routine but vary the activities each session.
  • Reward yourself for achieving milestones.

Knowing how to fuel your motivation will lead to long-term success and enjoyment in your language learning adventure.

Setting Achievable Goals

Before diving deep into your French studies, it’s imperative to set achievable goals that cater to your level and interests. This approach helps you stay focused and encourages consistency, which is key in language learning. By breaking down your long-term goals into smaller, manageable tasks, you make the journey feel less daunting and more rewarding.

Celebrating Progress and Milestones

Goals are not just checkpoints; they are opportunities for you to celebrate your growth and progress. Acknowledging your accomplishments along the way, no matter how small, can significantly boost your motivation to continue learning. Whether it’s mastering a new verb tense or holding a conversation, take the time to reward yourself.

In addition, you can celebrate progress by jotting down your achievements in a journal or sharing them with friends or fellow learners, fostering a supportive language community. Create little rituals for each milestone, like treating yourself to a French pastry or enjoying a French film, to make the experience enjoyable and memorable.

Summing up

Taking this into account, mastering French can be both engaging and rewarding when you incorporate unique tips that resonate with your learning style. By exploring cultural nuances, utilizing multimedia resources, and practicing conversation with native speakers, you can enhance your language skills effectively. Embrace the journey by setting realistic goals and persistently challenging yourself. With consistency and creativity, you’ll not only retain what you learn but also enjoy the process of becoming fluent in French.

FAQ

Q: What are some effective methods to enhance my French vocabulary?

A: One effective method to boost your French vocabulary is to incorporate themed vocabulary lists into your daily routine. For example, focus on a specific topic each week, such as food, travel, or technology. Utilize flashcards or apps that allow you to engage with the vocabulary interactively. Additionally, watching French films or reading books in French can provide context and help reinforce new words in a memorable way.

Q: How can I improve my pronunciation in French?

A: Improving your French pronunciation can be achieved by listening to native speakers. Consider incorporating podcasts or YouTube videos into your study routine. Try to mimic the speakers, paying close attention to their intonation and rhythm. Additionally, use language apps that provide pronunciation feedback or join a local language group where you can practice speaking with others. Recording yourself and comparing your pronunciation to native sources can also be beneficial.

Q: Is it important to practice speaking French daily, and how can I make it enjoyable?

A: Practicing speaking French daily is highly beneficial for fluency. To make it enjoyable, integrate it with activities you love. For instance, try to have conversations about your favorite hobbies or watch a French film and discuss the storyline afterward. Language exchange platforms can connect you with native speakers, allowing for a fun and engaging way to practice speaking. You could also role-play different scenarios, like ordering food or shopping, to enhance your conversational skills.

Q: How can I stay motivated while learning French and avoid burnout?

A: Staying motivated in your French learning journey can be achieved by setting small, manageable goals and celebrating each milestone. Create a study schedule that includes varied activities, such as music, games, or cultural experiences related to France or the Francophone world. Joining online forums or groups can provide a sense of community and accountability. Additionally, taking breaks and alternating between different forms of study will help maintain your enthusiasm and prevent fatigue.

Q: What resources can I use to practice my French skills outside of traditional textbooks?

A: There are numerous resources available beyond traditional textbooks to practice your French skills. Mobile apps like Duolingo or Babbel provide interactive lessons tailored to different skill levels. Websites featuring French recipes, blogs, or travel articles can immerse you in the language while catering to your interests. Furthermore, joining online language exchange platforms allows for real-time conversation practice with native speakers. Engaging with social media accounts that share content in French can also be a fun way to learn in a more casual setting.

Creating Galaxy Nails – A Step-by-Step Guide

Most people admire the beautiful and mystical look of galaxy nails, but you can easily create this stunning design at home with a little practice. In this informative guide, you’ll learn step-by-step how to achieve the mesmerizing hues and sparkles of the universe on your fingertips. With just a few tools and some creativity, your nails will become a canvas for cosmic art. For additional inspiration, check out How To: Galaxy Nails ⋆ Beauty Nerd By Night for tips and tricks!

Key Takeaways:

  • Preparation: Start with clean, dry nails and apply a base coat to ensure a smooth application and enhance longevity.
  • Blending Colors: Use a sponge to dab on vibrant colors like purples, blues, and blacks to create a cosmic gradient, blending them for an ethereal look.
  • Finishing Touches: Add glitter or star stickers for added dimension, and seal the design with a top coat for a glossy finish.

Necessary Materials

Before you start creating your galaxy nails, make sure you have all the necessary materials on hand. Gather the right colors, tools, and additives that will bring your cosmic designs to life. For a helpful visual guide, check out this Easy Galaxy Nail Art Tutorial 💫 that showcases the necessarys you’ll need to get started.

Base Coats and Colors

Necessary base coats and colors form the foundation of your galaxy nail art. You should have a clear base coat to protect your nails, as well as a selection of dark shades like deep navy or black to create the backdrop of your galaxy. Additionally, vibrant hues like purples, blues, and pinks will help mimic the beauty of the universe. Investing in high-quality nail polishes will ensure your design shines bright.

Nail Art Tools

The tools you use will significantly impact the precision and detail of your galaxy nails. Essential tools include a dotting tool, makeup sponges, and nail brushes for creating intricate designs. A fan brush can be particularly effective for blending colors, while striping tape can help you achieve clean edges and lines. The right tools allow you to express your creativity and achieve stunning results in your nail art.

Hence, choosing the appropriate tools will enhance your artistry and improve your overall experience in creating galaxy nails. Tools such as sponges for blending colors or dotting tools for adding star-like details will elevate your designs. Don’t shy away from experimenting with different products to find what works best for you and your preferred style. With the right tools, you’ll be well on your way to achieving a splendid galaxy nail look.

Preparing Your Nails

Assuming you want your galaxy nails to look stunning, the first step is preparing your nails properly. This ensures a smooth application and helps your design last longer. Start by removing any old nail polish and gently pushing back your cuticles. Clean the nail beds thoroughly to eliminate any oils or residue to give your manicure a flawless base. Once your nails are ready, you can focus on maintaining their health to enhance the overall polish appearance.

Nail Care Routine

Preparing your nails also involves establishing a regular nail care routine. This includes moisturizing your cuticles and applying a strengthening treatment if needed. Keep your nails trimmed and shaped consistently to maintain their strength and aesthetics. Making this part of your routine means your nails will be healthier and more resilient, providing the perfect canvas for your galaxy nail art.

Applying the Base Coat

For a perfect application of your galaxy nails, applying a high-quality base coat is important. The base coat not only protects your nails from staining but also helps the polish adhere better and last longer. It creates an even surface that allows your creative designs to shine through.

Applying a base coat is simple but vital for achieving the best results. After your nails are clean and dry, apply a thin layer of base coat, ensuring you cover the entire nail evenly without flooding the cuticles. Allow it to dry completely before moving on to your nail art. This way, you provide the perfect foundation for vibrant colors, which enhances the overall look of your galaxy design.

Creating the Galaxy Effect

Unlike regular nail art, achieving a galaxy effect requires a blend of vibrant colors and textures to mimic the beauty of the cosmos. Start with a dark base color, such as black or deep blue, to represent the night sky. Then, layering various shades will give your nails that stunning, otherworldly appearance. This process involves creativity and patience, but the results will be nothing short of stellar.

Color Application Techniques

Against using a single brush throughout your design, consider employing different tools, like sponges or nail dotters, to apply your colors. Sponging allows you to create soft transitions between hues, while dotters can be used for creating the shimmering stars scattered across your galaxy. Mixing these techniques will enhance the overall effect and add dimension to your nails.

Blending Colors for Depth

Galaxy nail design relies on how effectively you blend colors for depth and richness. Start by layering lighter colors over darker ones, allowing some of the base to peek through. This method creates an illusion of space and gives your design a dynamic quality that captivates the eye.

At this stage, don’t hesitate to experiment with various color combinations; your palette can include purples, blues, pinks, and whites. Use a makeup sponge to dab on layers of color, lightly blending them together as you go. Aim for a gradient effect where colors transition smoothly into each other, mimicking the vastness of outer space. By varying pressure and sponge placement, you’ll achieve a multi-dimensional look, providing depth that resembles swirling galaxies.

Adding Stars and Highlights

All you need to do now is add some fun stars and highlights to your galaxy nails. This last step will truly bring your design to life. Whether you prefer tiny dots replicating stars or sparkly accents, your galactic theme will shine. Gather your tools and prepare to add those magical details that will elevate your nail art.

Dotting Techniques

Beside using a fine brush, dotting tools can help you create perfect little stars across your nails. You can utilize different sizes of dotting tools to achieve various star sizes. Start by dipping your dotting tool into white or silver polish, and gently press it onto your nails to form stars, clusters, or even constellations.

Using Glitter and Foils

Highlights like glitter and foils can add the finishing touch to your galaxy nails, giving them a twinkling effect that mimics the night sky. Applying these elements strategically will enhance the overall cosmic impact.

Stars often complement the deep hues of your galaxy nails exquisitely. To achieve this, sprinkle fine glitter over your wet polish for a more uniform shine, or use larger glitter particles for added texture. Foil pieces can be added sparingly for a striking contrast; simply tear small bits and press them onto the tacky surface of your design. These accents will create dimension, making your nail art truly out of this world!

Finishing Touches

Despite the vibrant galaxy design already on your nails, finishing touches bring everything together. This final layer enhances the shine and preserves the intricate work you’ve done. By following these simple steps, you’ll ensure your galaxy nails not only look stunning but also last longer. Let’s examine the details!

Top Coat Application

Along with making your galaxy nails shine, applying a quality top coat is important for protecting your artwork. Choose a gel or regular top coat, and apply it gently over your design using smooth strokes. This step seals everything in, enhancing the depth of colors and adding a glossy finish to your nails.

Drying and Curing Times

Among the different finishes, drying and curing times can vary significantly depending on the products used. If you’re using traditional polish, allow your nails to air dry for at least 30 minutes. If you opt for a gel top coat, follow your product’s instructions for curing, typically 60-90 seconds under a UV/LED lamp.

Coat your nails thoroughly, as the right drying or curing time ensures that your design sets perfectly, preventing smudging or chipping. Patience is key; rushing through this step may compromise your beautiful galaxy nails. If you’re using a gel top coat, ensure the lamp is properly maintained for optimal results. Allowing sufficient drying time will extend the life of your manicure, keeping your galaxy nails looking fresh and vibrant for days to come.

Care and Maintenance of Galaxy Nails

Many factors can affect the longevity of your galaxy nails, so it’s important to implement proper care and maintenance. Regularly moisturizing your hands and cuticles will help keep your nails healthy and prevent breakage. Additionally, avoid harsh chemicals and detergents that could wear down your vibrant designs. A topcoat applied every few days can also protect your nail art while providing a beautiful shine, ensuring your galaxy nails remain stunning for as long as possible.

Protecting Your Design

With a few simple precautions, you can protect your galaxy nail design from wear and tear. Wearing gloves while doing chores, like washing dishes or cleaning, helps shield your nails from potential damage. Additionally, steer clear of activities that could cause accidental chips or impacts. Taking these steps will contribute to the longevity of your stunning nail art.

Repairing Chips and Damage

Nails are not immune to wear, and chips or damage may occur over time. To quickly fix any imperfections, you can use a small amount of nail polish that matches your design. Gently apply it to the affected area while blending it into the surrounding polish. Finish with a topcoat to seal the repair and restore the glossy finish.

Chips can detract from the overall beauty of your galaxy nails, but they are easily fixable. For larger areas of damage, consider applying a sponge technique to replicate the galaxy effect, gently blending colors to match your original design. Once you’re satisfied with the touch-up, ensure you coat the repaired area with a topcoat for protection. This simple upkeep strategy helps maintain the stunning visual appeal of your galaxy nails even as they endure daily wear.

To wrap up

Following this step-by-step guide, you can easily create stunning galaxy nails that showcase your creativity and skill. By gathering the right materials and carefully layering colors, you’ll achieve a beautiful cosmic effect anyone would admire. Don’t hesitate to experiment with different shades and designs to make your galaxy nails truly unique to your style. Enjoy the process and the compliments that are sure to come your way!

FAQ

Q: What materials and tools do I need to create galaxy nails?

A: To create stunning galaxy nails, you will need the following materials: a base coat, black nail polish (or dark blue/purple), various nail polishes in cosmic colors (such as white, pink, blue, and purple), a makeup sponge, a top coat, and optional glitter or star decals. Tools include a small brush or dotting tool for finer details and a sponge for blending colors.

Q: How do I prepare my nails for galaxy nail art?

A: Start by prepping your nails through filing and shaping them to your desired length. Next, push back the cuticles gently and cleanse your nails with nail polish remover to eliminate any oils. Apply a base coat to protect your natural nails and allow it to dry completely before proceeding with the galaxy design.

Q: Can I create galaxy nails without using a sponge?

A: While using a makeup sponge is a common technique for applying the blend of colors seamlessly, you can also use a brush or your fingers to dab on the colors. However, using a sponge tends to give a softer gradient effect, which is ideal for mimicking a galaxy. If you prefer not to use a sponge, be sure to tap lightly for the best result.

Q: What techniques should I use to get the best blend of colors on my nails?

A: To achieve a beautiful color blend for galaxy nails, start with a layer of dark polish as your base. Once dry, apply the chosen colors to your sponge, ensuring they are layered next to each other without much overlap. Dab the sponge onto your nail, rotating it as you go to create a more natural, blended effect. You can repeat this process with additional layers until you achieve the desired intensity.

Q: How can I make my galaxy nails last longer?

A: To ensure your galaxy nails stay vibrant and chip-free, always begin with a good base coat that protects your nails. After applying your galaxy design, seal it with a high-quality top coat to provide shine and durability. Avoid exposing your nails to harsh chemicals and wear gloves while doing chores. Additionally, apply the top coat every few days for ongoing protection and to maintain the shine.

Skip to content