Nail Art Inspiration

Nail Art Inspiration

Minimalist Nail Art Ideas You’ll Love

Art doesn’t have to be extravagant to make a statement, especially when it comes to your nails. Minimalist nail art embodies simplicity and elegance, allowing you to express your style without the fuss. In this post, you’ll discover a variety of chic and easy designs that you can recreate at home, perfect for any occasion. Whether you’re a beginner or a seasoned nail enthusiast, these minimalist ideas will inspire you to elevate your nail game while keeping it effortless.

Key Takeaways:

  • Simple Designs: Minimalist nail art focuses on clean lines and understated elegance, making it perfect for everyday wear.
  • Neutral Color Palettes: Soft and muted colors are often used to enhance the minimalist aesthetic, allowing for versatile styling options.
  • Geometric Patterns: Incorporating basic shapes and patterns can add an artistic touch while maintaining a minimalist vibe.

The Essentials of Minimalist Nail Art

While embracing a minimalist approach to nail art, it’s important to focus on simplicity and subtlety. The essence of minimalist nail art lies in clean lines, negative space, and a limited color palette. By choosing understated designs, you not only allow your natural nails to shine but also create a chic and timeless aesthetic. Understanding the basics can help you elevate your nail art game, making it easy to express your personal style through understated yet elegant designs.

Tools You’ll Need

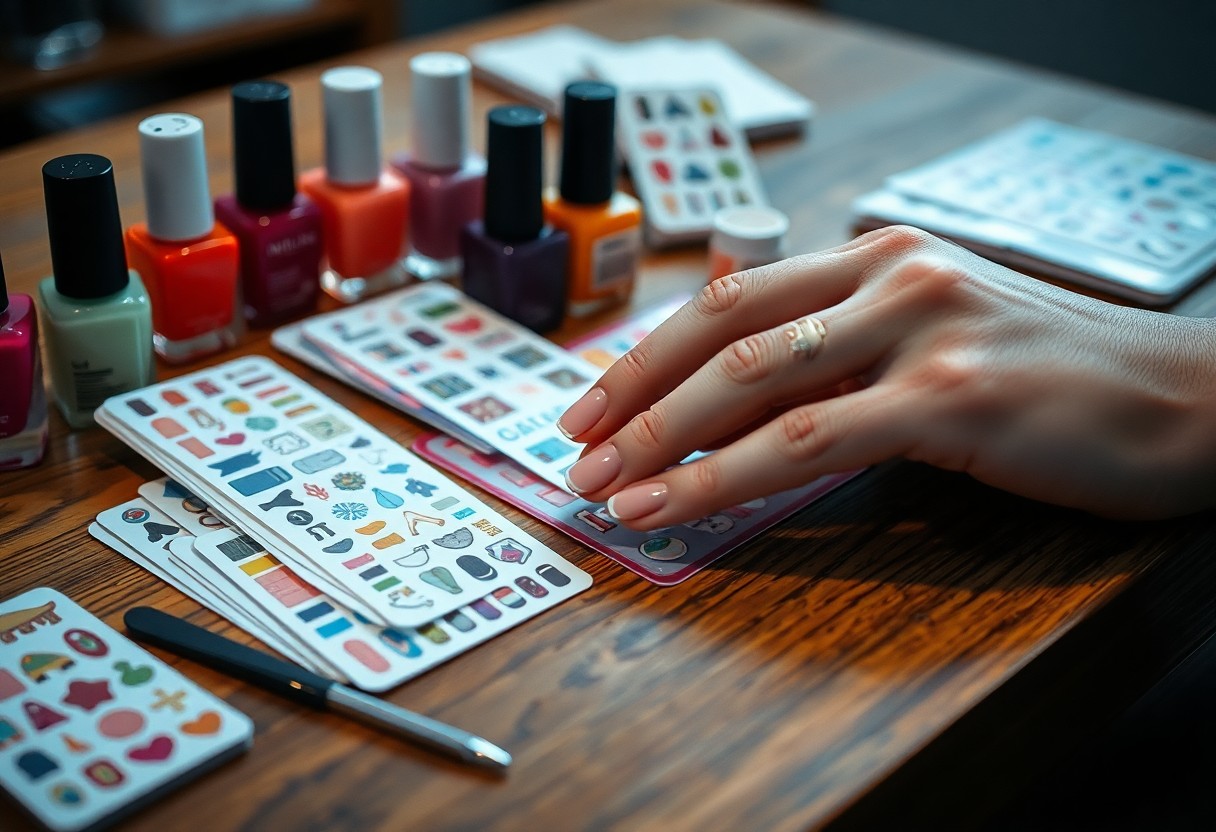
Beside a good quality base coat and nail polish, you will need a few necessary tools to create stunning minimalist nail art. While a fine-tipped brush is perfect for detailing, a dotting tool can help you achieve precise shapes. Additionally, you’ll find that nail tape or striping tape can be handy for creating clean lines and geometric patterns. Gathering these tools will empower you to experiment with various designs while maintaining that minimalist vibe.

Choosing the Right Base Color

On selecting the perfect base color for your minimalist nail art, the right shade plays a significant role in your overall look. Opt for soft, muted tones such as nude, pastel, or even transparent shades to enhance the minimalist feel. Neutral colors can provide a clean canvas, allowing your unique designs to stand out without overwhelming your nails. You have the power to create a fresh and modern aesthetic by selecting colors that compliment your skin tone and the designs you wish to incorporate.

Minimalist nail art is all about finding harmony between your base color and the designs you choose. Soft hues such as light beige, delicate pink, or classic white work beautifully as a backdrop, enhancing the simplicity of your patterns. You can even experiment with transparent shades for an ultra-clean look. Whatever base color you choose, ensure it reflects your personal style and adds to the overall elegance of your nail art. By focusing on these harmonious color choices, you can effortlessly elevate your minimalist nail art game.

Simple Designs to Try

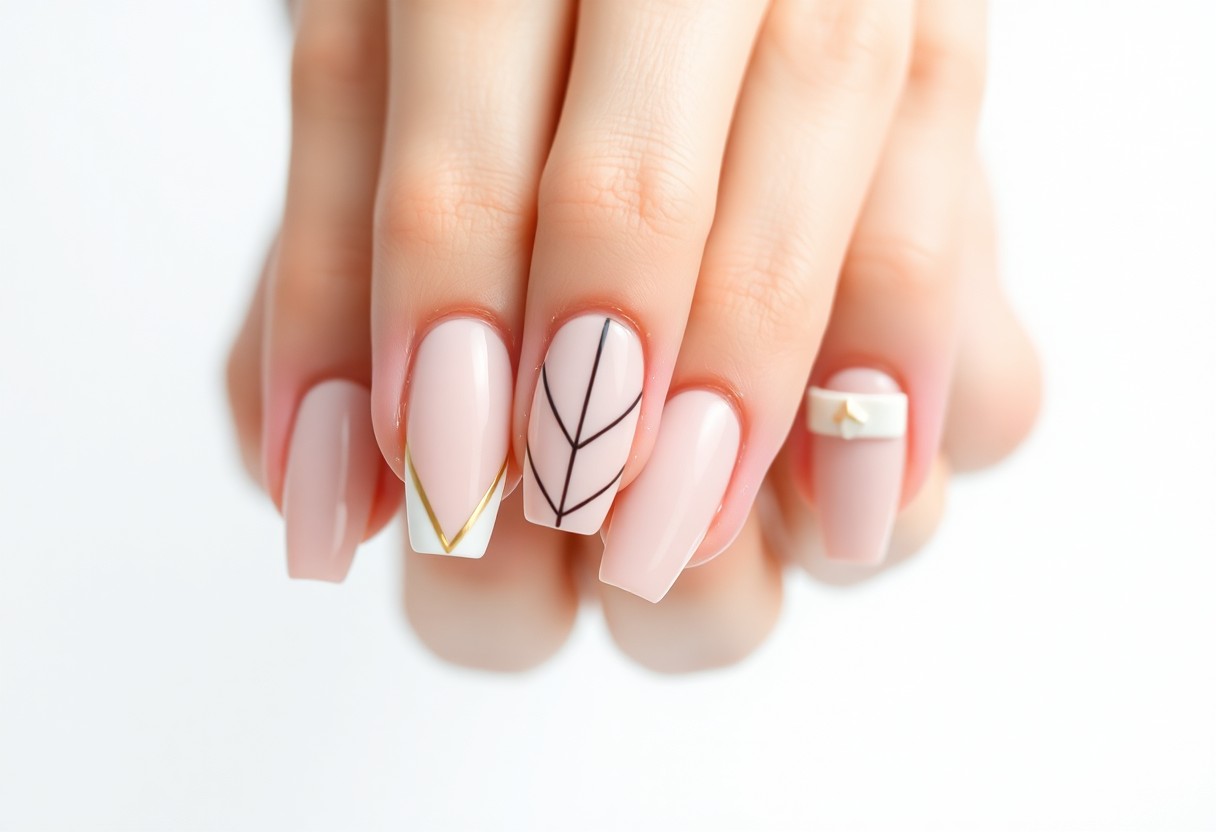
One of the best aspects of minimalist nail art is its delightful simplicity. You can easily achieve stunning looks with just a few basic techniques. Consider the beauty of negative space, geometric patterns, or even understated embellishments. These designs embrace clean lines and subtle elegance, allowing your nails to make a statement without overwhelming your style. Whether you’re heading to a casual brunch or a formal event, these simple ideas will elevate your look effortlessly.

Negative Space Nail Art

An exciting approach to nail art is negative space, which utilizes the natural color of your nails as part of the design. This technique allows you to create unique patterns and shapes while keeping the overall look sleek and sophisticated. You can explore various styles, from simple stripes and dots to more complex designs that accentuate the beauty of your bare nails.
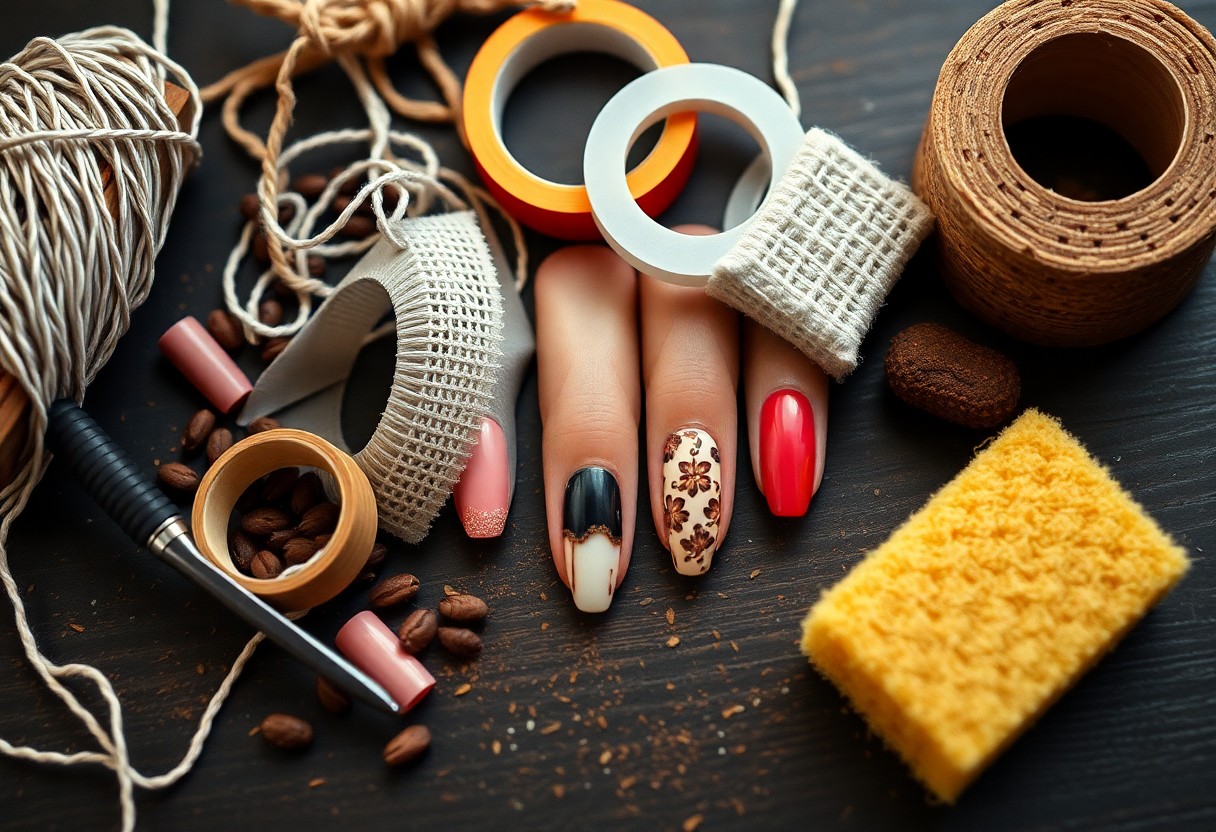
Geometric Patterns

Against the backdrop of minimalist nail art lies the captivating world of geometric patterns, which are both trendy and chic. These designs often blend lines, angles, and shapes in a harmonious way, creating eye-catching yet simple looks.

For instance, you can experiment with triangular designs on a neutral base or go for bold contrasts with vivid colors. Combining straight lines and varying shapes into your nail art can give your fingers a contemporary flair. You can also play with asymmetry; allowing some nails to feature intricate patterns while keeping others minimal. This approach will not only showcase your creativity but also keep your look effortlessly stylish.

Seasonal Minimalist Nail Ideas

All year round, you can express your style through minimalist nail art that captures the essence of each season. Embrace subtle colors and simple designs that elevate your look without overwhelming your fingertips. For inspiration, check out 30 Simple Nail Designs That Beginner- … – IPSY to find ideas perfect for any seasonal occasion.

Spring and Summer Inspirations

Against the backdrop of blooming flowers and sunnier days, your nails can reflect the vibrant energy of spring and summer. Soft pastels, delicate florals, and nude bases with tiny accents are the ideal way to keep your nails fresh and trendy.

Fall and Winter Themes

Between cozy sweaters and sparkling holidays, your nail art can mirror the season’s charm. Opt for warm earth tones and muted palettes, or add a touch of shimmer to your nails for festive gatherings.

Considering the changing atmosphere during fall and winter, you can fully embrace deeper shades such as burgundy, forest green, or even taupe, complemented by geometric patterns or minimalist stripes. These ideas help you keep your nails looking chic and sophisticated while still being seasonally appropriate, allowing for a stylish transition between your wardrobe and nail design.

Incorporating Color into Minimalism

Despite the common perception that minimalism means sticking to a monochromatic palette, you can infuse color into your nail art while maintaining a clean aesthetic. By choosing a few selected hues and applying them thoughtfully, your nails can pop without overwhelming your overall look. Simple techniques like accent nails or subtle gradients can add just the right amount of vibrancy, allowing you to express your style without sacrificing minimalistic elegance.

Accent Nails

Nails are a perfect canvas for accent colors, allowing you to highlight one or two fingers with a bolder shade while keeping the rest neutral. This technique adds interest without compromising the minimalist approach. Opt for a contrasting color that complements your primary polish, and you’ll create a chic and modern look that elevates your nail game effortlessly.

Subtle Color Gradients

Minimalism can beautifully embrace subtle color gradients, where one color gently transitions into another. This technique creates a soft, eye-catching effect perfect for those who prefer a hint of color on their nails without the drama. You can achieve this by blending shades that are close in tone for an understated yet sophisticated finish.

Incorporating subtle color gradients into your nail art allows you to maintain a minimalist style while adding a touch of elegance. Start with a light base coat and gradually blend in a slightly darker shade towards the tips. This ombre effect creates a visually appealing transition and adds depth to your nails without overwhelming them. Experiment with various color combinations to find the perfect match for your personal style, ensuring that your nails remain chic and modern.

Maintenance for Minimalist Nail Art

Keep your minimalist nail art looking fresh and polished with regular maintenance. Minimalist designs may appear simple, but they require attention to detail to ensure they stay sharp and chic. Maintaining your nails helps prolong the life of your art and keeps your overall look sophisticated. Short upkeep sessions can make all the difference, so stay on top of your nail care routine!

Keeping It Fresh

At least once a week, make a point to inspect your nails and ensure the base color remains vibrant. Use a clear top coat to seal in your design and add shine, which can help prevent chipping and dullness. This simple step creates a fresh appearance and enhances the minimalist aesthetic you’ve chosen.

When to Touch Up

Along with weekly inspections, keep an eye out for any wear or damage that might necessitate a touch-up. If you notice any chips or fading, it’s time to refresh your minimalist nail design. You want to maintain the clean lines that characterize this style, and addressing any imperfections promptly will ensure your nails remain chic.

With the changing nature of nail wear, typically, you should touch up your nail art every two weeks. However, this can vary based on your daily activities or how fast your nails grow. If you’re constantly using your hands, manual labor, or even just frequent exposure to water, you might find it necessary to touch up sooner. Keep a small kit handy for quick fixes, and don’t hesitate to refresh your look whenever you feel it’s losing its luster.

Minimalist Nail Art for Special Occasions

To stand out during special moments, you can choose minimalist nail art that exudes sophistication and charm. Whether it’s a wedding, birthday party, or an elegant dinner, subtle designs like thin stripes, dots, or a single accent nail can enhance your look without overwhelming it. This approach allows your personality to shine through while staying chic and appropriate for any event.

Weddings and Formal Events

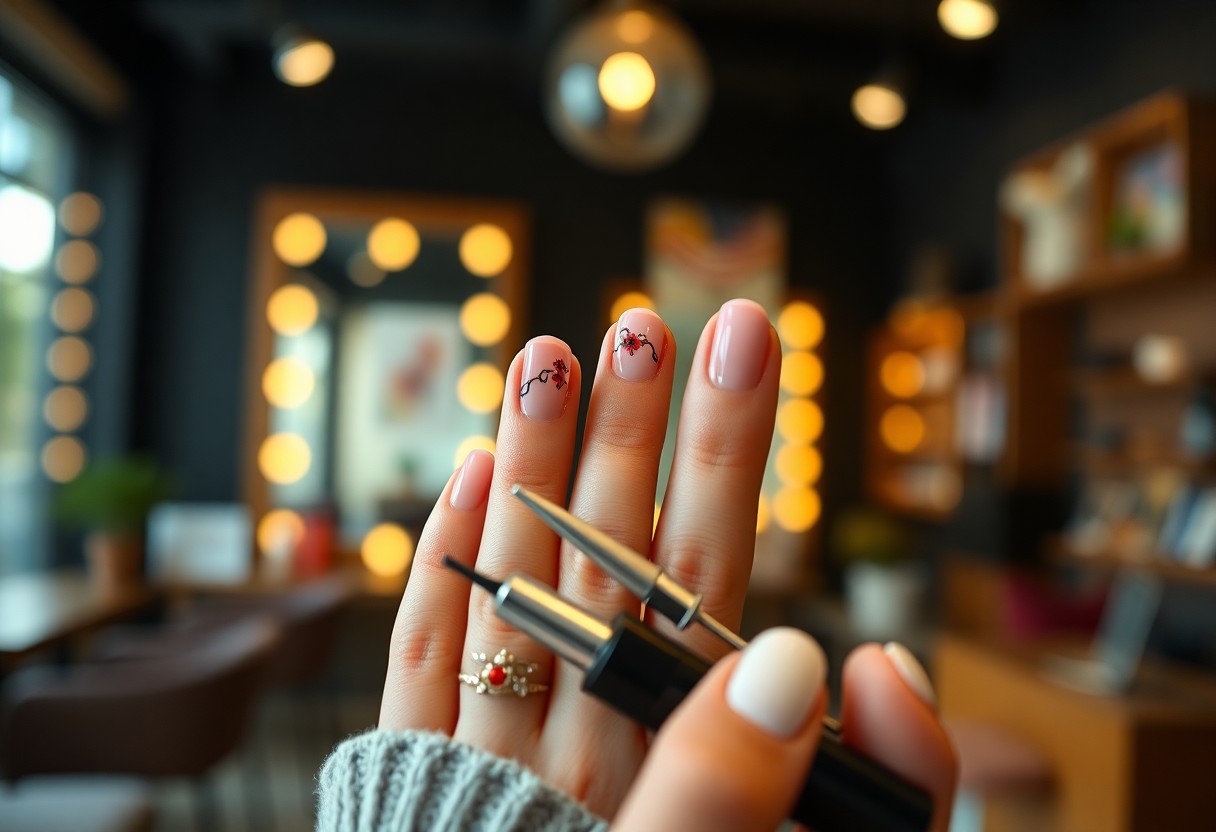
On your big day or at formal gatherings, opting for a delicate nude base paired with fine gold or silver accents can add just the right touch of elegance. Simple floral motifs or geometric designs are perfect for complementing a sophisticated outfit, ensuring your nails look polished and refined without drawing too much attention away from your overall ensemble.

Everyday Elegance

One of the best ways to embrace minimalist nail art is to adopt styles that add a touch of sophistication to your everyday look. Choosing clean lines, muted colors, and understated designs can elevate your nails while keeping them effortlessly chic.

Indeed, everyday elegance is all about creating a refined yet simple nail aesthetic that resonates with your personal style. You can experiment with soft pastels, classic whites, or light greys for a fresh vibe. Additionally, subtle nail art like tiny dots or a singular stripe can serve as a delightful highlight without overshadowing your daily outfits. With these minimalist designs, your nails will always look well-groomed and fashionable, perfect for any occasion in your busy life.

Conclusion

Conclusively, embracing minimalist nail art can elevate your style while keeping it chic and understated. With various designs, from subtle lines to delicate dots, you’re sure to find inspiration that aligns perfectly with your aesthetic. Whether you’re preparing for a special occasion or simply want to refresh your look, these nail art ideas allow you to express yourself without overwhelming your personal style. Experiment with different colors and techniques to find the perfect minimalist nail art that complements your lifestyle and enhances your beauty.

FAQ

Q: What is minimalist nail art?

A: Minimalist nail art focuses on simplicity, featuring clean lines and understated designs. It often includes muted colors, geometric shapes, and negative space, creating an elegant and chic look that doesn’t require elaborate techniques or intricate patterns.

Q: What are some popular minimalist nail art designs?

A: Some popular minimalist nail art designs include simple stripes, dots, or geometric shapes placed on a nude or pastel base. Other options are negative space designs where parts of the nail are left unpainted, and delicate floral accents that are subtle rather than bold.

Q: How can I achieve a minimalist look at home?

A: To achieve a minimalist nail art look at home, start with clean, well-prepped nails. Use a base coat to protect your nails, then choose a neutral or pastel polish. Keep designs simple by using striping tape for clean lines or a dotting tool for precise dots. Finish with a top coat to add shine and extend the wear of your design.

Q: Are there any color palettes recommended for minimalist nail art?

A: Yes, minimalist nail art often features a soft, muted color palette. Consider using shades like pale pink, soft beige, white, or light gray. These colors work well together and allow for easy layering of designs without overwhelming the overall look.

Q: Can minimalist nail art be done with nail wraps or stickers?

A: Absolutely! Nail wraps and stickers are great tools for creating minimalist nail art. They come in various designs that embody simplicity and elegance, making it easy to achieve the minimalist aesthetic without the need for advanced nail art skills. Just apply them to your nails and finish with a top coat for added durability.

Nail Stickers – The Easy Way to Nail Art

Many individuals find nail art to be an enjoyable form of self-expression, but the process can often feel daunting. Fortunately, nail stickers provide a simple and effective solution for you to elevate your manicure without the mess and complexity of traditional techniques. With a variety of designs available, you can achieve salon-quality results right at home. In this blog post, you’ll discover how to use nail stickers to create stunning looks effortlessly and tips to ensure long-lasting wear.

Key Takeaways:

  • Convenience: Nail stickers offer a quick and hassle-free solution for achieving beautiful nail art without the need for extensive tools or techniques.
  • Variety: Available in countless designs and styles, nail stickers allow individuals to express their creativity and personalize their nails easily.
  • Durability: High-quality nail stickers are designed to last, providing a long-lasting manicure that can withstand daily activities.

What Are Nail Stickers?

While traditional nail art can be time-consuming and often requires a skilled hand, nail stickers present a quick and fun alternative. These adhesive designs allow you to achieve intricate nail art without the need for professional tools or techniques. Simply peel off the sticker and apply it to your nail for a seamless and beautiful look that can be customized to suit any style or occasion.

Types of Nail Stickers

Types of nail stickers can vary widely, catering to different preferences and occasions. Here’s a breakdown:

TypeDescription
Foil StickersGives a metallic or shimmering effect.
Vinyl DecalsFlexible and can be applied in various shapes.
Water Transfer StickersRequires water for application and offers high detail.
3D StickersAdds texture and depth to your nail design.
Nail WrapsCover the entire nail for a quick design.

Any of these options can elevate your manicure effortlessly!

Benefits of Using Nail Stickers

The benefits of using nail stickers are numerous and can simplify your nail care routine. You can enjoy salon-quality results from the comfort of your home, saving time and money. Nail stickers also allow for easy removal and reapplication, granting you the flexibility to switch up your look as often as you like.

The ease of application and versatility of nail stickers make them an attractive option for anyone looking to enhance their nails. You can experiment with various designs without the fear of making mistakes, as these stickers generally adhere well and can be easily adjusted during application. This means you can express your unique style and keep your nails looking fresh and trendy, all while enjoying a hassle-free process.

How to Apply Nail Stickers

Some simple steps can help you achieve a stunning nail art look with nail stickers. Start by prepping your nails, ensuring they are clean, dry, and free of polish or oils. This will ensure that the stickers adhere properly and last longer.

Preparation Steps

Above all, it’s vital to prep your nails before applying the stickers. Begin by removing any old nail polish, pushing back your cuticles, and shaping your nails. Cleanse your nails with rubbing alcohol to eliminate any residue, and ensure they are completely dry.

Application Techniques

Beside proper preparation, using effective application techniques can enhance your results. Gently peel the sticker from its backing, aligning it carefully with the base of your nail. Press down firmly, smoothing out any bubbles, and finalize your look with a layer of top coat for added durability.

Considering the application process, it’s beneficial to work in a well-lit area to ensure precision. Use a pair of tweezers for better control when positioning the stickers. If you make a mistake, simply lift and reposition the sticker before sealing it with a top coat. This attention to detail will enhance the overall look of your nail art.

Creative Nail Art Ideas with Stickers

Not only are nail stickers a time-saver, but they also open up a world of creative possibilities for your manicures. You can easily mix and match different patterns and colors to achieve unique, eye-catching designs. From chic geometric patterns to fun floral motifs, the options are virtually endless, allowing you to express your personality and style with minimal effort.

Seasonal Designs

Behind every seasonal celebration lies an opportunity to elevate your nail art. Whether it’s festive snowflakes for winter, vibrant flowers for spring, or spooky designs for Halloween, nail stickers can easily transform your look to reflect the season. Simply apply the stickers as a quick and easy way to stay stylishly thematic throughout the year.

Customizing Your Look

At any time, you can take your nail art to the next level by customizing it to match your personal style. With a wide range of stickers available, you can choose designs that resonate with your tastes, whether that’s sleek and polished, bold and vibrant, or cute and whimsical. Mix and match different styles for a fun, eclectic look or use a single set for a more uniform appearance.

The key to customizing your look with nail stickers is to select designs that enhance your individuality. Consider layering stickers over solid colors or alternating between various designs on different nails. Not only can you personalize your nail art using unique themes, but you can also incorporate stickers that represent your interests or special occasions, making each manicure truly one-of-a-kind.

Maintenance and Care for Nail Stickers

To ensure your nail stickers last longer and maintain their vibrant look, proper maintenance is imperative. Avoid exposure to harsh chemicals and prolonged water immersion, as they can weaken the adhesive. When applying nail stickers, consider using a top coat for added protection and to enhance shine. Regular touch-ups can help keep your nails looking fresh, ensuring that your nail art remains a statement for days on end.

How to Ensure Longevity

After applying your nail stickers, give them some time to adhere fully by avoiding activities that may put stress on your nails for a few hours. You can also enhance their longevity by applying a clear topcoat to seal the stickers. Regularly moisturize your hands and nails to prevent dryness that can lead to lift or peeling. Also, practicing gentle handling of your hands will keep your stickers intact for longer periods.

Removing Nail Stickers Safely

Safely removing nail stickers is important to prevent damage to your natural nails. Begin by soaking your nails in warm, soapy water for about 10 minutes to loosen the adhesive. Gently lift the edges of the sticker with an orange stick or your fingers, being careful not to peel or rip off your natural nail. If you experience any resistance, continue to soak for a few more minutes before attempting to remove it again.

Maintenance of your natural nails is key during the removal process. Ensure to be gentle and patient to avoid unnecessary breakage. After the stickers are removed, consider applying a nourishing nail oil to hydrate and strengthen your nails. This practice will not only enhance their health but also prepare them for your next nail art adventure.

Where to Buy Nail Stickers

Keep your nail art game strong by knowing where to find the best nail stickers. Whether you prefer shopping online or exploring local stores, there are plenty of options available to help you elevate your manicure easily. From unique designs to classic patterns, you can discover nail stickers that suit your style and make your nails pop.

Online Retailers

Where you shop online can make a significant difference in the variety and price of nail stickers. Websites like Amazon, Etsy, and specialized beauty retailers offer extensive selections that you can browse from the comfort of your home. With just a few clicks, you can find nail stickers to fit every occasion, style, and preference.

Local Stores

One of the best ways to find nail stickers is by visiting local stores that specialize in beauty and cosmetics. These shops often carry a rotating stock of trending designs that you can see in person, allowing you to pick the perfect match for your next nail art session.

Plus, shopping at local stores gives you the opportunity to support your community and discover unique finds you might not see online. Additionally, you might meet beauty enthusiasts who can share tips and recommendations on the best nail stickers for various occasions. Check out beauty supply stores, drugstores, or even fashion boutiques to see what gems you can uncover.

Tips for Choosing the Right Nail Stickers

Despite the vast selection of nail stickers available, selecting the right ones can make or break your nail art experience. Keep in mind these tips:

  • Consider the size of your nails; opt for stickers that fit well.
  • Choose designs that reflect your personal style.
  • Look for high-quality materials that are easy to apply.
  • Check for reviews before purchasing to ensure lasting wear.

Perceiving your preferences and needs will help you achieve the best results.

Matching Styles with Your Personality

To create the perfect nail art, you should choose stickers that resonate with your personal style. Whether you’re drawn to bold patterns, subtle designs, or seasonal themes, selecting stickers that reflect your individuality will enhance your overall look. Express yourself through nail art by mixing and matching different styles that align with your mood, occasion, or outfit.

Considerations for Nail Health

To maintain your nail health while using stickers, ensure you choose products that are non-toxic and breathable. Additionally, provide your nails with regular breaks between applications to prevent any potential damage or weakening.

With a focus on your nail health, it’s important to keep your nails clean and properly moisturized. Before applying stickers, gently file and clean your nails to create a smooth surface. Avoid using stickers that require harsh removers, as this can lead to peeling or dryness. Remember to hydrate your cuticles and nails regularly, and give your nails time to recover between manicure sessions for optimal health.

To wrap up

Taking this into account, nail stickers present you with a simple yet stunning solution to achieve nail art without the fuss. With their ease of use and variety of designs, you can quickly enhance your manicure with minimal effort. To elevate your nail art game, check out this guide on How to Use Nail Stickers Like A Pro. Embrace nail stickers and enjoy the art of self-expression through your nails!

FAQ

Q: What are nail stickers and how do they work?

A: Nail stickers are decorative adhesive decals that can be applied directly to your nails. They come in various designs, colors, and sizes, allowing for a wide range of nail art options without the need for painting. To apply, simply choose a sticker that fits your nail, peel it off the backing, and press it firmly onto your nail. For best results, seal it with a topcoat to enhance durability and shine.

Q: How long do nail stickers typically last?

A: The longevity of nail stickers can vary based on several factors, including the brand, application method, and care of the nails. Most nail stickers can last anywhere from a few days up to two weeks. To extend their wear, it’s important to apply them to clean, dry nails and to avoid activities that may cause excessive wear, such as dishwashing or using harsh chemicals without gloves.

Q: Are nail stickers safe for my natural nails?

A: Yes, nail stickers are generally safe for natural nails when used correctly. They do not require any harsh chemicals for application and can be removed easily when you decide to change your nail art. However, it’s vital to follow the manufacturer’s instructions for removal to prevent any potential damage to the nail surface.

Q: Can I customize nail stickers to fit my personal style?

A: Absolutely! Many brands offer customizable nail stickers, allowing you to create your unique designs. You can upload your artwork or choose from a range of templates. Some even provide options to add text or images that reflect your personality, making your nail art truly one-of-a-kind.

Q: Are nail stickers suitable for sensitive skin or allergies?

A: While many nail stickers are made from non-toxic materials, individuals with sensitive skin or a history of allergies should proceed with caution. It’s recommended to perform a patch test by applying a sticker to a small area of skin before using them on your nails. Additionally, look for hypoallergenic options if you have concerns about allergic reactions.

Can You Do Nail Art with Household Items

Nail art doesn’t have to be expensive or require professional tools; you can unleash your creativity using everyday household items. From rubber bands to tape, the possibilities are endless when it comes to achieving stunning designs right at home. In this post, you’ll discover various techniques and items you can use to elevate your nail game without breaking the bank. Get ready to transform your nails with what you already have in your beauty arsenal!

Key Takeaways:

  • Creativity is key: Household items like plastic bags, sponge, and tape can be used to create unique nail art designs.
  • Accessibility: You don’t need expensive tools or products; everyday materials can help achieve beautiful nail art.
  • Experimentation: Trying out different techniques with common items can lead to innovative and fun nail art styles.

Exploring Household Items for Nail Art

To unleash your creativity, exploring household items for nail art can transform your manicures into mini masterpieces. With just a few everyday products, you can achieve intricate designs that rival salon quality. From kitchen supplies to crafting tools, you’ll be amazed at the resources available right at home. Embrace the DIY spirit, and let your imagination run wild as you discover how to use these common items to elevate your nail art game.

Common Kitchen Supplies

Across your kitchen, you can find a treasure trove of supplies that can be used for stunning nail art. Items like toothpicks, sponges, and even plastic wrap can help you create unique patterns and textures. Using a simple sponge, for instance, allows you to dab on colors for an eye-catching ombre effect, while toothpicks can be utilized for fine detailing. By looking around your kitchen, you can easily access tools that enhance your nail artistry without spending a dime.

Crafting Tools and Their Uses

Below, you’ll discover that various crafting tools can elevate your nail art skills significantly. Items such as paintbrushes, dotting tools, and scissors can create intricate designs that showcase your artistic side. Craft paint and nail tape can also be utilized to achieve sharp lines and fun embellishments, adding that professional touch you desire. The beauty of using crafting tools is that they are readily available, and with just a bit of creativity, they can make your nail designs stand out.

At home, you likely have an assortment of crafting tools that can be repurposed for nail art. For example, paintbrushes can be used for detailed line work, while dotting tools are perfect for creating polka dots or intricate designs. Additionally, craft scissors can assist in achieving clean edges when working with tape or stickers, while old makeup sponges can help you blend colors seamlessly. By utilizing these tools creatively, you can experiment with various techniques to enhance your nail art projects effectively.

Techniques for Nail Art with Household Items

Clearly, you can unleash your creativity by using various techniques for nail art with household items. From using a simple toothpick to create intricate designs to utilizing tape for crisp lines, the options are limitless. If you’re unsure where to begin, check out Where to start with DIY nail art? : r/RedditLaqueristas for some inspiration and tips!

Stamping and Printing Methods

Above all, stamping and printing methods can create stunning designs on your nails effortlessly. You can use everyday items like sponge applicators or kitchen sponges to apply polishes and create eye-catching patterns. By experimenting with different objects around your home, you’ll achieve unique looks that stand out.

Creating Patterns and Designs

About your patterns and designs, there are several innovative techniques to explore. Using brushes, dots, or even straws can help you achieve various effects and textures that elevate your nail art game.

It’s beneficial to practice creating patterns with objects like old toothbrushes, forks, or even the ends of your makeup brushes. Each household item can offer a different texture and look, allowing you to explore your artistic side. Experimenting with various colors and layering techniques will inspire you to develop a unique style that reflects your personality and taste.

Safety and Precautions

Despite the fun of experimenting with nail art, it’s important to prioritize safety and precautions. Always keep your workspace clean and ensure proper ventilation when using any household materials. For ideas on getting started, check out 8 nail art designs you can DIY at home with limited tools … to inspire your creativity without compromising safety.

Ensuring Non-Toxic Materials

The materials you use for nail art should be non-toxic and safe for your skin. Look for products that are labeled as free from harmful chemicals. Common household items such as food coloring, hand sanitizer, and vinegar can often serve as effective alternatives to commercial nail art supplies.

Avoiding Skin Reactions

The potential for skin reactions should always be taken seriously. Pay close attention to how your skin reacts to various materials, especially if you have sensitive skin or allergies. Always perform a patch test on a small area before applying any item directly to your nails or cuticles. If you notice any irritation, discontinue use immediately.

Skin reactions can range from mild redness and irritations to allergic responses. It’s wise to avoid using items like glue, paint, or chemicals not meant for nail use. Always assume that any material could cause a reaction, especially if you are trying something new. Being cautious can help you enjoy your DIY nail art experience without any discomfort.

Tips for Successful Nail Art

Now, to elevate your nail art game, keep these tips in mind:

  • Start with a clean canvas – ensure your nails are dry and free from polish.
  • Use thin layers of polish for better control and quicker drying.
  • Experiment with different household items to create unique designs.
  • Be patient and allow each layer to dry properly.

Recognizing the importance of practice will help you improve your skills over time.

Preparing Your Nails

Any successful nail art starts with proper nail preparation. Clean your nails thoroughly, shape them to your desired length, and push back cuticles for a polished look. It’s vital to apply a base coat to shield your nails from staining and to create a smooth surface for the art.

Finishing Touches and Top Coats

Before showcasing your beautiful designs, finish with a top coat to seal in your artwork. This step adds shine and helps prevent chipping, ensuring your nail art looks fresh for longer.

Another important aspect of finishing touches is the careful application of your top coat. Use smooth, even strokes to avoid disturbing your design. This clear coat not only enhances the shine but also provides a protective layer, allowing your creativity to stand the test of time. Additionally, consider using a quick-dry top coat if you’re in a hurry; it will help speed up the final drying process without sacrificing quality.

Creative Ideas and Inspiration

Your journey into household nail art can be both fun and fulfilling. Explore everyday items—like coffee filters for a tie-dye effect, or scotch tape for geometric patterns—to unleash your imagination. The possibilities are endless; from simple polka dots to intricate designs, let your creativity shine through. Plus, don’t hesitate to mix and match techniques for a truly unique look that reflects your personal style.

Seasonal and Themed Designs

Against the backdrop of each season, you can create stunning themed nail designs using items from home. For instance, in autumn, leaves can inspire warm color palettes, while winter can evoke thoughts of snowflakes and icy blue hues. By incorporating these elements, your nails can embody the spirit of each holiday or celebration, making your artistic expression timely and relevant.

Social Media Trends

Seasonal nail art often finds inspiration from trending designs across platforms like Instagram and TikTok. Creative influencers showcase innovative techniques that can spark your imagination. By keeping an eye on these trends, you can not only stay relevant but also make use of household items to replicate popular styles.

Social media’s influence on nail art trends encourages you to engage with a community of enthusiasts and experiment with viral designs. You can find tutorials on how to create vibrant ombre effects with kitchen sponges or patterned prints with plastic wrap. By participating in these trends, you not only enhance your skills but also connect your creations with a broader audience. Whether you’re trying out the latest nail hacks or sharing your own, social media platforms are a valuable resource for inspiration and ideas.

Final Words

With these considerations in mind, you can effectively create stunning nail art using everyday household items. Explore your creativity by utilizing tools like toothbrushes, sponges, or even plastic wrap to achieve unique designs. Experimenting at home allows you to personalize your nail art without the need for expensive supplies. By using common objects, you not only save money but also embrace a fun, DIY approach to beauty. So gather your household items and transform your nails into a canvas for your artistic expression.

FAQ

Q: Can I really use household items for nail art?

A: Absolutely! Household items can be a fantastic resource for creating unique nail art. Items like toothpicks, sponges, tape, and even kitchen utensils can be utilized to achieve a variety of designs, from dots to stripes and more intricate patterns.

Q: What common household items are best for making nail art?

A: Some of the best household items for nail art include:
– Toothpicks: Perfect for detailed designs or dotting.
– Sponges: Great for creating gradient effects.
– Tape: Helps in making clean lines or geometric designs.
– Old makeup brushes: Useful for painting techniques or adding finesse.
– Paper clips: Can be bent into various shapes for unique nail decorations.

Q: How can I clean up after using household items for nail art?

A: Cleaning up after your DIY nail art is easy. For items like sponges or brushes, simply wash them with soap and water. For sticky tape residue, a bit of nail polish remover applied to a cotton ball can help clean surfaces. Always ensure to work on a covered surface to make cleanup simpler.

Q: Are the designs made with household items durable?

A: The durability of nail art using household items largely depends on the type of nail polish used, as well as the top coat application. Using high-quality nail polish and a strong top coat will help your designs last longer, regardless of whether you used professional tools or everyday items.

Q: Can I create intricate designs with household items?

A: Yes, you can create intricate designs with household items! While it may take a bit more practice and creativity, you can achieve complex patterns using tools like toothpicks for detail work or sponges for textured backgrounds. The key is being patient and experimenting with different techniques to find what works best for your style.

I Tried the Viral Nail Hack – Here’s What Happened

Viral trends come and go, but when you discover a nail hack that promises to revolutionize your manicure game, it’s hard to resist. You may have heard about the buzz surrounding I Tried the Viral TikTok French Manicure Stamp Hack, and you might be wondering if it lives up to the hype. In this post, I’ll share my personal experience with this trending technique and reveal whether it truly delivers flawless results or falls short of expectations.

Key Takeaways:

  • Effectiveness: The viral nail hack demonstrated varying results depending on individual nail types.
  • Technique: Proper technique is imperative for achieving the desired outcome; even small mistakes can lead to less satisfying results.
  • Durability: The longevity of the finished look may not match expectations, with some users experiencing quicker wear than anticipated.

The Viral Nail Hack Explained

To achieve flawless nails without the hassle of traditional methods, the viral nail hack has gained immense popularity on social media. This innovative technique claims to streamline the nail application process while delivering salon-quality results right at home. With a few simple steps and readily available materials, you can elevate your nail game and impress your friends with your new skills.

Origin of the Hack

Explained by nail enthusiasts and beauty influencers, the viral nail hack first surfaced on platforms like TikTok and Instagram. It quickly captured attention, as users shared time-lapse videos showcasing the simplicity and effectiveness of the technique. As more people tried and tested it, the buzz around this hack grew, turning it into a must-try for anyone passionate about nail art.

Materials Required

Hack your way to beautiful nails with a few straightforward materials you likely already have at home. To begin, gather your preferred nail polish, a sponge for blending the colors, and a topcoat to seal the design. You may also want to have a few cotton swabs on hand for corrections and a base coat to ensure your polished look lasts longer. By having these imperatives ready, you can efficiently recreate the viral nail hack and impress everyone with your newfound skills.

Step-by-Step Process

If you’re ready to give the viral nail hack a try, follow this detailed step-by-step guide. It simplifies the procedure and ensures you can achieve salon-worthy results at home.

Process Overview

StepDescription
1Prepare your nails
2Gather your materials
3Apply the base coat
4Apply the viral hack technique
5Finish with a top coat

Preparation of Nails

Nails should be clean, dry, and free from any old polish. Start by removing any existing nail polish and buffing the surface for better adhesion. Trim and shape your nails to your desired length before moving on to the next steps.

Application Technique

Above all, the application technique plays a significant role in the success of the nail hack. Utilize a precise method to ensure an even coverage and avoid messiness during the process.

Process your materials calmly. Ensure that you apply thin, controlled layers of product to avoid bubbles and streaks. This includes ensuring that each layer is fully dry before applying the next. Properly following this technique will lead to impressive, long-lasting results that can be the highlight of your nail game.

A Day in the Life with the Hack

Not every day is created equal, especially when you incorporate a viral nail hack into your routine. From typing on your computer to tapping your phone, you’ll notice the changes immediately. The initial excitement of having fashionable nails can quickly shift into practicality as you navigate daily tasks. By the end of the day, it’s vital to evaluate how well the hack holds up under pressure and whether it enhances or hinders your activity.

Durability and Wear

Wear will ultimately determine the longevity of your nails after trying this hack. You may find that while they look fabulous initially, daily activities such as dishwashing or typing can take a toll. Over the course of the day, you should keep an eye out for chips or any signs of lifting that might suggest the hack isn’t as durable as advertised. By the end of your day, you’ll have a clear understanding of how well this hack stands the test of everyday life.

Comfort and Feel

Along with durability, comfort plays a significant role in your experience with this nail hack. You might be surprised to discover that the new addition feels both natural and light, allowing you to go about your tasks without feeling burdened. However, this may vary depending on how you apply the technique and the materials used. It’s worth noticing whether your nail beds feel irritated or if the weight of the additions is manageable throughout the day.

Indeed, finding a balance between aesthetics and comfort is vital for your overall satisfaction with the nail hack. At times, you may forget you’re even wearing enhancements, feeling like they blend seamlessly with your natural nails. Pay attention to how your nails react as the day progresses; if discomfort starts to creep in, it may indicate that the hack needs some adjustments. Ultimately, your comfort will play a significant role in whether you continue to use this hack in the future.

Visual Results

Despite the mixed reviews online, I was curious to see the tangible results of the viral nail hack. Watching how it transformed my nails was both exciting and nerve-wracking. The before and after images told a compelling story of improvement, showcasing a striking difference that was hard to ignore.

Before and After

At the start, my nails were in dire need of attention, lacking shine and vibrancy. After implementing the nail hack, the transformation was evident, leaving my nails looking healthier and more polished.

Comparison with Traditional Methods

To better assess the effectiveness, here’s a breakdown comparing the nail hack with traditional methods of nail care:

Comparison of Nail Care Methods

Nail HackTraditional Methods
Quick application timeTime-consuming processes
Less product neededMultiple products required
Instant gratificationGradual results over time

But while the nail hack may offer quicker results, it’s important to weigh your options. Traditional methods often provide a more thorough approach to nail health, including conditioning and strengthening treatments that may not be part of a shortcut. Both techniques have their merits, but your choice should reflect your goals for nail care and the importance of long-term health versus immediate appearance.

Common Issues Encountered

After trying the viral nail hack, you may encounter several common issues that can affect your experience. Many users report problems such as uneven application, air bubbles, and peeling. These can lead to a less-than-perfect finish, detracting from the overall appeal of your nails. Understanding these potential pitfalls can help you navigate the process more smoothly and achieve the desired results.

Mistakes to Avoid

Common mistakes when attempting this nail hack include rushing through the application, using too much product, or not preparing your nails properly. To ensure a successful outcome, take your time, follow the techniques demonstrated in the tutorial, and make sure your nails are clean and dry before you begin.

Troubleshooting Tips

Issues that arise when using the nail hack can often be resolved with a few troubleshooting tips. You should consider these approaches to improve your results:

  • Ensure proper prep by cleaning and buffing your nails.
  • Use a thin, even layer of the product to avoid lumps.
  • Allow each layer to dry adequately before applying the next.

Assume that your environment, like humidity and temperature, can also impact your nail results. Thus, it’s wise to work in a controlled space for better adherence and drying.

At times, persistent issues might require you to reassess your approach. To fine-tune your technique, consider these additional troubleshooting tips:

  • Experiment with different brands of nail products for optimal results.
  • Check your application tool’s condition; it should not be worn out.
  • Test out your drying time; extending it can yield better results.

Assume that with patience and experimentation, you’ll refine your technique over time, leading to beautiful nails that turn heads.

Expert Opinions

Once again, the viral nail hack has drawn the attention of industry experts who emphasize the importance of checking the practicality and safety of such tricks before trying them at home. Their insights highlight potential pitfalls and the long-term effects of using unconventional methods on your nails. While you may be tempted to follow trends, professional advice can guide you towards healthier choices that protect your nail integrity.

Nail Technicians’ Insights

Among the most common concerns nail technicians express about viral hacks is the risk of damaging your natural nails. They caution that shortcuts may offer temporary results but can lead to long-term issues. Technicians often suggest considering professional services for complex designs or techniques, ensuring you avoid unnecessary harm.

Dermatologist Tips

On the other hand, dermatologists weigh in with crucial advice to help you maintain healthy nails. They emphasize understanding the differences between nail products and ensuring that your choices don’t compromise your nail health. Common tips include:

  • Choose nail products free from harsh chemicals.
  • Moisturize your nails and cuticles regularly.
  • Limit the use of fake nails and adhesives.
  • Consult a professional if you notice any irritation.

Thou must prioritize your skin’s well-being as well, as unhealthy nails can often indicate underlying skin issues.

Even dermatologists stress the importance of recognizing when a nail hack may lead to adverse effects on your skin or nails. They encourage an informed approach to any beauty trend to prevent complications. Here are additional suggestions to promote nail health:

  • Avoid excessive filing or buffing of your nails.
  • Incorporate a balanced diet to support nail growth.
  • Pay attention to changes in your nails, as they may signal health concerns.
  • Be cautious with the use of acetone-based removers.

Thou shouldn’t ignore any warnings from professionals—your nails deserve the best care.

Final Words

Ultimately, trying the viral nail hack can be an eye-opening experience that offers both benefits and challenges. You may find it enhances your nail art game or leads to unexpected results. By understanding the technique, you can adjust your approach to better fit your needs. Whether you love it or decide to skip it next time, your nails will always reflect your personal style. Stay curious and keep experimenting to discover what works best for you!

FAQ

Q: What is the viral nail hack about?

A: The viral nail hack involves using common household items to achieve a perfect nail design or to improve the longevity of nail polish. It typically showcases techniques like using tape for clean lines or using a specific brand of topcoat to extend wear time.

Q: Did the nail hack actually work?

A: In my experience, the nail hack provided some effective results. The techniques I applied helped improve the look of my nails and allowed for clearer lines. However, the effectiveness can vary based on individual nail types and products used.

Q: Are there any risks associated with trying the nail hack?

A: Most of the techniques seen in viral nail hacks are safe for use. However, it’s always wise to perform a patch test with any new products to avoid allergic reactions. Additionally, using tools improperly can lead to nail damage, so it’s important to follow instructions carefully.

Q: How long did the results last after trying the hack?

A: The results varied, but I found that using the recommended topcoat helped my nail design last longer than usual—approximately a week before seeing significant chipping. Regular maintenance and touch-ups can prolong the manicure even further.

Q: Can I adapt the nail hack to different designs?

A: Absolutely! The beauty of nail hacks is their versatility. You can adapt the techniques to suit any nail design you desire, whether it’s creating ombre effects, nail art, or simply achieving a sleek gel-like finish. Personalizing the hack can lead to unique and creative results!

How to Recreate Celebrity Nail Looks at Home

Most people admire the stunning nail designs sported by their favorite celebrities but feel that achieving those looks at home is daunting. You don’t need to be a professional nail artist to master these trendy styles; all you need is the right tools, techniques, and a bit of creativity. This guide will help you break down popular celebrity nail looks and provide step-by-step instructions to recreate them effortlessly. Get ready to bring a touch of Hollywood glamour to your fingertips without stepping foot in a salon!

Key Takeaways:

  • Research your favorite celebrity nail designs by browsing social media platforms like Instagram and Pinterest, as many celebrities share their manicure looks online.
  • Gather tools, such as high-quality nail polish, nail art brushes, dotting tools, and decals to achieve the desired look, ensuring you invest in the right materials for a salon-quality finish.
  • Practice your application technique by experimenting with different styles and designs at home, which will help you build confidence and improve your skills over time.

Essential Tools and Products

A variety of tools and products can help you recreate stunning celebrity nail looks in the comfort of your home. Start with a solid foundation by investing in quality nail polishes, crucial grooming tools, and nail art supplies. With the right items on hand, you’ll be able to achieve salon-worthy designs that elevate your manicure game and make you feel fabulous.

Nail Care Basics

Among the first steps in achieving a celebrity-inspired manicure is proper nail care. Ensure your nails are clean and trimmed, and consider using a nourishing cuticle oil to keep your cuticles healthy. Regularly exfoliating and moisturizing your hands will enhance the overall appearance of your nails, giving them that flawless look that celebs often flaunt.

Must-Have Nail Art Supplies

By stocking your beauty arsenal with crucial nail art supplies, you can easily create intricate designs that wow. These may include nail brushes, dotting tools, striping tape, and nail decals. With a well-curated collection, you’ll be equipped to experiment and elevate your nail art skills while recreating looks inspired by your favorite stars.

At the heart of nail art creativity is the right set of must-have supplies. Nail brushes allow you to create detailed designs, while dotting tools help you achieve perfect polka dots and intricate patterns. Striping tape can be invaluable for precise lines, and nail decals provide an easy way to add flair without the need for advanced techniques. With these tools at your disposal, you’ll feel empowered to bring celebrity nail looks to life in your very own home manicure routine.

Popular Celebrity Nail Looks

Clearly, celebrity nail looks often set trends that many aspire to replicate. From stylish patterns to eye-catching colors, these designs inspire creativity and personal expression in your nail care routine. Whether you’re aiming for glam or something more understated, there’s a multitude of iconic styles that you can easily recreate at home. With the right products and techniques, you can bring a touch of celebrity flair to your fingertips.

Iconic Styles to Emulate

Nail art has reached new heights with celebrities showcasing stunning designs that capture attention. From the timeless elegance of a classic red manicure to the bold sophistication of geometric patterns, you can draw inspiration from the styles worn by stars like Zendaya and Kylie Jenner. Emulate these iconic looks by selecting a signature color and implementing unique accents that reflect your personality, combining a touch of celebrity glam with your own twist.

Seasonal Trends from the Stars

Below, the seasonal nail trends set by celebrities can help you choose your next manicure idea, keeping your nails fashionable all year round. From vibrant summer hues to warm autumn shades, each season brings fresh opportunities to express yourself through nail art. Paying attention to what your favorite stars are wearing can guide you in selecting colors and designs that perfectly match the season’s vibe.

Even more exciting, many celebrities collaborate with nail brands to release seasonal collections that showcase trendy colors and exclusive designs. By following these trends, you can elevate your nail game and stay in sync with what’s hot. Whether it’s pastel shades for spring or dark, moody tones for fall, incorporating elements from your favorite celebrity trends allows you to keep your nails on point while expressing your unique style.

Step-by-Step Guides for DIY

Not all celebrity nail looks are out of reach! With the right techniques, you can recreate these stunning designs at home. Here’s a simplified breakdown to guide you through each style:

Nail LookSteps to Recreate
Ombre Effect1. Apply a base coat. 2. Use a makeup sponge and two polish colors. 3. Dab onto nails. 4. Seal with topcoat.
Marble Nails1. Apply a base coat. 2. Drop polish colors in water. 3. Swirl with a toothpick. 4. Dip your nail. 5. Topcoat.

Technique for Each Look

At each step, focus on achieving even coverage and precision. For the ombre effect, use a light hand when applying polish with the sponge for a seamless blend. In the marble technique, be quick while swirling in the water—practice makes perfect!

Tips for Flawless Application

By paying attention to details, you can elevate your nail game. Here are some crucial tips for flawless application:

  • Always start with a clean nail surface.
  • Use a base coat to protect your nails.
  • Layer polishes gradually for a smoother finish.

This can make a noticeable difference in the longevity of your manicure.

And to further enhance your skills, keep in mind these pointers:

  • Invest in quality tools for precision.
  • Allow each layer to dry completely.
  • Practice on a disposable nail wheel for technique.

This will help boost your confidence and refine your application skills.

Color Theory and Nail Health

Keep in mind that understanding color theory can elevate your nail game while ensuring the health of your nails. The right shades can complement your skin tone and enhance your overall appearance. Additionally, choosing high-quality, non-toxic polishes can prevent nail damage, allowing you to flaunt your favorite celebrity-inspired looks without compromising the integrity of your nails.

Choosing the Right Shades

Among the plethora of shades available, it’s crucial to find those that not only reflect current trends but also harmonize with your complexion. Warmer skin tones often look stunning with earthy tones and yellows, whereas cooler skin tones might shine in jewel tones and metallics. Take time to experiment and find hues that make your nails pop and feel uniquely yours.

Nail Care for Longevity

Behind every stunning nail look is a commitment to proper nail care and maintenance. This includes regular moisturizing, hydration, and the occasional break from polish to prevent brittleness. Implementing a routine that includes cuticle oil and nail strengtheners can also significantly enhance the durability of your nail art.

Hence, prioritizing your nail care routine is key to achieving longevity in both your nail health and your stunning celebrity-inspired designs. Incorporate practices like avoiding overly aggressive filing and using gloves during household chores to minimize damage. By giving your nails the attention they deserve, you can ensure that they’re not just a canvas for beautiful colors but remain strong and healthy for all your nail art needs.

Common Mistakes to Avoid

For a flawless nail recreation, steer clear of common mistakes that can sabotage your efforts. Poor preparation, skipping base coats, and rushing through the process can lead to unsatisfactory results. Check out this guide on CELEBRITY NAIL STRIP LOOK TO RECREATE AT HOME for helpful tips and tricks to get it right.

Application Errors

Across the nail art community, application errors are often the biggest hurdle. You may apply products too thickly, forget to properly prep your nails, or overlook the importance of curing time for gel nails. These blunders can lead to chips, peeling, and uneven finishes, making it difficult to achieve that celebrity look.

Maintenance Gone Wrong

Mistakes in nail maintenance can severely impact the longevity of your at-home manicure. Neglecting regular upkeep—such as moisturizing your cuticles and avoiding harsh chemicals—can cause your nails to weaken and your polish to chip. Ensuring you have consistent care routines not only enhances the appearance of your nails but also keeps them healthy.

Further, your nail health directly influences how long your nail art will last. Monitor your nails for signs of breakage or wear, as these can ruin the overall look. Engaging in regular habit, such as applying cuticle oil and choosing gentle cleansers, will help maintain your nails and keep your designs looking fresh. With proper care, you can enjoy your recreated celebrity nail looks for longer.

Customizing Looks to Fit Your Style

After you’ve found inspiration from your favorite celebrity nail looks, it’s time to make those designs your own. Tailor the colors and shapes to reflect your style, whether that means opting for bolder hues or a more minimalist approach. Consider your lifestyle and how much maintenance you’re willing to commit to, allowing you to create a unique nail design that not only looks great but also fits your personality and daily routine.

Personalizing Celebrity Designs

On your journey to customizing celebrity nail designs, take a moment to analyze the elements you love most. Whether it’s the color palette, nail shape, or embellishments, use these features as a base. Feel free to swap out colors or add your favorite patterns—after all, it’s your nails that should shine!

Experimenting with Nail Art

Beside customizing celebrity designs, you can explore nail art as a fun and creative way to express yourself. Consider incorporating different techniques, such as ombré, marbling, or even simple dot patterns, to enhance your nail look. 

Even if you’re new to nail art, practicing on a few practice nails can help you build confidence in your skills. Look online for tutorials or step-by-step guides that match your selected design. Don’t shy away from mixing and matching techniques; blending styles can lead to stunning results. Use different tools like dotting tools or brushes to create unique textures and effects. Let your imagination run wild, and you’ll soon discover that your nails can become a canvas for your creativity.

Final Words

Hence, you can effortlessly recreate stunning celebrity nail looks at home with the right tools, techniques, and inspiration. Explore various styles, gather the necessary materials, and don’t hesitate to experiment with colors and designs that resonate with your personal style. For some fresh ideas, check out this resource for 10 Celebrity Nail Looks You Can Recreate at Home featuring trendy spring nails. Enjoy the creative process, and let your nails be a canvas for your unique expression!

FAQ

Q: What tools and materials do I need to recreate celebrity nail looks at home?

A: To recreate celebrity nail looks, you will need a few important tools and materials. Start with a good quality nail file, cuticle pusher, and buffer to prep your nails. Invest in a base coat and a top coat for longevity and shine. You will also need nail polish in the colors of your choice, nail art brushes, dotting tools, and potentially nail stickers or gems for embellishments. A UV lamp is necessary if you are using gel polish. Having a clean workspace and some cotton swabs or pads with nail polish remover will also help tidy up any mistakes.

Q: How can I find the right nail design inspired by a celebrity?

A: To find the right nail design inspired by a celebrity, browse social media platforms like Instagram and Pinterest where many celebrities showcase their nail art. You can also check beauty magazines or follow nail art blogs that feature celebrity designs. Once you find a look you love, save a photo as a reference. Pay attention to the color palette and the techniques used, such as ombre, negative space, or intricate nail art, so you can replicate it effectively.

Q: Are there any specific techniques for replicating intricate nail designs?

A: Yes, replicating intricate nail designs requires some specific techniques. For detailed designs, start with a solid base coat. Use nail art brushes for fine details and line work, as these will give you more control. Dotting tools are excellent for creating dots and small patterns. If you are trying a stamp design, a nail stamping kit can provide various patterns and images effortlessly. Practice on a piece of paper or a nail wheel before applying it to your nails to build confidence in your technique.

Q: How do I ensure my nail designs last longer?

A: To ensure your nail designs last longer, start with a clean nail surface free from oils or old polish. Apply a high-quality base coat to protect your nails. Use two thin layers of color polish rather than one thick layer, as this helps prevent chipping. After applying your design, seal it with a top coat to enhance shine and durability. Lastly, try to avoid exposure to harsh chemicals or excessive water, as this can weaken the polish and cause it to chip.

Q: What troubleshooting tips can I follow if my nail art doesn’t turn out as expected?

A: If your nail art doesn’t turn out as expected, there are several troubleshooting tips you can follow. Firstly, if your polish is streaky, ensure you are using thin layers and allowing each layer to dry completely before adding another. If your designs smear or smudge, consider using quick-drying top coats. If you make a mistake, a small brush dipped in nail polish remover can clean up the edges for a more polished look. Finally, don’t get discouraged; some designs take practice, so give yourself the grace to experiment and improve over time!

Skip to content