Inails Near Me Global

Nail Art for Special Occasions

Most people desire to stand out during special occasions, and nail art is one of the most expressive ways to achieve this. Whether you’re preparing for a wedding, birthday, or any significant event, enhancing your nails can elevate your entire look. In this post, you’ll discover various nail art ideas tailored for different occasions, along with tips on how to choose the best designs that reflect your style. Get ready to sparkle with creativity and leave a lasting impression!

Key Takeaways:

  • Design Variety: Explore a wide range of themes and techniques suitable for different special occasions such as weddings, birthdays, and holidays.
  • Personalization: Incorporate unique elements that reflect the individual’s personality or the event’s theme, making the nail art more meaningful.
  • Quality Products: Use high-quality nail products to ensure durability and a professional finish that lasts through the event.

Choosing the Right Nail Art for Different Occasions

Your choice of nail art can significantly enhance your overall look for any special occasion. Understanding the nature of the event and your personal style are key to selecting the perfect design. Whether it’s an elegant wedding or a festive birthday party, there’s a myriad of options available to express your personality while complementing your outfit.
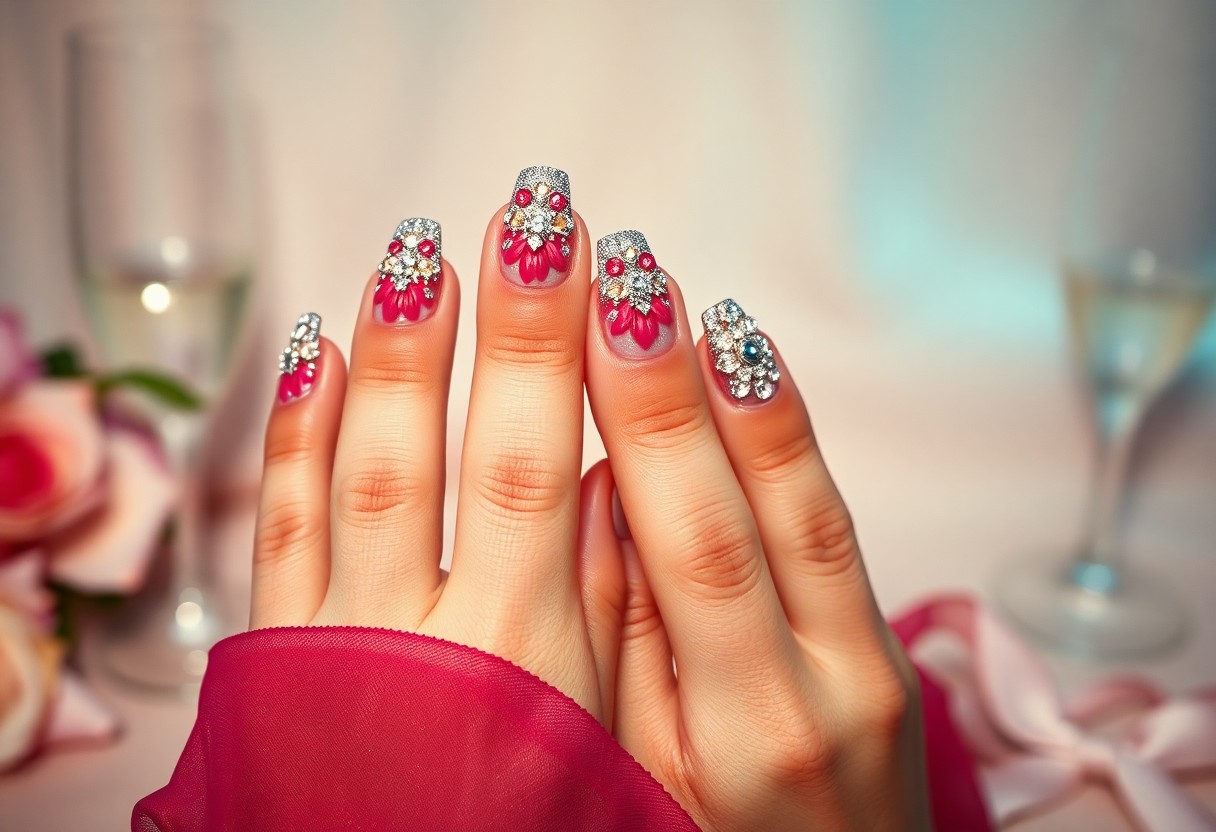
Weddings

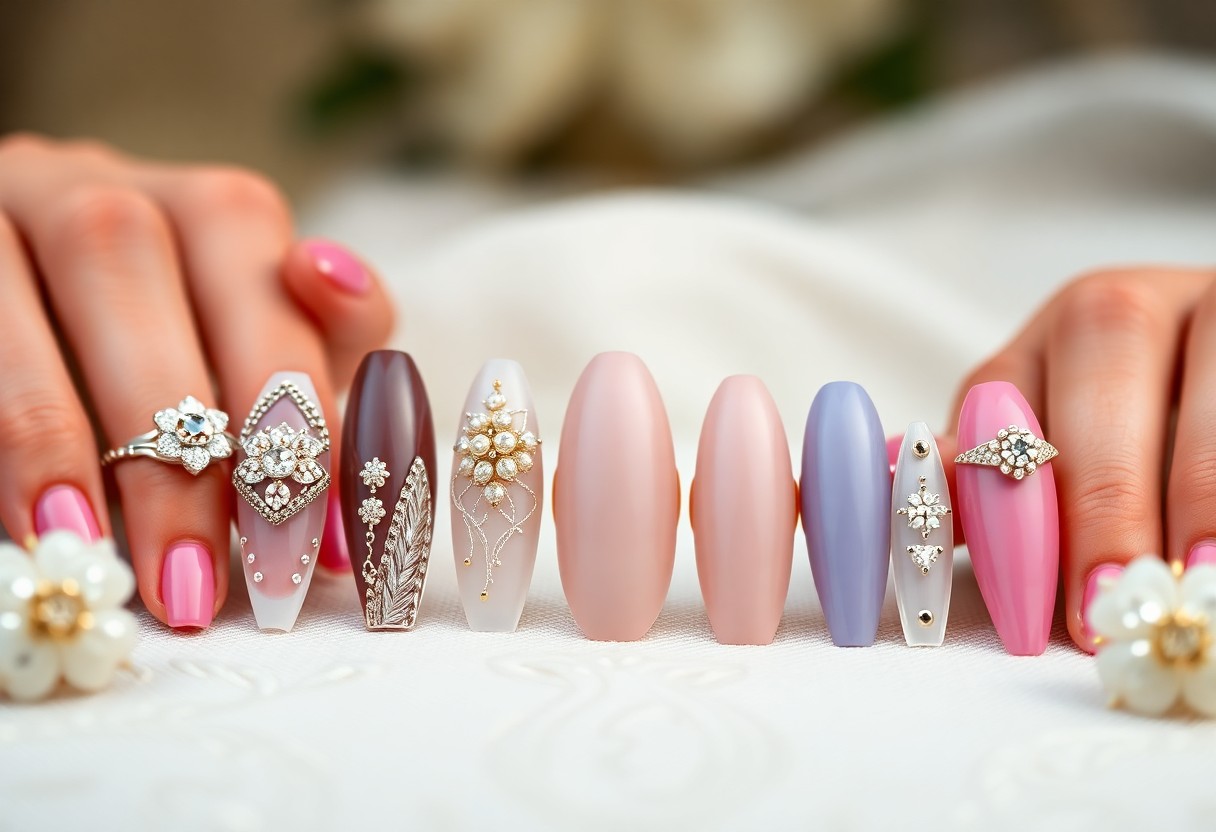
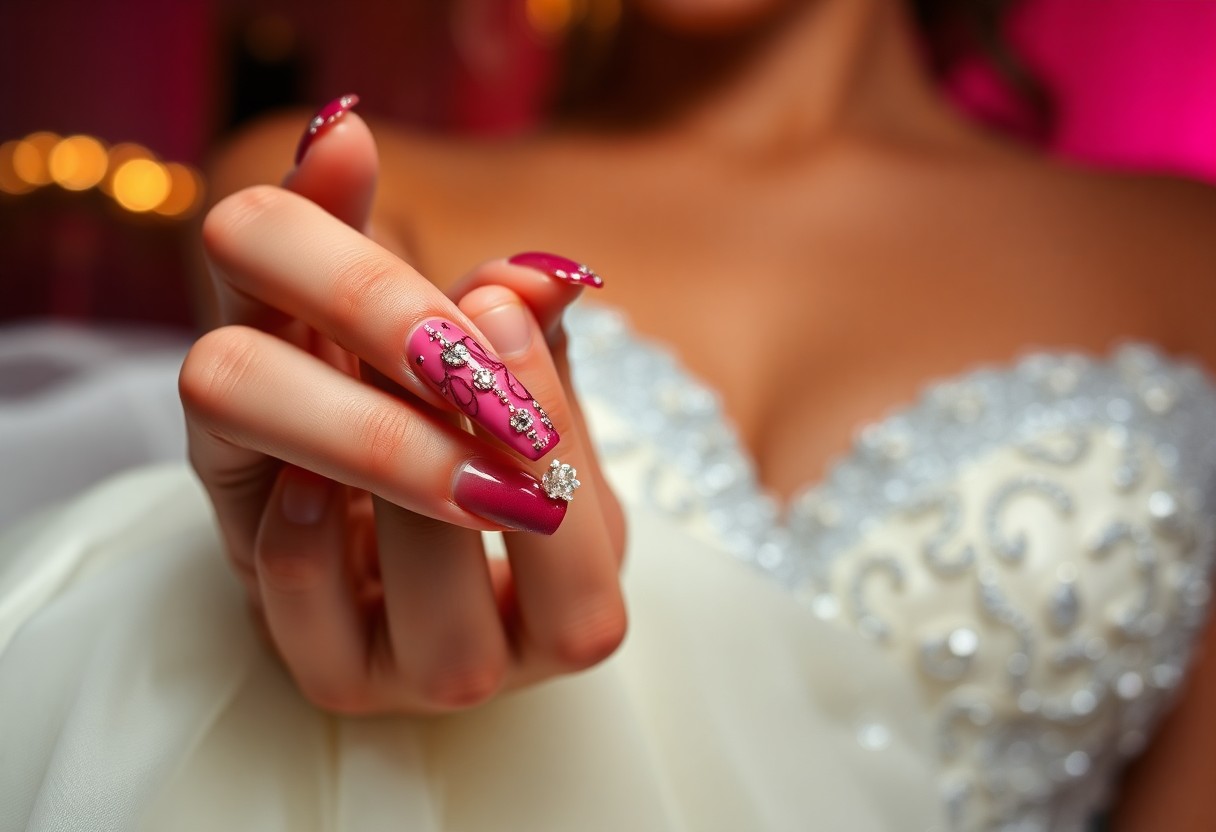
Around weddings, elegant and timeless nail art is often favored to complement the bridal look. Soft pastels, classic whites, or delicate nudes adorned with subtle lace or pearl designs can elevate your style without stealing the spotlight. Consider your attire and the bridal color palette to ensure harmony on this special day.

Birthdays

To celebrate birthdays, vibrant and playful nail art can add joy to your festivities. Fun colors, sparkles, or whimsical patterns can reflect your personality and excitement for the occasion.

Also, think about incorporating elements that represent your age or theme of your party, such as balloons for a fun twist or a glitter accent for a touch of glam. Nail art stickers and decals can also provide quick and easy festive touches, so don’t hesitate to experiment with creative designs that showcase your individuality throughout the celebration.

Formal Events

On formal event nights, sleek designs are often preferred to match sophisticated attire. Neutral shades, geometrical shapes, or minimalist nail art bring a tasteful elegance, helping you maintain a polished look.

But if you want to make a statement, consider adding a tiny accent nail adorned with metallic foils or small rhinestones. Such accents can subtly enhance your ensemble, giving you a memorable flair while still respecting the event’s formal atmosphere.

Holidays

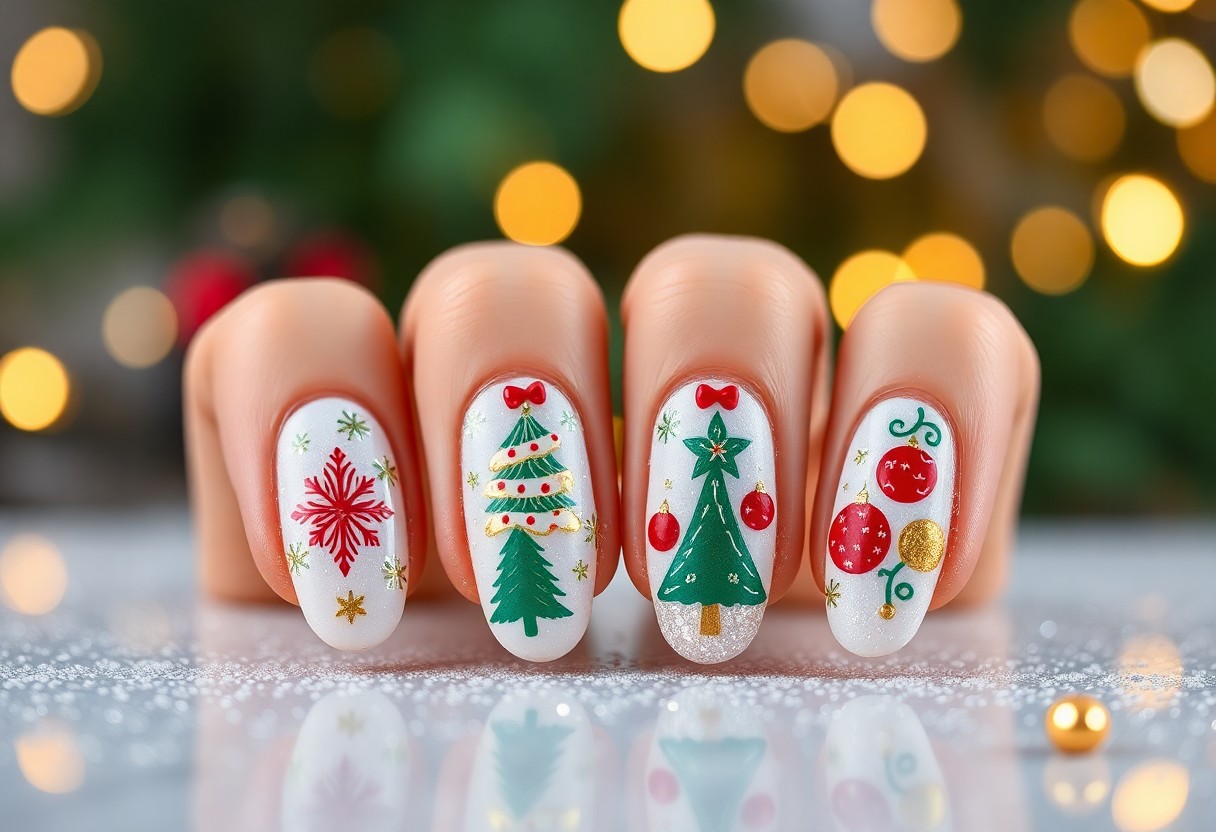
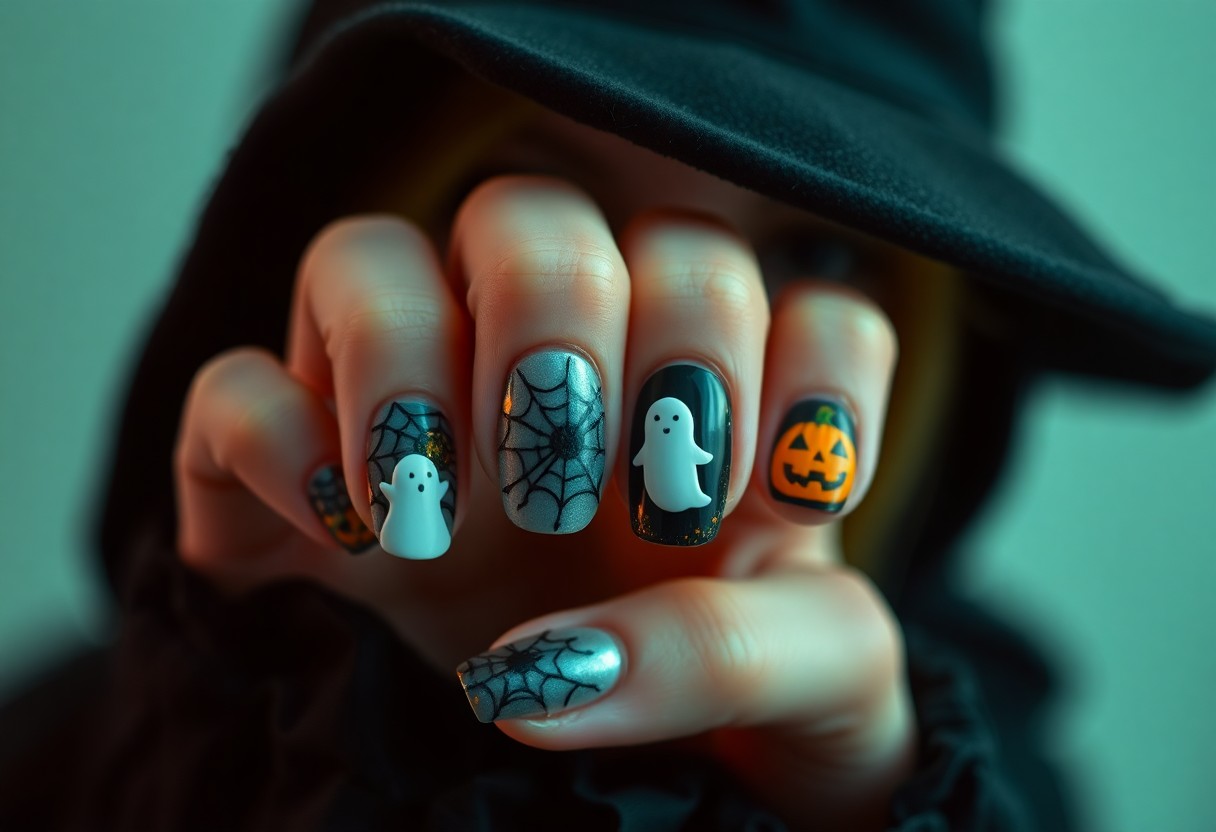
Between festive gatherings, holiday-themed nail art can capture the spirit of the season. Think about incorporating seasonal colors and motifs, like snowflakes for winter or vibrant hues for summer festivities.

With the endless options available, let your creativity shine through your nails. You can choose various techniques like nail stamping or hand-painted designs to represent holiday cheer, making your unmissable flair a conversation starter at any celebration. Embrace the spirit by pairing seasonal designs with your outfits for a cohesive look throughout the holidays.

Popular Nail Art Techniques

Some of the most popular nail art techniques include gel nails, acrylics, and nail stickers or wraps. Each method offers unique benefits and styles, allowing you to express your creativity and enhance your look for special occasions. Understanding these techniques will help you choose the best option for your needs.

Gel Nails

Above all, gel nails provide a durable and glossy finish that can last for weeks without chipping. This technique involves applying a gel polish that cures under UV or LED light, ensuring a long-lasting and vibrant look for your nails. You can achieve a variety of designs, from intricate patterns to simple solid colors, making them ideal for any special event.

Acrylics

Techniques for acrylic nails involve creating a durable extension using a combination of liquid monomer and powder polymer. This method provides a sturdy base that allows for various nail shapes and lengths, perfect for achieving stunning nail art designs. Whether you opt for classic French tips or bold, colorful designs, acrylics can withstand daily wear while maintaining their beauty.

This flexibility makes acrylic nails an excellent choice for those looking to experiment with intricate artwork or dazzling embellishments. Additionally, acrylics can also be easily filled or refilled, ensuring your breathtaking nail art remains stunning for a longer period. Transform your nails into a work of art that will turn heads at any event.

Nail Stickers and Wraps

Nail stickers and wraps offer an effortless solution for achieving stylish nails without the complexity of traditional techniques. With a wide variety of designs and patterns available, you can easily apply them at home to elevate your manicure in minutes. Perfect for last-minute occasions, these options provide instant glamour and creativity.

Further enhancing your nail art experience, nail stickers and wraps allow for quick customization without the need for extensive tools or skills. They adhere easily to your natural nails or acrylics, allowing you to switch up your look as often as you like. Take advantage of this versatile option to keep your nails looking fresh and fashionable for any special occasion!

Color Schemes and Themes

Keep in mind that choosing the right color scheme and theme is important for making your nail art stand out on special occasions. Whether you prefer timeless elegance or a modern twist, your choice can set the mood for the event. Consider the outfit you’ll wear and the overall aesthetic you wish to convey, allowing your nails to complement your personal style and the occasion.

Classic Colors for Elegance

For a sophisticated look, opt for classic colors like deep reds, soft pinks, or elegant nudes. These hues exude refinement and can be paired effortlessly with any outfit. Classic colors not only enhance your nails’ beauty but also reflect a sense of grace that never goes out of style. You can even add subtle nail art details, such as delicate lines or tiny gems, to elevate the elegance further.

Bold and Trendy Choices

At the forefront of nail art, bold and trendy colors like electric blue, vibrant orange, or striking metallics allow you to make a statement. These colors can provide a fun pop that captures attention and enhances your overall look. Don’t hesitate to explore options that defy convention; the bolder the choice, the more it can express your unique personality and mood.

It’s important to choose colors that not only reflect current trends but also resonate with your personal style. Combining different shades and finishes can allow you to create a standout design that speaks volumes about your creativity. Consider geometric patterns or ombre effects using these vibrant colors to further showcase your individuality and stylish flair at special occasions.

Seasonal Themes

One excellent way to express your creativity is through seasonal themes, which allow you to embrace the colors and motifs associated with each time of year. From bright pastels in spring to warm tones in autumn, aligning your nail art with the seasons can add a special touch to your look. You can incorporate seasonal symbols like snowflakes, blossoms, or leaves to create a cohesive theme that enhances your overall style.

Classic seasonal themes allow you to celebrate the unique beauty of every time of year. In spring, choose soft pastels and floral designs, while summer might invite vibrant neon colors or beach-inspired motifs. Autumn calls for earthy tones and chic leaf patterns, and winter can inspire festive designs with glitter and icy blues. Embracing these seasonal elements not only inspires creativity but ensures your nail art is always in harmony with the world around you.

DIY Nail Art Ideas

Once again, you can bring your creativity to life with DIY nail art that’s perfect for any special occasion. Whether you’re preparing for a wedding, a birthday, or just a night out, there are endless possibilities to express your personal style. With the right techniques and a little patience, you can create stunning designs right at home, making your nails an extension of your unique flair.

Simple Techniques for Home

At home, you can achieve beautiful nail art by using techniques like dotting, striping, or sponging. These simple methods don’t require any advanced skills but can transform a basic manicure into something spectacular. Start with a solid base color and experiment with patterns and textures to elevate your look.

Tools and Products Needed

Products you will need for your DIY nail art include a base coat, top coat, a selection of nail polishes, and some basic tools like dotting tools, nail brushes, and striping tape. Having these necessarys on hand allows you to explore various designs and techniques comfortably, ensuring every creation looks professional.

But investing in quality tools and products can significantly enhance your results. A good base coat not only protects your nails but also helps your artwork last longer. Nail brushes with different sizes can help you achieve intricate designs, while dotting tools can create beautiful polka dots and patterns. Don’t forget to have a quick-dry top coat handy to give your finished look a flawless shine!

Professional Nail Services

All special occasions deserve a touch of elegance, and professional nail services can elevate your look significantly. A skilled nail technician not only ensures high-quality application but also provides a variety of designs suited for any event, whether it’s a wedding, anniversary, or a gala. Investing in professional nail care allows you to enjoy lasting results and intricate art that might be difficult to achieve on your own.

Choosing a Nail Salon

For the best nail art experience, it’s necessary to choose the right nail salon. Start by researching local salons, reading reviews, and checking their portfolios to ensure they align with your style. Look for cleanliness, professionalism, and friendly staff to create a welcoming environment where you can comfortably express your preferences.

Communicating Your Vision

Your vision is the foundation of your nail art. Articulating what you want to your nail technician will ensure that the final look matches your expectations. Use images for inspiration and describe the elements that attract you, whether it’s color, patterns, or styles, enabling the technician to create a design that resonates with your taste.

For instance, if you’re aiming for a romantic look for a wedding, share images of soft pastels and delicate floral designs. Highlight your preferences for specific colors and any additional embellishments, like gems or glitter. Engaging in a dialogue about what you specifically like will empower the technician to bring your vision to life, ensuring that your nails complement your overall look for the occasion.

Maintenance and Care for Special Occasion Nails

To ensure your special occasion nails look fabulous for as long as possible, proper maintenance and care are crucial. You should handle your nails with care, avoiding any activities that may cause damage. Keeping your nails clean, moisturized, and protected will help maintain their vibrant appearance. Additionally, regular touch-ups can prevent any chips or wear, keeping your manicure looking fresh throughout your event.

Tips for Longevity

To prolong the life of your beautifully done nails, consider the following tips:

  • Avoid exposure to harsh chemicals and detergents.
  • Wear gloves when performing household chores.
  • Limit direct contact with water.
  • Apply top coat every few days for added durability.

This care routine will extend the beauty of your nails.

Aftercare Recommendations

Below are some important aftercare tips to keep your nails looking stunning after your special occasion. Post-event, your nails may need some extra TLC to ensure they remain healthy and flawless. Avoid removing any nail enhancements immediately after an event, as this can cause damage to your natural nails. Instead, gently soak your nails in warm soapy water before slowly removing them if necessary. Be sure to hydrate your cuticles using cuticle oil and avoid using your nails as tools to prevent any chips or breaks.

With these aftercare recommendations, your nails will not only remain beautiful longer but also promote healthy nail growth. Keeping your nails nourished will enhance their appearance and strength, helping you be ready for your next special occasion with just a little more preparation.

Conclusion

Summing up, when it comes to nail art for special occasions, you have countless options to enhance your look and express your personality. From elegant designs for weddings to vibrant patterns for parties, the right nail art can make a stunning statement. Explore creative inspirations and ideas to suit your celebration by visiting Wedding, party, special event nails – Pinterest. Let your nails be a bold reflection of your unique style and the significance of the event.

FAQ: Nail Art for Special Occasions

Q: What types of nail art are best suited for weddings?

A: For weddings, elegant and subtle designs often work best. Classic French manicures can be elevated with delicate lace designs or soft pastel colors. Additionally, nail art featuring small pearls, crystals, or minimalistic floral patterns can add a touch of sophistication without being overpowering.

Q: How can I choose nail art designs for my birthday party?

A: Birthday parties are the perfect opportunity to showcase vibrant and playful nail art. Consider designs that reflect your personality, favorite colors, or theme of the party. Options like confetti designs, glitter gradients, or holographic finishes can make your nails stand out. Don’t hesitate to experiment with bold patterns like geometric shapes or animal prints to express your fun side.

Q: What are some nail art ideas for formal events?

A: For formal events, it’s advisable to opt for more understated and chic nail art. Solid colors like deep reds, navy blues, or classic nudes are always elegant. You can add a subtle accent nail featuring minimalist designs such as a thin gold stripe or a delicate dot pattern, providing just the right amount of flair without overwhelming the overall look.

Q: How long should I allow for nail art preparation before a special event?

A: It’s recommended to book your nail art appointment at least 1-2 days prior to your special occasion. This allows time for any potential touch-ups and ensures that your nails look fresh and polished. If you prefer to do your own nail art, set aside a few hours the day before the event to avoid rushing and ensure great results.

Q: Can I incorporate nail art with other beauty treatments for a special occasion?

A: Absolutely! Nail art can beautifully complement other beauty treatments, such as hairstyling and makeup. Coordinate your nail design with your overall look—whether it’s matching colors or themes. This cohesive approach enhances your entire appearance for the occasion. Just ensure your nail art is done before applying hand creams or any products to maintain the design’s integrity.

Wedding Nail Ideas for Every Bride-to-Be

Ideas for your wedding nails can make a significant impact on your overall bridal look. From classic French tips to trendy ombre styles, the choices are endless and should reflect your personality and theme. You can express your individuality through intricate nail art designs or choose timeless elegance with subtle shades. In this blog post, you’ll discover various styles and inspirations tailored just for you, ensuring your nails are picture-perfect as you walk down the aisle.

Key Takeaways:

  • Personalization: Choose nail designs that reflect your unique style and personality, whether it’s classic elegance or bold creativity.
  • Seasonal Inspiration: Consider the season of your wedding to guide your nail color palette, from soft pastels in spring to rich jewel tones in winter.
  • Coordination: Ensure your nails complement your wedding attire and overall theme, creating a cohesive look that enhances your bridal ensemble.

Classic Bridal Nail Designs

Your wedding day is a moment of timeless elegance, and classic bridal nail designs can enhance your look beautifully. From the traditional French manicure to classic nude tones, these designs never go out of style. If you’re seeking inspiration, Show me your BRIDAL NAILS! : r/RedditLaqueristas is a wonderful resource to explore ideas to match your personality and gown.

French Manicure Variations

At your wedding, a French manicure remains a go-to choice for brides. It offers a sophisticated and polished appearance that complements any bridal look. You can opt for the classic white tips or experiment with colored tips that align with your wedding theme, adding a modern twist to this timeless design.

Simple Elegance with Neutral Shades

With neutral shades, you can achieve a sophisticated and understated look for your wedding day. Soft hues, such as beige, blush, or soft pink, enhance your natural beauty while offering a chic and refined feel. These subtle colors also pair well with a variety of wedding dress styles.

Elegance is the hallmark of neutral shades, making them perfect for your bridal nails. Their understated charm allows your ring to take center stage, while still providing a polished finish to complete your bridal look. Neutral nails offer versatility and can seamlessly transition from the ceremony to the reception, ensuring your hands remain picture-perfect throughout your special day.

Trendy Nail Art Ideas

While planning your wedding day, don’t overlook the significance of your nails. Trendy nail art can elevate your bridal look, allowing you to express your personal style. Whether you prefer intricate designs or subtle accents, exploring contemporary nail art ideas can add a unique flair to your overall ensemble, making your special day even more memorable.

Ombre Techniques for a Modern Twist

Ideas for ombre nails are endless, offering a soft and romantic gradient effect that’s perfect for brides. You can opt for classic white transitioning into a delicate pastel, or play with bolder colors that reflect your wedding palette. This technique adds depth and elegance to your look, making it a trendy choice for the modern bride.

Geometric Patterns and Accents

Around your wedding, unique geometric patterns can set your nails apart from the traditional designs. These contemporary styles utilize shapes like triangles, stripes, and lines to create a visually stunning effect. Whether painted in metallic hues or combined with soft pastels, geometric patterns can be playful yet sophisticated, perfectly complementing your bridal attire.

Nail art featuring geometric patterns allows you to infuse a touch of modernity into your wedding look. You can incorporate bold lines or even minimalist designs for a chic appearance. The beauty of geometric patterns lies in their versatility, adapting effortlessly to both classic and contemporary wedding themes. Feel free to mix and match colors and shapes to showcase your personality while maintaining an elegant aesthetic.

Floral and Nature-Inspired Nails

To embrace the beauty of nature on your special day, floral and nature-inspired nails are an enchanting choice. These designs can capture the essence of your wedding theme and reflect your personality, whether you prefer subtle accents or bold florals. From delicate blossoms to intricate leaf patterns, there are countless options to express your love for the outdoors. You can even incorporate your wedding flowers into your nail art for a truly personalized touch.

Hand-Painted Floral Designs

Designs featuring hand-painted florals can elevate your nail look to artistic heights. Skilled nail artists can create stunning blooms in various styles, from watercolor effects to intricate details, allowing you to customize colors that match your wedding palette. These designs offer a romantic and feminine touch, making them perfect for brides who want their nails to be a standout feature on their big day.

Using Real Dried Flowers

Flowers infused into your nails can provide a unique and organic aesthetic. Indeed, using real dried flowers allows you to incorporate nature directly into your manicure, creating an ethereal and one-of-a-kind look. Whether you choose tiny blossoms or elegant petals, these delicate elements evoke a sense of whimsy and intimacy. You can effortlessly pair them with nude or pastel bases to make the flowers pop. This trend not only adds texture but also serves as a beautiful reminder of the natural beauty surrounding you on your wedding day.

Glamorous Nail Enhancements

Once again, you have the opportunity to elevate your wedding day look with stunning nail enhancements that radiate glamour. Choosing the right enhancements can bring your entire bridal style together, allowing your nails to be not just a finishing touch, but a focal point. From breathtaking glitter to intricately designed gems, these enhancements can give your nails a captivating and luxurious flair that perfectly complements your wedding attire.

Glitter and Sparkle Techniques

Before submerging into the world of glitter and sparkle, consider the various techniques that can transform your nails into a shimmering masterpiece. From a soft glitter gradient to full-on glitterbombs, you can find a style that feels just right for you. Pairing these techniques with carefully chosen shades can add depth and dimension to your bridal look, making your nails a captivating accessory on your special day.

Rhinestones and Nail Art Gems

Around your wedding, you may want to incorporate rhinestones and nail art gems for an extra touch of sophistication. These embellishments can be arranged in various patterns, from minimalist lines to elaborate designs, allowing you to personalize your nails in a way that reflects your unique style. The sparkly additions can easily catch the light, drawing attention to your exquisite nails and enhancing your bridal ensemble.

Understanding how to effectively use rhinestones and nail art gems can elevate your bridal nails to a new level of elegance. Choose high-quality gems that reflect your overall color palette, and consider the placement – whether it’s a single gem on each nail or a statement piece on an accent nail. A balance of intricate design and simplicity is key, as you want your nails to shine without overshadowing your overall look. This thoughtful approach will ensure your nails are both eye-catching and harmonious with your wedding day theme.

Seasonal Wedding Nail Inspirations

Many brides-to-be look for nail designs that reflect the beauty of the season in which they’re tying the knot. Choosing seasonal colors and themes for your wedding nails can enhance your overall bridal look and provide a cohesive feel. From soft pastels to autumnal hues, your nails can be as unique and expressive as your love story.

Spring and Summer Shades

Any bride can embrace the freshness of spring and summer with vibrant and playful nail shades. Think bright pinks, lavender purples, or even soft mint greens that evoke the spirit of blooming flowers and sunny days. Floral accents or delicate glitter can add a touch of whimsy to your wedding nail design, perfectly matching the cheerful ambiance of the season.

Fall and Winter Designs

About the colder months, deeper hues and intricate designs can create a stunning contrast against your wedding gown. Rich burgundies, forest greens, and shimmering golds add elegance and warmth to your bridal look. Consider incorporating textures like matte finishes or velvety designs to reflect the cozy vibe of fall and winter celebrations.

In addition to classic colors, you can experiment with nail art such as geometric patterns or festive motifs like snowflakes or leaves. These details can elevate your nail game while mirroring the seasonal elements surrounding your wedding, creating a beautifully harmonious look that ties together your entire bridal aesthetic.

Tips for Choosing the Perfect Wedding Nails

Not every nail design will work for every bride. To find the right wedding nails for your big day, consider these tips:

  • Choose a style that reflects your personality
  • Coordinate nail colors with your wedding theme
  • Think about your comfort level with nail art
  • Consult with a professional nail artist for expert advice

After you’ve thought through these factors, your perfect wedding nails will be just a few steps away.

Matching with Your Dress and Theme

Besides your personal style, it’s vital to match your nails with your dress and wedding theme. Consider the color palette and design elements of your dress when selecting nail colors and styles. Soft pastels may harmonize beautifully with a romantic gown, while bold designs could complement a modern or edgy look. Take inspiration from your wedding decor and flowers as well, ensuring that your nails feel cohesive with the overall aesthetic of your big day.

Considering Nail Length and Shape

Tips for determining nail length and shape include understanding how they can enhance your overall look. The shape of your nails can influence the perception of your hands, making them appear longer or more elegant. Long, almond-shaped nails often exude glamour, while shorter, square nails can convey simplicity and ease.

Indeed, you should also consider your lifestyle and daily activities when choosing nail length. If you’re not used to long nails, opt for a shorter length that allows for comfort and practicality without sacrificing style. Assessing the specific shape that best complements your fingers will also help make your nails the perfect finishing touch for your wedding day ensemble.

To wrap up

Ultimately, choosing the perfect wedding nail design is an exciting opportunity to express your personal style on your special day. From classic elegance to trendy nail art, there’s a plethora of options tailored for your individual preferences. Consider the color palette of your wedding, the season, and your overall theme when making your selection. With these wedding nail ideas, you can ensure your hands look as stunning as you feel, making every detail count as you walk down the aisle.

FAQ

Q: What are some popular nail colors for brides on their wedding day?

A: Popular nail colors for brides often include classic shades like soft pinks, whites, and nudes. Other brides may opt for shades that match their wedding theme or bouquets, such as pastel shades or metallics. For a bolder statement, deep reds or dark berries can also be striking, especially if paired with elegant nail art.

Q: How can I incorporate nail art into my wedding nails?

A: Incorporating nail art can range from simple to intricate designs. For a subtle touch, brides can add delicate floral patterns or tiny gems on accent nails. Those looking for more flair might consider intricate lace designs or watercolor effects. Utilizing a professional nail artist can help you achieve a custom look that complements your overall bridal style while ensuring the designs are durable for the big day.

Q: Should I choose gel or regular polish for my wedding nails?

A: Gel polish is a popular choice for wedding nails since it lasts longer and is less likely to chip, providing a flawless look throughout the event. It also has a glossy finish that many brides appreciate. However, if you prefer a more natural finish or have sensitivities to gel products, regular polish can also be a good option, especially with proper topcoat application.

Q: How far in advance should I schedule my bridal nail appointment?

A: It’s advisable to schedule your bridal nail appointment about one to two weeks before your wedding day. This timing ensures that your nails look fresh and perfect without the risk of wear or chipping. However, if you wish to try out different designs in advance, consider doing a test run several weeks prior, ensuring you have enough time to finalize the look.

Q: Can I include my bridal party in my nail design plans?

A: Absolutely! Many brides choose to have matching or complementary nail designs for their bridal party. This can create a cohesive look for photos and is a lovely way to include your bridesmaids in the wedding preparations. You might select a similar color palette or design theme that reflects the overall vibe of your wedding, allowing everyone to feel special on your big day.

Festive Nail Art for the Holiday Season

Many people love to express their holiday spirit through festive nail art, adding a touch of cheer to your seasonal celebrations. With a variety of designs ranging from classic to contemporary, your nails can become a canvas for creativity. In this blog post, you’ll discover inspiring ideas, tips for executing nail art at home, and recommendations for the perfect products to achieve stunning results. Get ready to transform your nails into festive masterpieces that will dazzle at every holiday gathering!

Key Takeaways:

  • Creative Designs: Explore a variety of festive patterns including snowflakes, Christmas trees, and reindeer to enhance your holiday spirit.
  • Pops of Color: Incorporate classic holiday colors like red, green, gold, and silver to make your nail art stand out during celebrations.
  • DIY Techniques: Utilize simple tools such as dotting tools, striping brushes, and nail stamps to create intricate designs at home.

Essential Tools for Holiday Nail Art

Your holiday nail art journey begins with the right tools. To create stunning designs, you’ll need a few vital items that help you achieve that festive look. These tools will not only make the process easier but will also enhance your creativity. Get ready to gather your supplies and transform your nails into a holiday masterpiece!

Nail Polish Types

Nail polish comes in various types, each designed to produce unique finishes. These include:

  • Base Coat
  • Regular Polish
  • Top Coat
  • Gel Polish
  • Special Effects Polish

Recognizing the differences among these polish types will help you choose the right products for your festive nail designs.

Base CoatPrepares nails and protects them from staining.
Regular PolishComes in various colors and finishes for daily wear.
Top CoatAdds shine and prolongs the wear of your nail art.
Gel PolishProvides a long-lasting, chip-resistant finish.
Special Effects PolishIncludes glitter, chrome, or matte finishes for unique designs.

Tools and Accessories

Polish application is only part of the nail art process; the right tools and accessories can elevate your designs. Invest in quality brushes, dotting tools, and nail art pens to assist in creating intricate patterns and details. Additionally, nail tape, sponges, and stickers can help introduce textures and layering to your designs.

Tools such as nail files, cuticle pushers, and tweezers are also vital for preparing your nails before applying polish and maintaining their health. For more advanced techniques, consider using tools like nail stencils or stampers to achieve professional-looking results. With the proper tools, you’ll unleash your creativity and create beautiful holiday nail art with ease.

Popular Holiday Nail Art Themes

You’ll find that during the holiday season, numerous nail art themes help you express your festive spirit. From traditional colors and patterns to fun and whimsical designs, there are endless ideas to explore that will enhance your holiday style. Whether you prefer subtle classics or bold statements, these themes cater to every taste, allowing you to showcase your creativity while celebrating the season.

Classic Christmas Designs

Beside the cheerful red and green color scheme, classic Christmas designs include iconic motifs like snowflakes, Christmas trees, and candy canes. These timeless patterns evoke a sense of nostalgia and warmth, making them perfect for any holiday gathering. By incorporating these traditional elements, you can create a festive vibe that resonates with the spirit of Christmas.

Festive Winter Patterns

To elevate your nail art, consider incorporating festive winter patterns that go beyond traditional Christmas themes. From elegant snowflakes to cozy knit patterns, winter designs can embody the beauty of the season while remaining stylish and unique. These patterns can incorporate soft hues, glitter, and textures that resonate with the chilly elegance of winter days.

Due to their versatility, festive winter patterns allow you to get creative. You can choose to use a muted pastel palette for a serene look or vibrant shades for a more lively approach. White and blue tones paired with shimmering accents can create a stunning winter wonderland effect. Layering different designs on your nails can also add depth and visual interest, ensuring your manicure stands out during the holiday festivities.

Step-by-Step Nail Art Techniques

After deciding on your festive nail art, it’s necessary to understand how to execute your designs effectively. Follow these step-by-step techniques for ultimate nail creativity. You can break your process down into various phases to enhance your skills and achieve beautiful results.

StepDescription
1.Prep your nails by cleaning, buffing, and applying a base coat.
2.Choose your color palette and apply the base color.
3.Use nail art brushes or dotting tools for design.
4.Apply a top coat for a lasting finish.

Simple Designs for Beginners

For those new to nail art, starting with simple designs can be very rewarding. You want to choose easy patterns that won’t overwhelm you, yet still look festive. Think about using dots, stripes, or basic shapes that can easily be achieved with minimal tools.

Advanced Techniques for Experts

Techniques for expert nail artists involve precision and creativity. You can explore techniques such as stamping, marbling, or using gel polish for intricate designs. These will elevate your holiday nails to a professional level.

  1. Nail stamping with plates and special polish.
  2. Ombre effects using gradient techniques.
  3. Water marbling for unique designs.
  4. 3D nail art with embellishments.

Plus, expert nail art techniques allow you to play with textures and layers. You can mix and match colors seamlessly, create multi-dimensional effects, and even incorporate nail jewels and stickers for added flair. Focusing on these skills will surely impress your friends during the holiday season.

Advanced TechniquesBenefits
Nail stampingQuickly achieve complex designs.
Water marblingUnique patterns that are one-of-a-kind.
Gel polishingLong-lasting and vibrant colors.

Seasonal Color Palettes

To elevate your festive nail art this holiday season, embracing seasonal color palettes can make a significant impact. Rich, vibrant hues bring joy and excitement to your fingertips, while soft, frosty tones evoke a sense of winter wonder. Combining these colors strategically allows you to express your unique style while harmonizing with the festive spirit around you. So, let your creativity shine with these curated palettes designed to suit every celebration!

Christmas Color Schemes

An excellent way to celebrate Christmas through your nail art is by using traditional holiday colors. Think classic reds, deep greens, and sparkling golds or silvers that sparkle like holiday lights. You can mix and match these colors for a delightful candy cane stripe or opt for a sleek red and gold ombre. The festive hues not only embody the season’s spirit but also allow your nails to stand out at every gathering.

New Year’s Eve Color Trends

Christmas isn’t the only time for celebration; as you welcome the new year, it’s the perfect occasion to go bold with your nail colors. Think of shimmering metallics, extravagant glitter, and deep jewel tones to ring in the new year with style. Whether you choose a dazzling gold or a rich midnight blue, your nails can create a stunning statement that complements your party look.

Indeed, New Year’s Eve color trends are all about glamour and vibrancy. You can incorporate sparkle by using glitter toppers over a solid base color or even try gradient techniques that shift colors as the light catches your nails. Bold colors such as royal purple, emerald green, and sparkling silver can embody the excitement of new beginnings. Pairing these shades with intricate nail art or accent nails will ensure your festive manicure is as memorable as the night itself.

Nail Care Tips for the Holiday Season

Keep your nails in top condition during the festive season with these crucial tips:

  • Moisturize your cuticles daily.
  • Avoid using your nails as tools.
  • Keep nails trimmed and shaped regularly.
  • Opt for breathable nail polish to prevent damage.
  • Consider a nourishing nail oil to enhance strength.

The right care can help you flaunt beautiful nails throughout the holidays.

Preparing Your Nails

One of the keys to festive nail art is ensuring your nails are well-prepped. Start by removing any old polish and gently buffing the surface to create a smooth canvas. Trim and shape your nails to your desired length and style, and don’t forget to push back cuticles for a neat finish. A good base coat is crucial as it protects your nails from potential staining and enhances polish adherence.

Maintaining Nail Health

Care for your nails by prioritizing their health throughout the holiday hustle.

Indeed, maintaining nail health is crucial for showcasing your festive nail art. Make it a habit to hydrate your nails and cuticles regularly with quality oils or creams. Incorporating a balanced diet rich in vitamins and minerals will fortify your nails from within. Furthermore, give your nails a break from polish occasionally, allowing them to breathe and recover. Keeping your nails clean and avoiding harsh chemicals will also help keep them strong and vibrant during the celebratory season.

Showcasing Your Nails

Not only do festive nail designs make a statement, but they also add a touch of sparkle to your holiday celebrations. Whether you’re at a party or simply enjoying the season, showcasing your nails can enhance your overall look. From classic red and green to intricate snowflakes and glitter, take the opportunity to express your personality through your nail art. Let your nails shine and become a conversation starter this holiday season!

Photography Tips

Tips for capturing the beauty of your nail art can elevate your showcasing game. Use natural light for vibrant colors, and experiment with various angles to find the best shot. Consider these pointers:

  • Keep your hands clean and moisturized for a polished look.
  • Use a solid background to make your nails pop.
  • Play with depth of field to emphasize the design.

Knowing these techniques can help you take stunning photos of your festive nail art!

Sharing on Social Media

Tips for sharing your nail art on social platforms can help you connect with other enthusiasts. Use relevant hashtags, like #HolidayNails or #NailArt, to reach a broader audience. Try posting in the finest lighting and at peak engagement times to ensure visibility. Engaging with followers through polls or questions can also make your posts more interactive. Cultivating a community around your nail art can inspire you and others.

In addition, share progress photos or short videos detailing your nail art process. This behind-the-scenes content fosters engagement and allows your audience to appreciate the creativity and effort you put into your designs. Don’t be shy to tag fellow nail artists for collaborations and inspirations—this can broaden your reach and create a supportive network within the nail art community!

Final Words

Presently, your holiday celebrations can be beautifully enhanced with festive nail art that reflects the joy and spirit of the season. From glittering snowflakes to jolly ornaments, your creativity can shine through each design you choose. Experiment with various colors, patterns, and techniques to create nail art that not only complements your festive outfits but also adds a playful touch to your celebrations. Embrace this fun opportunity to express your personality while celebrating the holidays, and let your nails be a conversation starter among friends and family.

FAQ

Q: What are some popular festive nail art designs for the holiday season?

A: Some popular festive nail art designs for the holiday season include snowflakes, Christmas trees, candy canes, reindeer, and ornaments. You can also incorporate traditional holiday colors like red, green, gold, and silver, or create a winter-themed look with blues and whites. Nail art decals, glitter, and metallic finishes can elevate any design and add that extra holiday sparkle!

Q: Can I do festive nail art at home, or should I visit a salon?

A: You can absolutely do festive nail art at home! With the right tools, such as nail polish, brushes, dotting tools, and decals, anyone can create beautiful designs. There are many tutorials available online that guide you through different techniques. However, if you’re looking for a more intricate design or a professional finish, visiting a salon may be a great option.

Q: What supplies do I need for DIY festive nail art?

A: For DIY festive nail art, you’ll need a few necessary supplies: base coat and topcoat for a smooth finish, nail polish in your desired festive colors, nail art brushes for detailed work, dotting tools for creating patterns, and nail tape for clean lines. You may also want to stock up on glitter, rhinestones, or stickers for added embellishments. Don’t forget to have some nail polish remover handy for any touch-ups!

Q: How do I ensure my festive nail art lasts through the holiday season?

A: To ensure your festive nail art lasts through the holiday season, start with a strong base coat to protect your nails from discoloration. After painting your design, finish with a quality topcoat to seal everything in place. Regularly moisturize your hands and nails, and avoid exposing them to excessive water or harsh chemicals. Reapplying topcoat every few days can help maintain shine and longevity.

Q: Are there any nail care tips for the holiday season?

A: Yes! The holiday season can be tough on your nails due to colder weather and holiday activities. Be sure to keep your nails moisturized by using cuticle oil regularly. If you plan to use decorative elements like glitter, gently remove them with a good quality remover to avoid damaging your natural nails. Additionally, try to keep your nails trimmed and shaped to minimize breaks during bustling holiday preparations.

The Best Nail Designs for Prom Night

Many aspects go into making your prom night unforgettable, and your nails are no exception. As you prepare for this magical event, having the perfect nail design can enhance your overall look and boost your confidence. In this post, we will explore a variety of stunning nail designs that are sure to complement your prom attire and express your unique style. From elegant classics to bold statements, you’ll find inspiration that resonates with you and elevates your special night.

Key Takeaways:

  • Trendy Colors: Embrace popular prom colors like metallics, pastels, and glitter to complement your attire.
  • Creative Nail Art: Consider unique designs such as floral patterns, geometric shapes, or ombre effects to showcase your personality.
  • Durability Matters: Opt for long-lasting nail products to ensure your manicure stays flawless throughout the night.

Trending Nail Shapes for Prom Night

While it’s crucial to choose the right outfit and hairdo for prom night, your nails play a significant role in completing your overall look. Trending nail shapes can enhance your style, express your personality, and make a lasting impression. Here’s a look at some of the most popular nail shapes that will steal the spotlight on prom night.

Classic Almond

Against the backdrop of various nail shapes, the classic almond style remains timeless. This shape mimics the gentle curves of an almond, offering an elegant and sophisticated look that’s perfect for any formal occasion. You can opt for soft pastel shades or striking hues, enhancing your overall prom aesthetic.

Bold Coffin

Between chic and edgy, the bold coffin shape stands out for its distinctively wide and tapered design. This shape complements dramatic nail art, allowing you to experiment with designs that draw attention, making it a popular choice for individuals seeking a bolder statement on prom night.

Nail artists have embraced the bold coffin shape due to its versatility and strength. This shape works beautifully with various nail designs, from intricate florals to geometric patterns. Whether you choose a high-gloss finish or matte look, bold coffin nails will accentuate your confidence and style, ensuring your hands are as stunning as your gown.

Elegant Stiletto

Across the spectrum of nail shapes, the elegant stiletto is renowned for its fierce and sharp appearance. This shape creates elongated nails that can add an element of glam to your prom look. You can opt for simple colors or adorned designs to elevate your overall outfit.

With stiletto nails, the sky’s the limit regarding design possibilities. You can use rhinestones, glitters, or ombre effects to create a dramatic flair that suits your personality. As an eye-catching choice, elegant stiletto nails will definitely give you a bold and fashionable edge at your prom, making them an excellent choice for your special night.

Popular Nail Colors for Prom

There’s no denying that the color of your nails can enhance your overall prom look. Choosing the right nail color is necessary in complementing your outfit and making a statement. This year’s popular nail colors range from elegant neutrals to striking metallics, offering a variety of options for every style and personality.

Timeless Neutrals

After all, timeless neutrals are a go-to choice for any prom look. Shades like nude, soft beige, and delicate blush not only exude sophistication but also complement a wide range of dress colors. These versatile hues allow your nails to blend in, ensuring your overall appearance remains polished and chic.

Vibrant Pastels

Pastels are perfect for adding a touch of playful elegance to your prom attire. Light lavender, mint green, and baby blue are radiant options that evoke a sense of freshness and whimsy. Pastels beautifully contrast with bold outfits, providing a light-hearted touch that captures the joyous spirit of the event.

Hence, vibrant pastels are becoming increasingly popular, as they suit various skin tones and add a romantic flair to your nails. They’re an excellent way to express your personality while remaining on-trend. Whether you choose a solid pastel shade or opt for artistic designs, these colors will surely make your nails the talk of the night.

Bold Metallics

Colors like gold, silver, and rose gold bring a fierce element to your prom nails. The shimmer and shine of metallics make a strong statement, perfectly in line with the glamour of prom night. You can opt for a full metallic manicure or incorporate these shades as accents to elevate your nail game.

Consequently, bold metallics are favored for their eye-catching appeal and ability to seamlessly align with your prom dress. Whether you prefer a high-shine chrome look or an iridescent finish, these colors can instantly transform your nails into a stunning accessory that complements the dazzling atmosphere of the evening.

Nail Art Techniques for a Glamorous Look

All eyes will be on your nails as you dance the night away at prom, and incorporating the right techniques can elevate your look. From delicate ombre styles to sparkling glitter accents, there are various nail art techniques you can choose from to complement your prom outfit and express your personal style. Whether you prefer a subtle touch or something more eye-catching, these designs will ensure your nails are as glamorous as the rest of your ensemble.

Ombre Designs

For a dreamy effect, opt for ombre designs that blend complementary colors for a stunning gradient look. You can choose shades that match your dress or go for bold contrasts to stand out. This technique adds depth and dimension to your nails, giving them a sophisticated finish that is perfect for prom night.

Glitter Accents

After you’ve decided on your base color, consider adding glitter accents to create a dazzling focal point. Sparkling details can elevate even the simplest nail designs, ensuring your look radiates elegance and glam. From a sprinkle of fine glitter to bold glitter stripes, the options are endless.

In fact, glitter accents are the perfect way to catch the light as you move, making your nails pop throughout the night. You can apply glitter to just one or two nails for an understated elegance, or go all out and cover your entire manicure for maximum impact. Experiment with different types of glitter—chunky or fine—to find the perfect finish to match your personality.

Floral Patterns

With floral patterns, you can add a touch of whimsy and romance to your prom nails. Whether you choose soft pastels or vibrant colors, floral designs bring a charming detail to your overall look. You can go for intricate designs or opt for simple blossoms, depending on your style and the time you have to create your nail art.

Also, floral patterns can be versatile! You can mix and match colors to create a bridal-style nail or stay bold with bright hues for a more playful vibe. Adding a glossy top coat will enhance the beauty of your designs, ensuring they look fresh throughout the night and highlight the elegance of your prom attire.

Embellishments to Elevate Your Nail Design

Unlike basic nail art, embellishments can transform your manicure into a show-stopping accessory for prom night. Adding sparkling details not only enhances your overall look but also showcases your personal style. Whether you opt for rhinestones, metallic foils, or nail foils, these elements can take your nail design to the next level and help you stand out amongst the crowd.

Rhinestones and Gems

Your nails will dazzle when you incorporate rhinestones and gems into your design. These sparkling additions can be strategically placed on accent nails or used to create intricate patterns, lending a luxurious feel to your look. For prom, consider choosing jewels that match your gown for a cohesive and glamorous ensemble.

Foil and Metallic Strips

For a modern twist on nail art, consider using foil and metallic strips to elevate your design. These materials can add a bold, eye-catching contrast to traditional polish, creating a stunning effect that captures the light beautifully. Whether applied in a geometric pattern or used for delicate accents, metallics can give your nails a sophisticated edge.

Plus, foil and metallic strips are versatile and easy to apply, making them perfect for a last-minute touch-up. You can choose from a variety of finishes, such as gold, silver, or holographic, which can suit any dress color or style. The reflective quality of these materials ensures that your nails will stand out on the dance floor and complement your ensemble brilliantly.

Nail Foils

An exciting option to consider for your prom nails is nail foils, which add a unique texture and dimension. These foils can come in various designs, from bold prints to intricate patterns, allowing you to customize your look easily. They provide an eye-catching alternative to traditional nail polish, making your nails a focal point of your overall appearance.

Foils can be applied over a base color or used alone for a minimalist design. The application process is simple; just apply adhesive and press the foil down for a chic finish. This technique gives your nails an artistic flair and can be combined with other embellishments like rhinestones for a truly statement-making look. With nail foils, your prom night nails will undeniably be unforgettable.

DIY vs. Salon: Choosing the Best Option for Prom

Your nail choices can set the tone for your entire prom look, and deciding between a DIY approach or professional salon services is key. While DIY offers a fun creative outlet, salon experiences often bring expert craftsmanship and unique designs. Weighing both options can help you achieve nails that not only look stunning but also feel personally tailored to your style for this special night.

Benefits of DIY

About DIY nails allows you to unleash your creativity and personalize your designs to match your prom attire perfectly. You can experiment with various colors, patterns, and techniques, all in the comfort of your home. Additionally, it can be more budget-friendly, saving you both time and money while still delivering a unique touch to your overall look.

Advantages of Professional Services

About opting for professional salon services ensures a polished finish and often offers access to advanced techniques and intricate nail art that might be challenging to accomplish on your own. Skilled technicians can provide personalized advice, ensuring that your nails complement your dress and style perfectly. This not only enhances your overall appearance but also helps alleviate any stress you may have about your prom preparations.

Another benefit of professional services is the time-saving aspect; salons have the tools and expertise to complete your manicure efficiently, leaving you free to focus on other vital prom details. The high-quality products used by professionals can also lead to longer-lasting wear, ensuring your nails remain stunning throughout the night. Plus, the pampering experience can be a wonderful way to get into the prom spirit!

Nail Care Tips Before Prom Night

Keep your nails looking their best with these vital nail care tips:

  • Moisturize your hands and cuticles regularly.
  • File your nails to your desired shape.
  • Buff the surface for a smooth finish.
  • Apply a strengthening base coat before polish.
  • Consider a professional manicure for added flair.

After applying these tips, explore The 35 Best Prom Nail Ideas to Complete Your Look for inspiration.

Preparing Your Nails

Care for your nails by soaking them in warm water and using a gentle scrub to remove any dirt. Follow this with a nourishing cuticle oil to soften the cuticles for easy pushback. Ensure your nails are clean and dry before applying polish to achieve a long-lasting finish.

Maintenance for Longevity

Between now and prom night, maintain your polished look by applying a top coat every few days. This not only adds shine but also protects your manicure from chips and wear. Consider wearing gloves while doing chores to prevent damage.

For instance, protecting your nails from harsh chemicals and excessive moisture will help keep your manicure intact. Regularly check for any signs of wear and touch up as needed to ensure your nails look flawless throughout the evening. A little extra care goes a long way in making your nails shine bright on your special night.

Final Words

With this in mind, choosing the best nail designs for prom night is all about expressing your personal style while complementing your dress and overall look. Whether you go for classic elegance, bold colors, or intricate details, the right nails can elevate your entire ensemble. Take the time to explore different options, and consider what makes you feel confident. Your nails can be the perfect finishing touch that enhances your special night, ensuring you shine as brightly as the memories you will make.

FAQ

Q: What are some popular nail design trends for prom night?

A: Some of the most popular nail design trends for prom night include elegant ombre styles, glitter and metallic finishes, intricate nail art featuring flowers or geometric shapes, and classic French tips with a twist. Additionally, pastel colors and bold jewel tones are also trending, allowing for both subtle and eye-catching options.

Q: How can I choose the right nail color to match my prom dress?

A: To choose the right nail color, consider the primary color of your prom dress. For example, if your dress is a bright color, such as red or royal blue, opt for complementary or contrasting shades like gold or silver. If your dress features pastel tones, soft pinks or nude shades may work best. Always test colors against fabric swatches to ensure harmony.

Q: Should I opt for nail art, or keep it simple for prom?

A: It ultimately depends on your personal style and the overall look you want to achieve for prom. Nail art can add a fun and creative touch, especially if your dress is simpler in design. Conversely, if your dress is heavily embellished or patterned, simple, clean manicures can provide a classic and elegant complement without overwhelming your look.

Q: How can I ensure my nails stay looking great all night long?

A: To keep your nails looking fabulous throughout prom night, start with a good quality base coat for durability. Avoid excessive hand washing or using your hands for heavy tasks, as this can chip your polish. Carry a small touch-up kit with imperative items like a mini nail file and a bottle of your polish color for quick fixes during the evening.

Q: What nail care tips should I follow in the lead-up to prom night?

A: In the days leading up to prom, focus on keeping your nails and cuticles healthy. Moisturize your hands and nails regularly with cuticle oil or hand cream. Avoid harsh chemicals that can weaken your nails, and consider a gentle manicure to shape and smooth them. If you wish to grow your nails out, maintain a balanced diet rich in vitamins that promote nail health.

Nail Art to Match Your Halloween Costume

Nail art can elevate your Halloween look to the next level, allowing you to express your creativity in a fun and festive way. With countless designs to choose from, you can easily find styles that complement your costume perfectly. Whether you’re dressing up as a classic witch or a spooky skeleton, coordinating your nails with your outfit enhances your overall appearance. In this post, you’ll discover a variety of nail art ideas that will help you stand out this Halloween while showcasing your unique style.

Key Takeaways:

  • Creativity is key when designing nail art that complements your Halloween costume. Incorporate colors and themes from your outfit for a cohesive look.
  • Technique matters; explore different methods such as stamping, freehand painting, or nail wraps to achieve stunning designs effortlessly.
  • Accessorizing with nail art can elevate your Halloween ensemble. Consider adding 3D elements like rhinestones, studs, or even glow-in-the-dark polish for extra flair.

Choosing the Right Nail Art Design

To create a cohesive look for your Halloween costume, selecting the right nail art design is vital. Consider the overall theme and mood of your outfit, as well as the message you want to convey. Your nails can serve as the perfect finishing touch, enhancing your costume and showcasing your creativity. Aim for a design that complements your ensemble, whether it’s elegant, spooky, or vibrant. With countless options available, you can easily find nail art that harmonizes with your Halloween aesthetic.

Coordinating Colors and Themes

Design your nail art to align with the colors and themes of your Halloween costume. Consider the color palette of your outfit and aim for shades that either match or create an interesting contrast. For instance, if you’re going for a classic witch look with black and purple, using nail polish in those hues will create a seamless connection between your nails and costume. Alternatively, if you’re dressing as a more vibrant character, incorporate bright or metallic colors to add extra flair and excitement.

Popular Halloween Motifs

Design your nails with popular Halloween motifs to elevate your festive look. Classics like pumpkins, skulls, ghosts, and bats can add a playful touch to your style. These designs can be achieved through nail stamping, hand painting, or even nail wraps, giving you versatility in application. Whether you opt for intricately detailed designs or minimalist representations, incorporating these motifs can make your nails a standout element of your costume.

But you can also get creative by combining various motifs for a unique twist. For example, a spooky nail set featuring alternating designs of ghosts and pumpkins can create a fun yet unified theme. You might also consider abstract interpretations, like spider webs, or using glitter to mimic the glimmer of Halloween magic. By mixing and matching motifs while keeping your overall costume in mind, you can craft a mesmerizing nail art look that leaves a lasting impression.

Nail Art Techniques for Halloween

Some of the most exciting nail art techniques can transform your Halloween look from ordinary to extraordinary. Whether you want a spooky, playful, or elegant flair, incorporating these techniques into your nail art can enhance your overall costume. From freehand designs to fun stickers and decals, there are endless ways to express your Halloween spirit through your nails!

Freehand Painting

Halloween offers the perfect opportunity to unleash your creativity with freehand painting. You can create intricate designs, such as cobwebs, ghosts, or pumpkins, directly on your nails. Using fine brushes and nail polish, you can layer colors and establish texture, bringing a unique touch that matches your costume. The key is to practice your designs beforehand for a polished finish on the big night!

Stickers and Decals

With the right stickers and decals, you can achieve an eye-catching Halloween nail design in no time. These accessories come in various themes, including witches, bats, and skulls, allowing you to effortlessly enhance your Halloween vibe.

For instance, opting for glow-in-the-dark decals can add an extra layer of excitement to your nails, making them stand out in dim lighting. You can easily apply these stickers over a base color, or mix and match them with freehand designs for a more personalized touch. Stickers are a great option if you’re short on time or looking for a hassle-free way to achieve festive nail art.

Tools and Materials Needed

Despite the intricate designs you may envision for your Halloween nail art, the right tools and materials can make all the difference. Gathering your supplies in advance will streamline the process, ensuring you can focus on creativity and fun. From basic polishes to specialty tools, having everything within reach will help you transform your nails into a stylish part of your costume, making your Halloween look truly unforgettable.

Essential Nail Art Supplies

By starting with the necessary nail art supplies, you lay a strong foundation for your designs. You’ll need a base coat and top coat for protection and longevity, along with a variety of nail polish colors to match your costume. Nail brushes and dotting tools will allow you to create unique patterns, while nail strips or stencils can help you achieve precision. Don’t forget to stock up on remover and cotton pads for easy clean-up!

Optional Accessories for Flair

Against the backdrop of your Halloween costume, optional accessories can elevate your nail art to new heights. Consider embellishments like rhinestones, glitter, or nail stickers to add a touch of drama and sparkle to your designs. These items can be easily applied to enhance your nails while providing extra texture and depth that are sure to catch the eye.

In addition to rhinestones and glitter, you might explore other embellishments such as nail wraps, which can feature Halloween-themed prints, or themed charms that can be glued onto your nails for added detail. Mixing and matching these accessories allows you to personalize your nail art further, creating a cohesive look that reflects your unique style and Halloween spirit. The possibilities are endless, so let your imagination run wild for the perfect finishing touch!

Step-by-Step Nail Art Tutorials

After deciding on your Halloween costume, it’s time to bring your nail art to life! Follow these step-by-step tutorials to create stunning designs that will complement your look perfectly.

Materials NeededInstructions
Nail polish (various colors)Start with a base coat to protect your nails.
Nail art tools (dotting tools, brushes)Use a thin brush for intricate designs.
Top coatFinish with a top coat for shine and durability.
Nail stickers or stampsApply stickers after base coat but before top coat.

Classic Halloween Designs

By incorporating classic Halloween motifs, you can easily enhance your festive attire. Designs like ghosts, pumpkins, and spider webs offer timeless appeal, making them excellent choices for your nails. Use white, orange, black, and purple polishes to bring these designs to life, ensuring your nails are just as spooky as your costume.

Creative and Unique Ideas

For those looking to stand out, consider some innovative nail art designs. Explore themes like the galaxy, horror movie characters, or even a whimsical twist on traditional designs. By pushing the boundaries of conventional nail art, you can create a breathtaking showcase that keeps everyone intrigued and engaged.

For instance, you might use a makeup sponge to blend different colors for a galaxy effect, incorporating glitter for added sparkle. Alternatively, try using nail stickers or stamps featuring intricate designs inspired by your favorite horror films. This creativity not only showcases your artistic side but also ties in beautifully with your Halloween festivities, leaving a lasting impression.

Care and Maintenance for Halloween Nails

Your Halloween nail art is a fun way to complete your costume, but it requires proper care and maintenance. To keep your nails looking fresh and fabulous throughout the festivities, be sure to avoid excessive exposure to water and harsh chemicals. Moisturize your hands and nails regularly, and opt for non-acetone removers when taking off your polish to minimize damage. A little extra attention can go a long way in preserving your spooky nail designs.

Ensuring Longevity

Around Halloween, ensuring the longevity of your nail art can enhance its appearance throughout the night. Use a high-quality top coat over your designs to seal in the look and provide additional protection. Reapplying this top coat every few days will also help maintain shine and prevent chipping, allowing you to enjoy your festive nails without worrying about wear and tear.

Easy Removal Tips

Among the various nail art techniques, some can be stubborn to remove, so having a plan is necessary. Here are some tips for easy removal of your Halloween nails:

  • Soak your nails in warm water for a few minutes to soften the polish.
  • Use a non-acetone remover to gently dissolve the nail art.
  • Consider wrapping your fingers in cotton soaked in remover for stubborn designs.

Perceiving how each technique impacts your nails will help you choose the best method for your specific designs.

Due to the creative nature of Halloween, you might have used multiple layers of polish or intricate designs that can complicate removal. In such cases, it is wise to use these strategies:

  • Opt for a base coat under your nail art to protect your natural nails.
  • Gently buff your nails before applying polish to aid in removal.
  • If you experience stubborn residue, repeat the soaking process until the polish comes off.

Perceiving the length of time your design has been on your nails can also guide you in choosing the right removal techniques.

Summing up

Following this guide, you can elevate your Halloween costume with stunning nail art that perfectly complements your look. From spooky designs to whimsical patterns, the right nail art can enhance your overall appearance and showcase your creativity. Whether you opt for intricate details or simple accents, your nails will be a standout feature of your Halloween ensemble, helping you create a memorable and cohesive costume that captures the spirit of the season.

FAQ

Q: How can I choose nail art that complements my Halloween costume?

A: When opting for nail art for your Halloween costume, consider the colors and themes of your outfit. If you’re dressing as a witch, you might opt for dark, moody colors with glitter accents. For a brighter costume, like a butterfly, vibrant colors with floral designs can harmonize beautifully. Additionally, using elements from your costume, such as decals or stencils related to your theme, can enhance your overall look.

Q: What nail art techniques work best for Halloween?

A: Several techniques can elevate your Halloween nail art, including nail stamping, water marbling, and freehand painting. Nail stamping allows you to apply intricate designs quickly, while water marbling creates unique, swirling patterns. Freehand painting is perfect for detailed designs like pumpkins, ghosts, or spider webs. Consider mixing techniques for a standout result that truly captures the Halloween spirit.

Q: How can I make my Halloween nail art last longer?

A: To extend the lifespan of your Halloween nail art, start with a good quality base coat to protect your natural nails. After applying your designs, seal them with a top coat for durability and shine. Additionally, avoid harsh chemicals and wear gloves when doing chores to minimize chipping and wear. Reapplying top coat every few days can also help maintain your nails’ appearance throughout the Halloween festivities.

Q: Can I incorporate nail art into a simple costume?

A: Absolutely! Nail art can elevate even the simplest costumes. For instance, a basic black dress can be enhanced with glossy black nails adorned with silver spider webs or orange and black accents for a Halloween theme. Nail art provides the perfect opportunity to add personality and flair, regardless of the complexity of your outfit.

Q: What are some easy Halloween nail art designs for beginners?

A: Beginners can start with simple designs like polka dots, stripes, or one-color gradients in traditional Halloween colors like orange, black, and purple. Using nail stickers or decals can also simplify the process without the need for advanced skills. Another easy idea is to use sponges to create a sponge-painted ombre effect resembling a night sky, which can be accented with tiny white dots for stars or little ghosts.

Skip to content