Inails Near Me Global

How to Choose Nail Colors That Match Your Jewelry

You want your nails to enhance your overall look, and choosing the right nail color to complement your jewelry is key. Start by examining the metal tones in your pieces—whether silver, gold, or rose gold—to find shades that will harmonize beautifully. Additionally, consider the gemstones in your jewelry. For more insights, check out Which nail polish color(s) goes the best with any outfit style … to discover versatile options. With the right approach, you can create a polished and coordinated appearance.

Key Takeaways:

  • Color Harmony: Choose nail colors that complement the main colors of your jewelry for a cohesive look.
  • Metal Tone: Match your nail polish with the metal of your jewelry; silver pieces pair well with cool tones, while gold pairs nicely with warm shades.
  • Occasion: Consider the event or season when selecting nail colors; lighter shades often suit spring and summer, while darker tones work well in fall and winter.
  • Skin Undertones: Identify your skin’s undertones to select nail polish shades that enhance both your jewelry and your overall appearance.
  • Texture and Finish: Play with different finishes (matte, glossy, metallic) to create a unique look that sets your jewelry apart.

Understanding the Basics of Color Theory

Before you select nail colors that harmonize with your jewelry, grasping the fundamentals of color theory can dramatically enhance your choices. Color theory encompasses the relationships between colors, helping you create pleasing and cohesive looks. By understanding how colors interact, you can ensure your nail polish complements your jewelry, showcasing your overall style and aesthetic in a more sophisticated manner.

The Color Wheel

Color is organized in a color wheel, which illustrates the relationships between primary, secondary, and tertiary colors. This visual tool allows you to see how different shades work together. By understanding the position of colors on the wheel, you can easily find which nail polishes will complement or contrast beautifully with your jewelry, making your overall look more polished and intentional.

Complementary vs. Analogous Colors

Assuming you want to make a statement with your nails, you can opt for complementary or analogous colors for the best effects. Complementary colors sit opposite each other on the color wheel, creating striking contrasts that grab attention. Conversely, analogous colors are adjacent to each other, offering a more harmonious and subtle appearance.

With complementary colors, you can create bold looks that are visually striking, perfect for making a statement with your jewelry. On the other hand, using analogous colors will give your look a more cohesive and sophisticated vibe, which is ideal when you want your jewelry to shine without overwhelming your ensemble. Choosing between these color schemes allows you to tailor your nail colors based on your style preference, occasion, and jewelry. This flexibility can elevate your overall appearance, making it feel uniquely yours.

Assessing Your Jewelry

It is important to assess your jewelry before selecting nail colors. Understanding the design, style, and materials can lead you to complementary hues that enhance your overall look. Take note of your favorite pieces and how they appeal to you, as this will guide your color choices when painting your nails.

Identifying Metal Types

If you want to choose nail colors that align with your jewelry, start by identifying the metals present in your pieces. Different metals can evoke various moods and color palettes.

Metal TypeSuggested Nail Colors
GoldWarm neons, corals, and rich reds
SilverCool pastels, blues, and grays
Rose GoldSoft pinks, nudes, and light mauves
PlatinumDeep jewel tones and classic neutrals

Recognizing your jewelry’s metal type opens a world of nail color possibilities, enabling you to create a polished and cohesive look.

Recognizing Gemstone Colors

Clearly, recognizing the colors of the gemstones in your jewelry is vital for crafting a harmonious aesthetic. Their vibrant shades can inspire your nail polish selections.

With a careful evaluation of the gemstones, you can choose nail colors that either match or complement these hues. For example, if you own a piece adorned with emeralds, deep greens or metallic golds would harmonize beautifully. Alternatively, if your jewelry features sapphires, shades of blue or metallic finishes can enhance the overall ensemble, making your accessories shine. By analyzing your gemstones, you ensure your nails and jewelry work together seamlessly.

How to Choose Nail Colors

Unlike picking a nail color at random, choosing one that complements your jewelry can elevate your overall look. Consider the style and hue of your accessories, as these factors will guide you in selecting nail shades that enhance your outfit. A cohesive color palette can make a statement, so take time to experiment with different combinations to see what feels right for you.

Matching with Metallic Jewelry

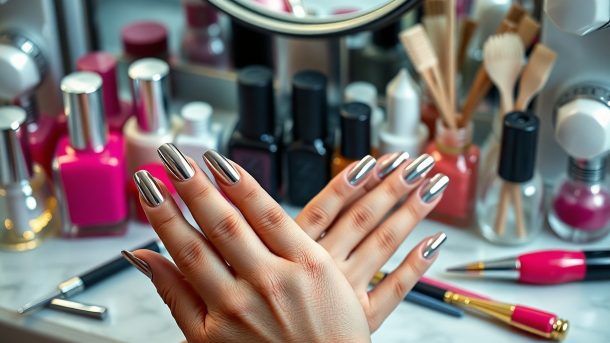
The right nail color can beautifully highlight your metallic jewelry. Opt for shades like deep red, sleek black, or classic nude that create a striking contrast with gold or silver pieces. A glossy finish works well to add glam to your nails, ensuring they catch the light just like your jewelry.

Coordinating with Colorful Gems

On the other hand, using your colorful gemstone jewelry as inspiration can make your nail color pop. This technique adds an extra layer of cohesiveness to your style. You can choose nail polishes that either match your gemstone shades or use complementary colors to enhance their vibrancy.

Nail colors that coordinate with colorful gems allow you to create a harmonious and eye-catching appearance. For instance, if you wear a pair of emerald earrings, applying a rich green polish or a soft pastel shade can bring the look together. Alternatively, pairing bright jewelry with contrasting nail colors like coral or bright blue can create an exciting visual dynamic that draws attention to both your nails and your jewels.

Tips for Seasonal Nail Color Selection

After you have determined your jewelry styles, consider how the seasons can guide your nail color choices. Understanding seasonal hues can enhance your overall look. Here are some tips to keep in mind:

  • Choose bright pastels and bold neons for summer.
  • Opt for earthy tones and metallics during fall.
  • Incorporate icy shades and deep jewel tones for winter.
  • Explore floral patterns and soft hues in spring.

The key is to let your jewelry and seasonal trends complement each other.

Spring and Summer Trends

One of the best ways to embrace the spring and summer seasons is through vibrant and lively shades. During these months, think about incorporating playful pastels, such as mint green and pale pink, or opt for eye-catching brights like coral and electric blue. These colors not only uplift your mood but also harmonize beautifully with your seasonal jewelry, creating a cohesive look.

Fall and Winter Inspirations

Any time the temperature drops, you can switch gears to warmer and richer tones. This is the perfect time to bring in hues like deep burgundy, forest green, and warm caramel, which resonate with the cozy aesthetic of fall and winter. These colors will harmonize stunningly with your gold or silver jewelry.

Nail hues for fall and winter enable you to express your personal style while embracing the changing seasons. Shades like burnt orange or deep plum not only reflect the natural palette around you but also create an inviting contrast with your winter ensembles. Consider incorporating glitter or metallic finishes that can elevate your look for holiday events. Pairing these shades with your jewelry can enhance the richness of your overall appearance, making your hands and accessories the perfect accent of seasonal elegance.

Consideration of Skin Tone

Not all colors will look good on you simply based on your personal preference; your skin tone plays a significant role in how nail color appears. Taking the time to identify whether you have warm, cool, or neutral undertones will not only enhance the appearance of your nails but also ensure harmony with your jewelry. This alignment pulls your overall look together, allowing your nail color and jewelry to complement your unique style beautifully.

Warm vs. Cool Undertones

Assuming you’ve already determined your skin’s undertone, you can start selecting nail colors that either enhance or contrast with it. Individuals with warm undertones typically have a yellow, peach, or golden hue to their skin, which pairs well with earthy tones like coral, orange, and rich browns. Cool undertones, on the other hand, display a pink or blue hue, best complemented by colors like jewel tones, purples, and icy pastels.

Shades that Flatter

Even if you know your undertone, the right shade will depend on various factors, such as the intensity of the color and the occasion. Lighter shades tend to look fresh and classic, while darker, bold colors can make a striking statement. Opt for shades that highlight your personal style and feel comfortable for any occasion, as confidence is key to really pulling off any nail color.

Another aspect to consider is how the nail shades interact with your jewelry. For example, if your jewelry features warm gold tones, select nail colors that harmonize with that warmth, like creamy peaches or soft corals. Alternatively, if your jewelry is silver or platinum, cooler shades like deep blues or rich purples can create a sophisticated contrast. Emphasizing these aspects will elevate your nail game and create a polished, cohesive look.

Experimenting with Nail Art

Despite the traditional approach to nail polish, experimenting with nail art can elevate your overall look, especially when paired with your favorite jewelry. By incorporating design elements that reflect the style of your accessories, you can create a unique harmony between your nails and adornments. Whether you opt for simple stripes or intricate patterns, taking the time to play with various techniques can result in a standout look that draws compliments and admiration.

Simple Nail Designs

The simplest nail designs can make a significant impact, allowing you to enhance your jewelry without overwhelming it. A classic solid color paired with a subtle glitter accent or a delicate dot pattern can complement your accessories effortlessly. Aim for designs that reflect the colors or shapes found in your jewelry to create a cohesive style.

Advanced Techniques for Jewelry-Inspired Nails

With a bit of practice, you can master advanced nail art techniques that take inspiration from your jewelry pieces. Implementing metallic accents, gemstones, or even intricate nail stamping can transform a standard manicure into a true work of art. To achieve this look, explore the following tips:
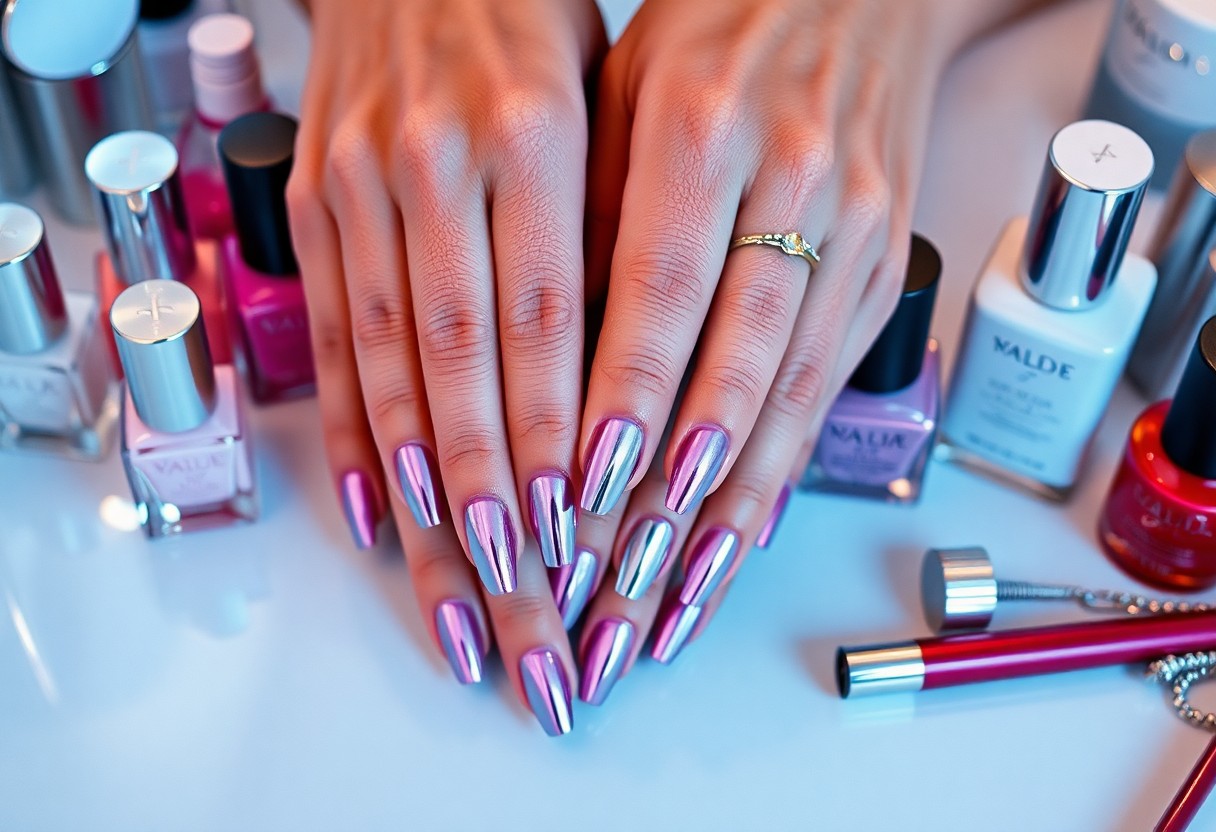
Jewelry-Inspired Nail Techniques

Metallic AccentsUse metallic nail polish that mimics the finish of your jewelry.
Gemstone EffectsIncorporate rhinestones or nail gems to replicate the sparkle of precious stones.
Nail StampingCreate intricate patterns that reflect the designs of your jewelry.

Jewelry-inspired nail art allows you to express your creativity while showcasing your personal style. You can achieve stunning looks with a few advanced techniques that elevate your manicure. Here’s how to get started:

  1. Choose colors that mirror your jewelry’s metallics and tones.
  2. Incorporate designs that reflect the patterns or textures of your accessories.
  3. Experiment with layering techniques to add depth and dimension.

Summing up

Taking this into account, selecting nail colors that complement your jewelry can elevate your overall look effortlessly. Consider the metal type and gemstone hues when choosing your nail polish shades. Soft pastels work well with silver, while bold colors may enhance gold. Always keep your personal style in mind, and don’t hesitate to experiment! For tips on choosing the right colors for specific jewelry, check out this resource on What nail polish colours suit yellow gold rings the best?.

Q: How do I select nail colors that complement my gold jewelry?

A: When choosing nail colors to go well with gold jewelry, consider warm shades that enhance the golden hues. Colors like soft peach, coral, and warm taupe are ideal choices. Metallic gold nail polish can also create a striking match if you are looking for a more cohesive look. Additionally, rich jewel tones, such as emerald green or deep burgundy, can provide a beautiful contrast that accents gold nicely.

Q: What nail colors work best with silver jewelry?

A: To match silver jewelry, opt for cool-toned nail colors that resonate with the silver’s shine. Light pastel shades such as baby blue, lavender, or soft pink offer a fresh and delicate appearance. For a bolder approach, consider darker shades like charcoal gray or navy blue, which can create a modern and sophisticated contrast. Metallic silver or chrome finishes can also enhance the look, giving an edgy vibe while maintaining harmony with the silver accessories.

Q: Are there specific colors that coordinate well with colorful gemstone jewelry?

A: Yes, when wearing colorful gemstone jewelry, it’s best to pick nail colors that either match or provide a complementary contrast to the stones. For example, if you have vibrant ruby or garnet pieces, deep red or burgundy nails can enhance this look. If your jewelry features turquoise or sapphire, consider lighter shades like mint green or sky blue for a fresh pop. Alternatively, a neutral nail color such as nude or soft gray can provide a great backdrop, allowing the bright pieces to stand out while keeping your overall look balanced.

The Boldest Nail Colors for Confident Statements

Just when you thought the world of nail colors was limited to subtle shades, it’s time to explore how bold hues can elevate your style. These vibrant colors not only enhance your look but also embody confidence and self-expression. Each nail polish choice you make can speak volumes about your personality and mood. To fully embrace your daring side, check out this guide on Bright And Bold: How To Rock Vibrant Nail Polish Colors With … and discover the boldest shades that will undoubtedly turn heads.

Key Takeaways:

  • Daring Shades: Vibrant colors like electric blue, fiery red, and deep purple make bold statements that stand out.
  • Trendy Textures: Matte, glossy, and metallic finishes add dimension and uniqueness to your nail art.
  • Seasonal Choices: Seasonal trends often dictate nail color themes, with bold hues making a comeback for special occasions.
  • Personal Expression: Nail color is a personal choice; selecting bold shades reflects confidence and individuality.
  • Mix and Match: Combining different colors or patterns can create an eye-catching design that elevates your overall look.

The Psychology of Color

To understand the impact of bold nail colors, it’s crucial to investigate into the psychology of color. Different hues evoke various emotions and can influence your mood and confidence levels. By choosing the right shade, you can not only express your personality but also communicate your feelings without saying a word. For further insights, check out What Does Your Nail Polish Say About You? – ORLY.

Color and Confidence

Color directly affects your confidence levels and self-image. Wearing vibrant nail colors can enhance your mood and make you feel empowered. The boldness of your choice often reflects your ability to make confident statements and embrace your individuality.

Choosing the Right Shade for Your Personality

Behind every confident statement lies the choice of a nail color that resonates with your true self. Opting for a shade that reflects your inner personality allows you to feel authentic and assured.

For instance, if you’re lively and adventurous, vibrant colors like electric blue or fiery red may suit you well. On the other hand, if you prefer an understated elegance, soft pastels or classic nudes might better express your personality. By aligning your nail color with your authentic self, you not only boost your confidence but also create a powerful impact on those around you.

Trending Bold Nail Colors

Any confident individual knows that bold nail colors are a wardrobe crucial. This season, vibrant shades are taking center stage, with daring hues designed to make a statement and express your personality. Whether you prefer the classic allure of reds or the unexpected pop of blues and greens, there’s a shade to suit every bold spirit. Explore the trending colors that will elevate your manicure game and inspire your next nail art adventure.

Vibrant Reds

By embracing vibrant reds, you tap into a timeless elegance that radiates confidence and sophistication. This shade commands attention and adds a glamorous touch to any outfit, making it a must-have in your beauty arsenal. Pair it with a glossy finish for an extra dose of chic.

Electric Blues

On the other hand, electric blues are all about making a powerful statement. This electrifying hue captures attention and is a standout choice for anyone willing to step outside the traditional color palette. Electric blues can elevate your look from ordinary to extraordinary.

Trending in the nail art world, electric blues are not just bold; they are also versatile. You can opt for a solid color or play with geometric designs and accents. This vibrant hue complements various skin tones, making it a preferred option for those who want edgy yet stylish nail art. Pair it with metallic or matte finishes to create a unique effect that will leave everyone in awe.

Fierce Greens

Between the quiet elegance of olive and the striking allure of forest shades, fierce greens offer a dynamic range for those yearning for uniqueness. This bold color choice symbolizes growth and creativity, daring you to step outside your comfort zone in your nail game.

And with fierce greens gaining popularity, you have the opportunity to experiment with different tones and finishes. Whether you prefer deep emerald shades that embody sophistication or bright lime hues for a playful touch, fierce greens can easily transition from a day at the office to an evening out. Pair with gold accents for an eye-catching blend or go for a simple matte finish for a minimalist vibe.

Nail Art Techniques for a Statement Look

Despite the variety of nail colors available, techniques like nail art can elevate your manicure to a bold new level. By incorporating different styles and designs, you can make a confident statement that truly reflects your personality. From eye-catching ombre effects to intricate geometric designs, these techniques allow you to express yourself in unique ways and stand out from the crowd.

Ombre Effects

Before submerging into ombre nails, consider how the gradient blend of colors can create a stunning visual impact. This technique allows you to transition from one hue to another seamlessly, providing a chic and modern look that’s perfect for any occasion. Experiment with contrasting shades or stick to similar tones for a softer effect that fits your style.

Geometric Designs

One of the most striking ways to personalize your nails is through geometric designs. These patterns can range from simple lines to complex shapes that capture attention and showcase your creativity. You can use tape to create precise shapes or freehand your designs for an artistic flair that makes your nails truly unique.

Also, incorporating geometric designs opens up endless possibilities for creativity. You can play with color combinations, sizes, and placements, allowing your nails to become a canvas of self-expression. Whether you prefer minimalist designs or bold, intricate patterns, geometric nail art can enhance your look and make a strong statement about your personality and style.

Caring for Bold Nail Colors

Your bold nail colors deserve the best care to maintain their stunning appearance. Proper nail care not only enhances the vibrancy of your polish but also ensures the longevity of your statement-making manicure. Invest in quality base and top coats, hydrate your nails and cuticles regularly, and consider reapplying your top coat every few days to keep your nails looking fresh and fabulous.

Prepping Your Nails

Your nails should be prepped properly to achieve a flawless base for your bold color. Start by cleaning and shaping your nails, then gently buff the surface to create an even texture. Moisturize your cuticles and push them back for a clean, polished look. Applying a base coat will not only protect your nails from staining but also improve adhesion for the bold polish that follows.

Long-lasting Finishes

Before applying your bold nail color, you want to ensure that it lasts as long as possible. A few extra steps can help maintain that vibrant statement for days on end.

Bold colors can chip quickly if not applied with care. To extend the life of your manicure, opt for high-quality, chip-resistant nail polishes, and always finish with a glossy top coat. Additionally, avoid submerging your nails in water for prolonged periods immediately after application and consider using gloves during household chores. These practices will protect your striking nail colors and keep them looking impeccable for longer.

Celebrity Inspiration

Once again, you can turn to the bold and fearless world of celebrities for inspiration when choosing your next nail color. From the red carpet to social media, these trendsetters are not afraid to express themselves through vibrant hues and daring designs. Their fearless attitude towards nail art encourages you to embrace the boldness within and experiment with striking colors that make a statement.

Iconic Nail Looks

Across numerous events and appearances, you can find celebrities rocking iconic nail looks that range from vivid scorpion reds to deep midnight blues. These striking choices not only elevate their outfits but also add a personal touch that showcases their individuality. By incorporating elements from these showstopping styles, you can create your own signature nail looks that leave a lasting impression.

Celebrities Who Boldly Use Color

At the forefront of nail artistry are celebrities who boldly embrace vibrant colors, pushing the boundaries of traditional nail fashion. From Billie Eilish’s neon shades to Rihanna’s trendsetting metallics, these stars show you that your nails can be as expressive as your personality. Their adventurous spirit in utilizing nail polish as a form of self-expression encourages you to experiment and find the colors that resonate with you.

But beyond just looking fabulous, these celebrities also inspire you to own your choices. When you see stars like Lizzo proudly sporting eye-catching nail designs or Kacey Musgraves opting for playful pastel shades, it sets a precedent that it’s okay to be adventurous and unapologetic with your style. By taking a cue from their bold color choices, you can cultivate a unique nail aesthetic that reflects your inner confidence and makes a powerful statement.

DIY Tips for Bold Nails

For a stunning DIY manicure, follow these tips to achieve bold and vibrant nails. Start by gathering all necessary supplies, and make sure to prep your nails properly before applying color. Be sure to:

  • Remove any old polish.
  • Shape your nails with a file.
  • Push back cuticles gently.
  • Apply a base coat for smoothness.
  • Use quick, even strokes for nail polish application.
  • Finish with a top coat for shine and longevity.

This process will help you achieve professional-looking, bold nails right at home.

At-Home Manicure Essentials

Essentials for a perfect at-home manicure include a quality nail polish remover, a good nail file, cuticle oil, and a sturdy base and top coat. Additionally, you may want to invest in some high-pigment nail polishes in various bold shades to switch up your look. Having the right tools will support an optimal nail care routine, ensuring your nails are always ready to make a statement.

Techniques for Flawless Application

Any successful manicure relies on techniques that promote a flawless application of polish. Start by ensuring your nails are clean and dry, which prevents the polish from chipping easily. Apply thin layers of color, letting each coat dry before applying the next, ensuring even coverage and preventing smudges.

Due to the importance of drying time, you should allocate some patience between each coat. If you’re struggling with precision, consider using painter’s tape to block off areas around your nails. This way, you can eliminate messes and create crisp lines. Following these techniques will ensure that your bold nail color looks impeccable and lasts longer, enhancing your confident statement.

Conclusion

Hence, embracing bold nail colors can transform your style and amplify your confidence. By experimenting with vibrant shades and unique finishes, you can create eye-catching statements that reflect your personality and mood. Whether you opt for fiery reds, daring blues, or striking metallics, allowing your nails to be a canvas for creativity is an empowering choice. Let your fingertips do the talking and express yourself boldly, because your nails can be a powerful accessory in making a statement wherever you go.

Q: What are some of the boldest nail colors to try for making a confident statement?

A: Pertaining to bold nail colors, rich and vibrant shades are key. Popular choices include deep crimson reds, striking royal blues, vivid emerald greens, and eye-catching fuchsia. Metallic shades such as gold and silver also make a strong impact. These colors exude confidence and can really elevate your overall look. Additionally, consider trying out textures and finishes like matte, glitter, or holographic, which can add an extra layer of boldness to your manicure.

Q: How can I choose the right bold nail color for my skin tone?

A: Selecting the perfect bold nail color largely depends on your skin tone. For warm undertones, shades like coral, warm reds, and orange-based hues are flattering. If you have cool undertones, try jewel tones such as emerald green, sapphire blue, and purple. Neutrals like white and black can complement any skin tone and serve as a canvas for nail art. Ultimately, experimenting with different colors can also help you discover what makes you feel the most confident and stylish.

Q: How can I maintain my bold nail color for a long-lasting finish?

A: To ensure your bold nail color stays vibrant and chip-free, start with a strong base coat to protect your nails and enhance adherence. Apply two to three coats of your chosen color, allowing sufficient drying time between layers. Always finish with a high-quality top coat to seal the color and provide shine. Additionally, regular upkeep includes moisturizing your cuticles and avoiding harsh detergent exposure. Wearing gloves during chores can also help preserve your manicure, allowing you to flaunt those bold nails for longer.

How to Create Plaid Nail Designs for Fall

You can easily elevate your autumn style by mastering the art of plaid nail designs. This trendy look embodies the essence of fall with its cozy patterns and warm colors. In this guide, you’ll discover step-by-step instructions and necessary tips to create your own stunning plaid nails. Gather your tools and colors, and let your creativity flow as you transform your nails into a fashionable autumn accessory.

Key Takeaways:

  • Choose Colors Wisely: Select warm and rich tones like burgundy, mustard, and forest green to embody the fall aesthetic.
  • Master the Pattern: Familiarize yourself with the classic plaid pattern, consisting of intersecting lines that create a grid-like design.
  • Use Nail Tape: Employ nail tape or striping tape to achieve clean lines and precise sections while painting your plaid design.
  • Add Texture: Consider incorporating matte or glossy topcoats to vary the texture of the plaid and enhance its visual appeal.
  • Experiment with Variations: Don’t hesitate to explore different plaid styles, such as tartan or gingham, to create unique looks.

Understanding Plaid Nail Designs

To master plaid nail designs, it’s vital to grasp their unique structure and appeal. Plaid patterns consist of interweaving lines and colors that create an intricate visual effect, perfect for adding a touch of sophistication and warmth to your fall manicure. The blend of contrasting and complementary shades plays a significant role in achieving that cozy autumn vibe, making plaid an ideal choice for the season.

Key Characteristics of Plaid

One of the defining features of plaid is its crisscross pattern, which typically consists of horizontal and vertical lines intersecting in various colors. This geometric design evokes a classic and timeless style, allowing you to experiment with colors and sizes to create your unique take on plaid. Texture can also be incorporated through matte or glossy finishes, enhancing the visual dynamics of your nail art.

Popular Color Combinations for Fall

With fall around the corner, warm and rich color combinations dominate plaid nail designs. Think deep reds, burnt oranges, and rich browns, often paired with muted greens and creamy whites. These hues not only reflect the changing leaves but also evoke feelings of warmth and comfort during the cooler months.

Understanding the popular color combinations for fall can help you achieve a more cohesive and seasonal look for your plaid nail designs. You can create a striking contrast using deep burgundy with soft gold accents, or opt for a classic combination of navy blue and mustard yellow. Additional pairings like olive green with rusty orange can also capture the essence of fall, allowing you to showcase your personal style while embracing the seasonal charm.

Gathering Your Materials

You will want to gather your materials before exploring into creating your stunning plaid nail designs. Collecting everything in advance will streamline the process and ensure you have what you need to achieve a polished look. Essential items include nail polish, tools for painting, and any extras for embellishments. Make sure your workspace is organized, allowing you to focus on bringing your nail art vision to life this fall.

Essential Tools and Supplies

Little did you know, having the right tools makes all the difference in achieving perfect nail art. You’ll need a base coat, topcoat, several shades of nail polish, a thin nail brush or striping tape, and a dotting tool for detail work. Additionally, keep cotton swabs and nail polish remover on hand for any touch-ups or clean-ups along the way. With the right supplies, you’ll be ready to create beautiful plaid designs.

Choosing the Right Nail Polish

You should choose your nail polish carefully to ensure vibrant, long-lasting plaid designs. Aim for colors that complement the fall palette, including rich oranges, deep reds, and warm browns. Consider also using a mix of glossy and matte finishes to add depth to your design. A good-quality polish can elevate the look of your nail art and help create clean lines important for plaid patterns.

Polish plays a key role in the outcome of your plaid nail designs. Opt for polishes with strong pigmentation to achieve bold colors that pop against the backdrop of fall. For best results, select fast-drying formulas to avoid smudges as you layer your designs. Selecting the right shades and finishes will not only enhance your creativity but will also allow your plaid patterns to stand out beautifully this season.

Preparing Your Nails

After deciding on your plaid nail design for fall, it’s vital to prepare your nails properly to ensure a flawless application. Take the time to clean, file, and shape your nails to create a neat canvas. This will enhance the overall look of your nail art and keep your nails healthy.

Nail Care Tips Before Design

Any effective nail design starts with proper care. Take a moment to follow these tips to enhance the preparation process:

  • Remove old polish completely.
  • Soak your nails in warm water to soften cuticles.
  • Gently push back your cuticles.
  • File your nails to your desired shape.
  • Moisturize your hands and nails.

This will create a perfect base for your plaid design.

The Importance of a Base Coat

Any nail design you choose, applying a base coat is vital. The base coat acts as a protective barrier between your nails and the nail polish, preventing staining and damage. Additionally, it helps the polish adhere better and last longer, ensuring your plaid design shines brightly without chipping.

The base coat not only extends the life of your manicure but also promotes healthier nails. It fills in ridges, providing a smooth surface for your colored polish, which can enhance the overall appearance of your design. Furthermore, using a high-quality base coat can also prevent nail discoloration and increase shine, making your plaid patterns pop even more.

Step-by-Step Guide to Creating Plaid Nail Designs

Not everyone knows how simple it is to nail that cozy plaid vibe on your nails this season. Follow the detailed Fall Plaid Nail Designs for Autumn Lovers to make your creative process smooth and enjoyable.

Information Breakdown

StepDescription
Prep Your NailsFile and shape your nails for a clean canvas.
Base ColorApply a base coat and your chosen color.
Striping TapePlace tape for lines and sections.
Add ColorsFill in the sections to create the plaid pattern.
Top CoatSeal your design with a top coat for shine and durability.

Basic Techniques for Plaid Patterns

Designs with plaid patterns can seem complex, but they are achievable with a few basic techniques. Start with a solid base color, then use thin brushes or striping tape to create the lines. Vary the colors to achieve that quintimportant autumn look, combining deeper shades to capture the essence of fall.

Tips for Accurate Line Work

Guide your hand carefully while creating your plaid design to ensure neat lines. Consider these tips:

  • Use striping tape to define areas and create straight lines.
  • Opt for a fine brush for precision in line work.
  • Practice steady hands by resting your wrist or elbow for support.
  • Start with lighter pressure; you can always go over to darken.

Any practice will make a noticeable difference.

Creating precise lines is key for achieving that polished plaid look. To enhance your technique, consider the following points:

  • Utilize a top coat for a smooth finish once your polish dries.
  • Experiment with different angles and strokes to find what suits you.
  • Be patient; allow layers to dry fully before adding the next.
  • Have fun with it, and don’t worry about perfection!

Any attempt will lead to improvement and creativity in your designs.

Customizing Your Plaid Design

Once again, customizing your plaid design allows you to showcase your unique style. Whether you prefer classic color combinations or trendy hues, you can easily adapt your plaid patterns to fit your personality. Mixing and matching colors will make your nails stand out, while varying line thicknesses can add depth and dimension to the design. Feel free to play around with different shades and patterns until you find the perfect combination that reflects your individuality!

Incorporating Seasonal Elements

Your autumn plaid design can be enhanced by incorporating seasonal elements such as leaves, pumpkins, or even acorns. Adding these small motifs alongside your plaid will deepen your connection to the fall season and make your nail art more thematic. Choose colors that resonate with fall, like deep oranges, rich browns, or forest greens, to elevate your design and make it feel even more festive.

Experimenting with Different Textures

Experimenting with different textures can take your plaid nail designs to the next level. Consider using matte polish for a more understated look or glossy finishes for a sleek effect. You might also try incorporating glitter or foils to create eye-catching accents within your plaid design. Textured top coats or even nail art items like stencils can help you achieve unique patterns, giving your nails a special touch that sets them apart.

Plaid nail designs can greatly benefit from the use of different textures to create visual interest and depth. By layering matte and glossy polishes, you can create a striking contrast that highlights your plaid pattern. Additionally, incorporating nail art tools like sponges or brushes can allow for more intricate designs, such as fuzzy checks or gradient backgrounds. Experimenting with mixed media, such as adding studs or jewels, can provide an extra dimension, making your fall nail art truly one of a kind.

Factors to Consider for Long-Lasting Designs

All nail designs benefit from a few key factors that enhance their longevity. Consider the following:

  • Select high-quality nail polish.
  • Use a reliable base coat.
  • Keep your nails well-hydrated.
  • Avoid excessive heat or moisture.

Any one of these factors can significantly impact the lifespan of your plaid nail designs, ensuring they look fresh throughout the fall season.

Maintaining Your Nail Art

Even the most beautiful nail art requires some maintenance to stay looking pristine. Regularly check for chips and touch up color as needed, ensuring your designs remain vibrant and intact. Consider using gloves when doing chores to protect your nails and extend their wear.

Choosing the Right Top Coat

Maintaining the look and longevity of your plaid nail designs starts with selecting the right top coat. A high-quality top coat not only seals in your design but also adds durability and shine.

To ensure your nail art lasts, opt for a top coat known for its chip-resistant properties. Look for options that offer a glossy finish, as this will enhance the colors of your plaid design while providing an extra layer of protection. Some top coats even have quick-drying formulas, allowing you to finish your manicure without long wait times.

Final Words

From above, you can confidently create stunning plaid nail designs for fall by following simple steps and utilizing the right materials. Embrace various colors and patterns to express your style while incorporating techniques like striping tape and freehand painting. Your nail art will surely stand out this season. For inspiration and ideas, check out these amazing Plaid Nail Designs Fall that can elevate your nail game and get you excited about experimenting with new looks.

FAQ

Q: What materials do I need to create plaid nail designs for fall?

A: To create stunning plaid nail designs for fall, you will need the following materials: a base coat, a range of nail polish colors (think warm fall shades like burgundy, mustard yellow, burnt orange, and forest green), striping tape or a thin nail art brush, a top coat, and a dotting tool (optional). Make sure to gather some cotton pads and nail polish remover for cleanup, as well as a small dish of water to help with cleaning your brushes if needed.

Q: How do I achieve the perfect plaid pattern on my nails?

A: To achieve a perfect plaid pattern on your nails, start by applying a base coat to protect your nails and ensure smooth application. Once the base coat is dry, apply your chosen base color (usually a lighter shade) and allow it to fully dry. Next, use striping tape to create intersecting lines on your nails, following a grid pattern. Paint over the entire nail with a contrasting color and remove the tape while the polish is still wet to reveal clean stripes. You can create additional layers by repeating the taping and painting process with different colors, ensuring to vary the direction of the lines. Finish off with a top coat to seal in your design and add shine.

Q: Are there any tips for making my plaid nail design last longer?

A: To ensure that your plaid nail designs last longer, it’s important to start with a clean surface. Before applying any polish, clean your nails thoroughly with nail polish remover to remove any oils or residue. Always use a high-quality base coat to create a strong foundation for your design, which will help prevent chipping. After completing your design, seal it with a generous layer of top coat, and consider applying an additional top coat every few days to maintain the look. Avoid exposure to harsh chemicals and wear gloves during activities that may damage your nails. Finally, make sure to store your nail products in a cool, dry place to maintain their effectiveness.

The Easiest Way to Achieve Chrome Nails

Over the past few years, chrome nails have taken the beauty world by storm, becoming a must-have trend for nail enthusiasts like you. Achieving that stunning, reflective look doesn’t have to be complicated or time-consuming. In this post, we’ll guide you through the simplest methods to create gorgeous chrome nails at home, ensuring your manicure stands out without the hassle of salon visits. Whether you’re preparing for a special occasion or just want to elevate your everyday style, you’ll find all the tips and tricks you need right here.

Key Takeaways:

  • Preparation: Start with clean, filed nails for a smooth base.
  • Base Coat: Apply a quality base coat to enhance adhesion and longevity.
  • Chrome Powder: Use fine chrome powder for the best reflective effects.
  • Application Technique: Rub the chrome powder onto the cured nail polish effectively to achieve even coverage.
  • Top Coat: Seal your design with a gel top coat to protect and enhance shine.

Understanding Chrome Nails

Achieving the trendy look of chrome nails isn’t as complicated as it may seem. This modern style enhances your manicure with a reflective, mirror-like finish that elevates any look. Whether you’re attending a special event or just want to indulge in a bit of self-care, chrome nails can effortlessly add a touch of glam to your everyday style.

What Are Chrome Nails?

With their stunning metallic finish, chrome nails utilize a unique powder that creates an illusion of depth and shine. This powder, typically applied over a gel manicure, reflects light beautifully, giving your nails a sleek and polished appearance. When done correctly, chrome nails can appear smooth and shiny, mimicking the look of real metal.

Benefits of Chrome Nails

Besides their eye-catching appeal, chrome nails offer durability and versatility. They can be customized in various shades, making them suitable for any occasion or style preference. Additionally, the long-lasting nature of gel polish means your chrome finish can stay vibrant for weeks, providing excellent value for your time and investment.

Indeed, choosing chrome nails can transform a basic manicure into a statement. Their unique glossiness and reflective surfaces not only capture attention but also pair effortlessly with any outfit. Plus, the ability to mix and match colors and designs means you can experiment with different looks, ensuring your nails stand out while still showcasing your personal style. Whether opting for classic silver or bold colors, the possibilities are endless!

Essential Tools and Products

Assuming you’re all set for a stunning chrome finish, having the right tools and products is key to your success. Invest in a quality base coat, top coat, chrome powder, and a few application tools to achieve those eye-catching chrome nails. For comprehensive tips and tricks, check out Chroming Your Nails – Tips and Tricks.

Base Coat and Top Coat

To create a flawless chrome manicure, start with a reliable base coat to protect your nails, followed by a good quality top coat that ensures the chrome polish adheres well and lasts longer. These layers not only enhance the shine but also prevent chipping.

Chrome Powder and Application Tools

Behind the magic of that shiny chrome effect lies the chrome powder and application tools you use. Chrome powder is typically very fine and reflects light beautifully, giving your nails that desired metallic finish.

In addition, you’ll want to have application tools such as sponge applicators or silicone brushes to evenly distribute the chrome powder on your nails. A good rubbing alcohol or nail cleanser can help prep your nails, while a fine detail brush will help you achieve precision during application. By carefully selecting these tools, you’ll elevate your nail art to a professional level.

The Easiest Way to Achieve Chrome Nails

Your journey to stunning chrome nails is made easy with a simple, step-by-step guide. Follow these simple instructions for a dazzling finish that will have everyone asking for your secret.

StepDescription
1Prepare your nails.
2Apply a base coat.
3Apply your color polish.
4Use chrome powder.
5Seal with top coat.

Preparing Your Nails

Against a backdrop of well-groomed nails, the process begins. Start by removing any old polish and trimming your nails to your preferred length. Gently file the edges and shape your nails, ensuring they are smooth. Push back your cuticles and apply a bit of moisturizer to keep them healthy. This will create the perfect canvas for your chrome masterpiece.

Application Process

Nails play a vital role in achieving the perfect chrome effect. Begin by applying a base coat to protect your natural nails, followed by your chosen color polish. Once dried, it’s time to introduce the chrome powder. Use an applicator to gently rub the powder onto the nails, creating that sought-after reflective look. Finally, seal the deal with a top coat to ensure longevity.

Even after applying the chrome powder, the finish can vary a lot based on the technique. Be sure you are using gentle, circular motions while rubbing the powder into your freshly polished nails. Keep pressure light to avoid smudging the base color underneath. Once you’re satisfied with the chrome effect, finish with a top coat. This not only enforces the chrome look but also adds shine and durability, ensuring your nails stay stunning longer.

Tips for Longevity

Many techniques can help prolong the life of your chrome nails. Consider these tips for keeping your nails looking fresh:

  • Always apply a base coat before your chrome polish.
  • Seal with a quality top coat to protect your finish.
  • Avoid excessive exposure to water and harsh chemicals.
  • Wear gloves when doing household chores.
  • Limit the use of nail polish removers containing acetone.

Knowing how to care for your nails will ultimately enhance their longevity. For more insights, check out Get Salon-Quality Chrome Nails at Home.

Maintenance Techniques

Between regular touch-ups, it’s necessary to maintain the appearance of your chrome nails. Use a designated nail oil to nourish and hydrate your cuticles, ensuring your overall nail health remains strong. Regularly file and shape your nails to prevent snags and chips, and avoid using them as tools to minimize damage.

Common Mistakes to Avoid

Maintenance of your chrome nails includes avoiding certain pitfalls that may undermine their elegance. You might be tempted to skip a base coat, thinking it isn’t necessary, but this can lead to peeling and discoloration of your color. Additionally, neglecting to apply a top coat will expose your nails to wear and tear, leading to premature fading.

Consequently, overlooking the need for proper prep work and maintenance can result in disappointing outcomes. Investing time in applying base and top coats, along with using the right tools, will ensure that your chrome nails maintain their stunning finish. Prioritizing these steps will not only enhance your nail art but also save you time and money in the long run.

Alternative Techniques

Not everyone has access to a salon, which is why exploring alternative techniques for achieving chrome nails at home can be a game changer. From simple topcoat hacks to creative applications of pigment powders, you have plenty of options to choose from to get that stunning metallic finish without breaking the bank.

Gel vs. Regular Polish

After weighing the benefits of gel and regular polish, you might find that gel offers longer-lasting results and a more lustrous finish. On the other hand, regular polish can be easier to work with and requires no curing lamp, making it a convenient option for those seeking a quick and glossy look.

DIY Hacks for Chrome Effects

Across various platforms, you can discover an array of DIY hacks to achieve beautiful chrome effects at home. Utilizing common nail products and a clever application technique can yield impressive results that rival salon finishes.

Further, consider using a soft brush to apply chrome powders over a sticky top coat for an ethereal shine. Other hacks include mixing metallic pigments with clear polish for a custom blend or layering different shades for a unique effect. These methods allow you to tap into your creativity while achieving the chrome look you adore, making your nail art truly personalized.

Troubleshooting Common Issues

Unlike other nail art techniques, achieving perfect chrome nails can sometimes lead to unexpected challenges. Whether you encounter an uneven finish or chipped chrome, knowing how to address these issues can ensure your manicure looks flawless. By following simple tips and tricks, you can troubleshoot effectively and maintain the stunning appearance of your chrome nails.

Uneven Finish Solutions

With a few adjustments to your application technique and products, you can easily achieve a smooth, even finish. First, ensure that your base coat is applied evenly and allowed to dry thoroughly before applying the chrome powder. If the finish remains uneven, consider using a finer chrome powder or applying a second layer for improved results.

Fixing Chipped Chrome Nails

Chipped chrome nails can be frustrating, but they are fixable with the right approach. It’s important to address chips promptly to prevent further damage to your manicure.

Indeed, using a clear topcoat can help seal and protect your chrome nails, but if they do chip, you can make quick fixes. Start by cleaning the chipped area and gently buffing it to smooth out any rough edges. Then, apply a small amount of chrome powder to the chipped spot and finish with a layer of clear topcoat. This will seamlessly blend the repair and restore the glossy look you desire. Additionally, consider touching up any areas that might need reinforcement on a regular basis to keep your manicure looking fresh.

Conclusion

Conclusively, achieving stunning chrome nails can be a simple and enjoyable process when you follow the right steps. By preparing your nails properly and using high-quality products, you can effortlessly create that desirable metallic look. For a detailed guide, consider checking out How To Liquid Chrome Nails. With practice, you will master this trend and enjoy your fabulous nails while turning heads everywhere you go.

FAQ

Q: What materials do I need to achieve chrome nails at home?

A: To achieve chrome nails at home, you will need a few necessary materials: a base coat, a gel nail polish in your desired color, a chrome powder or chrome pigment, a no-wipe top coat, and applicator tools like a makeup sponge or applicator brush. Start by preparing your nails, apply the base coat, and cure it under a UV/LED lamp. Then, apply the gel polish and cure again before proceeding with the chrome powder application.

Q: How do I apply chrome powder to get a perfect finish?

A: To apply chrome powder effectively, first apply a no-wipe top coat over your cured gel polish. Cure this top coat for approximately 30 seconds under the UV/LED lamp. Once cured, take your applicator tool and gently rub the chrome powder onto the surface of the nail using circular motions. Make sure to cover the nail evenly for a flawless chrome effect. If desired, seal the chrome finish with another layer of no-wipe top coat and cure once more.

Q: How long will my chrome nails last, and how should I care for them?

A: Chrome nails can last anywhere from 1 to 3 weeks or longer, depending on your nail care routine and daily activities. To prolong the wear of your chrome nails, avoid using your nails as tools, refrain from excessive exposure to water, and apply cuticle oil regularly to keep the surrounding skin hydrated. When it’s time to remove your chrome nails, use a proper nail polish remover designed for gel products to prevent damage to your natural nails.

How to Master Negative Space Nail Art

There’s a captivating world of nail art waiting for you, and mastering negative space techniques can elevate your designs from ordinary to extraordinary. By embracing the skin of your nails as part of the art, you can create striking contrasts and unique styles that stand out. In this guide, you will learn the important tools, techniques, and tips to effortlessly create stunning negative space nail art that showcases your creativity and style. Let’s investigate the exciting process of transforming your nails into a canvas of artistic expression!

Key Takeaways:

  • Understanding Negative Space: Negative space refers to the areas on the nail that are left unpainted, creating a contrast between the polish and the natural nail.
  • Precision Tools: Invest in quality tools like fine brushes and striping tape to achieve clean lines and precise designs.
  • Color Choices: Choose complementary colors that enhance the effect of negative space. Lighter shades can highlight the design, while darker shades create a striking contrast.
  • Design Techniques: Explore various techniques such as geometric patterns, floral designs, or minimalist art to effectively utilize negative space.
  • Practice Is Key: Consistent practice will improve your skills and confidence, allowing you to experiment with more complex negative space designs over time.

Understanding Negative Space Nail Art

Before you investigate the creative world of nail art, it’s necessary to grasp the concept of negative space. This technique involves deliberately leaving parts of your nails unpolished, allowing for a striking contrast between the nail surface and the chosen colors. Negative space can highlight unique designs and patterns, making your nail art truly stand out.

What is Negative Space?

An necessary aspect of nail art, negative space refers to the areas of your nail that are intentionally left bare. It creates a balance between the polished and unpolished, offering a fresh and modern look. This technique can be used in various designs, from simple shapes to intricate patterns, empowering you to express your style.

Importance of Negative Space in Nail Art

If you want to add depth and dimension to your nail designs, incorporating negative space is key. By playing with contrasts and visual lines, negative space can elevate your nail art from basic to breathtaking.

Negative space allows for your creativity to shine, as it provides breathing room within your designs. This technique can make bold colors pop, draw attention to specific shapes, or enhance the overall design aesthetic without overwhelming the viewer. Embracing negative space in your nail art can lead to innovative looks, setting you apart from the crowd.

Essential Tools and Supplies

The right tools and supplies are vital for creating stunning negative space nail art. Begin with a base coat to protect your nails, then select your favorite nail polish colors, top coat for a glossy finish, and nail art tape for clean lines. Cotton pads and nail polish remover are imperative for cleanup, and a good set of dotting tools can help add intricate designs. With these items at hand, you’ll be well-prepared to master this artistic technique.

Nail Polish Choices

Any color palette can work for negative space nail art, but it’s best to choose polishes that complement your design. Opt for a mix of vibrant hues and subtle shades to allow the negative space to pop. Metallics and pastels often work beautifully together, while bold primary colors can create a striking contrast. Ultimately, the choice of polish will set the tone for your overall nail art creation.

Brushes and Stencils

There’s a variety of brushes and stencils available that can elevate your negative space nail art game. Using fine-tipped brushes allows for intricate detailing, while wider brushes are perfect for fills and broader strokes. Nail art stencils are excellent for achieving precise shapes, making it easier to maintain the integrity of the negative space. Experimenting with different tools will give you the versatility to explore various styles and techniques.

Understanding how to use brushes and stencils effectively will greatly enhance your nail art results. Fine detail brushes are ideal for creating sharp lines and intricate designs, giving your artwork a professional finish. Stencils, on the other hand, simplify the process of producing uniform shapes, allowing you to fill in colors cleanly without worrying about messing up the negative spaces. By pairing the right brush sizes with suitable stencils, you can unleash your creativity and develop your unique nail art style with confidence.

Step-by-Step Guide to Creating Negative Space Nail Art

Not only is negative space nail art visually stunning, but it also allows your natural nails to shine through. Follow this simple step-by-step guide to create your own stunning design:

StepDescription
1Gather your supplies: nail polish, tape, and topcoat.
2Prepare your nails by cleaning and buffing.
3Apply a base coat and let it dry completely.
4Use tape to create your desired negative space design.
5Fill in the exposed areas with your chosen color and allow to dry.
6Remove the tape carefully and finish with a topcoat.

Preparing Your Nails

One important aspect to achieving beautiful negative space nail art is to ensure that your nails are well-prepared. Start by removing any old polish, then shape your nails as desired. Buff the surface to smooth out any ridges, and apply a nourishing base coat to protect your nails and create a stable foundation for the polish.

Application Techniques

Techniques vary, but finding the right one for your design can elevate your nail art. You might consider using tape or nail stencils to define the negative space areas precisely, ensuring clean lines. Alternatively, a fine brush can help you create intricate designs without the need for tape.

For instance, if you choose to use tape, place it strategically to create geometric patterns. This will help you achieve sharp edges where the color meets the negative space. Additionally, you can experiment with matte and glossy finishes to enhance visual interest within your design. This combination will ensure that your negative space nail art stands out beautifully.

Tips for Perfecting Your Negative Space Design

Despite the simplicity of negative space nail art, executing it perfectly can be tricky. Here are some tips to elevate your designs:

  • Use high-quality striping tape for clean lines.
  • Practice your design on paper before nail application.
  • Invest in good brushes for detailed work.
  • Apply a top coat to enhance the design’s longevity.

Any mistakes can be fixed by practicing and refining your techniques.

Common Mistakes to Avoid

Your negative space designs can easily fall flat if you make some common mistakes. Overloading your nails with too many colors or patterns can clutter the look. Failing to apply a base coat can affect the adhesion of the polish, leading to chipping and peeling. Additionally, not allowing each layer to dry completely often results in smudging or blending of colors.

Experimenting with Techniques

Designing negative space art allows for creativity, so don’t hesitate to experiment. Consider using sponges for a gradient effect, or stencils for intricate designs. You can also try using a dotting tool for unique patterns or layering different finishes like matte and glossy. The key is to try different combinations and techniques to see what resonates with your style.

Avoid sticking to one technique as it may limit your creativity. Instead, feel free to mix and match methods like combining negative space with watercolor effects or incorporating embellishments like studs and gems. Experimenting will not only expand your skills but also allow you to discover new and exciting looks that enhance your nail art collection.

Factors Influencing Successful Negative Space Nail Art

Many aspects can impact the outcome of your negative space nail art. Paying attention to these factors will help ensure a flawless design:

  • Nail shape and length
  • Type of polish used
  • Application technique
  • Design complexity

Assume that by mastering these elements, you’ll enhance the beauty of your nail art. For more detailed guidance, check out this Tutorial – Negative Space Nail Art.

Nail Shape and Length

Nail shape and length play a significant role in negative space nail art. Longer nails typically provide more canvas for intricate designs, while short nails can create elegantly simple patterns. Your chosen shape, whether it’s square, almond, or stiletto, can also impact how effectively the negative space is showcased.

Lifestyle Considerations

The way you live your life should influence your nail art choices. If you have an active lifestyle, opting for simpler designs may be a better fit, as they will wear better over time. Frequent exposure to water or harsh chemicals can also affect the longevity of your nail art. Understanding your daily routines and commitments will help you decide on the best negative space designs that suit your lifestyle while keeping your nails looking beautiful.

Understanding how your daily activities impact your nails is vital for selecting the right negative space art. If you work in a hands-on job or participate in sports, consider designs that are more resilient and easier to maintain. Conversely, if you have a desk job or enjoy low-activity pursuits, you might be free to explore complex designs that require more upkeep. Ultimately, aligning your nail art choices with your lifestyle will ensure that you can enjoy your beautiful nails without compromising practicality.

Popular Negative Space Nail Art Designs

Now, let’s explore some of the most popular negative space nail art designs that you can easily recreate at home or at the salon. From chic geometric patterns to elegant floral motifs, negative space allows you to play with contrasts and create striking visual effects. Incorporating these designs into your nail routine can elevate your overall look and make a fashion statement while still maintaining a minimalist vibe.

Simple Patterns

One of the easiest ways to start with negative space nail art is by using simple patterns. You can play with stripes, polka dots, and triangles to create a clean and modern design. Choose a base color that complements your skin tone, and use nail tape for precision.

Advanced Techniques

Techniques in negative space nail art can become quite elaborate, allowing you to showcase your artistic flair. By experimenting with various tools and styles, your designs can incorporate intricate elements that appeal to a sophisticated aesthetic.

Advanced Techniques

1. StampingUse a nail stamping kit to create detailed designs.
2. WatermarbleUtilize the watermarble technique for a unique blend of colors.
3. Ombre EffectBlend two or more colors for a stunning ombre effect.
4. LayeringLayer multiple colors of polish to create depth.

Advanced negative space techniques can help you achieve stunning designs that captivate attention. Experimenting with different tools and intricate methods can give your nails a professional touch. By practicing, you’ll enhance your skills and create artful expressions on your fingertips.

  1. Find the right tools for precision.
  2. Pick a color palette that speaks to you.
  3. Practice your techniques on a nail wheel.
  4. Watch tutorials to learn innovative styles.
Advanced Techniques

1. Dotting ToolsUse for creating intricate dots and patterns.
2. Striping BrushesGreat for detailed lines and fine designs.
3. SpongesFor blending colors seamlessly.
4. Nail TapeHelpful for achieving clean, sharp lines.

Final Words

Hence, mastering negative space nail art allows you to showcase your creativity while exploring minimalistic designs. By experimenting with different shapes, colors, and techniques, you can develop your own unique styles. Pay attention to your skill set and practice consistently to refine your abilities. With the right tools and a touch of patience, you’ll be able to create stunning negative space designs that reflect your personality and artistry. Dive into this exciting style and let your nails become a canvas for your imagination.

Q: What is negative space nail art and how do I get started?

A: Negative space nail art is a technique that involves leaving parts of your natural nail exposed while incorporating nail polish, designs, or embellishments in specific patterns. To get started, you’ll need a few basic tools: a base coat, nail polish in your desired colors, tape or stencils for creating shapes, and a top coat for finishing. Begin by applying a base coat to protect your nails. Once dry, use tape or stencils to create shapes, ensuring that sections of your natural nail remain bare. Paint over the design, remove the tape or stencils while the polish is still wet, and finish with a top coat for shine and durability.

Q: What types of designs work best for negative space nail art?

A: Negative space nail art provides a versatile canvas for various designs. Geometric shapes, such as triangles, stripes, and squares, are popular because they create clean lines that contrast well with the exposed nail. Floral designs with negative space can also create a beautiful effect, as can abstract patterns. Consider using a combination of matte and glossy finishes to add dimension to your designs. Experimenting with different colors and shapes will help you find what resonates best with your personal style.

Q: How can I make my negative space nail art last longer?

A: To extend the life of your negative space nail art, start with a good quality base coat to create a strong foundation. Ensure that each layer of polish is fully dry before applying the next coat or before removing any tape or stencils. For added durability, apply a top coat to protect your design and add shine. Additionally, avoid activities that may chip or wear down your nails, such as excessive exposure to water or physical labor, and consider using cuticle oil regularly to keep your nails and skin healthy.

Skip to content