Inails Near Me Global

Experimenting with Edgy Nail Shapes – What to Try

Most nail enthusiasts are always on the lookout for ways to express their personal style, and experimenting with edgy nail shapes can transform your manicure from ordinary to extraordinary. Unique shapes like stiletto, coffin, or almond offer a bold statement that sets you apart from the crowd. In this blog post, you’ll discover various edgy nail shapes, their distinct features, and how to choose the right one for your fingertips. Embrace your individuality and elevate your nail game with these exciting options!

Key Takeaways:

  • Unique Shapes: Explore various nail shapes like stiletto, coffin, and almond to express your personal style.
  • Color Combinations: Experiment with bold color palettes and creative nail art designs to complement your edgy nail shapes.
  • Maintenance Tips: Keep your nails looking sharp by following proper care routines tailored for your chosen nail shape.

Understanding Nail Shapes

For many, choosing the right nail shape can elevate your overall manicure and enhance your personal style. Nail shapes not only reflect your individual aesthetic but also complement your hand shape and length. Being aware of different nail shapes will help you decide which ones resonate with your identity and give you the confidence to express yourself through your nails.

Classic Nail Shapes

Between the variety of nail shapes available, classic styles like round, square, and oval remain popular for their timeless appeal. Round nails offer a soft and natural look, while square nails exude strength and structure. Oval shapes provide a delicate balance, elongating fingers and adding elegance. Understanding these classic options can give you a solid foundation as you experiment with more daring designs.

Edgy Nail Shapes Overview

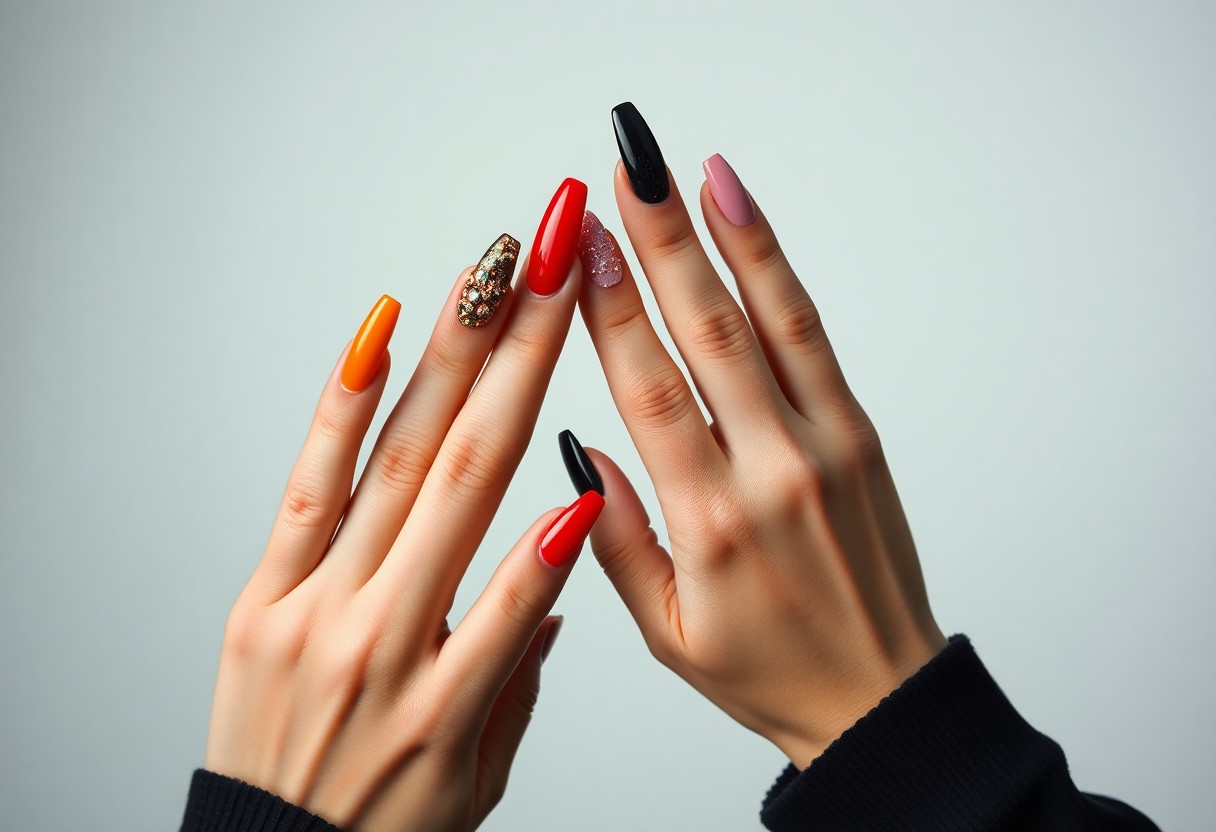
Overview of edgy nail shapes introduces you to an exciting world of creative possibilities. Shapes like stiletto, coffin, and almond challenge traditional norms, allowing you to showcase your personality and style. These bolder options convey confidence and flair, perfect for those who wish to stand out. By exploring edgy nail shapes, you can redefine your nail game and make a statement.

At their core, edgy nail shapes offer a unique way to break away from conventional beauty standards. Stiletto nails, with their sharp point, add dramatic flair, while coffin nails combine elegance with an edge, often featuring a tapered end. Almond shapes provide an avant-garde look that’s both stylish and manageable. By experimenting with these shapes, you step into a realm of self-expression that highlights your creativity and individuality.

Trending Edgy Nail Shapes

You’re in luck if you’re looking to explore the latest nail trends! From bold to chic, edgy nail shapes like coffin, stiletto, and almond are making waves in the beauty community. If you’re unsure which style complements your hands best, check out The Best Nail Shape to Compliment Your Hands – Nailuxe for guidance.

Oval and Almond

After exploring various options, you might find yourself drawn to the elegant curvature of oval or almond shapes. Both styles elongate the fingers and add a touch of sophistication, making them perfect for any occasion.

Coffin and Ballerina

Ballerina nails, also known as coffin nails, bring a trendy edge to your manicure. Their unique shape—wider at the apex and tapered at the tips—offers a modern twist and looks fabulous with intricate designs or solid colors.

Another reason to love coffin nails is their versatility; they suit any personality and provide a strong foundation for nail art. Pair them with vibrant colors or even embellishments for a striking look that stands out.

Stiletto and Mountain Peak

For those seeking a fierce appearance, stiletto nails are an unbeatable choice. With their sharp tips and long silhouette, they exude confidence and are perfect for showing off bold designs.

To enhance the edgy vibe, consider the mountain peak shape, which adds an extra flair to your manicure. Both styles draw attention and can be customized with eye-catching colors or embellishments that truly showcase your creative side.

Tools and Techniques for Experimentation

Your journey into edgy nail shapes requires the right tools and techniques to successfully create and maintain your desired look. From basic nail care to specialized shaping kits, having these vitals on hand will make your experimentation both enjoyable and rewarding. Be prepared to embrace creativity and precision as you redefine your nail aesthetics.

Essential Tools for Nail Shaping

Tools such as high-quality nail files, clippers, and buffers are fundamental for achieving various nail shapes. Invest in different grit nail files to create smooth edges, and consider a glass file for a more polished finish. Don’t forget cuticle pushers and nippers to maintain neat cuticles, allowing your edgy designs to shine.

Techniques for Achieving Precision

An effective technique for achieving precision in nail shaping involves careful filing and consistent angles to sculpt your desired shape. Start by gently filing the edges of your nails to shape them into your chosen edgy style while keeping your hand steady to ensure uniformity.

Due to the intricacies of nail shaping, using a professional approach can significantly enhance your results. Consider working in sections, focusing on one side at a time. Always file in one direction to prevent splitting or damage. Additionally, practicing on practice nails can hone your skills before you launch on shaping your own or others’ nails. This layered approach will increase your confidence and precision with each try.

Color and Design Choices for Edgy Shapes

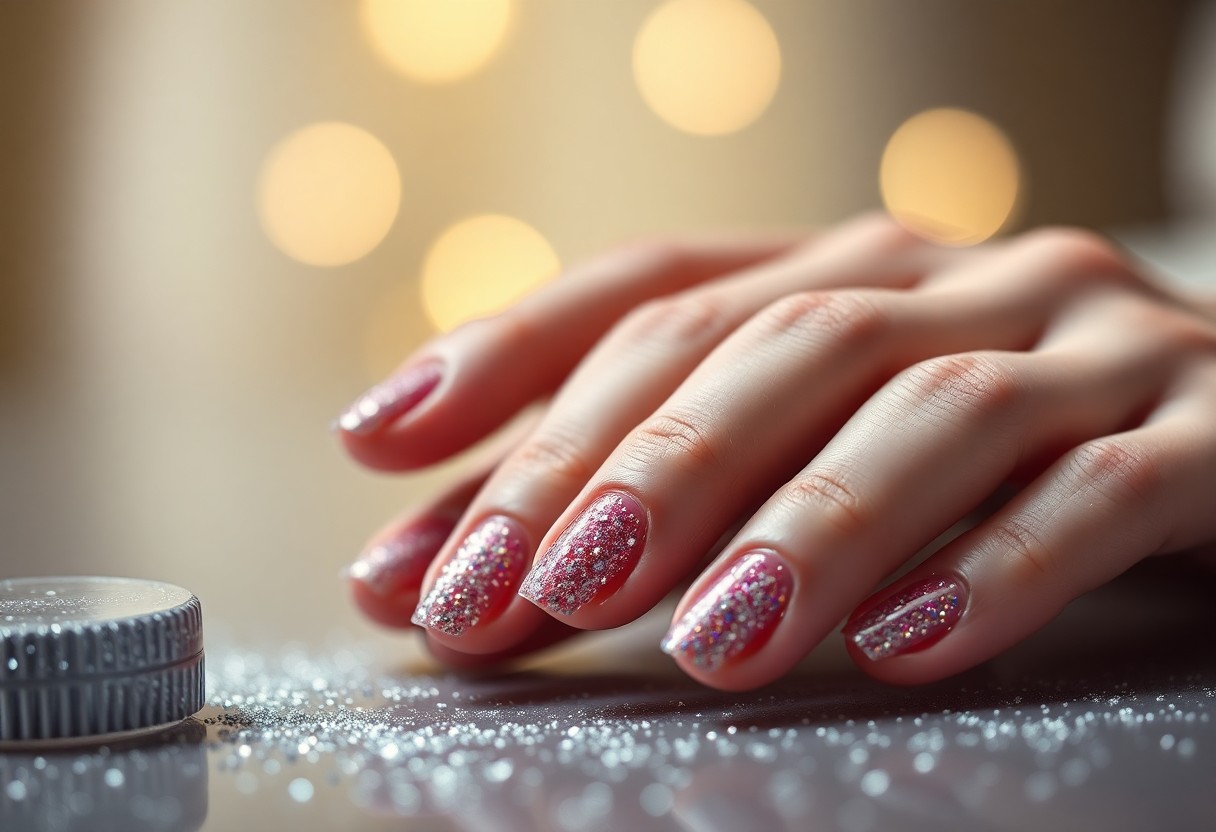
Many nail enthusiasts are exploring color and design options that enhance the unique look of edgy nail shapes. In terms of selecting hues and patterns, you’ll discover that the right combination can truly accentuate your manicure. From bold, bright colors to subtle neutrals, your choices in shades can reflect your personality and style, making each nail a canvas for self-expression.

Popular Color Palettes

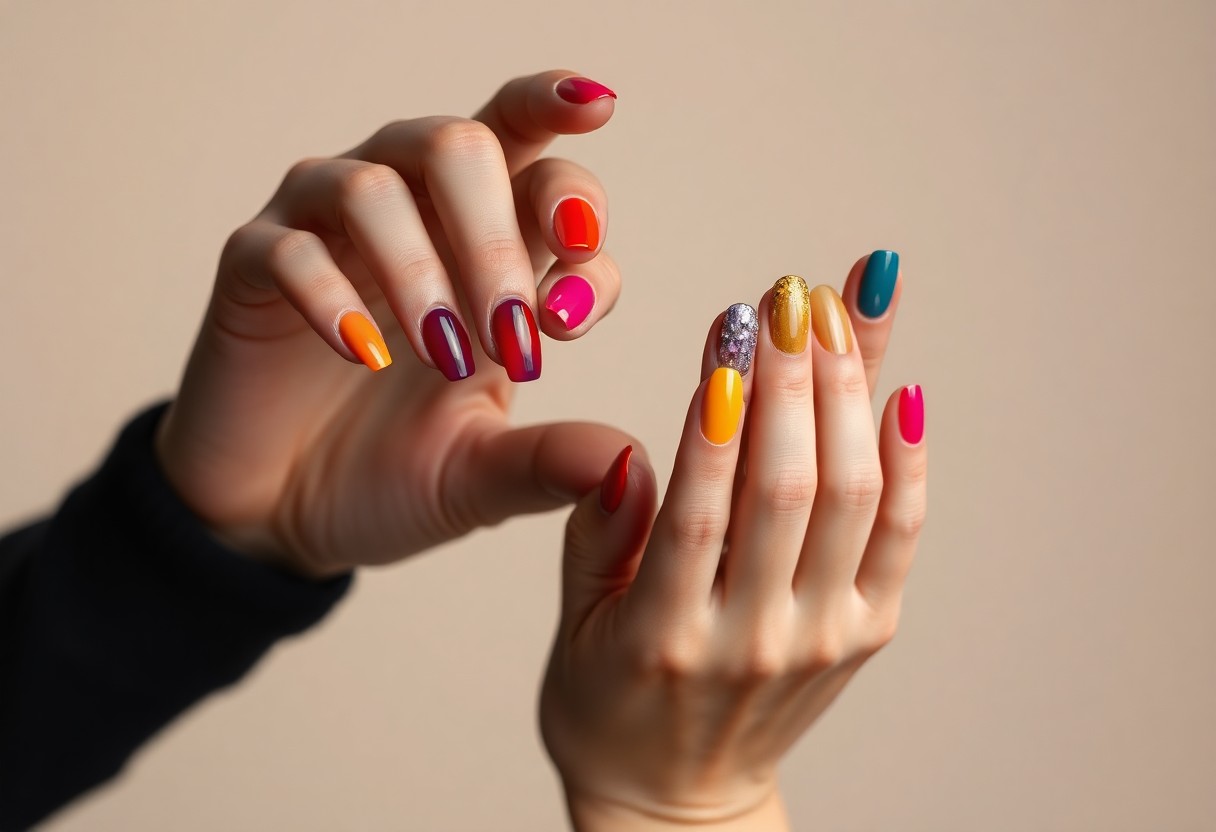
Palettes that feature bold colors, such as electric blues, vibrant reds, and eye-catching purples, are trendsetters for edgy nail shapes. Additionally, consider monochrome combinations or pastel shades for a more understated yet chic appearance. You can also play with metallic finishes that add an avant-garde twist to your nails, elevating your entire look.

Nail Art Ideas to Complement Shapes

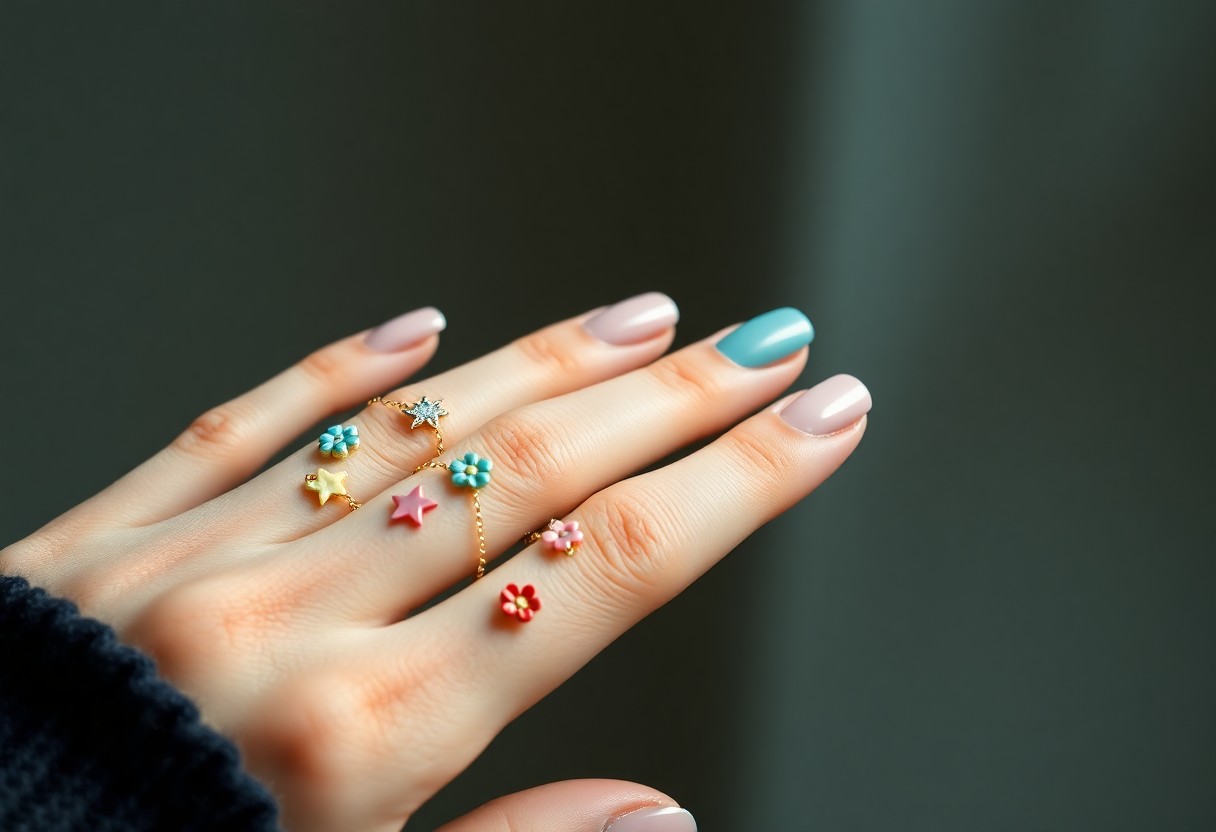
Ideas that focus on geometric patterns, abstract art, or minimalist designs often work best with edgy nail shapes. By choosing complementary nail art that highlights your unique polish shape, you can enhance its dimensions and style. Techniques like negative space or layering patterns can add depth, allowing you to create captivating visuals on your fingertips.

Considering asymmetrical designs or playful motifs can further elevate your edgy nails. Utilizing techniques like striping tape or dotting tools lets you explore textures and patterns that draw attention to the shape. Fun additions like studs, gems, or even hand-painted details can transform a simple manicure into a statement piece that showcases your boldness and creativity.

Maintenance and Care for Edgy Nails

Keep your edgy nails looking sharp and stylish by implementing a few simple maintenance routines. Regularly touch up your nail polish to prevent chipping, and consider using a quality top coat to enhance shine and durability. Moisturizing your cuticles is necessary to maintain healthy nail growth and prevent hangnails, so incorporate cuticle oil into your routine. Regular salon visits or DIY manicures will also help preserve the integrity and shape of your unique nail designs.

Tips for Longevity

Along with regular maintenance, following these tips can extend the life of your edgy nails:

  • Choose a high-quality nail polish brand.
  • Invest in good nail tools designed for your nail shape.
  • Avoid using your nails as tools for opening packages.
  • Limit exposure to water during activities like washing dishes.

Knowing these tips will help you enjoy your stunning nail art without frequent touch-ups.

Avoiding Common Pitfalls

Across your nail care journey, it’s easy to make mistakes that can compromise the beauty of your edgy nails. Avoiding these pitfalls is key to maintaining your unique style and ensuring your nails remain vibrant and strong.

Indeed, being aware of common issues can save you time and frustration. Watch out for using low-quality products, which can lead to dullness and rapid chipping. Also, neglecting your cuticles can cause hangnails and lead to unpleasant infections. If you happen to work with your hands a lot, consider wearing gloves during chores to protect your nails. This proactive approach will keep your edgy shapes looking fabulous longer.

To wrap up

Drawing together your adventurous spirit and the latest trends, experimenting with edgy nail shapes can transform your manicure into a true expression of your individuality. You can try styles like stiletto, coffin, or almond to add an unexpected flair to your look. Each shape offers its own unique vibe, enhancing your overall aesthetic. Don’t shy away from combining colors and patterns with these shapes; your nails are a blank canvas just waiting to reflect your personality. Dive into this fun journey, and you’ll discover a newfound confidence in your self-expression through nail art.

Q: What are some popular edgy nail shapes to experiment with?

A: There are several trendy nail shapes that can give your manicure an edgy look. Here are a few to try:
1. Stiletto: This shape is characterized by its long and pointed ends, resembling a stiletto heel. It’s bold and perfect for making a statement.
2. Ballerina: Also known as coffin nails, this shape is tapered at the sides with a flat end, creating a graceful yet edgy silhouette.
3. Almond: These nails are slightly wider at the base and softly tapered toward the top, resembling an almond shape. It’s chic and adds a contemporary twist.
4. Edge: This is an extreme version of the stiletto, featuring an exaggerated point. It’s perfect for those who want to truly stand out.

Q: How can I maintain the health of my nails while trying edgy shapes?

A: Maintaining healthy nails is vital, especially when trying out more demanding shapes. Here are some tips:
1. Hydrate: Keep your nails and cuticles moisturized by applying cuticle oil regularly. This prevents breakage and supports growth.
2. Avoid harsh chemicals: Limit exposure to harsh detergents and chemicals. Wearing gloves while cleaning can protect your nails.
3. Regular trims: Schedule regular appointments to keep the length and shape in check. This helps prevent splitting and breaking, especially for longer shapes like stiletto.
4. Strengthening treatments: Consider using nail strengtheners or treatments that can help fortify your nails against wear and tear.

Q: How do I choose the best edgy nail shape for my hands?

A: Selecting the right edgy nail shape involves consideration of both your hand shape and personal style. Here are some factors to keep in mind:
1. Hand shape: Oval and longer fingers can pull off the stiletto or almond shapes beautifully, while broader hands may find the ballerina or square shapes complement their proportions better.
2. Lifestyle: If you lead an active lifestyle, it may be wise to opt for shorter versions of edgy shapes to avoid breakage.
3. Personal style: Think about your overall aesthetic. If you enjoy a glamorous look, longer nails (like stilettos) might suit you. For a more artsy vibe, the ballerina shape can be very expressive.
4. Nail care routine: Consider how much time you are willing to spend on maintenance. Some shapes require regular upkeep to stay chic, while others naturally last longer.

Glitter Nails – How to Add Sparkle Without the Mess

Most nail enthusiasts love the idea of glitter nails but dread the cleanup that often follows. Fortunately, you can add that stunning sparkle to your manicure without the hassle of loose glitter everywhere. In this blog post, you will discover several techniques and products designed to help you achieve eye-catching glitter nails while keeping the mess to a minimum. Get ready to elevate your nail game with easy tips and tricks that will make your nails twinkle without the fuss!

Key Takeaways:

  • Prep Your Nails: Ensure a clean nail surface by properly filing and buffing before applying any glitter products.
  • Use a Base Coat: A good quality base coat will help the glitter adhere better and make removal easier later on.
  • Apply Glitter Strategically: Opt for a glitter polish or a glitter gel for more control, allowing you to create designs without excessive mess.

Understanding Glitter Types

For your sparkling nail art, it’s vital to know the different types of glitter available. Each type has its unique qualities, making them suitable for various designs and effects. Here’s a quick overview:

Type of GlitterDescription
Fine GlitterSmall particles that create a subtle shimmer.
Chunky GlitterLarger pieces for a bold, eye-catching effect.
Holographic GlitterReflects light in a rainbow of colors.
Metallic GlitterShiny and reflective, giving a metallic finish.
Biodegradable GlitterEnvironmentally friendly option made from plant materials.

Assume that knowing these qualities will help you choose the right glitter for your nail application, enhancing your overall look.

Cosmetic Glitter vs. Craft Glitter

Across the glitter spectrum, cosmetic glitter is specifically designed for skin application, ensuring it’s safe and won’t cause irritation. In contrast, craft glitter, often made from non-toxic materials, is intended for non-body uses, such as crafting and decoration. Using cosmetic-grade glitter for nail art will give you peace of mind while achieving that desired sparkle.

Eco-Friendly Options

On the quest for responsible beauty, eco-friendly glitters have emerged as a viable choice for your nail art needs. These sustainable options often come from biodegradable materials, reducing environmental impact.

For instance, many brands now offer biodegradable glitters made from natural ingredients like cellulose. This means that when you wash away your nail art, you’re not contributing to plastic pollution. Additionally, some of these eco-conscious options still deliver stunning effects, ensuring your nails remain both glamorous and sustainable. Consider investing in these green glitters to enhance your beauty routine without harming the planet.

Techniques for Application

Some effective methods for adding glitter to your nails include using a glitter top coat or applying loose glitter with a damp brush. For tips and tricks, you might want to explore the question Is there a secret trick with how to put on glitter nail polish? shared by enthusiasts on forums.

Glitter Top Coats

With glitter top coats, you can achieve a sparkling finish without the mess of loose glitter. Simply apply one or two coats over your favorite nail polish, allowing each layer to dry before adding more for a more intense shimmer.

Nail Art Brushes and Dipping

Behind the scenes, nail art brushes and dipping techniques allow for precise glitter placement, giving you more control over your designs. Using a fine-tipped brush, you can apply glitter to specific areas for intricate patterns, while dipping your nails directly into loose glitter creates a stunning all-over effect.

Techniques such as using nail art brushes or dipping enhance your artistry by allowing for detailed designs or a full glittery coverage, adding dimension to your nails. When using a brush, you can carefully select the areas where you want glitter, ensuring a professional finish. Dipping offers a bold look, letting the glitter adhere directly to the polish, creating a striking visual appeal without the mess typically associated with loose glitter.

Tips for Preventing Mess

Keep your nail art experience enjoyable by following these tips to prevent glitter from getting everywhere:

  • Work over a tray or paper towel to catch excess glitter.
  • Use a small brush to apply glitter precisely.
  • Seal your glitter with a topcoat to avoid fallout.

After considering these strategies, you’ll find that they can significantly reduce your cleanup time. For more ideas on How to Apply Glitter Nail Polish Without the Mess?, keep reading!

Using Adhesives Effectively

Across different nail art techniques, the use of adhesives can significantly enhance your glitter application. A peel-off base coat not only makes removal easier but also keeps the glitter contained during application. Additionally, using a glue pen allows you to apply glitter only where you want it, ensuring a cleaner process.

Cleanup Strategies

Any craft or beauty project will require some cleanup afterward, and glitter nails are no exception. It’s necessary to have your cleanup game plan ready before starting your nail art.

Preventing glitter from sticking to unwanted surfaces is key. Keep tape or lint rollers handy to lift any stray particles from your skin and surfaces. A gentle scrub with a damp cloth can help remove glitter from hard surfaces, while a quick wash with soap and water will keep your hands and nails clean. By employing these cleanup strategies, you’ll have a stress-free, sparkling nail experience.

Nail Care and Maintenance

Now that you’ve added a touch of sparkle to your nails, it’s vital to focus on nail care and maintenance to keep your glitter nails looking fresh and fabulous. Regularly moisturizing your cuticles and using a top coat will help preserve the longevity of your manicure. Don’t forget to gently file your nails to prevent any chips or breaks, ensuring that your glitter stays intact for as long as possible. A little care goes a long way in maintaining the beauty of your sparkling fingertips.

Protecting Your Glitter Nails

At all times, protecting your glitter nails is key to enjoying their beautiful shimmer without the worry of wear and tear. Opt for a high-quality top coat that offers a protective barrier, minimizing chipping and dulling caused by daily activities. Additionally, avoid using your nails as tools, and consider wearing gloves when engaging in tasks that may expose your nails to harsh chemicals or physical damage. This simple precaution can keep your glitter shining brightly.

When to Remove Glitter

Remove your glitter nails when they start to chip significantly or if the sparkle begins to fade. If you’re experiencing discomfort or lifting at the edges, it’s also a good time to take them off. Keeping your nails healthy is more important than holding onto a faded manicure.

And while it’s tempting to hold onto your glittery look, allowing your nails to breathe is vital. The chemicals in nail polish can weaken your natural nails over time, so if you notice any signs of damage or irritation, prioritize removing the glitter. Additionally, if you’ve worn the polish for a couple of weeks, it’s a good practice to do a maintenance check; changing your manicure not only keeps it looking fresh but also promotes healthier nail growth.

Glitter Nail Trends

Once again, glitter nails are making a stunning comeback, offering a fabulous way to express your creativity and style. From subtle sparkles to show-stopping designs, the latest trends focus on incorporating glitter in unique ways that elevate any manicure. You can choose from various finishes, including holographic, metallic, and chunky glitters, allowing you to find the perfect sparkle that suits your personality and occasion. Whether for everyday wear or special events, these trends cater to every nail enthusiast’s desires.

Popular Color Combinations

Across the glitter nail scene, certain color combinations have emerged as favorites among enthusiasts. Classic pairings such as deep navy and gold, soft pastels with silver, or bold reds adorned with holographic sparkles are consistently eye-catching. You can experiment with differing shades and glitter types to create a polished look that makes your nails pop. These combinations not only add visual interest but also provide a sophisticated touch to your overall style.

Seasonal Styles

To transform your nail art with the seasons, you can incorporate seasonal colors and themes into your glitter designs. For instance, warm tones and earthy glitters are perfect for autumn, while frosty blues and whites capture the spirit of winter. Embrace the vibrancy of spring blooms with pastel sparkles or go bold with bright summer hues. Seasonal styles help keep your manicures fresh and exciting throughout the year.

Further exploring seasonal styles allows you to align your nail art with your wardrobe and celebrations. Think about festive occasions, like Halloween or the winter holidays, and incorporate themed glitters that resonate with the mood. You might opt for orange and black glitters for Halloween or a sparkling silver and red look for Christmas. By adapting your glitter nails to seasonal trends, you ensure your style remains current while celebrating the beauty of each time of year.

DIY Glitter Nail Kits

Despite the availability of countless glitter nail products, creating your own DIY glitter nail kit is an excellent way to customize your manicure experience. With a few important items, you can curate a collection that suits your style and preferences while avoiding the chaos that often accompanies commercial glitter application. Your hands will thank you for the sparkly creativity without the mess!

What to Include

At the core of your DIY glitter nail kit, you should include a selection of fine and chunky glitters in various colors, a clear base coat, and nail art brushes for application. Consider adding nail tape, a mixing palette, and a small funnel to streamline your process. These tools will elevate your glitter game, making it easy to achieve that stunning sparkle.

Store-Bought vs. Homemade

Homemade nail kits can offer a personalized touch that store-bought alternatives can’t replicate. You have the freedom to select specific glitter types and colors that resonate with your preferences, ensuring that your nail art is unique. Furthermore, DIY kits can be more cost-effective, allowing you to experiment without breaking the bank.

Nail enthusiasts often debate the merits of store-bought versus homemade glitter nail kits. While store-bought options may provide convenience and quicker results, they might lack the customization and personal touch that a homemade kit offers. By creating your own, you can mix and match different shades and textures to suit your individual style, transforming your nail art into a truly creative expression. Plus, the satisfaction of crafting a kit tailored just for you adds to the overall manicure experience.

To wrap up

Conclusively, achieving dazzling glitter nails without the mess is entirely within your reach. By choosing the right type of glitter polish or applying loose glitter strategically, you can enhance your manicure without leaving a trail of sparkle. Utilizing tools like nail tape or a silicone mat can also minimize cleanup. With these tips, you can confidently express your personal style while keeping your nail care routine neat and manageable. Now, go ahead and add that touch of shine to your nails with ease!

Q: What are some techniques for applying glitter to my nails without creating a mess?

A: One effective technique is to use a glitter nail polish instead of loose glitter. Glitter nail polish is designed to adhere well and can be applied in a single coat or two for more sparkle without the cleanup associated with loose glitter. Another method is to use tape or a stencil to create clean lines. Apply a base coat, place the tape where you want the glitter to go, and then apply the glitter polish or loose glitter on top. Once it dries, remove the tape for a clean edge. Additionally, using a makeup sponge to dab glitter polish can minimize mess, as you can control the amount applied to each nail.

Q: Can I use regular nail polish as a base for glitter application?

A: Yes, you can use regular nail polish as a base for glitter. In fact, using a solid color can enhance the sparkle of the glitter on top. Start by applying your chosen base color and allow it to dry completely. Then, apply your glitter polish or press loose glitter onto your nails while the base is still slightly tacky to ensure better adhesion. If you’re using loose glitter, consider sealing it with a top coat to lock everything in place and prevent any flaking.

Q: What are the best products to use for easy removal of glitter nails?

A: For easier removal of glitter nail polish, opt for an acetone-based nail polish remover as it tends to break down the glitter particles more effectively than non-acetone formulas. You can also soak a cotton ball with the remover and place it on your nails, wrapping them with aluminum foil for 10-15 minutes. This allows the remover to penetrate the glitter and makes it easier to wipe away. For those who frequently use glitter, consider investing in peel-off base coats that allow you to lift off the polish without scrubbing, simplifying the removal process tremendously.

Pastel Nails – The Trend That Never Goes Out of Style

Many fashion enthusiasts appreciate the timeless elegance of pastel nails, a trend that remains a favorite across seasons. These soft, muted hues not only add a refreshing touch to your manicure but also complement a wide range of styles and occasions. If you’re looking for some inspiration, check out these 30 Pastel Nail Ideas For a Refreshing, Colorful Manicure that will elevate your look and keep your nails chic and trendy all year long.

Key Takeaways:

  • Timeless Appeal: Pastel nails have a universally appealing aesthetic that transcends seasons and trends, making them a classic choice for any occasion.
  • Diverse Options: The versatility of pastel shades allows for a wide range of creative designs, from simple solid colors to intricate nail art, catering to every personal style.
  • Soft & Subtle: Pastel tones provide a gentle and soft look that is perfect for those who prefer understated elegance without compromising on trendiness.

The Evolution of Pastel Nails

Before you investigate the world of pastel nails, it’s vital to understand how this trend has gracefully evolved over the years. Originating in the vibrant 1980s when bold colors dominated the scene, pastel shades began to emerge as a softer, more delicate alternative. The transition of pastels from seasonal trends to all-year-round favorites showcases their versatility and timeless appeal, proving that these muted colors can effortlessly complement any ensemble.

Historical Background

About the history of pastel nails, it’s fascinating to note that pale hues have long been associated with femininity and elegance. The delicate shades gained popularity in the mid-20th century, often linked to the iconic French manicure. As nail polish technology advanced, pastel colors became more accessible, allowing you to express your personal style in a subtle yet impactful way.

Influence of Fashion Trends

After you explore the historical aspects, you’ll see how fashion trends significantly impacted the popularity of pastel nails. Designers on the runway have often embraced these soft hues, leading to seasonal collections featuring pastel palettes. This constant visibility has encouraged you to experiment with your own nail designs, integrating pastels into your wardrobe seamlessly.

Also, the influence of fashion trends extends to social media, where pastel nails have become a staple in beauty influencers’ looks. As you scroll through various platforms, you likely notice countless outfits styled with matching pastel manicures, illustrating how these shades can elevate any look. With fashion constantly evolving, pastel nails remain a go-to choice, offering you a chic and trendy option that fits effortlessly into your personal style.

Why Pastel Nails Remain Popular

The ongoing appeal of pastel nails stems from their ability to blend seamlessly with various styles and preferences. They offer a fresh, soft look that complements both casual and formal outfits, making them a top choice for people of all ages. This timeless trend consistently captures attention, thanks to the plethora of shades available, allowing you to express your individuality while maintaining sophistication and elegance.

Versatility and Suitability

After all, pastel nails suit nearly every occasion and personal style. Whether you’re dressing up for a wedding or keeping it casual for brunch with friends, these subtle hues can enhance your look without overpowering it. Their adaptability means you can freely experiment with different shades and nail art, ensuring your manicure always feels fresh and exciting.

Seasonal Adaptations

For every season, pastel nails can effortlessly adapt to shifts in weather and fashion trends. In spring, you might opt for soft pinks and lavenders, while summer could inspire you to choose brighter pastel blues and greens. Even in autumn and winter, muted pastels can provide a chic alternative to darker shades, allowing for year-round versatility.

Popular pastel colors also evolve with seasonal trends, enabling you to stay in tune with current aesthetics. You can embrace cooler pastels in colder months, like soft mint or icy blues, creating a refreshing contrast against the seasonal backdrop. In warmer months, brighter pastel shades give off a fun and festive vibe, perfect for outdoor events or vacations. This adaptability ensures that your pastel nails remain relevant and stylish, no matter the season.

Choosing the Right Pastel Shades

Many nail enthusiasts find that choosing the perfect pastel shade can elevate their look effortlessly. Whether you’re aiming for a romantic vibe or something more playful, explore 30 Trending Nail Designs Everyone Will Obsess Over in … for inspiration. Pastel shades can be versatile, allowing you to express your individuality while keeping your style fresh and vibrant.

Skin Tone Considerations

Choosing the right pastel shade involves considering your skin tone. Pastels tend to work best when they complement your natural undertones. For warm skin, shades like peach and coral can bring out your glow, while cool undertones may find soft lavender and mint green particularly flattering.

Color Combinations and Designs

One of the exciting aspects of pastel nails is the myriad of color combinations and designs available to you. You can mix and match various pastel shades or incorporate subtle nail art for a unique touch. This allows for a creative expression that fits any occasion, from casual outings to special events.

Also, consider using accent nails or ombre techniques to elevate your pastel manicure. Pairing two or three complementary pastel shades can create a harmonized look that is both trendy and sophisticated. You can explore patterns like stripes or polka dots for added flair, making your nails the perfect accessory to any outfit.

Nail Care for Pastel Nails

Despite their delicate appearance, pastel nails require dedicated care to maintain their beauty. To keep your pastel polish looking vibrant and fresh, it’s crucial to invest time in your nail health. Regular manicures and proper maintenance will enhance your nail’s appeal and longevity. Get inspired by Cute Spring Nails That Will Never Go Out Of Style: Pastel … designs.

Pre-Manicure Preparation

Against the grain, chips and cracks can occur if you don’t properly prepare your nails before applying pastel polish. Start by cleaning your nail beds and gently pushing back your cuticles. Consider using a buffer to smooth the surface of your nails, ensuring an even application of your pastel shade.

Maintenance Tips

Care for your pastel nails by following these tips to extend their lifespan:

  • Avoid harsh chemicals when cleaning to prevent discoloration.
  • Moisturize your cuticles regularly to maintain their health.
  • Use a protective topcoat every few days for added shine.

Thou will find that consistent care makes your pastel nails look fresh and polished every day.

Hence, maintaining your pastel nails is all about routine and precaution. Follow these additional tips to keep them looking their best:

  • Apply a new coat of polish every week to prevent wear.
  • Avoid using your nails as tools to minimize breakage.
  • Keep your nails trimmed and shaped to enhance their appearance.

Thou can achieve that dreamy pastel look all season long with a little diligence!

DIY vs. Professional Manicure

Unlike the convincing charm of a professional manicure, DIY pastel nail art allows for complete creativity and whimsy. While salon treatments boast precision and a pampering experience, doing your nails at home empowers you to experiment with different shades and designs without the need for an appointment. Ultimately, the choice boils down to your personal preferences and schedule.

Advantages of DIY

By opting for a DIY manicure, you can tailor your nail care to fit your schedule and creativity. You have the freedom to choose from an array of pastel colors, experiment with nail art techniques, and even take pleasure in the process without the pressure of a salon environment. Plus, you can save money and give yourself a little at-home spa treatment whenever you desire.

When to Visit a Salon

Below are some scenarios when you might consider visiting a salon for your pastel nail needs: significant events, intricate designs, or when you’re short on time. A professional can help ensure your nails look immaculate and long-lasting, making it worth the investment in certain situations.

In fact, special occasions like weddings, parties, or interviews are ideal times to book a salon appointment. If you want nail art that requires a steady hand, such as intricate designs or nail extensions, a professional’s experience can make a noticeable difference. Additionally, if you’re pressed for time and can’t achieve your desired look at home, a salon visit can save you from a last-minute DIY rush.

Current Trends in Pastel Nail Art

Once again, pastel nails are captivating the beauty scene as a timeless choice for those seeking a soft and elegant aesthetic. This season, you’ll notice a surge in creative pastel nail designs, featuring playful patterns, abstract shapes, and subtle gradients that elevate your style. Whether you prefer a minimalist approach or something more intricate, pastel hues are versatile enough to suit any occasion, from casual outings to formal events.

Popular Techniques

Along with the classic solid color application, you can explore various trending techniques to enhance your pastel nail art. Ombre effects, marble finishes, and color-blocking are just a few styles gaining popularity, allowing you to personalize your look. Nail stamping and negative space art can also create stunning, eye-catching designs that make a statement while maintaining a soft pastel palette.

Celebrity Influences

To stay current with pastel nail trends, following celebrity choices can provide inspiration and guidance. A-list stars often sport chic pastel nails during red carpet events or casual outings, sparking trends that quickly catch on among fans and beauty enthusiasts alike.

Hence, you can draw inspiration from your favorite celebrities who frequently flaunt pastel nails, showcasing various styles that resonate with your preferences. Celebrities like Hailey Bieber and Kylie Jenner have made pastel nail art a staple, often incorporating unique designs that blend elegance with modern flair. By observing their choices, you can discover fresh ideas and techniques to experiment with, ensuring your pastel nails remain on-trend and uniquely yours.

Conclusion

As a reminder, pastel nails remain a timeless choice that seamlessly blends elegance with playfulness in your nail art routine. Whether you opt for soft lavender, blush pink, or mint green, these hues complement various styles and occasions, ensuring your look is always on trend. Incorporating pastel shades into your manicure can elevate your overall style and express your personality. By embracing this classic trend, you enhance your beauty while keeping your nail game fresh and current throughout the seasons.

FAQ

Q: What are pastel nails and why are they so popular?

A: Pastel nails are a charming and soft approach to nail art, featuring light, muted colors like lavender, mint green, baby blue, and peach. They are popular due to their versatility, as they can be worn in both casual and formal settings. The gentle shades provide a fresh look that complements a wide range of outfits and skin tones. Additionally, pastel shades tend to evoke feelings of warmth and playfulness, making them a favorite choice for various seasons, especially spring and summer.

Q: How can I achieve the perfect pastel nail look?

A: Achieving the perfect pastel nail look involves a few necessary steps. Start with clean and trimmed nails, and apply a base coat to protect and smooth your nails. Choose high-quality pastel nail polish, as some brands may require multiple coats for full opacity. Apply a thin first coat, allowing it to dry completely before adding a second coat. Finally, finish with a top coat to enhance shine and longevity. For a creative touch, consider adding nail art elements like delicate designs or glitter to elevate your pastel manicure.

Q: Are pastel nails suitable for all occasions?

A: Yes, pastel nails are suitable for almost any occasion! Their soft and subtle colors make them a perfect choice for both casual outings and formal events. Pastel shades can add a touch of elegance to wedding celebrations or prom nights, while still being fun for everyday wear. Just be sure to choose the right pastel color that complements your outfit and the event’s atmosphere. Additionally, you can personalize pastel nails with different nail art or accent designs to match the occasion perfectly.

Gradient Nails – A Fresh Look for Every Occasion

Just when you thought your nail game couldn’t get any better, gradient nails come in to add that perfect touch of sophistication and style. This versatile trend allows you to showcase your creativity, matching shades that complement your outfit for any event. Whether you want a subtle blend or a bold statement, gradient nails are your go-to for a refreshed look. To get inspired, check out these 29 Ombré Nail Ideas That Modernize the Colorful Mani and discover how you can elevate your manicure today!

Key Takeaways:

  • Versatility: Gradient nails offer a stunning and customizable style that can suit any occasion, from casual outings to formal events.
  • Color Blending: The technique allows for unique combinations of colors, creating visually appealing transitions that enhance the overall look.
  • Easy Application: With various methods available, gradient nails can be achieved at home or professionally, making them accessible for everyone.

What Are Gradient Nails?

Your nails can be a canvas for creativity, and gradient nails offer a stunning way to showcase your personal style. This trend merges two or more colors that blend seamlessly from one to the next, creating an eye-catching and dynamic effect. Perfect for various occasions, gradient nails can elevate your look while allowing you to express your individuality.

Definition and Overview

Above all, gradient nails, often referred to as ombre nails, are a nail art technique where colors transition smoothly. Typically, this technique features darker shades at one end that gradually blend into lighter shades towards the other, creating a visually appealing gradient effect. The result is a polished and sophisticated look that is versatile enough for both casual and formal settings.

Popular Techniques

Any nail artist can create gradient nails using several popular techniques, including the sponge method, brush blending, and airbrushing. Each method offers a unique approach, allowing you to experiment with various colors, finishes, and styles.

Also, the sponge method is one of the most popular techniques, where you apply selected polish colors onto a cosmetic sponge and dab it onto your nails for a soft gradient. Brush blending involves using a nail art brush to gently mix colors directly on the nail, allowing greater control. For those seeking a more professional finish, airbrushing can create flawless gradients quickly. No matter your preferred technique, you can achieve stunning results that make your nails stand out.

Choosing the Right Colors

One of the most exciting aspects of gradient nails is selecting the right colors that resonate with your personality and the occasion. Consider your wardrobe, skin tone, and even your mood when picking shades. You have the opportunity to create stunning combinations that range from subtle ombres to vibrant blends, allowing you to express yourself uniquely for any event. Don’t hesitate to experiment with both pastel and bold colors to find what works best for your personal style.

Seasonal Color Trends

Seasonal trends can greatly influence your choice of colors for gradient nails. In spring and summer, fresh pastels or bright hues can evoke feelings of warmth and joy, while autumn and winter often call for deeper, more muted tones. By aligning your nail color palette with the current season, you not only stay trendy but also enhance the overall aesthetic of your look.

Complementary vs. Contrasting Colors

For your gradient nails, it’s important to understand the difference between complementary and contrasting colors. Complementary colors sit opposite each other on the color wheel, creating a harmonious blend. In contrast, you can choose colors that are adjacent for a seamless look or opt for stark contrasts to make a bold statement. Both approaches can yield beautiful results, depending on the vibe you want to achieve.

A well-thought-out color strategy can significantly elevate your gradient nails. When you use complementary colors, you create a soft transition that is pleasing to the eye, making it perfect for events that call for elegance and sophistication. On the other hand, contrasting colors can deliver a striking and edgy look, ideal for making a statement at parties or casual gatherings. Consider the mood and setting when deciding on your color mix, and don’t hesitate to play around with different combinations to find what resonates with you.

Tools and Materials Needed

Once again, achieving the stunning gradient nail effect requires some crucial tools and materials. You’ll need a few key items to ensure your nails look flawless for any occasion. Gather your nail polish, sponge, a base coat, top coat, and any additional tools like tape or a dotting tool to create clean edges and enhance your design. With these supplies on hand, you’re ready to start your gradient journey!

Essential Nail Art Supplies

Tools for creating gradient nails are quite simple. You’ll need quality nail polishes in your desired colors, a makeup sponge for blending, and base and top coats to ensure longevity and shine. Additionally, having a nail file, cuticle pusher, and possibly some stencils or tape can help achieve precise lines and clean outcomes. Having these crucials will make your nail art process smooth and enjoyable.

Recommended Brands and Products

Around the world of nail art, there are several brands that stand out for their quality and ease of use. Popular choices include O.P.I, Essie, and Zoya for their vibrant colors and smooth application. You might also want to try makeup sponges from reputable beauty brands to ensure they effectively blend your polishes. These products will elevate your gradient nails to the next level.

In fact, experimenting with different brands can help you discover the best formulation for your gradient techniques. You’ll find that some polishes blend more seamlessly, while others may have better staying power. Trying out various top and base coats can also make a significant difference in the overall finish and durability of your nail art. So, don’t hesitate to explore and find what works best for you!

Step-by-Step Guide to Applying Gradient Nails

Despite the seemingly intricate process, achieving beautiful gradient nails is straightforward and fun. Follow these steps to create a stunning look that works for any occasion.

StepAction
1Preparation and Base Coat
2Gradient Application Techniques
3Top Coat Finish

Preparation and Base Coat

Behind every great manicure is proper preparation. Begin by cleaning your nails and pushing back the cuticles. Apply a quality base coat to protect your nails and create a smooth canvas for the gradient effect.

Gradient Application Techniques

Step-by-step, you can create seamless gradient nails using various techniques. The most popular methods include the sponge technique and the brush technique, allowing you to customize your look.

Plus, using the sponge technique, you can easily blend two or more nail polish colors. Simply apply each polish in stripes on a makeup sponge, dab it onto your nails, and repeat until you achieve your desired blend. The brush technique, on the other hand, entails using a nail art brush to manually blend colors directly onto your nail. Experiment with both methods to find which one gives you the gradient you love most!

Maintenance and Care for Gradient Nails

For maintaining your stunning gradient nails, it’s imperative to implement a proper care routine. Regularly moisturize your cuticles and hands to keep your nails healthy and the gradient looking fresh. You can check out this link on First time doing gradient nails. How did I do? for additional tips from the community. Keeping your nails clean and avoiding harsh chemicals will also contribute to their longevity.

Tips for Longevity

Between applying top coats and avoiding excessive wear, here are some tips to extend the life of your gradient nails:

  • Use a high-quality top coat to seal your design.
  • Avoid using your nails as tools to minimize chipping.
  • Wear gloves while doing chores to protect your nails.

The more care you provide, the longer your gradient nails will stay vibrant.

How to Fix Common Issues

Beside proper maintenance, you might encounter some common issues with your gradient nails. If you experience smudging or fading, consider applying a fresh coat of clear polish over the design to restore its appearance. In case of chipping, use a small amount of polish to touch up the affected area as closely as possible to the original gradient.

Care for your gradient nails involves acting promptly to maintain their beauty. If uneven blending occurs, gently sponge over the area to correct it. For those pesky bubbles, lightly file the surface after polishing and reapply a top coat to level it out. Your attention to these details can keep your nails looking their best.

Gradient Nails for Different Occasions

Keep your style versatile with gradient nails, as they can elevate your look for any event, from casual outings to formal celebrations. Choose color combinations that suit the mood and setting, allowing you to express your personality while keeping your nails on-trend.

Everyday Looks

By opting for subtle gradient designs in soft pastels or neutral shades, you can create everyday looks that enhance your overall vibe without being overpowering. These understated styles are both chic and appropriate for any day-to-day setting, whether at work or during errands.

Special Events and Celebrations

Across various special occasions, gradient nails offer a stunning way to complement your outfit. Bold colors and intricate transitions can transform your look for parties, weddings, and festive gatherings. Whether you prefer glitter accents or vibrant hues, gradient nails are a fantastic choice to add a touch of elegance.

Consequently, choosing gradient nails for celebrations allows you to play with colors and techniques that reflect the energy of your events. Think about using metallic shades or a bold ombre effect to turn heads at your next gathering. Matching your nail colors with your outfit can enhance your look, creating a cohesive style that showcases your attention to detail and flair for fashion.

To wrap up

So, if you’re looking to elevate your nail art game, gradient nails offer a fresh look that can suit any occasion. From subtle to bold, this technique allows you to express your personality and creativity through color blending. Explore different color combinations to find your perfect match, and don’t shy away from experimenting. For some stunning inspiration, check out this Stunning Deep Purple to Lilac Gradient Nails for Every … to spark your next manicure idea!

Q: What are gradient nails and how are they created?

A: Gradient nails, often referred to as ombre nails, are a nail art technique that blends two or more colors seamlessly for a soft transition effect. This look can be achieved using various methods, such as a makeup sponge to dab colors onto the nail, or through the use of nail brushes for a more controlled application. The colors typically blend from light to dark or from one shade to another, allowing for endless creativity in design.

Q: What occasions are best suited for gradient nails?

A: Gradient nails are versatile and can be styled for numerous occasions. They are perfect for casual outings, formal events, weddings, and seasonal festivities. The beauty of gradient nails is that they can be customized to suit different themes and personal styles. For example, lighter pastel gradients can evoke a playful, spring vibe, while deeper jewel tones can add sophistication for evening affairs.

Q: How can I maintain my gradient nails for lasting wear?

A: To ensure your gradient nails maintain their fresh look, applying a high-quality top coat is important, as it not only enhances the shine but also protects against chipping. Additionally, moisturizing your hands and cuticles can help prevent any peeling or damage to the nails. It’s advisable to avoid prolonged exposure to water and harsh chemicals, as they can cause wear and tear on the design. Regular touch-ups with the top coat can also prolong the vibrancy of the gradient effect.

How to Incorporate Nail Charms Into Your Look

Many people are embracing the vibrant world of nail art, and adding nail charms is a fantastic way to elevate your manicure. Nail charms come in various designs and styles, allowing you to express your personality and creativity. In this guide, you will learn practical tips and techniques for seamlessly integrating these playful embellishments into your nail art routine, ensuring that your look stands out while still feeling polished and put-together. Get ready to enhance your nails with a touch of flair that reflects your unique style!

Key Takeaways:

  • Choose the Right Style: Select nail charms that complement your overall aesthetic, whether it’s playful, elegant, or edgy.
  • Placement Matters: Strategically place nail charms on accent nails or mix and match with different designs for a cohesive look.
  • Consider Occasion: Tailor your nail charm choice to the event, opting for subtle designs for formal settings and bold ones for casual outings.

Understanding Nail Charms

Before you start adding nail charms to your look, it’s vital to understand what they are and how they can enhance your style. Nail charms come in various shapes, sizes, and designs, making them versatile accessories for expressing your personal flair. If you’re curious about Alternative uses for nail charms? : r/CraftingWorld, you’ll discover they can also serve as embellishments in other crafts. Now, let’s look into the different types available.

Types of Nail Charms

3D CharmsElevate your nail game with dimensional designs.
Flat CharmsEasy to apply and perfect for layering.
Add-on StickersQuick and simple embellishments to customize your nails.
RhinestonesBring sparkle and glamour to your manicure.
Seasonal ThemesCelebrate special occasions with themed charms.

Knowing the types of nail charms allows you to mix and match them creatively. Choose based on your mood or occasion for an empowered nail design!

Choosing the Right Charms for Your Style

An important factor to consider when selecting nail charms is your personal style. Whether you prefer a minimalist aesthetic or something more extravagant, the right charm can enhance your look without overwhelming it.

This means identifying designs that complement your wardrobe and resonate with your personality. Opt for colors and themes that reflect your taste, and don’t hesitate to experiment. Pairing charms with certain outfits can create a cohesive look that draws attention to your nails in a stunning way.

Preparing Your Nails for Charms

Clearly, preparing your nails properly is the key to successfully incorporating nail charms into your look. This step not only ensures that the charms adhere well but also enhances the overall aesthetic of your manicure. Start by cleaning your nails, pushing back cuticles, and shaping them to your desired length. A smooth canvas allows the charms to shine and stay in place without complications.

Nail Care Basics

Behind every stunning nail art, there is solid nail care. Begin with ensuring your nails are healthy and free from peels or splits. Regularly moisturize your cuticles and use a good-quality base coat to protect your nails. This foundation not only strengthens your nails but also provides a perfect base for applying nail charms.

Application Techniques

Preparing your nails for charm application can make a significant difference in how they hold up throughout the week. Consider using nail glue or a clear top coat to affix the charms securely. Depending on their design, gently press them onto your dried polish or incorporate them in wet polish for a seamless finish. Additionally, use tweezers for precision if the charms are small or intricately designed.

A good application technique will not only ensure that your nail charms last longer but also enhances their visibility and impact. When applying, keep the charms slightly away from the cuticle area to prevent lifting and ensure a comfortable wear. For smaller charms, pressing them directly into the wet polish provides a strong foundation, while larger ones may benefit from a dab of nail glue to secure them in place. Experiment with different placements to find what suits your style best!

How to Apply Nail Charms

Despite their stunning appearance, applying nail charms is a straightforward task that can elevate your manicure. You can use various charm designs to create a unique look, but the key is to ensure proper application techniques for durability and aesthetics. With the right method, these little embellishments can stay securely on your nails while making a bold statement.

Tools and Materials Needed

Along with the nail charms themselves, you’ll need a few necessary tools and materials for a seamless application process. Gathering everything beforehand will help streamline the task and ensure you achieve the best results.

Tools and Materials

Nail CharmsYour chosen designs
Nail GlueFor secure adhesion
Top CoatTo seal and protect the charms
Nail FileTo shape your nails
Pusher/SticksFor precise placement

Step-by-Step Application Guide

Against common belief, applying nail charms is simple when you follow a structured approach. By sticking to the steps outlined below, you will enhance your nails while ensuring that the charms are correctly positioned and long-lasting.

Step-by-Step Guide

1. Prepare Your NailsShape and clean your nails for optimal adhesion
2. Apply Base CoatStart with a base to protect your nails
3. Position Nail CharmsUse nail glue to attach the charms
4. Seal with Top CoatApply top coat to enhance longevity

And to further assist you, here’s a more detailed breakdown of the application process. Each step is vital to ensure that your nail charms look fantastic and stay in place. By focusing on adhesion and protection, you’ll create a stunning manicure that will catch everyone’s eye.

Detailed Steps

Prepare Your NailsGently file and buff nails, cleaning the surface to promote adhesion.
Apply Base CoatAllow the base coat to dry completely before proceeding.
Position Nail CharmsUse a small amount of glue, placing the charm in your desired position.
Seal with Top CoatCover charm and surrounding nail area for extra strength.

Styling Tips with Nail Charms

Many ways exist to enhance your overall look with nail charms. Consider incorporating them into your nail art to create a unique statement. Here are some tips to bear in mind:

  • Choose charms that complement your outfits.
  • Mix different sizes and styles for a more dynamic effect.
  • Align the colors of your charms with your nail polish.
  • Use charms as accents rather than overwhelming your nails.

After you apply your nail charms, don’t hesitate to showcase them as a focal point of your style!

Occasion-Based Styles

After selecting the perfect nail art for your occasion, adjust your charm choice accordingly. For formal events, opt for sleek and elegant charms like gemstones or metallic designs. For casual outings, feel free to go wild with quirky shapes and bright colors that reflect your personality. The right charm can elevate your entire ensemble!

Mixing and Matching Charms

Styling nail charms takes creativity, especially when mixing and matching. You don’t have to stick to just one type of charm; feel free to combine various styles and designs to create a personalized look that reflects your individuality.

In fact, combining charms like stars, butterflies, or floral designs can create a whimsical, layered effect that makes your nails stand out. Play with different materials such as metals, gems, and acrylics for a more textured appearance. Make sure to balance the colors and sizes so your nails remain cohesive while showcasing the diversity of your charms. With enough practice, you’ll discover the perfect combinations that suit your style best!

Maintaining Your Nail Charms

To keep your nail charms looking stunning, regular maintenance is vital. Taking care of your charms will ensure they remain intact and vibrant, enhancing your overall nail aesthetic. The right techniques can extend their lifespan while preventing damage to your natural nails.

Care Tips for Longevity

About achieving the best results with your nail charms involves some simple care tips:

  • Avoid harsh chemicals that can weaken the adhesive.
  • Keep your nails dry to prevent lifting.
  • Use gentle hand soaps and moisturizers.
  • Limit exposure to high-impact activities.

Assume that by practicing these care techniques, your nail charms will look fabulous for longer.

Removal Process

Maintaining the integrity of your natural nails is just as important during the removal of your nail charms. Using the right method will prevent any damage and ensure a smooth transition to your next design.

Removal should be done with care to avoid stressing your nails. You can soak a cotton ball in acetone and place it on the charm to gently dissolve the adhesive. After a few minutes, use a soft tool to lift the charm off your nail. If it resists, re-soak the cotton and try again. Always finish by moisturizing your nails and cuticles, as removal can leave them dry.

Trending Looks with Nail Charms

Your nails can be a stunning reflection of the latest trends, especially when you incorporate vibrant nail charms. The current favorites range from playful themes like stars and hearts to sophisticated designs featuring geometric shapes or floral patterns. Mixing and matching these charms with your nail art can elevate your look, making it a focal point that expresses your individuality.

Celebrity Inspirations

Among the plethora of celebrities flaunting nail charms, stars like Billie Eilish and Ariana Grande are known for their unique styles that often include dazzling nail adornments. Their bold choices inspire you to play with eclectic designs, from minimalist charms to extravagant details, allowing you to find your own signature look.

Seasonal Trends

One of the best aspects of nail charms is their adaptability to seasonal themes, making them a go-to accessory throughout the year.

Indeed, as the seasons change, so can your nail charm selections. In spring, opt for pastel colors and floral charms to celebrate blooms; during summer, bright hues and beach-themed charms like seashells can enhance your playful vibe. Fall brings about richer, earthy tones paired with charms like leaves or pumpkins, while winter invites festive motifs like snowflakes or holiday symbols. Embracing these seasonal changes can keep your nail art fresh and in sync with the time of year.

Conclusion

So, incorporating nail charms into your look is an exciting way to express your personal style and add a unique touch to your manicures. Start by selecting charms that resonate with your personality or the theme of your outfit, and consider placement carefully for the best effect. Whether you’re going for a subtle accent or a bold statement, experiment with different designs and combinations to find what works for you. Ultimately, let your creativity shine as you elevate your nail game with these fashionable accessories.

FAQ

Q: What are nail charms and how can they enhance my manicure?

A: Nail charms are decorative elements that can be applied to your nails to add personality and style to your manicure. They come in various shapes, sizes, and materials, including rhinestones, 3D figures, and metallic pieces. By incorporating nail charms, you can create a unique look that reflects your mood, event, or personality. Whether you’re aiming for a glamorous statement or a fun, playful vibe, nail charms can elevate the overall aesthetic of your nails and make your manicure stand out.

Q: How do I properly apply nail charms to ensure they stay in place?

A: To ensure your nail charms stay securely in place, start by applying your base coat and a color of your choice. Once your polish is dry, use a top coat as an adhesive for the charms. Carefully place the charm onto your nail while the top coat is still wet for better adhesion. For more substantial charms, consider using nail glue to make sure they stay put. After placing all the charms, finish off with another layer of top coat to seal them in, which also adds shine and protection. This method will help extend the life of your manicure and keep your charms looking fresh.

Q: Are there specific occasions or themes where nail charms work best?

A: Nail charms can effectively complement a variety of occasions and themes. For example, during the holiday season, charms such as snowflakes, Christmas trees, or ornaments can enhance the festive spirit. For a wedding or formal event, delicate pearls or elegant floral designs offer a sophisticated touch. If you’re attending a beach party, consider charms shaped like seashells or starfish for a fun summer vibe. The versatility of nail charms allows you to customize your look based on your personal style and the occasion, making them a great addition to any manicure.

Skip to content