Inails Near Me Global

Creating Galaxy Nails – A Step-by-Step Guide

Most people admire the beautiful and mystical look of galaxy nails, but you can easily create this stunning design at home with a little practice. In this informative guide, you’ll learn step-by-step how to achieve the mesmerizing hues and sparkles of the universe on your fingertips. With just a few tools and some creativity, your nails will become a canvas for cosmic art. For additional inspiration, check out How To: Galaxy Nails ⋆ Beauty Nerd By Night for tips and tricks!

Key Takeaways:

  • Preparation: Start with clean, dry nails and apply a base coat to ensure a smooth application and enhance longevity.
  • Blending Colors: Use a sponge to dab on vibrant colors like purples, blues, and blacks to create a cosmic gradient, blending them for an ethereal look.
  • Finishing Touches: Add glitter or star stickers for added dimension, and seal the design with a top coat for a glossy finish.

Necessary Materials

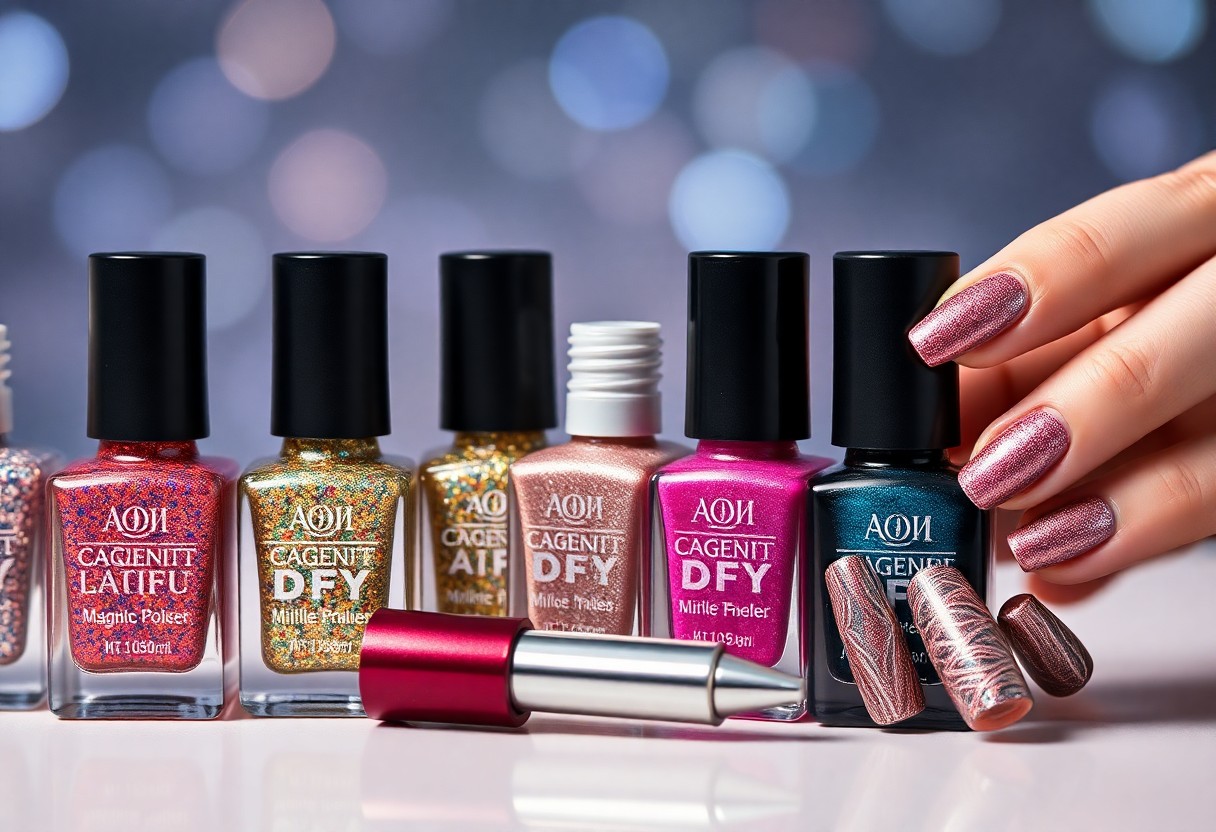
Before you start creating your galaxy nails, make sure you have all the necessary materials on hand. Gather the right colors, tools, and additives that will bring your cosmic designs to life. For a helpful visual guide, check out this Easy Galaxy Nail Art Tutorial 💫 that showcases the necessarys you’ll need to get started.

Base Coats and Colors

Necessary base coats and colors form the foundation of your galaxy nail art. You should have a clear base coat to protect your nails, as well as a selection of dark shades like deep navy or black to create the backdrop of your galaxy. Additionally, vibrant hues like purples, blues, and pinks will help mimic the beauty of the universe. Investing in high-quality nail polishes will ensure your design shines bright.

Nail Art Tools

The tools you use will significantly impact the precision and detail of your galaxy nails. Essential tools include a dotting tool, makeup sponges, and nail brushes for creating intricate designs. A fan brush can be particularly effective for blending colors, while striping tape can help you achieve clean edges and lines. The right tools allow you to express your creativity and achieve stunning results in your nail art.

Hence, choosing the appropriate tools will enhance your artistry and improve your overall experience in creating galaxy nails. Tools such as sponges for blending colors or dotting tools for adding star-like details will elevate your designs. Don’t shy away from experimenting with different products to find what works best for you and your preferred style. With the right tools, you’ll be well on your way to achieving a splendid galaxy nail look.

Preparing Your Nails

Assuming you want your galaxy nails to look stunning, the first step is preparing your nails properly. This ensures a smooth application and helps your design last longer. Start by removing any old nail polish and gently pushing back your cuticles. Clean the nail beds thoroughly to eliminate any oils or residue to give your manicure a flawless base. Once your nails are ready, you can focus on maintaining their health to enhance the overall polish appearance.

Nail Care Routine

Preparing your nails also involves establishing a regular nail care routine. This includes moisturizing your cuticles and applying a strengthening treatment if needed. Keep your nails trimmed and shaped consistently to maintain their strength and aesthetics. Making this part of your routine means your nails will be healthier and more resilient, providing the perfect canvas for your galaxy nail art.

Applying the Base Coat

For a perfect application of your galaxy nails, applying a high-quality base coat is important. The base coat not only protects your nails from staining but also helps the polish adhere better and last longer. It creates an even surface that allows your creative designs to shine through.

Applying a base coat is simple but vital for achieving the best results. After your nails are clean and dry, apply a thin layer of base coat, ensuring you cover the entire nail evenly without flooding the cuticles. Allow it to dry completely before moving on to your nail art. This way, you provide the perfect foundation for vibrant colors, which enhances the overall look of your galaxy design.

Creating the Galaxy Effect

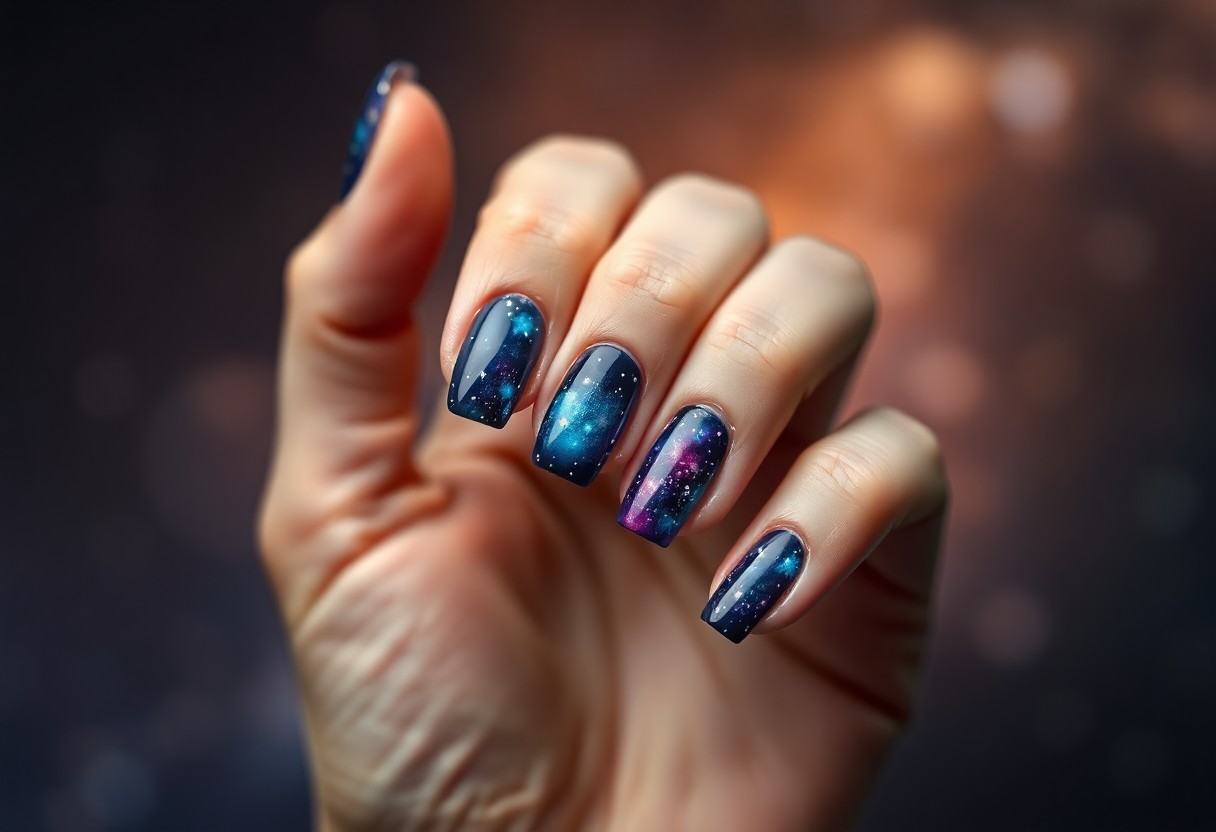
Unlike regular nail art, achieving a galaxy effect requires a blend of vibrant colors and textures to mimic the beauty of the cosmos. Start with a dark base color, such as black or deep blue, to represent the night sky. Then, layering various shades will give your nails that stunning, otherworldly appearance. This process involves creativity and patience, but the results will be nothing short of stellar.

Color Application Techniques

Against using a single brush throughout your design, consider employing different tools, like sponges or nail dotters, to apply your colors. Sponging allows you to create soft transitions between hues, while dotters can be used for creating the shimmering stars scattered across your galaxy. Mixing these techniques will enhance the overall effect and add dimension to your nails.

Blending Colors for Depth

Galaxy nail design relies on how effectively you blend colors for depth and richness. Start by layering lighter colors over darker ones, allowing some of the base to peek through. This method creates an illusion of space and gives your design a dynamic quality that captivates the eye.

At this stage, don’t hesitate to experiment with various color combinations; your palette can include purples, blues, pinks, and whites. Use a makeup sponge to dab on layers of color, lightly blending them together as you go. Aim for a gradient effect where colors transition smoothly into each other, mimicking the vastness of outer space. By varying pressure and sponge placement, you’ll achieve a multi-dimensional look, providing depth that resembles swirling galaxies.

Adding Stars and Highlights

All you need to do now is add some fun stars and highlights to your galaxy nails. This last step will truly bring your design to life. Whether you prefer tiny dots replicating stars or sparkly accents, your galactic theme will shine. Gather your tools and prepare to add those magical details that will elevate your nail art.

Dotting Techniques

Beside using a fine brush, dotting tools can help you create perfect little stars across your nails. You can utilize different sizes of dotting tools to achieve various star sizes. Start by dipping your dotting tool into white or silver polish, and gently press it onto your nails to form stars, clusters, or even constellations.

Using Glitter and Foils

Highlights like glitter and foils can add the finishing touch to your galaxy nails, giving them a twinkling effect that mimics the night sky. Applying these elements strategically will enhance the overall cosmic impact.

Stars often complement the deep hues of your galaxy nails exquisitely. To achieve this, sprinkle fine glitter over your wet polish for a more uniform shine, or use larger glitter particles for added texture. Foil pieces can be added sparingly for a striking contrast; simply tear small bits and press them onto the tacky surface of your design. These accents will create dimension, making your nail art truly out of this world!

Finishing Touches

Despite the vibrant galaxy design already on your nails, finishing touches bring everything together. This final layer enhances the shine and preserves the intricate work you’ve done. By following these simple steps, you’ll ensure your galaxy nails not only look stunning but also last longer. Let’s examine the details!

Top Coat Application

Along with making your galaxy nails shine, applying a quality top coat is important for protecting your artwork. Choose a gel or regular top coat, and apply it gently over your design using smooth strokes. This step seals everything in, enhancing the depth of colors and adding a glossy finish to your nails.

Drying and Curing Times

Among the different finishes, drying and curing times can vary significantly depending on the products used. If you’re using traditional polish, allow your nails to air dry for at least 30 minutes. If you opt for a gel top coat, follow your product’s instructions for curing, typically 60-90 seconds under a UV/LED lamp.

Coat your nails thoroughly, as the right drying or curing time ensures that your design sets perfectly, preventing smudging or chipping. Patience is key; rushing through this step may compromise your beautiful galaxy nails. If you’re using a gel top coat, ensure the lamp is properly maintained for optimal results. Allowing sufficient drying time will extend the life of your manicure, keeping your galaxy nails looking fresh and vibrant for days to come.

Care and Maintenance of Galaxy Nails

Many factors can affect the longevity of your galaxy nails, so it’s important to implement proper care and maintenance. Regularly moisturizing your hands and cuticles will help keep your nails healthy and prevent breakage. Additionally, avoid harsh chemicals and detergents that could wear down your vibrant designs. A topcoat applied every few days can also protect your nail art while providing a beautiful shine, ensuring your galaxy nails remain stunning for as long as possible.

Protecting Your Design

With a few simple precautions, you can protect your galaxy nail design from wear and tear. Wearing gloves while doing chores, like washing dishes or cleaning, helps shield your nails from potential damage. Additionally, steer clear of activities that could cause accidental chips or impacts. Taking these steps will contribute to the longevity of your stunning nail art.

Repairing Chips and Damage

Nails are not immune to wear, and chips or damage may occur over time. To quickly fix any imperfections, you can use a small amount of nail polish that matches your design. Gently apply it to the affected area while blending it into the surrounding polish. Finish with a topcoat to seal the repair and restore the glossy finish.

Chips can detract from the overall beauty of your galaxy nails, but they are easily fixable. For larger areas of damage, consider applying a sponge technique to replicate the galaxy effect, gently blending colors to match your original design. Once you’re satisfied with the touch-up, ensure you coat the repaired area with a topcoat for protection. This simple upkeep strategy helps maintain the stunning visual appeal of your galaxy nails even as they endure daily wear.

To wrap up

Following this step-by-step guide, you can easily create stunning galaxy nails that showcase your creativity and skill. By gathering the right materials and carefully layering colors, you’ll achieve a beautiful cosmic effect anyone would admire. Don’t hesitate to experiment with different shades and designs to make your galaxy nails truly unique to your style. Enjoy the process and the compliments that are sure to come your way!

FAQ

Q: What materials and tools do I need to create galaxy nails?

A: To create stunning galaxy nails, you will need the following materials: a base coat, black nail polish (or dark blue/purple), various nail polishes in cosmic colors (such as white, pink, blue, and purple), a makeup sponge, a top coat, and optional glitter or star decals. Tools include a small brush or dotting tool for finer details and a sponge for blending colors.

Q: How do I prepare my nails for galaxy nail art?

A: Start by prepping your nails through filing and shaping them to your desired length. Next, push back the cuticles gently and cleanse your nails with nail polish remover to eliminate any oils. Apply a base coat to protect your natural nails and allow it to dry completely before proceeding with the galaxy design.

Q: Can I create galaxy nails without using a sponge?

A: While using a makeup sponge is a common technique for applying the blend of colors seamlessly, you can also use a brush or your fingers to dab on the colors. However, using a sponge tends to give a softer gradient effect, which is ideal for mimicking a galaxy. If you prefer not to use a sponge, be sure to tap lightly for the best result.

Q: What techniques should I use to get the best blend of colors on my nails?

A: To achieve a beautiful color blend for galaxy nails, start with a layer of dark polish as your base. Once dry, apply the chosen colors to your sponge, ensuring they are layered next to each other without much overlap. Dab the sponge onto your nail, rotating it as you go to create a more natural, blended effect. You can repeat this process with additional layers until you achieve the desired intensity.

Q: How can I make my galaxy nails last longer?

A: To ensure your galaxy nails stay vibrant and chip-free, always begin with a good base coat that protects your nails. After applying your galaxy design, seal it with a high-quality top coat to provide shine and durability. Avoid exposing your nails to harsh chemicals and wear gloves while doing chores. Additionally, apply the top coat every few days for ongoing protection and to maintain the shine.

How to Add Rhinestones to Your Nail Designs

Rhinestones can transform your nail designs into eye-catching masterpieces that stand out. By incorporating these sparkling embellishments, you can elevate your manicure and showcase your unique style. In this post, you’ll learn practical tips and techniques to effectively add rhinestones to your nails, ensuring they stay in place and look fabulous. For a step-by-step guide, check out How to Attach Rhinestones to Nails: 13 Steps (with Pictures). Get ready to shine with your stunning nail art!

Key Takeaways:

  • Choose the right size: Select rhinestones that complement the nail design and the size of the nails for a balanced look.
  • Adhesive options: Use a strong nail adhesive or gel to securely attach rhinestones, ensuring they last longer without easily falling off.
  • Placement techniques: Experiment with different placements, like accent nails or patterns, to enhance your overall nail design creativity.

Choosing the Right Rhinestones

For creating stunning nail designs, selecting the right rhinestones is vital. The variety available in terms of colors, sizes, and finishes allows you to personalize your look. Consider the overall aesthetic you want to achieve and how the rhinestones will complement your base colors and patterns. Your choice can elevate a simple design into a dazzling statement piece.

Types of Rhinestones

With different types of rhinestones on the market, you can choose options that best fit your style. Here are some popular types:

  • Glass rhinestones
  • Acrylic rhinestones
  • Crystal rhinestones
  • Flatback rhinestones
  • Self-adhesive rhinestones

This makes it easy to find the perfect option for your nail art project.

TypeCharacteristics
GlassBrilliant shine, durable
AcrylicLightweight, budget-friendly
CrystalHigh-quality, premium shine
FlatbackEasy to apply, versatile
Self-adhesiveNo glue needed, convenient

Sizing Considerations

About choosing the right size of rhinestones, it is important to consider the scale of your nail design. Going for oversized stones can create a bold statement, while smaller options can add subtle elegance. Evaluate how the size aligns with the rest of your nail art to achieve a balanced look.

Rhinestones come in various sizes typically measured in millimeters. For nails, popular sizes range from 1mm to 5mm, depending on the detail you wish to portray. Make sure to assess your nail shape and design style to ensure that the rhinestones you choose enhance your overall look rather than overpower it. Mixing different sizes can also create an eye-catching effect, helping you to achieve the perfect design.

Preparing Your Nails

While getting your nails ready for rhinestone embellishments, it’s necessary to ensure they are clean and well-maintained. Start with removing any previous nail polish and gently push back the cuticles. Trim and file your nails to your desired shape, ensuring they are smooth and even. This preparation not only gives a polished look but also provides a clean canvas for the rhinestones to adhere to, enhancing the overall outcome of your nail design.

Nail Care Basics

By focusing on nail care basics, you lay the foundation for a great rhinestone design. Keep your nails well-hydrated by applying cuticle oil regularly, as this promotes healthy growth and strengthens your nails. Additionally, using a gentle scrub can help remove dead skin around the nails, ensuring a fresh appearance.

Selecting a Base Color

Selecting your base color is an important step in nail design. Choose a shade that complements the rhinestones you plan to use, as this will enhance the overall look of your nails. A neutral color can provide a chic backdrop, while bold shades can make your rhinestones pop.

At the same time, consider your personal style and the occasion when choosing your base color. Lighter shades such as pastels or whites create an elegant look, making them ideal for special events. Conversely, vibrant colors like reds or blues can add a fun and playful touch. Test a few swatches on your nails to ensure you’re happy with your color choice before proceeding with the rhinestones.

Tools and Materials Needed

Unlike other nail art techniques, adding rhinestones requires specific tools and materials to achieve the best results. You will need quality rhinestones in various sizes and shapes, a reliable adhesive, and nail tools like a picker or dotting tool to help place the stones precisely. Additionally, consider having a clean-up brush and a top coat to secure your design and provide a professional finish.

Essential Tools

At the very least, you will need a rhinestone picker tool, which makes it easier to handle small gems, and a dotting tool for precise placement. Nail tweezers can also be helpful to pick up and position your rhinestones accurately without any mess. A clean-up brush is useful for tidying up any excess adhesive around the rhinestones.

Recommended Adhesives

Any strong adhesive that can hold your rhinestones in place is suitable for nail designs. Some popular choices include nail glue, gel top coat, or clear-drying craft glue. Each type offers unique benefits, allowing for flexibility in your designs.

For instance, nail glue provides a strong hold and is specifically formulated for use on nails, ensuring your rhinestones stay in place longer. Gel top coat not only attaches rhinestones but also adds a glossy finish to your designs. Clear-drying craft glue is a great option if you’re looking for something more accessible, but ensure it is safe for use on nails to avoid any damage. Choose the adhesive that best fits your crafting style and the durability you desire.

Techniques for Applying Rhinestones

All nail designs can benefit from the strategic application of rhinestones. Whether you want a simple accent or an intricate pattern, understanding these techniques will help elevate your nail game. Choose the method that suits your style and skill level, and let your creativity shine by embedding these sparkling gems into your manicures.

Simple Placement Methods

Along with traditional nail polish, you can easily incorporate rhinestones into your designs using straightforward placement methods. Start by selecting a nail glue or a gel base coat, apply a tiny dot onto your nail, and carefully place each rhinestone where you want it. Use a toothpick or rhinestone picker for precision, and finish with a top coat to secure your design.

Advanced Design Techniques

Techniques for advanced design allow you to create stunning, eye-catching patterns using rhinestones. You can achieve elaborate artistry by employing tools and methods that require more skill but yield beautiful results. Consider trying out the following techniques:

Advanced Design Techniques

  1. Gradient Placement: Mix sizes and colors for a blended effect.
  2. Negative Space: Create designs that leave parts of the nail unembellished.
  3. Layering: Stack multiple rhinestones for depth.
  4. Geometric Patterns: Arrange stones in precise, angular designs.
  5. 3D Shapes: Combine rhinestones with other embellishments for a multidimensional look.

With these advanced techniques, you can craft unique nail art that captures attention. Combining your skills with creativity opens up a world of possibilities in rhinestone design. You can start by selecting a geometric shape, carefully mapping out your design on paper, and then translating it onto your nails with rhinestones. This strategic approach makes the process manageable and enjoyable.

Steps for Advanced Design Techniques

  1. Sketch your desired design on paper.
  2. Gather rhinestones of various sizes and colors.
  3. Practice the layout with dotting tools before applying glue.
  4. Use a top coat to seal and protect your design.
  5. Experiment with placement for personalized style.

Aftercare for Rhinestone Nails

Not properly caring for your rhinestone nails can lead to premature peeling and loss of your dazzling accents. To extend the life of your design, avoid exposing your nails to excessive water and harsh chemicals. Use gloves when doing dishes or cleaning, and be gentle when you wash your hands. Regularly apply a nourishing cuticle oil to keep your nails and the surrounding skin healthy and hydrated.

Maintaining Your Design

On a daily basis, be mindful of how you interact with surfaces. Avoid scraping your nails against hard objects and opt for a light touch when typing or using your phone. This attention will help maintain the integrity of your rhinestone accents, ensuring that they stay sparkling for longer.

Removing Rhinestones Safely

By taking the right approach, you can safely remove rhinestones without damaging your nails. Begin by softening the adhesive used for the rhinestones. You can do this with a generous application of acetone or a special nail polish remover designed for rhinestone removal.

In fact, be sure to soak a cotton ball in acetone and place it over the rhinestones for a few minutes to allow the glue to loosen. Afterward, gently lift the rhinestones with a wooden stick or cuticle pusher. Avoid pulling or yanking, as this can cause damage to your natural nail. Cleanse your nails afterward and apply a nourishing treatment to restore moisture and health to your nails and cuticles.

Creative Design Ideas

Once again, let your imagination run wild with rhinestone nail designs! Combine various shapes and sizes of rhinestones to create stunning patterns or incorporate them into intricate nail art. You can embellish the tips of your nails or create unique designs using negative space. The key is to blend rhinestones with your chosen colors and styles to achieve an overall cohesive look that truly reflects your personality.

Themed Nail Designs

On your journey to fabulous nail art, consider adopting themed designs that resonate with your personality or current occasions. Whether you’re celebrating a holiday, a special event, or just expressing yourself, using rhinestones as accents can elevate your nail art game. Choose colors and shapes of rhinestones that complement your theme for a polished, chic effect.

Mixing and Matching Rhinestones

One of the most exciting aspects of nail design is the ability to mix and match rhinestones. You can create a playful look by combining different colors, sizes, and shapes. This allows you to express your unique style and creativity while ensuring your nail design stands out.

Further, mixing and matching rhinestones opens up endless possibilities for your nail designs. Experiment with contrasting colors and textures to create dynamic patterns. Pair larger stones with smaller ones for an eye-catching effect, or use similar shades for a more subtle approach. Don’t hesitate to explore various placements, layering rhinestones in a gradient or clustering them together for added drama. Your nails can be a canvas for your artistic flair, letting your creativity shine through with every design you create.

Summing up

Now that you’ve learned the steps to add rhinestones to your nail designs, you can elevate your nail game with stunning embellishments. Whether you choose to apply a few strategically placed stones or create intricate patterns, the key is to ensure they are securely fixed with the right adhesive. Practice will make perfect, and soon you’ll find yourself experimenting with different sizes and colors to match your personal style. Enjoy the creativity and make your nails truly stand out!

FAQ

Q: What types of rhinestones are best for nail designs?

A: When identifying rhinestones for nail designs, consider the type of adhesive you will be using. Flat-back rhinestones are ideal as they sit well on the nail surface. Crystal or glass rhinestones provide a more glamorous look, while acrylic rhinestones are lighter and can be easier to work with. Additionally, ensure to choose a size that complements the design – smaller sizes for intricate patterns and larger stones as focal points.

Q: How do I properly apply rhinestones to my nails?

A: To apply rhinestones, first, create your desired nail design and allow the base coat to dry completely. Use a dotting tool or a toothpick dipped in nail glue to pick up the rhinestone. Place it gently onto the nail where you want it to stick. Make sure to press down slightly to secure a stronger bond. Once you’ve applied all rhinestones, seal the design with a top coat to protect them and enhance their shine.

Q: Can I use regular nail polish with rhinestones?

A: Yes, you can use regular nail polish with rhinestones. However, for better adhesion and a long-lasting effect, it’s recommended to use a nail glue designed specifically for embellishments. After painting your nails with regular polish, allow it to dry before adding rhinestones to ensure they adhere well. Once you’ve finished your design, apply a top coat to protect both the polish and the rhinestones.

Q: How do I remove rhinestones from my nails without damaging the polish?

A: To safely remove rhinestones, soak a cotton ball in acetone nail polish remover and press it against your nail for a few seconds to loosen the adhesive. Gently peel the rhinestone off using a pair of tweezers or your fingers. If residue is left, you can use a small amount of remover on a cotton swab to clean it up. Be gentle to avoid damaging the underlying nail polish.

Q: Are rhinestones safe to use on natural nails?

A: Yes, rhinestones are safe to use on natural nails if applied correctly. It’s important to apply them using a safe adhesive and avoid excessive pressure when attaching them. Always ensure that you follow up with a top coat to seal the rhinestones and protect your natural nails. If you experience any adverse reactions or discomfort, remove them immediately and consult with a nail professional.

Top 10 Nail Decals for Creative Designs

Decals can transform your mundane manicure into a stunning masterpiece with ease. If you’re looking to express your unique style or add a splash of fun to your nails, you’ve come to the right place. In this post, we’ll explore the top 10 nail decals that are perfect for creating eye-catching designs. From elegant florals to quirky patterns, these decals will elevate your nail game and inspire your next manicure adventure. Get ready to unleash your creativity and give your nails the attention they deserve!

Key Takeaways:

  • Diverse Designs: The top nail decals showcase a wide range of artistic styles, from floral patterns to geometric shapes, catering to various tastes.
  • Ease of Application: Most nail decals are user-friendly, allowing anyone—regardless of nail art skill level—to achieve stunning results easily.
  • Durability: High-quality nail decals are designed to withstand wear, ensuring that creative designs last longer and maintain their vibrant look.

Top 10 Nail Decals

For those looking to elevate their nail game, nail decals offer an easy and fun way to express creativity. From simple designs to intricate patterns, there are countless options available to suit your personal style. In this section, we’ll explore the top ten decals that will inspire you to get creative with your manicures.

Floral Patterns

An excellent choice for those who love a touch of nature, floral patterns can bring an enchanting vibe to your nails. Opt for vibrant colors or soft pastels to create different moods, making them perfect for any occasion.

Geometric Shapes

Across various styles, geometric shapes provide a modern edge to your nail art. With their clean lines and structured forms, these decals can cater to both minimalistic and bold looks, making them a versatile choice.

Considering the variety of geometric shapes available, you can mix and match triangles, circles, and stripes for a unique twist. This artistic approach allows you to create eye-catching designs that stand out, whether you prefer a monochromatic scheme or vibrant hues.

Animal Prints

To add some wild flair to your nails, animal prints like leopard or zebra patterns are a fantastic option. These designs can evoke a fierce attitude or just showcase your playful side, giving your manicure a bold statement.

With various colors and textures available, you can craft your own unique twist on animal prints. From classic browns and blacks to bright neon versions, you can easily find a style that fits your personality and mood.

Glitter and Metallics

Metallics can add a glamorous flair to your nail designs, making your fingertips sparkle. Whether it’s a full set or accents, the shiny finish will elevate your overall look.

Decals with glitter and metallic finishes come in a variety of styles and colors to suit any occasion. These accents can be layered or used sparingly for a chic touch that captures attention and complements your outfit seamlessly.

Seasonal Designs

Decals featuring seasonal designs allow you to switch up your nail art throughout the year. From autumn leaves to winter snowflakes, there’s a seasonal theme for every occasion.

Nail decals for seasonal designs make it easy to show your festive spirit without the hassle of hand-painting. Simply apply the decals to match the celebrations, ensuring your nails are perfectly in tune with the festive vibes all year round.

Quotes and Sayings

An inspiring choice, quotes and sayings decals can motivate and uplift you daily. Choose affirmations that resonate with you for a personal touch to your nails.

Sayings can be displayed on accent nails or as a full set, blending style with motivation. Whether it’s a reminder to stay strong or a cute phrase, these decals give a powerful and personal statement to your manicure.

Abstract Art

Above all, abstract art decals allow for a creative, free-form expression on your nails. Play with colors and shapes to reflect your unique artistic vision.

At their best, abstract designs create a captivating visual feast for the eyes, showcasing the diversity of styles you can portray. With these decals, each nail can tell its own story, leading to a stunning and cohesive design that highlights your individual style.

Customizable Options

Below the surface, customizable options for nail decals can make your nail art truly one-of-a-kind. Whether you want a specific color or your own design, these personalized decals elevate your nail designs to new heights.

But the beauty of customizable decals is in the endless possibilities they provide. From your initials to a favorite design, creating something uniquely yours ensures that your manicure stands out and expresses who you are.

Application Techniques

Keep your creativity flowing with the right application techniques for nail decals. First, ensure your nails are clean and dry; this helps the decals adhere better. You can use a pair of tweezers to precisely position the decals on your nails. Once applied, seal them with a clear topcoat to enhance durability and shine. For detailed guidance, check out 13 Types Of Nail Stickers, which outlines various options and their unique application methods. Enjoy experimenting to achieve the perfect nail art!

Maintenance Tips

Now that you’ve adorned your nails with stunning decals, keeping them in tip-top shape is key to prolonging their beauty. Start by avoiding harsh chemicals and excessive water exposure. When cleaning, opt for gentle soaps and refrain from scrubbing your nails too hard. Regularly moisturizing your hands and cuticles will also help maintain the integrity of both your decals and natural nails.

  • Limit contact with water for long periods.
  • Use a gentle cleanser for handwashing.
  • Apply cuticle oil daily.
  • Avoid using your nails as tools.

Assume that with these simple maintenance tips, your nail decals will continue to dazzle for days to come.

Where to Buy Nail Decals

Unlike traditional nail art methods, buying nail decals offers you a quick and easy way to elevate your manicure. You can find a diverse range of nail decals at beauty supply stores, craft stores, and online retailers like Amazon or Etsy. High-quality options are often available directly from nail art brands, allowing you to choose from intricate designs or themed sets. Make sure to read reviews and check the materials used to ensure you’re getting a product that suits your needs and nails. Happy shopping, and prepare to unleash your creativity!

Inspiration and Trend Highlights

Many nail trends today are influenced by fashion, art, and culture, offering you a wealth of inspiration to elevate your nail game. From minimalist designs featuring geometric patterns to bold, vibrant colors that make a statement, there’s something for everyone. You can draw ideas from your favorite runway looks or seasonal color palettes, allowing your nails to reflect your unique style. Consider exploring collaborations with popular artists or brands that often produce decals inspired by current trends, ensuring your designs remain fresh and in vogue.

Frequently Asked Questions

Despite the variety of nail decals available, you may still have questions about how to use them or which ones are best for your needs. If you’re unsure about the application process, it’s important to read the instructions carefully, as they can vary between brands. You might also wonder about the longevity of the designs; most decals can last up to two weeks with proper care. Additionally, if you’re concerned about removing them without damaging your nails, soaking your fingers in warm water can make the process easier. Don’t hesitate to explore your options!

To wrap up

Now that you’ve explored the top 10 nail decals for creative designs, you can easily elevate your nail art game. These decals offer a range of styles and themes, allowing you to express your personality and creativity flawlessly. Whether you prefer intricate patterns or whimsical designs, these options cater to various tastes. With the right techniques, you’ll turn your nails into a stunning canvas that showcases your artistic flair. Dive into your next nail art project with confidence, as these decals are sure to make your manicure truly standout.

FAQ: Top 10 Nail Decals for Creative Designs

Q: What are nail decals and how are they used?

A: Nail decals are thin, decorative stickers that can be applied to the surface of the nails to enhance their appearance. They come in various designs, including patterns, images, and textures. To use them, simply peel off the decal, position it on your nail, and seal it with a top coat for longevity. They are a quick and easy way to create intricate nail art without the need for extensive painting skills.

Q: What types of materials are commonly used for nail decals?

A: Nail decals are typically made from materials like vinyl, water-transfer paper, and adhesive stickers. Vinyl decals are durable and can withstand water exposure, making them ideal for everyday wear. Water-transfer decals are applied using water and can create stunning, detailed designs. Each type has its own application method and durability, so it’s important to choose the right material for your intended use.

Q: How can I choose the best nail decals for my style?

A: Selecting the best nail decals for your style involves considering your personal aesthetic, the occasion, and the season. For a fun and playful look, opt for colorful patterns or whimsical designs. If you’re looking for something more elegant, consider metallic or floral decals. Additionally, reading reviews and looking for high-quality brands can help you choose decals that are easy to apply and have lasting power.

Q: Can nail decals be used on any nail type?

A: Yes, nail decals can be used on various types of nails, including natural nails, acrylics, gels, and press-on nails. However, the application technique might differ slightly based on the nail surface. Ensure that the nails are clean and dry before applying decals, and always seal with a top coat to ensure longevity and prevent lifting.

Q: How do I remove nail decals safely without damaging my nails?

A: To remove nail decals without harming your natural nails, soak a cotton pad in nail polish remover and place it on the decal for a few seconds. This will help dissolve the adhesive. Gently wipe away the decal while ensuring that you do not scrape or pull excessively, which could damage your nail surface. If necessary, repeat the process until the decals are fully removed.

How to Apply Nail Foils Like a Pro

Over the past few years, nail foils have taken the manicure world by storm, offering a chic and unique way to elevate your nail art. In this guide, you will learn how to apply nail foils effectively and achieve a salon-quality finish at home. From choosing the right type of foil to mastering the application technique, you can transform your nails with expert finesse. For additional tips, check out these 5 Ways to Apply Nail Foils to take your skills to the next level.

Key Takeaways:

  • Preparation: Ensure your nails are clean and properly shaped before applying foils for optimal adhesion and appearance.
  • Adhesive: Use a high-quality adhesive specifically designed for nail foils to achieve a flawless and long-lasting finish.
  • Technique: Apply the foil with a gentle pressing motion, ensuring full contact with the adhesive for an even distribution of the design.

Understanding Nail Foils

A key element in achieving stunning nail art, nail foils offer a fun and trendy way to express your creativity. They can be applied over any base and are available in various styles, allowing you to customize your nails to match any occasion. With the right technique, you can achieve a professional-looking manicure that captures attention.

What Are Nail Foils?

Nail foils are thin, flexible sheets that feature a variety of designs and finishes, such as metallic, holographic, and patterned options. They adhere to your nails, creating captivating effects that can elevate your manicure, turning simple nail polish into intricate art. Their versatility makes them a popular choice among nail enthusiasts.

Types of Nail Foils

Against a backdrop of endless creativity, nail foils come in various forms, each catering to different artistic preferences. Below are some common types of nail foils:

TypeDescription
Transfer FoilsHighly reflective, these foils transfer designs directly onto your nails.
Water Decal FoilsEasy to apply, these foils use water for a seamless transfer.
Solid Color FoilsThese provide a base color, which can be layered for added depth.
Patterned FoilsDesigned with intricate prints, perfect for adding detail.
Metallic FoilsThese offer a shiny finish that brings a glamorous touch to your nails.

Knowing the variety of foils available can significantly enhance your nail art skills and creativity, enabling you to create unique and appealing designs tailored to your style.

Understanding the specific characteristics of each type of nail foil will enhance your application process. For instance, transfer foils require a special adhesive to properly bond with your nail, while water decals may need to be soaked before application. Below is a detailed breakdown of these types:

TypeApplication Method
Transfer FoilsApply adhesive and press foil onto the nail.
Water Decal FoilsSoak in water, slide onto the nail, and seal.
Solid Color FoilsApply over a wet base for blending.
Patterned FoilsUse adhesive to secure design onto the nail.
Metallic FoilsAdhere with top coat for a lasting shine.

Knowing these methods will ensure you achieve a flawless finish and maximize your nail art potential.

Preparing Your Nails

If you want your nail foils to adhere flawlessly, it’s imperative to start with a clean and well-prepared nail surface. Begin by removing any old polish and ensuring your nails are free from oils and residues. This step sets the foundation for a long-lasting application, allowing the nail foil to stick effectively.

Nail Care Essentials

On your journey to perfect nail foils, make sure you have imperative nail care supplies, including a good quality nail file, buffer, cuticle oil, and a gentle cleanser. Investing in these tools will not only improve the application process but also keep your nails healthy and strong.

Cleaning and Buffing Techniques

Around your nails, you must focus on thorough cleaning and buffing to achieve a smooth base. Start by gently pushing back your cuticles and trimming any excess skin. Next, file your nails to your desired shape and gently buff the surface to remove any shine, which promotes better foil adhesion.

Preparing your nails through cleaning and buffing enhances the overall look and longevity of your nail foils. Use a nail cleanser to remove any remaining oils or dirt. After cleaning, use a buffer in a back-and-forth motion to create a slightly textured surface; this will help the adhesive stick better. By ensuring your nails are properly cleaned and buffed, you’ll achieve the ideal canvas for the beautiful nail foils you are about to apply.

Application Techniques

For a flawless nail foil application, mastering the right techniques is necessary. Start by preparing your nails properly, ensuring they are clean, dry, and ready for the adhesive. Using the right amount of product and the right pressure while applying the foil will elevate your results, giving your nails that professional finish. Experimenting with different techniques, such as layering or mixing patterns, can also customize your look and make it uniquely yours.

Tools You Need

Behind every great nail foil application is a set of necessary tools. You’ll need nail foils in your chosen designs, foil adhesive, a pair of tweezers for precise placement, a base coat, and a top coat to seal your design. Some enthusiasts also find a detail brush useful for touching up the edges. Having these tools at your fingertips will streamline your application process and help you achieve stunning results.

Step-by-Step Application Guide

On your journey to a professional-looking nail foil application, follow these straightforward steps:

Steps

1. Prepare your nailsStart with clean, filed nails.
2. Apply a base coatThis ensures a smooth foundation.
3. Use foil adhesiveApply a thin layer to your nails.
4. Wait for the adhesive to dryIt should be tacky, not wet.
5. Apply the nail foilPress it gently onto the adhesive.
6. Seal with a top coatEnsure your design lasts.

For instance, when you reach the step of applying the foil, take a moment to find the right pressure. Pressing too hard may distort the design, while not enough pressure can lead to incomplete transfers. A gentle yet firm touch will help you achieve a beautiful finish. After applying the foil, sealing it with a top coat not only enhances the look but also protects it from chipping, ensuring your nail art remains vibrant longer.

Additional Tips

Tip 1Experiment with different foils.
Tip 2Layer foils for a unique design.
Tip 3Practice makes perfect, take your time!

Tips for a Flawless Finish

Keep your technique sharp by following these suggestions for a flawless look:

  • Ensure your nails are clean and dry before application.
  • Use a quality base coat to provide a solid foundation.
  • Apply the foil while the top coat is still tacky for better adhesion.
  • Seal your design with a high-quality top coat to enhance longevity.

Assume that paying attention to these details will elevate your nail game.

Common Mistakes to Avoid

On your journey to perfect nails, steer clear of these frequent pitfalls:

  • Skipping the base coat can lead to poor adhesion.
  • Overworking the foil can cause it to wrinkle.
  • Not waiting for your top coat to dry properly before applying the foil.
  • Using a low-quality foil that lacks vibrancy.

Maintaining Your Nail Foils

Foils can last longer with the right care routine:

Due to wear and tear from daily activities, it’s important to maintain your nail foils properly. Regularly apply cuticle oil to keep your nails hydrated and prevent peeling. Avoid excessive exposure to water and harsh chemicals, which can weaken the foil’s bond. Additionally, wear gloves while doing household chores. Schedule regular touch-ups to repair any chips or lifting, ensuring that your nails always look fresh and stunning.

DIY Nail Foil Designs

Unlike professional salons, you can personalize your nail foils at home to reflect your unique style. With just a few simple techniques and tools, you can create stunning designs that are sure to impress. Whether you opt for bold patterns or subtle accents, the possibilities are endless when you unleash your creativity on your nails.

Creative Design Ideas

The world of nail foils offers a vast array of design possibilities. You can try out abstract art, ombre gradients, or even geometric shapes using different foil colors and textures. Experiment with layering foils for a multidimensional look, or incorporate negative space for a modern twist. The key is to have fun and let your imagination guide you!

Combining Foils with Other Nail Art

Designs that blend nail foils with other nail art techniques can elevate your aesthetic. You can pair foils with classic polish, watercolor techniques, or even hand-painted details for a more dynamic look. This combination not only adds depth but also allows you to craft stunning, one-of-a-kind designs that showcase your personal flair.

Nail art is all about experimentation and expression. By mixing foils with traditional nail polish, you can create unique combinations that stand out. For example, applying a glossy finish over a matte base allows foils to shine with contrast, while hand-painted designs can act as a backdrop for a striking foil accent. Don’t hesitate to mix different styles and techniques; your nails are your canvas!

Troubleshooting Common Issues

Despite your best efforts, you may encounter some common issues while applying nail foils. Whether it’s difficulty with adherence or unsightly wrinkles, these problems can be easily resolved with a few tips and tricks. With practice, you’ll be able to achieve salon-quality results every time you use nail foils.

Foils Not Sticking

Among the most frustrating problems you might face is when your nail foils refuse to stick. This issue can often stem from insufficient adhesive or improper surface preparation. Ensure that your base coat is fully dried and that you are using a quality nail foil adhesive to enhance cling.

Fixing Wrinkles and Bubbles

To address any wrinkles or bubbles that form while applying nail foils, you should work slowly and carefully. Applying gentle pressure can help smooth out the foil onto your nail, ensuring a flawless finish. If you do encounter wrinkles, don’t panic—there are simple fixes to achieve a polished look.

A great way to fix wrinkles and bubbles is to use a clean orange stick or a cuticle pusher. Gently push the foil down from the center towards the edges, smoothing out any imperfections as you go. If you still see some stubborn bubbles, lightly press a warm cotton pad over the area to help reshape the foil and set it in place. This technique can help you achieve a smooth and professional result that showcases your creativity.

Conclusion

Presently, you have the tools and techniques to apply nail foils like a pro. By prepping your nails adequately, choosing the right adhesive, and mastering the application process, you can achieve stunning results in your nail art. Don’t forget to seal your design for longevity and practice for that flawless finish. With each application, you’ll gain confidence and creativity, elevating your nail game to new heights. Enjoy experimenting with different designs and colors to personalize your look!

FAQ

Q: What are nail foils and how do they work?

A: Nail foils are thin sheets of material that can be applied to the nails to create intricate designs and patterns. They work by being adhered to the nail surface using a special adhesive or top coat. When applied correctly, they can add a unique touch to your manicure, resembling art or metallic accents. There are various types of nail foils available, including holographic, metallic, and patterned designs.

Q: How do I prepare my nails before applying nail foils?

A: To prepare your nails for nail foils, first ensure that they are clean and dry. Start by removing any old nail polish and buffing the surface of your nails to create a smooth canvas. Following this, apply a base coat to protect your nails. Once the base coat is dry, you can apply a color nail polish if desired; this will provide a backdrop for the foils.

Q: What adhesive should I use for applying nail foils?

A: There are several types of adhesive specifically designed for nail foils. You can use nail foil glue, which is recommended as it ensures better adhesion and longevity. Alternatively, a sticky base coat can also work effectively. Whichever adhesive you choose, apply a thin layer to the nails and allow it to become tacky before adhering the foils.

Q: How do I apply nail foils without wrinkles or bubbles?

A: To apply nail foils smoothly, make sure your adhesive is properly set to a tacky, but not wet, state. Cut the foil into manageable pieces and gently press the foil onto the nail, starting from the center and working your way outwards to avoid trapping air. Using a small silicone tool or your fingertip, press down firmly but gently to smooth out any wrinkles or bubbles as you go.

Q: How can I seal nail foils for long-lasting wear?

A: To seal nail foils and ensure their longevity, apply a clear top coat over the entire nail after the foil application is complete. This will secure the foil in place and protect it from chipping or lifting. It’s best to use a non-wipe top coat to preserve the finish of the foils. Allow the top coat to dry completely for the best results.

Magnetic Nail Polishes – How They Work

With the rise of unique nail art trends, you may have come across magnetic nail polishes that create mesmerizing designs with just a few simple steps. You’ll learn how these polishes utilize magnetic particles and a magnet to produce stunning effects on your nails, elevating your manicure game. Understanding the science behind this innovative product can help you achieve those salon-quality looks at home, allowing you to express your style effortlessly. Let’s dive deeper into the workings of magnetic nail polishes and how you can use them for striking results.

Key Takeaways:

  • Magnetic Particles: Magnetic nail polishes contain tiny metallic particles that respond to magnetic fields, allowing them to create unique patterns when exposed to a magnet.
  • Application Technique: To achieve the desired effect, a layer of the magnetic polish is applied, followed by the swift positioning of a magnet over the nail, which manipulates the particles into a design.
  • Variety of Effects: Different magnet designs can produce diverse effects, including stripes, waves, and galaxies, offering a wide range of aesthetic options for nail art.

What are Magnetic Nail Polishes?

Before you investigate the world of nail art, it’s vital to understand what magnetic nail polishes are. These polishes contain finely milled metal particles that react to a magnetic field. When you bring a magnet close to the nail polish, it creates captivating patterns and designs. If you want to learn more about thermal and photochromatic options, check out this Thermal, Photochromatic, And Magnetic Nail Polish post.

Definition and Composition

Behind the allure of magnetic nail polishes lies a unique composition. These polishes typically combine standard nail polish ingredients with metallic elements like iron or magnetite. This blend allows the polish to be visually striking while responding to external magnetic forces. You will appreciate how the metal particles contribute to the final design.

Unique Features

Composition and creativity are at the heart of magnetic nail polish. One of the standout features is its ability to produce various designs with minimal effort. By simply using a magnet, you can create nail art that ranges from stripes to swirls. This interactive process allows for personalized nail designs, making your manicure truly individual.

Nail polishes with magnetic properties offer an exciting way to enhance your style. Whether you’re a novice or an experienced nail artist, these polishes encourage experimentation with patterns and colors. The convenience of applying a single coat and achieving dynamic results makes magnetic nail polishes a favorite choice for those seeking innovative nail aesthetics.

The Science Behind Magnetic Nail Polishes

The science behind magnetic nail polishes combines chemistry and physics to create unique, eye-catching designs. These polishes contain tiny iron filings that respond to a magnet’s magnetic field, resulting in mesmerizing patterns on your nails. When you apply the polish and hover a magnet above it, the iron filings within the formula align themselves, forming the distinctive designs that make these polishes so popular. Understanding this process will enhance your appreciation for this innovative beauty trend.

How Magnetism Works

To grasp the concept of magnetism in nail polishes, you should know that it involves the attraction and repulsion of magnetic fields. When a magnet is brought near the polish, its magnetic field interacts with the iron particles in the formula. This interaction causes the iron filings to shift and align in the direction of the magnetic force, creating beautiful designs on the surface of your nails.

Role of Iron Filings

One crucial component of magnetic nail polish is the addition of iron filings, which play a significant role in creating those stunning visual effects. These tiny particles are distributed throughout the polish and are key to its unique behavior when exposed to a magnet.

Iron filings facilitate the transformation of a simple nail polish into an artistic medium. When you apply the polish and place a magnet over it, these particles respond by moving and aligning according to the magnet’s polarities. This results in the formation of intricate swirls, stripes, and other patterns that weren’t there before the magnet was introduced. The quality and uniformity of the iron filings can greatly affect the final look of your nail art, emphasizing the importance of this component in magnetic nail polishes.

Application Techniques

Unlike traditional nail polishes, magnetic nail polishes require specific application techniques to achieve that stunning, shimmering effect. It’s crucial to understand these methods for optimal results, so you can impress with your unique nail art. Be patient, as the magnetic design will take a little extra effort but is worth it for the visual impact.

Step-by-Step Process

Between prep work and finishing touches, here’s a simplified guide to applying magnetic nail polish:

StepDescription
1Start with clean, dry nails and apply a base coat.
2Apply a generous layer of magnetic polish, ensuring full coverage.
3Immediately hover the magnet above the polish to create the design.
4Finish with a top coat for added shine and longevity.

Tools Needed

Around your workspace, you must gather crucial tools for a successful application of magnetic nail polish. These include a base coat, the magnetic polish itself, a magnet specifically designed for this purpose, a top coat, and the standard nail art tools such as nail files and cuticle pushers.

In addition, ensure you have a clean environment to work in, along with proper lighting. Using a high-quality magnet will enhance the effects of the polish, while a reliable base and top coat will protect your design for longer wear. Keeping every tool within easy reach will streamline your application process and help you achieve salon-quality results at home.

Popular Effects and Designs

Now that you understand how magnetic nail polishes work, it’s time to explore the popular effects and designs that you can create. With various magnetic particles that respond to the magnet’s pull, you can achieve stunning visual outcomes, ranging from bold stripes to soft waves. These unique patterns elevate your manicure, making it a conversation starter while allowing you to express your personal style effortlessly.

Common Patterns

Below are some of the most sought-after patterns you can achieve with magnetic nail polish. Popular choices include the classic cat-eye effect, where the magnet pulls particles toward the center, creating a mesmerizing shine. You can also experiment with diagonal stripes, starbursts, or even abstract swirls, offering a chic and dynamic look that enhances any outfit.

Customization Options

The customization options available with magnetic nail polishes are virtually limitless, allowing you to tailor your manicure to suit your style and preference. You can mix different colors, layer various types of magnetic polishes, or even incorporate glitter for added depth and texture. This versatility ensures that your nails are always on-trend and uniquely yours.

In fact, by playing with different magnets and their positions, you can create intricate designs that truly reflect your personality. You might experiment with stronger or weaker magnets to see how they affect the polish’s patterns or layer various shades for a gradient effect. The possibilities are endless, enabling you to craft a one-of-a-kind nail design for any occasion.

Pros and Cons of Magnetic Nail Polishes

All nail polishes have their upsides and downsides, and magnetic nail polishes are no different. Understanding the pros and cons can help you decide if they’re right for you. Check out the table below for a quick overview:

ProsCons
Creates unique designs with easeRequires specific magnetic tools
Fast applicationCan be challenging for beginners
Long-lasting effectsMay require special top coats
Wide range of colors and effectsPotential for streaking
Fun and trendyCan be more expensive

If you’re curious about how to apply these polishes effectively, check out A magnetic polish tutorial (detailed instructions in comments).

Benefits

Across the beauty community, magnetic nail polishes are sought after for their eye-catching designs and trendy appeal. They allow you to achieve intricate patterns without needing extensive nail art skills, making it fun and accessible for anyone looking to elevate their manicure. The application process is relatively quick, allowing you to enjoy professional-looking results in the comfort of your home.

Limitations

Nail enthusiasts should be aware that while magnetic polishes offer unique designs, they can also present challenges. Some formulas may require specific techniques to activate the magnetic effects properly, and this can be a learning curve for those who are inexperienced. Additionally, obtaining the desired result may take some trial and error, which could lead to frustration.

Benefits such as creating intricate designs can sometimes be overshadowed by the limitations that come with proper application and technique. You may find that achieving consistent results requires practice, especially when working with different brands or formulations. Keeping these factors in mind can help ensure that your experience with magnetic nail polishes is enjoyable and rewarding.

Maintenance and Removal

Not only do you want your magnetic nail polish to look stunning, but maintaining its integrity is crucial for longevity. Regular maintenance involves keeping your nails clean and avoiding excessive exposure to harsh chemicals, as this can alter the magnetic effect. You should also periodically check for chipping or wear, ensuring your nails remain vibrant and eye-catching.

Care Tips

Below are some care tips to help preserve your magnetic nail polish:

  • Apply a top coat to enhance durability.
  • Avoid using your nails as tools to prevent chips.
  • Keep your nails moisturized to prevent breakage.

Knowing these tips will help your magnetic nails stay fabulous longer.

Removal Techniques

Against common belief, removing magnetic nail polish is relatively simple. The best approach is to use an acetone-based remover, as it effectively breaks down the polish while minimizing residual effects on your natural nails.

Even though magnetic nail polish adheres well, it can be easily removed like regular nail polish. Soak a cotton ball in the acetone-based remover and press it against your nail for a few seconds to allow the remover to penetrate. Gently wipe the polish away, and repeat if necessary. This method ensures that you do not damage your nails while providing a clean slate for your next manicure.

Conclusion

As a reminder, understanding how magnetic nail polishes work can enhance your nail art experience. These unique polishes use tiny metal particles that react to a magnetic force, allowing you to create stunning designs with just a swipe of a magnet. By selecting the right polish and technique, you can achieve eye-catching patterns that change with the placement of the magnet. Embrace this innovative approach and elevate your manicure game with the fascinating world of magnetic nail polishes.

FAQ

Q: What are magnetic nail polishes made of?

A: Magnetic nail polishes contain metal particles, usually iron, which respond to magnetic fields. The base of the polish includes standard nail polish ingredients, making it safe and easy to apply. When the magnetic field is applied, the metal particles align and create unique designs on the nail surface.

Q: How do I use magnetic nail polish effectively?

A: To use magnetic nail polish, start with a base coat to protect your nails. Apply a generous layer of the magnetic polish and quickly hold a magnet above the nail for a few seconds. This will encourage the metal particles to shift and form patterns. Finish with a top coat to seal the design and enhance longevity.

Q: Will any magnet work with magnetic nail polish?

A: Not all magnets are suitable for use with magnetic nail polishes. It’s best to use the magnet that typically comes with the polish, as it is designed to create the appropriate effect. Some nail kits may also offer specific magnets with different shapes and patterns to produce various designs.

Q: How long does the design last after applying magnetic nail polish?

A: The longevity of a magnetic nail polish design can vary based on factors like application technique, top coat used, and daily activities. Generally, with proper application and a good top coat, you can expect the design to last anywhere from five to seven days before showing signs of wear.

Q: Can I use magnetic nail polish over regular nail polish?

A: While it’s technically possible to apply magnetic nail polish over a regular nail polish, it may not yield the best results. The magnetic effects might not be as pronounced if the underlying polish interferes with the magnetism. It’s recommended to apply magnetic nail polish directly onto a bare or base-coated nail for optimal designs.

Skip to content