Inails Near Me Global

How to Match Your Nails to Your Seasonal Wardrobe

It’s necessary to consider how your nails can complement your seasonal wardrobe, enhancing your overall style and keeping your look cohesive. By understanding color theory and the latest trends, you can easily coordinate your nail designs with your outfits for any season. Whether you prefer bold hues for summer or subtle shades for fall, this guide will provide you with practical tips to ensure your nails are always in sync with your fashion choices. Elevate your style game by learning how to effortlessly match your nails to the colors and patterns of the season.

Key Takeaways:

  • Color Coordination: Choose nail colors that complement the predominant shades in your seasonal wardrobe to create a cohesive look.
  • Seasonal Trends: Stay updated on seasonal trends, as colors and finishes often change with the seasons, allowing you to keep your style fresh.
  • Textures and Finishes: Experiment with different nail textures such as matte or glossy, and consider seasonal designs, like florals for spring or metallics for winter, to enhance your style.

Understanding Seasonal Colors

For anyone looking to elevate their style, understanding seasonal colors is vital. Each season brings unique hues that reflect the environment, from the vivid greens and florals of spring to the warm and earthy tones of autumn. By aligning your nail colors with these seasonal palettes, you can create a cohesive look that enhances your wardrobe and showcases your personal style. This connection not only keeps your appearance fresh but also adds an element of thoughtfulness to your overall aesthetic.

The Color Wheel and Seasonal Palettes

Understanding the color wheel is the first step in exploring seasonal palettes. The color wheel illustrates how different colors interact and complement each other. By identifying the dominant colors of each season—such as pastels for spring or rich jewel tones for winter—you can select nail shades that harmonize beautifully with your clothing. This knowledge allows you to play with contrasts and complements, ensuring your nails and outfits are perfectly aligned.

Influences of Seasonality on Color Choices

Understanding how the seasons influence your color choices helps you make intentional decisions. Each season evokes different feelings and moods, which are often mirrored in colors; for instance, summer is lively and bright, while winter leans towards deeper, more muted shades. These natural shifts should guide your nail selections, ensuring that every detail in your look resonates with the seasonal vibe.

Seasonal shifts not only dictate the colors you see in nature but also reflect your lifestyle. In spring, you might gravitate towards pastel pinks and yellows that evoke freshness and new beginnings. Meanwhile, summer invites bolder colors like corals and bright blues that mirror the vibrant outdoors. As fall approaches, you may find earthy tones such as browns and deep reds more appealing, reflecting the changing leaves. With winter comes richer hues like navy and burgundy that evoke warmth against the cold backdrop. By considering these influences, your nail choices will harmonize seamlessly with the season, enhancing your overall style.

Matching Nail Colors to Seasonal Trends

Clearly, pairing your nail colors with seasonal trends not only enhances your style but also showcases your creativity. As the seasons change, so do the colors that resonate with the mood and atmosphere around you. Staying attuned to these shifts allows you to seamlessly integrate your nails into your overall wardrobe. From refreshing pastels to opulent jewel tones, each season brings with it the opportunity to express yourself through an array of vibrant hues.

Spring: Pastels and Brights

About spring nails, think soft pastels and cheerful brights that reflect the blossoming nature around you. Colors like baby blue, lavender, and hot pink can add that playful joy to your look. These shades not only embody the spirit of renewal but also complement floral patterns and lighter fabrics that dominate your spring wardrobe.

Summer: Bold and Vibrant Shades

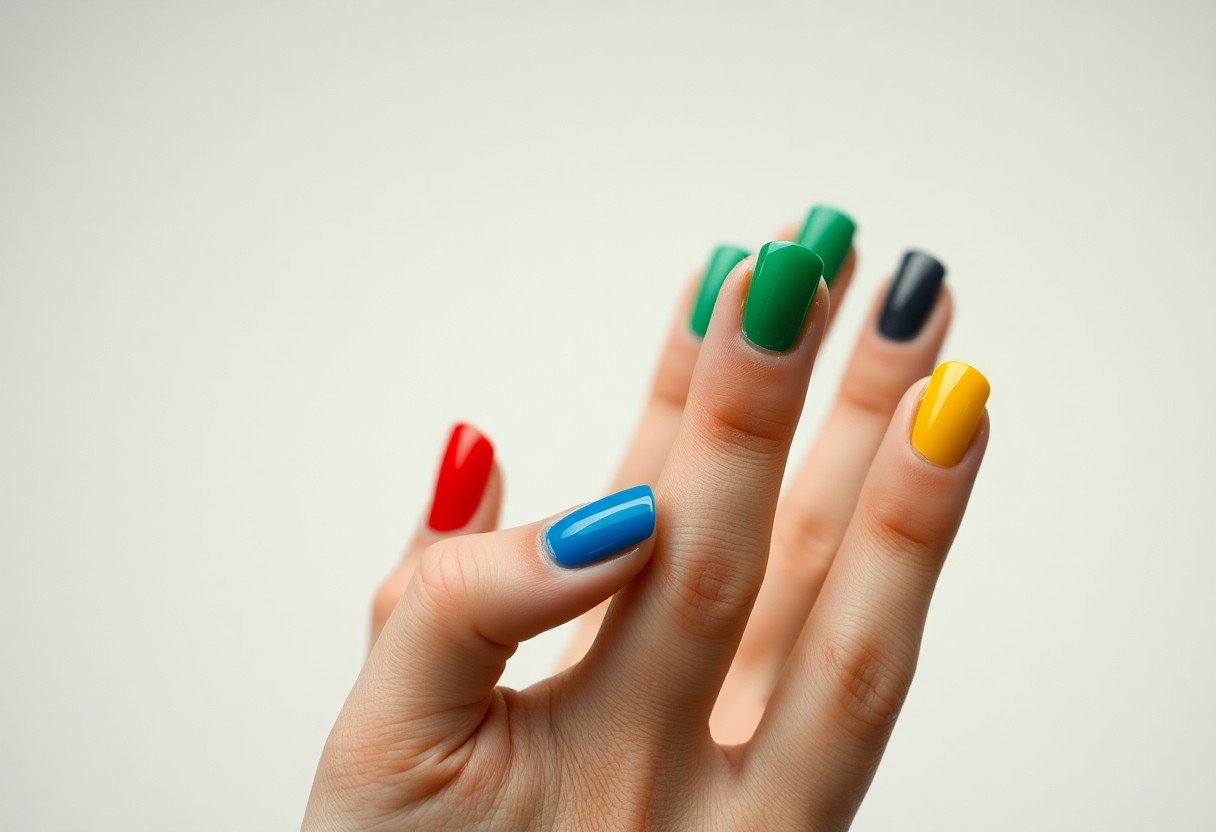
Seasonal selections for summer are all about embracing bold, saturated colors. Bright reds, sunny yellows, and electric blues can make a striking statement against your sun-kissed skin. These vivacious hues exude energy, perfectly matching your adventurous summer outings and flirty outfits.

Considering summer’s intense heat, opt for long-lasting formulas that resist chips and fading. You want your nails to stay vibrant even through beach days and late-night barbecues. Pairing your bold nail shades with printed dresses or denim shorts makes it easy to evoke a fun, carefree vibe. Don’t shy away from incorporating nail art or patterns to elevate your look even further.

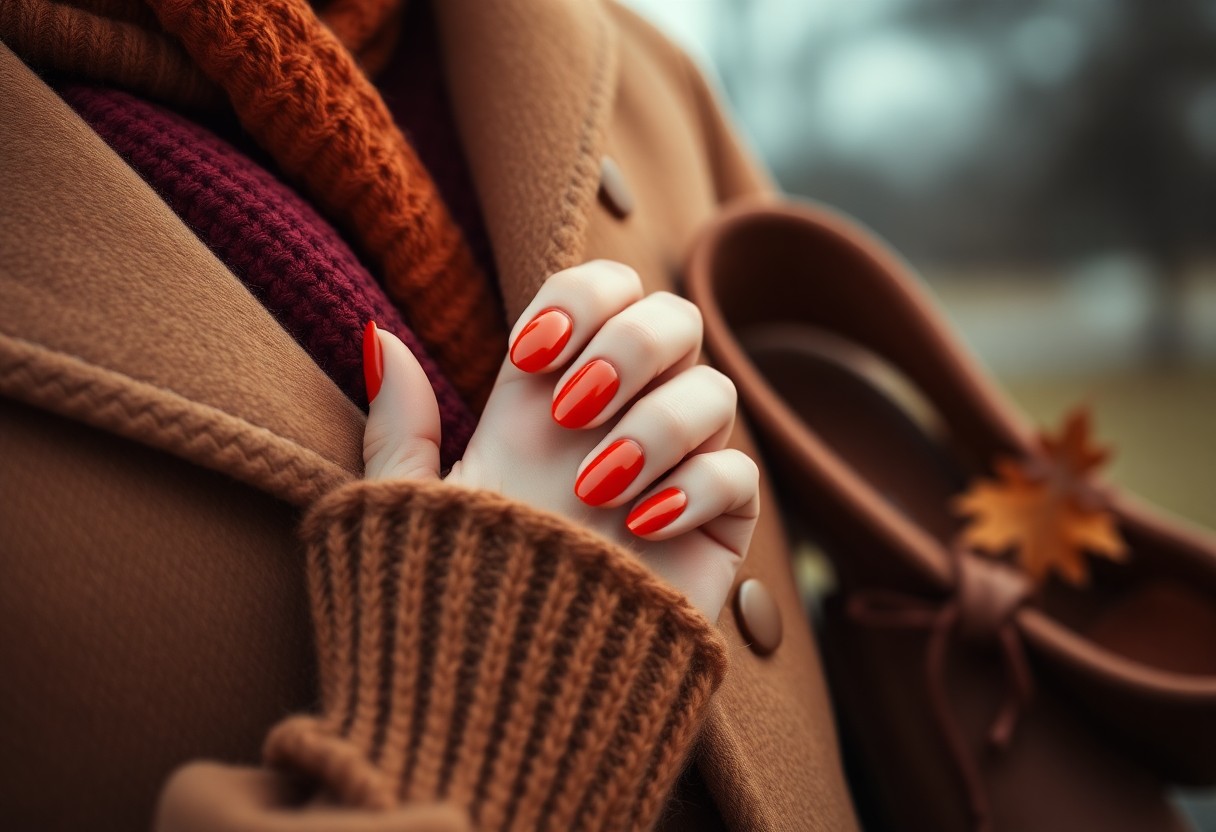
Fall: Rich and Earthy Tones

Colors for fall transition into warm, earthy tones that reflect the changing leaves. Think deep burgundy, burnt orange, and olive green that harmonize beautifully with the essence of autumn. These shades can easily complement your layering pieces and cozy fabrics, enhancing your seasonal aesthetic.

But fall doesn’t have to be limited to muted hues; consider mixing in metallics or a pop of color! Rich jewel tones, like emerald and sapphire, can accentuate both casual and formal outfits. Layering textures and patterns allows you to create a cohesive look that showcases your individual style while remaining in tune with the season.

Winter: Dark and Jewel Tones

Below, winter calls for deep, luxurious shades, such as midnight blue, plum, and rich gold. These colors not only feel sophisticated but also reflect the coziness of the season. Dark hues can be especially flattering against the stark winter landscape and pair wonderfully with your winter wardrobe of heavy knits and tailored coats.

Brights during winter can beautifully contrast against the monochrome tones often seen in winter fashion. Incorporating jewel tones can brighten your overall look while providing a lavish finish to your nails. So whether you’re attending a holiday party or simply enjoying the season, let your nails shine with opulence while staying cohesive with your outfits.

Nail Art Inspiration for Each Season

After selecting the perfect colors for your seasonal wardrobe, it’s time to draw inspiration from the essence of each season. Vibrant florals for spring, sun-soaked designs for summer, warm earthy tones for fall, and icy motifs for winter can all elevate your look. By integrating nail art that reflects seasonal themes, you ensure that your nails remain a stylish extension of your fashion choices, serving as the finishing touch to your overall aesthetic.

Seasonal Patterns and Designs

One exciting way to enhance your nail art is by incorporating seasonal patterns and designs. Think playful polka dots for spring, palm leaves for summer, plaids for fall, and snowflakes for winter. These seasonal motifs can not only coordinate beautifully with your outfits but also express your personal style and creativity. Let your nails be a canvas that tells the story of the changing seasons!

Incorporating Textures and Finishes

By exploring different textures and finishes, you can add depth and dimension to your seasonal nail art. Matte topcoats, glossy finishes, or even glitter overlays bring a unique flair to your designs, allowing you to personalize your nails while keeping them in line with seasonal trends.

Textures play a vital role in nail aesthetics and can elevate even the simplest designs. Consider adding a matte finish to a rich winter color for an elegant touch, or a glossy topcoat over vibrant summer hues for that eye-catching shine. Embellishments like rhinestones or foils can further enhance your seasonal look, making your nails stand out. Experimenting with various textures will not only keep your nail art fresh, but also anchor your style to the seasonal themes you’ll embrace throughout the year.

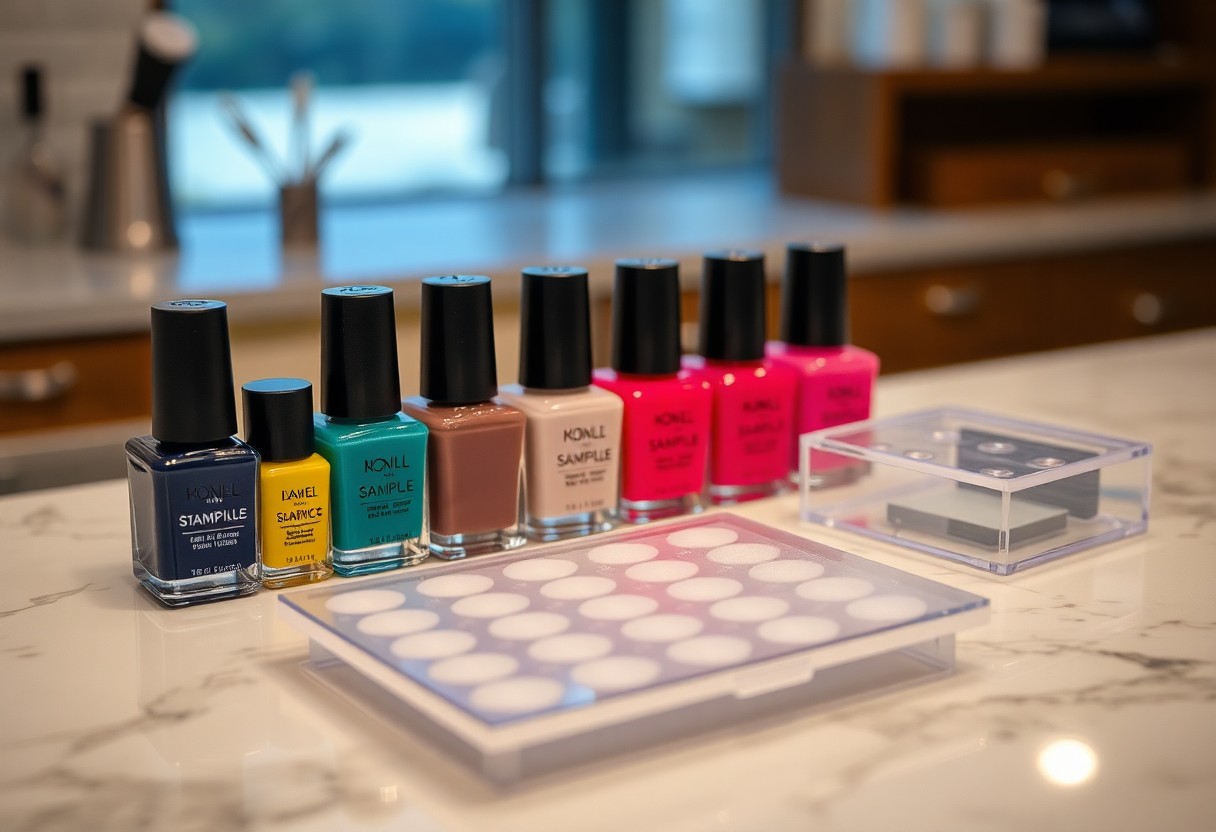
Tools and Products for Nail Matching

Despite the wide variety of nail products available, selecting the right tools can significantly enhance your nail matching experience. You’ll need necessarys like a high-quality base coat, top coat, and nail files, in addition to nail polishes that align with your season’s color palette. Investing in a good set of brushes and an efficient drying lamp can also elevate your nail art techniques, making your manicures not just stylish but also long-lasting.

Essential Nail Care and Prep

Besides selecting the right colors, preparing your nails is vital for an impeccable look. Start by cleaning your nails thoroughly and trimming any uneven edges. Applying a nourishing cuticle oil will hydrate your cuticles, while a base coat is key to preventing staining and ensuring longevity in your nail color. These foundational steps will help your nails look vibrant and your color choices truly stand out.

Recommended Nail Polishes and Brands

An array of nail polish brands cater to seasonal aesthetics, but a few stand out for their quality and color range. Look for brands like Essie, OPI, and Zoya, which offer seasonal collections that align with the latest trends. Each of these brands provides a wide selection of colors, ensuring that you will find the perfect match for your wardrobe. You’ll find that their formulas deliver excellent coverage and durability, allowing you to flaunt your customized look with pride.

Hence, choosing nail polishes from these reputable brands not only enhances your style but also aligns your nails with seasonal moods. With a reputation for quality, these brands often release limited editions that perfectly capture seasonal colors, ensuring you can keep your nails fresh and relevant. Explore their collections and experiment with textures like matte or glossy finishes to create unique looks tailored to your complete outfit.

Tips for Maintaining Nail Color Throughout the Seasons

Unlike your wardrobe, your nail color can be a canvas for seasonal expression that lasts. To keep your nails vibrant:

  • Apply a quality base coat to prevent chipping.
  • Use a top coat for added shine and protection.
  • Keep your nails moisturized to prevent dryness.
  • Limit exposure to harsh chemicals and prolonged water contact.
  • Reapply nail polish and top coat every week for longevity.

The more effort you put into maintaining your nails, the more they’ll enhance your seasonal style. For inspiration, check out Autumn is Nature’s Way of Showing Off—Your Nails ….

Protection Against Seasonal Elements

Color can fade and chip due to seasonal conditions like dry air or humidity. Shield your nails from these elements by wearing gloves during harsh weather and using hand creams that nourish and protect while locking in moisture. If you’re in an environment with changing temperatures, be mindful of how your nails react and adjust your routine accordingly.

Regular Maintenance and Touch-Ups

Protection isn’t just about external factors; it also involves regular upkeep of your nails. To maintain a polished look, schedule routine manicures or do touch-ups at home every week. This ensures chips and cracks are addressed promptly, keeping your nails looking fresh and vibrant.

Indeed, regular maintenance goes beyond just applying polish. You should also file your nails regularly to prevent breakage and to maintain their desired shape. Incorporate moisturizing treatments into your routine to nourish and strengthen your nails, and consider using a strengthening base coat to protect against seasonal wear and tear. By investing a little time into maintaining your nails, you can enjoy their beauty throughout the season.

To wrap up

From above, it’s clear that matching your nails to your seasonal wardrobe enhances your overall style. By paying attention to color palettes, incorporating trends, and selecting nail art that reflects your fashion choices, you can create a cohesive look. As you transition between seasons, rotate your nail polish shades and designs to align with the mood of your outfits. This way, you can express your personality and keep your style fresh and exciting all year round.

FAQ

Q: How do I choose nail colors that complement my seasonal wardrobe?

A: To choose nail colors that complement your seasonal wardrobe, start by analyzing the primary colors in your clothing for that season. For spring, light pastels and vibrant hues work well, while summer is perfect for bold and bright colors. In autumn, opt for earthy tones and deep shades, and for winter, consider rich, dark colors and metallics. Look for shades that echo the tones of your clothing or mix in hues that contrast for a fashionable pop.

Q: What are some tips for coordinating nail art with seasonal outfits?

A: Coordinating nail art with seasonal outfits can be fun and creative. For example, during spring, floral designs or abstract patterns in pastel colors can enhance a fresh look. Summer might call for bright geometric designs or beach-themed art. In fall, try incorporating leaf motifs or warm gradients, while winter designs can include snowflakes, holiday themes, or glitter. Just ensure the colors and patterns echo or contrast wisely with your wardrobe for a cohesive style.

Q: Are there specific nail finishes that work better for certain seasons?

A: Yes, different nail finishes can enhance your seasonal style. In spring and summer, a glossy or high-shine finish feels vibrant and fresh. Matte finishes can offer a chic and stylish alternative for fall and winter, providing depth and a modern touch. Glitter and metallic finishes are perfect for winter festivities, while sheers and creams are ideal for a light summer vibe. Choosing the right finish can elevate the overall look of your nails alongside your outfits.

Q: How can I maintain my nail color throughout the season?

A: To maintain your nail color throughout the season, start with a good base coat to protect your nails and help the color adhere better. After applying your chosen nail color, finish with a top coat for shine and longevity. Additionally, consider using quick-dry formulas or gel polishes that resist chips and fading. Regular touch-ups and moisturizing your hands and cuticles can also keep your nails looking fresh and vibrant as you transition through seasonal outfits.

Q: Is it okay to mix and match nail colors with different seasonal outfits?

A: Absolutely! Mixing and matching nail colors with different seasonal outfits can showcase your personal style. It’s an opportunity to experiment with trends and express your creativity. Don’t hesitate to mix seasonal colors or use accent nails with contrasting shades to add uniqueness. Just ensure that the final combination feels balanced and enjoyable to you. Have fun with the process, allowing your nails to reflect your mood and personality throughout the season!

The Psychology of Nail Colors – What Your Choice Says About You

Just as your clothing and accessories reflect your personality, the colors you choose for your nails can reveal important insights about you. Different shades evoke distinct emotions and perceptions, influencing how others see you and how you feel about yourself. Understanding this connection can enhance your self-expression and even boost your confidence. Dive deeper into the fascinating world of Nail Color Psychology: What Your Choice Says About You to discover what your nail color choice communicates.

Key Takeaways:

  • Nail Color Preferences: Your choice of nail color often reflects your personality traits, moods, and even your current state of mind.
  • Symbolism of Colors: Different colors carry unique meanings; for example, red can signify confidence and passion, while blue may indicate calmness and stability.
  • Social Influences: Cultural and social factors play a significant role in nail color trends, influencing individual choices and perceptions of beauty.

The Emotional Impact of Nail Colors

The colors you choose for your nails can significantly influence your mood and the way you are perceived by others. Each shade carries its own emotional weight, affecting not just how you feel about yourself, but also how you interact with the world around you. By understanding the psychology behind nail colors, you can harness the power of hues to reflect your personality and enhance your emotional well-being.

Warm Colors and Their Associations

Around you, warm colors like red, orange, and yellow exude energy and warmth. These vibrant shades can amplify feelings of excitement and enthusiasm, making you appear more approachable and confident. Opting for warm nail colors may indicate your desire for social interactions, creativity, or even a bold approach to life, inviting others to engage and connect with you in a lively atmosphere.

Cool Colors and Their Psychological Effects

Colors such as blue, green, and purple are known for their calming and soothing effects. You may find that using cool tones on your nails helps you convey a sense of tranquility and serenity. These colors can evoke feelings of peace and stability, making you seem more collected and grounded, even in stressful situations.

Also, cool colors are often associated with trustworthiness and professionalism. If you’re heading into an important meeting or a stressful environment, choosing a serene green or a soft blue can help you project confidence and reliability. These shades can also inspire reflection and creativity, allowing you to tap into a deeper sense of calm while fostering better communication in your interactions.

Cultural Significance of Nail Colors

Any discussion about nail colors must consider their cultural significance, as different hues often carry unique meanings in various societies. For you, the color of your nails can reflect your cultural background, beliefs, or even personal experiences. Understanding these meanings can help you choose colors that resonate with your identity and express your values, embracing both tradition and modern interpretations.

Symbolism Across Different Cultures

Before choosing a nail color, it’s insightful to explore how different cultures view certain shades. For instance, red often symbolizes good fortune and happiness in many Asian cultures, while black can signify elegance in Western contexts, but may represent mourning in others. Recognizing these nuances helps you appreciate the depth behind your color choice.

Trends in Nail Color Over Time

Time has shown that nail color trends evolve with societal changes, fashion movements, and cultural shifts. You may find that the colors that represent strength or femininity have transformed dramatically through the decades, influenced by iconic personalities or significant events. Understanding these trends allows you to connect with broader cultural dialogues while expressing your personal style.

Symbolism in nail color has evolved as new styles emerge, capturing the essence of the times you live in. From the bold, rebellious shades of the 1980s to the minimalist pastels popular in recent years, each era has showcased your desire for self-expression and individuality. By embracing these trends, you can not only beautify your nails but also align with the collective consciousness and aspirations of your generation.

Nail Color and Personality Traits

For many, nail color serves as a form of self-expression, reflecting various aspects of your personality. The hues you choose can reveal your mood, creativity, and even how you wish to be perceived by others. As you explore different colors, consider how each shade aligns with traits that resonate with your identity and lifestyle.

What Your Color Choice Reveals About You

With each color choice, you send a message about your personality and feelings. For instance, vibrant reds indicate confidence and passion, while calm blues suggest tranquility and reliability. Understanding the psychological implications of your favorite shades can help you gain insight into your own preferences and motivations.

Case Studies: Famous Personalities and Their Nail Colors

Their choices in nail polish often reflect their public personas, making statements that resonate with fans and followers. Here are a few notable examples:

  • Beyoncé: Often seen sporting nude and soft pink shades, conveying elegance and versatility.
  • Rihanna: Frequently opts for bold colors like deep burgundy and metallics, showcasing her daring, trendsetting personality.
  • Lady Gaga: Known for her avant-garde nail art, her bold choices mirror her playful and boundary-pushing nature.
  • Michelle Obama: Prefers classic shades such as neutral tones, signaling sophistication and approachability.

But what can we learn from these examples? Personalities like Beyoncé and Rihanna utilize nail colors to reinforce their unique styles and public identities. Their choices are not only fashion statements but also reflect the confident, powerful personas they embody. As you consider your preferences, think about how your nail color choices could similarly represent your identity and engage with the world around you.

Seasonal Trends in Nail Color

Your choice of nail color can shift dramatically with the seasons, reflecting not just your personal style but also the prevailing trends. Each season brings forth a unique palette that resonates with the mood and aesthetics of that time of year, empowering you to express yourself while staying in tune with current fashions.

Spring and Summer Shades

To embrace the vibrancy of spring and summer, you might gravitate towards lighter, more playful shades. Soft pastels, bright corals, and sunny yellows can evoke feelings of joy and warmth, allowing you to relish the season’s liveliness while showcasing your flair for fun.

Fall and Winter Trends

Above all, fall and winter trends often highlight deeper hues and richer tones, inviting you to explore a more sophisticated side. Earthy browns, dark greens, and bold burgundies can resonate with the cozy atmosphere, reflecting a sense of warmth amidst the cooling temperatures.

Considering the transition into colder months, you may find that these darker shades not only complement the season’s darker palette but also carry a sense of elegance and depth. You can experiment with textures, such as matte or glossy finishes, to further enhance the visual impact of your chosen colors. By staying attuned to these seasonal shifts, your nail colors can become an extension of the seasonal spirit while showcasing your personal style.

Selecting the Right Nail Color for Different Occasions

Despite the endless options available, choosing the right nail color for different occasions can enhance your overall appearance and convey the appropriate message. Whether you’re headed to a formal meeting or a festive celebration, your nail color can play a significant role in expressing your personality and aligning with the event’s vibe.

Professional Settings

The right nail color in a professional setting speaks volumes about your attention to detail and personal brand. Opt for muted colors like soft pinks, beiges, or classic reds that exude professionalism and sophistication while ensuring you maintain an approachable demeanor.

Casual Events and Special Occasions

Along with professional environments, your nail color can be a fun and expressive aspect of casual events and special occasions. Choosing bright or bold colors allows you to showcase your personality and mood more freely, making it easier to connect with others and elevate your overall look.

Considering the context of casual events and special occasions, you have the perfect opportunity to experiment with vibrant colors, unique patterns, and even nail art. This is the time to reflect your personality—whether it’s adopting a playful pastel for brunch with friends or a sparkling hue for a festive gathering. Let your nail color make a statement that complements your outfit and mood, helping you stand out while feeling confident.

The Science Behind Nail Polish Ingredients

All nail polishes are composed of various chemical ingredients that contribute to their color, consistency, and longevity. These components work together to create a formula that adheres well to your nails, provides coverage, and resists chipping. Understanding these ingredients can help you make informed choices about the products you use, especially if you’re concerned about health impacts.

Common Chemicals and Their Effects

Among the most notable ingredients in nail polish are toluene, formaldehyde, and dibutyl phthalate. Toluene can affect your nervous system, while formaldehyde is linked to skin irritation and allergies. Dibutyl phthalate, a plasticizer, has raised concerns regarding its hormonal effects. Being aware of these chemicals allows you to choose polishes that align with your health preferences.

Natural Alternatives

Their growing popularity has led many brands to create nail polishes using natural ingredients, which minimize harmful effects while still providing vibrant colors and finishes. These alternatives often use plant-based formulations, ensuring you can enjoy beautiful nails without the associated risks.

At the forefront of the natural nail polish movement, many new brands prioritize eco-friendly ingredients that eliminate harsh chemicals while maintaining quality. You can now find polishes made with elements like water, natural dyes, and crucial oils. These options not only protect your nails and health but also cater to a more sustainable lifestyle. By choosing natural alternatives, you maintain the style you love while also making choices that reflect your commitment to well-being and the environment.

Summing up

Conclusively, your choice of nail color reflects more than mere aesthetic preference; it can reveal aspects of your personality and emotional state. For instance, vibrant shades may indicate confidence and creativity, while classic hues can showcase sophistication and elegance. Understanding the psychology behind nail colors helps you make intentional choices that resonate with who you are. To explore deeper into this fascinating connection, explore The Psychology of Nail Color Choices for further insights.

FAQ

Q: What does the color red in nail polish signify about a person?

A: The color red is often associated with passion, confidence, and energy. Individuals who choose red nail polish may be seen as assertive and bold, often exuding a sense of self-assuredness. This color can also reflect a desire to stand out or make a strong impression in various social settings.

Q: Why do some people prefer neutral or nude nail colors?

A: Neutral and nude nail colors are often chosen by individuals who appreciate simplicity and elegance. These shades can indicate a preference for a more understated approach, suggesting that the person values classic styles and may project an image of sophistication and professionalism. Furthermore, these colors can be versatile, easily matching different outfits and occasions.

Q: What does choosing bright colors, like neon or vivid shades, say about someone’s personality?

A: Bright colors, including neon shades, typically denote playfulness and a vibrant personality. Those who opt for such lively colors might be perceived as outgoing, adventurous, and open to new experiences. This choice can demonstrate a desire to express creativity and a spirited approach to life, suggesting that the individual enjoys being in the spotlight.

Q: How do dark nail colors, such as black or deep burgundy, reflect on a person’s character?

A: Dark nail colors often convey a sense of sophistication, mystery, and elegance. Individuals who prefer these shades might be viewed as strong and independent, often embracing a nonconformist attitude. This choice can indicate that a person is comfortable with their identity and may enjoy expressing their uniqueness and depth of character through their style.

Q: What are some common associations with pastel nail colors?

A: Pastel nail colors tend to evoke feelings of calmness, femininity, and serenity. People who favor these shades may be seen as gentle, nurturing, and approachable. Pastel colors can also suggest a carefree attitude and a love for lightheartedness and whimsy, often reflecting a person’s cheerful disposition and appreciation for softer aesthetics.

How to Create Marble Nail Art in 5 Easy Steps

Marble nail art can elevate your manicure, giving it a stylish and eye-catching look. With just a few simple techniques, you can achieve stunning marble designs right at home. In this guide, I’ll walk you through five easy steps that will help you create beautiful marble nails with minimal effort. Whether you’re a nail art novice or an experienced enthusiast, you’ll find this process straightforward and enjoyable. Gather your tools, and let’s get started on your journey to mastering this chic nail art trend!

Key Takeaways:

  • Choose Your Colors: Select 2-3 nail polish colors that will blend well together for the marble effect.
  • Water Technique: Use a cup of room temperature water to create the marble pattern by dropping the nail polish onto the surface.
  • Finish with Top Coat: Seal your design with a top coat to enhance shine and longevity.

Materials Needed

Before you explore creating stunning marble nail art, it’s vital to gather all the necessary materials. This will not only streamline the process but also help you achieve the best results. You’ll need specific nail polish colors, tools, and supplies to bring your marble nail art to life!

Nail Polish Colors

Materials play a vital role in achieving the perfect marble effect. Choose at least three contrasting nail polish colors that complement each other. Classic combinations include black, white, and a pop of color like pink or blue, but feel free to get creative with your selection!

Tools and Supplies

Among the vital items you’ll need are a small bowl of water, a toothpick or dotting tool, and a base coat and top coat for added durability. Additionally, a quick-drying top coat can help seal your design and prevent smudging.

In addition to those items, you might find it helpful to have small pieces of tape or a makeup brush to clean up any excess polish around your nails. Having cotton swabs and nail polish remover on hand is also advisable for easy cleanup of any mistakes. With these tools and supplies, you’re well on your way to mastering the marble nail art technique!

Step 1: Prepare Your Nails

Even the most beautiful marble nail art requires a well-prepared canvas. Start by ensuring your nails are clean and shaped, as this will enhance the overall look of your design. Neglecting this step can lead to an uneven finish, making it more challenging to achieve that flawless marble effect.

Clean and Shape

An necessary part of preparing your nails is cleaning and shaping them. Begin by removing any old polish and debris with a gentle nail polish remover. Then, shape your nails using a nail file to your desired length and style – whether square, oval, or almond. A well-groomed nail will serve as the ideal foundation for your marble art.

Apply Base Coat

By applying a base coat, you create a protective layer that helps the nail polish adhere better and prevents staining. This step is vital, as it allows your marble design to last longer while maintaining the vibrancy of the colors you choose. A base coat also smoothens out any imperfections on your nails, ensuring a flawless application of your marble nail art.

Consequently, applying the base coat is not just about protection; it also enhances the longevity and appearance of your nail art. Choose a high-quality base coat that suits your nail type, and apply a thin, even layer to each nail. Allow the base coat to dry completely before moving on to the next steps. This will ensure that the subsequent layers adhere effectively and that your masterpiece remains intact.

Step 2: Choose Your Colors

Once again, selecting the right colors is an imperative part of achieving stunning marble nail art. Think about the aesthetic you want to create, whether it be bold and vibrant or soft and serene. Choose contrasting colors to enhance the marble effect, or opt for shades within the same color family for a more subtle look. Your chosen colors should also reflect your personal style and complement your skin tone.

Color Selection Tips

The following tips may help you choose the perfect colors for your marble design:

  • Consider a color wheel to find complementary shades.
  • Test out colors on a small piece of paper.
  • Think about the season or occasion you are painting your nails for.
  • Don’t shy away from metallic or glittery finishes for added depth.

This approach will enhance your overall design and make your nail art truly pop.

Suggested Color Combinations

Bespoke combinations can elevate your nail art game. Some popular pairings include classic black and white for a timeless look, vibrant pink and gold for a glamorous flair, or deep blue and silver for a cool effect. You can also create a unique blend using earthy tones like taupe and olive green for a natural vibe.

Hence, experimenting with different combinations can lead you to discover your signature marble style. Consider the mood you want to convey, and don’t be afraid to mix unexpected hues. Finding your perfect combination can make a significant difference in the overall impact of your nail art, making it uniquely yours.

Step 3: Create the Marble Effect

Not all marble effects are created equal, and achieving that stunning swirl can be a game-changer for your nail art. For this step, you’ll focus on the actual creation of your marble pattern using the method of your choice, bringing together the colors you’ve chosen. Patience is key as you experiment with various techniques to find the perfect design that suits your style.

Water Marbling Technique

One effective method for achieving a beautiful marble look involves the water marbling technique. Start by filling a small cup with room-temperature water, then drop your chosen nail polishes onto the surface. Use a toothpick or a similar tool to swirl the colors together, creating a marbled effect. Dip your nail into the design, ensuring it captures the desired pattern and finish with a top coat to seal your work.

Alternative Techniques

Between the water marbling and other creative approaches, you can explore several alternative techniques to achieve a marbled effect on your nails. Some popular methods include the sponge technique, using a plastic bag, or even a paintbrush to swirl the colors directly on your nail.

In fact, these alternative techniques can provide unique results while also being more accessible for beginners. For instance, using a sponge allows you to dab colors together, creating a textured effect without the complexity of water marbling. The plastic bag technique involves applying polish onto a bag and dabbing it onto your nails, offering more control over the design. Experimenting with these methods can lead you to discover the best technique for your personal style and expertise level.

Step 4: Applying Top Coat

Many nail art enthusiasts overlook the significance of the top coat, but it plays a vital role in enhancing the final look of your marble nails. This clear polish not only adds a beautiful shine but also seals in your design, ensuring its longevity and preventing chipping. A properly applied top coat can elevate your marble nail art, making it appear professional and well-crafted.

Importance of Top Coat

Between the intricate designs and layers of polish, a good top coat serves as a protective barrier that keeps your nails looking fresh for longer. It also enhances the depth and vibrancy of your marble effect, making colors pop. Without it, your masterpiece may dull faster, losing that stunning look you worked hard to achieve.

Application Tips

Any successful top coat application starts with a gentle approach to avoid disturbing your marble design. Follow these imperative tips to ensure a flawless finish:

  • Apply the top coat only after your design is completely dry.
  • Use a clean brush to pick up a small amount of top coat.
  • Apply a thin layer; thicker coats can lead to smudging.
  • Seal the edges of your nails to prevent chipping.

Assume that you will need to reapply top coat every few days to maintain the shine and protection of your nail art.

And as you apply your top coat, keep in mind some additional tips for the best results. Start from the base of your nail and work your way to the tip, applying the polish smoothly in one stroke. Avoid overworking the top coat, as this can disturb the marble design underneath. Allow each layer to dry completely before adding more. This not only improves your overall outcome but also extends the life of your nail art:

  • Choose a quick-drying top coat to save time.
  • Avoid using oil-based removers between applications.
  • Practice patience by allowing drying time between layers.

Assume that with proper care, your marble nail art can dazzle for weeks to come.

Step 5: Finishing Touches

All great marble nail art deserves a flawless finish. To seal your design, apply a clear top coat to protect your artwork and enhance the glossy appearance. For more tips, check out How to Create Your Own Marble Nail Art. Once dry, your nails will not only look stunning but also last longer.

Clean-Up Tips

With a little attention, you can make your nails look polished and professional. Use a small brush dipped in nail polish remover to tidy up any smudges around your cuticles. Follow these steps:

  • Dip a brush into nail polish remover.
  • Gently brush away excess polish.
  • Repeat until nails are clean.

The end result will be tidy and beautifully marbled nails.

Nail Care After Art

Around the final touches, don’t forget to care for your nails. Applying cuticle oil can keep your nails nourished and healthy, while regular moisturizing helps maintain their strength. This ensures your artistry doesn’t just look good but also promotes nail health in the long run.

Another effective way to maintain nail health after your artistic session is by avoiding harsh cleaning products and excessive water exposure. Wearing gloves during chores can protect your nails while allowing your new marble design to shine. Regular hydration and a balanced diet will also contribute to stronger nails, ensuring that your beautiful nail art lasts as long as possible.

Conclusion

Conclusively, creating stunning marble nail art is an achievable process that requires just a few steps. By following the outlined techniques for preparation, design, and application, you can easily transform your nails into eye-catching works of art. Take your time and experiment with colors to find the perfect marble effect that complements your style. With practice and patience, you’ll elevate your nail art skills and impress others with your creativity. Enjoy the process and have fun personalizing your marble designs!

FAQ: How to Create Marble Nail Art in 5 Easy Steps

Q: What materials do I need to create marble nail art?

A: To create marble nail art, you will need the following materials: two or three nail polish colors of your choice, a base coat, a top coat, a small bowl of water, a toothpick or a dotting tool for design manipulation, and nail tape to protect your cuticles if desired. Ensure your workspace is covered with old newspapers or a plastic sheet for easy cleanup.

Q: How do I prepare my nails before starting the marble nail art?

A: It’s important to start with clean and dry nails. First, remove any old nail polish and shape your nails with a file. Next, apply a base coat to protect your nails and enhance polish adhesion. Let it dry completely to ensure a smooth finish. This preparation helps the marble effect to stand out better and makes the overall nail art last longer.

Q: What technique should I use to create the marble effect in the water?

A: To achieve the marble effect, drop your selected nail polish colors into the bowl of water one at a time. Start with one color, then add the next color, allowing them to spread slightly on the surface before adding the third. Use the toothpick or dotting tool to gently swirl and create your desired marble pattern. Make sure the colors blend well without becoming too muddled.

Q: How do I apply the marbled design to my nails?

A: Once your marble design is created in the water, dip your nail into the water at an angle. Ensure that your nail covers the desired area of the marble pattern. After dipping, lift your nail out of the water and clean up any excess polish around your nail with a cotton swab or a brush dipped in nail polish remover. Repeat this step for each nail, ensuring not to disturb the marble pattern too much.

Q: What steps should I follow after applying the marble nail art?

A: After applying the marble design, allow your nails to dry completely before applying a top coat. The top coat not only seals the design but also adds shine. It’s advisable to use a quick-dry top coat to speed up the drying process. Make sure to clean up any excess around your nails, and remove any nail tape if you used it before applying the top coat. Finally, allow your nails to dry thoroughly to enjoy your beautiful marble nail art!

The Beginner’s Guide to Nail Stamping

Many individuals are discovering the creative world of nail stamping, a technique that allows you to effortlessly adorn your nails with stunning designs. If you’re new to nail art, this guide will help you navigate the basics of nail stamping, including tips and tools you’ll need to get started. Whether you’re looking to enhance your nail game for a special occasion or simply want to express your personal style, you’ll find valuable insights here. For a more detailed exploration, check out The Art of Nail Stamping: A Beginner’s Guide.

Key Takeaways:

  • Tools: Essential items for nail stamping include a stamping plate, liquid polish, and the stamper itself.
  • Technique: Proper technique involves applying polish to the plate, scraping excess off, and pressing the stamper onto the nail for a clear image.
  • Practice: Achieving perfect nail designs may require repeated attempts, so patience and practice are key for mastering the art of nail stamping.

What is Nail Stamping?

Before entering into the fun world of nail art, it’s important to understand what nail stamping is. Nail stamping is a technique that uses specially designed plates and a stamping tool to transfer intricate designs onto your nails. This method allows you to create stunning patterns quickly and easily, making nail art accessible to everyone, even if you’re a beginner.

History of Nail Stamping

Between the early 2000s and today, nail stamping has gained immense popularity as a creative way to decorate nails. Initially developed in Japan, this technique was brought to the Western market through various beauty brands, allowing enthusiasts like yourself to easily replicate professional-looking nail designs at home.

How Nail Stamping Works

At its core, nail stamping involves using a design plate, a silicone stamp, and nail polish. The process consists of applying polish to the plate, scraping off the excess with a card, and then pressing the stamp onto the design before transferring it to your nail.

History of nail stamping is fascinating, as it highlights the evolution of nail art techniques over time. The stamping process starts by applying your chosen nail polish to a metal or acrylic plate, which contains various designs. Once you scrape off the excess polish with a scraper card, the remaining polish settles only in the etched design areas. You then use a silicone stamp to pick up the pattern and transfer it onto your nail, allowing for endless creative possibilities. Experiment with different colors and patterns to find styles that express your unique personality.

Essential Tools and Materials

If you’re looking to master nail stamping, you’ll need to gather some imperative tools and materials. From plates to polishes, having the right items at your disposal will make the stamping process much smoother. This guide will help you identify what you need to get started on your nail art journey effectively.

Plates

Tools like stamping plates come in various designs featuring intricate patterns, allowing you to create stunning nail art. Choose plates that resonate with your style, as they serve as the canvas for your creative vision.

Stamps and Scrapers

Below are two vital tools in your nail stamping kit: the stamper and the scraper. The stamper picks up the design from the plate, while the scraper removes excess polish, ensuring a clean transfer.

At the heart of a successful stamping experience is the quality of your stamper and scraper. A soft, flexible stamper is ideal, as it easily conforms to the shape of your nail for a perfect application. Pair this with a sturdy scraper that efficiently spreads nail polish across the plate without damaging the design.

Nail Polishes

Across the world of nail stamping, the types of nail polishes you choose significantly influence the outcome of your designs. Opt for polishes that are pigmented and specifically labeled for use with stamping, as they adhere better to the plates and create vibrant results.

Materials also play a role in defining how well your nail art turns out. Stamping polishes are often thicker, ensuring they transfer well onto your nails. Experimenting with various colors and finishes will enhance your designs, allowing you to create a unique look every time. Choose a palette that reflects your personality and complements your style to make your nail art truly stand out.

Step-by-Step Guide to Nail Stamping

After familiarizing yourself with the necessary tools, it’s time to investigate the step-by-step process of nail stamping. Follow this guide for seamless results.

StepDescription
1Prepare your nails properly.
2Apply a base coat and let it dry.
3Choose your stamping plate and design.
4Apply polish to the design on the plate.
5Scrape the excess polish.
6Stamp the design onto your nail.
7Finish with a top coat for longevity.

Preparing Your Nails

An effective nail stamping session begins with prepping your nails. Start by removing any old polish and ensuring your nails are clean and free of oils. Shape your nails to your desired length and buff the surface gently. Applying a base coat not only protects your nails but also provides a smooth canvas for stamping, so let it dry completely before moving on to the next step.

Stamping Techniques

Against general belief, nail stamping can be simplified by mastering a few techniques. A steady hand and patience are your best friends here.

Stamping involves using a special plate and a rubber stamp to transfer designs onto your nails. One effective technique is to apply a generous amount of polish on the desired design before quickly scraping off the excess. Be gentle, as too much pressure can ruin the design. When pressing the stamp onto your nail, aim to apply even pressure for a perfect transfer. Practicing with different designs will help you gain confidence and refine your skills for impeccable results.

Common Mistakes and How to Avoid Them

Your nail stamping journey can be filled with pitfalls, but by understanding common mistakes, you can elevate your skills. One common issue is inconsistent images; however, with practice and the right techniques, you can achieve flawless designs. Another frequent mistake is messy application, which can ruin the overall look of your manicure. By identifying these problems early, you’ll enhance your nail art experience and achieve beautiful results.

Inconsistent Images

With nail stamping, inconsistency in image transfer can lead to a disappointing outcome. To achieve better results, make sure to thoroughly clean your stamping plate and use a high-quality stamp that picks up polish evenly. Practice different pressure levels when applying the stamp to your nail, and always work quickly, as some polishes dry fast and can affect image transfer.

Messy Application

Across your nail stamping project, messy application can detract from the overall design. This usually happens when excess polish remains on the skin around your nailbed, making the finish look unpolished. Taking time to prep your nails with a barrier, like liquid latex, can help minimize cleanup afterward. Also, ensure you’re using the right amount of polish on your stamping plate to avoid unnecessary smudging.

Even with careful planning, messy application can still occur. To minimize this, use a smaller brush or a clean-up tool with acetone to tidy up around your nail edges after stamping. Being mindful of your angle and pressure while applying polish to the plate can also help prevent overflow. A touch of patience during the process will ultimately lead to a polished look.

Tips for Successful Nail Stamping

Once again, nail stamping can be a rewarding yet challenging venture, so keep these helpful tips in mind for the best results:

  • Ensure your nails are clean and dry.
  • Use high-quality stamping polish for better transfer.
  • Practice your timing while applying the stamp.
  • Apply pressure evenly when stamping.
  • Don’t forget to clean your plates after each use.

Recognizing these key points will make your nail stamping experience enjoyable and successful.

Choosing the Right Products

Across the world of nail stamping, choosing the right products is important for achieving beautiful designs. Look for stamping polishes that are thicker and more pigmented, as they transfer more easily to your nails. Additionally, invest in good quality plates that are etched deeply, ensuring your designs will pick up more accurately. The right tools can make all the difference, so take the time to research and select wisely.

Maintenance of Tools

Besides choosing the right products, maintaining your tools is important for long-lasting performance. Always clean your stamping plate immediately after use with acetone or nail polish remover to remove any leftover polish. Use a lint-free cloth or a dedicated stamping pad for cleaning to avoid scratching the plate’s surface. Store your tools in a cool and dry place to prevent damage.

Right maintenance not only prolongs the life of your stamping tools but also ensures that they perform at their best every time you indulge in your nail art adventures. Regularly inspect your plates for any scratches or damaged areas, and replace them if necessary. A clean and well-kept setup will guarantee smoother application and more precise designs.

Creative Design Ideas for Nail Stamping

Not only is nail stamping a fun way to express your creativity, but it also opens up endless possibilities for unique designs. You can explore different color combinations, motifs, and styles to elevate your nail art game. For more inspiration, check out the Beginners Guide to Nail Stamping – Nail Arts in Minutes, which provides amazing tips and ideas for your next stamping session.

Seasonal Themes

Before venturing into specific designs, consider incorporating seasonal themes into your nail stamping. Whether it’s pastel colors and florals for spring, vibrant hues for summer, warm tones for autumn, or cozy patterns for winter, aligning your nail art with the seasons can make your manicure feel fresh and relevant.

Mixing Patterns

Any good nail art enthusiast will tell you that mixing patterns adds depth and personality to your nails. By blending geometric designs with florals or stripes with polka dots, you can create visually striking nail art that showcases your unique style.

Themes that blend contrasting patterns can elevate your nail art to new heights. For instance, pairing delicate lace designs with bold graphic shapes not only adds interest but also allows you to showcase your artistic creativity. Experiment with different plate designs and colors to unleash your inner nail artist and create stunning combinations that draw attention.

Conclusion

Presently, you have all the foundational knowledge to look into nail stamping, a creative and enjoyable way to elevate your nail art skills. With a variety of tools and techniques at your disposal, you can effortlessly express your personality through stunning nail designs. As you practice and experiment, you’ll refine your skills and discover endless possibilities for your manicures. Embrace the journey, and let your creativity shine in every stamped design you create!

FAQ

Q: What is nail stamping?

A: Nail stamping is a nail art technique that involves transferring intricate designs onto the nails using a special plate, a scraper, and a stamper. The designs are etched onto a metal or plastic plate, and you pick up the desired design with the stamper after applying nail polish to the plate and scraping off the excess. This method allows for easy and precise application of detailed patterns.

Q: Do I need any special tools for nail stamping?

A: Yes, to get started with nail stamping, you will need a few necessary tools: a nail stamping plate that features multiple designs, a stamper to transfer the design, a scraper to remove excess polish from the plate, and appropriate nail polish that works well with stamping (typically highly pigmented and quick-drying). Optional tools include a cleaning brush for the plates and a top coat to seal your design.

Q: Can I use any nail polish for stamping?

A: Not all nail polishes are suitable for stamping. It is recommended to use specially formulated nail stamping polishes, which are thicker and have a higher pigment concentration. However, you can also use regular nail polishes that are opaque and quick-drying. Avoid fast-drying top coats as they may not adhere well to the stamping process.

Q: What are some tips for achieving a successful nail stamping design?

A: For a successful nail stamping experience, consider these tips: clean your stamping plates with alcohol to remove any residue; apply a thin layer of polish to the design, ensuring it covers the grooves; use a firm yet gentle scraping motion to remove excess polish; and roll the stamper onto the design instead of pressing to ensure it picks up the pattern effectively. Practice makes perfect, so don’t hesitate to try multiple times!

Q: How do I properly care for my stamping tools and plates?

A: To maintain your stamping tools and plates in good condition, clean them after each use with a gentle nail polish remover or rubbing alcohol to remove any residual polish. Store stamping plates in a flat position to avoid scratches, and ensure the stamper is kept clean and stored in a dust-free environment. Regular maintenance will extend the life of your stamping tools and ensure optimal performance.

How to Master French Tips with a Twist

Over the course of your journey to mastering French, you may have encountered a multitude of tips and techniques. This guide will provide you with innovative strategies that not only enhance your language skills but also keep the learning process enjoyable and engaging. By incorporating these unique approaches into your routine, you will find yourself navigating the complexities of the French language with greater ease and confidence. Let’s probe effective methods that can transform your language learning experience and steer you toward fluency.

Key Takeaways:

  • Engage with Entertainment: Incorporate French films, music, and books into your learning to make it more enjoyable and relatable.
  • Experiment with Conversation: Practice speaking with native speakers or language exchange partners to enhance fluency and confidence.
  • Utilize Digital Tools: Leverage language apps and online resources to tailor your practice and track progress effectively.

Understanding French Grammar: Essential Rules

While stepping into French grammar, you’ll discover a structured framework that can enhance your communication skills. Understanding articles, gender, and agreements between nouns and adjectives is vital for crafting accurate sentences. Familiarizing yourself with these important rules will allow you to express yourself more confidently and engage with the French language on a deeper level.

Verb Conjugation Simplified

After grasping the fundamentals of French grammar, focusing on verb conjugation can significantly improve your fluency. Conjugation involves changing the form of a verb to correspond with different subjects, tenses, and moods. By mastering regular and irregular verb patterns, you’ll be able to construct both simple and complex sentences effortlessly.

Noun and Adjective Agreement

Between nouns and adjectives, agreement ensures that both elements match in gender and number, making your sentences coherent and grammatically correct. In French, nouns are either masculine or feminine, and adjectives must change their endings accordingly. This agreement enhances your overall comprehension of the language while preventing common errors in conversation and writing.

Verb forms play a significant role in the agreement of nouns and adjectives in French. For example, if you describe a masculine noun, the adjective must take a masculine form, and similarly for feminine nouns. This relationship not only solidifies the clarity of your message but also aligns with the natural flow of the language. Paying attention to these details will help you construct sentences that resonate with authenticity.

Building Vocabulary: Creative Techniques

Any effective language learner knows building vocabulary is fundamental to mastering French. You can enhance your word bank with innovative methods that make learning engaging. Consider using various creative techniques such as thematic word lists or mnemonics to help you retain and recall new vocabulary effortlessly. By integrating these methods into your study routine, you’ll find that expanding your knowledge of French words becomes both enjoyable and efficient.

Thematic Word Lists

On creating thematic word lists, you categorize vocabulary based on themes such as travel, food, or emotions. This structured approach allows you to learn words in context, making it easier for you to recall them during conversations. For instance, when preparing for a trip to France, gathering relevant words and phrases connected to sightseeing can boost your confidence in everyday interactions.

Using Mnemonics for Retention

Behind every successful learner is a solid strategy for memorization, and mnemonics can be your best friend. These memory aids create associations between new vocabulary and familiar concepts, enhancing your ability to recall words effortlessly. By crafting vivid pictures or clever phrases, you make the learning process enjoyable and personalized, setting yourself up for long-term retention.

Further elaborating on using mnemonics for retention, you might find it helpful to develop personalized stories or images that link the French words to their meanings. For example, if you’re learning the word “chat” (cat), you could visualize a funny scene with a cat chasing a chatty bird. This imaginative connection not only reinforces your understanding but also makes the vocabulary stick in your mind. As you use mnemonics, you’ll notice that your vocabulary expands quickly, and the words become a natural part of your French conversations.

Listening Comprehension: Strategies to Enhance Skills

Now, enhancing your listening comprehension in French can significantly boost your language mastery. To improve your understanding, immerse yourself in diverse auditory environments where French is spoken. Engage with conversations at varying speeds, focusing on different accents and contexts. This exposure will refine your auditory skills while building your confidence in real-world scenarios.

Engaging with French Media

With engaging films, podcasts, music, and TV shows, you can immerse yourself in the rhythm and nuances of the French language. Choose media that aligns with your interests, as this will keep you motivated and excited. By actively seeking out French content, you not only improve comprehension but also develop a deeper cultural appreciation, enriching your overall learning experience.

Active Listening Exercises

Media such as audiobooks, online lectures, or news broadcasts can serve as effective tools for active listening exercises. You should select short segments and concentrate on understanding what’s being said without relying on subtitles or transcripts. This method encourages you to pick up on context, vocabulary, and pronunciation naturally, helping to solidify your grasp on the language.

Exercises such as repeating phrases, summarizing content, or conducting targeted listening sessions can elevate your active listening skills. Start with slower-paced material to develop your confidence, then gradually increase difficulty. Engage in partner practice or utilize language exchange platforms to test your understanding and receive instant feedback. This approach not only sharpens your listening abilities but also enhances overall language fluency.

Speaking Practice: Finding Your Voice

Not finding your voice in French can be a challenge, but practicing consistently can help. Engage with resources that spark your interest – for example, check out this Enhance Your Nails with a Twist on French Manicure video to get inspired while you learn! Embrace conversations that excite you, and you’ll be speaking like a native in no time.

Language Exchange Partners

After you’ve gained some basics, seek out a language exchange partner. They can offer you real-time practice and cultural insights, enhancing your fluency. You could meet through online communities or language exchange apps, ensuring your speaking practice is reciprocal and enjoyable.

Utilizing Technology for Speaking

Beside finding partners, technology can amplify your speaking practice. Many platforms offer language speaking prompts, where you can record yourself and receive feedback from native speakers or AI tools designed to improve your pronunciation.

With language learning apps like Tandem or HelloTalk, you’ll find interactive features that let you speak directly with native French speakers from around the world. Additionally, consider using video call platforms for live conversations to simulate real-life dialogues, making your learning experience dynamic and effective. The more you practice speaking with diverse technology tools, the more comfortable you’ll become in expressing yourself in French.

Cultural Immersion: Learning through Context

Despite the incredible amount of language resources available, true mastery of French often comes from immersing yourself in the culture. Engaging with locals, experiencing traditional events, and participating in community activities will deepen your understanding of language in its natural context. This approach allows you to grasp slang, idioms, and nuances that textbooks simply can’t provide, helping you communicate with authenticity and confidence.

Exploring French Cuisine and Literature

Learning about French cuisine and literature offers a delightful way to connect with the language. By venturing into classic novels and culinary traditions, you can broaden your vocabulary while also understanding cultural references and social norms. Cooking traditional recipes in French and discussing them with others further enhances your language skills and appreciation for French culture.

Traveling through Virtual Experiences

Before you set off on your journey to master French, consider how virtual experiences can transport you to France from the comfort of your home. Online cooking classes, virtual museum tours, and language exchange platforms create unique opportunities to engage with the language and culture. This modern method not only enriches your comprehension but also makes learning enjoyable and accessible.

Through virtual experiences, you can explore bustling Parisian streets or the serene countryside of Provence at your own pace. Enjoy dining experiences that showcase regional cuisines or participate in live-streamed cultural events led by French speakers. This immersive technology allows you to practice conversational skills and interact with native speakers, making your language journey both effective and engaging.

Maintaining Motivation: Tips for Long-Term Success

To keep your French learning journey exciting, incorporate a variety of methods and engagement strategies. Here are some tips to maintain your motivation:

  • Mix up your learning resources, such as apps, books, and videos.
  • Join French-speaking groups online or locally.
  • Set a routine but vary the activities each session.
  • Reward yourself for achieving milestones.

Knowing how to fuel your motivation will lead to long-term success and enjoyment in your language learning adventure.

Setting Achievable Goals

Before diving deep into your French studies, it’s imperative to set achievable goals that cater to your level and interests. This approach helps you stay focused and encourages consistency, which is key in language learning. By breaking down your long-term goals into smaller, manageable tasks, you make the journey feel less daunting and more rewarding.

Celebrating Progress and Milestones

Goals are not just checkpoints; they are opportunities for you to celebrate your growth and progress. Acknowledging your accomplishments along the way, no matter how small, can significantly boost your motivation to continue learning. Whether it’s mastering a new verb tense or holding a conversation, take the time to reward yourself.

In addition, you can celebrate progress by jotting down your achievements in a journal or sharing them with friends or fellow learners, fostering a supportive language community. Create little rituals for each milestone, like treating yourself to a French pastry or enjoying a French film, to make the experience enjoyable and memorable.

Summing up

Taking this into account, mastering French can be both engaging and rewarding when you incorporate unique tips that resonate with your learning style. By exploring cultural nuances, utilizing multimedia resources, and practicing conversation with native speakers, you can enhance your language skills effectively. Embrace the journey by setting realistic goals and persistently challenging yourself. With consistency and creativity, you’ll not only retain what you learn but also enjoy the process of becoming fluent in French.

FAQ

Q: What are some effective methods to enhance my French vocabulary?

A: One effective method to boost your French vocabulary is to incorporate themed vocabulary lists into your daily routine. For example, focus on a specific topic each week, such as food, travel, or technology. Utilize flashcards or apps that allow you to engage with the vocabulary interactively. Additionally, watching French films or reading books in French can provide context and help reinforce new words in a memorable way.

Q: How can I improve my pronunciation in French?

A: Improving your French pronunciation can be achieved by listening to native speakers. Consider incorporating podcasts or YouTube videos into your study routine. Try to mimic the speakers, paying close attention to their intonation and rhythm. Additionally, use language apps that provide pronunciation feedback or join a local language group where you can practice speaking with others. Recording yourself and comparing your pronunciation to native sources can also be beneficial.

Q: Is it important to practice speaking French daily, and how can I make it enjoyable?

A: Practicing speaking French daily is highly beneficial for fluency. To make it enjoyable, integrate it with activities you love. For instance, try to have conversations about your favorite hobbies or watch a French film and discuss the storyline afterward. Language exchange platforms can connect you with native speakers, allowing for a fun and engaging way to practice speaking. You could also role-play different scenarios, like ordering food or shopping, to enhance your conversational skills.

Q: How can I stay motivated while learning French and avoid burnout?

A: Staying motivated in your French learning journey can be achieved by setting small, manageable goals and celebrating each milestone. Create a study schedule that includes varied activities, such as music, games, or cultural experiences related to France or the Francophone world. Joining online forums or groups can provide a sense of community and accountability. Additionally, taking breaks and alternating between different forms of study will help maintain your enthusiasm and prevent fatigue.

Q: What resources can I use to practice my French skills outside of traditional textbooks?

A: There are numerous resources available beyond traditional textbooks to practice your French skills. Mobile apps like Duolingo or Babbel provide interactive lessons tailored to different skill levels. Websites featuring French recipes, blogs, or travel articles can immerse you in the language while catering to your interests. Furthermore, joining online language exchange platforms allows for real-time conversation practice with native speakers. Engaging with social media accounts that share content in French can also be a fun way to learn in a more casual setting.

Skip to content