Inails Near Me Global

How to Avoid Infections from Nail Tools

It’s important to prioritize your health and hygiene when it comes to nail care. Using the right techniques and practices can significantly reduce your risk of infections from nail tools. In this post, you’ll learn how to properly clean and maintain your nail equipment, recognize signs of potential contamination, and what precautions to take when visiting nail salons. By following these guidelines, you can enjoy beautiful nails without compromising your well-being.

Key Takeaways:

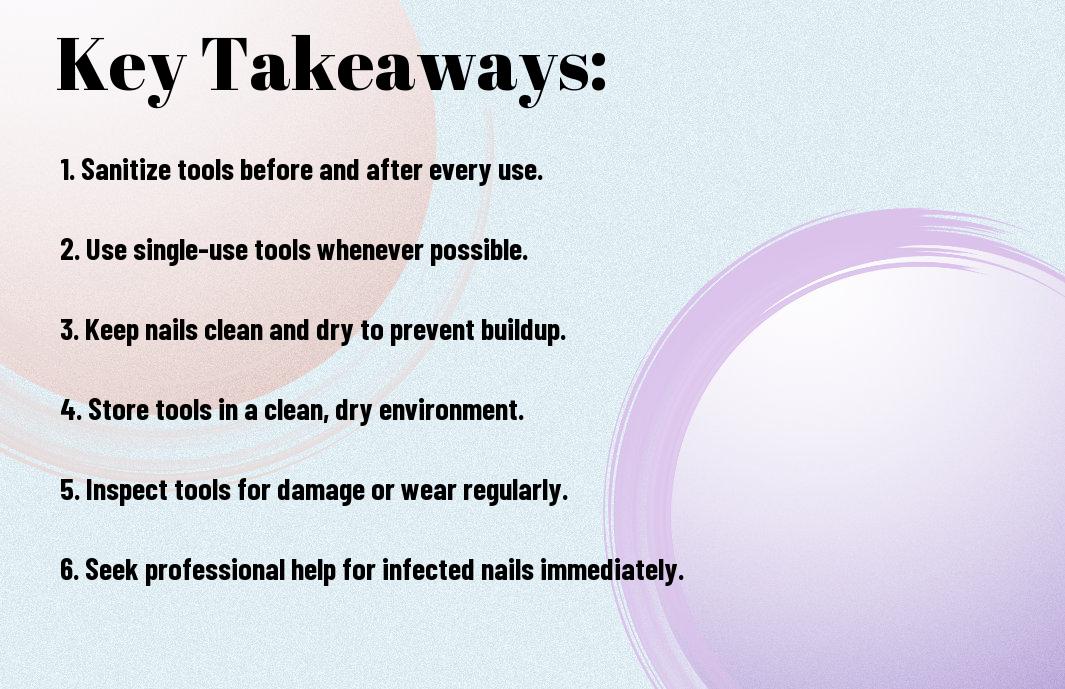
  • Proper Sanitization: Always disinfect nail tools before and after each use to prevent bacteria and fungi from accumulating.
  • Personal Tools: Use your own nail tools instead of sharing them, which minimizes the risk of cross-contamination.
  • Quality Products: Invest in high-quality nail tools made from stainless steel or other non-porous materials that are easier to clean and maintain.

Understanding Nail Tool Infections

A thorough understanding of nail tool infections is crucial for maintaining your nail health. These infections can occur when bacteria, fungi, or viruses enter the skin through cuts or abrasions caused by improperly cleaned or damaged tools. If you frequently visit nail salons or use home tools, awareness of how these infections develop can help you prevent them effectively.

Common Types of Infections

  • Bacterial infections (e.g., Staphylococcus aureus)
  • Fungal infections (e.g., toenail fungus or onychomycosis)
  • Viral infections (e.g., warts or herpes simplex)
  • Parasitic infections (e.g., scabies or other skin parasites)
  • Infections due to ingrown nails

The health risks associated with these infections can vary in severity, affecting your nails and overall well-being.

Causes of Nail Tool Contamination

About the causes of nail tool contamination, several factors can lead to infections. Improper sanitation, sharing tools, and using damaged or worn-out equipment can increase the risk. Additionally, exposure to moist environments and neglecting your skin’s integrity can exacerbate the chance of infection.

Plus, using unsterilized tools, particularly in shared spaces like nail salons, creates an environment where harmful microorganisms can thrive. Regularly inspecting and properly maintaining your nail tools can significantly reduce the risk of contamination and subsequent infections.

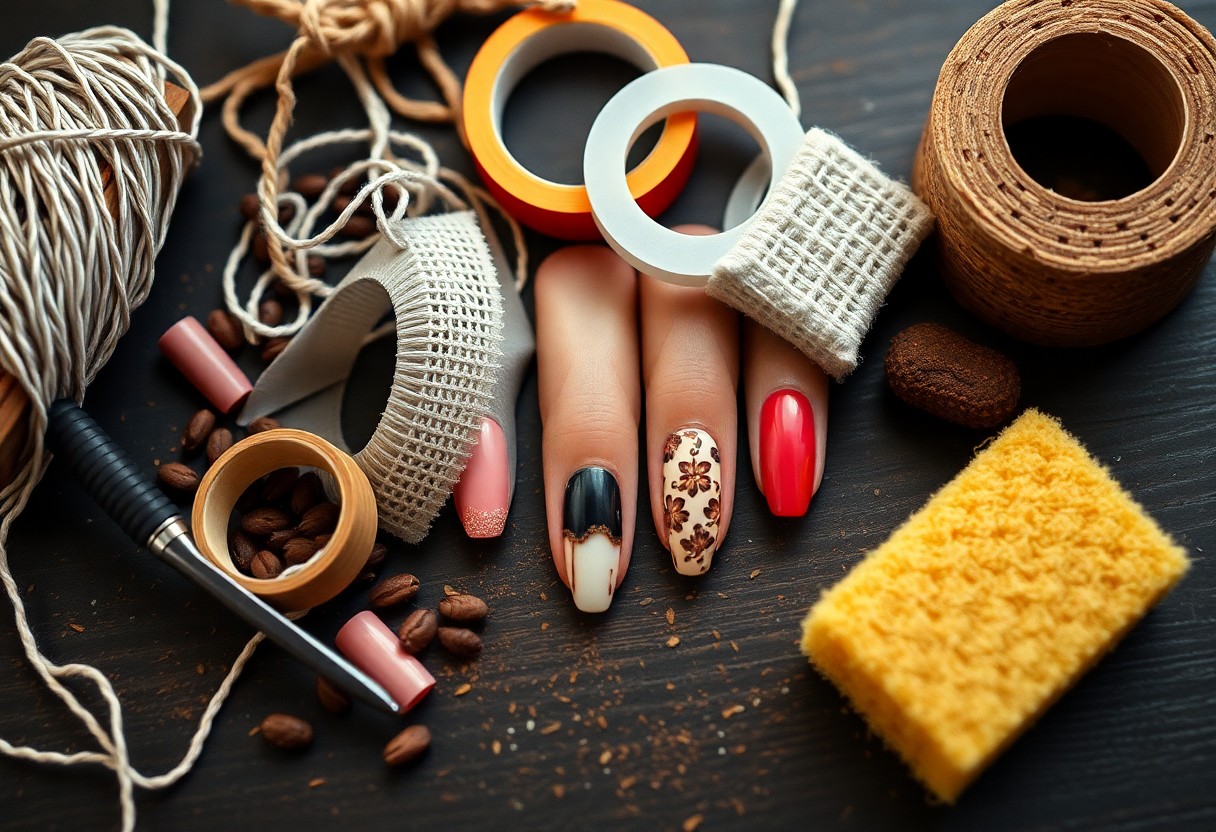
Best Practices for Nail Tool Hygiene

Some important practices can significantly improve nail tool hygiene and protect against infections. Always prioritize cleanliness and ensure that the tools you use are adequately sanitized before and after each use. Regular maintenance not only keeps your tools in good shape but also reduces the risk of contamination, which is crucial for safe nail care.

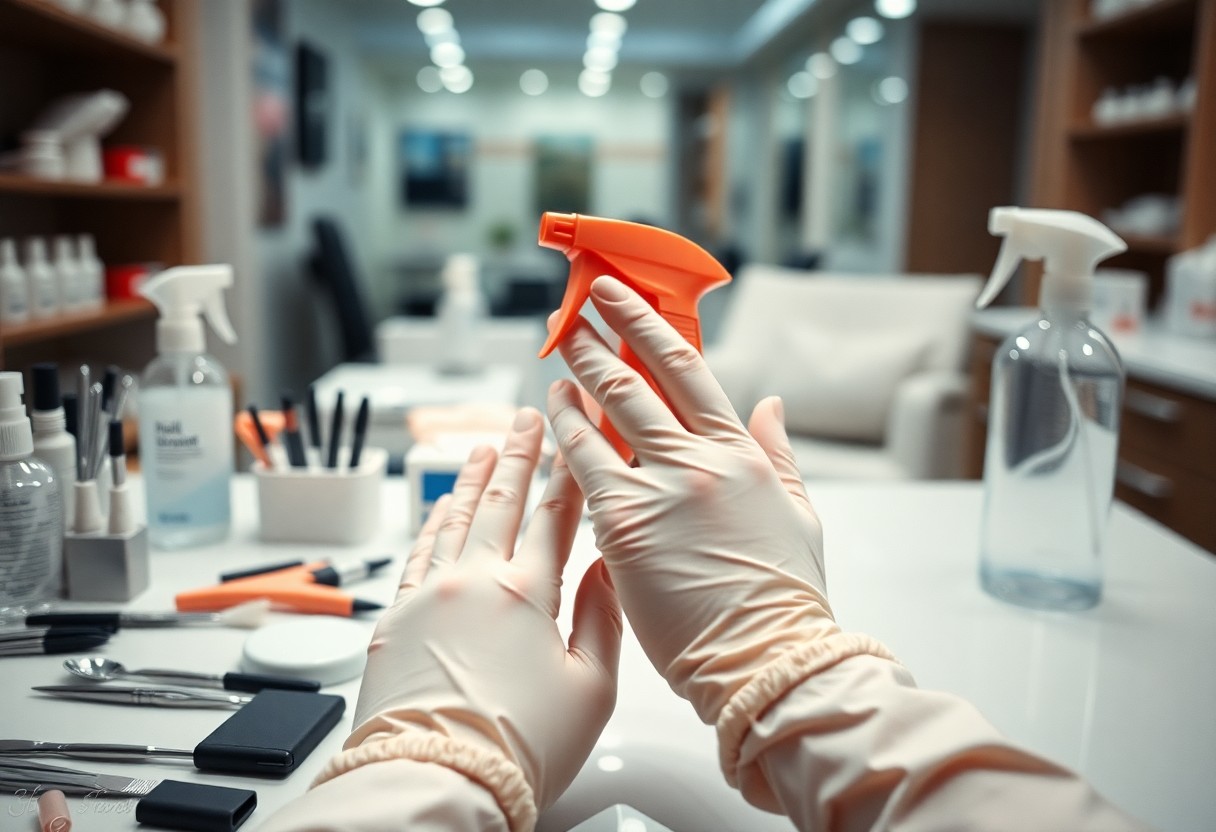
Cleaning and Sanitizing Tools

Among the most effective ways to prevent infections is the proper cleaning and sanitizing of your nail tools. Use soap and water to wash your tools thoroughly, followed by a disinfectant solution specifically designed for beauty instruments to eliminate harmful bacteria and viruses.

Storage and Maintenance Tips

With proper storage and maintenance, you can extend the life of your nail tools and minimize the risk of infections. Always keep your tools in a clean, dry place, and consider using a dedicated container to protect them from dust and bacteria. Regularly check for any signs of wear, such as rust or deterioration.

  • Store tools in a closed, hygienic container.
  • Avoid sharing your tools with others.
  • Inspect tools for damage before each use.
  • Clean the storage container regularly.
  • Any damaged or heavily worn tools should be replaced to ensure safety.

Storage should always be a priority to maintain the integrity of your nail tools. Invest in a specialized case or organizer that separates each tool to prevent cross-contamination. Ensure that the storage area is kept clean and dry to deter mold and bacterial growth. Additionally, avoid leaving tools out in the open where they may gather dust or come into contact with unclean surfaces.

  • Keep tools organized to avoid accidents.
  • Use protective covers for sharp instruments.
  • Label your tools if sharing with others.
  • Any signs of mold or rust should lead to immediate disposal and replacement of the affected tools.

Choosing the Right Nail Tools

Not all nail tools are created equal; selecting the right ones can significantly reduce your risk of infection. Ensure that the tools you choose are specifically designed for nail care and prioritize those that can be sanitized effectively. Look for reputable brands that emphasize hygiene in their product design, and always check for reviews to understand how other users value the tool’s effectiveness and safety.

Quality vs. Cost

The price of nail tools can be tempting to consider first, but opting for cheaper alternatives may not serve you well in the long run. High-quality tools are often made from materials that withstand regular sterilization without degrading. Investing in reliable tools pays off by reducing the risk of injury or infection, enhancing your overall nail care experience.

Recommended Materials

Before purchasing nail tools, it is crucial to focus on the materials from which they are made. Stainless steel, for instance, is a fantastic option as it is durable, easy to sanitize, and resistant to rust and corrosion. Additionally, certain plastics designed for nail care are also viable, but you must ensure they are labeled as disinfectable.

Recommended materials for nail tools include stainless steel, titanium, and high-quality plastics. Stainless steel is particularly preferred because it does not harbor bacteria and is easy to clean, making it safe for professional and at-home use alike. If you choose tools made from other materials, verify their cleaning capabilities to avoid any risk of infection. Investing in tools made from these recommended materials ensures longevity and safety, enabling you to maintain your nails without compromise.

Sterilization Techniques

Keep your nail tools safe by practicing effective sterilization techniques. Regularly disinfect your manicure and pedicure tools using EPA-approved disinfectants to eliminate harmful pathogens. Additionally, you can find valuable advice in these 8 Tips to Prevent Getting a Fungal Infection From Your … for maintaining hygiene standards both at home and in salons.

Methods for Home Use

Below are simple methods you can use at home to sterilize your nail tools. Soaking them in 70% isopropyl alcohol for 10 minutes is effective. For non-metal tools, consider using a soap solution followed by thorough rinsing and air drying. Consistent cleaning after each use ensures your tools remain free from infections.

Professional Sterilization Standards

Above all, understanding professional sterilization standards is vital for your safety. Salons must follow strict guidelines to ensure all reusable tools are sanitized and disinfected. Look for establishments that utilize autoclaves or sealed sterilization pouches, ensuring your nail care experience is not only enjoyable but also safe.

Understanding these professional sterilization standards helps you evaluate the safety practices of your nail salon. Ensure that technicians are trained to use proper sterilization equipment and techniques, which minimizes the risk of any infections. By being informed and vigilant about the sanitation practices in establishments you visit, you can greatly reduce your chances of encountering harmful microorganisms.

Signs of Infection to Watch For

Once again, staying vigilant is imperative for your health. If you notice any unusual changes around your nails such as redness, swelling, or increased tenderness, it could be a sign of infection. Pay attention to any discharge, especially if it’s pus-like, and be cautious of persistent pain that doesn’t subside. Early detection is key to preventing further complications.

Symptoms and Indicators

To effectively monitor for infection, be aware of the common symptoms and indicators. These can include warmth at the site, a change in color, or an unusual odor emanating from the affected area. Fever or chills may accompany more severe infections, signaling the need for prompt attention.

When to Seek Medical Attention

An urgent response is warranted if you develop signs of infection. If the symptoms continue to escalate, or if you experience severe pain, swelling, or fever, do not hesitate to consult a healthcare professional. A timely intervention can make a significant difference in recovery.

Indicators that you should seek medical attention include excessive redness or swelling that worsens, discharge that is increasing in volume, or if you have underlying health conditions that could complicate the infection. Acting promptly in such instances can lead to better treatment outcomes and minimize risks associated with nail tool infections.

Educating Yourself and Others

After learning about the risks associated with nail tools, you should focus on educating yourself and those around you. Understanding the importance of hygiene practices ensures that you can enjoy nail care without the fear of infections. Share your knowledge with friends and family, as awareness can significantly reduce the spread of harmful bacteria and fungi in your community.

Importance of Awareness

Among the many benefits of awareness is the ability to identify potential risks before they escalate. By understanding how infections can occur, you equip yourself with the knowledge to make informed decisions about nail care, allowing you to take proactive measures for prevention.

Sharing Best Practices

By discussing and promoting best practices, you foster a culture of health and safety regarding nail tool usage. This not only empowers you but also those in your circle to make smarter decisions.

A few best practices include always sanitizing tools before and after use, avoiding sharing personal nail tools, and opting for professional services that prioritize hygiene. Encourage others to follow these steps, as they create a healthier environment for everyone. Sharing experiences and tips within your community can further enhance the collective safety and ensure everyone is aware of the importance of maintaining clean nail care practices.

Conclusion

With these considerations, you can significantly minimize the risk of infections from nail tools. Always opt for sterilized or disposable implements and clean your tools regularly with disinfectants. Avoid sharing nail tools with others, and be cautious of salons that do not maintain high hygiene standards. Keep your nails clean and well-groomed, and monitor for any signs of infection. By prioritizing these practices, you protect your skin and health while enjoying beautiful nails.

FAQ

Q: Why is it important to clean nail tools before use?

A: Cleaning nail tools is vital to prevent the spread of bacteria and other pathogens that can cause infections. Tools can harbor germs from previous clients or even from the environment, and thorough sanitation helps ensure that you are using safe, hygienic instruments during your manicure or pedicure.

Q: What is the best way to disinfect nail tools?

A: The most effective way to disinfect nail tools is to use an EPA-registered disinfectant. First, wash the tools with soap and water to remove any debris. Then, immerse them in the disinfectant solution for the recommended time specified on the product’s label. Be sure to rinse and dry the tools after disinfection to eliminate any chemical residue.

Q: How often should nail tools be replaced?

A: Nail tools should be replaced regularly, especially those that show signs of wear or damage. Items such as files, buffers, and cuticle pushers generally have a shorter lifespan and may need replacement after a few uses. Stainless steel tools can last longer if maintained properly, but replacing them every few months can help minimize infection risks.

Q: Can I share nail tools with others?

A: Sharing nail tools is not recommended due to the risk of transmitting infections like fungal infections or warts. If you must share tools, ensure they are thoroughly cleaned and disinfected before and after each use. Ideally, each person should have their own set of nail tools to maintain personal hygiene and health.

Q: What signs should I look for to identify an infection from nail tools?

A: Signs of an infection can include redness, swelling, warmth, pain around the nail area, pus or drainage, and persistent discomfort. If you notice any of these symptoms after using nail tools, it is advisable to seek medical attention promptly to address the issue and prevent further complications.

Are UV Lamps Safe for Your Skin

Just like any beauty treatment, the use of UV lamps can raise concerns about your skin’s health and safety. As you explore the benefits of tanning or therapeutic devices that utilize ultraviolet light, it’s necessary to understand the potential risks involved. In this post, you’ll gain insight into how UV lamps affect your skin, the scientific evidence surrounding their use, and expert recommendations to ensure your skincare routine remains both effective and safe.

Key Takeaways:

  • UV Exposure can increase the risk of skin damage and cancer, so caution is advised when using UV lamps.
  • Protective Measures such as sunscreen and protective clothing should be used to minimize harmful effects.
  • Regulation and Awareness regarding the safety of UV lamps vary; informed choices are important for skin health.

Understanding UV Lamps

While UV lamps have gained popularity for various uses, it’s crucial to understand their impact on your skin. These devices emit ultraviolet radiation, which can penetrate the skin and potentially lead to damage. This chapter will help you navigate the different types of UV lamps and their effects on skin health, allowing you to make informed choices regarding their use.

Types of UV Lamps

While exploring UV lamps, you will encounter several types, each serving specific purposes:

  • UV-A lamps: Used primarily for tanning salons.
  • UV-B lamps: Often used in phototherapy treatment for skin conditions.
  • UV-C lamps: Typically found in germicidal applications.
  • Black lights: Used mainly for artistic and decorative purposes.
  • LED UV lamps: Popular in certain medical and cosmetic applications.

Any use of these lamps should be approached with caution.

Type of UV LampCommon Uses
UV-ATanning
UV-BPhototherapy
UV-CGermicidal
Black LightsArt & Decor
LED UVMedical/Cosmetic

How UV Lamps Work

Work by emitting specific wavelengths of ultraviolet light, UV lamps can stimulate reactions in the skin. The UV radiation targets skin cells, affecting their behavior and sometimes encouraging tanning or treating skin issues. It is vital to understand how this interaction impacts your skin health.

For instance, UV-A rays penetrate deeply, contributing to skin aging and increasing the risk of skin cancer, while UV-B rays can cause sunburn but play a role in vitamin D synthesis. Understanding these intricacies can help you weigh the benefits and risks of using UV lamps for your skin care needs.

Potential Risks of UV Exposure

You may not realize that prolonged exposure to UV light can pose significant risks to your skin. While UV lamps can offer benefits like improved skin texture and reduced acne, they can also lead to skin damage, premature aging, and an elevated risk of skin cancer. Understanding these risks is vital for making informed decisions about UV lamp usage.

Skin Damage

After using UV lamps, your skin may experience redness, dryness, and peeling. These symptoms indicate that the skin has been compromised by UV radiation, which can lead to more severe issues over time, such as deep wrinkles and uneven skin tone.

Long-term Health Effects

Skin exposure to UV radiation can significantly increase your risk of developing skin cancer, including melanoma, which is the deadliest form of skin cancer. The accumulation of UV damage over the years can cause mutations in your skin cells, potentially leading to malignant growths.

It is vital to be aware that the long-term health effects of UV exposure are not only limited to skin cancer. Prolonged UV exposure can also cause other serious skin conditions and significantly accelerate the aging process. Regular use of UV lamps without adequate protection may lead to a lifetime of skin-related issues, underscoring the importance of moderation and protective measures.

Benefits of UV Lamps

Not all UV lamps are harmful; in fact, they offer several advantages when used appropriately. These lamps can help in vitamin D production, support skin health, and even enhance mood by mimicking sunlight. When integrated into specific therapeutic protocols, they can assist in treating various skin conditions, making them a valuable asset in your skincare routine.

Medical Uses

Benefits of UV lamps extend into the medical field, particularly in treating skin disorders such as psoriasis, eczema, and vitiligo. Dermatologists often recommend controlled UV exposure to help reduce inflammation and promote healing, making these lamps an integral part of many treatment plans.

Therapeutic Effects

With the utilization of UV lamps, you can experience various therapeutic effects, particularly for skin health. They can stimulate the production of certain skin-repairing substances, ultimately improving the appearance and texture of your skin.

Therapeutic benefits are not limited to skin treatment; UV light can also enhance circulation and accelerate wound healing. Regular, controlled exposure may lead to reduced pain in some conditions and improve your overall skin resilience. However, it’s important to consult with a healthcare professional to determine the right approach and duration for your individual needs.

Safety Precautions

Despite their popularity, UV lamps pose some risks to your skin. To mitigate these dangers, it’s advisable to take certain safety precautions. For instance, when getting a manicure, you should wear gloves or sunscreen to protect your skin while exposing it to UV light.

Recommended Usage Guidelines

Guidelines suggest limiting your exposure to UV light during salon treatments. Opt for services that use low-UV lamps and ensure your technician follows recommended protocols to minimize risks.

Protective Measures

Across the board, implementing protective measures can significantly enhance your safety. This includes using sunscreen formulated for your hands before UV exposure and wearing protective gloves that block UV radiation.

Measures like applying broad-spectrum sunscreen with an SPF of 30 or higher can safeguard your skin from UV damage. Additionally, consider taking breaks during long nail sessions to reduce cumulative exposure to UV light. Prioritizing these protective steps helps ensure that your beauty routine doesn’t come at the expense of your skin’s health.

Alternative Options

For those seeking safer alternatives to UV lamps, consider a range of options that can still help achieve healthy-looking skin. Products like broad-spectrum sunscreens, self-tanners, and gradual tanning lotions can offer a sun-kissed glow without the damaging effects of UV exposure. Additionally, exploring other light sources, such as LED therapy, may provide beneficial results for your skin without the associated risks of tanning lamps.

Natural Sunlight

After weighing the pros and cons, it’s important to understand that occasional exposure to natural sunlight can benefit your skin. It helps your body produce vitamin D, which is imperative for overall health. However, limit your exposure to avoid sunburn and long-term damage. Opt for early morning or late afternoon sun when rays are less intense to safely enjoy the benefits of natural sunlight.

Chemical Alternatives

Options such as self-tanning products and bronzers allow you to achieve a tanned appearance without UV exposure. These alternatives often contain dihydroxyacetone (DHA), a color additive that reacts with your skin’s outer layer to produce a temporary tan. Using these products can minimize the risk of skin damage compared to traditional tanning methods, as they do not involve harmful UV radiation.

The benefits of using chemical alternatives extend beyond just avoiding UV damage. Many self-tanners include moisturizing agents that can help enhance your skin’s condition, while bronzers provide a quick boost for special occasions. Always choose high-quality products and perform a patch test to avoid adverse reactions. Applying these alternatives can give you the sun-kissed look you desire while prioritizing your skin’s health.

Public Perception and Myths

Unlike many beauty trends that come and go, the use of UV lamps has sparked considerable debate about their safety. Misunderstandings abound, with some people believing that these devices are completely harmless when used occasionally. The reality is that while UV lamps can provide certain benefits, they also pose significant risks to your skin, which you should consider before using them regularly.

Common Misconceptions

Beside the belief that UV lamps deliver a safe form of tanning, many individuals think they can effectively replace sun exposure without any negative impacts. This misconception may lead you to underestimate the potential for skin damage and long-term health risks associated with UV radiation.

Expert Opinions

Between dermatologists and health organizations, there is a consensus that UV lamps can increase your risk of skin cancer and accelerate skin aging. Experts emphasize the importance of moderation and highlight safer alternatives for achieving a sun-kissed look.

Common advice from dermatologists suggests that you should limit your exposure to UV lamps, prioritizing your skin’s health over aesthetic desires. Consulting with a skincare professional can provide tailored recommendations to suit your needs. While you may enjoy the appearance of a tan, understanding the associated risks can empower you to make more informed choices when it comes to your skin care routine.

Summing up

Hence, while UV lamps can be effective for certain applications, you should approach their use with caution. Prolonged or excessive exposure can lead to skin damage, including premature aging and increased risk of skin cancer. It is imperative to consult with a healthcare professional if you’re considering using UV lamps for cosmetic purposes and to follow safety guidelines to protect your skin. Prioritizing your skin health will help you make informed decisions about UV exposure.

FAQ

Q: What are UV lamps used for?

A: UV lamps are commonly used for various purposes, including sterilization, tanning, and therapeutic treatments for skin conditions like psoriasis and eczema. They emit ultraviolet light, which can have both beneficial and harmful effects on the skin.

Q: Can using UV lamps cause skin damage?

A: Yes, excessive exposure to UV lamps can lead to skin damage, including premature aging, sunburns, and an increased risk of skin cancer. It is important to use UV lamps responsibly and follow recommended guidelines to minimize these risks.

Q: How can I protect my skin if I use a UV lamp?

A: To protect your skin while using a UV lamp, you should apply a broad-spectrum sunscreen with a high SPF, wear protective clothing, limit exposure time, and use UV-blocking eyewear. Following these precautions can help reduce potential skin damage.

Q: Are there safer alternatives to UV lamps for achieving a tan?

A: Yes, safer alternatives to UV lamps for tanning include self-tanning lotions, sprays, and bronzers. These products provide a tanned appearance without the harmful effects of UV radiation. Additionally, some sunless tanning options include natural ingredients that can be more skin-friendly.

Q: Should I consult a dermatologist before using a UV lamp?

A: It is advisable to consult a dermatologist before using a UV lamp, especially if you have pre-existing skin conditions or a family history of skin cancer. A dermatologist can provide personalized advice on the safest options for your skin type and concerns.

Trying 30 Days of Different Nail Art Designs

Nail art is not only a creative outlet but also a fashion statement that allows you to express your personality. By begining on a 30-day challenge of different nail art designs, you can explore various techniques, styles, and themes that will elevate your manicure game. Each week, you’ll experiment with unique trends, from minimalist looks to bold patterns, enhancing your skills along the way. This journey will inspire you to embrace your creativity while keeping your nails looking fabulous and fresh throughout the month.

Key Takeaways:

  • Variety: Exploring different nail art designs enhances creativity and keeps your manicure fresh and exciting.
  • Skill Development: Trying new techniques each day can improve your nail art skills and boost confidence in your abilities.
  • Self-Expression: Nail art serves as a fun way to express personal style and individuality through unique designs.

The Basics of Nail Art

To get started with nail art, it’s important to understand fundamental techniques and designs that can elevate your manicure game. For inspiration, check out NailArtBreak, which offers a variety of tutorials ranging from simple to advanced styles. Familiarizing yourself with these basics can build a strong foundation for your nail art journey, allowing you to express your creativity while also ensuring a polished finish.

Essential Tools and Supplies

On your nail art journey, you’ll need a few important tools and supplies to get started. Stocking up on high-quality nail polish, brushes, dotting tools, and a good top coat will make all the difference in achieving professional-looking designs. Additionally, having nail tape, sponges, and a clean-up brush on hand can help create various techniques, from gradients to intricate patterns.

Choosing the Right Nail Polish

Nail polish selection can affect the outcome of your nail art significantly. Opt for polishes that offer good opacity, quick drying time, and long-lasting wear to enhance your designs and extend their lifespan.

Choosing the right nail polish involves considering the finish you desire, whether it’s matte, glossy, or glittery, and matching it to your planned design. Investing in a few high-quality brands known for their pigmentation can elevate your art. Don’t forget to explore various colors and textures, as this variety will allow you to experiment and develop unique styles that suit your personality.

Week 1: Classic Nail Art Designs

Some of the most timeless nail art designs are those that have stood the test of time. This week, you’ll explore classic techniques that enhance your nail game, presenting sophistication and elegance. From the iconic French manicure to playful polka dots, these designs allow you to express your style while remaining effortlessly chic.

French Manicure

Around the world, the French manicure is celebrated for its simple yet sophisticated look. This design typically features a nude or sheer base with white tips, making your hands appear polished and elegant. Perfect for any occasion, it provides a clean and fresh aesthetic that complements various outfits.

Polka Dots

To add a fun and vibrant touch to your nails, consider the playful polka dot design. This classic motif can be through varied sizes and colors, allowing you to showcase your personality. No matter your color scheme, polka dots can easily transform your nails into eye-catching accessories.

It’s easy to create a polka dot design using a dotting tool or a toothpick. Start with a base coat of your choice, then select contrasting colors for your dots. You can play with different dot sizes and arrangements to achieve the desired look. Experiment with patterns, such as evenly spaced dots for a more uniform effect or sporadic placements for a whimsical feel. This versatile technique not only enhances your nails but also allows you to showcase your creativity. Perfect for a casual day out or a festive gathering, polka dots are a delightful addition to your nail art repertoire.

Week 2: Trendy Nail Art Techniques

For Week 2, you’ll examine the world of trendy nail art techniques that will take your designs to the next level. You can check out Day 1 of My 30 Day Nail Art Challenge to inspire your creativity. With each technique, you can enhance your skills and elevate your nail game this week.

Ombre Effect

One of the most popular techniques making waves in the nail art community is the ombre effect. This technique allows you to blend two or more colors seamlessly, creating a stunning gradient that adds depth to your nails. By choosing colors that complement each other, you can easily achieve a stylish look that’s perfect for any occasion.

Marble Nails

Week two wouldn’t be complete without marble nails, a sophisticated trend that mimics the elegant swirls of natural marble. To achieve this look, you start with a solid base color and then use a nail art brush or a toothpick to swirl together contrasting colors, creating a marble effect that is truly unique. Applying a top coat will enhance the marble’s shine and longevity, making your nails stand out even more.

Week 3: Creative and Fun Designs

All week long, you’ll explore nail art that adds a splash of creativity and fun to your personal style. This week is all about stepping outside the box with unique designs that reflect your personality. From bold color combinations to intricate patterns, you’ll find an array of ideas to elevate your nail game. Embrace your artistic side, and don’t be afraid to showcase your creativity through fun and eye-catching designs!

Geometric Patterns

Behind the trend of geometric patterns in nail art is a mix of precision and creativity. These designs are characterized by clean lines, sharp angles, and a variety of shapes that create stunning visuals. You can play with color contrasts or keep it monochrome, allowing for endless possibilities. Geometric patterns are not only stylish but also a fantastic way to express your artistic flair on your nails.

Floral Designs

With floral designs, your nails can blossom into beautiful works of art. These designs can range from delicate daisies to vibrant roses, allowing you to convey any mood or season. Whether you choose intricate hand-painted flowers or simple stickers, floral nail art adds a touch of elegance and charm to your look.

Hence, focusing on floral designs offers a refreshing approach to nail art that can be tailored to suit your tastes. You can experiment with different color palettes, from soft pastels to bold hues, while combining various flower types for a themed nail look. Seasonality can also play a role; bright florals for summer or muted tones for fall can keep your nails in tune with nature. Whether you’re a beginner or a pro, floral designs allow you to unleash your creativity while remaining timeless and chic.

Week 4: Seasonal and Thematic Art

Now it’s time to get creative with seasonal inspirations and themes. This week, you have the chance to express your individuality through vibrant designs that celebrate different occasions. Whether you’re planning for a festive holiday or embracing the colors of the changing season, these nail art ideas elevate your style while showcasing your personality.

Holiday-Inspired Nails

Along with the subtle beauty of everyday designs, you can bring the fun of the holidays to your fingertips. Embrace colors and motifs that reflect seasonal festivities, from glittery snowflakes for winter to blooming flowers in spring. Your nails can serve as a canvas for celebration, allowing you to share your holiday spirit with the world.

Summer Vibes

With warmer days on the horizon, you can channel that energy into cheerful nail designs that capture the essence of summer. Bright colors, playful patterns, and tropical themes can all be incorporated into your nail art, making it a perfect representation of leisurely days and bright sunshine.

In fact, summer vibes can inspire you to experiment with vibrant shades like coral, turquoise, and sunny yellow. Think tropical prints, palm trees, or even beach scenes for an added flair. You’ll find that mixing these elements can create fun nail art that not only looks great but also puts you in a summer state of mind, no matter the season!

Tips for Maintaining Your Nail Art

Many individuals admire beautiful nail art but often overlook its maintenance. To keep your designs looking fresh and vibrant, consider these tips:

  • Apply a clear top coat every few days to seal in your designs and prevent chipping.
  • Avoid harsh chemicals or prolonged exposure to water to maintain the integrity of your nail art.
  • Wear gloves while doing household chores to protect your nails from damage.
  • Moisturize your cuticles regularly to promote healthy nail growth.

Knowing these tips will help extend the life of your nail art and keep your manicure looking salon-fresh.

Long-lasting Techniques

Any nail art lover knows that time and effort can go to waste if your designs don’t last. To achieve long-lasting results, use high-quality nail polish, and always start with a base coat. Additionally, be sure to allow each layer to dry completely before applying the next one to minimize smudging or peeling.

Nail Care Best Practices

One of the best ways to maintain your nail art is by practicing proper nail care. Keeping your nails healthy and strong is imperative for beautiful designs that last longer. Regularly trim and shape your nails, and be mindful of your dietary choices, which can influence nail strength and growth.

Nail health is often overlooked but is vital for maintaining your artwork. A balanced diet rich in vitamins and minerals can significantly improve the appearance and strength of your nails. Consider supplementing your diet with biotin and staying hydrated. Additionally, consistently moisturizing your hands and cuticles can prevent dryness and brittleness, ensuring your nail art looks its best for as long as possible.

To wrap up

Drawing together various nail art designs over 30 days can be a transformative experience for your self-expression and creativity. As you explore different styles, techniques, and themes, you’ll not only expand your skills but also discover your unique preferences. Embrace the journey of experimenting with colors, patterns, and textures, and enjoy the process of creating beautiful art on your nails. By the end of the month, you’ll likely feel more confident in your abilities and inspired to continue innovating with your nail art.

FAQ

Q: What can I expect from trying 30 days of different nail art designs?

A: By trying 30 days of different nail art designs, you can expect to enhance your creativity, improve your nail art skills, and discover new techniques. Each day presents a unique design, which can help you build a diverse portfolio of styles. This challenge can also add a fun and artistic element to your daily routine, resulting in various looks that showcase your personality and taste.

Q: Do I need a lot of supplies to start this challenge?

A: While having a basic set of nail art supplies can be helpful, you don’t need an overwhelming amount to begin. Start with a few necessary tools such as nail polish in different colors, brushes, dotting tools, and nail stickers or stamps if you wish. As you progress through the challenge, you can gradually add to your collection based on the designs you want to experiment with.

Q: How can I find inspiration for each day’s nail art design?

A: Inspiration can come from various sources, such as social media platforms like Instagram and Pinterest, nail art blogs, or even your surroundings. You can explore seasonal themes, holidays, or color combinations that resonate with your mood. Additionally, consider creating a mood board or saving images of designs you admire to refer back to throughout the challenge.

Q: What should I do if I struggle with a particular design?

A: If you find a specific design challenging, it’s perfectly normal! Take a break and revisit it later, or look for tutorials that can guide you step-by-step. You might also try simplifying the design or modifying it with elements you are comfortable with. The goal is to enjoy the process and allow room for experimentation and creativity without putting too much pressure on yourself.

Q: Can I share my nail art journey with others?

A: Absolutely! Sharing your nail art journey can be incredibly rewarding and may even inspire others to participate. Consider documenting your designs on social media using relevant hashtags, or start a blog or journal to showcase your progress. Engaging with the nail art community online can provide positive feedback, tips, and encouragement as you begin on this creative challenge.

Can You Do Nail Art with Household Items

Nail art doesn’t have to be expensive or require professional tools; you can unleash your creativity using everyday household items. From rubber bands to tape, the possibilities are endless when it comes to achieving stunning designs right at home. In this post, you’ll discover various techniques and items you can use to elevate your nail game without breaking the bank. Get ready to transform your nails with what you already have in your beauty arsenal!

Key Takeaways:

  • Creativity is key: Household items like plastic bags, sponge, and tape can be used to create unique nail art designs.
  • Accessibility: You don’t need expensive tools or products; everyday materials can help achieve beautiful nail art.
  • Experimentation: Trying out different techniques with common items can lead to innovative and fun nail art styles.

Exploring Household Items for Nail Art

To unleash your creativity, exploring household items for nail art can transform your manicures into mini masterpieces. With just a few everyday products, you can achieve intricate designs that rival salon quality. From kitchen supplies to crafting tools, you’ll be amazed at the resources available right at home. Embrace the DIY spirit, and let your imagination run wild as you discover how to use these common items to elevate your nail art game.

Common Kitchen Supplies

Across your kitchen, you can find a treasure trove of supplies that can be used for stunning nail art. Items like toothpicks, sponges, and even plastic wrap can help you create unique patterns and textures. Using a simple sponge, for instance, allows you to dab on colors for an eye-catching ombre effect, while toothpicks can be utilized for fine detailing. By looking around your kitchen, you can easily access tools that enhance your nail artistry without spending a dime.

Crafting Tools and Their Uses

Below, you’ll discover that various crafting tools can elevate your nail art skills significantly. Items such as paintbrushes, dotting tools, and scissors can create intricate designs that showcase your artistic side. Craft paint and nail tape can also be utilized to achieve sharp lines and fun embellishments, adding that professional touch you desire. The beauty of using crafting tools is that they are readily available, and with just a bit of creativity, they can make your nail designs stand out.

At home, you likely have an assortment of crafting tools that can be repurposed for nail art. For example, paintbrushes can be used for detailed line work, while dotting tools are perfect for creating polka dots or intricate designs. Additionally, craft scissors can assist in achieving clean edges when working with tape or stickers, while old makeup sponges can help you blend colors seamlessly. By utilizing these tools creatively, you can experiment with various techniques to enhance your nail art projects effectively.

Techniques for Nail Art with Household Items

Clearly, you can unleash your creativity by using various techniques for nail art with household items. From using a simple toothpick to create intricate designs to utilizing tape for crisp lines, the options are limitless. If you’re unsure where to begin, check out Where to start with DIY nail art? : r/RedditLaqueristas for some inspiration and tips!

Stamping and Printing Methods

Above all, stamping and printing methods can create stunning designs on your nails effortlessly. You can use everyday items like sponge applicators or kitchen sponges to apply polishes and create eye-catching patterns. By experimenting with different objects around your home, you’ll achieve unique looks that stand out.

Creating Patterns and Designs

About your patterns and designs, there are several innovative techniques to explore. Using brushes, dots, or even straws can help you achieve various effects and textures that elevate your nail art game.

It’s beneficial to practice creating patterns with objects like old toothbrushes, forks, or even the ends of your makeup brushes. Each household item can offer a different texture and look, allowing you to explore your artistic side. Experimenting with various colors and layering techniques will inspire you to develop a unique style that reflects your personality and taste.

Safety and Precautions

Despite the fun of experimenting with nail art, it’s important to prioritize safety and precautions. Always keep your workspace clean and ensure proper ventilation when using any household materials. For ideas on getting started, check out 8 nail art designs you can DIY at home with limited tools … to inspire your creativity without compromising safety.

Ensuring Non-Toxic Materials

The materials you use for nail art should be non-toxic and safe for your skin. Look for products that are labeled as free from harmful chemicals. Common household items such as food coloring, hand sanitizer, and vinegar can often serve as effective alternatives to commercial nail art supplies.

Avoiding Skin Reactions

The potential for skin reactions should always be taken seriously. Pay close attention to how your skin reacts to various materials, especially if you have sensitive skin or allergies. Always perform a patch test on a small area before applying any item directly to your nails or cuticles. If you notice any irritation, discontinue use immediately.

Skin reactions can range from mild redness and irritations to allergic responses. It’s wise to avoid using items like glue, paint, or chemicals not meant for nail use. Always assume that any material could cause a reaction, especially if you are trying something new. Being cautious can help you enjoy your DIY nail art experience without any discomfort.

Tips for Successful Nail Art

Now, to elevate your nail art game, keep these tips in mind:

  • Start with a clean canvas – ensure your nails are dry and free from polish.
  • Use thin layers of polish for better control and quicker drying.
  • Experiment with different household items to create unique designs.
  • Be patient and allow each layer to dry properly.

Recognizing the importance of practice will help you improve your skills over time.

Preparing Your Nails

Any successful nail art starts with proper nail preparation. Clean your nails thoroughly, shape them to your desired length, and push back cuticles for a polished look. It’s vital to apply a base coat to shield your nails from staining and to create a smooth surface for the art.

Finishing Touches and Top Coats

Before showcasing your beautiful designs, finish with a top coat to seal in your artwork. This step adds shine and helps prevent chipping, ensuring your nail art looks fresh for longer.

Another important aspect of finishing touches is the careful application of your top coat. Use smooth, even strokes to avoid disturbing your design. This clear coat not only enhances the shine but also provides a protective layer, allowing your creativity to stand the test of time. Additionally, consider using a quick-dry top coat if you’re in a hurry; it will help speed up the final drying process without sacrificing quality.

Creative Ideas and Inspiration

Your journey into household nail art can be both fun and fulfilling. Explore everyday items—like coffee filters for a tie-dye effect, or scotch tape for geometric patterns—to unleash your imagination. The possibilities are endless; from simple polka dots to intricate designs, let your creativity shine through. Plus, don’t hesitate to mix and match techniques for a truly unique look that reflects your personal style.

Seasonal and Themed Designs

Against the backdrop of each season, you can create stunning themed nail designs using items from home. For instance, in autumn, leaves can inspire warm color palettes, while winter can evoke thoughts of snowflakes and icy blue hues. By incorporating these elements, your nails can embody the spirit of each holiday or celebration, making your artistic expression timely and relevant.

Social Media Trends

Seasonal nail art often finds inspiration from trending designs across platforms like Instagram and TikTok. Creative influencers showcase innovative techniques that can spark your imagination. By keeping an eye on these trends, you can not only stay relevant but also make use of household items to replicate popular styles.

Social media’s influence on nail art trends encourages you to engage with a community of enthusiasts and experiment with viral designs. You can find tutorials on how to create vibrant ombre effects with kitchen sponges or patterned prints with plastic wrap. By participating in these trends, you not only enhance your skills but also connect your creations with a broader audience. Whether you’re trying out the latest nail hacks or sharing your own, social media platforms are a valuable resource for inspiration and ideas.

Final Words

With these considerations in mind, you can effectively create stunning nail art using everyday household items. Explore your creativity by utilizing tools like toothbrushes, sponges, or even plastic wrap to achieve unique designs. Experimenting at home allows you to personalize your nail art without the need for expensive supplies. By using common objects, you not only save money but also embrace a fun, DIY approach to beauty. So gather your household items and transform your nails into a canvas for your artistic expression.

FAQ

Q: Can I really use household items for nail art?

A: Absolutely! Household items can be a fantastic resource for creating unique nail art. Items like toothpicks, sponges, tape, and even kitchen utensils can be utilized to achieve a variety of designs, from dots to stripes and more intricate patterns.

Q: What common household items are best for making nail art?

A: Some of the best household items for nail art include:
– Toothpicks: Perfect for detailed designs or dotting.
– Sponges: Great for creating gradient effects.
– Tape: Helps in making clean lines or geometric designs.
– Old makeup brushes: Useful for painting techniques or adding finesse.
– Paper clips: Can be bent into various shapes for unique nail decorations.

Q: How can I clean up after using household items for nail art?

A: Cleaning up after your DIY nail art is easy. For items like sponges or brushes, simply wash them with soap and water. For sticky tape residue, a bit of nail polish remover applied to a cotton ball can help clean surfaces. Always ensure to work on a covered surface to make cleanup simpler.

Q: Are the designs made with household items durable?

A: The durability of nail art using household items largely depends on the type of nail polish used, as well as the top coat application. Using high-quality nail polish and a strong top coat will help your designs last longer, regardless of whether you used professional tools or everyday items.

Q: Can I create intricate designs with household items?

A: Yes, you can create intricate designs with household items! While it may take a bit more practice and creativity, you can achieve complex patterns using tools like toothpicks for detail work or sponges for textured backgrounds. The key is being patient and experimenting with different techniques to find what works best for your style.

I Tried the Viral Nail Hack – Here’s What Happened

Viral trends come and go, but when you discover a nail hack that promises to revolutionize your manicure game, it’s hard to resist. You may have heard about the buzz surrounding I Tried the Viral TikTok French Manicure Stamp Hack, and you might be wondering if it lives up to the hype. In this post, I’ll share my personal experience with this trending technique and reveal whether it truly delivers flawless results or falls short of expectations.

Key Takeaways:

  • Effectiveness: The viral nail hack demonstrated varying results depending on individual nail types.
  • Technique: Proper technique is imperative for achieving the desired outcome; even small mistakes can lead to less satisfying results.
  • Durability: The longevity of the finished look may not match expectations, with some users experiencing quicker wear than anticipated.

The Viral Nail Hack Explained

To achieve flawless nails without the hassle of traditional methods, the viral nail hack has gained immense popularity on social media. This innovative technique claims to streamline the nail application process while delivering salon-quality results right at home. With a few simple steps and readily available materials, you can elevate your nail game and impress your friends with your new skills.

Origin of the Hack

Explained by nail enthusiasts and beauty influencers, the viral nail hack first surfaced on platforms like TikTok and Instagram. It quickly captured attention, as users shared time-lapse videos showcasing the simplicity and effectiveness of the technique. As more people tried and tested it, the buzz around this hack grew, turning it into a must-try for anyone passionate about nail art.

Materials Required

Hack your way to beautiful nails with a few straightforward materials you likely already have at home. To begin, gather your preferred nail polish, a sponge for blending the colors, and a topcoat to seal the design. You may also want to have a few cotton swabs on hand for corrections and a base coat to ensure your polished look lasts longer. By having these imperatives ready, you can efficiently recreate the viral nail hack and impress everyone with your newfound skills.

Step-by-Step Process

If you’re ready to give the viral nail hack a try, follow this detailed step-by-step guide. It simplifies the procedure and ensures you can achieve salon-worthy results at home.

Process Overview

StepDescription
1Prepare your nails
2Gather your materials
3Apply the base coat
4Apply the viral hack technique
5Finish with a top coat

Preparation of Nails

Nails should be clean, dry, and free from any old polish. Start by removing any existing nail polish and buffing the surface for better adhesion. Trim and shape your nails to your desired length before moving on to the next steps.

Application Technique

Above all, the application technique plays a significant role in the success of the nail hack. Utilize a precise method to ensure an even coverage and avoid messiness during the process.

Process your materials calmly. Ensure that you apply thin, controlled layers of product to avoid bubbles and streaks. This includes ensuring that each layer is fully dry before applying the next. Properly following this technique will lead to impressive, long-lasting results that can be the highlight of your nail game.

A Day in the Life with the Hack

Not every day is created equal, especially when you incorporate a viral nail hack into your routine. From typing on your computer to tapping your phone, you’ll notice the changes immediately. The initial excitement of having fashionable nails can quickly shift into practicality as you navigate daily tasks. By the end of the day, it’s vital to evaluate how well the hack holds up under pressure and whether it enhances or hinders your activity.

Durability and Wear

Wear will ultimately determine the longevity of your nails after trying this hack. You may find that while they look fabulous initially, daily activities such as dishwashing or typing can take a toll. Over the course of the day, you should keep an eye out for chips or any signs of lifting that might suggest the hack isn’t as durable as advertised. By the end of your day, you’ll have a clear understanding of how well this hack stands the test of everyday life.

Comfort and Feel

Along with durability, comfort plays a significant role in your experience with this nail hack. You might be surprised to discover that the new addition feels both natural and light, allowing you to go about your tasks without feeling burdened. However, this may vary depending on how you apply the technique and the materials used. It’s worth noticing whether your nail beds feel irritated or if the weight of the additions is manageable throughout the day.

Indeed, finding a balance between aesthetics and comfort is vital for your overall satisfaction with the nail hack. At times, you may forget you’re even wearing enhancements, feeling like they blend seamlessly with your natural nails. Pay attention to how your nails react as the day progresses; if discomfort starts to creep in, it may indicate that the hack needs some adjustments. Ultimately, your comfort will play a significant role in whether you continue to use this hack in the future.

Visual Results

Despite the mixed reviews online, I was curious to see the tangible results of the viral nail hack. Watching how it transformed my nails was both exciting and nerve-wracking. The before and after images told a compelling story of improvement, showcasing a striking difference that was hard to ignore.

Before and After

At the start, my nails were in dire need of attention, lacking shine and vibrancy. After implementing the nail hack, the transformation was evident, leaving my nails looking healthier and more polished.

Comparison with Traditional Methods

To better assess the effectiveness, here’s a breakdown comparing the nail hack with traditional methods of nail care:

Comparison of Nail Care Methods

Nail HackTraditional Methods
Quick application timeTime-consuming processes
Less product neededMultiple products required
Instant gratificationGradual results over time

But while the nail hack may offer quicker results, it’s important to weigh your options. Traditional methods often provide a more thorough approach to nail health, including conditioning and strengthening treatments that may not be part of a shortcut. Both techniques have their merits, but your choice should reflect your goals for nail care and the importance of long-term health versus immediate appearance.

Common Issues Encountered

After trying the viral nail hack, you may encounter several common issues that can affect your experience. Many users report problems such as uneven application, air bubbles, and peeling. These can lead to a less-than-perfect finish, detracting from the overall appeal of your nails. Understanding these potential pitfalls can help you navigate the process more smoothly and achieve the desired results.

Mistakes to Avoid

Common mistakes when attempting this nail hack include rushing through the application, using too much product, or not preparing your nails properly. To ensure a successful outcome, take your time, follow the techniques demonstrated in the tutorial, and make sure your nails are clean and dry before you begin.

Troubleshooting Tips

Issues that arise when using the nail hack can often be resolved with a few troubleshooting tips. You should consider these approaches to improve your results:

  • Ensure proper prep by cleaning and buffing your nails.
  • Use a thin, even layer of the product to avoid lumps.
  • Allow each layer to dry adequately before applying the next.

Assume that your environment, like humidity and temperature, can also impact your nail results. Thus, it’s wise to work in a controlled space for better adherence and drying.

At times, persistent issues might require you to reassess your approach. To fine-tune your technique, consider these additional troubleshooting tips:

  • Experiment with different brands of nail products for optimal results.
  • Check your application tool’s condition; it should not be worn out.
  • Test out your drying time; extending it can yield better results.

Assume that with patience and experimentation, you’ll refine your technique over time, leading to beautiful nails that turn heads.

Expert Opinions

Once again, the viral nail hack has drawn the attention of industry experts who emphasize the importance of checking the practicality and safety of such tricks before trying them at home. Their insights highlight potential pitfalls and the long-term effects of using unconventional methods on your nails. While you may be tempted to follow trends, professional advice can guide you towards healthier choices that protect your nail integrity.

Nail Technicians’ Insights

Among the most common concerns nail technicians express about viral hacks is the risk of damaging your natural nails. They caution that shortcuts may offer temporary results but can lead to long-term issues. Technicians often suggest considering professional services for complex designs or techniques, ensuring you avoid unnecessary harm.

Dermatologist Tips

On the other hand, dermatologists weigh in with crucial advice to help you maintain healthy nails. They emphasize understanding the differences between nail products and ensuring that your choices don’t compromise your nail health. Common tips include:

  • Choose nail products free from harsh chemicals.
  • Moisturize your nails and cuticles regularly.
  • Limit the use of fake nails and adhesives.
  • Consult a professional if you notice any irritation.

Thou must prioritize your skin’s well-being as well, as unhealthy nails can often indicate underlying skin issues.

Even dermatologists stress the importance of recognizing when a nail hack may lead to adverse effects on your skin or nails. They encourage an informed approach to any beauty trend to prevent complications. Here are additional suggestions to promote nail health:

  • Avoid excessive filing or buffing of your nails.
  • Incorporate a balanced diet to support nail growth.
  • Pay attention to changes in your nails, as they may signal health concerns.
  • Be cautious with the use of acetone-based removers.

Thou shouldn’t ignore any warnings from professionals—your nails deserve the best care.

Final Words

Ultimately, trying the viral nail hack can be an eye-opening experience that offers both benefits and challenges. You may find it enhances your nail art game or leads to unexpected results. By understanding the technique, you can adjust your approach to better fit your needs. Whether you love it or decide to skip it next time, your nails will always reflect your personal style. Stay curious and keep experimenting to discover what works best for you!

FAQ

Q: What is the viral nail hack about?

A: The viral nail hack involves using common household items to achieve a perfect nail design or to improve the longevity of nail polish. It typically showcases techniques like using tape for clean lines or using a specific brand of topcoat to extend wear time.

Q: Did the nail hack actually work?

A: In my experience, the nail hack provided some effective results. The techniques I applied helped improve the look of my nails and allowed for clearer lines. However, the effectiveness can vary based on individual nail types and products used.

Q: Are there any risks associated with trying the nail hack?

A: Most of the techniques seen in viral nail hacks are safe for use. However, it’s always wise to perform a patch test with any new products to avoid allergic reactions. Additionally, using tools improperly can lead to nail damage, so it’s important to follow instructions carefully.

Q: How long did the results last after trying the hack?

A: The results varied, but I found that using the recommended topcoat helped my nail design last longer than usual—approximately a week before seeing significant chipping. Regular maintenance and touch-ups can prolong the manicure even further.

Q: Can I adapt the nail hack to different designs?

A: Absolutely! The beauty of nail hacks is their versatility. You can adapt the techniques to suit any nail design you desire, whether it’s creating ombre effects, nail art, or simply achieving a sleek gel-like finish. Personalizing the hack can lead to unique and creative results!

Skip to content