Inails Near Me Global

Top-Rated Nail Drills for Beginners

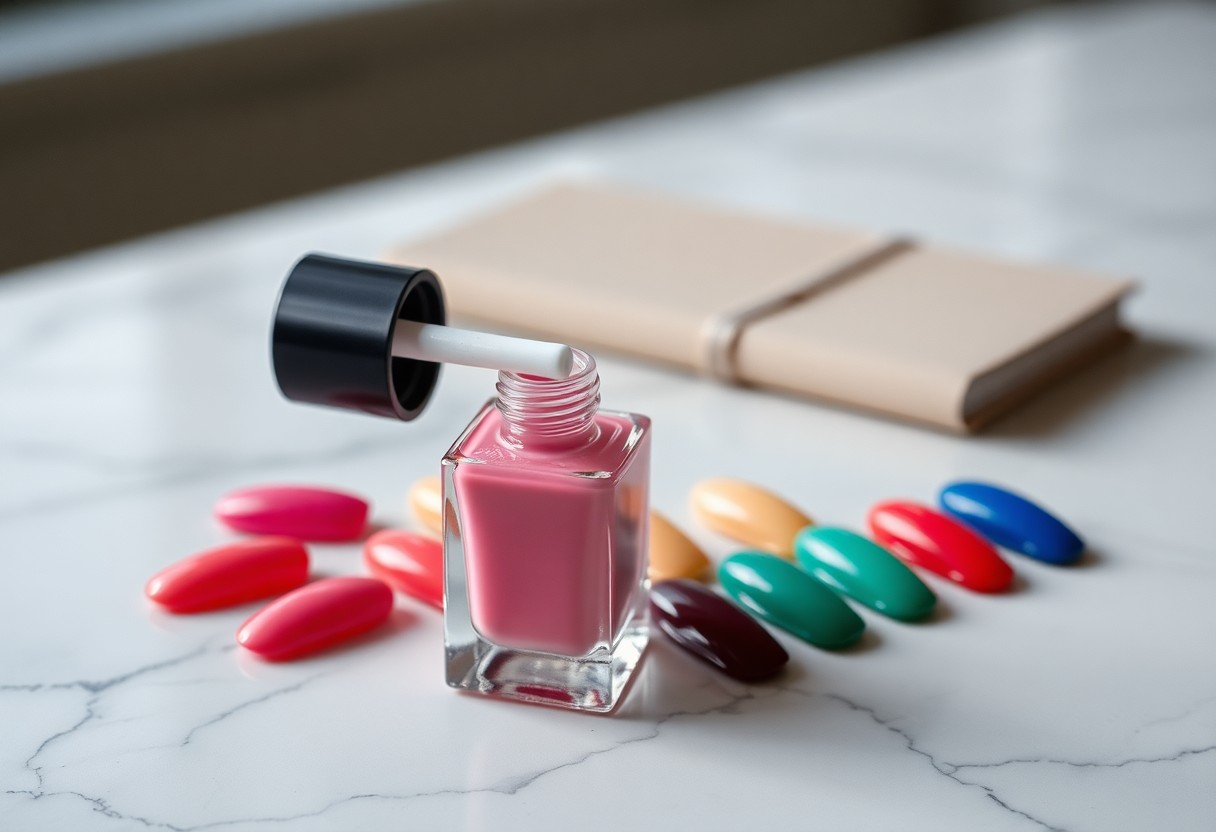
It’s imperative to find the right nail drill as you begin on your nail care journey. With a multitude of options available, understanding the top-rated models can make a significant difference in your experience. This guide will help you explore the most beginner-friendly nail drills, ensuring you have the tools to achieve professional-quality results at home. Whether you’re focusing on acrylics, design work, or natural nail care, these drills will enhance your skills and efficiency in no time.

Key Takeaways:

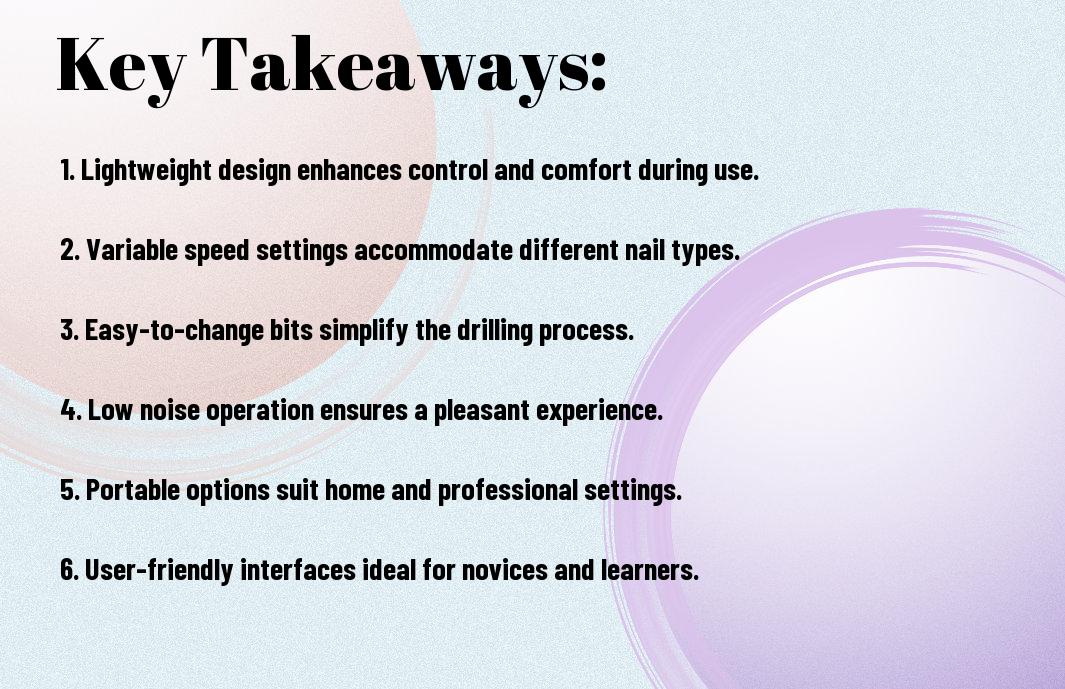
  • Beginner-Friendly Options: Look for nail drills specifically designed for novices, ensuring easy handling and operation.
  • Variable Speed Settings: A drill with adjustable speeds allows greater control, catering to different nail types and techniques.
  • Safety Features: Prioritize models with safety mechanisms, such as overheat protection or low vibration, to enhance comfort and protect nails.

Understanding Nail Drills

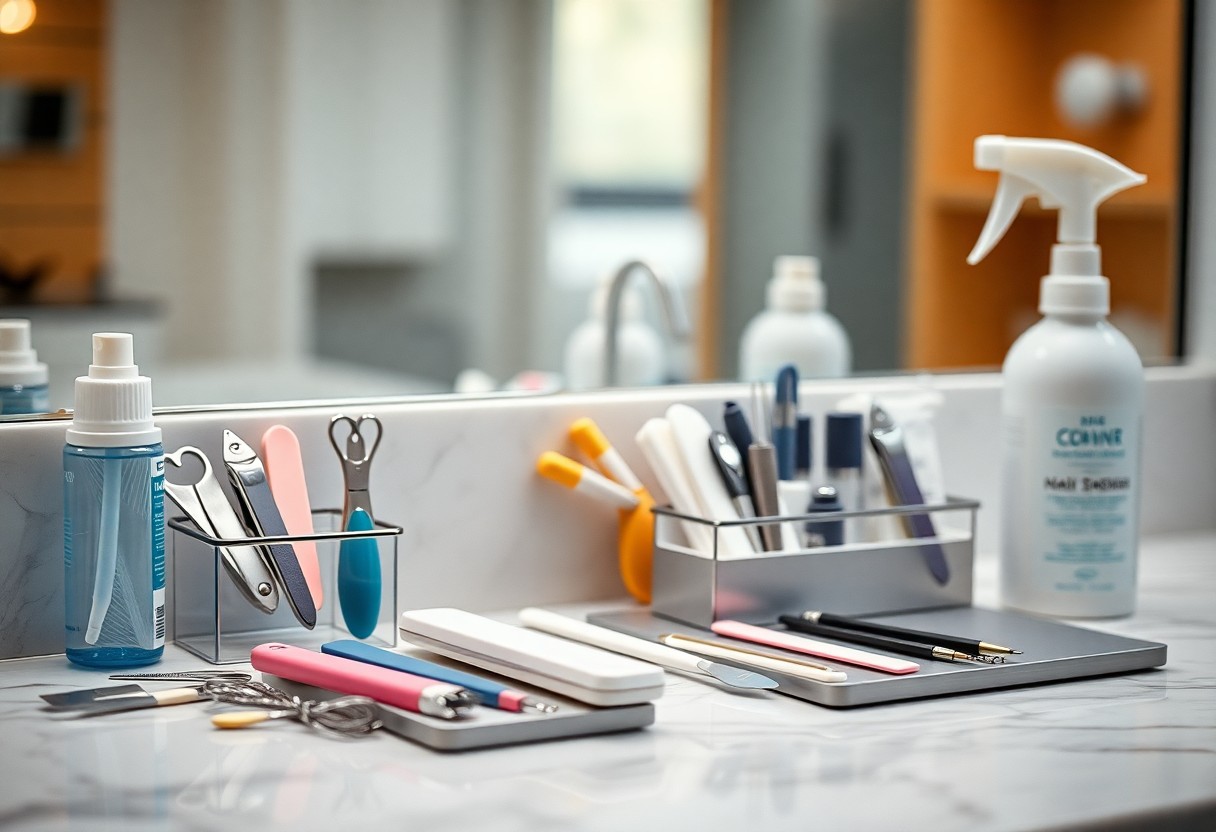
The world of nail drills can be quite vast and overwhelming, especially for beginners. These handy tools are designed to help you achieve salon-quality nail care from the comfort of your home. Understanding nail drills will not only streamline your nail care routine but also boost your confidence in using them effectively.

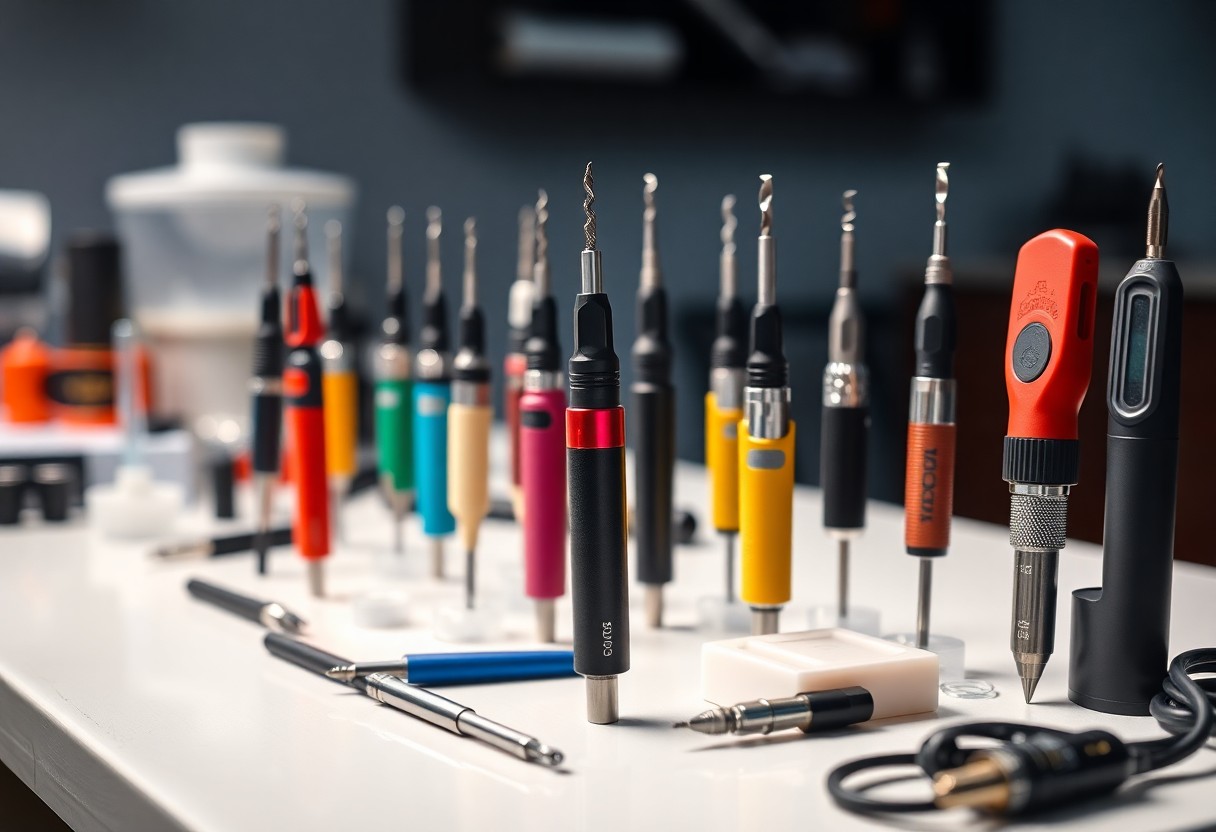
Types of Nail Drills

On your journey to finding the right nail drill, you will encounter various types designed for different uses. Below is a brief overview:

  • Electric Nail Drills
  • Manual Nail Drills
  • Portable Nail Drills
  • Professional Nail Drills
  • Multi-functional Nail Drills

Thou can choose the one that best fits your needs.

Key Features to Consider

Beside the type of nail drill, several key features should factor into your decision-making process:

  • Speed Settings
  • Noise Level
  • Weight and Ergonomics
  • Accessibility of Bit Heads
  • Safety Features

Assume that understanding these features will enhance your overall experience.

Due to the vast array of options, it helps to research deeper into the key features of nail drills. Consider the following:

  • Durability
  • Battery Life (for portable models)
  • Ease of Cleaning
  • Customer Reviews and Ratings
  • Manufacturer Warranty

Assume that prioritizing these aspects ensures you invest in a reliable tool.

Top-Rated Nail Drills for Beginners

You might be overwhelmed by the selection of nail drills available on the market, but knowing which ones are top-rated can make your decision easier. These beginner-friendly nail drills provide an excellent balance of performance, ease of use, and affordability, allowing you to create beautiful manicures and pedicures without the professional price tag. Let’s probe the best models and pricing options to help you find the perfect nail drill for your needs.

Review of Best Models

About the best models, you’ll find options that cater to varying preferences and skill levels. From lightweight designs with user-friendly controls to more advanced features like variable speed settings and multiple attachments, each model ensures a smooth and enjoyable experience while working on your nails. Please consider your specific needs, whether you’re focusing on natural nails or enhancements, to choose the model that suits you best.

Comparison and Pricing

The following table summarizes the top-rated nail drills for beginners, highlighting their key features and prices to help you make an informed decision.

ModelPrice
Model A$59.99
Model B$39.99
Model C$79.99

Also, this comparison allows you to weigh different features against your budget. You may find that some models offer extra features that justify a higher price, while others deliver great value at a lower cost. Consider what aspects are most important for your nail care routine, such as portability or power, as these can significantly influence your final choice.

Safety Tips for Using Nail Drills

Now that you’re ready to use your nail drill, it’s important to prioritize safety. Here are some tips to keep in mind:

  • Always wear eye protection to shield against dust and debris.
  • Adjust the drill speed according to the thickness of the nail.
  • Keep your workspace clean to avoid accidents.
  • Never force the drill; let it do the work to prevent overheating.

Thou shall ensure your safety by following these guidelines.

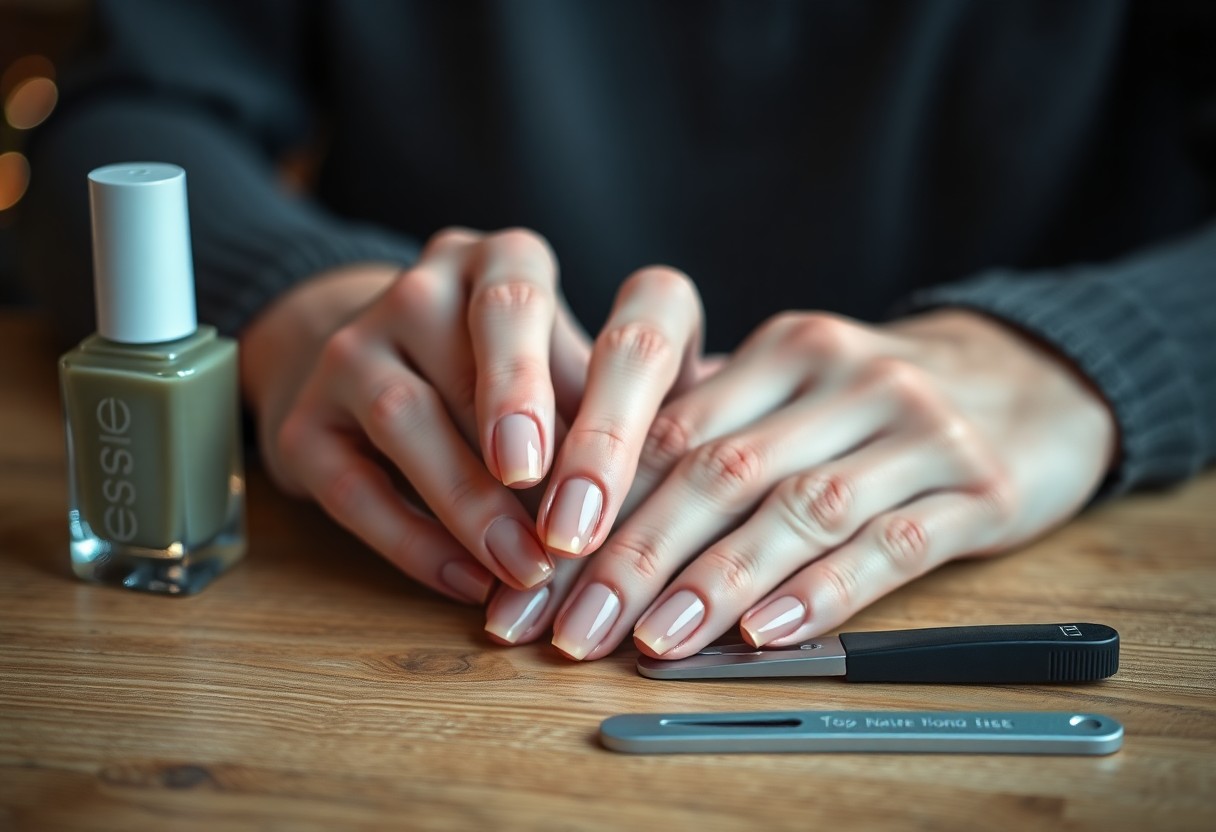
Proper Handling Techniques

Against common belief, using a nail drill is not just about technique; it’s also about how you handle the tool. Always hold the drill firmly while maintaining a steady hand. Position the drill at a slight angle to the nail, avoiding flat contact to ensure even filing. Moreover, be cautious of how long you spend on each section to prevent excessive heat buildup. This way, you’ll enhance your precision and minimize risk.

Maintenance and Care

Behind every great nail drill is a commitment to maintenance and care. Regularly clean your drill bits and inspect them for wear, as this ensures optimal performance and longevity. Always store your nail drill in a safe place, away from moisture and extreme temperatures, which can damage the equipment. Additionally, replace worn-out bits promptly to maintain efficiency and prevent damage to your natural nails.

A key aspect of using a nail drill effectively lies in its maintenance. Regular cleaning removes dust and debris that can accumulate during use, allowing for smoother operation. Ensure you also check the power cord and plug for any signs of wear. Keeping your equipment in good condition will not only extend its lifespan but also enhance its performance, giving you the best results every time you use it.

Common Mistakes to Avoid

Unlike seasoned nail technicians, beginners may find themselves making some common mistakes when using nail drills. It’s beneficial to educate yourself through resources and communities, such as discussing your concerns in the thread titled First Timer Question! What is the best nail drill?. This can help you avoid pitfalls and make your nail drilling experience much smoother.

Overuse of Drill

At times, you may be tempted to rely too heavily on your nail drill, which can lead to damaged nails or excessive thinning. It’s important to find a balanced approach and allow your natural nails to recover.

Ignoring Safety Protocols

About not adhering to safety protocols, you may unintentionally expose yourself to potential harm. Proper technique and tool use can safeguard not just your nails, but your overall health during nail care procedures.

Protocols for nail safety include using a dust mask to avoid inhaling nail dust, ensuring proper eye protection, and maintaining a clean workspace to prevent infections. Additionally, familiarize yourself with the specific instructions for your nail drill and the bits to avoid misuse. Investing time in understanding these guidelines will enhance both your skills and safety.

FAQs About Nail Drills

Your journey in mastering nail drills may leave you with questions. To help you navigate through common concerns, consider checking out this Nail Drill For Beginners resource. Here, you’ll find insights on various aspects, from usage to maintenance, ensuring you make informed decisions as you develop your skills.

How to Choose the Right Drill

After determining your skill level and specific needs, assess features such as speed settings, power source, and ease of use when selecting a nail drill. Beginners typically benefit from more versatile models that offer variable speeds and safety features, making it easier to gain confidence while honing your technique.

Troubleshooting Common Issues

To ensure optimal performance, keep an eye out for common issues such as overheating, uneven filing, or excessive vibration. Addressing these concerns early can improve your overall nail care experience and prolong the life of your drill.

Further, if you encounter overheating, consider taking breaks between tasks, as prolonged use can lead to equipment failure. Uneven filing may be remedied by adjusting your technique or using different drill bits for various tasks. Should you experience excessive vibration, make sure the drill is securely connected or consult the manual for tightening instructions. Troubleshooting can elevate your efficiency and enjoyment of nail care.

Resources for Further Learning

For those looking to deepen their understanding of nail drills and techniques, exploring a variety of educational resources can be very beneficial. This can include online courses, workshops, and reputable websites that focus on nail care and design. Engaging with these resources will help you enhance your skills and stay up-to-date with the latest trends in the industry.

Online Courses and Workshops

Between the multitude of platforms available today, you can find online courses that cater specifically to beginners in nail art and drill usage. These courses often cover the basics of nail drills, safety protocols, and practical applications, allowing you to learn at your own pace while gaining hands-on experience.

Recommended Websites and Blogs

Across the internet, numerous websites and blogs provide valuable insights and tutorials on nail drills and techniques suitable for beginners. These resources often feature step-by-step guides, tips from professionals, and reviews of tools that can enhance your skills while helping you navigate the world of nail care effectively.

Recommended websites and blogs, such as Nailpro and The Nail Hub, offer extensive knowledge and expert recommendations. You can find everything from instructional videos to product reviews and expert interviews. By visiting these sites regularly, you’ll be better equipped to choose the right nail drill and master your technique, ultimately improving your nail care expertise.

To wrap up

As a reminder, investing in a top-rated nail drill as a beginner can significantly enhance your nail care routine, making it easier and more efficient. Selecting the right drill that suits your specific needs will not only improve your skills but also help you achieve professional-quality results at home. Pay attention to features such as adjustable speed settings, ease of use, and durability when making your choice. With the right tool in your hands, you can elevate your nail game and enjoy the process of nail artistry with confidence.

How to Clean and Maintain Your Nail Tools

You deserve the best when it comes to nail care, and that starts with keeping your nail tools in pristine condition. Proper cleaning and maintenance not only ensures your tools work effectively, but also helps prevent infections and prolongs their lifespan. In this guide, you will learn step-by-step procedures for sanitizing, storing, and caring for your nail tools, empowering you to achieve flawless nails with every use.

Key Takeaways:

  • Regular Cleaning: Ensure your nail tools are cleaned after each use to prevent bacteria buildup and ensure hygiene.
  • Disinfection: Use a proper disinfectant solution to sanitize your tools, following the manufacturer’s instructions for effective results.
  • Storage: Store your nail tools in a dry, clean environment to protect them from dust and damage.

Importance of Clean Nail Tools

Your nail tools play a significant role in maintaining the health and beauty of your nails. When these tools are not cleaned properly, they can harbor bacteria and fungi, which can lead to infections or other nail conditions. Keeping your tools clean helps ensure safe and effective nail care, providing not only better results but also enhancing your overall experience. By prioritizing cleanliness, you are investing in both your health and the longevity of your nail instruments.

Preventing Infections

One way to ensure your nail care routine is safe is by preventing infections through proper cleaning and maintenance of your tools. Contaminated instruments can introduce harmful pathogens to your nails and skin, potentially resulting in unpleasant infections. Regular cleaning practices, such as sanitizing tools after each use, play a vital role in minimizing these risks and fostering healthier nail care.

Ensuring Tool Longevity

Against the backdrop of beauty routines, maintaining your nail tools can significantly extend their lifespan and performance. Regular cleaning and proper storage help prevent rust, corrosion, and dullness, ensuring that your tools remain sharp and effective. This thoughtful care allows you to not only save money on replacements but also guarantees that your nails receive the best possible treatment.

Hence, investing time in cleaning and maintaining your nail tools translates to better performance and prolonged life. Keeping your tools in excellent condition avoids wear and tear, thus preventing unnecessary expenses on replacements. Additionally, clean, well-maintained tools ensure smoother application and precision during your nail care routine, giving you professional-quality results at home. By adhering to proper maintenance practices, you are making a wise choice for your nails and your wallet.

Essential Cleaning Supplies

Clearly, having the right cleaning supplies is vital for maintaining the hygiene and longevity of your nail tools. Investing in quality disinfectants, brushes, wipes, and a container for soaking your tools ensures you can effectively eliminate bacteria and debris, prolonging the life of your instruments while promoting safe nail care practices. Make sure to stock up on these imperatives to facilitate a seamless and efficient cleaning routine.

Disinfectants

Among the various cleaning supplies, disinfectants stand out as a key element in ensuring your nail tools are safe for use. Look for hospital-grade disinfectants approved for use on metal tools, as they are effective in killing bacteria and viruses. Regularly disinfecting your tools will help you avoid cross-contamination and promote a healthier nail care environment.

Brushes and Wipes

By incorporating brushes and wipes into your cleaning routine, you create a thorough process for maintaining your nail tools. Brushes are excellent for scrubbing away dirt and residue from hard-to-reach areas, while wipes allow for quick and convenient disinfection of surfaces. Together, they ensure your nail tools remain in pristine condition.

Considering the importance of cleanliness in nail care, integrating brushes and wipes into your maintenance routine simplifies the process. Use dedicated brushes for scrubbing your tools, ensuring you reach all nooks and crannies, and utilize wipes for rapid disinfection of surfaces during your cleaning routine. This approach not only enhances cleanliness but also streamlines the process, making it easier for you to prioritize hygiene without sacrificing time.

Step-by-Step Cleaning Process

Many nail enthusiasts may overlook the importance of properly cleaning their nail tools. Following a systematic cleaning process ensures that your tools remain in top condition and reduce the risk of infections. Below is a simple guide to help you through the cleaning process:

StepsActions
1. Gather SuppliesAssemble your cleaning materials: soap, alcohol, and a soft cloth.
2. Rinse ToolsWash your tools under warm water to remove debris.
3. Clean with SoapUse mild soap and a brush to scrub each tool thoroughly.
4. DisinfectSoak in alcohol or use a disinfectant spray for proper sanitation.
5. DryUse a clean cloth to dry all tools before storage.

Preparatory Steps

Cleaning your nail tools starts with preparation. Assemble all necessary supplies, including a mild soap, disinfectant alcohol, and a soft cleaning brush. Ensure that you have a clean towel or cloth on hand for drying. This step sets the foundation for an effective cleaning process, ensuring that you have everything you need within arm’s reach.

Cleaning Techniques for Different Tools

Between the various tools, it’s important to utilize tailored cleaning techniques to ensure optimal hygiene and maintenance. For example, metal tools can benefit from soaking in disinfectant, while plastic ones may need gentle scrubbing with soap and a brush. Adopting different methods ensures that you preserve the integrity of the materials used in your tools.

Process the cleaning of specific tools with attention to their characteristics. For nail clippers and scissors, soak them in a disinfectant solution for 10 minutes before scrubbing them with a soft brush. Buffing pads can simply be wiped with alcohol to avoid damage. For any other tools, it’s best to follow the respective manufacturer’s recommendations to maintain their longevity and effectiveness.

Daily Maintenance Tips

Keep your nail tools in top shape by following these daily maintenance tips:

  • Wipe down tools with disinfectant after each use.
  • Store them in a clean, dry environment.
  • Avoid sharing your personal nail tools with others.
  • Inspect your tools regularly for signs of damage.

Any attention you give to their upkeep will extend their lifespan.

Storage Solutions

Below are some effective storage solutions for your nail tools. Opt for a dedicated case or organizer that keeps instruments separated and protected from dust and debris. Additionally, label compartments to ensure easy access while maintaining order.

Regular Inspection

For optimal performance, conduct a regular inspection of your nail tools. Check for any signs of wear such as rust, dullness, or cracks, and replace them as needed. This will prevent any potential hazards during use and ensure that your tools function at their best.

At least once a month, take the time to examine all your nail tools closely. Pay special attention to blades, grips, and other moving parts. If you notice any issues, such as loose screws or other malfunctions, address them promptly. Your safety and the quality of your nail care depend on well-maintained tools.

Deep Cleaning Methods

Not cleaning your nail tools thoroughly can lead to the buildup of bacteria and debris, which may compromise the quality of your manicure and your health. To effectively deep clean, incorporate both soaking and sterilization techniques to ensure that your tools remain in optimal condition and safe for use.

Soaking Techniques

For a thorough clean, start by soaking your nail tools in a solution of warm water and mild soap or a specialized nail tool cleaner. Allow them to sit for at least 10-15 minutes to break down grime and sanitize the surface. After soaking, use a soft brush to scrub any remaining dirt before rinsing and drying your tools completely.

Sterilization Options

With sterilization options, you can further ensure your nail tools are completely free from harmful germs and bacteria. Using an autoclave or UV sterilizer can provide effective methods for disinfecting metal tools, making them safe for your next use.

Another option is to use a disinfectant solution, such as isopropyl alcohol (70% or higher), which can be applied after cleaning to eliminate pathogens. Simply soak your tools in the solution for about 10 minutes, ensuring they are fully submerged. Afterward, let them air dry on a clean towel. This extra step can significantly enhance the hygiene of your nail tools and promote a healthier manicure experience.

Common Mistakes to Avoid

Unlike many assume, keeping your nail tools in good condition requires more than just occasional cleaning. It’s easy to overlook some effectively simple practices that can lead to potential issues. By avoiding these common mistakes, you can extend the life of your tools and ensure a safe, enjoyable manicure experience.

Using Harmful Chemicals

Harmful chemicals can damage your nail tools and even pose risks to your health. Avoid using harsh disinfectants or abrasive cleaners that may corrode metal surfaces or degrade other materials. Instead, opt for gentle, non-toxic cleaning solutions that effectively sanitize without causing harm.

Neglecting Regular Maintenance

Regular maintenance is key to prolonging the life of your nail tools. Without routine care, dirt, grime, and bacteria can accumulate, leading to potential infections and tool deterioration. Setting a schedule for cleaning and inspecting your tools ensures they remain in optimal condition.

For instance, consider establishing a weekly routine where you clean your nail tools with a mild soap and warm water, followed by drying them thoroughly. Additionally, sharpening your tools or replacing worn ones can prevent mishaps during use and enhance your overall nail care experience. Investing time in regular maintenance will pay off in the long run, both in performance and hygiene.

Conclusion

Considering all points, maintaining the cleanliness of your nail tools is necessary for both hygiene and longevity. By regularly sanitizing and properly storing your implements, you not only protect your health but also enhance your nail care experience. Incorporate the tips shared, and for a comprehensive guide, check out this resource on How to Clean Your Nail & Beauty Tools. Your nails deserve the best care, so invest a little time in upkeep.

Q: Why is it important to clean nail tools regularly?

A: Cleaning nail tools regularly is important to prevent the spread of bacteria and infections. Tools such as clippers, files, and cuticle pushers can harbor germs and debris that can lead to nail and skin issues if not sanitized properly. Establishing a consistent cleaning routine helps ensure that your nail tools remain safe for use and prolongs their lifespan.

Q: What is the best way to clean my nail tools?

A: To clean your nail tools, start by rinsing them under warm water to remove any visible debris. Next, use a gentle soap or a mild disinfectant solution to scrub each tool with a soft brush or cloth, paying special attention to nooks and crannies. After cleaning, rinse thoroughly to remove any soap residue. Finally, soak the tools in a disinfectant solution, like rubbing alcohol or a specialized tool cleaner, for about 10-15 minutes before rinsing again and allowing them to air dry.

Q: How often should I disinfect my nail tools?

A: It is recommended to disinfect your nail tools after each use, especially if they have come into contact with your nails or skin. For tools that are used on multiple clients or in a professional setting, disinfecting after each client is vital. For personal use, clean tools after each session and conduct a more thorough deep clean every month or so to maintain hygiene.

Q: Can I use household cleaners to maintain my nail tools?

A: While some household cleaners may be effective, it’s best to use products specifically designed for nail tool maintenance. Many household cleaners may contain harsh chemicals that could damage your tools or leave harmful residues. Instead, opt for hospital-grade disinfectants or products specifically formulated for nail equipment to ensure both effectiveness and safety for your tools.

Q: How should I store my nail tools after cleaning?

A: After cleaning and thoroughly drying your nail tools, store them in a clean, dry container to prevent contamination. Avoid placing tools loose in a drawer; instead, use a sterilized case or pouch where they won’t touch each other, which can cause scratches or damage. Keeping your tools in a designated spot also makes it easier to locate them when needed, ensuring they remain in pristine condition for future use.

How to Prevent Your Nails from Chipping

Many people experience the frustration of chipped nails, which can detract from your overall appearance and confidence. You can take simple, effective steps to keep your nails looking their best through proper care and protective measures. This guide will help you understand the best practices for maintaining strong, healthy nails that resist chipping, ensuring you can show off your manicure with pride. With a few adjustments to your routine, you will greatly reduce the chances of your nails chipping and breaking.

Key Takeaways:

  • Moisturize your nails regularly to maintain flexibility and prevent brittleness.
  • Choose quality nail products, including polishes and topcoats, that are designed to resist chipping.
  • Avoid harsh chemicals and excessive exposure to water to protect your nails from damage.

Understanding Nail Structure

A comprehensive understanding of nail structure helps you maintain healthier nails and enjoy a longer-lasting manicure. Your nails are composed of layers of keratin, a type of protein that contributes to their strength. To explore insightful tips on how to stop nail polish from chipping? : r/Nailpolish, research into nail care techniques that can significantly enhance your nail health.

Anatomy of the Nail

Structure is key to understanding how to care for your nails effectively. Each nail consists of several parts: the nail plate, nail bed, cuticle, and matrix, which all work together to maintain nail integrity. The nail plate is the visible part while the nail bed provides support and nourishment. By keeping these elements in mind, you can better protect your nails from damage.

Common Causes of Chipping

Behind nail chipping are various factors that can weaken your manicure. Frequent exposure to water, harsh chemicals, or improper application of nail polish are only a few reasons your nails may chip. Understanding these irritants helps you proactively care for your nails.

Common habits and environmental triggers contribute significantly to nail chipping. Activities like washing dishes without gloves, using your nails as tools, or applying polish on dry, brittle nails can all exacerbate the problem. Additionally, skipping base and top coats can leave your polish unprotected, making it more susceptible to chipping. By identifying and altering these behaviors, you can enhance the durability of your manicures.

Nail Care Routine

Assuming you are looking to keep your nails healthy and chip-free, establishing a consistent nail care routine is crucial. This routine should involve not just polishing but also nourishing your nails to enhance their overall strength. Incorporate moisturizing, gentle filing, and regular trims into your regimen to prevent splits and breaks, giving you a better chance of maintaining flawless nails.

Daily Maintenance Tips

Above all, keeping up with daily maintenance is key to prolonging the life of your manicure. Consider the following tips:

  • Apply a protective base coat before polish.
  • Use a top coat every few days for added durability.
  • Moisturize your cuticles regularly.
  • Avoid using your nails as tools.

This will help keep your nails looking pristine.

Professional Treatments

Maintenance of your nails might also benefit from professional treatments, which can provide deeper care than at-home routines. Regular visits to a nail technician can ensure your nails receive necessary hydration, keratin treatments, and expert shaping. This proactive approach not only enhances the appearance of your nails but can also fortify them against damage.

Plus, seeking professional help means you can get personalized advice tailored to your nail type and lifestyle. Nail technicians can identify specific problems, such as splitting or brittleness, and offer solutions like paraffin baths or specialized products. Investing in these treatments can significantly extend the longevity of your manicure and promote healthier nail growth.

Choosing the Right Products

Your choice of products plays a significant role in preventing your nails from chipping. Look for high-quality nail polishes, strengthening treatments, and moisturizers specifically designed for nails. Ingredients matter, so opt for formulas that nourish and protect while providing a durable finish. With the right products, you can maintain vibrant nails that withstand daily wear and tear.

Nail Polishes and Top Coats

Among the factors influencing nail durability, the selection of nail polishes and top coats is vital. Opt for long-lasting, chip-resistant formulas, and don’t skip applying a top coat, as it serves as a protective shield, enhancing the polish’s longevity while giving your nails a glossy finish.

Moisturizers and Strengtheners

Nail health also depends on adequate moisture and strength. Regularly applying moisturizers and strengtheners can help maintain nail integrity and flexibility, reducing the chances of chipping.

Right moisturizers and strengtheners should contain nourishing ingredients like vitamins, oils, and proteins to support healthy nail growth. Look for options that specifically target brittleness and provide hydration. Incorporating these products into your routine can significantly improve your nails’ resilience, allowing you to enjoy beautifully manicured nails without the worry of chipping.

Lifestyle Changes for Stronger Nails

Unlike many think, the key to preventing nail chipping often lies in lifestyle adjustments. Proper care and maintenance can go a long way in preserving your nail health. Consider incorporating easy ways to stop your nail polish chipping by reassessing your daily routines and habits.

Nutrition and Supplements

Supplements like biotin, vitamin E, and zinc can greatly improve your nail strength. A formulated blend of these nutrients helps promote healthy nail growth, reducing the chances of breakage. Be sure to maintain a balanced diet full of fruits, vegetables, and lean proteins to give your nails the support they need.

Avoiding Harmful Habits

Across various daily activities, your habits can directly impact the strength of your nails. Engaging in practices that put undue stress on your nails, such as using them as tools or biting them, can lead to significant chipping. You should aim to keep your nails well-trimmed and avoid harsh products that can strip your nails of moisture.

Also, regular hand washing without the use of moisturizers can dry out your nails, making them prone to chipping. Make it a point to apply a good hand cream after washing your hands to keep both your skin and nails properly hydrated. Small changes in how you care for and treat your nails can yield significant improvements over time.

Protective Measures

Now that you know the importance of nail care, implementing protective measures can significantly reduce the chances of your nails chipping. Simple habits such as wearing gloves while performing household chores or avoiding excessive water exposure will safeguard your nails, ensuring they remain strong and beautiful.

Wearing Gloves

To protect your nails from harsh chemicals and the wear and tear of daily tasks, it’s imperative to wear gloves whenever you clean, wash dishes, or handle any abrasive materials.

Avoiding Excess Water Exposure

Excessive exposure to water can weaken your nails over time, making them more prone to chipping and breaking. Limit prolonged contact with water to maintain their integrity.

Water can cause your nails to swell and soften, compromising their strength. This can lead to splits or chips, particularly if you engage in activities like washing dishes or taking long baths frequently. To minimize this risk, consider wearing gloves during water-intensive tasks and aim to moisturize your hands and nails regularly, restoring hydration without overexposure to water.

Special Considerations

Once again, it’s imperative to consider individual differences in nail health. Factors such as age, diet, and lifestyle can significantly affect how prone your nails are to chipping. Assessing your unique situation can help you implement the most effective strategies to keep your nails strong and healthy.

Nails During Seasonal Changes

Beside temperature fluctuations and humidity levels affecting your nails, seasonal changes can alter their moisture content, making them vulnerable to chipping. By adjusting your nail care routine with the seasons—like increasing hydration in winter and protecting against sun damage in summer—you can help maintain their strength all year round.

Addressing Underlying Health Issues

After identifying surface-level factors affecting your nails, it’s important to evaluate any underlying health issues that may contribute to nail chipping. Conditions such as thyroid disorders or nutrient deficiencies can weaken your nails significantly, leading to increased chipping and breakage.

Health plays a major role in the condition of your nails. If you suspect that you may have an underlying health issue affecting your nail integrity, consulting with a healthcare professional can provide insights and solutions. Nutritional imbalances, such as inadequate biotin or protein intake, may require dietary adjustments or supplements to enhance nail strength. By addressing these health concerns, you can improve not only the appearance of your nails but also their overall resilience against chipping.

Final Words

With these considerations, you can effectively prevent your nails from chipping. Prioritize hydration by using cuticle oils and moisturizers, and adopt a proper nail care routine that includes regular trimming and filing. Wearing gloves during household chores will protect your nails from harsh chemicals and damage. Opt for high-quality nail products and consider a strengthening top coat for added durability. By being mindful of your habits and using the right techniques, you can enjoy strong, healthy nails that are less prone to chipping.

FAQ

Q: What are the best practices for applying nail polish to avoid chipping?

A: To prevent chipping, start with clean, dry nails and apply a base coat before your nail polish. Use thin layers of polish, allowing each coat to dry completely before applying the next. Finish with a top coat for added protection, and consider reapplying the top coat every few days to maintain a strong barrier.

Q: How can my daily habits impact the integrity of my nails?

A: Daily habits play a significant role in the health of your nails. Avoid using your nails as tools for opening items or scraping surfaces, as this can lead to chips and breakage. Wear gloves while doing dishes or using cleaning products to protect your nails from harsh chemicals and moisture loss, which can weaken them over time.

Q: Are there any specific nail care products that can help prevent chipping?

A: Yes, investing in high-quality nail care products can make a difference. Look for nail strengtheners, moisturizers, and cuticle oils that are specifically designed to nourish and protect your nails. These products can help maintain flexibility and strength, reducing the likelihood of chipping.

Q: Can my diet affect the condition of my nails?

A: Absolutely. A balanced diet rich in vitamins and minerals is imperative for healthy nails. Nutrients like biotin, protein, zinc, and omega-3 fatty acids contribute to nail strength. Incorporate foods like eggs, nuts, fish, and leafy greens into your diet to support nail health and minimize chipping.

Q: How often should I give my nails a break from polish?

A: Allowing your nails to go polish-free periodically is beneficial. Aim for at least a week or two every month without polish to let your nails breathe and recover. During this time, focus on moisturizing and treating your nails with strengthening products to maintain their health and prevent any potential damage.

The Importance of Using a Base Coat

Most people underestimate the power of a base coat in their nail care routine. By applying a base coat, you not only create a smooth foundation for your nail polish but also protect your nails from potential staining and damage. This simple step enhances the longevity of your manicure while improving the overall appearance of your nails. Understanding the science behind base coats can elevate your nail game, ensuring a polished and professional look every time. In this post, we’ll explore why incorporating a base coat is crucial for maintaining the health and beauty of your nails.

Key Takeaways:

  • Protection: A base coat serves as a barrier between your nails and polish, preventing potential staining and damage.
  • Longevity: Applying a base coat helps to improve the durability and wear of your nail polish, extending the life of your manicure.
  • Smooth Finish: It creates an even surface, allowing for better application and a more polished appearance of the color coat.

What is a Base Coat?

Before applying your favorite polish, it’s vital to use a base coat. A base coat is a special nail product applied before color polish to create an optimal surface for better adhesion and enhance the longevity of your manicure. It acts as a barrier between your nails and the polish, preventing staining and ensuring a smoother application.

Definition and Purpose

What you need to know about a base coat is that it serves two primary functions: protecting your natural nails and improving the durability of your nail polish. By creating an even foundation, it allows the color to adhere better, while also safeguarding your nails from potential discoloration.

Types of Base Coats

What you should consider are the various types of base coats available, each designed for specific needs. Some offer strengthening properties, while others might cater to particular issues like peeling or brittleness. The right choice can enhance your overall manicure experience.

  • Strengthening base coats
  • Peel-off base coats
  • Hydrating base coats
  • Vitamin-infused base coats
  • Color-correcting base coats

Knowing the different types of base coats can help you choose the right one based on your nail condition and desired outcome. Here’s a quick breakdown:

TypePurpose
StrengtheningHelps to fortify weak nails.
Peel-offAllows for easy removal without remover.
HydratingNourishes dry, brittle nails.
Vitamin-infusedProvides vital nutrients to nails.
Color-correctingNeutralizes discoloration for a better base.

Consequently, understanding the different types of base coats can significantly enhance your nail care routine. Selecting the appropriate base coat offers unique benefits depending on your nail needs.

  • Consider your specific nail condition.
  • Assess the desired finish you aim to achieve.
  • Be aware of any sensitivities or allergies.
  • Choose products that complement your color polish.
  • Evaluate cost versus quality for your budget.

Knowing which type of base coat to use can make a lasting impact on your nails’ strength and appearance. Here’s a useful comparison:

TypeBenefit
StrengtheningPrevents breakage and splits.
Peel-offMinimizes removal mess and damage.
HydratingRestores moisture to brittle nails.
Vitamin-infusedPromotes overall nail health.
Color-correctingEnsures an even base for vibrant color.

Benefits of Using a Base Coat

You may not realize it, but using a base coat can significantly enhance your overall manicure experience. It acts as a barrier between your nails and the polish, protecting your nails from staining, while also improving the adherence of the color lacquer. This simple addition to your nail care routine not only promotes healthier-looking nails but also prolongs the life of your manicure, ensuring a flawless finish for days on end.

Enhancing Nail Health

The use of a base coat can significantly improve the health of your nails. It creates a protective layer that prevents nail damage and discoloration caused by pigmented polishes. Many base coats are formulated with nourishing ingredients that strengthen your nails and prevent peeling or breaking. This added protection keeps your nails looking fresh and maintains their natural beauty over time.

Improving Color Longevity

With a base coat, you can enjoy vibrant nail color that lasts much longer. This product creates an optimal foundation for nail polish, ensuring better adhesion and minimizing chips and cracks. By applying a base coat, you help your manicure withstand daily wear and tear, leading to a longer-lasting finish that looks salon-fresh for days.

Longevity is a key benefit of using a base coat. It not only adheres the color polish to your nail surface more effectively but also reduces the likelihood of wear and fading that can occur with everyday activities. A well-applied base coat sets the stage for your polish, leading to fewer touch-ups and a more durable finish, so you can confidently flaunt your nails without worrying about chipping or losing vibrancy.

How to Properly Apply a Base Coat

Keep your nails healthy and vibrant by following the right steps for applying a base coat. Start by ensuring your nails are clean and free of any old polish or oils. For a detailed understanding of base and top coats, check out the Difference Between Base Coat and Top Coat Nail Polish – ORLY.

Preparation Steps

Any successful manicure begins with good preparation. First, remove any residual polish with a gentle remover and wash your hands. Next, shape your nails with a file and push back your cuticles. Finally, apply a nail primer if necessary to enhance adherence.

Application Techniques

On applying your base coat, you’ll want to use a few key techniques. Begin by applying a thin layer of the base coat across your nail, starting in the center and moving towards the sides. Allow it to dry fully before applying your favorite color polish.

Properly applying your base coat can make all the difference in your manicure’s longevity. Use smooth strokes to cover the entire nail surface while avoiding the cuticles and skin. Two to three brush strokes per nail often ensures an even application. Allow your base coat to dry completely to create a robust foundation for your nail color, aiding in better adhesion and preventing chipping.

Common Mistakes to Avoid

Many people underestimate the significance of a base coat in their nail routine, leading to common errors that can affect the longevity and appearance of their manicure. Avoiding these mistakes will ensure your nails remain healthy and beautifully polished.

Skipping the Base Coat

One of the most common mistakes you can make is skipping the base coat entirely. This may seem like a time-saving shortcut, but it can result in uneven color application and increased staining of your nails.

Improper Application

Behind many a disappointing manicure lies the improper application of the base coat. Applying it too thickly or too thinly can hinder the polish’s adherence and overall finish.

And, to achieve a flawless finish, it’s vital to apply the base coat evenly. Take your time to ensure a smooth layer covering the entire nail, and avoid flooding the cuticles. A correctly applied base coat will create a better surface for your nail polish, allowing for even color distribution and enhanced durability while preventing peeling and chipping.

Choosing the Right Base Coat

Despite the variety of base coats available, selecting the one that aligns with your nail needs is crucial. Consider factors such as your nail type, the polish you plan to use, and any specific concerns like hydration or strengthening. Your choice can affect the longevity and appearance of your manicure, making it worthwhile to explore your options carefully.

Factors to Consider

Below are some important elements you should think about when choosing a base coat:

  • Your nail type (oily, dry, or brittle)
  • Desired finish (matte, glossy, or satin)
  • Specific nail concerns (peeling, breakage, or discoloration)
  • Compatibility with your favorite nail polish

After weighing these factors, you’ll be better positioned to select a base coat that meets your specific needs.

Recommended Products

Against a backdrop of countless base coat brands, knowing which ones are favored can save you time and effort in your search. For instance, many nail enthusiasts recommend using brands like OPI, Essie, or CND for their effective formulas that cater to various nail concerns—hydration, strengthening, or smoothing. These brands also offer diverse options, so you can find the ideal base coat suited to your personal preferences.

For instance, OPI’s Nail Envy is renowned for its strengthening properties, ideal for brittle nails, while Essie’s First Base is appreciated for its sticky formula that improves polish adhesion. If you’re seeking a nourishing option, CND’s Stickey Base Coat is a great choice for oily nails, creating a solid foundation for your manicure. Exploring these products can greatly enhance the effectiveness of your overall nail care routine.

FAQs About Base Coats

Now that you understand the importance of using a base coat, you may have some questions. One of the most common queries is about the role of base coats and how they can impact the longevity and appearance of your manicures. Let’s address some frequently asked questions so you can make the best choice for your nail care routine.

Do I need a base coat for every manicure?

Every time you apply nail polish, a base coat is recommended. It not only creates a smooth surface for your polish but also helps to protect your nails from staining and damage. Skipping this step can result in uneven application and less vibrant color.

Can I use a base coat alone?

Between applying colored polish and opting for a bare look, you might wonder if a base coat is sufficient on its own. The answer is yes, you can absolutely use a base coat alone if you prefer a natural look while still protecting your nails.

Base coats are designed to adhere to the nail and provide rigidity, which can lead to a polished appearance. If you choose to wear a base coat by itself, look for one that offers a glossy finish to enhance your nails’ natural beauty while ensuring they remain healthy and protected. This option is ideal for those who want a minimalistic approach without sacrificing nail care.

Summing Up

Conclusively, using a base coat is crucial for achieving the best results in your nail care routine. It provides a protective barrier between your nails and polish, helping to prevent staining and chipping. Additionally, a base coat enhances the longevity of your manicure, allowing you to enjoy vibrant, beautiful nails for longer periods. By incorporating a base coat into your regimen, you ensure that your nails remain healthy and your polish looks flawless, ultimately elevating your overall manicure experience.

Why You Should Never Skip the Top Coat

Nails can transform your look, but to achieve a polished, long-lasting manicure, you should never skip the top coat. This necessary step not only enhances your nail polish’s shine and vibrancy but also provides a protective barrier against chips, cracks, and fading. By incorporating a top coat into your nail care routine, you’re ensuring that your hard work lasts longer, keeping your manicure looking fresh and flawless. Investing a few extra minutes for this step can save you time and frustration, allowing you to enjoy beautiful nails for days to come.

Key Takeaways:

  • Protection: A top coat acts as a protective barrier, shielding your nail polish from chips, scratches, and dents.
  • Shine: Using a top coat enhances the shine and overall finish of your manicure, giving it a polished, high-gloss look.
  • Longevity: Applying a top coat can significantly extend the life of your nail polish, allowing you to enjoy your manicure for a longer time without touch-ups.

The Importance of Top Coat

For anyone who loves nail care, applying a top coat is an imperative step that should never be overlooked. It not only seals your manicure but also extends its longevity, ensuring a flawless finish that lasts longer. Without a top coat, you risk dulling the vibrant colors and diminishing the overall appearance of your nails. Make this step a non-negotiable part of your nail routine to achieve that salon-quality outcome at home.

Protection Against Chipping

Above all, a top coat provides a barrier that significantly reduces the risk of chipping. When you apply your polish, it’s vulnerable to nicks and dents from daily activities. The top coat acts like a shield, keeping your nails intact and looking fresh longer. By investing in this extra layer, you’re safeguarding your hard work and maintaining the pristine look of your manicure.

Enhanced Shine and Finish

The application of a top coat elevates your manicure with a brilliant shine that catches the light beautifully. This glossy finish not only makes your nails look healthier but also enhances the color payoff of your nail polish. At times, without a top coat, colors can appear flat or uneven, diminishing your effort. By opting for a high-quality top coat, you allow your nails to shine to their fullest potential, transforming a simple polish into a stunning statement while also providing extra protection from wear and tear.

The Benefits of Using a Top Coat

The benefits of using a top coat in your nail care routine are numerous. Not only does it enhance your nail’s shine, but it also serves as a protective shield, keeping your color vibrant and fresh for longer. A quality top coat creates a seal that helps mitigate chips, scratches, and other damage, ensuring your manicure looks its best. Incorporating a top coat is a simple yet effective step that elevates your nail game significantly.

Longevity of Nail Color

Against the commonly held belief that nail polish alone is sufficient, applying a top coat dramatically enhances the longevity of your nail color. Without it, your manicures are likely to succumb to chips and fading within days. A top coat acts like armor, extending the life of your polish so you can enjoy that flawless finish for much longer.

Prevention of Staining

Above all, a top coat plays a vital role in preventing staining of your natural nails. Dark or pigmented polishes can leave unsightly marks on your nail bed, making your nails look dull and unhealthy.

At times, you may notice that your favorite vibrant nail colors leave visible stains on your nails even after removal. This is where a good top coat comes into play. By applying it underneath your colored polish, you create a barrier that prevents the pigments from penetrating your nails. As a result, your natural nails remain clean and free from discoloration, allowing you to switch up your nail looks without the worry of long-term damage.

Different Types of Top Coats

Now that you understand the importance of a top coat, let’s explore the different types available to enhance your manicure:

Standard Top CoatProvides a glossy finish and durability.
Fast-Drying Top CoatDries your polish quickly to save time.
Matte Top CoatGives your nails a non-shiny, sophisticated look.
UV Top CoatCures under UV light for long-lasting effects.
Peel-Off Top CoatMakes removing your polish effortless.

After learning about these options, you might be tempted to join the conversation about skipping top coats. Check out this discussion on Reddit about skipping top coats for more insights.

Fast-Drying Options

On a busy schedule? Fast-drying top coats are your best friend. They minimize waiting time, allowing you to get back to your daily activities sooner without sacrificing your nail polish’s longevity. These formulations typically contain special ingredients that speed up the drying process, so you can enjoy beautiful nails without the usual hassle.

Matte vs. Glossy Finishes

One of the exciting decisions you’ll face is choosing between matte and glossy top coats. Both finishes can dramatically change the look of your nails and can be selected based on your personal style and occasion.

Coats serve as your finishing touch, whether you prefer a sleek, shiny surface or a more subdued, matte appearance. Glossy finishes will reflect light, giving your nails a vibrant look, while matte finishes offer a modern and edgy vibe. Consider trying both to see which one resonates with your personal aesthetic or suits different occasions.

Application Tips for the Perfect Top Coat

Unlike applying nail polish, applying a top coat requires precision for a flawless finish. Follow these tips to master the technique:

  • Ensure your base color is completely dry before application.
  • Use long, even strokes to apply the top coat.
  • Cap the edges of your nails to prevent chipping.
  • Apply a thin layer initially, allowing it to self-level.

Perceiving the difference a top coat makes is immediate, enhancing your manicure’s longevity and shine.

How to Apply Evenly

To achieve an even application, always start from the center of your nail and move outward. This technique ensures that the product spreads evenly without pooling at the edges, which can lead to an uneven finish. Make sure to use a clean brush and avoid overloading it with top coat to maintain controlled application.

Timing Between Coats

For optimal results, timing between layers is important. Allow your base color to fully dry before applying the top coat. If you’re layering multiple coats of top coat, waiting a minute or two between coats can prevent smudges and ensure that each layer adheres properly, promoting a beautiful, long-lasting shine.

Understanding the timing is key to a perfect finish. If you apply your top coat too soon, it can disrupt the underlying polish, leading to streaks and an uneven texture. By allowing adequate drying time, you ensure that each layer bonds effectively, giving you a smooth and flawless finish that enhances the durability of your manicure.

Common Myths About Top Coats

All too often, misconceptions about top coats can lead you to underestimate their importance. Some believe that a top coat is simply an unnecessary add-on, but in reality, it plays a vital role in enhancing the longevity, shine, and protection of your manicure. By debunking these myths, you can ensure your nails look their best while being safeguarded against chipping and wear.

Skipping Top Coat Saves Time

Saves you precious minutes, but the illusion of efficiency might cost you more in the long run. Skipping the top coat often leads to chips and dullness that require much more time to fix than applying that extra layer. Investing those extra moments can save you hassle later, allowing you to enjoy a polished look for longer.

Top Coat is Only for Nail Polish

After all, you might believe top coats are exclusively for your nail polish, but this isn’t the case. Top coats can be beneficial for various nail treatments, including gel and acrylics. By applying a top coat over these enhancements, you enhance their durability while improving the overall appearance of your nails.

In fact, using a top coat on gel and acrylic nails not only provides a protective layer but also adds a glossy finish that elevates the look of your nails. Moreover, it helps prevent discoloration and fading, ensuring that your investment in nail enhancements lasts longer. So whether using traditional polish or getting stylish tips with gel or acrylics, a top coat is imperative for maintenance and appeal.

Frequently Asked Questions

Keep your nails looking fabulous by understanding the importance of a top coat. If you’re wondering, Why Do I Need To Use A Top Coat?, it’s crucial for extending your manicure’s lifespan while adding shine and protection.

Can You Use Top Coat Alone?

An effective top coat can indeed be used on its own, giving your nails a glossy finish without color. This approach can enhance the natural color of your nails while still providing some protection against chips and scratches.

How Often Should You Reapply?

Any time you notice your nails losing their shine or if they begin to chip, it’s a good idea to apply your top coat again. Regular reapplication can significantly extend the life of your manicure.

With daily activities and exposure to elements, your manicure may start to wear down faster than you’d like. You should aim to reapply your top coat every few days to keep it looking fresh and glossy. Regular maintenance helps to seal in your color and keep your nails healthy and vibrant.

Conclusion

On the whole, you should never skip the top coat in your nail care routine, as it serves as a protective barrier, enhances the longevity of your manicure, and elevates the overall appearance of your nails. By always applying a top coat, you ensure that your polish remains vibrant and chip-free for longer, saving you both time and effort in touch-ups. Prioritizing this final layer not only extends the life of your nail art but also gives your nails that polished, professional finish you desire.

FAQ

Q: What is the purpose of a top coat in nail care?

A: A top coat serves several vital functions in nail care. Primarily, it adds a protective layer over your nail polish, helping to shield it from chips, scratches, and fading. This additional layer enhances the longevity of the polish, ensuring your manicure looks fresh for a longer period. Additionally, top coats can also add shine or a matte finish, depending on the type you choose, giving your nails a polished and professional appearance.

Q: How does skipping the top coat affect the longevity of my manicure?

A: Skipping the top coat significantly shortens the lifespan of your manicure. Without this protective layer, your nail polish is more susceptible to wear and tear from everyday activities. Chips and scratches are more likely to occur, and the color may fade faster due to exposure to elements like water, sunlight, and harsh chemicals. Ultimately, a manicure without a top coat can start to look dull and worn much sooner than one that includes this vital step.

Q: Can I use a top coat with any type of nail polish?

A: Yes, most top coats are designed to be compatible with a wide variety of nail polishes, including regular, gel, and even specialty formulas. However, it’s always a good idea to check the labels or manufacturers’ recommendations to ensure compatibility. Using the right top coat can help achieve the desired finish and longevity, whether you choose a glossy, matte, or quick-dry option.

Q: Are there different types of top coats, and how do I choose the right one?

A: There are several types of top coats available, each serving different purposes. Some are formulated for quick drying, while others may provide extra shine or a matte finish. There are also specialized top coats designed to enhance nail art or provide extra protection for gel manicures. When choosing a top coat, consider your desired finish, your nail type, and any specific needs you might have, such as a quick-drying option if you’re often in a hurry.

Q: Does using a top coat require special application techniques?

A: While applying a top coat is generally straightforward, there are a few techniques that can enhance its effectiveness. To get the best results, start with a clean, dry nail surface. Apply the top coat slowly and evenly, starting from the base of the nail and moving to the tip, sealing the edges to prevent chipping. Allow it to dry fully for maximum durability. For added shine, consider applying a second coat of topcoat after the first one has dried.

Skip to content