Inails Near Me Global

Subtle Nail Art for Professional Settings

Just because you work in a professional environment doesn’t mean you have to sacrifice style. Subtle nail art can enhance your overall look while maintaining a polished appearance. From muted colors to delicate designs, you can express your personality without compromising professionalism. This blog post will guide you through the best choices for understated yet elegant nail art that complements your work attire, helping you feel confident and put-together. Discover how to incorporate tasteful nail art that aligns seamlessly with your professional image.
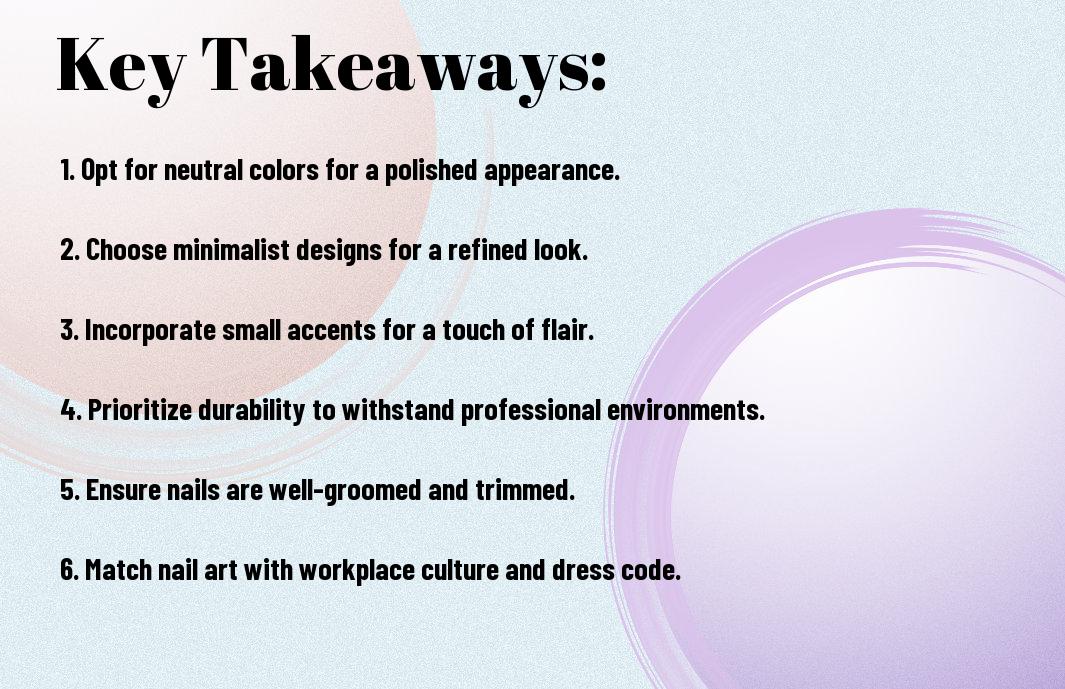
Key Takeaways:

  • Minimalist Designs: Opt for simple, understated patterns that enhance your appearance without being distracting.
  • Neutral Colors: Choose muted shades or classic colors like nude, pale pink, or soft gray for a polished and professional look.
  • Quality Over Quantity: Focus on well-groomed nails, ensuring they are clean and neatly shaped to convey professionalism.

Understanding Professional Nail Art

For those in professional settings, nail art can be a form of self-expression while still maintaining a polished appearance. Subtle designs, like soft colors or minimalistic patterns, can enhance your style without appearing unprofessional. For more inspiration, check out 15 Professional Nail Ideas That Are Still … – Byrdie.

The Importance of Subtle Designs

To stand out in a professional environment, subtle nail designs strike the right balance between elegance and individuality. They allow you to showcase your personality while adhering to workplace standards, ensuring your appearance aligns with the expectations of your role.

Choosing the Right Colors and Patterns

With the right colors and patterns, you can create a professional yet stylish look. Opt for hues that complement your wardrobe, like neutral shades or soft pastels, while patterns should remain understated to maintain a sophisticated appearance.

Patterns can be simple, such as a delicate accent nail, fine lines, or tiny geometric shapes. Avoid anything too flashy or intricate, as these can draw undue attention and detract from your professional image. Instead, focus on designs that are tasteful and enhance your overall look without overwhelming it.

Techniques for Subtle Nail Art

While achieving a sophisticated look, there are various techniques to incorporate subtle nail art within professional settings. You can explore soft color palettes, delicate designs, and minimalist approaches that maintain a polished appearance without being overbearing. Combining these elements allows you to express your style while still keeping your nails workplace-appropriate.

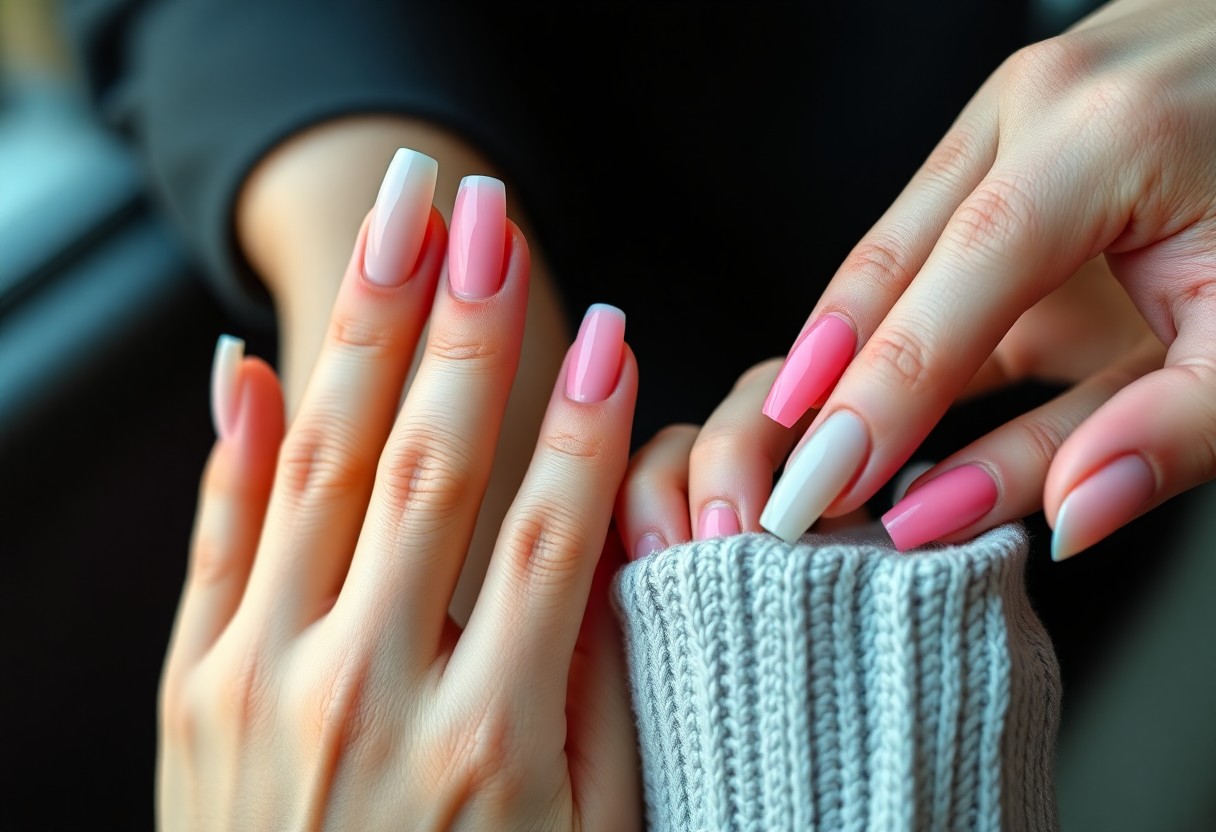
Minimalist Nail Designs

Along with the right colors, minimalist nail designs can make a powerful statement. These designs often utilize negative space, soft shades, or simple geometric patterns that keep your look elegant and refined. A few popular options include:

  • Creamy neutrals with a single accent
  • Thin stripes or dots in muted tones
  • Subtle metallic finishes on bare nails

Thou will find that less truly is more.

Classic French Tips with a Twist

Minimalist nail designs can also be paired with classic French tips but with a modern flair. You might opt for alternative colors, like pastels instead of white, or experiment with asymmetrical lines for a fresh take. Consider these elements:

  • Colored tips in muted or pastel shades
  • Using glitter or metallics for a subtle sparkle
  • Incorporating negative space into the French design

Thou will elevate your professional style with this stylish update.

Twist on classic French tips can really transform your look. You can change the traditional white end to pastel pink or soft lavender for an eye-catching contrast. Additionally, try creating varying width tips or mixing finishes like matte and glossy. You’ll also enjoy these options:

  • Single accent nails paired with French tips
  • Wavy or angled lines instead of straight tips
  • Adding tiny floral or abstract designs alongside

Thou will truly stand out while maintaining professionalism.

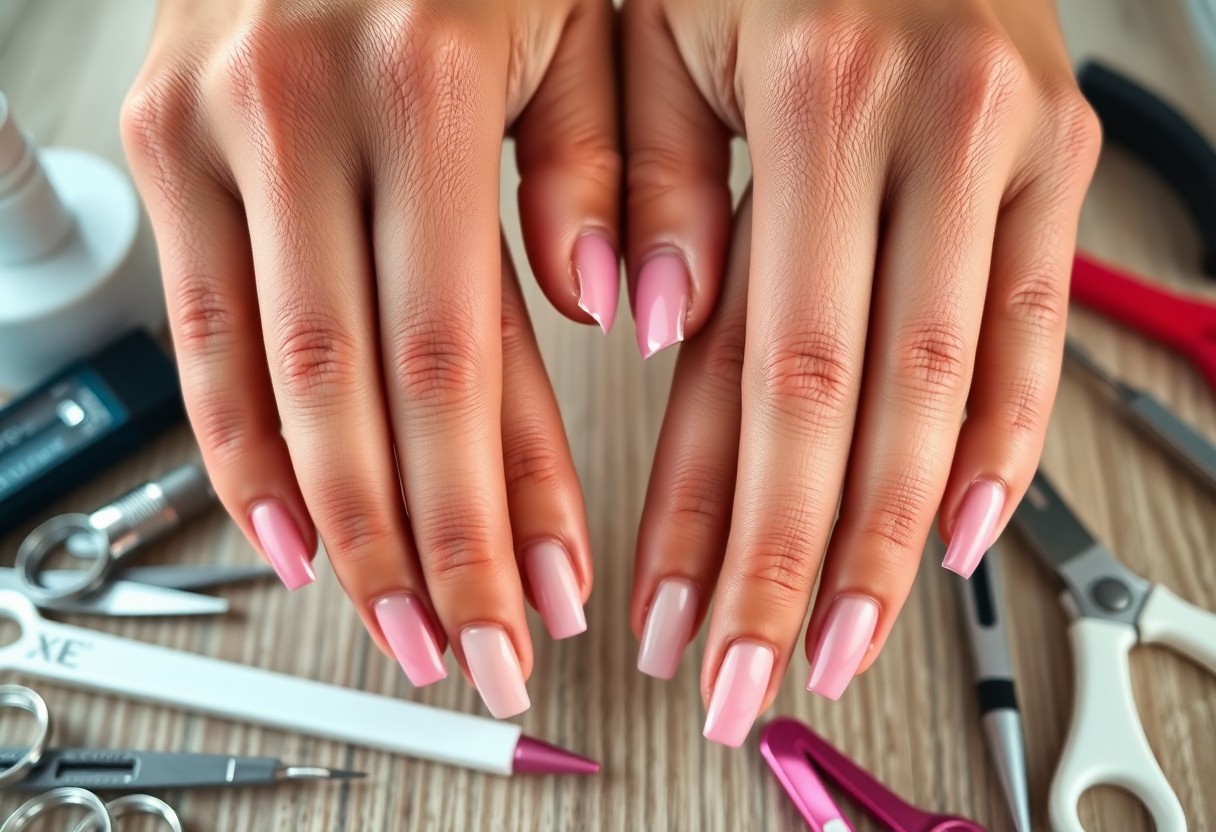
Nail Care and Preparation

Many professionals underestimate the importance of nail care and preparation before applying subtle nail art. Clean, well-maintained nails not only provide a perfect base for your designs but also reflect your attention to detail and professionalism. Invest time in nurturing your nails to ensure they look polished and healthy.

Essential Nail Care Tips

The following tips will help you maintain your nails:

  • Keep nails trimmed and shaped.
  • Moisturize your hands and cuticles regularly.
  • Use a base coat to strengthen your nails.
  • Avoid biting or peeling nails.

Perceiving your nails as a part of your professional image is key.

Preparing for Nail Art Application

At the onset of your nail art journey, the preparation phase is just as important as the design itself. You should start with clean, dry nails to ensure that the polish adheres properly. Remove any old nail polish, wash your hands thoroughly, and softly push back your cuticles. Applying a good base coat will protect your nails while providing an even canvas for the art. Consider using a nail file to shape your nails uniformly, as this enhances the final look of your nail designs.

Nail care should be approached as a routine, contributing to the overall health of your nails. Regular maintenance, such as buffing, trimming, and keeping your cuticles in check, can significantly improve the appearance of your nails. Additionally, using a high-quality base coat can protect your nails from staining, making your nail art last longer. Each step in preparation paves the way for flawless application, ensuring that your subtle nail art shines in any professional setting.

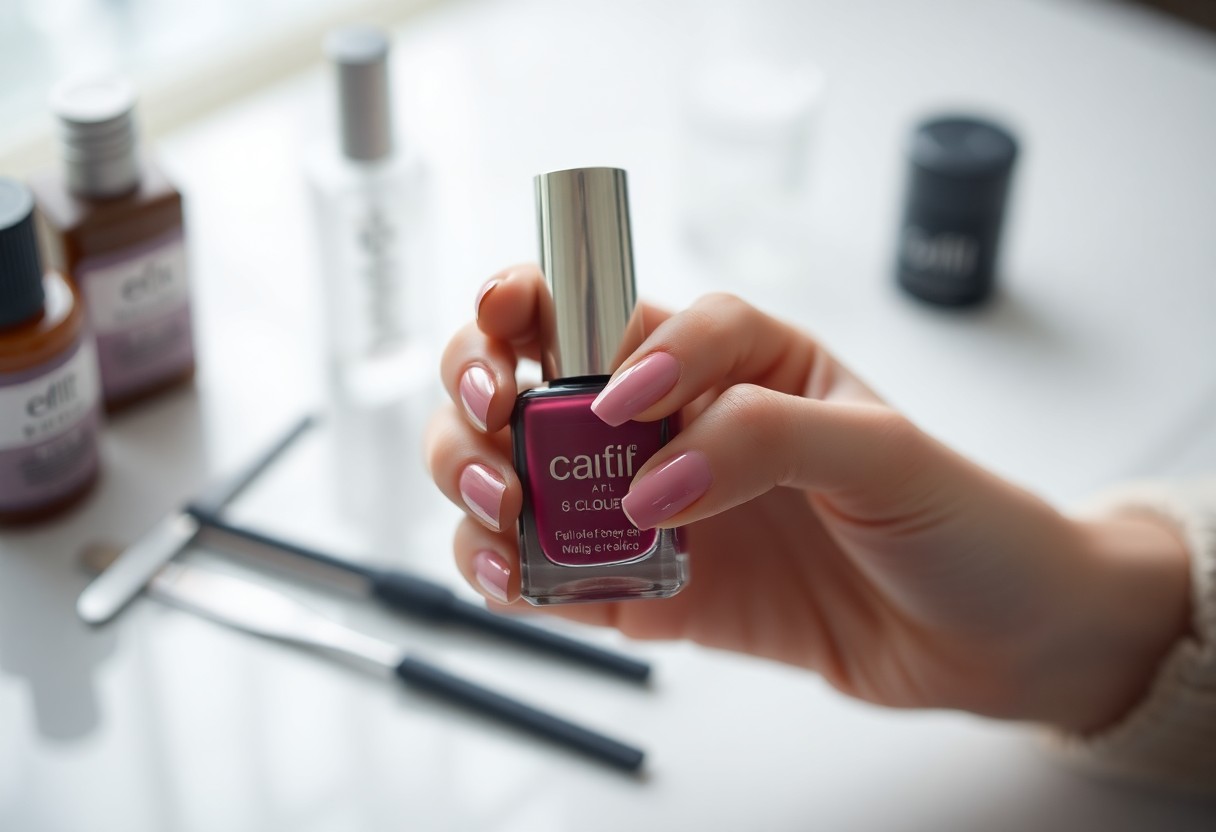
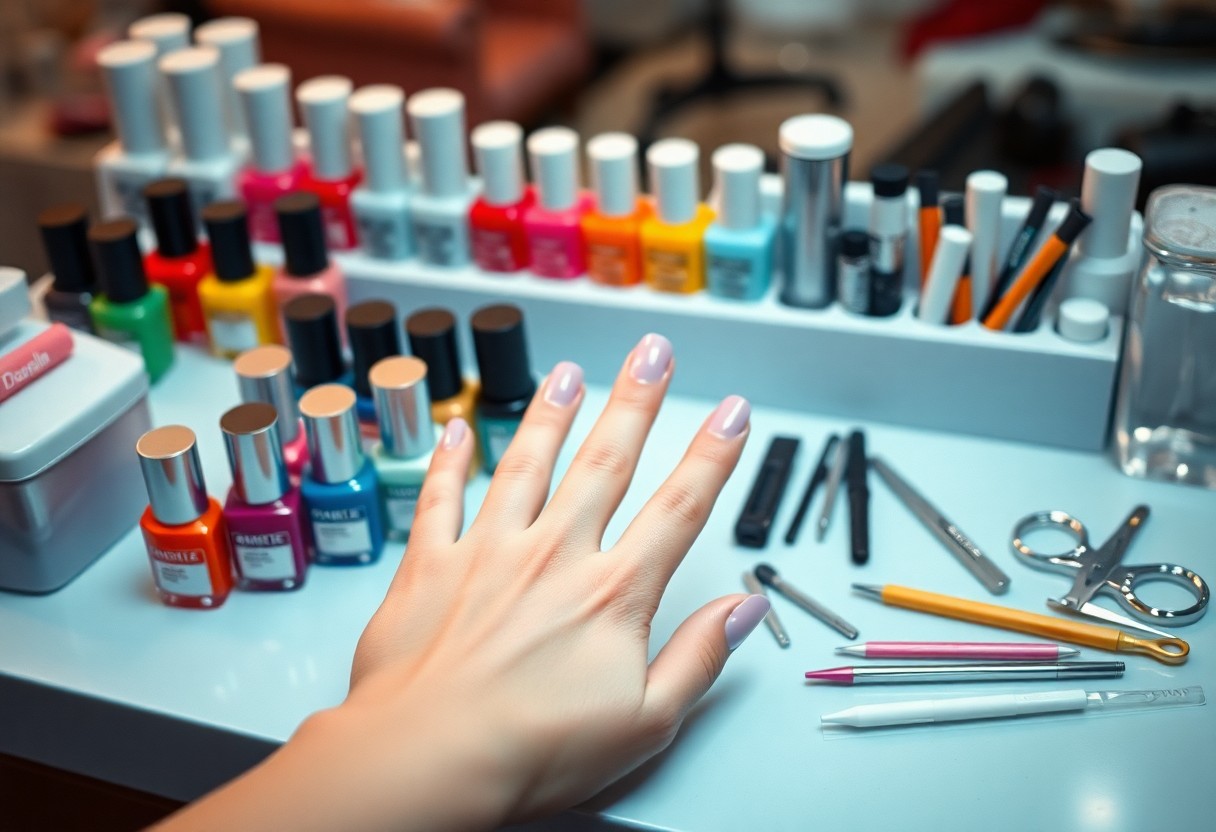
Choosing the Right Nail Products

Now that you understand the importance of subtle nail art in professional settings, it’s necessary to choose the right nail products that align with your style. Opt for neutral colors, muted tones, or soft pastels to ensure your nails look polished without drawing too much attention. Avoid any overly bright or extravagant designs that might conflict with a professional image. Instead, focus on high-quality products that provide longevity and a clean finish, enhancing your overall look while keeping it sophisticated.

Recommended Tools and Products

Choosing the right tools is as important as selecting the perfect polish. Invest in a high-quality base coat, top coat, and nail polish to ensure a smooth application and long-lasting effect. A good nail file, buffer, and cuticle pusher will also help you achieve a refined appearance. Additionally, look for ergonomic tools that make your nail care routine more comfortable and effective.

Long-lasting and Safe Nail Polishes

Products that emphasize durability and safety are ideal for professional settings. Look for polishes that are free from harmful chemicals, such as formaldehyde and toluene, to ensure healthier nails.

Nail polishes that are long-lasting offer you the convenience of fewer touch-ups throughout your busy work week. Brands that boast a chip-resistant formula often use advanced technology to enhance wear time without compromising shine or color quality. Make sure to select polishes labeled ‘non-toxic’ and ‘3-free’ or ‘5-free,’ as they provide a safer alternative for your health while still delivering stunning results. Your nails deserve care that aligns with your professional lifestyle, and these polishes offer just that.

Trends in Professional Nail Art

Unlike the bold designs often seen on social media, professional nail art has shifted towards subtler options that convey elegance and sophistication. This trend allows you to express your personality while maintaining a polished appearance, making it suitable for any work environment. Soft colors, minimalist designs, and delicate accents are now the go-to choices for those looking to enhance their nails without overpowering their professional look.

Current Subtle Nail Art Trends

Below are some of the current subtle nail art trends that you might consider. Techniques like negative space designs, micro-french tips, and muted pastel shades have gained popularity for their understated yet chic appeal. Natural nail shapes complemented by simple line art or small dots can also add a modern touch without being distracting. These designs allow for a refined aesthetic that fits seamlessly within professional settings.

Seasonal Considerations

The season can greatly influence your choice in nail art, as certain colors and styles resonate more during particular times of the year. Lighter pastel colors are often associated with spring, while deeper, muted tones give a warm feel in autumn. You can adapt your nail art to reflect seasonal changes without straying from a professional appearance.

Another factor to consider is how specific holidays or events might inspire your nail choices. Subtle hints of seasonal themes, like using soft gold accents for winter or floral motifs in summer, can keep your nails looking fresh and relevant. Balancing seasonal trends with a polished look ensures you stay professional while still enjoying creative expression in your nail art.

Maintenance and Touch-Ups

Keep your nail art looking polished and professional by establishing a regular maintenance routine. You should aim for touch-ups every two to three weeks, depending on your nail growth and the type of design you choose. This will prevent chipping and ensure your look stays refined and well-groomed, leaving a positive impression in your professional environment.

Keeping Your Nails Looking Fresh

Maintenance of your nail design requires consistent care. Make it a habit to apply a clear topcoat every few days to protect your nails and enhance their shine. Regularly moisturize your cuticles to keep them healthy and well-hydrated. This small effort goes a long way in maintaining a fresh and elegant appearance that complements your professional look.

When to Schedule Your Next Appointment

On average, it’s advisable to schedule your next appointment about every two to three weeks. This timing allows sufficient opportunity for your nails to grow while also keeping your manicure looking its best. Frequent appointments help address any chips or fading, ensuring that your nails consistently look neat and professional.

At the two-week mark, take a close look at your nails. If you begin to notice noticeable chip edges or fading color, it’s a good time to book your next appointment. Scheduling ahead can help you avoid any last-minute rush and ensure you maintain that polished look important in professional settings.

Final Words

Presently, adopting subtle nail art in professional settings can enhance your overall appearance while maintaining an appropriate and polished look. By choosing understated designs and harmonious colors, you can express your personality without compromising professionalism. Consider options like minimalist patterns or muted shades that complement your workplace attire. This approach allows you to stand out subtly, making a positive impression on colleagues and clients alike. With the right balance, your nails can reflect both creativity and professionalism, boosting your confidence in any environment.

FAQ

Q: What is subtle nail art, and why is it suitable for professional settings?

A: Subtle nail art refers to understated and elegant designs that enhance the appearance of nails without being distracting. This style is suitable for professional settings because it maintains a polished look while allowing individuals to express their personality. Designs might include soft colors, minimalistic patterns, or accent nails that are not overly bright or flashy.

Q: What types of colors are recommended for subtle nail art in the workplace?

A: For professional environments, neutral and muted colors tend to work best. Shades like soft pinks, pale nudes, gentle beiges, and light grays are excellent choices. These colors provide a sophisticated appearance while complementing various professional attires. Additionally, opting for pastel tones can add a touch of style without overwhelming your overall look.

Q: Can I incorporate nail art designs without violating office dress codes?

A: Yes, you can certainly incorporate nail art while adhering to office dress codes. Focus on simple designs like thin stripes, polka dots, or small geometric shapes that can be done in subtle colors. Stick to minimal embellishments, such as a single gem or matte finish, which can elevate your nails without breaching professional standards.

Q: How can I ensure my subtle nail art lasts in a professional setting?

A: To ensure your nail art remains intact, start with a good base coat to protect your nails and enhance longevity. Use high-quality nail polish and finish with a top coat to seal the design and add shine. Regular touch-ups as needed are important, along with dealing with any chips promptly to maintain a well-groomed appearance.

Q: How can I care for my nails while wearing subtle nail art?

A: Proper nail care is necessary, even when adorned with subtle art. Keep your nails hydrated by applying cuticle oil regularly. Avoid excessive exposure to water and harsh chemicals, which can weaken your nails and designs. Additionally, consider using gloves while doing household chores to protect your nails and ensure that your nail art remains pristine.

Gel vs. Acrylic Nails – Pros and Cons

Many people find themselves torn between gel and acrylic nails when choosing the perfect manicure. Each option has its own set of advantages and disadvantages, making it important for you to understand what best suits your lifestyle and preferences. In this post, we will explore the pros and cons of both gel and acrylic nails, helping you make an informed decision for your next nail enhancement. Dive in to discover what fits your beauty routine and lasts the best for your day-to-day activities.

Key Takeaways:

  • Longevity: Acrylic nails often last longer than gel nails, making them a preferred choice for durability.
  • Appearance: Gel nails typically offer a more natural look and shine compared to acrylics, appealing to those seeking a less artificial finish.
  • Removal Process: Gel nails can be easier to remove, but both methods require care to avoid damaging the natural nail.

Understanding Gel Nails

A gel nail is a popular manicure option that provides a glossy finish and long-lasting wear. They are cured under a UV or LED light, making them more durable than traditional nail polish. If you’re curious about the differences, check out What’s the Difference Between Gel Nails and Acrylics? for a detailed comparison.

Composition and Features

After understanding the basics, you’ll find that gel nails are made from a combination of polymers and resins that create a flexible and natural-looking finish. These components work together to give your nails strength and shine without the bulkiness often associated with acrylics.

Application Process

Across the beauty industry, the application process for gel nails is favored for its efficiency. Your nail technician will first prep your natural nails, apply a base coat, and then cure it under UV or LED light. Following this, colored gel polish is layered on and cured again until your desired look is achieved.

In addition, each layer of gel is crucial to achieving that smooth finish. Although the curing time is quick, the process may require several layers for optimal color and durability. Once all layers are applied and cured, a top coat seals the gel, ensuring it lasts for weeks without chipping.

Understanding Acrylic Nails

You may find acrylic nails to be a popular choice for enhancing your natural nails with added length and strength. These artificial nails are made by combining a liquid acrylic and a powder, which creates a durable layer over your existing nails. You can find them in various shapes and styles, making it easy to customize your look.

Composition and Features

One of the standout features of acrylic nails is their composition, which consists of a combination of liquid monomer and powder polymer. This mixture creates a hard, protective layer that not only adds length and versatility to your nails but also provides a strong foundation that resists chipping and breaking.

Application Process

Across the beauty industry, the application of acrylic nails involves a meticulous process that ensures a flawless finish. A nail technician will first prepare your natural nails by cleaning and shaping them, followed by applying a primer to enhance adhesion. After that, the acrylic mixture is applied to your nails, sculpting the desired shape and length.

Another important aspect of the application process is the drying technique. Once the acrylic has been applied, it hardens quickly, usually within minutes, thanks to the reaction between the monomer and polymer. The technician may then buff and shape the nails for a smooth finish, followed by applying polish or nail art as you desire. This careful application results in sturdy nails that can last for several weeks with proper care.

Pros of Gel Nails

Keep in mind that gel nails offer several benefits, making them a popular choice among nail enthusiasts. They provide a natural look, flexibility, and a high-gloss finish that can last for weeks without chipping. With their lightweight formula, gel nails feel more comfortable than other types, giving you a beautiful and polished appearance without sacrificing durability.

Durability

Nails enhanced with gel products are known for their remarkable durability. They can withstand daily activities without easily chipping or breaking, ensuring that your manicure remains intact for longer periods. This longevity makes gel nails an appealing option for those with busy lifestyles who still want their nails to look perfect.

Aesthetic Appeal

One of the standout features of gel nails is their aesthetic appeal. The glossy finish creates a vibrant and polished look that enhances the natural beauty of your nails. With a variety of colors and designs available, you can easily customize your gel nails to suit any occasion or personal style.

Consequently, the aesthetic qualities of gel nails deliver not just beauty, but also versatility. You can achieve intricate designs, vibrant colors, and a smooth finish that elevates your overall look. This makes gel nails a favorite among fashion-forward individuals who want to express their personality through their manicured nails. Whether you prefer classic shades or trendy patterns, gel nails contribute to a polished and elegant appearance.

Cons of Gel Nails

To fully understand the downsides of gel nails, you should consider the potential drawbacks. While they offer a beautiful finish and durability, the process can be time-consuming, and the exposure to UV light during curing might raise concerns about skin damage. Additionally, if not done correctly, gel nails can weaken your natural nails over time, leading to breakage. It’s crucial to weigh these factors before deciding on gel nails for your next manicure.

Removal Process

Nails can be challenging to remove when it comes to gel applications, requiring a soaking procedure that can be quite time-intensive. You may need to visit a salon for safe removal, as improper techniques can damage your natural nails. The process typically involves soaking in acetone, which can be drying and potentially irritating to your skin. Regular upkeep is necessary, so consider how this might affect your nail health.

Cost Implications

Above all, weighing the financial aspect of gel nails is vital for your budgeting. Initial application costs can be higher than other types of manicures, and the need for regular maintenance and professional removal adds up over time.

Cost can be a significant factor when choosing gel nails. While the initial investment in gel nails might seem justified due to their longevity and aesthetic appeal, the recurring appointments for fills and maintenance can gradually increase your overall spending. Moreover, if you opt for salon removal instead of DIY methods, you will incur additional expenses. Evaluate these costs to ensure they align with your beauty budget and priorities.

Pros of Acrylic Nails

Your journey into the world of nails might lead you to acrylics, which offer a variety of advantages. Acrylic nails are robust and durable, making them a popular choice for those who desire long-lasting wear. They can withstand daily wear and tear, providing you with a beautiful manicure that stays intact longer than other options. Additionally, the application process allows for intricate designs that can elevate your style.

Customization Options

Acrylic nails give you limitless customization options. You can choose from various shapes, lengths, and colors to craft a look that’s uniquely yours. Whether you prefer a classic French tip or a bold, artistic design, the versatility of acrylics enables you to express your personal style.

Longevity

Around three to six weeks, acrylic nails maintain their stunning appearance, depending on how well you care for them. This extended wear makes them ideal for those who want to enjoy a polished look without frequent trips to the salon.

Due to their durable nature, acrylic nails can last several weeks without significant chipping or wear. This longevity is particularly beneficial for those with busy lifestyles or individuals who frequently find themselves working with their hands. Regular maintenance, such as fills or touch-ups, can further extend their lifespan while ensuring your nails continue to look fresh and fabulous.

Cons of Acrylic Nails

All nail enhancements come with their downsides, and acrylic nails are no exception. While they are popular for their durability and variety, they can pose some significant drawbacks. Issues such as damage to natural nails, potential allergic reactions, and strong odors can make you rethink your choice. Understanding these cons can help you make an informed decision about whether acrylic nails are the right fit for you.

Damage to Natural Nails

One of the most significant concerns with acrylic nails is the potential damage they can inflict on your natural nails. The application process involves filing the nail surface to create a bond, which can thin and weaken your nails over time. Additionally, if acrylics are improperly removed or maintained, it can lead to brittleness, splits, and even permanent damage to your natural nail bed, necessitating time for recovery.

Odor and Allergies

An important aspect to consider is the odors and potential allergic reactions associated with acrylic nails. The chemicals used in applying acrylics, especially the acrylic liquid, often release strong fumes that can be unpleasant to breathe in. Those with sensitive skin or respiratory issues may find themselves experiencing irritation or reactions, highlighting the need for caution when opting for acrylic nails.

Odor from acrylic nails can be quite strong, stemming from substances like acetone and the monomer used in the process. This smell may linger in the salon even after your appointment. If you are sensitive to strong scents, you might find the experience uncomfortable. Moreover, allergies can manifest in various ways, from skin irritation to respiratory difficulties, making it imperative for you to consider your health history before choosing acrylic nails.

Final Words

Upon reflecting on the pros and cons of gel and acrylic nails, you have several factors to consider when choosing the best option for your needs. Gel nails offer a more natural look and flexibility, while acrylics provide strength and durability. Your lifestyle, budget, and personal preferences are key influences in this decision. It’s vital to weigh these aspects carefully, ensuring that your choice aligns with your desires for maintenance and appearance. Ultimately, understanding these differences empowers you to make an informed decision for your nail care journey.

FAQ

Q: What are the main differences between gel and acrylic nails?

A: The main differences between gel and acrylic nails lie in their composition and application process. Acrylic nails are created using a mixture of liquid monomer and powder polymer, which hardens when exposed to air. Gel nails, on the other hand, are made from a semi-solid gel that requires curing under a UV or LED lamp. This difference in curing affects the overall finish and durability of the nails—acrylic nails tend to be thicker and stronger, while gel nails offer a more natural, shiny appearance.

Q: What are the pros of choosing gel nails over acrylic nails?

A: Gel nails offer a number of advantages compared to acrylics. Firstly, they tend to look more natural, providing a glossier finish that mimics the appearance of natural nails. Additionally, gel nails are less prone to chipping and provide more flexibility, making them less likely to break. Moreover, the curing process creates a strong bond, which can result in a longer-lasting manicure without the strong chemicals often associated with acrylics.

Q: What are the drawbacks of using acrylic nails?

A: While acrylic nails provide a strong and durable option for nail enhancement, there are some drawbacks to consider. The application process can be more invasive, as it often involves filing down the natural nail to create a strong bond. This can lead to potential damage or thinning of the natural nail over time. Additionally, acrylics can have a strong odor during application due to the chemicals used, which might be off-putting to some individuals. Lastly, if not applied or removed properly, they can risk lifting and cause damage to the natural nail.

Q: Are gel nails easier to maintain than acrylic nails?

A: Generally, gel nails are considered easier to maintain than acrylic nails. They require less filing and can be less prone to lifting due to their flexibility, which allows them to withstand daily activities better. Regular upkeep typically involves minimal maintenance, as the growth gap from the cuticle area is less noticeable compared to that of acrylic nails. However, both types of nails require regular fills or maintenance every two to three weeks, depending on individual nail growth.

Q: Can I remove gel nails at home, or should I seek professional help?

A: While it is possible to remove gel nails at home, it is often recommended to seek professional help to avoid damaging the natural nails. The best practice for removal involves soaking the nails in acetone to loosen the gel before gently pushing it off. At home, this process can lead to mishaps if not done carefully. Professionals have experience and tools that can make the process quicker and safer, ensuring that your natural nails remain intact and healthy.

How to Extend the Life of Your Gel Manicure

Manicure longevity is a priority for many, especially with the vibrant look and durability of gel polish. To ensure your gel manicure stays flawless for as long as possible, there are several key practices you can adopt. From proper aftercare to mindful habits, you can significantly enhance the durability and appearance of your nails. This guide will provide you with crucial tips and techniques to help you enjoy your gel manicure to the fullest, maintaining its shine and chip-free finish for weeks on end.

Key Takeaways:

  • Moisturize your hands and cuticles regularly to prevent dryness and peeling, which can lead to the gel manicure chipping.
  • Avoid hot water exposure for prolonged periods, as it can weaken the adhesion of the gel polish.
  • Use gloves while cleaning or doing household chores to protect your manicure from harsh chemicals and abrasives.

Understanding Gel Manicures

The gel manicure is a popular nail treatment that combines traditional nail polish with a gel formula. This innovative process often involves curing the gel under a UV or LED light, resulting in a glossy finish that lasts longer than standard polish. Gel manicures are known for their durability and resistance to chipping, which makes them a favorite among those seeking a long-lasting manicure.

What are Gel Manicures?

Below are the crucial elements of gel manicures. They are typically applied in multiple layers, including a base coat, color, and top coat. Each layer is cured under a special light to form a hard, protective coating that helps retain shine and prevent wear. This method not only allows for intricate designs but also promotes healthy nail growth by providing a strong barrier against external damage.

Benefits of Gel Manicures

Behind the allure of gel manicures lie several advantages that make them an ideal choice for many. The long-lasting nature of gel polish means that you can enjoy fresh, vibrant nails for up to two weeks or more without frequent touch-ups. Additionally, gel manicures are less prone to chipping, providing you with a stress-free experience, especially for those with busy lifestyles.

But the benefits don’t stop there. You’ll also appreciate the quick drying time offered by gel manicures, as the curing process means you won’t have to worry about smudging your nails right after application. Furthermore, many gel formulas offer a glossy finish that can elevate your overall look. For individuals who frequently engage in activities that wear down traditional polish, gel manicures present a strategic solution to maintain beautiful nails while minimizing maintenance efforts.

Preparing Your Nails

Some crucial steps can help you prepare your nails for a gel manicure, ensuring a longer-lasting finish. Start by cleaning your nails thoroughly, removing old polish, and gently pushing back your cuticles. As you get ready, check out How to Make Gel Nails Last Longer: 18 Tips that Work for additional techniques that can enhance your manicure longevity.

Pre-Manicure Care

Before starting your gel manicure, it is vital to ensure your nails are in the best condition. This includes trimming and shaping your nails to your desired length and style. Take the time to exfoliate and moisturize your hands, which not only helps with the application process but also contributes to the overall appearance of your nails.

Choosing the Right Products

Besides proper nail care, selecting high-quality products can significantly affect the durability of your gel manicure. Invest in a reputable gel polish and base coat, as cheap products may not provide the same adhesion and longevity. Make sure to choose products that are specifically designed for gel applications to ensure the best results.

Preparing for your manicure involves more than just the application; it’s about using the right tools and products to support your nail health. Opt for a gel polish that is known for its staying power, and pair it with a reliable top coat. Additionally, consider using a nourishing cuticle oil to maintain the health of your nails and surrounding skin as this can help keep your manicure looking fresh and vibrant for longer.

Application Techniques

For a long-lasting gel manicure, mastering application techniques is key. Start by prepping your nails correctly, ensuring they are clean, dry, and free of oils. Use a base coat to create a smooth surface for better adhesion. Apply thin layers of gel polish, allowing each layer to cure properly under the UV or LED lamp for optimal results. This attention to detail will enhance the overall durability of your manicure.

Proper Gel Application

Between each coat, be mindful of how you apply the polish. Use even strokes, starting from the center of the nail and working your way to the edges. This technique prevents pooling at the cuticles, which can lead to lifting. Keeping a steady hand and applying thin layers will help your manicure adhere better and last longer.

Curing Process Best Practices

Below the surface of your gel manicure lies the importance of the curing process. Properly curing each layer not only hardens the gel but also ensures it bonds well to your natural nail. Make sure to follow the guidelines provided with your gel products regarding the duration and type of lamp needed for curing.

But don’t rush the curing process. It’s imperative to ensure that the gel polish is fully cured to achieve optimal strength and longevity. If your gel polish feels tacky after curing, it may not be fully set, which can lead to premature chipping or lifting. Always make sure to check the manufacturer’s instructions for the right curing time, and ensure that your lamp is functioning properly. Taking the time for this step pays off in the longevity of your manicure.

Maintaining Your Manicure at Home

Many people seek ways to prolong the life of their gel manicure, and caring for your nails at home can make all the difference. By implementing a few simple habits, you can keep your nails looking fresh and shiny for weeks. This includes protecting your hands from excessive moisture, using gentle cleansers, and applying cuticle oil regularly to nourish your nails.

Daily Care Routine

Your daily care routine is necessary for maintaining the integrity of your gel manicure. Be sure to wash your hands with mild soap and keep them moisturized without soaking them too much in water. Incorporate a hydrating lotion that is free of harsh chemicals and a quick-drying topcoat to maintain the shine and protect the color.

Dealing with Chips and Peeling

Your gel manicure may be prone to chips and peeling over time, especially if your hands are frequently exposed to harsh conditions. Be attentive to any signs of damage and take immediate action to minimize the effects on your manicure.

But if you do encounter chips or peeling, there are ways to mitigate the damage. You can use a brush-on gel topcoat to smooth over the affected area, sealing it and preventing further chipping. For significant issues, consider visiting your nail technician for a repair or a fill-in. Taking prompt action not only enhances the appearance of your manicure but also extends its lifespan.

Protecting Your Manicure

Unlike regular nail polish, gel manicures require additional care to maintain their shine and prevent chipping. To protect your manicure, be mindful of your hands’ daily exposure to elements that can cause wear and tear. Simple precautions can significantly stretch the longevity of your gel polish, ensuring your nails look their best for weeks on end.

Avoiding Damage in Daily Activities

Protecting your manicure starts with being attentive to your daily activities. Avoid using your nails as tools; this includes opening cans or scraping off labels. Instead, use appropriate instruments designed for the task. Be gentle while typing or handling items, as excessive force can lead to chipping.

Tips for Special Occasions

About special events, you want your gel manicure to shine just as brightly as the occasion. To keep your nails looking pristine, consider these tips:

  • Apply a top coat before attending an event to enhance longevity.
  • Carry a small nail file for quick fixes on the go.
  • Avoid harsh chemicals like bleach, as they can dull your manicure.
  • Be cautious with foods that stain and always keep a napkin handy.

Assume that taking these precautions will help retain your manicure’s beauty during special occasions.

At events where you want to make a lasting impression, always plan ahead for your manicure care. Here are additional strategies to consider:

  • Choose less abrasive seating arrangements to avoid scratching your nails.
  • Bring your own set of utensils or glassware to prevent unintentional damage.
  • Take breaks to ensure your hands stay relaxed and avoid accidental contact with rough surfaces.

Assume that these proactive measures will keep your nails looking fabulous throughout your event.

Regular Care and Removal

Once again, regular care and proper removal are imperative to prolong the life of your gel manicure. Maintaining the health of your nails helps you enjoy your polished look longer, while also preventing damage to the natural nail. Moisturizing your cuticles, avoiding harsh chemicals, and wearing gloves while doing household chores can significantly aid in keeping your gel manicure looking fresh and vibrant.

How to Safely Remove Gel Manicure

Among the key steps for safely removing your gel manicure, it’s important to avoid picking or peeling the polish off, as this can damage your natural nails. Instead, soak a cotton ball in acetone, place it on the nail, and wrap it with aluminum foil. After 10-15 minutes, gently slide off the gel with an orange stick.

Aftercare for Healthy Nails

Below, prioritize aftercare for your nails post-manicure. Once you’ve removed the gel polish, nourish your nails and cuticles with a good quality cuticle oil or moisturizer to promote healing and hydration.

And, maintain this routine consistently to keep your nails strong and healthy. Consider regular breaks between gel manicures to allow your nails to breathe and recover. Additionally, incorporating biotin or other vitamins into your diet can further enhance the resilience of your nails, ensuring they remain in top condition for your next gel manicure.

Summing up

On the whole, extending the life of your gel manicure involves a combination of proper application, maintenance, and care. Ensure your nails are clean and well-prepped before applying your gel polish, and always seal the edges to prevent chipping. After your manicure, protect your nails by avoiding excessive moisture and harsh chemicals. Additionally, regularly moisturize your hands and cuticles to keep them healthy. By following these steps, you can enjoy your beautiful gel manicure for a longer period, saving you time and money while looking fabulous.

FAQ

Q: How can I protect my gel manicure from chipping?

A: To protect your gel manicure from chipping, avoid using your nails as tools. Be gentle when tapping or pressing on surfaces, and use gloves when doing household chores or working with harsh chemicals. Additionally, applying a top coat every few days can add an extra layer of protection.

Q: What should I avoid doing after getting a gel manicure?

A: After getting a gel manicure, it’s best to avoid soaking your nails in water for extended periods, as excess moisture can weaken the gel. Steer clear of activities that may cause your nails to experience trauma, such as opening cans or digging into hard materials with your fingertips.

Q: How should I care for my nails between gel manicures?

A: Caring for your nails between gel manicures involves keeping them moisturized and healthy. Use a cuticle oil daily to hydrate the cuticles and surrounding skin. Additionally, consider a nail strengthener to reinforce the nail bed, and maintain a balanced diet to support overall nail health.

Q: Can I use regular nail polish over my gel manicure?

A: It’s not recommended to apply regular nail polish over a gel manicure as it can weaken the gel and lead to chipping. If you desire to change your color, it’s best to remove the gel properly and start fresh with a new gel application.

Q: How often should I consider getting a gel manicure touch-up?

A: It’s advisable to schedule a touch-up for your gel manicure every 2 to 4 weeks, depending on how quickly your nails grow. Regular maintenance helps prevent lifting and keeps your nails looking fresh. Monitoring for any signs of wear can also guide you on when to go in for a refill.

The Ultimate Guide to Acrylic Nail Care

Acrylic nails can elevate your look and boost your confidence, but proper care is crucial to keep them looking fresh and beautiful. In this guide, you will learn everything you need to know about maintaining your acrylic nails, from the best products and techniques for cleaning, to tips for preventing damage and ensuring longevity. Whether you are a newbie or a seasoned acrylic wearer, this guide will help you achieve gorgeous nails while prioritizing their health and durability.

Key Takeaways:

  • Maintenance: Regular upkeep is imperative for extending the life of your acrylic nails and keeping them looking fresh.
  • Hygiene: Proper cleaning and care are important to prevent infections and maintain nail health.
  • Removal: Safe and gentle removal methods are necessary to avoid damage to your natural nails.

Understanding Acrylic Nails

To fully embrace the beauty of acrylic nails, it’s vital to grasp what they are and how they function. Acrylic nails offer a durable and stunning alternative to natural nails, allowing for creative designs and extended length. For more information on acrylic nails, check out What You Need to Know Before Getting Acrylic Nails.

What Are Acrylic Nails?

Below is an overview of acrylic nails, which are enhancements made from a blend of liquid monomer and powder polymer. These are applied over your natural nails, creating a hard protective layer that can be shaped and styled according to your preference.

Benefits of Acrylic Nails

Acrylic nails provide various advantages, making them a popular choice for nail enthusiasts. They are incredibly durable, often lasting for weeks without chipping or breaking, which means less maintenance for you. You can also enjoy a wide array of styles, colors, and designs, transforming your nails into a canvas for your creativity.

With acrylic nails, you can achieve a polished and sophisticated look that complements your style. They are ideal for those who desire longer nails but struggle with breakage. Additionally, acrylics can help you overcome nail-biting habits, fostering healthier nail growth in the long run. The flexibility in customization allows you to express yourself, ensuring your nails always look stunning.

Getting Acrylic Nails Applied

Any time you decide to enhance your look with acrylic nails, it’s important to ensure that the application is done correctly for both aesthetic appeal and nail health. From choosing the right technician to understanding the application steps, this guide will help you navigate the process seamlessly, so you can enjoy beautiful, long-lasting nails.

Choosing a Professional Nail Technician

Nails are an expression of your personal style, and selecting a skilled technician can make all the difference. Look for a licensed professional with experience in acrylic applications. Read reviews, check out their social media, and don’t hesitate to ask about their sanitation practices to ensure a safe and quality experience.

The Application Process

Nails undergo several steps during the acrylic application process to ensure a perfect finish. Initially, your technician will prepare your natural nails by cleaning and buffing them. They will then apply a primer before sculpting the acrylic, forming it over your nails to achieve the desired shape. Finally, after the acrylic has set, they’ll file and shape them to finish your desired look.

Considering the intricacies involved, your technician will also assess your nail type and health during the application process. They may apply tips to extend your nails if necessary, ensuring a sturdy base. The acrylic mixture is then expertly applied in layers, allowing for sculpting and shaping. This meticulous process can take anywhere from 45 minutes to a couple of hours, depending on the complexity of your desired finish and the technician’s skill level.

Daily Care for Acrylic Nails

Unlike natural nails, acrylic nails require consistent care to maintain their beauty and durability. Incorporating daily routines, such as moisturizing your cuticles and avoiding harsh chemicals, can significantly extend the life of your acrylics. By prioritizing daily care, you can keep your nails looking fresh and prevent potential damage, ensuring they remain a stunning accessory to your overall look.

Cleaning and Maintenance

Acrylic nails thrive on proper cleaning and maintenance. Gently wash your hands daily with a mild soap, ensuring that you remove any dirt or residue without damaging the acrylic. You can use a soft brush to clean beneath the nails and avoid soaking your hands in water, which can loosen the acrylic over time. Following this routine will help prolong the life and appearance of your nails.

Avoiding Common Pitfalls

Across the acrylic nail care community, there are common mistakes that can lead to premature damage or degradation. From neglecting proper cleaning to using the wrong products, these pitfalls can shorten the lifespan of your nails.

Daily practices and mindful choices are your best defense against these issues. Avoiding excessive exposure to water, limiting contact with harsh chemicals, and steering clear of using your nails as tools are practical steps you can take. Keeping your nails hydrated with cuticle oil and maintaining regular visits to your nail technician for fills and maintenance will also support the integrity of your acrylics, ensuring they look their best for longer.

Repairing and Maintaining Acrylic Nails

Despite the durability of acrylic nails, they may chip or lift over time. To keep your nails looking pristine, it’s imperative to address any issues promptly. Regular maintenance and repairs not only enhance the aesthetic appeal of your nails but also prolong their lifespan. By staying proactive about your acrylic nails, you can ensure that they remain healthy and beautiful.

Identifying Issues Early

Below are some common signs that indicate your acrylic nails may need attention. Look for noticeable lifting at the edges, chips in the acrylic, or any changes in color or texture. Early detection allows you to address the problem before it worsens, ultimately saving you time and money on repairs.

Tools and Products for Repairs

Behind every successful acrylic nail repair is a set of imperative tools and products. Investing in a good quality acrylic nail kit, including a brush, nail file, and glue, will equip you to handle minor damages with ease. Having these tools on hand will streamline the repair process whenever issues arise.

Also, consider keeping a repair kit stocked with items like a buffer, cuticle oil, and a nail strengthener. A buffer will help smooth out any rough edges, while cuticle oil maintains nail health. Nail strengtheners can help prevent further damage, giving your acrylics extra support. By having these tools readily available, you empower yourself to perform quick fixes and prolong the life of your stunning acrylic nails.

Removing Acrylic Nails Safely

Once again, the removal process of acrylic nails is just as important as their application. To ensure that your natural nails remain healthy and undamaged, it’s necessary to follow a safe removal method. Avoid the temptation to rip them off, as this can lead to breakage and long-term damage. Instead, choose a method that will gently dissolve the acrylic, protecting your natural nails in the process.

Professional vs. At-Home Removal

Beside the option of removing acrylic nails at home, you can also choose to visit a professional nail technician. While at-home removal can save you time and money, a professional can ensure that the process is done with minimal risk of damage. Assess your comfort level and the condition of your nails to make the best choice for your situation.

Steps for Safe Removal

Steps to remove acrylic nails correctly involve careful techniques to safeguard your natural nails. Start by trimming your acrylics as short as possible and using an acetone-soaked cotton ball to soften the adhesive. Wrap your fingers with foil to keep the cotton in place and allow it to sit for a while. Finally, gently scrape off the softened acrylic using a wooden stick and buff any leftover residue.

Safe removal begins with preparation; make sure to gather the necessary tools such as acetone, cotton balls, and aluminum foil. After trimming your acrylic nails, soak the cotton balls in acetone and place them over each nail, securing them with foil. This allows the acetone to penetrate and dissolve the acrylic effectively. After 20-30 minutes, gently scrape away the acrylic using a wooden stick to avoid hurting your natural nails. Always follow up with nourishing cuticle oil to restore moisture and promote healthy nail growth.

Common Myths About Acrylic Nails

Keep in mind that myths surrounding acrylic nails can lead to misconceptions about their safety and maintenance. Many people believe that acrylics will damage your natural nails irreparably, but with proper care, that’s far from the truth. By debunking these myths, you can embrace the beauty of acrylic nails without fear.

Debunking Misconceptions

Misconceptions about acrylic nails often stem from misunderstandings about the application process and nail health. You might have heard that they cause thinning or breaking of your natural nails, but this can occur mainly due to improper application or removal techniques. When done correctly by a skilled technician, acrylics can coexist harmoniously with your natural nails.

Understanding the Truth

Understanding the truth about acrylic nails involves recognizing the benefits and responsibilities associated with their use. Many people believe that acrylics are inherently harmful, which isn’t true when you prioritize quality products and professional care. By following the right aftercare routine and allowing your nails time to breathe between applications, you can maintain healthy natural nails alongside your acrylic enhancements.

At the end of the day, knowledge is power when it comes to acrylic nail care. Regular maintenance, such as timely fills and gentle handling, will keep your nails looking fabulous while reducing any potential risks associated with acrylics. By understanding both the advantages and limitations of acrylic nails, you empower yourself to make informed decisions that suit your lifestyle and nail health needs.

To wrap up

As a reminder, maintaining your acrylic nails is imperative for both their longevity and the health of your natural nails. By following the care tips outlined in this guide, such as regular hydration, gentle cleaning, and avoiding harsh chemicals, you can keep your acrylics looking fabulous while preventing damage. Always prioritize regular maintenance appointments and listen to your nails’ needs. With the right care, you can enjoy beautifully manicured nails that enhance your overall style and confidence.

The Ultimate Guide to Acrylic Nail Care – FAQ

Q: What are acrylic nails and how are they applied?

A: Acrylic nails are artificial nail enhancements made from a mixture of a liquid monomer and a powdered polymer. The application process typically involves cleaning the natural nails, applying a primer, and then sculpting the acrylic mixture over the nail bed, which can be shaped into various styles. A UV or LED lamp is used to cure the product, resulting in a strong and durable nail extension.

Q: How do I maintain my acrylic nails to keep them looking good?

A: To maintain your acrylic nails, it’s crucial to keep them clean and moisturized. Regularly apply cuticle oil to the base of your nails and hand lotion to prevent dryness. Avoid exposing your nails to harsh chemicals and always wear gloves while doing household chores. Schedule regular fill-ins, typically every 2-3 weeks, to manage regrowth and maintain the overall appearance of the nails.

Q: Can I do everyday activities with acrylic nails?

A: Yes, you can perform most everyday activities with acrylic nails, but it’s important to be cautious. While acrylic nails are quite durable, they can still chip or break if subjected to excessive force. Avoid using your nails as tools for opening packages or scratching surfaces, and be careful with heavy lifting to prevent stress on the nails.

Q: What should I do if my acrylic nails lift or break?

A: If you notice any lifting or breaking of your acrylic nails, it’s best to visit your nail technician for repairs as soon as possible. Do not attempt to fix it yourself, as this can lead to further damage to your natural nails. If immediate professional help isn’t available, you can apply a nail glue or adhesive to temporarily secure the broken piece until you can get it fixed properly.

Q: Are there any special products I should use for acrylic nail care?

A: Yes, using specific products can help maintain the health of your acrylic nails. Look for non-acetone nail polish removers to avoid damaging the acrylic. Additionally, use gentle soaps and moisturizers, and consider applying a top coat designed for acrylics to enhance durability and shine. Using a strengthener can also help protect both your acrylics and natural nails.

Common Myths About Gel and Acrylic Nails

Most people have encountered various myths about gel and acrylic nails that can lead to confusion when choosing the right option for your nails. Whether you’re a novice or a seasoned nail enthusiast, understanding the truth behind these popular enhancements is crucial for making informed decisions and maintaining healthy nails. In this post, we’ll debunk some of the most prevalent misconceptions, providing you with the facts you need to enhance your nail experience while keeping your nails looking fabulous.

Key Takeaways:

  • Damage: Many believe that gel and acrylic nails cause significant damage to natural nails, but with proper application and care, they can be safe and non-damaging.
  • Longevity: There’s a myth that gel nails last longer than acrylics; however, the longevity of each depends on factors like nail care and personal lifestyle rather than the product itself.
  • Maintenance: Some think that maintenance for gel and acrylic nails is excessively high; in reality, regular fills and careful upkeep can keep them looking great without too much effort.

Myth 1: Gel Nails Are More Damaging Than Acrylics

A common belief is that gel nails are more damaging to your natural nails than acrylics. However, this isn’t necessarily true. The actual damage depends more on the application and removal process than the product itself. When applied and removed correctly, gel nails can be less harmful than acrylics since they typically require less filing of your natural nail. It’s important to choose a skilled technician who follows proper techniques to minimize any potential damage, whether you opt for gel or acrylic nails.

Myth 2: Acrylic Nails Last Longer Than Gel Nails

For many, the belief that acrylic nails last longer than gel nails is prevalent, but that’s not necessarily the case. Gel nails can be just as durable, with proper application and care, often lasting up to three weeks or more. Factors such as your lifestyle, nail care routine, and the skills of your nail technician play significant roles in longevity. If you’re looking to bust more myths around gel nails, check out the Common Gel Nail Myths Debunked | Miss Dolla Blog USA for more insights.

Myth 3: You Can’t Soak Off Acrylic Nails

One of the common misconceptions about acrylic nails is that you can’t soak them off. In reality, you can safely remove acrylic nails by soaking them in acetone. By doing so, the acrylic begins to break down, allowing you to gently peel or scrape it off without damaging your natural nails. It’s necessary to give yourself enough soaking time and to follow the right procedure for removal to maintain the health of your nails. Using the right techniques ensures your nails stay strong after the acrylics are gone.

Myth 4: Gel Nails Don’t Chip or Break

It’s a common misconception that gel nails are impervious to chipping or breaking. While gel nails are more flexible and durable than traditional polish, they are not indestructible. Your daily activities, like typing or household chores, can expose your nails to stress, leading to chips or breaks if proper care isn’t taken. To prolong the life of your gel nails, consider using gloves during heavy-duty tasks and avoid using your nails as tools. Understanding this reality will help you maintain the integrity of your beautiful nails without disappointment.

Myth 5: Both Nail Types Require the Same Maintenance

While many believe that gel and acrylic nails require similar maintenance, the truth reveals significant differences. Recognizing these differences can help you better care for your nails and prolong their beauty.

Nail TypeMaintenance Requirements
Gel NailsNeed regular touch-ups every 2-3 weeks.
Acrylic NailsRequire fills every 3-4 weeks, based on growth.
Gel NailsLess prone to lifting, easier upkeep.
Acrylic NailsMore maintenance due to potential lifting.
Gel vs AcrylicGel needs less frequent, but more specialized upkeep.

Assume that understanding the maintenance differences will enhance your nail care experience and ensure your nails always look their best.

Myth 6: You Can’t Customize Nail Designs with Gel

There’s a misconception that gel nails limit your creative potential, but that’s far from the truth. In fact, gel polish can be easily customized with a variety of colors, textures, and nail art techniques. Whether you prefer intricate designs, gradients, or even 3D embellishments, gel nails provide a versatile canvas for your personal style. You can experiment with different finishes, like matte or glossy, and incorporate glitter or foils to make your nails truly unique. So, embrace your creativity and let your gel nails become an extension of your personality!

Conclusion

Now that you are equipped with the facts about common myths surrounding gel and acrylic nails, you can make informed decisions about your nail care. Understanding the differences in application, durability, and safety will help you choose the best option for your lifestyle and nail health. Embrace your nail journey with knowledge, ensuring that your choices enhance both your appearance and well-being.

FAQ

Q: Are gel and acrylic nails the same?

A: No, gel and acrylic nails are not the same. Gel nails are made using a gel formula that requires UV or LED light to cure and harden, giving them a glossy finish. Acrylic nails, on the other hand, are made from a combination of a liquid monomer and a powder polymer, which hardens when exposed to air. Each has different applications and results, catering to various preferences.

Q: Do gel and acrylic nails damage natural nails?

A: Both gel and acrylic nails can potentially cause damage to natural nails if not applied or removed correctly. However, when applied properly by a trained professional and removed safely, the risk of damage can be minimized. It’s vital to practice good nail care and allow natural nails to rest between applications.

Q: Can you get acrylic nails if you have weak or damaged nails?

A: Yes, you can get acrylic nails even if you have weak or damaged nails. In fact, acrylics can provide a protective layer, helping to shield the natural nails while they recover. However, it’s important to consult with a nail technician who can assess your nail health and provide tailored advice based on your specific situation.

Q: Do gel and acrylic nails require maintenance?

A: Yes, both gel and acrylic nails require maintenance. Typically, they need to be refilled or “infilled” every two to three weeks as the natural nails grow. Additionally, regular touch-ups can help maintain their appearance and prevent lifting or chipping. Proper care can also extend the longevity of the enhancements.

Q: Can I paint over my gel or acrylic nails?

A: Yes, you can paint over gel or acrylic nails. Many people choose to apply regular nail polish or gel polish for added color and design. However, it’s important to use a remover that is suitable for the type of enhancement to avoid damaging the nails during future maintenance or removal. Using a topcoat can also protect both the polish and the underlying enhancements.

Skip to content