Many people are discovering the effortless beauty of nail wraps, a versatile alternative to traditional nail polish. If you’re looking to elevate your manicure game without the hassle of drying time and lengthy salon visits, nail wraps may be the perfect solution for you. This guide will walk you through everything you need to know, from types and application techniques to tips for durability, ensuring your nails look fabulous with minimal effort. Get ready to unlock the secrets of stunning nail art at your fingertips!
Key Takeaways:
- Application Process: Nail wraps are easy to apply; simply clean your nails, choose the right size wrap, and adhere them securely for a professional look.
- Variety of Designs: They come in numerous styles and patterns, allowing you to easily switch up your nail art without the mess of polish.
- Durability: Nail wraps can last from a week to several weeks depending on care, providing a longer-lasting manicure than traditional nail polish.
What Are Nail Wraps?
Before stepping into the world of nail wraps, it’s necessary to understand what they are. Nail wraps are adhesive designs that you apply directly to your nails, offering a quick and easy way to achieve a polished look without the need for traditional nail polish. To learn more, check out The Beginner’s Guide to Nail Wraps: Everything You Need ….
Definition and Purpose
Behind the simplicity of nail wraps lies their innovative design. They allow you to effortlessly embellish your nails with various colors and patterns, providing a salon-quality appearance right at home. Their primary purpose is to enhance the beauty of your nails while delivering a long-lasting finish.
Types of Nail Wraps
Wraps come in a variety of forms, allowing you to choose the style that suits your aesthetic. Here are the main types:
- Vinyl wraps
- Gel wraps
- Polish strips
- Nail foils
- 3D wraps
This selection caters to different preferences and occasions.
| Vinyl wraps | Durable, flexible, and easy to apply |
| Gel wraps | Offer a glossy finish, can be cured with a UV light |
| Polish strips | Quick to apply, mimics the look of nail polish |
| Nail foils | Unique designs, applied with a special adhesive |
| 3D wraps | Add dimension and texture for a standout look |
Indeed, the variety of nail wraps can be overwhelming, but it allows you to express your individuality. Here’s a quick overview of the types:
- Classic prints
- Seasonal designs
- Metallic finishes
- Floral patterns
- Artistic styles
This diversity ensures that there’s a nail wrap for every personality and event.
| Classic prints | Timeless designs that never go out of style |
| Seasonal designs | Themes that reflect holidays or seasons |
| Metallic finishes | Adds a dazzling effect to your nails |
| Floral patterns | Perfect for a feminine touch to your look |
| Artistic styles | Unique wraps that showcase creative designs |
Benefits of Using Nail Wraps
One of the most appealing aspects of nail wraps is their ability to provide a quick and beautiful manicure without the need for extensive salon visits. You can achieve a professional look from the comfort of your home while saving time and money. Additionally, nail wraps offer unique designs that allow you to express your personal style effortlessly while ensuring your nails remain in pristine condition.
Durability and Longevity
Against traditional nail polish, nail wraps are renowned for their impressive durability. You can expect your nail wraps to last for several weeks without chipping or fading, providing you with a longer-lasting solution. This resilience makes them an ideal choice for anyone looking to maintain their manicure without frequent touch-ups.
Variety of Designs and Styles
Against monotonous nail polish options, nail wraps offer an expansive array of designs and styles that cater to every taste. From bold patterns to delicate motifs, you can find wraps that suit any occasion or outfit effortlessly. This versatility means you can switch up your look as often as you like, providing endless opportunities for you to showcase your creativity.
Indeed, the variety of designs available is one of the standout features of nail wraps. You have access to countless themes, colors, and artistic patterns, from chic minimalist styles to vibrant, eye-catching graphics. This diversity enables you to select the perfect wrap for special events, holidays, or simply to reflect your mood, making your nail art journey as exciting and unique as you are.
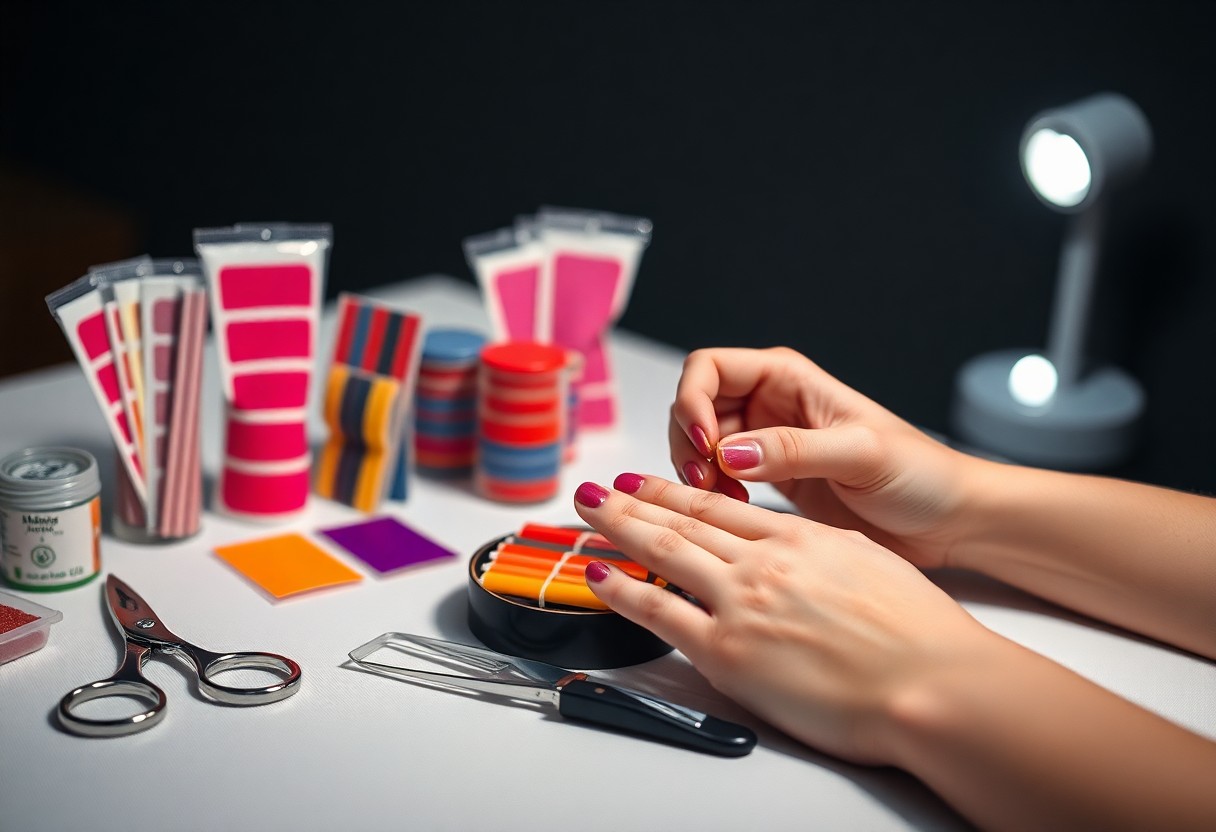
How to Apply Nail Wraps
Despite their relatively simple application process, achieving a professional look with nail wraps requires careful attention to detail. Selecting the right size and ensuring your natural nails are prepped properly will set the foundation for a flawless finish. With the right techniques, you can easily enjoy a chic manicure that lasts for weeks.
Preparation of Natural Nails
Before applying nail wraps, it’s important to prepare your nails properly. Start by cleaning your nails thoroughly, removing any old polish, dirt, or oils. Next, gently push back your cuticles and file your nails to your desired shape. Finally, buff the surface of your nails lightly to create a smooth base for the wraps to adhere properly.
Step-by-Step Application Process
To successfully apply your nail wraps, follow this step-by-step process:
Step-by-Step Application Process
| 1. Choose the Right Size | Select a wrap that fits your nail size perfectly. |
| 2. Peel Off the Backing | Carefully remove the adhesive backing from the wrap. |
| 3. Place the Wrap on Your Nail | Align the wrap with your cuticle and press down gently. |
| 4. Smooth Out Bubbles | Use your fingers or a cuticle stick to flatten any bubbles. |
| 5. Trim Excess Wrap | Use scissors to carefully trim away any overhang. |
| 6. Seal the Edges | Apply a top coat for durability and shine. |
Another important aspect of the application process is ensuring you seal the edges properly. This will not only enhance the longevity of your nail wraps but also prevent lifting or chipping. After trimming the excess, applying a thin layer of top coat will provide an added layer of protection while giving your wraps a glossy finish. Trust the process, and soon you’ll have beautifully decorated nails that turn heads.
Tips for Keeping Nail Wraps Looking Great
All it takes is a little care and attention to keep your nail wraps looking fabulous. Follow these imperative tips:
- Avoid soaking your nails in water for prolonged periods.
- Use gloves while cleaning or doing dishes.
- Apply a clear topcoat every few days for added shine.
- Keep your nails trimmed to minimize wear.
This will ensure your wraps maintain their vibrant appearance and stay intact longer.
Maintenance and Care
With regular maintenance, your nail wraps can last longer and look their best. Be sure to clean your nails before application to remove any oils, and always apply wraps on clean, dry nails. For added protection, consider applying cuticle oil regularly to keep both your nails and wraps in top condition.
Avoiding Common Mistakes
About the most common mistakes people make when applying nail wraps is overlooking preparation. Preparation is key to a smooth application and lasting wear. Ensure your nails are clean, dry, and free of any oils before starting. Additionally, avoid pulling on the wraps, as this can cause them to lift. Always follow the manufacturer’s instructions to achieve the best results.
Looking out for these simple missteps can save you time and enhance the longevity of your nail wraps. Prioritizing proper application techniques and avoiding excessive moisture or rough handling will keep your beautiful designs intact. You should also allow ample time for the wraps to adhere properly, securing them against chips and damage.
Removing Nail Wraps Safely
Keep your nails healthy and strong by following the right technique when removing nail wraps. Improper removal can lead to damage or irritation. Always take your time and use the appropriate tools to ensure a smooth and safe removal process.
Tools Needed for Removal
One of the first steps in safely removing your nail wraps is gathering the necessary tools to make the process easier and more effective.
| Acetone or Non-Acetone Nail Polish Remover | Cotton Balls or Pads |
| Aluminum Foil | Pusher or Orange Stick |
| Buffing Block | Moisturizer or Cuticle Oil |
Step-by-Step Removal Process
The process of removing your nail wraps should be systematic to ensure your nails remain undamaged. Follow these steps carefully.
| 1. Soak cotton in acetone. | 2. Place the soaked cotton on your nails. |
| 3. Wrap with aluminum foil. | 4. Wait 10-15 minutes. |
| 5. Gently push off the wrap. | 6. Buff and moisturize your nails. |
Hence, following each step accurately is paramount in preventing damage. The soaking process allows the adhesive to dissolve, making it easier to lift off the wraps without harsh scraping. If any residue remains, simply buff it away gently using a buffing block. Don’t forget to apply a moisturizer or cuticle oil afterward to nourish your nails and cuticles, ensuring they stay hydrated and healthy.
Frequently Asked Questions
Now, as you explore the world of nail wraps, you may have some common questions. To help you out, we have compiled answers to some inquiries you might have. If you want a deeper understanding, check out The Ultimate Guide to Nail Wraps: Elevate Your Nail Art … for more detailed information.
Can Nail Wraps Damage Natural Nails?
Asked about the safety of nail wraps, you’ll be pleased to know that when applied and removed correctly, they should not damage your natural nails. Ensuring that you follow application instructions carefully will help maintain the health of your nails while enjoying beautiful designs.
How Long Do Nail Wraps Last?
Around two weeks is the typical lifespan of nail wraps, depending on your lifestyle and how well you care for them. Various factors can influence this duration, such as exposure to water or oils and the nature of your daily activities.
Due to their adhesive nature, nail wraps can endure common wear and tear, but maintaining proper care plays a significant role in their longevity. Avoiding excessive heat or moisture and using gloves during chores can help your nail wraps last longer. Regular touch-ups on any chipped edges can also extend their wear, showcasing your stylish nails for as long as possible.
To wrap up
So, as you explore the world of nail wraps, you’ll discover a fun and creative way to enhance your manicure with ease. By selecting the right materials, applying them correctly, and caring for them properly, you can achieve lasting, salon-quality results at home. Don’t hesitate to experiment with different designs and techniques to find what works best for your personal style. With practice, you can master the art of nail wraps and enjoy beautiful nails anytime you desire.
Q: What are nail wraps and how do they work?
A: Nail wraps are thin, pre-cut pieces of adhesive material that are designed to adhere directly to the surface of your nails. They come in various designs, colors, and finishes, allowing you to achieve a polished look without the need for traditional nail polish. To use them, simply select your desired design, peel off the backing, and press the wrap onto your natural nail, smoothing out any bubbles as you go. Finally, you can file off any excess wrap for a perfect fit.
Q: How long do nail wraps typically last?
A: The longevity of nail wraps can vary based on the brand and how well you apply them, but they generally last anywhere from one to two weeks. Proper application and care can enhance their lifespan. To ensure your nail wraps last longer, avoid exposing your hands to excessive moisture and use gloves while doing household chores. Additionally, applying a top coat can help protect the wraps and extend their wear.
Q: Can I remove nail wraps easily, and what is the best method?
A: Yes, nail wraps can be removed easily. The best method involves using a gentle nail polish remover, preferably one that is acetone-free to minimize damage to your natural nails. Soak a cotton ball with the remover, place it on your nail, and wrap it in aluminum foil for a few minutes. This allows the adhesive to soften, making it easier to peel off the wraps without damaging your nails. If any residue remains, you can buff it away with a nail file.